Tag

Herb

Browsing

Balmain Bugs: A Delicious Seafood Option

Balmain Bugs, also known as slipper lobsters, are a type of seafood that are highly sought after for their sweet, delicate flavor. These crustaceans are found along the coasts of Australia and New Zealand, and are often served in fine dining restaurants as a gourmet dish. Balmain Bugs are a versatile seafood option that can be cooked in a variety of ways, from steaming to grilling, making them perfect for any occasion.

One of the great things about Balmain Bugs is that they are relatively easy to prepare, and can be cooked in a variety of ways. They are often served with melted herb butter, which adds a delicious depth of flavor to the dish. Balmain Bugs can be found in many seafood markets throughout Australia and New Zealand, making it easy to find a fresh and delicious seafood option for your next meal.

How to Prepare Balmain Bugs with Herb Butter

To prepare Balmain Bugs with herb butter, you will need to start by cleaning the bugs thoroughly. Rinse them under cold water, and remove any debris or dirt that may be on the shells. Next, you can either steam or grill the Balmain Bugs, depending on your preference. Once they are cooked, you can melt some butter in a saucepan and add your choice of herbs, such as parsley, thyme, or chives. Pour the melted herb butter over the Balmain Bugs and serve immediately.

Tips for Perfectly Steaming or Grilling Balmain Bugs

When steaming Balmain Bugs, it is important to use a steamer basket or a large pot with a steaming rack. Place the bugs in the basket or on the rack, and cover with a lid. Steam for approximately 5-6 minutes, or until the flesh is opaque and cooked through.

If you prefer to grill your Balmain Bugs, you can do so by preheating your grill to medium-high heat. Brush the bugs with a little oil and season with salt and pepper. Grill for approximately 3-4 minutes per side, or until the flesh is opaque and cooked through.

In conclusion, Balmain Bugs with herb butter is a delicious seafood dish that is perfect for any occasion. Whether you choose to steam or grill your bugs, be sure to follow these tips for perfectly cooked and flavorful Balmain Bugs.

This is an easy potato recipe that’s a great alternative to frozen wedges. It can be eaten as a side dish or as a simple and quick main course. Your kids will never ask for greasy fries again.

These potato wedges are simply delicious and also really healthy because they are a real alternative to greasy fries and the like and not only delight children. They are a real treat as an accompaniment to fish and meat, but they can also be eaten as a main course. Instead of mayo, you can serve a delicious herb quark with the wedges. These homemade potato herb wedges are also ideal as a side dish for grilling or raclette.

Ingredients for 4 persons

– 1 kg of potatoes
– 4 tbsp olive oil
– thyme
– basil
– oregano
– 250 g low-fat quark
– 3 garlic tens
– 1 pack of frozen herbs
– some mineral water
– 2 spring onions

Preparation of wedges with herb quark

The potatoes must be peeled and washed well with cold water so that no residue of sand remains. Next, the potatoes need to be cut into eighths. For smaller potatoes, you can also cut quarters or sixths, depending on your taste. The potatoes must then be placed in a large bowl so that the four tablespoons of olive oil and herbs can be poured over them. Use the herbs according to your own feelings and taste.

This must be mixed well so that all the potatoes have come into contact with the oil and herbs. The potatoes can then be spread out on a baking sheet. Make sure that the potatoes are not on top of each other so that they can brown well. The potatoes have to be in the oven at 200 degrees for 45 – 50 minutes, depending on how brown you want them.

The herb quark can be prepared while the potatoes are in the oven. Put the frozen herbs and spring onions in a bowl with the low-fat quark, add the two garlic cloves with the garlic press, and a good sip of mineral water. Then mix it all together with a whisk. If the quark is not really creamy, add a little mineral water. Season the quark with salt and pepper.

Useful additional knowledge

This recipe can also be varied with fresh garden herbs, depending on taste. For children who don’t like garlic, you can simply leave it out. The herb quark is also delicious as a spread or dip.

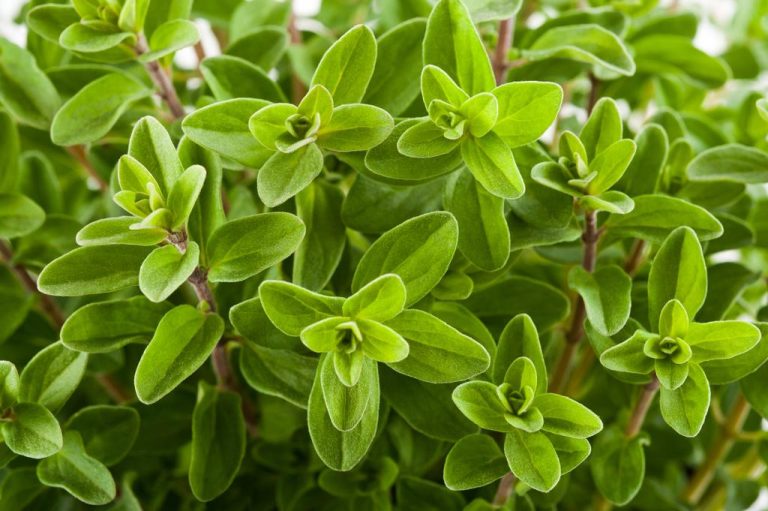
The aromatic-sweet spice not only tastes delicious, but is also said to have a healing effect. We will tell you here what exactly is in marjoram.

Effect of marjoram: The healing spice is beneficial

Marjoram is even more popular with many cooks than the spicy oregano. Due to the beneficial ingredients, the application is diverse according to spice experts. Marjoram does a lot, especially for digestion. This is what the aromatic herb contains:
Lots of essential oil: As with other spices, the oils are mainly responsible for the aroma, taste and healing effect of marjoram.
Tannins and bitter substances: In conjunction with the essential oil it contains, the tannins and bitter substances in marjoram are proven to fight bacteria. The spice has an antiseptic effect and therefore helps against inflammation and relieves abdominal cramps.
Secondary plant juices: Marjoram supports the body in the production of digestive juices in the stomach, bile and liver.
Vitamin C and zinc: The spice also contains vitamins that can help with colds and all the side effects such as coughs or runny noses.

One spice, many areas of application: marjoram is not only used in the kitchen

Due to the special ingredients, marjoram is not only popular in the kitchen. When it comes to health, many like to use the spice. Whether it’s a loss of appetite, flatulence and stomach problems, a cough or a cold: marjoram has a healing effect on the human body. For example, a particularly aromatic tea can be made from fresh marjoram. Our tip: For one cup, add one to two teaspoons of leaves and flowers to 150 milliliters of cold water, boil, strain and then drink at a pleasant temperature.

Classically, marjoram is a typical meat and sausage spice. Specialties such as liver sausage and black pudding, for example, are traditionally refined with marjoram. Especially in Bavaria, the herb is often used in the preparation of liver dumplings or roast pork. But the spice is also ideal for potato and mushroom dishes and gives every dish a very special taste. It is particularly recommended for use with greasy dishes. Due to the stomach-friendly, digestion-friendly effect of marjoram, you can avoid annoying stomach pains after a large meal.

Curry herb is still quite unknown in the local kitchen. Here we explain what you can prepare with the plant and how you can use it.

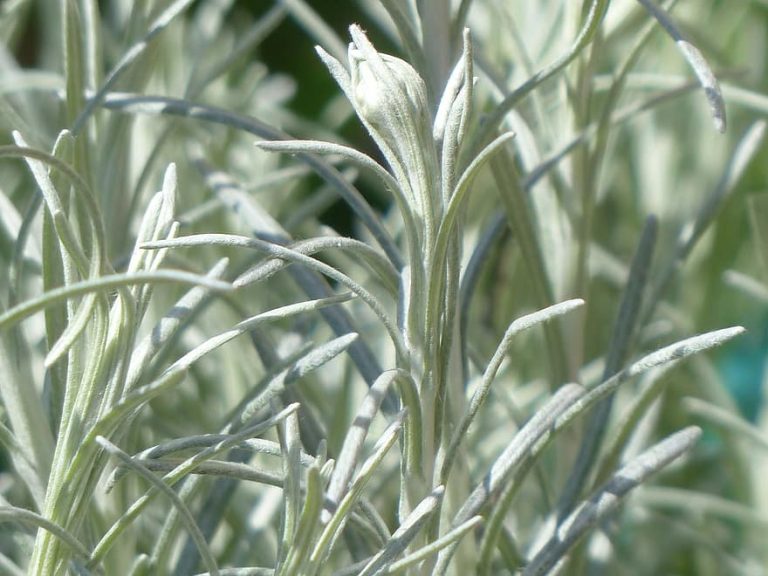
Curry herb is a bushy, evergreen plant that originally comes from the Mediterranean region. It is also called immortelle or Italian helichrysum and actually has nothing to do with Indian curry powder. However, they taste very similar – that’s how the plant got its name.

Curry herb is mainly used in cooking; but it is also said to have various healing effects.

Curry herb in the kitchen: recipe ideas

Curry herb is used in particular as a spice for rice and meat dishes and can be prepared in different ways:
You can chop the needle-like leaves of the curry herb and add them to your vegetable pan as a herb spice. The herb goes particularly well with Asian dishes with coconut milk, but also as a tart addition to a risotto. Tip: Do not let the curry herb cook for longer than 5-6 minutes, otherwise it will give off bitter substances.
The finely chopped leaves can also be added fresh to a salad and add value to any dressing. Note, however, that the intense flavor of the curry herb only really comes into its own when it is cooked briefly.
If you want some variety for your spread, you can also use the chopped herb for homemade herb butter or herb quark.
Curry herb also has a slight sage note and is therefore also suitable as a seasoning for veal or lamb dishes. The whole stalk of the herb is added to the pan. Important: You should not serve the stalk, as eating it can lead to stomach problems.
It is best to harvest the stalks and leaves of the herb before flowering, because after that they lose their aroma. You can also use curry herb not only fresh, but also dried – this way you make it last longer, but the aroma of the dried leaves is not quite as intense.

Curry herb as a medicinal plant

Curry herb contains essential oils, flavonoids and bitter substances. It should therefore have a digestive, antispasmodic and anti-inflammatory effect and promote the body’s own defense mechanisms.

A tea made from curry herb can help, especially with cold symptoms such as a cough or sore throat. For a cup of tea, pour boiling water over about two teaspoons of dried curry herb blossoms and let the brew steep for about seven minutes.
The essential oil obtained from the curry herb can be used well for irritations on the skin, such as light sunburn. It can also serve as a basis for healing ointments.
Curry herb is therefore versatile and also very easy to care for – the perfect addition to your herb bed in the garden or on the balcony.

The taste of chervil goes well with many dishes and gives a fresh, spring-like note.

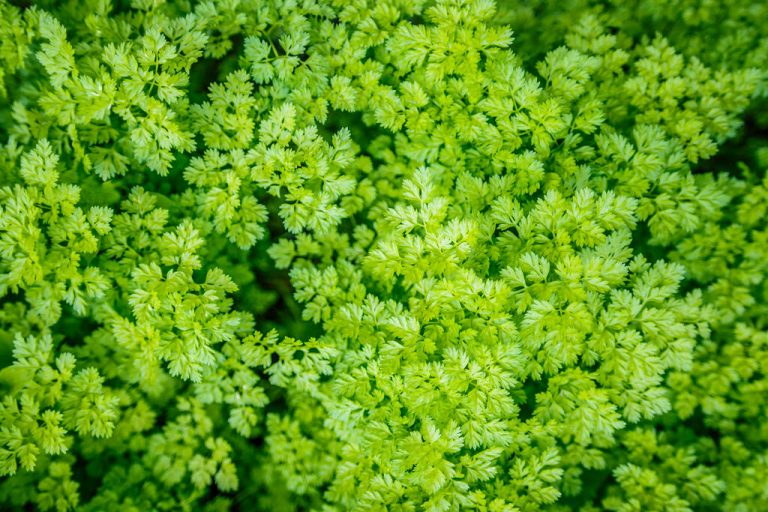
Chervil belongs to the umbelliferae family and comes from south-eastern Europe. Today the herb is widespread worldwide. The leaves bear a close resemblance to parsley. After all, chervil, parsley and coriander belong to the same family.

In England, chervil is also called “french parsley”, i.e. French parsley. In France and Belgium, the herb is used extensively.

Chervil heralds the culinary spring and is in season from March to September. You can easily plant the herb in the garden or on the balcony. Chervil tastes best when the plant is about ten centimeters high. From a height of about 60 centimeters, chervil begins to bloom and is then no longer suitable for culinary purposes.

Chervil: Tasty and healthy

Due to its many important nutrients, chervil is also of great health value. The ingredients include:
iron
zinc
potassium
vitamin C
Vitamin A
calcium
flavonoids
bitter substances
essential oils
Due to the ingredients, chervil is said to have many positive effects on the body:
Due to the flavonoids, chervil has a draining effect and thus supports the detoxification organs. In combination with vitamin A, this has a cleansing effect on the skin. Chervil is also traditionally used to fast and detoxify.
Vitamin C has a positive effect on the immune system, and chervil is said to have an anti-inflammatory effect.
Minerals like iron, zinc and potassium promote red blood cell formation and are good for the heart.
In addition, chervil is said to have a digestive effect, for which the bitter substances and essential oils are primarily responsible.

This is how you use chervil correctly

Chervil impresses with an unobtrusive taste with a mild anise note. Traditionally, chervil is one of the fasting herbs and is often prepared on Maundy Thursday, especially in southern Germany. In addition, chervil is an important ingredient in the “Frankfurter Grünen Sauce”, which is considered a Hessian speciality.

Despite the unmistakable taste, chervil goes well with other kitchen herbs. The subtle taste underlines other herbs but does not dominate them.

It is best to use fresh chervil. When dried, chervil loses a lot of its taste. So that the herb stays fresh longer, you can water the bundle or wrap it in damp kitchen paper. Alternatively, you can also freeze chervil.

Chervil goes well with various vegetable dishes, but also with fish or poultry. To preserve the taste, you should not cook the cabbage, but add it just before serving. Chervil gives dishes a fresh, spring-like note without being too intrusive.

Chervil has a wide range of culinary uses. Wonderful soups and sauces can be conjured up from the cabbage. But chervil is also suitable raw on bread and butter, in a salad or as a decoration for scrambled eggs or omelettes.

Recipe for a delicious chervil soup

Soup with chervil is a classic especially at Easter. We show you a simple recipe. The quantities are enough for about two full servings. If you’re only serving the soup as a starter, you’ll get about four servings.

Ingredients:
2 bunches of fresh chervil
2 large potatoes
1 onion
1 leek
750 milliliters vegetable broth
oil for frying
a dash of white wine (optional)
150 milliliters cream (optional)
Salt
pepper
nutmeg
Preparation:
Cut the onion and leek into fine pieces.
Wash the potatoes and cut them into cubes.
Then fry the onions in oil in a large saucepan until translucent.
Add the potatoes.
Let the vegetables fry for about five minutes, stirring occasionally.
Then add the leeks as well.
Deglaze everything with a dash of white wine and then pour the vegetable broth over your soup. If you prefer not to use wine, just add the vegetable broth right away.
Let everything simmer for about 20 minutes until the potatoes are soft. If you like your soup particularly creamy, you can now stir in the cream or a cream alternative.
Rinse the chervil and chop finely.
Turn off the burner and add the chervil to the soup.
Finely puree the soup and then season with salt, pepper and nutmeg. Enjoy your meal!

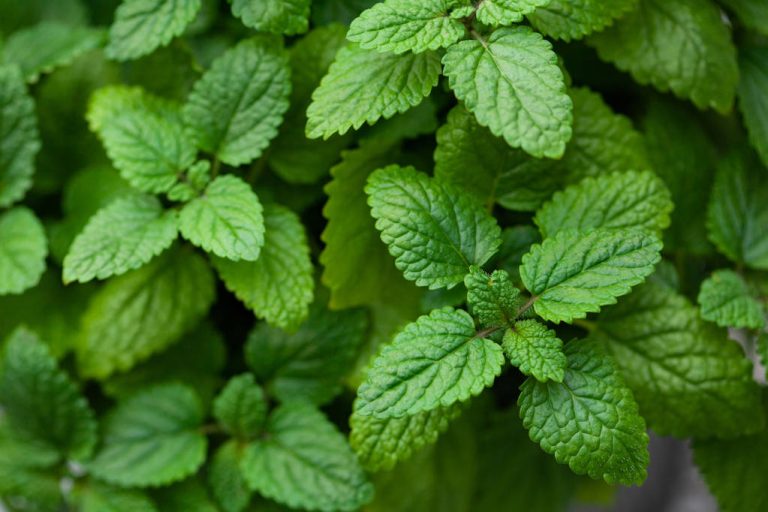
Lemon balm is a versatile medicinal herb that can alleviate a variety of ailments. We will show you how to grow lemon balm at home and how you can use it fresh or dried all year round.

Lemon balm has been a popular medicinal herb since ancient times.
calming and anxiolytic,
relaxes the intestines (against flatulence and a feeling of fullness),
against the first signs of cold sores (as a high-dose cream).
Thus, the lemon balm can help against various ailments.

Lemon balm: application and cultivation

You can use the lemon balm in many ways. For example as:
relaxing tea,
refreshing syrup or as
delicious herb in the kitchen.
If you want to grow the plant yourself, you can plant it in a large pot where it can spread well. The lemon balm is a perennial shrub. Once planted, you can harvest the leaves for many years.

The lemon balm…
…likes a sunny spot,
…needs a relatively large amount of water,
…also grows well in a herb spiral,
…needs no fertilizer,
…should overwinter on the windowsill.
In winter, the plant continues to grow slowly on the warm window sill, so that you have something of it all year round.

Cut and propagate lemon balm

When fresh shoots sprout from the lemon balm in the spring, you can cut them back and plant these shoots. For this type of propagation you should only use strong young shoots that serve as cuttings.

How to successfully plant a cutting:
To pull a new plant from the shoot, you only leave the top two leaves on the shoot. Cut off all other leaves. You should use a sharp, clean knife for this.
Put some potting soil in a pot and plant the cutting so that the top two leaves are sticking out.
Place the cutting in a warm place and water it thoroughly.
You can also propagate lemon balm by dividing it. To do this, carefully remove the perennial from the pot and free the roots from the soil. With a sharp, clean knife, cut the root system in two. Make sure each half of the plant has young shoots.

Tip: No matter which method you choose, remember that the plant needs more water than usual, so you should water it more.

Harvest and dry lemon balm

In winter you can still grow the lemon balm on the windowsill. However, it does not grow as quickly in the cold season as it does in summer. Therefore, you can always harvest a few strands to dry in summer and early autumn. From the first rays of sunshine in spring, the plant will thrive again and sprout.
You can use the dried leaves as a relaxing tea or as a culinary herb.

How to dry lemon balm:
First, cut off individual strands from the plant.
Pluck off the lower leaves.
Tie some stems together loosely with a rubber band.
Use string to hang the bouquets upside down in a dark, dry place.
The lemon balm should be dry within two weeks.
Caution: Other recipes recommend drying the lemon balm in the oven. However, this requires leaving the oven door open or preheating the oven and turning it off before adding the leaves. These processes require a lot of energy – that’s why we at Utopia advise you to dry herbs better in the air. If you have a dehydrator, you can use that as well.

The smell of lemon balm changes slightly when you dry the leaves. They no longer smell so strongly of lemon. But don’t worry: If you infuse the leaves as a tea, the typical taste and smell will come back.

After drying, you can store the leaves in a tightly sealed screw-top jar in the cupboard.

Drying rosemary is very easy and makes the delicious spice durable. We explain how you can dry rosemary in different ways.

Drying rosemary: Here’s how

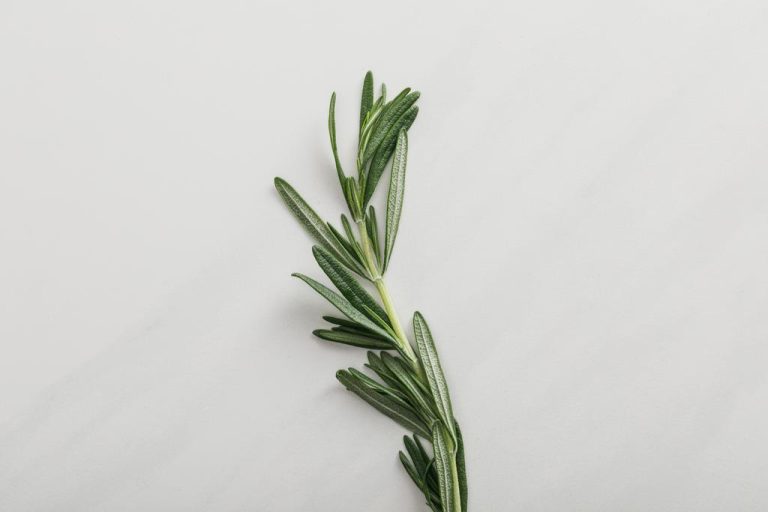
Rosemary is a particularly aromatic and powerful spice. It is easy to grow in the garden, on the balcony or even on the windowsill. You can use it fresh, especially in the warm season. Then you can also build up a small supply for the winter – for example by making rosemary oil or drying the plant.

If you want to dry rosemary, you have two options:
You let it dry slowly in a dry and warm place.
You dry the herb in the oven.
Drying in the oven is much faster. However, you need additional electricity. It’s only a good idea if you don’t have a way to preserve the rosemary in a dry place.

Drying Rosemary: Harvesting and Preparation

You can harvest rosemary in the summer months, when it is most aromatic. To harvest the rosemary, cut off as many sprigs as you need. Regular harvesting can replace pruning the plant.

The best time is in the morning or mid-morning, once the dew has dried on the branches. It is good if the plant has received plenty of sunshine in the previous two days. Then the aromas are particularly strong.

You should avoid washing the rosemary. The branches lose their aroma. However, remove dried or wilted parts of the plant.

Air dry rosemary

Dry rosemary by bundling it up and hanging it in a dry, airy place. For this you need:
scissors
yarn
rubber band
Use the rubber band to bundle up to eight sprigs of rosemary into a small bouquet. Tie a piece of string to it so you can hang the waistband upside down.

A suitable place for drying is important. It should have the following properties:
warm (optimal are 21 to 27 degrees)
dry
airy
preferably without direct sunlight
Once you have found a suitable place, hang up the rosemary bouquets. You leave them hanging until the branches are noticeably dry and brittle. This takes several days. Exactly how long is difficult to say. That depends on the individual circumstances.

As soon as the rosemary is dry, you can remove it and store the whole sprigs airtight. You can also pluck off the individual needles and store them in an old screw-top jar.

Drying rosemary: in the oven

To dry the rosemary in the oven, it is best to place the individual sprigs on a grid. They shouldn’t touch. Put the grid in the oven at the lowest temperature (maximum 50 degrees) and leave the oven flap open a crack so that the moisture can escape.

After about three to four hours, the branches should feel dry and brittle. If not, leave them in the oven longer and check regularly. Once the sprigs are dry, you can store them the same way you would air-dry rosemary.

With the oven method, however, consider the high energy consumption and prefer air drying. You may be able to house your rosemary with friends or relatives if you don’t have a suitable room. They will certainly be “rewarded” for their hospitality with a glass of dried, fragrant rosemary.

The garlic mustard has a long tradition as a medicinal plant. Today the wild plant is mainly used as a herb. In this article, you will learn how to recognize and use garlic mustard.

The garlic mustard, Latin Alliaria petiolata, belongs to the cruciferous family and is related to mustard and the shepherd’s purse. Finds indicate that garlic mustard was used as a spice and medicinal plant 5000 years ago.

The rocket is a biennial plant that usually occurs wild. It is native and widespread throughout Europe. The garlic mustard grows mainly in nitrogenous soil and can be found in parks, deciduous forests, along roadsides and even in urban areas.

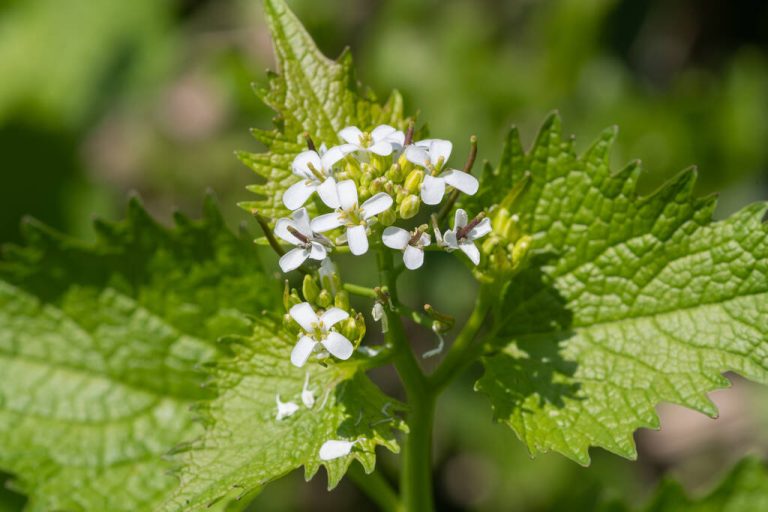
The plant is also called leek herb because of its special taste and reaches a height of 50 to 90 centimeters. The leaves are slightly reminiscent of those of the stinging nettle, but are much more jagged and not hairy.

The garlic mustard forms small white flowers from April to August. When they have finished flowering, pods that are about five centimeters long develop, in which the small black seeds are located.

Garlic mustard in your garden

The flowers of the garlic mustard are an important food source for insects, bees and caterpillars. Under the right conditions, you can plant the plant in your garden:

Location:
The garlic mustard prefers a place in the shade or partial shade.
The plant needs nitrogenous soil, as well as rich soil. It is best to mix them with fresh hummus.
You can also plant the garlic mustard on the balcony. A north-facing site is best for this.
Sowing:
You can release the seeds from March to April or in October. However, early March is best for sowing.
The garlic mustard belongs to the cold germs. The seeds need frost and low temperatures to germinate. You should definitely avoid sunny places.
It can take anywhere from 14 days to a month for the seeds to germinate. Since the seeds are difficult to germinate, you may need several attempts.
Care:
In the field, it is not necessary to additionally fertilize the plants. In the pot, you should treat the garlic mustard with nitrogenous, organic fertilizer about every six months.
Garlic mustard is sensitive to drought. You should water them on hot days.
Garlic herb is hardy. Therefore, no preparations for the winter are necessary.
Harvest:
You can harvest the leaves all year round, although the young leaves are more tender and taste better in spring.
You can easily recognize garlic mustard by its smell. If you rub a leaf between your fingers, you should notice a distinct smell of garlic

ingredients and effects

Since there is no commercial interest in the wild plant, it has hardly been scientifically studied. It is considered a healthy wild herb because it contains some valuable ingredients:
mustard oil glycosides
saponins
Vitamin A
vitamin C
essential oils
Originally, the garlic mustard was often used as a medicinal plant for various diseases. Today, however, it is rarely used as a medicinal plant. This is probably due to the fact that there are plants that are more suitable for the application areas. Mainly the garlic mustard had the following areas of application:
rheumatism
gout
colds
inflammation
wound healing
In traditional use in folk medicine, the following effects were attributed to garlic herb:
anti-inflammatory
blood purifying
diuretic
expectorant
However, the properties of the plant have not been scientifically proven.

How to use garlic mustard in the kitchen

The spicy kitchen herb is enjoying increasing popularity. It used to be very popular, especially among the poor, because spices were very expensive.

The taste is strongly reminiscent of garlic with a peppery note. The garlic mustard can be compared to wild garlic, but has a much milder taste. In addition, it leaves no unpleasant bad breath.

In order to preserve its aroma, you should only process the plant raw. Due to high temperatures, it loses its unique taste. If you want to use it to refine soups or sauces, you should only add the herb just before serving. You can use the garlic mustard in many ways in the kitchen and use all parts of the plant:

Root: Similar to horseradish, you can grate the root of the plant. It has a spicy taste and is well suited for sandwiches. However, you should only use the roots of the plant in the first year, as they become woody in the second year.
Leaves: Cut into small pieces, the leaves are perfect for herb butter and herb quark. The garlic mustard can also be processed into a wild herb pesto. The plant goes particularly well with walnuts.
Seeds: You can grind the fresh seeds into wild herb mustard in a mortar. When dried, the seeds can be used like pepper.
Flowers: The small, white flowers are suitable for decorating salads or other dishes.
You can freeze the herb to preserve the flavor. Garlic mustard loses its flavor as it dries.

Lemongrass is a classic in Asian cuisine. To avoid long transport routes and packaging waste, you can also plant the kitchen herb yourself. We’ll show you how to do it and how to use lemongrass in the kitchen.

In Germany, the scent of lemongrass is mainly known from cosmetic products such as scented oils and perfume. In Asia, however, the spicy grass is indispensable in the kitchen. The plant owes its fresh, intense scent to the essential oils. The genus of lemongrass includes around 55 different species, most of which come from Asia. East Indian and West Indian lemongrass are among the most popular varieties.

Lemongrass is now mainly grown in Southeast Asia, especially in Thailand, Vietnam and Indonesia. From there it is exported all over the world. But you can also plant the exotic plant here with us and thus avoid long transport routes for the sake of the climate.

plant lemongrass

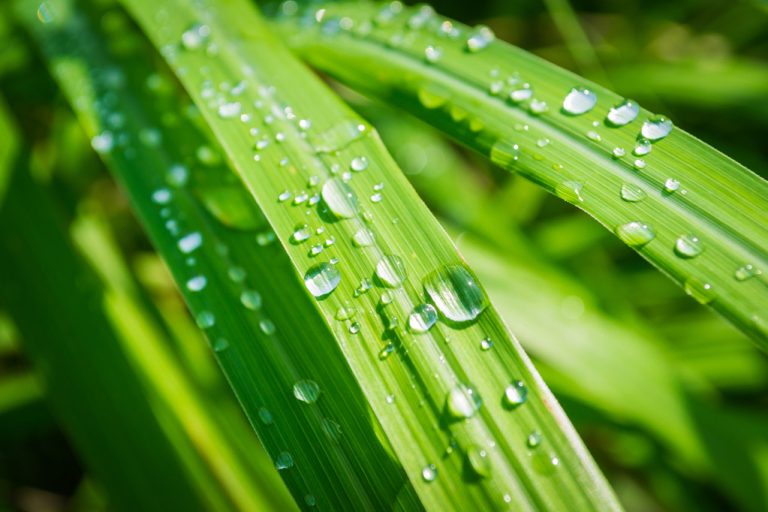
Lemongrass is a perennial plant. Up to 90 centimeters long, grass-like, grey-green leaves hang down from its strong stem. If you want to plant lemongrass yourself, you should consider the following:
The site:
bright
sheltered from the wind
lots of sunlight
nutrient-rich, loose soil
mature compost, sand, gravel
sensitive to waterlogging
The plant is used to tropical climates and is therefore not winter-proof here. That’s why it’s best to plant them in a pot. Alternatively, you can also plant the exotic grass on the south side of a house wall.

The Sowing
Lemongrass is one of the warm germs and therefore needs a constant temperature of at least 20 degrees to germinate.
Press the seeds lightly into the soil and spray them with some water.
Air the seeds regularly to prevent rot and mold.
Alternatively, you can buy fresh stems from the Asian store and soak them in 3cm of water for a week or two until roots form. Make sure to change the water regularly.
Since lemongrass doesn’t flower, you can use this method to propagate your plant later.

Caring for and harvesting lemongrass

Caring for Lemongrass:
In the warm months you can put lemongrass outside or in the field. This is also the right time to transplant the plant into a larger pot.

Winter: However, the exotic grass does not tolerate temperatures below seven degrees. When winter is approaching, you should bring the plant indoors in good time and place it in a warm, sunny spot. In winter it is sufficient to water lemongrass every two weeks.
Summer: The plant has its main growth phase between June and August. During this time, you should water them two to three times a week to keep the soil moist.
In the summertime, lemongrass needs some fertilizer every month or two. Organic fertilizer is particularly suitable for this. At the beginning of the main growth phase, it is best to enrich the soil with horn shavings. Regularly remove leaves that have turned yellow, as they cost the plant unnecessary energy and hinder its growth.

Harvest Lemongrass:
In the summer months you can harvest lemongrass regularly. Pruning encourages healthy, bushy growth.
In the kitchen, only the light-colored stems of the plant are used, since the remaining leaves are very fibrous.
Use a sharp knife to cut off the tough stems just above the root. You can simply cut off the green part and compost it.
Be careful not to bruise or bruise the bulb of the plant when harvesting.

Lemongrass as a medicinal plant

In Asia, lemongrass is traditionally used as a medicinal plant. It is mainly used for digestive problems and is said to help against stress and nervousness.

In 2011, the Journal of Advanced Pharmaceutical Technology and Research dealt extensively with the effects of lemongrass as a medicinal plant and was able to demonstrate the following properties:
antibacterial
antifungal
anti-inflammatory
antioxidant
lowering cholesterol
calming
In addition, lemongrass is said to have a strong effect against mosquitoes. Therefore, the scent is often used in sprays or scented candles intended to repel mosquitoes. However, this effect has not been scientifically proven.

To benefit from its healing properties, prepare lemongrass as a tea:
For one liter of tea you need two stalks of lemongrass. Here’s how you do it:
Split the stems in half to help the essential oils dissolve.
Pour boiling water over the stalks.
Let the tea steep for five to ten minutes. Then you remove the plant parts.
Tip: Lemongrass tea is also a good cold drink

Cooking with Lemongrass

In Asian cuisine, lemongrass is about as common as parsley or chives in our country. Use fresh lemongrass for full flavor. When drying, the stems lose a lot of flavor. Store freshly harvested lemongrass wrapped in a kitchen towel in the fridge. It will keep like this for about two weeks. How to use lemongrass in your kitchen:
Wash the lemongrass thoroughly and remove the outermost layer before using it.
It’s important that you chop the stalks finely, as the herb is very fibrous and will remain quite firm after cooking.
Alternatively, you can cook the stalks in half and remove them before serving.
Add lemongrass at the beginning so that the full aroma can unfold.
Lemongrass gives Asian dishes an authentic, fresh touch. It is suitable for Asian soups, curry dishes or colorful vegetable pans. You can also refine sauces or salads with lemongrass. The Asian herb gives classic European dishes, such as pumpkin soup, an exotic touch – you have to try it!

Postelein is a hardy leafy vegetable and provides you with valuable vitamins even in the cold season. Here you can find out how to plant Postelein yourself. We also show you a simple recipe for salad with Postelein.

Postelein is a healthy leafy vegetable for the cold season. That is why the plant is also called winter purslane, although it is not related to purslane itself.

Postelein belongs to the springwort family and is also known as common plate herb. The annual plant originally comes from North America, but has also been cultivated and valued in Europe for many years.

Postelein has been somewhat forgotten in recent years. The regional leafy vegetables are easy to care for and provide you with vitamins even in the cold season.

Postel in your garden

You can easily plant Postelein in your garden. The lettuce is easy to care for and particularly suitable for the winter. Postelein withstands cold temperatures down to minus twenty degrees.

You should consider the following points so that Postelein thrives in your garden:
Location:
Postelein prefers a sunny to half-shady site.
Since the leaves don’t take root very deeply, you can grow the leafy greens on the balcony.
Floor:
Postelein thrives best in well-drained, humus-rich soil.
Before you start sowing, you should loosen the soil well and enrich it with some ripe compost.
Sowing:
The optimal germination temperature for Postelein is below twelve degrees. You should therefore only sow Postelein from the cool days of September. Depending on the temperature, sowing is possible until March.
To do this, make a groove about one centimeter deep in the soil and scatter the seeds densely. Then cover them lightly with soil. If you create several rows, you should keep a distance of four to six inches between them.
At eight to twelve degrees, the seeds need about two to three weeks to germinate.
Care:
Like spinach, Postelein is one of the so-called weak eaters. If you enriched the soil with compost at the beginning, you do not have to fertilize the plants additionally.
Postelein is sensitive to drought. Make sure the soil is always moist.
Harvest:
You can harvest Postelein for the first time after six to eight weeks. Cut the leaves about an inch off the ground.
Similar to arugula, the leaves grow back – so you can harvest regularly.
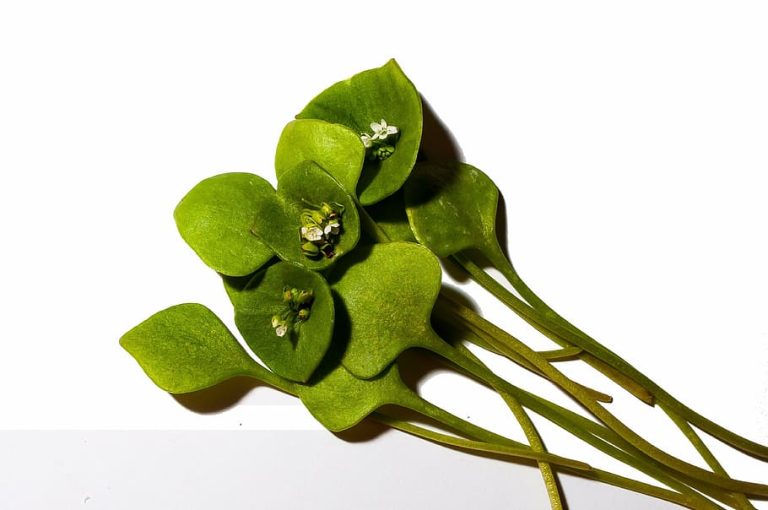
From April, Postelein will sprout small white flowers. It is then no longer suitable for consumption.
Caution: In the flowering period, Postelein likes to multiply itself and spreads widely. Cut off the flowers early to avoid this.

Recipe for a delicious salad with Postelein

The thick, heart-shaped leaves of Postelein are characterized by their mild, slightly sour taste. The winter salad provides you with something in the cold season

Vitamin C,
iron
and calcium.
Postelein is usually prepared as a salad. Older leaves can also be steamed like spinach. We present you a simple recipe for the tasty winter salad:

Ingredients:
200 g Postelein
1 ripe pear (alternatively 1 apple)
optionally 1 ripe avocado
1-2 cloves garlic
olive oil
balsamic vinegar
Salt
pepper
a handful of walnuts
Preparation:
Wash the Postelein thoroughly and pluck the larger leaves into small pieces.
Also wash the pear and cut it into small cubes.
Divide the avocado and cut the flesh into cubes.
Peel the garlic cloves(s) and cut them into fine pieces.
Mix all ingredients in a suitable container.
Season your salad with olive oil, balsamic vinegar, salt and pepper.
Garnish with walnut pieces before serving.