Tag

Home

Browsing

We show you home remedies and tips for removing felt-tip pens. Whether a scribble needs to be removed from a child’s face or a line from other materials. Felt pen stains can be gently removed with household tricks. You can certainly be spared the expensive trip to the next cleaning.

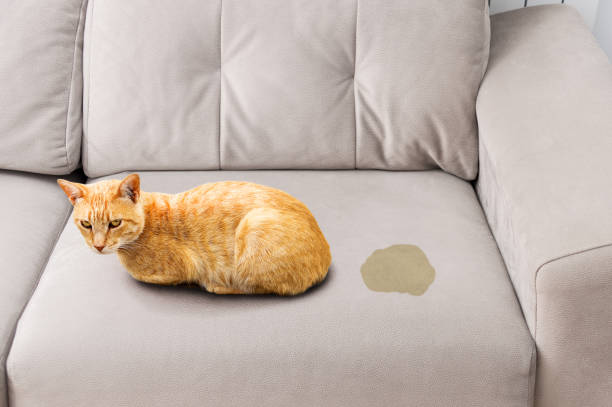
It’s annoying when felt-tip pens adorn the sofa. You can get marker stain remover at the drugstore. However, household items such as milk, hairspray, vinegar, and nail polish remover are also inexpensive ways to remove markers. In the following list, we show which home remedies are suitable for which stain.

Check the material before removing the stain

A felt-tip pen stain is not only quickly but also inexpensively removed with the right agent. However, always bear in mind that it is possible that the stain will disappear, but that a light stain can appear due to the material fading with the appropriate home remedy. So always check a hidden spot before use to see if the material is sensitive to the home remedy in question. However, there is one exception. Your child’s skin will not fade, don’t worry! After removing the felt-tip pen, simply care for it with one of our home remedies for smooth skin.

1) Remove felt pen from skin

Every mother knows the problem: If it’s been very quiet in the house for a while and you’re happy to see how nicely the children are playing, then there is usually a very big and often very creative surprise for the parents. For example this one: The offspring comes out of the children’s room and has painted on itself with a felt pen. Keep Calm! It all goes away over time as the skin rapidly renews itself. But if you or the children do not want to have the original tattoos on the children’s skin until the skin is renewed, there are ways to clean it. There are some very simple tricks: water and soap, milk, or even lemon juice. Take a damp cloth and gently rub the child’s face clean. Also, note our tips on removing adhesive and adhesive residue.

2) Removal of a felt pen from fabric

Use more or less mild home remedies to easily remove felt-tip pen stains from textiles. But be careful: Always check a harmless part of the fabric! (Draw a line with the felt-tip pen in a place that is not visible and check the effectiveness of the remedy there first.) It would be a shame if the remedy ruined the fabric. In addition, always dab carefully from the outside so as not to worsen the stain by wiping. Of course, you can also buy a stain remover in the drugstore, but there are six ways to inexpensively remove a felt-tip pen stain from fabric with home remedies:

  • Milk: Soak the fabric in milk and leave it soaked for a day. After that, wash your clothes immediately.
  • Baking soda: Take a little baking soda, make a paste with water and leave it on for just a few minutes. Wash the fabric immediately afterward.
  • Lemon Juice: Put some juice on the stain and wait 30 minutes before washing the clothes in the machine.
  • Caution: lemon juice can bleach your fabric.
  • Vinegar: Mix 1 part vinegar with 2 parts water and leave the mixture on for 30 minutes. Warning: the vinegar can bleach your fabric.
  • Hairspray: Spray the stain with hairspray and let it dry. Then put it in the regular wash. No risk of bleaching!
  • Acetone: Glass cleaner or nail polish remover contains acetone and can loosen felt tip stains. This home remedy is not suitable for sensitive fabrics as it is a very strong agent.

3) Remove felt tip pen from plastic

As far as it is a water-soluble marker, removing it is easy. With a bit of hot water and soap, this is quickly done. But what can you do if it’s a permanent marker? Either get a specialty stain remover from the drugstore, or put on cleaning gloves, grab a microfiber or cotton cloth, get a bucket of warm water, and use the following home remedies. The same applies again: first try out how the material reacts in an inconspicuous area and then go to work with the following home remedies:

  • Soap and Water: This simple option removes only water-soluble markers from plastic. But it’s definitely worth a try.
  • Special eraser: This can be used to break up and remove color pigments.
  • Deodorant: Spray the deodorant on the felt-tip pen stain and let it soak in for a moment. Then wipe with the rag. If necessary, repeat the application until the pen is gone.

4) Remove marker

Edding is a special kind of felt pen. It is insoluble in water and very broad and strong. In addition, it is often used in the colors red and black and has a strong color effect. It is very annoying when this strong pen of all things accidentally lands on an object in the household. But, especially when there are children in the house, this kind of thing happens.

There are several ways to clean a CD or DVD. Often, however, it is not only about cleaning, but also about removing scratches. You can easily clean scratches or dirt on the top or bottom of the CD or DVD with our household products.

We have put together seven home remedies for you to make CDs with fingerprints or scratches clean and functional again. Toothpaste, washing-up liquid, or compressed air spray are different ways to clean your CD or DVD. So nothing stands in the way of data recovery from CDs and DVDs.

Remove scratches on top

When you talk about cleaning a CD and DVD, it’s often about removing scratches. But grease stains or simply dust can also be a reason for having to clean the CD and DVD. There is a difference if this is supposed to be on the top or the bottom and if there are stains or scratches. If the CD or DVD has scratches, you don’t have to throw the data carrier away right away. You can remove the scratches if you work carefully. If the scratch is not on the underside that is being read but on the upper side with the label, this means that the laser beam is no longer reflected during reading and playback errors occur. You can quickly fix this problem in the following ways:

  1. Edding works best for drawing over scratch. This allows reflection when reading and the CD or DVD can be played without any problems.
  2. CD markers have proven to be very practical for painting over because they are particularly soft and do not contain any solvents. Using another felt-tip pen may cause damage.
  3. Not only CDs and DVDs get scratched, but also smartphones. That’s why we have 7 tips for protecting cell phones and smartphones for you.

Remove scratches on the underside

Depending on the depth and nature of the scratches, problems may arise during playback. The first step is to do the cleaning. This can often solve minor problems. You can also polish out a superficial scratch with a fine-grain polishing compound. There are special polishing pastes for this. But you can also use toothpaste or car polish because you often have these tools to hand. Of course, you have to be very careful when polishing to avoid further scratches. To gently clean your CD or DVD, proceed as follows:

  • A lint-free cloth is best for applying the home remedy of your choice and then polishing from the inside out.
  • Don’t go in circles! Because this can lead to further scratches.
  • Work with little pressure and then remove the polish with cold, clear water.
  • The CD or DVD dries best in the air. This is how you achieve a quick repair of the CD or DVD.

1) Use compressed air spray

A simple way to clean your disk is to blow it clean with compressed air spray. But be careful: Do not tilt the spray sideways to prevent condensation from forming. It is not a good idea to clean the CD or DVD with your breath, because the moisture contained in it would only stick the dust particles together and they would then stick to the CD or DVD even more. So if you have compressed air spray handy, cleaning is easy.

2) With the glasses cleaning cloth

You can use a lint-free lens cleaning cloth or another clean microfiber cloth to clean your CD or DVD if, for example, there are dust particles on the data carrier. You’ll notice that the CD then suddenly jumps to a different point when playing, for example. Never wipe in the reading direction, i.e. in a circle around the ruts. You could damage the rut with it. Always wipe from the inside out! You can wipe both damp and dry. Only use cold or lukewarm water, as hot water can damage your CD.

3) Toothpaste for polishing

You can also remove slight scratches on your data carrier by polishing the CD or DVD with toothpaste. Use normal toothpaste from your bathroom. Gently rub the CD from the inside out with a little toothpaste and a clean, lint-free microfiber cloth. Leave the toothpaste on for 5 minutes. Then carefully remove the toothpaste. But be careful: Again, only wipe from the inside out so as not to damage the CD or DVD.

4) Rubbing alcohol and water

A CD or DVD can be cleaned well with alcohol. However, it is necessary to mix 1 part alcohol with 1 part distilled water to clean your disc, as pure alcohol would be too intense. It is best to use rubbing alcohol for the mixture. You can get it at the pharmacy, for example. With the mixture and a lint-free microfiber cloth, gently clean the data carrier in straight lines from the inside out. Then let the DVD or CD air dry.

5) Spotlessly clean with washing-up liquid

Commercial washing-up liquid is suitable as a home remedy for cleaning a CD or DVD. You can clean your CD or DVD with a dry, lint-free cloth and clear cold water with a little washing-up liquid or with a glass cleaner. Fill a salad bowl with a squirt of dish soap and water. Put your dirty DVD in the bowl. Then rinse the DVD with cold water. Then stand the DVD upside down on the cloth to dry and let it air dry.

6) Glass cleaner for CD and DVD

Instead of regular washing-up liquid, you can also use a squirt of glass cleaner. Prepare a bowl of plain cold water and a squirt of glass cleaner, and clean the CD or DVD with dish soap in the same manner as described in the previous paragraph. Simply dip the CD or DVD into the bowl of water and glass cleaner mixture, then stand upright on a clean cloth to dry.

7) Ultrasonic cleaning device

There are many home remedies for cleaning DVDs and CDs. None is gentler and safer than the one with the ultrasonic cleaning device. If you work a lot with CDs and DVDs or have a large collection, then it is definitely worth buying this device. You can use it not only for CDs and DVDs but also for jewelry or watches, for glasses, and even for dentures.

You can easily clean your iron with simple home remedies. Because when the appliance is dirty, residues of grease and fibers are spread over your fresh laundry. We would therefore like to introduce you to tips and home remedies for cleaning your iron.

The iron has to work perfectly for ironing to make any sense. But after a while, dirt means that the iron no longer glides so well over the clothes. It is therefore important to clean the iron from time to time.

Dirt under the iron is harmful

Iron is often used. But rarely cleaned. Dirt can collect and damage the device and clothing. And even the iron test winners from 2021 have to be cleaned. Whether through clothing or fat residues. Detergent residues also damage the device. In addition, due to the high heat, the clothes can easily stick to the iron. In order to avoid all this, the perfect gliding property must be achieved. With the right tips, this is easy to implement. Also, note our article on ironing on holiday without an iron.

Cleaning with home remedies

A clean appliance is just one of many ironing tips for smooth laundry. Simple home remedies are sufficient for cleaning the iron. You can also use home remedies to help your device slide better. So you don’t need expensive and chemical means. In the following, we will show you how to remove dirt and ensure good lubricity.

1) Clean the iron with the lemon

Lemon as a home remedy is very popular. Because the citric acid smells good and is easy to use. Since the acid is fat-dissolving, you can use it to clean the underside of the iron. To do this, you need to heat up the iron slightly. Then put a bit of the citric acid on a cloth and rub the underside with it. The process should be repeated until all the dirt has really disappeared. Then clean the underside again with a cloth to remove any residue of the acid. Then the underside of the iron should shine like new.

2) Vinegar for cleaning

The household remedy vinegar is just as good as citric acid. However, use vinegar essence for this. It doesn’t smell very pleasant, but it’s very effective. So soak a cloth in vinegar and place the iron on it as if you were ironing. Then let it stand for about 10 minutes. To avoid a fire hazard, the iron should be off. Thus, the iron softens nicely. And after 10 minutes you can dry the floor with a dry cloth. This method is also great for getting your iron to glide smoothly.

3) Clean the iron with table salt

There is also the possibility to use salt as a home remedy. But you shouldn’t use that. Because although salt cleans the underside of the iron well, the layer can also be attacked. If you still want to try it, put a little table salt on a damp cloth. You can then rub the soleplate of the iron with it.

4) Baking soda to clean the iron

Many people also swear by the powerful baking soda in the home. And you can use it to clean your iron too. To do this, soak a cloth with a baking soda/water mixture. Then you can place the iron on the cloth and let the whole thing soak. But be careful, the plug should be pulled here too! However, since this process does not bring as much success as one is used to with baking powder, it is better not to use it.

5) Remove dirt with the glass-ceramic cleaner

Ironing tips are useful. And the tips for cleaning the iron are just as valuable. So we have another tip. For this, you need a glass-ceramic cleaner. Then spray a damp cloth with this and use it to clean the underside of your iron. Then just rub dry and the dirt is gone.

6) Candle wax for cleaning

If none of the available home remedies have helped so far, then try candle wax. But this one should be colorless. To do this, first, let your iron warm up. Then stroke the surface a few times with the candle wax. This should bond the dirt to the wax. Then you have to wipe everything clean. Also, note our article on removing candle wax in the household.

7) Lubricity through aluminum foil

Of course, choosing the right iron is important. Therefore, always pay attention to tips on buying household appliances. If you already have an iron and now want to improve the glide of your iron, take a piece of aluminum foil. Then run the hot iron over it a few times. This not only increases lubricity but also removes dirt.

Descaling an iron

Descaling an iron is very easy. Because with a vinegar rinse, descaling is uncomplicated. Accordingly, fill the tank of the iron with one part vinegar and two parts water. Then let the iron warm up. Then you can let it evaporate over a sink. To avoid this in general, you should always use a mixture of tap water and distilled water. Because lime basically has no chance. Also, read our tips for descaling the sink.

Almost everyone owns a kettle these days. And everyone knows it: after a while, limescale builds up. Then it can take an eternity for the water to boil and the kettle becomes a power guzzler. That’s why we have instructions for descaling the kettle with natural home remedies.

This practical kitchen appliance has replaced the good old tea kettle in many households. They are available in both small and large versions. And with it, you can prepare tea in no time at all. But when it calcifies, it no longer works well. Then vinegar, baking soda, and co. will help you.

Causes of the lime deposits

The reason for a calcified kettle is usually hard water. Because then limescale forms in the cooker. And this settles mainly on the heating element and in the interior of the container. As a result, in regions where the water is medium or very hard, many experiences the problem more often. At the latest when the cooking time has doubled, you should do something. Because that costs unnecessary energy. Under no circumstances should you wait until there are lime residues in the water. Because lime eats away at the heating element and thus ruins the device. In addition, bacteria can be found in lime. And so it becomes a power guzzler. Consequently, you should use natural home remedies to remove limescale deposits.

Natural home remedies for descaling the kettle

Our grandmothers used natural home remedies and they have not lost their effectiveness. So when it’s time to descale your kettle, don’t use chemical cleaners. Because you can operate it with simple household items, such as the following. In addition, a properly functioning one ensures less energy consumption and thus makes a small contribution to environmental protection in the household.

1) Combat limescale with vinegar essence

The effective household remedy vinegar is a good way to clean your kettle and remove the limescale deposits. All you have to do is fill your kettle with about 1 liter of water. Then add a small cup of vinegar essence and let it boil. You should open the windows to counteract the strong smell. Then leave the mixture on for 1-2 hours. After dumping the vinegar water, run the kettle full of water at least 2 more times. Brown limescale in the toilet can also be removed with vinegar.

2) Descale the kettle with citric acid

If your kettle is only slightly calcified, you can cut a lemon in half. Then clean the stove with the cut surface. You should squeeze out the lemon juice well. Then rinse off with clear water. If you need to remove stubborn limescale from your kettle, you can also buy powdered citric acid and boil it in the water. In addition, note our tips for descaling and polishing the sink.

3) Baking soda and baking powder for descaling

The all-rounder baking soda and the popular household remedy baking powder can also be used for descaling. To descale the kettle with baking soda, you need to add about 1 tablespoon of baking soda to 200 ml of water. Then let the mixture boil. Then let the mixture sit for an hour before dumping it out. Then rinse it out well or run two more passes with normal water. Also, note our tips for descaling washing machines and dishwashers.

Instructions for descaling and cleaning the kettle

For a better overview, we have created step-by-step instructions for descaling the kettle using natural home remedies. So nothing can go wrong and your kettle is ready for use again. Depending on the severity of the calcification, you can repeat the process several times.

Prevent limescale in the kettle

You should descale your kettle regularly to prevent limescale deposits. You can also filter your water beforehand. This way you prevent the hard water from attacking the kettle. And such water filters are not expensive. The water also tastes better then.

Metal is usually a material that is quite frugal. But now and then you have to clean metal. A common metal is a steel. We will show you which home remedies you can use to effectively clean metal and steel. So that your metal objects last a long time.

Special base metals, which are found in the household as alloys, are susceptible to rust and other contamination. Therefore, you should regularly clean objects made of these types of metal. Simple home remedies such as vinegar, lemon, and Co. will help you with this.

What are metals?

Colloquially, one often speaks of metal. Metals designate certain types of chemical elements. And these are located on the periodic table of elements to the left and below the dividing line between boron to polonium. Consequently, there are different metals, including gold and silver. But iron, steel, and copper are also metals. These types of chemical elements have certain properties. Accordingly, they can conduct heat and electricity and are easily deformable. You can differentiate the metals into groups: there are heavy and light metals, as well as base and precious metals.

Different types of metal in the home

In the household itself, there are many areas in which metals are used. However, these are often alloys. It’s a mixture of two metals. Steel, aluminum, brass, and silver are often used in the household. As a result, your cutlery, vases, or a safe that holds cash, passport, and important papers may be made of metal. While the cleaning of cutlery is carried out more often, the valuables compartment, on the other hand, gets dusty very quickly.

Rust is a big problem with metal

You should clean metal regularly. Because some types of metal can rust. These include the base types, such as iron, aluminum, steel, zinc, tin, etc. You should quickly remove the rust from the cutlery so that the rust does not attack the metal. Here are a few home remedies that can help:

1) Cleaning with vinegar

You can clean metal, like steel, using vinegar, a powerful household remedy. Because this is a real all-rounder. Consequently, removing rust is easy. In addition, you usually have this handy in the household. To do this, you have to apply vinegar to the affected areas and leave it to work for several hours. Then it should resolve itself. If not, help with a cloth. Also, read our article on cleaning the grill grate and removing rust.

2) Clean metal with coke

To do this, sprinkle the affected area with some cola. Then let the cola sit for several hours. The acid contained dissolves the rust. So you can just wipe it off. So cola is a good home remedy to remove rust. In addition, also read how to clean clogged pipes with coke.

3) Clean metal with lemon

If you don’t have any cola in the house, you can also use the juice of a lemon as a home remedy. Here, too, you have to rub the rusty area with the juice and let it soak in. Then you have to wipe away the lemon juice with a cloth. So you can use this method to remove rust from pans and pots.

The cleaning of steel

Many areas in the house or apartment are made of stainless steel or steel. Normally, cleaning steel should be quite easy for you. Because this is a metal that can be easily treated. For example, you can use the following home remedies to clean stainless steel:

  • Vinegar
  • lemon juice
  • water with the household remedy baking powder

To do this, apply the agents mentioned to the surface. Then let it soak in for a while. Then clean the surface with warm water and a soft cloth. It is recommended to polish after cleaning to make the steel shine. Of course, it depends on what kind of product it is and where you use it. In addition, note our tricks for removing rust stains from clothing.

Use special stainless steel cleaners

Especially for stainless steel, it can be useful to use a special cleaner. This is then placed on a microfiber cloth. Then you can easily clean the surfaces. The advantage of the clothes is that they do not attack the surface and scratches do not occur.

Now remove the oven smell with home remedies. Who does not know it? The oven is used frequently but rarely cleaned. But after a while, bad smells develop. Then you should effectively neutralize the oven smell.

So that the oven smells good again, you can neutralize the smelly oven smell. Here you can do without chemical cleaning agents and drive unpleasant smells out of the oven by using household remedies such as baking soda, lemon, and Co.

Why does my oven stink?

There are many reasons for unpleasant smells in the oven. A first look into the oven usually helps. Because then you can often see that food leftovers have collected and are responsible for the stench. Even if you recently cooked a fish in the oven, this can cause a bad smell. Likewise, sponge residue or other cleaning material could have gotten stuck on the heating rods during the last cleaning. Then they burn and it stinks. Therefore, you should always clarify the cause. A flashlight will help you with this. Also, note our tips for cleaning the oven.

New oven stinks

Even a new oven can stink if it has not been sufficiently seasoned. Because in the production and manufacture of such devices, substances are used that cause unpleasant odors. Therefore, you should burn it in the oven before use. You will usually find instructions for this in the oven packaging after buying a new oven.

Home remedies to remove oven smell

While you can neutralize bad odors in a new oven by properly baking it in, you can use household remedies to remove the smell from an old oven. We have collected the most important home remedies for you. Also, note our tips for neutralizing odors in the apartment.

1) Neutralize oven odor with lemon

Strong-smelling food odors can linger in the oven for a long time. But with the home remedy lemon juice, you can quickly clean your old oven and provide a fresh scent. To do this, put some lemon juice in a glass of water. Then put this in the oven for a few minutes and heat it to 120 degrees. The steam dissolves grease stains and neutralizes unpleasant odors.

2) Use of baking soda against oven stink

It works just as well with the use of baking soda. Because baking soda also neutralizes odors. You can also use a paste made from 2 tablespoons of baking soda, 1 tablespoon of salt, and 2 tablespoons of water to remove burnt-on residue and clean your oven. So you kill two birds with one stone.

3) Baking soda removes a bad smell from the oven

To get rid of unpleasant smells from the oven, use baking powder, the most popular household remedy that is readily available. Because that can also eliminate stench and is a great cleaning agent. To do this, mix baking soda with water to form a paste. Then use it to clean your oven. Then wipe everything well with a damp cloth.

4) Vinegar for odor neutralization

You can also use vinegar as an oven smell home remedy. To do this, wipe out your stinky oven with the household remedy vinegar. However, many people find the smell of vinegar unpleasant. Therefore, you can also mix it with lemon juice. Afterward, it smells fresh in the oven.

5) Eliminate orange peels to stink

In addition to the usual home remedies for removing odors from the oven, you can banish the stench with orange peels. To do this, place the orange peels on a baking sheet and put them in the oven. Then warm them up briefly. They then spread a pleasant scent in the oven. In addition, note our tips for getting rid of musty smells in the closet and removing the smell of vomit.

Useful tips to remove the cat’s urine smell. Anyone who has ever had cat urine anywhere in the apartment knows how stubborn it can be. Now remove cat urine from sofas, carpets, or wood.

If the smell of cat urine spreads in the apartment, quick help is required. Or if your darling has a mishap on the sofa, that’s no longer a problem. Because we have collected home remedies for cat urine and the bad smell for you.

Effective home remedies for cat urine

After you have found and eliminated possible causes, you can eliminate the cat urine problem. There are a number of methods to choose from to remove cat urine odor. Consequently, you can use various means to remove cat urine and neutralize odor. In addition, note our tips for neutralizing odors in a smelly apartment.

1) Neutralize odor with baking soda or baking soda

If the mishap has just happened, you can optimally bind cat urine with the household remedy baking soda and neutralize the smell. To do this, apply the powder to the urine stain and leave it on until it is dry. You can then remove everything, for example with a vacuum cleaner. It works just as well with the use of baking soda.

2) Remove cat urine with myrtle oil

Pure myrtle oil has long been popular with cat owners because it effectively counteracts cat urine odor. But the oil contains substances that are toxic to cats. Therefore, the oil should be diluted before use. So put a few drops in water. You can then wipe over the affected area and effectively remove the cat’s urine smell. Also, note useful tips for removing cat droppings from the carpet.

3) Lemon fragrance or cleanser with citrus freshness

If you want to prevent cat urine smell, you can put some lemon scent on the spot where your cat prefers to pee. Because cats don’t like the smell and avoid these places. It can also be helpful to place orange peels in preferred locations. Lemon juice is also a good home remedy for fleas in cats.

4) Remove soap and coffee powder from urine

You can also remove the stain using gall soap. Then you can spread some coffee powder on the spot to get rid of the smell of cat urine as well. After the powder has dried, you can gently brush or vacuum it off.

5) Vinegar cleaner against cat pee odor

A homemade vinegar cleaner is a good home remedy for cat pee odor. For the production you need the following resources:

  • 1 part distilled vinegar
  • 2 parts warm water

Then apply this mixture to the urine stain with a sponge and let it dry for about 10 minutes. You can also put the agent in a spray bottle and spray the stain. Once the vinegar has dried, rinse off with lukewarm water. Consequently, the smell of urine is neutralized. Vinegar is just as effective in removing the smell of nicotine.

6) A mix of hydrogen peroxide

An alternative to the vinegar solution is a hydrogen peroxide mix. It’s best to make this mixture in a disposable cup or container that you can throw away afterward. Since the remedy quickly loses its effect, you should use it within 2 hours at the latest. In addition, you should test the bleach on an area that is not visible beforehand. For the mixture you need the following ingredients:

  • 450 ml hydrogen peroxide solution 3%
  • 2 tablespoons baking soda or baking powder
  • 2 drops of dishwashing liquid or liquid soap

Instructions for using hydrogen peroxide

You should also use the hydrogen peroxide as in the following instructions. The following application tips will ensure that everything works perfectly. Equally interesting is the treatment of skin fungus with hydrogen peroxide.

  • put on protective gloves
  • Pour hydrogen peroxide into the container
  • Add baking powder or baking soda
  • Add dishwasher or liquid soap
  • Put the remedy on the urine stain and rub it in
  • let dry
  • wipe with a damp cloth

7) Special cat urine odor eliminator

If the above remedies don’t work for you, then you can resort to special cat urine odor eliminators. Because these usually contain effective pro-bacteria and enzymes. And you can get these enzyme cleaners at pet stores, drugstores, or online. You can find out how to use them in the instructions for use. Also, note our tips for neutralizing the odor of the litter box.

Grass stains are stubborn and difficult to remove from clothing. Anyone with children knows this only too well. But with simple home remedies for removing grass stains, this will no longer be a problem in the future.

When children play in nature, they usually come back with dirty clothes. Then especially removing the patches of grass is a challenge for the parents.

1) Using a raw potato

Similar to removing spinach stains, a raw potato will also help you with grass stains. To do this, cut it in half and rub the green spot with the cut surface. This applies to dark clothes and not too light ones. Finally, leave it on for a bit and wash the clothes as usual.

2) Remove grass stains with lemon juice

If you discover a grass stain on a pair of jeans, use the home remedy lemon juice to remove it. Accordingly, put the juice on the green spot and let it work for about an hour. Then wash it off and put it in the washing machine. However, you should always test it in an inconspicuous area to see if the acid will damage the jeans and their color.

3) Classic gall soap against grass stains

You can also use classic gall soap to effectively remove grass stains. To do this, work the soap into the affected clothing and then leave it on for about an hour. Finally, wash out the soap and put the laundry in the washing machine.

4) Toothpaste to remove grass stains

The Sat 1 winner against grass stains is the toothpaste. Because toothpaste contains the active ingredients menthol and other whitening agents. Therefore, you can put toothpaste to good use to get rid of weed stains. So put the toothpaste on the stain and let it soak for an hour. Also, read how to remove carrot stains.

5) Eliminate alcohol to stain

The best way to treat grass stains with alcohol is to first dab the stain with a cotton ball soaked in alcohol. Then treat it with a lukewarm detergent solution. Finally, rinse everything thoroughly. Also, note how to remove other common stains.

Cleverly and effectively remove spinach stains. While spinach is healthy and delicious, spinach stains can be very stubborn. But you can remove spinach stains from clothes with simple home remedies.

If you got some spinach on your clothing or carpet, treat the stain quickly. In order for this to disappear completely, you can use home remedies for pre-treatment.

Remove stains successfully

Stains are very common in everyday life. If you’re not paying attention, something from lunch ends up on your favorite piece of clothing. If there are also foods that cause particularly stubborn stains, it is very annoying. For example spinach. Quickly reheat and eat the spinach. Then it happened the stain on the white T-shirt or your favorite pair of jeans. So that you can still enjoy the healthy spinach and remove stains, you should pretreat it immediately. Because then the chances of success are greater than the stain disappears completely. Also, note tips for removing carpet stains.

1) Remove spinach stains with raw potato

Before you put the laundry soiled with spinach in the washing machine, you should pretreat it with a raw potato. This will ensure that the stain is actually washed out. To do this, cut a potato in half and rub the affected area well with the cut patch. Then you can wash your clothes normally.

2) Pre-treat the stain with buttermilk

You can also remove spinach stains by soaking the affected garment in buttermilk. Then the buttermilk should soak up the green color. Then wash the clothes as usual. Also, read how to remove carrot and carrot stains.

3) Remove spinach stains with gall soap

The gall soap is an effective home remedy for stains of all kinds. You can also rub the spinach stain with gall soap and pretreat it. Then let the whole thing soak for about 15 minutes and then put it in the washing machine. Gall soap is also a good home remedy for grass stains.

4) Alcohol against stains

If you want to remove a stubborn spinach stain, you can put some rubbing alcohol on it. But only if they are not sensitive substances, as the alcohol is corrosive. Depending on the size of the stain, one or two drops will suffice. You can then wash the clothes normally. Also, note that you can get rid of wax stains and remove cream stains from fabrics.

5) Washing soda to remove spinach stain

Laundry soda is an environmentally friendly alternative to other cleaning products. Accordingly, you need to mix the soda with water and let it soak the affected clothes. Then wash as usual and the spinach stain is gone.

The cup of coffee is part of the daily morning ritual for many people. But a coffee machine also needs care and should be descaled and cleaned regularly. Because without descaling there is no taste perfect coffee and damp coffee residues are also an ideal breeding ground for mold and other germs.

But how do I know that the coffee machine has to be descaled?

Many coffee machines now show this using a control light. But there are also other signs that the machine has to be descaled:
White deposits are formed
The coffee machine runs slower
The machine is exceptionally loud
The coffee doesn’t get really hot and does not taste good
How often you have to clean your machine depends on how often you use it, how strong the water hardness is and how quickly it calculates. On average, however, a coffee machine should be cleaned every 1-2 months.

Decalate the coffee machine with professional cleaning agents:

A large number of different descalcers are offered in stores. Almost every coffee machine manufacturer also offers suitable descaling agents for their machine. But there are also some brand -independent products.

Basically, you cannot do anything wrong with these descaling agents – simply put the descaler into the machine according to the manufacturer’s specifications and start descaling. After that, the coffee machine is perfectly descaled and ready for further use.

Decalate the coffee machine with home remedies – this is how it works:

However, professional cleaning products from the trade have a big disadvantage: they are quite expensive. But there are also cheaper ways to decalify and clean the coffee machine – for example, some home remedies are perfect for this. This makes the coffee machine cleaning not only cheaper, but also more environmentally friendly.

The classic: coffee machine decalcify with vinegar essence

A very widespread method is to clean the coffee machine with vinegar essence. But how exactly does it work? We show you step by step what you have to do to clean your coffee machine with vinegar essence:
First of all, it is important that the vinegar essence with water is diluted in a ratio of 1: 4. Because undiluted and highly concentrated, it can harm rubber seals and other sensitive parts in the machine.
Once you have diluted the vinegar essence, put it in the water tank of the coffee machine, let it work briefly and start the descaling process according to the specifications of the respective manufacturer.
It is important that you let water run through the machine for 2-3 times after descaling so that the next coffee does not taste like vinegar.
The descaling is ready and the coffee machine is ready to go again.

For particularly environmentally conscious descaling: descaling with citric acid

You don’t have any vinegar essence at home right now? No problem – you can easily clean your coffee machine with a simple lemon. This has the advantage that citric acid is particularly environmentally friendly. And you only have to take the following steps:
Clean the surfaces of the coffee machine:
Halve a lemon and remove the seeds
Squeeze some lemon juice over a sponge. With the sponge you can then wipe over lime deposits, leave the whole thing on for about 30 minutes and then wipe it moist.
Discalate the coffee machine:
To clean the inside of the coffee machine, you have to press the lemon completely.
Then it is important to give the lemon juice through a sieve so that no pulp gets into the machine.
Now you can dilute the juice of a whole lemon with about one liter of water and then put the mixture into the water tank.
Now you can start descaling again according to the manufacturer.
Once the descaling has ended, think about rinsing the coffee machine with water 2-3 times.
You already have a perfectly descaled coffee machine and the coffee tastes great again.

Special caution is required here: descaling coffee machine with amidosulfonic acid

If the coffee machine is once particularly dirty, there is also the possibility to decalcify the coffee machine with amidosulfonic acid. Available, for example in the hardware store.

But here you have to be particularly careful! This acid has a caustic effect. Therefore, you should wear mouth protection and safety glasses with the application.

This is how it works: Mix ten grams of amidosulfonic acid with one liter of water and then start descaling as usual.

It is particularly important here that the machine is washed through water several times after cleaning.

Baking powder – descale the miracle cure for the coffee machine

There are many home remedies that are suitable for descaling. Baking powder is also ideal for cleaning. Simply dissolve baking powder in one liter of water and then let this solution run through the coffee machine. The machine is clean again and the coffee tastes flawless again. The descaling is so easy with baking powder.

The descaling with home remedies is therefore not only significantly cheaper than decalcifying with buyable solutions, but also more environmentally friendly.

How can I protect my coffee machine against lime?

Unfortunately, the formation of lime cannot be completely avoided. You can take some preventive measures, but these will not completely prevent lime formation. One way to restrict the formation of lime to do without tap water. Instead, use still water from bottles (i.e. water without carbon dioxide), this is far from the water from the tap. It may be enough if you descalate the coffee machine every 6 – 12 months.