Tag

Homemade

Browsing

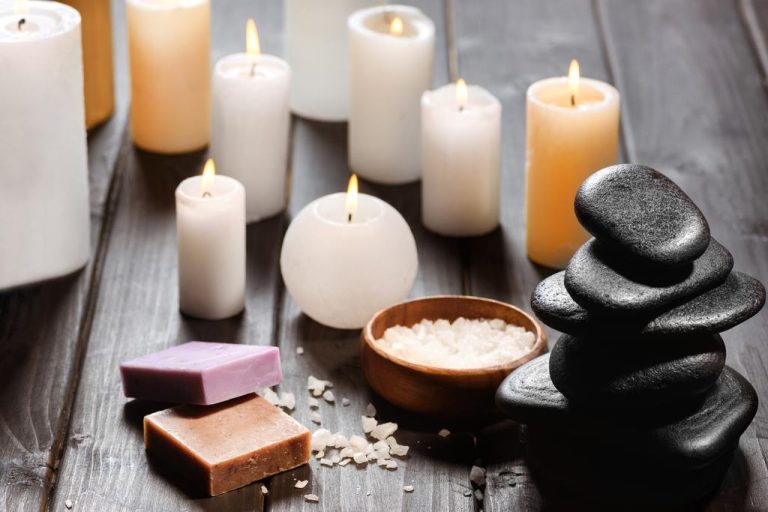
Traditional candles are increasingly taking on new forms: faces, bodies, cubes. But you can also pour the unusual candles yourself. We explain how to do it.

1.1 Material selection: Everything at a glance

When choosing your materials, there are a few things you should keep in mind. For example, when choosing the wax, you can choose between waxes of different origins. That’s what we’re going to talk about in more detail in the next paragraph. In general, to cast wax you need:
for the heat source: a medium saucepan and container or bowl for a double boiler
Bees, paraffin or stearin wax (like pallets?)
or like wax residues from home
as you like: wax color and/or glitter
Perfumes or oils for scented candles
a mold for casting: a jam jar, a toilet paper roll, or a pre-made mold
Wicks and wooden sticks (depending on the mold)
If you have taken care of all this, you will not be missing anything to pour candles. Now we will show you what you should pay attention to when choosing wax and shape.

1.2 Material selection: The right wax

The most popular waxes for pouring candles are paraffin, stearin or beeswax. As a by-product of petroleum, paraffin wax is the most commonly used in Germany. However, paraffin (wax) is often criticized. Not least because of their chemical composition. The EU Chemicals Regulation (also known as the CLP Regulation) is a global system for the classification and labeling of chemicals. She classifies paraffin as harmless to humans, but emphasizes that it also depends on the use and the further composition. However, this does not necessarily mean the paraffin in candles. Because this is also found in cosmetics and medicine, for example. Unfortunately, it is not uncommon for remains of this to end up in nature. Because paraffin is environmentally friendly, petroleum, definitely not.

Stearin wax has a higher melting point than paraffin, so it’s not quite as sensitive to heat and has a longer shelf life. Stearin wax is less polluting, but more expensive. It is obtained from vegetable or animal fats, mostly palm oil or coconut fat. Incidentally, both paraffin and stearin waxes are colorless.

A wax of natural but animal origin is beeswax. Therefore the candles are not vegan. On the other hand, organic beeswax candles are probably the most environmentally friendly alternative. But it is also the most expensive raw material to produce. In addition, beeswax already comes with a golden-yellowish color. As you can see, unfortunately none of the waxes are really sustainable or vegan, which is why you can first look around for wax residues at home. You can use both colored and colorless candle residues. Watering works just as well and you usually already have them at home.

1.3 Material selection: the right shape

Depending on the purpose of the candle, you can use different shapes. You can easily use toilet paper rolls from home to mold your candles and then easily remove them from the roll. Aluminum foil, which you can shape like a bowl, is also suitable for smaller shapes.

If you want to pour scented candles or colorful candles, jam jars are good for this. You can wrap them up with a lid and give them away as gifts. You can also observe the color gradient for candles made of colored wax, and the glass alternative is always sustainable.

If you would like to dare to make large, unusual candles, you can probably still get some shapes online. These range from bodies and faces to a wide variety of shapes. It’s worth browsing. Since the process of making the candles is always the same, you can first try your hand at the toilet roll and then individual shapes.

2.1 Preparation: heat source

There are different ways to heat wax. We will introduce you to the safest and cleanest option. This means that candle casting can also be carried out with small children without any problems, under the supervision of adults.

In order to melt the wax of your candles, you need to set up a water bath. To do this, take a medium-sized saucepan and add a few glasses of water to a heatproof container to melt the wax, or a few more to melt in a bowl. You put your bowl on the pot with water, you put the container in it so that part of it lies or stands in the water.

Once this is done, you can add your wax to the bowl or container and begin melting it. Occasional stirring should be enough to get your wax runny. One benefit of heating your wax in a water bath is that you can easily keep it warm or reheat it.

2.2 Preparation: Prepare the wick

Without a good wick, there is no long-lasting candle. But that is not an obstacle either. We will show you how you can make a wick quickly and easily at home and how to properly prepare this or a store-bought one for watering.

Make a wick yourself: You can easily make a candle wick yourself. For this you need yarn made of pure and thick cotton (this is important!). Once you have chosen your shape, you can first adjust and cut your yarn to length. Then you take your cut yarn and dip it completely into your wax except for a few finger widths (leave the top free) and wait for the first pass until it is well soaked. Then let your wick cool down briefly before repeating the process three to four times. Then let your wick cool down before you use it. Finished!

Prepare a store-bought or homemade wick: You can attach your wicks, whether you have made them yourself or bought them, to one side of the wooden stick and place this over the opening of your mould. This way your wick won’t slip or fall into the wax when pouring and you can easily pour without worrying about your wick slipping.

3.1 Casting: procedure

Now let’s get to the watering! Once the wax has melted, you can color it, add essential oils or glitter. Note that the wax is initially clear and later white. Therefore, you should use moderation with the intensity of your color. You can also place multiple containers in a water bath to pour different color gradients. To do this, you wait after each layer of paint until it cools down. Now it’s about how your candle should ultimately look like.

For smooth candles, the wax should be hot and very runny. This creates a smooth candle shape when pouring, just like you know from the drugstore. To pour matte candles, you should wait a while after heating your wax until it has cooled down a bit, but of course it is still liquid enough. This creates the matte effect of your candle.

Now let’s get to the fun part. You can simply let your poured candles cool down in the molds. Ideally, you’ll give them a day to really solidify.

3.2 Creative casting

We would now like to briefly introduce you to a special way of designing your candle despite its original shape. So you can pour candles with a great optical effect without any effort.

Ideally, use a vessel that has the familiar candle shape. You can also use a toilet paper roll, but you can only see your result afterwards. Therefore, jam jars are ideal for observing the pouring. Then color wax in two containers with at least two colors or leave one colorless or white. Then lay the wick together with the wooden stick over your glass.

Tilt your glass and pour the first layer of paint into the glass. Pour until the wax takes the shape of a pyramid or triangle. Let the layer cool and then take the container of the other color. Now turn your glass in the other direction and pour out the free part. You can repeat this alternately before you recognize the triangle pattern and your glass is filled.

4. Your candle as a decoration or gift

After a few runs, you should be able to make candles fairly easily, which is why you can make candles for yourself as well as for family and friends.

Beautifully cast candles in the form of bodies are increasingly found as decoration in our living rooms. Colorless or single-colored candles are simple and give your living room table style. Colorful candles are perfect as a decoration in the garden for long summer nights. Even poured scented candles give your room a Christmassy scent in winter.

Therefore, you can also give your candles nicely wrapped as homemade gifts. Individually selected shapes can be used for family and friends in advance. This gives your gift a personal touch. As you can see, the production is not too difficult and time-consuming, the result is all the more beautiful. Have fun!

This is an easy potato recipe that’s a great alternative to frozen wedges. It can be eaten as a side dish or as a simple and quick main course. Your kids will never ask for greasy fries again.

These potato wedges are simply delicious and also really healthy because they are a real alternative to greasy fries and the like and not only delight children. They are a real treat as an accompaniment to fish and meat, but they can also be eaten as a main course. Instead of mayo, you can serve a delicious herb quark with the wedges. These homemade potato herb wedges are also ideal as a side dish for grilling or raclette.

Ingredients for 4 persons

– 1 kg of potatoes
– 4 tbsp olive oil
– thyme
– basil
– oregano
– 250 g low-fat quark
– 3 garlic tens
– 1 pack of frozen herbs
– some mineral water
– 2 spring onions

Preparation of wedges with herb quark

The potatoes must be peeled and washed well with cold water so that no residue of sand remains. Next, the potatoes need to be cut into eighths. For smaller potatoes, you can also cut quarters or sixths, depending on your taste. The potatoes must then be placed in a large bowl so that the four tablespoons of olive oil and herbs can be poured over them. Use the herbs according to your own feelings and taste.

This must be mixed well so that all the potatoes have come into contact with the oil and herbs. The potatoes can then be spread out on a baking sheet. Make sure that the potatoes are not on top of each other so that they can brown well. The potatoes have to be in the oven at 200 degrees for 45 – 50 minutes, depending on how brown you want them.

The herb quark can be prepared while the potatoes are in the oven. Put the frozen herbs and spring onions in a bowl with the low-fat quark, add the two garlic cloves with the garlic press, and a good sip of mineral water. Then mix it all together with a whisk. If the quark is not really creamy, add a little mineral water. Season the quark with salt and pepper.

Useful additional knowledge

This recipe can also be varied with fresh garden herbs, depending on taste. For children who don’t like garlic, you can simply leave it out. The herb quark is also delicious as a spread or dip.

Liver dumpling soup is a starter in Bavaria and a hearty delicacy, especially on cool days. A liver dumpling traditionally consists of beef liver, rolls, bacon, eggs, and spices. Clear beef broth is used as a soup.

The homemade liver dumpling soup should not be missing from the menu in any real Bavarian restaurant. It is often eaten as a starter with roast pork or as a small meal in between meals. A fresh liver dumpling melts in your mouth and is a hearty taste experience for spoiled palates.

This recipe is enough for 4 people and is based on the original Bavarian tradition.

Ingredients liver dumpling soup

  • 400 grams of beef liver
  • 3 old rolls (rolls)
  • 125 ml milk
  • 2 eggs
  • 3 liters of beef broth
  • ½ bunch parsley
  • 1 medium onion
  • 150g streaky bacon
  • ½ tsp ground marjoram
  • a good pinch of salt and pepper

Preparation of the liver dumpling soup

  1. Cut the rolls into small cubes and place them in a bowl. Add the hot but not boiling milk. Cover the bowl and leave to stand until the rolls are well soaked.
  2. Remove the skin and tendons from the beef liver, scrape with a knife or puree in a food processor, and place in a bowl.
  3. Cut the bacon and onion into small cubes and add.
  4. Squeeze out the rolls well, tear them into small pieces and add to the liver mixture. Beat the two eggs on top.
  5. Heat the beef broth.
  6. Add the chopped parsley, salt, pepper, and marjoram to the liver dumpling mixture.
  7. Mix the dough with well-moistened hands.
  8. Form approx. 8 – 10 cm large dumplings and place in the hot beef broth. Liver dumplings should not boil, just soak in the broth for about 20 minutes below the boiling point. Liver dumplings are done when they rise to the surface in the beef broth.
  9. To serve, place two liver dumplings on deep plates. Finely sift the beef broth and pour over it. Enjoy your meal!

Garnish

Fresh pretzels taste best with liver dumpling soup.

Useful additional knowledge

If you chill the liver dumpling mass before processing, it can be shaped better. If the dough is too soft and cannot be shaped into dumplings, breadcrumbs give the mixture the necessary consistency. Liver dumpling soup tastes best when eaten immediately after preparation. In Bavaria, the dish is decorated with parsley rolls.

Recipe info

  • Preparation time: approx. 40 minutes
  • Difficulty level: easy

This delicious and nutritious Bolognese is homemade and consists only of fresh and natural ingredients. This original Bolognese sauce tastes just like it does in Italy. Like the soul of Italy. original bolognese sauce

If you are fed up with always eating your pasta with fixed products, this pasta sauce is just the thing for you, because only fresh and natural ingredients are used in this sauce and guarantee a special treat.

Even if you don’t have a grandmother in Sicily, you can feast on this Bolognese like in Italy. This homemade Bolognese guarantees a real holiday feeling and conjures up summer in your kitchen.

Ingredients for 8 servings of Bolognese sauce

  • 500 grams of minced meat
  • 3 carrots
  • 1 kg of fresh tomatoes
  • 2 onions
  • 1 pot of basil
  • 4 garlic tens
  • olive oil

Preparation of the Bolognese sauce

  1. Peel and dice the carrots.
  2. Peel and dice the onion
  3. Quarter the tomatoes and remove the green stalk.
  4. Heat 4 tablespoons of olive oil in a large saucepan and add the carrots, onions, and tomatoes. Let everything boil down really well and for about an hour. Stir frequently so that nothing sticks to the pan. While everything is simmering, add the peeled and minced garlic ten.
  5. As soon as the carrot pieces are simmered until soft, remove everything from the stovetop and use a hand blender to puree the cooked ingredients into a sauce.
  6. Heat olive oil in a pan and brown the minced meat until crumbly.
  7. Then add the ground beef to the tomato sauce.
  8. Season everything with salt and pepper and add a few tablespoons of olive oil if necessary.
  9. Finally, pluck the basil from the pot and chop it up and add it to the sauce.

Useful additional knowledge about the original Bolognese sauce

If you want a vegetarian tomato sauce, simply leave out the minced meat. In addition to the basil, other herbs can also be added depending on the season.

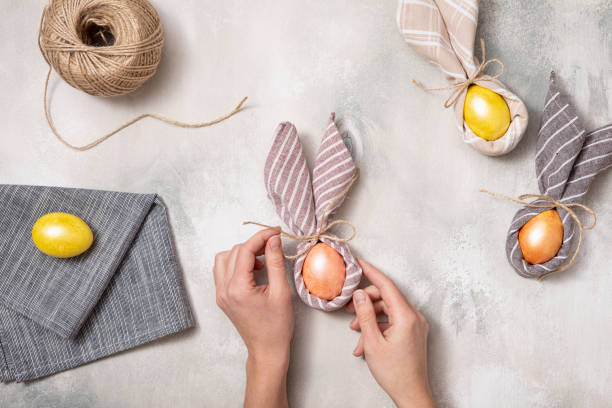
Homemade Easter decorations not only help to save, but also offer lots of fun and activity for the whole family. There are no limits to your own creativity.

On special occasions, such as Easter, you want to get yourself and your loved ones in the right mood for the coming days with purely decorative items. You will find out how expensive beautiful decorations can be. Then there are gifts and food for the Easter holidays and you’ll soon have spent a small fortune again. So here are a few tips on how to make beautiful Easter decorations yourself and save money.

Not only that you can make beautiful decorative objects yourself and thus spend less money, but at the same time it is a good opportunity to actively promote the community of your family. If you have children, you know how much fun a handicraft afternoon can be.

Different craft ideas for Easter

  • A very traditional Easter decoration is the Easter shrub. You can customize it in different sizes. Simply select the vase depending on the desired size. Then put the branches you cut in the garden in the vase and decorate them with bows, small chains, or colorful eggs, of course, you have colored them yourself. In principle, there are no limits to the imagination. Browse through craft shops in advance and get more ideas for pendants and decoration options. Forsythia, for example, is ideal for the branches, but also all other similar shrubs. The nice thing about such a shrub is that you can use it all year round with decorations that change depending on the season. You can also distribute a small chain of lights in the branches so that the shrub can also provide an atmospheric atmosphere in the evening hours.
  • You can easily create suitable window pictures and hangers for the Easter tree out of cardboard. There are plenty of themed templates to download and trace on the internet.

  • Artificial grass can not only be used to fill Easter baskets, but you can also arrange it beautifully, for example on a beautiful plate or bowl together with one or more candles, colored or uncolored eggshells, and other materials. The materials can be put together to match the furnishings, according to color and seasonal themes. So you can also use them as a year-round decoration.
  • If you don’t want to use artificial grass, you can simply sow cress. And later decorate the Easter eggs and chocolate. All you need is a plate, a bowl, or something similar, and a bit of cotton wool on which to spread the cress seeds. Then simply moisten the cotton a little every day. After a few days, the first seedlings are already growing.

Lots of homemade summer drinks and tips for refreshing summer drinks. Tasty and cool drinks are just the thing for summer. Because especially in the hot season it is important that you drink enough. Unfortunately, most store-bought drinks contain a lot of sugar and are therefore not ideal for quenching thirst. Homemade drinks are much cheaper and also healthier. These can usually be made quickly with just a few ingredients. There are no limits to your own taste and the drink is just as sweet or sour as you prefer.

Homemade summer drinks with fresh ingredients

When making refreshing summer drinks, care should be taken to always use fresh and natural ingredients. This not only gives the drink a great taste but is also healthy. In summer you can fall back on many different seasonal products. Many fruits are even available regionally. And even homemade smoothies taste delicious in summer.

  • Great herbs like peppermint and lemon balm are now at their tastiest and can be processed fresh from the harvest.
  • The advantage of processing ripe and fresh fruit is that sugar can be saved thanks to the fruit sweetener. Great herbs give drinks a fresh aroma.

1) Refreshing summer drink lemonade

Lemonade is one of the most popular drinks and is very easy to make yourself. A popular variant is a lemonade: simply add some lemon juice and sugar to water and stir well. Of course, this lemonade can also be made with sparkling water. If you add a few sprigs of fresh mint or lemon balm to the lemonade and put it in the fridge for a while, it gets a particularly fresh aroma. But be careful: homemade lemonade should be drunk within a day, otherwise, it could spoil.

2) On hot days: Refreshing iced tea

Ice tea is also very popular because the tea has a refreshing aroma even when it is cold. Making it is almost as easy as making lemonade. The basis is a tea that can be selected according to taste preference. Black and green tea are well suited. Fruit and herbal teas are also suitable for children. Mixtures are also great, for example, black tea with fruit tea or green tea with mint. Prepare the tea as usual and then let it cool down. Now you can add a bit of juice, syrup, or a little sugar as you like. Served with ice cubes, the homemade ice tea is a great low-sugar refreshment.

3) Alcohol-free punch for special occasions

On hot summer days, alcohol puts additional strain on the body, which leads to circulatory problems in many people. A punch can also be made without alcohol. The fresh fruits in the bowl provide a wonderful aroma and can be varied according to your own preferences. Due to the sweetness of the fruit, additional sugar can usually be avoided. A punch is always popular at summer parties and can also be drunk by children in this variant. So it’s a great idea for the grill menu.

4) Iced Coffee – cold pick-me-up

You can also make a delicious, cold iced coffee at home in no time. The coffee should be brewed as usual. After cooling, it is filled into a tall glass, whereby the vessel should only be filled two-thirds full. Then some (few) ice cubes and a scoop of ice cream can be added. Cold milk and whipped cream also refine the iced coffee. Especially on hot summer days, you don’t have to do without your beloved coffee.

5) Fruit Buttermilk – healthy refreshment

Buttermilk has a refreshing taste and is pleasingly low in fat. Buttermilk is especially delicious mixed with juice. Most juices are suitable for this, although viscous juices with pulp, such as blood orange juice, can also be supplemented with buttermilk.

6) Fresh smoothies – nutritious and healthy

As a drink, but also as a way to fill up a small hunger, smoothies are also a great refreshment in summer. There are numerous ways to make a sweet or savory smoothie. Especially in summer, ice cubes can be added to add more water to the smoothie and cool it down. An ideal refreshment when it is very hot and you are often not very hungry.

7) Herbal Water – simple and effective

However, the simplest drink is refreshing herbal water. Simply pour tap water into a container and add fresh herbs of your choice. A piece of ginger also provides variety. After a few hours in the fridge, the water has taken on the aroma and is a delicious refreshment. This option is particularly suitable for those who often drink too little water.

If you are unsure about the large selection of face care products in drugstores, you can quickly and easily create the right cream or mask for every skin problem with just a few resources.

Facial care is of the utmost importance for pore-deep, radiantly beautiful skin. After all, the face not only radiates the woman’s state of mind but also bears the marks of time. For example, a poor diet causes skin blemishes, and lack of sleep causes dark circles and swollen eyes. The following article will therefore provide you with an overview of helpful tips and tricks on how you can effectively care for your skin with just a few resources.

Quark mask – effective against tired skin

If your skin shows the first signs of tiredness in the form of swollen eyes or dark circles, you should consider using a curd mask. You can make the mask yourself and you need low-fat quark, a dash of wheat germ oil, and some mole. The quark and whey in particular are responsible for ensuring that your skin is sufficiently moisturized. The milk protein stimulates natural cell renewal and thus strengthens the protective layer of the skin. Wheat germ oil, on the other hand, has a high proportion of vitamin E, which is effective against skin aging. The three ingredients should be mixed well, left on the skin for half an hour, and then rinsed off with warm water.

Care measure against eye wrinkles

For a special eye wrinkle oil, you need 10 grams of lanolin and 10 grams of cocoa butter. You should melt both ingredients in hot water. If you get a creamy consistency, you can now process the mass with 50 grams of safflower oil and heat it to 60 degrees Celsius. Now take the mixture out of the water bath and stir until it is lukewarm and no more lumps can be seen. Optionally, you can then add three drops of lemon balm oil, stir the mixture vigorously again and fill it into a clean container. The eye wrinkle oil can smooth out wrinkles around the eyes and should be rubbed carefully into the affected areas for a few minutes several times a week using circular movements.

A black cumin seed cream for the skin?

A black cumin cream, which you can easily make at home, ensures pore-deep cleaning and intensive care. For this, you need 50 milliliters of black cumin oil and jojoba oil, and 10 grams of beeswax. Heat the ingredients in a water bath up to 60 degrees Celsius until the wax is completely dissolved. If desired, the warm mixture can now be enriched with essential oils. Leave the mixture in the fridge for a few hours. You should not use the cream until it has been set.

We’ve collected ideas for homemade Christmas gifts that you can easily use to conjure up great surprises for your loved ones! From delicious treats to beautifully designed candles, there is something for everyone. So you can avoid unnecessary stress during the Christmas season with homemade Christmas presents.

Avoid the stress with homemade Christmas presents

Just before Christmas, the same problem keeps popping up: What do I give my family and friends as presents? But not only the gift idea is a problem. In most cases, the gift for Christmas should not be too expensive and still look very attractive and bring a lot of joy. So that the search for the ideal Christmas present does not turn out to be too difficult, we have collected stylish and individual gifts that are homemade and that can be produced cheaply in this article. This makes it easy to find the right DIY gift for family and friends. Consequently, you avoid stress at Christmas.

Delicious homemade Christmas ideas

At Christmas, we like to eat chocolate and sweets. This is why gifts that can be nibbled on by family and friends are particularly useful in this cold season. Depending on the taste of your loved one, you can use different basic ingredients. And if you want to do something for the health of the recipient, why not give away a DIY spice mix Golden Milk.

1) Gingerbread gifts

Gingerbread dough is ideal for making a loving gift. It’s easy to use. Even if you’re not a professional baker, you can handle it with ease. For example, at Christmas, you can poke or cut a large star out of gingerbread dough and bake it in the oven.

The baked gingerbread star is then beautifully decorated with colorful sugar writing and colored sprinkles. Dark or white (homemade) chocolate can also be used to design the star. After the decoration, the gingerbread star only has to be wrapped in clear foil and the Christmas present is ready.

The shape of the gingerbread can be designed individually – you can cut out the first letter of the recipient or make something out of the dough that reminds you of the recipient. There are no limits to creativity there. Also, read how to make the salt dough yourself.

2) Homemade cookies and cakes

Homemade cookies and cakes are also great Christmas gifts, which will bring a lot of joy to the person receiving the gift thanks to their delicious taste. You can also design these with colorful sugar writing, sprinkles, and chocolate. This is how the treats become your very own personal work of art.

Baking and decorating cookies is a lot of fun, especially with children. Making shortbread, vanilla crescents, and butter cookies and then watching the cookies bake in the oven with a children’s punch in your hand is a wonderful weekend activity in the run-up to Christmas.

And even if there are intolerances or special eating habits in your family, that’s not a problem. Grandma’s cookie recipes can also be easily veganized and are therefore equally suitable for people with lactose intolerance and vegans.

3) Christmas pralines and chocolate

Not only as a chocolate Santa Claus and hot chocolate, but the cocoa specialty also tastes particularly good during the dark season. And you can easily make pralines and chocolate yourself as a Christmas present and give them to your loved ones.

You can use praline recipes, for example, and give them a Christmassy touch: simply add marzipan, orange peel, or speculaas spice and the Christmassy flavor is there. Edible glitter in gold or silver for decoration is particularly pretty on the pralines.

It works similarly with chocolate. You can also easily make these yourself. Similar to the chocolates, you can then simply add the Christmas spices of your choice. Finally, you can add traditional Christmas cookie decorations like candy stars or little chocolate Santa Clauses to complete the Christmas look.

4) Design and give away candles

Candles are very popular design elements at Christmas because they spread a very nice warm glow in the home. You can easily design a candle yourself by taking a plain candle and a napkin with a (Christmas) print that you like. Then you carefully remove the top, printed napkin layer and place it on your candle. Now you blow-dry it until the top layer of wax has melted enough that it has accepted the pressure of the napkin. You already have a self-designed Christmas candle!

5) Make lanterns yourself as a Christmas present

Lanterns can also create a pleasant atmosphere. These can be easily made at home with very simple tools. For the handicrafts of lanterns, you need conventional disposable glasses and bright colors and paper. The glasses are simply painted with bright colors and covered with colored paper. The paper can also be covered with glitter and stars. A beautiful bow can also be attached to the glass. Finally, colorful candle sand is filled into the lantern and a pretty candle is placed in the decorated glass. As a result, you are giving away a cozy living light for your home.

6) Winter flowers and plants as a gift idea

Flowers and plants can also evoke beautiful Christmas associations. For green, mistletoe and poinsettia are ideal decorative elements at Christmas time. If you then make the green arrangements yourself, the recipient will be very happy. For example, the flower pot of the poinsettia can be individually designed using serviette technology. This works in a similar way to the candle. You carefully remove the top layer of the serviette and then use napkin glue to apply the motif to the flower pot. Then add a layer of glue to seal and the Christmas self-designed flower pot is ready!

7) Giving away a self-tied bouquet

If you want to bring a bouquet with you at Christmas time, just tie it yourself. By attaching fir green, mistletoe, and small balls or bells, it immediately looks Christmassy. In the end, the whole thing is topped with a ribbon bow with a wintry motif. This is how the classic souvenir becomes an individual gift idea. Dried flowers can also be given away and you can also make this Christmas present yourself.

Candied orange peel is a fruity candy that’s easy to make at home. In this way, the peel of the citrus fruits can still be used in a tasty way instead of ending up in the trash.

Candiing fruit is an easy way to make it last longer. The fruits are cut into cubes or strips and then sugared. Candied ginger, candied apples or candied orange slices are popular sweets.

Instead of using whole orange slices, it is also possible to candy just the peel of the citrus fruit. Candied orange peels have the same fruity taste and at the same time the advantage of reducing unnecessary food waste. This way you can still use the peel of the oranges, which is otherwise considered a waste product.

Important: Be sure to use organic oranges for candied orange peels. They are untreated because organic farming does not use synthetic chemical pesticides. So you can be sure that the orange peel does not contain any unwanted pollutants.

Make candied orange peel yourself: this is how it works

Ingredients:

Peel of 4 organic oranges
400 gsugar
200 g water

Directions:

Thoroughly clean the orange peels. Remove any remaining pulp and use a knife to cut out any damaged areas. Wash the shells under plenty of running water and drain well in a colander.
Cut the orange peel into 5mm wide strips.
Put 200 grams of sugar in a saucepan with the water and bring the mixture to a boil. Let the brew simmer until the sugar has completely dissolved. Reduce the temperature until the water is just slightly simmering.
Add the peel strips to the sugar stock and let them simmer for about ten minutes.
Take the pot off the stove and leave the orange peels in the sugar sauce overnight. Use a small saucepan lid or plate to weigh them down so they are completely covered with the liquid.
The following day, stir another 100 grams of sugar into the brew and let the shells simmer for another ten minutes. After that they have to go overnight again.
On the third day, stir in the last 100 grams of sugar. Let the orange peels simmer in the broth for a third time for ten minutes and then steep overnight.
On the fourth day you can strain the candied orange peel. Use a colander and catch the orange syrup. You can still use it in other ways.
Spread the candied shells out on parchment paper (or a parchment substitute) to dry. Make sure they are spaced enough apart and don’t stick to each other.
The candied orange peels are ready when they are no longer sticky. Until then, they usually have to dry for two to three days. You can then fill them into an airtight screw-top jar for storage.

Candied Orange Peels: Tips and Variations

Stored sealed, the candied orange peels can be kept for several months. You can eat them pure or use them to decorate desserts and drinks, for example.

You can vary the simple basic recipe in different ways:

Instead of orange peel, you can also candy the peel of other citrus fruits and thus save them from the garbage. Try the recipe with grapefruit, lemon or tangerine peels, for example, or mix different varieties.
If necessary, you can replace the sugar in the recipe with a sugar alternative such as birch sugar (xylitol). Then make sure to adjust the amount if necessary. You can exchange xylitol for sugar in a ratio of 1:1 – but this is not the case with all common sugar alternatives.
To refine them, roll the candied orange peels in sugar, for example, while they are still sticky. Or you can cover them with homemade chocolate icing after drying. When buying, look out for Fairtrade chocolate.

In March, the wild garlic season finally begins again. Wild garlic spaetzle are perfect as a fresh and delicious spring dish. We’ll show you how to prepare the spaetzle.

Spaetzle are a typical Swabian dish. They are served as a side dish, but often also as a main course. Wild garlic spaetzle taste unique and are filling at the same time. You can prepare them relatively easily and quickly with just a few ingredients. The wild garlic season is from mid-March to mid-May. During this period you can buy wild garlic regionally and freshly or pick it yourself:

Make sure that your food is organic if possible, especially animal products. An organic seal confirms species-appropriate animal husbandry. In addition, it is also worth buying eggs without chick shredding. In this way you ensure that the male chicks are also raised.

Wild garlic spaetzle: Spring recipe

Ingredients:

100 g wild garlic
400g flour 4 eggs
1 pinch(s) of salt
50 ml water 2 onions
1 tablespoon neutral vegetable oil

Directions:

Wash the wild garlic, spin dry and then chop very finely.
Place the flour, eggs, and salt in a bowl and use a mixer to mix the ingredients into a smooth batter. Gradually add a portion of the water while stirring until the 50 milliliters are used up. Stir the batter until it bubbles.
Stir the chopped wild garlic into the batter. Then let the dough rest for at least 30 minutes.
Peel the onions, halve and cut into thin slices. Then fry them in a pan with neutral vegetable oil over low heat until golden brown.
Then bring salted water to a boil in a saucepan.
As soon as the water boils, rub the dough into the boiling water using either a spaetzle strainer or a spaetzle press. It’s easiest if you pour the batter into the strainer or press in batches and scrape or press into the water.
If you don’t have a spaetzle sieve, spread the dough very thinly on a board. Hold the board against the edge of the pot, use a long knife to pry off small strings from the dough and slip them into the water.
Remove the spaetzle as soon as they float to the surface and place them in a bowl of cold water. That way they don’t stick together.
Mix the finished spaetzle with the onions and season with pepper and salt. The delicious, homemade wild garlic spaetzle are ready.

Wild garlic spaetzle: Vegan variant

With a few small changes, you can also prepare the wild garlic spaetzle vegan. The eggs are omitted from the recipe. For the dough, you need a little more water, soy flour, and a little turmeric for the yellowish color. The rest of the steps remain the same.

Use in step 2:

  • 250 ml water instead of 50 ml water
  • 3 tbsp soy flour or egg replacer instead of eggs
  • 0.5 tsp turmeric (for the color)