Tag

how

Browsing

Mangoes taste fruity and sweet. You can read in this article how to store mangoes correctly and how they are in terms of sustainability.

Mangoes are a popular southern fruit. Not only do they taste good, but mangoes are also healthy. It’s important to store mangoes properly so they stay fresh for as long as possible before you eat them. Throwing away mangoes would be a particularly bad thing, as they mainly grow in the tropics and subtropics and are exported from there to Germany. Mangoes therefore cause quite a bit of CO2 emissions. Especially mangoes that are imported by plane pollute the environment. Many supermarkets label fruit that has been transported in this way.

Because of its tropical origin, you should try not to eat mangoes too often. If you’re looking for a local alternative to mangoes, you can use peaches or nectarines. These do not taste identical, but the taste and appearance of the pulp are similar. Take a look at our seasonal calendar for more regional alternatives. You can plant a leftover mango seed, but in our latitudes it is difficult for fruit to grow on the tree and if so, only after several years.

Basically, we recommend buying organic food. Then they are free of chemical-synthetic pesticides. With the exotic mangoes, a fair trade seal indicates fair trade.

Factors affecting how mangoes are stored

The best way to preserve and store a mango depends on several factors:

Ripeness: Above all, the fact whether your mango is already ripe or not yet has an effect on storage and storage. You can recognize a ripe mango by the fact that it smells intensely and gives slightly when you (lightly) press the peel. Note that color is not an indicator of ripeness, as there are varieties that remain completely green. If the skin has brown speckles, the fruit is usually ripe.
Bruises: If the mango has bruises, you should cut them away immediately. Bruises promote the formation of mold, which can quickly spread to the whole fruit.
Whole fruit or (partly) cut: The storage also changes whether your mango is still whole or whether you have already cut it.

You should keep this in mind when storing a mango

Basically, it can take a few days to a week for a purchased, unripe mango to be ripe. Ripe mangoes only last a few days.

Store loosely: You can store a mango in a fruit bowl or similar. It should lie loosely so that there are no pressure points. Therefore, do not put heavy fruit on top of the mango or even jam it in the peel or bowl.
Neighboring fruits: To speed up the ripening process, you can put the mango in the sun or keep it with apples, tomatoes or bananas. These give off ripening gases that can affect neighboring fruit and vegetables. You can read more about this in the article Store fruit and vegetables together – or separately? read. If your mango is already ripe, it is better to keep it away from direct sunlight and the fruits and vegetables mentioned.
Temperature: Store mangoes at room temperature. Neither unripe nor ripe mangoes should be kept in the refrigerator. On the one hand, the cool temperature slows down the ripening process. There is a risk that the unripe mango will spoil rather than ripen. On the other hand, because it can lose its taste there. You should only put a (partly) cut mango in the fridge. But then consume or process them promptly.

This way you can keep mangoes longer

Freeze a mango by slicing it into chunks and placing in a sealable freezer-safe container. This makes sense if you realize your mango is already ripe and you can’t process or eat it in time, or if you have some of your mango left over. It keeps frozen for a few months.

You can also enjoy a mango as dried fruit. To do this, cut them into pieces and dry them in the sun, in the oven or in a dehydrator. Dried mango can be kept for up to a year.

Cooked mangoes in the form of mango chutney or as jam or marmalade will keep for about a year if unopened. This is also suitable as a gift or souvenir.

Of course, it’s best if you only buy as much mango as you can use in time. Mangoes go well with many dishes. For example, you can give your salad or curry an exotic touch. It is a sweet highlight in fruit salad, smoothie or yoghurt. Add them to desserts like cake or ice cream.

Unlike most types of honey, linden honey is not blossom honey. It is also special in terms of taste. Here you can find out what other properties make linden honey stand out.

Linden honey is not to be confused with linden blossom honey: although both types of honey come from the linden tree, they differ significantly in taste. The special thing about linden honey is its menthol-like note, which is not penetrating but clearly noticeable. This isn’t everyone’s preference, so if you’ve never tried linden honey, you might want to taste it before you buy it.

What makes linden honey special?

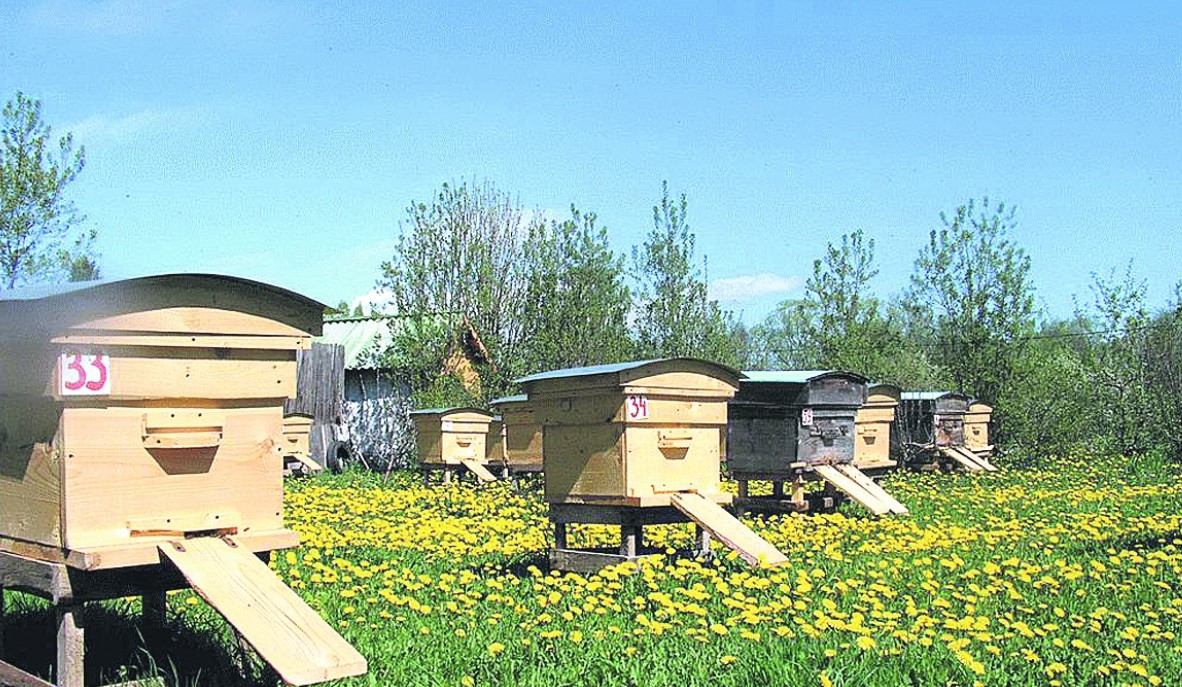
The linden tree is one of the most important forage plants for bees because it provides large quantities of nectar and pollen. Especially in northern Germany, lime trees characterize the landscape. Both linden honey and linden blossom honey therefore often come from the northern regions of the country.

The main difference between the two types of honey is their composition. As the name suggests, the bees extract lime blossom honey from the blossoms of the tree. Linden honey, on the other hand, is not blossom honey, which makes it something special: instead, honeydew is used as the basis for its extraction. These are the sugary excrements of insects that feed on the linden leaves. Linden honey therefore falls into the category of honeydew honey, as does forest honey, for example.

In terms of taste, linden honey is heavier and stronger. In addition to the already mentioned menthol note, it can also have fruity, citrus-like aromas. Both types differ not only in taste: Linden honey is also a special type of honey in other respects. Its dark yellow color, which can go into orange or amber, is characteristic. Lime blossom honey, on the other hand, is rather light yellow to whitish and often has a slight green tinge. The consistency of both types can vary from liquid to creamy to firm.

Is linden honey healthy?

Linden honey and linden blossom honey are said to have both a diaphoretic and antipyretic effect. That is why both types are used as home remedies for colds and flu-like infections, for example. In addition, the two types of honey are said to have a calming and sleep-inducing effect.

These properties have not been specifically proven for linden honey. However, there is better evidence that honey generally has health-promoting effects. Recent studies suggest, among other things, that honey

can have an anti-inflammatory effect
has probiotic and antibacterial properties,
contains antioxidant agents that protect the body from free radicals,
can inhibit the development of cancer and cardiovascular disease.
Due to its high sugar content, you should consume linden honey just like other types of honey in moderation – this is how you best benefit from its positive properties. You can find out more about honey as a sugar substitute here: Maple syrup, honey, agave syrup & Co.: the truth about sugar substitutes.

The best way to use lime honey as a home remedy is to stir it into a cup of hot lime blossom tea. The health effects of linden blossoms have been better researched: They also have a sweat-inducing effect, relieve the urge to cough and promote expectoration. Linden blossom tea is also recommended as a sleep aid. In addition, it harmonises well with the lime honey in terms of taste.

Linden honey: Best from regional beekeeping

You can also get linden honey in the supermarket – but it is better to buy it from regional beekeepers. This not only has the advantage of shorter and therefore climate-friendly transport routes: by supporting regional beekeepers and their bee colonies, you also help to preserve biodiversity. You can recognize high-quality honey from Germany by the protected designation “Real German Honey”.

It is also worth making sure that the linden honey you choose is organic. Organic honey is produced under the most environmentally friendly and natural conditions possible.

For a flavorful side dish, you can sauté broccoli. We will show you how to do this and how you can use the vegetables afterwards.

You probably know broccoli as an ingredient for soups, casseroles or as a vegetable side dish. Broccoli is pre-cooked for many dishes, but that’s not the only way to prepare the vegetable. The broccoli remains particularly crisp and al dente when roasted. At the end of this post you will find many ideas on how to vary and use fried broccoli.

Since you can also eat broccoli raw, you don’t have to worry about it not cooking through properly. If you fancy trying raw broccoli, check out our related post. There you will find out what speaks for and against eating broccoli raw.

We recommend that you buy broccoli regionally and seasonally and pay attention to organic quality. The organic seals from Demeter, Bioland or Naturland stand for sustainable agriculture without chemical-synthetic pesticides. With seasonal vegetables from the region, you can also avoid long transport routes. Broccoli is in season in Germany from June to October. Are you interested in when you can get other types of fruit and vegetables from your region? Our seasonal calendar gives you a comprehensive overview.

Alternatively, you can cultivate and harvest broccoli in your own garden. More about this here: Planting broccoli: How to sow, cultivate and harvest broccoli.

Roast broccoli: Here’s how

Ingredients:

1broccoli
1 tbsp oil

Directions:

Divide the broccoli into individual florets that are as small as possible. Put them in a sieve and wash them thoroughly with water. Drain the broccoli briefly before frying.
Heat the oil in a pan. Sauté the broccoli in it for 5 to 8 minutes, turning it regularly to keep it from burning.

You can also use the stalk of broccoli. To do this, peel it and remove woody parts if necessary. Then, thinly slice or grate the stalk. Then you can fry it together with the remaining broccoli.

Fry broccoli: This is how you can use it afterward

You can serve and combine fried broccoli in many different ways:

as a simple vegetable side dish with salt and pepper
with garlic, nutmeg, ginger or chili
with herbs like parsley or thyme
drizzled with lemon juice
drizzled with olive or sesame oil
with roasted sunflower seeds or sesame
as an accompaniment to rice and pasta dishes
hearty with fried onions and smoked tofu
with yoghurt sauce (also vegan possible)
as part of casseroles, soups, stir-fries or salads

The gourd is a real eye-catcher in the garden because of its special shape. We will show you how to plant and use the bottle gourd.

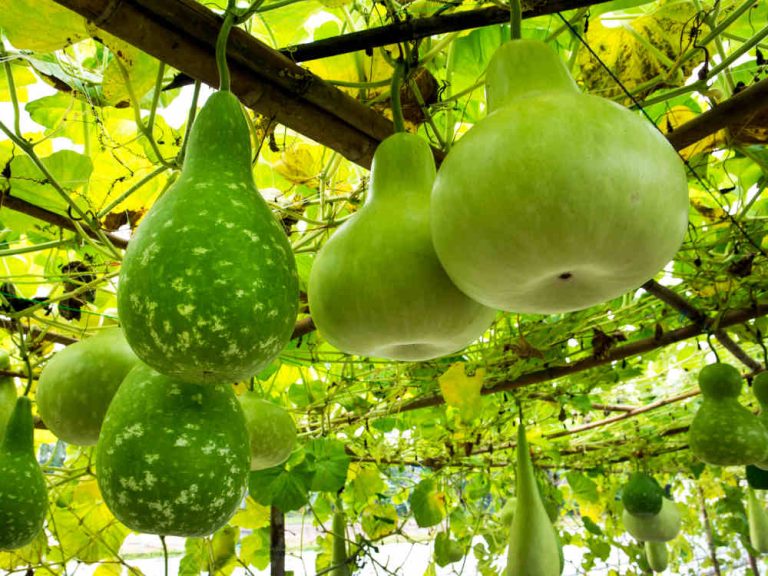
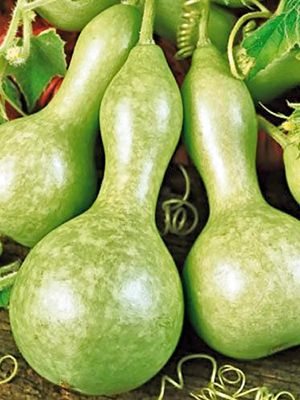
The calabash belongs to the climbing plants and is also called bottle gourd because of its unusual shape. This shape is mainly created when the pumpkin grows hanging down. The gourd originally came from North and South America. There, the pumpkin species is not only used in various recipes. The dried skin of the gourd is good for making various vessels and even musical instruments.

Planting calabash: this is how you do it right

The bottle gourd thrives primarily in countries with a Mediterranean climate. If you want to plant gourds in your own garden, it is best to prefer seeds to plants indoors. You will find a large selection of organic seeds for the calabash in well-stocked gardening shops.

Preparing calabash from seeds: From April you can germinate bottle gourd seeds in small flower pots with a diameter of about ten centimeters. You should only plant the early seeds in the garden when there is no longer any danger of night frosts, which is usually the case at the beginning of May.

Fill the flower pots with plenty of potting soil. Make sure the soil is peat-free to protect the bogs.
Put one seed in the center of each pot and cover it with a thin layer of soil.
Then place the growing pots in a bright and warm place, for example on the windowsill. Always keep the soil slightly moist for the next few days.
After a week you should be able to see the first cotyledons. Now move the calabash seedlings to a slightly cooler spot where the temperature should be between 16 and 20 degrees Celsius.
Before you plant the little bottle gourds in the garden, you should harden them off a bit. To do this, place the pots outside on warmer days.

Before you plant the calabash in the natural garden or vegetable garden, you should observe the following information:

The right location: A sunny and warm location is a must if you want to successfully establish the bottle gourd in your garden. For example, a garden bed in front of a hedge or a stable fence is best. Especially the latter can be a practical climbing aid for climbing plants.
The right soil: gourds need a lot of nutrients to develop their fruit. You should therefore dig up the soil at the location one to two weeks beforehand and dig up plenty of compost under the soil.
Planting calabash in the garden:

First dig sufficiently large planting holes for the young gourds. Leave at least 40 centimeters between each hole.
Lay a drainage layer of pebbles at the bottom of the holes so that the irrigation water runs off better later.
Now place the pumpkin plants that you have brought forward in the holes and fill everything back up with soil.
Finally, water the gourds with plenty of rainwater.

Proper care for the gourd

The bottle gourd is quite undemanding in its care and therefore also well suited for gardening beginners: inside. So that you can bring in the first successful pumpkin harvest from the end of August, you should consider the following tips:

Watering: Even if the gourd needs a lot of water, you should definitely avoid waterlogging. Especially on hot summer days you have to water the pumpkin plant, preferably in the cooler evening hours. Always aim the water jet directly at the roots, because wet leaves and flowers can quickly become moldy. You can also mulch calabashes from mid to late June so that the soil at the location retains moisture better.
Fertilizer: In order to be able to develop its flowers and fruits properly, the bottle gourd needs many additional nutrients. Therefore, enrich the soil at the site with compost every two weeks if possible. Horn shavings or plant manure are just as suitable as fertilizer.
Climbing aids: Even though gourds are climbing plants, they need some support to climb up. Therefore, put a stable climbing aid in the ground shortly after the harvest, to which you can tie the pumpkin plant.
Be stingy: The fewer flowers there are on your pumpkin plant, the larger the fruits that will later develop from them. So if you want to grow particularly large bottle gourds, you should remove some flowers. Concentrate on the first flowers at the ends of the shoots.
Harvesting: When the annual pumpkin plant slowly begins to wither at the end of August, you can harvest the bottle gourds. If you want to be on the safe side, you can tap the pumpkin’s skin lightly. If the tone sounds dull and hollow, the calabash is ripe. In the last few weeks before harvest, you should protect the pumpkins from the blazing sun with a damp cloth. This will prevent the shell from getting unsightly cracks.

You can use the bottle gourd in so many different ways

In their countries of origin, the calabash has long been used as a container for liquids or even as a musical instrument. If you want to paint and carve the gourds, the first thing to do after harvest is to dry them.

Drying and processing bottle gourd:

Find a warm, dry place for the gourds where they can air dry. Do not use additional heat sources such as fan heaters.
Place pumpkins that will stand on their own on a firm cloth-lined surface.
All other gourds should be hung up by tying some gardening raffia around the neck.
As soon as the seeds rattle loudly when you shake them, the pumpkin is dry.

You can process the dried bottle gourd into various items:

drinking bottles
vases
lamps
Musical instruments for children, for example rattles

How often should I clean the bathroom? We have tips and instructions for cleaning the bathroom properly. Because in order to stop germs and bacteria in the bathroom, you should clean the bathroom regularly. Some hygiene measures and cleaning rules can make your work much easier and ensure that a bathroom stays clean for a long time.

Bathroom cleaning tricks

Simple hygiene measures help you to keep your bathroom clean for longer. Even in the bathroom at home, germs and bacteria can quickly collect. Regular cleaning of the bathroom is therefore essential in order to avoid germs in the household. But with a guide and cleaning tips, cleaning becomes an easy routine. In addition, see our article on a bathroom renovation.

1) Clean from top to bottom

This rule is not only helpful in the bathroom but in all rooms. So it is best to start by cleaning the surfaces of hanging shelves and removing dust. You can also clean the mirror without leaving streaks as one of the first steps. In contrast, wiping the floor should be done at the very end.

2) Put away bathroom and hygiene items

Before you start cleaning, you should definitely put hygiene items such as creams, make-up, and other cosmetics out of the way. Because this is how the bathroom can be really cleaned. You can also use this opportunity to put other things aside or put them in the washing machine, such as bath mats, towels, scales, and trash cans.

3) Ventilate regularly and avoid mold

You should also air your bathroom regularly. Increased humidity in the bathroom causes mold to form. Therefore, air the room for several minutes every day, preferably after showering. In windowless bathrooms, you should open the bathroom door and the nearest window. This way you can avoid mold. If mold has already formed, read our home remedies for mold removal.

4) Change towels frequently

Germs particularly like to collect in damp towels. It is therefore advisable to replace them regularly and wash them at a wash cycle of 60 degrees. This ensures that all germs and bacteria are killed during the hot wash. You should also wash the bath mats regularly so that all dirt disappears. Because here, too, germs can form very quickly which is not healthy for humans themselves.

5) Clean the sink

The sink is super easy to clean with vinegar. To do this, mix the vinegar with water in a ratio of 1 to 1. This will also remove stubborn limescale stains. As a result, your bathroom is really clean. You also save on chemical cleaning agents. If you would like to do without these, you can also use washing soda as an environmentally friendly alternative.

6) Clean the shower and bathtub

Probably the worst task when cleaning the bathroom properly is the large shower and bathtub. But here, too, thorough cleaning is required. The use of baking soda or other common home remedies such as effective lemon juice can help you with this. So start by cleaning the tiles and joints, for example with the help of baking soda, which you mix with a little water to a paste. You can then clean the tub properly with lemon juice or diluted vinegar.

7) Tips to avoid lime

If the water in your region is particularly hard, it is advisable to dry the wet surfaces after every wash or shower. Use a microfiber cloth for the sink. And for the shower stalls, it is advisable to use a special squeegee. It is also advisable to use a microfiber cloth when cleaning and to dry everything with it. You should definitely use a small sieve for the shower drain so that hair and fluff don’t get into the drains and clog the pipe. Also, note our tips for cleaning chrome and chrome parts.

8) Remove lime with home remedies

If limescale deposits are difficult to remove, you can remove them with various home remedies. As a result, you can use it to remove limescale from washbasins and shower basins as well as from taps and shower heads. This means that unsightly deposits are a thing of the past.

Avoiding so-called FODMAPs can help against abdominal pain, flatulence and diarrhea. But what are these fodmaps anyway? And how does a (low) fodmap diet work?

First of all, the question of whether it means “Fodmaps” or “Foodmaps”: Fodmaps have nothing to do with the word “food” – FODMAP actually comes from English and is an abbreviation for fermentable oligo-, di- and monosaccharides and (English: and) polyols. But what is that exactly?

FODMAPs are fermentable polysaccharides

FODMAPs are dietary components that occur naturally in food or are added through food production. Today, the term stands for fermentable multiple sugars, double sugars (such as lactose), simple sugars (such as fructose) and sugar alcohols (sweeteners).

Fermentable means that the sugars can be fermented by intestinal bacteria: This can lead to bloating and flatulence. Important: Fodmaps are neither toxic nor dangerous, but they can be involved in digestive problems such as irritable bowel syndrome.

What do fodmaps do?

They have three things in common:

The absorption of the fodmaps in the small intestine is difficult or even impossible. Possible reasons for this are:
The molecules are too big and cannot fit through the intestinal wall.
The transport systems of the intestinal wall are not sufficient. This is the case, for example, with fructose.
The necessary digestive enzymes are not available – or not in sufficient quantities.
Fodmaps bind water: As a result, a lot of liquid collects in the intestine and the stool becomes softer or diarrhea occurs.
When Fodmaps enter the colon, they are fermented by the colon bacteria. Because they are short-chain, this process does not take much time and gas and flatulence develop after a short time.
These three characteristics mean that Fodmaps can cause some people to experience the symptoms of irritable bowel syndrome: abdominal pain, bloating or diarrhea. Anyone suffering from irritable bowel syndrome suffers chronically from these symptoms.

Low Fodmap Diet: How It Works

The (low) fodmap diet is a concept for the treatment of irritable bowel syndrome originally developed by Australian scientists, which you can read about here. Avoiding these substances improves the symptoms of irritable bowel syndrome.

In this diet, mainly foods that contain little of it are eaten. Fodmaps-rich foods, on the other hand, are avoided. One study showed that the diet significantly improved bloating, flatulence, stool consistency and abdominal pain in those affected by irritable bowel syndrome who took part in the study.

In the first phase of the (low) Fodmap diet, Fodmap-rich foods are completely avoided for six to eight weeks. If it becomes apparent during this time that the symptoms are significantly improving or normalizing, a long-term diet without these substances can make sense.

In the second phase of the diet, various Fodmap-rich foods are tested for their individual tolerability: a food rich in it is eaten in increasing amounts for three to four days to find out what amount is tolerated. A week later, the next food is tested. This systematic testing makes it possible to find out which Fodmap-containing foods trigger symptoms. These foods should be avoided in the future.

The goal of the diet is to find a diet that reduces symptoms and improves quality of life – without major dietary restrictions.

Who is the (low) fodmap diet suitable for?

This diet is particularly suitable for people who suffer from bloating, loose stools or diarrhea in combination with abdominal pain or cramps. This mostly affects patients with irritable bowel syndrome. Important: The (low) fodmap diet does not cure irritable bowel syndrome – it does help to avoid foods that cause stomach problems.

The (low) fodmap diet can also be helpful for people with fructose, lactose or sorbitol intolerance. The low-fodmap diet can also relieve abdominal pain and improve the consistency of the stool in patients with chronic inflammatory bowel diseases or celiac disease.

Fodmap list: Which foods contain fodmaps?

The (low) fodmap diet is not about eating entirely without: but the diet should be low in these substances. Unfortunately, you can neither taste nor see them. However, food can be classified according to the amount it contains.

However, the information is more of a rough guide: Anyone who eats a low-fodmap diet should test the individually tolerable amounts of appropriate foods (see the following lists).

Fodmap list vegetables

These vegetables are high in:

artichoke
cauliflower
beans
Chicory
Peas
spring onions (white part)
garlic
leek (white part)
lenses
Mushrooms
Beetroot
celery
soy
asparagus
savoy
onions

Fodmap list fruits

These fruits contain a lot of:

Apple
apricot
pear
blackberry
date
currants
cherries
mango
nectarine
peach
plum
watermelon
plums
fruit preserves
fruit juices

Cereal products fodmap list

These grain products are high in:

barley
rye
Wheat
bread
cereals
couscous
pastries
Grit
pasta

Fodmap list of dairy products

These dairy products are high in:

buttermilk
cream cheese
cottage cheese
yogurt
condensed milk
margarine
mascarpone
milk
milk ice cream
cream
sour cream

Other fodmap-rich foods

These foods are high in:

agave syrup
cashew nuts
fructose syrup
honey
Ketchup
pistachios
milk chocolate
Wine & sparkling wine (semi-sweet, sweet)
sugar substitutes

Low fodmap vegetables

aubergine
broccoli
Chinese cabbage
fennel
spring onion (green part)
green runner beans
cucumber
Ginger
carrot
Potato
Kohlrabi
Chickpeas
pumpkin
Leek (green part)
chard
olives
paprika
parsnip
Parsely
radish
Cauliflower
beets
salad
chives
bean sprouts
spinach
tomato
zucchini

Low fodmap fruits

pineapple
banana
blueberry
clementine
strawberry
Grapefruit
raspberries
honeydew melon
kiwi
lime
tangerine
orange
rhubarb
bunch of grapes
lemon

Low fodmap grain products

buckwheat
Spelt
Oats
millet
Corn
polenta
quinoa
rice
Popcorn
gluten free products
rice noodles

Low Fodmap dairy products

lactose-free milk
lactose-free dairy products
Brie
butter
Camembert
Cheddar
feta
hard cheese
coconut milk
Mozzarella
Parmesan
soy milk

Other low fodmap foods

maple syrup
dark chocolate
eggs
Vinegar
Fish
fish sauce
chicken meat
coconut
lamb meat
jam
seafood
olive oil
vegetable oil
rapeseed oil
beef
pork meat
Mustard
soy sauce
sherbet
tofu
Turkey
wine (dry)
sugar
sugar syrup

Both overviews come from the “Nutrition guide for the FODMAP diet” recommended by the German Irritable Bowel Aid Association. If you are looking for more information and tips, it is worth taking a look at the book.

In general, with irritable bowel syndrome, it makes sense to clarify the symptoms with a doctor and to discuss the change in diet with a nutritionist.

Cleaning the coffee machine made easy: In our instructions we will show you which steps are involved and what you have to consider.

With the right steps to a thoroughly cleaned fully automatic coffee machine.

With a coffee machine you can conjure up delicious and enjoyable coffee. Whether it’s a caffè latte, cappuccino, milk coffee or a simple black coffee – the all-rounder machines deliver all kinds of delicacies at the touch of a button. However, so that you can always enjoy your coffee free of bacteria and germs, you should make sure that your fully automatic coffee machine is properly cleaned. The mostly extensive technology offers many points of attack, which represent sources of fire for dirt and pathogens. With the help of regular and professional cleaning, however, you can enjoy your daily coffee absolutely free of any pathogens.

Thorough cleaning of the different components

If you want to clean your coffee machine properly, you should do each component individually. Pathogens such as fecal streptococci, pseudomonas and E. coli bacteria quickly collect in uncleaned machines. The growing breeding ground also provides an excellent environment for fungi, salmonella and algae. What seems quite frightening at first glance is not really dramatic. Most germs are not pathogens and can only harm small children and people with weakened immune systems. However, preventing mold growth should always be taken seriously. If you haven’t cleaned your fully automatic coffee machine for a long time, a crust can even form on the outlet. This is a clear sign of the spread of germs. Certain components should therefore be cleaned daily. Depending on the container, simply cleaning with hot water is not enough and you should use washing-up liquid or suitable cleaning agents.

The easiest part of a fully automatic coffee machine to clean is the water tank. Depending on the water quality, limescale can quickly build up in the tank. With most devices, the water tank can be removed without any problems. Here it is then necessary to descale the container. Whether you use simple cleaning agents or descaling tablets is entirely up to you. With constant cleaning, however, warm water and washing-up liquid should be completely sufficient. The next step is to take care of the coffee bean container. In addition to dust and all kinds of germs, grease residues can also settle. Here, too, you can use warm water and washing-up liquid to remove dirt. If there are large amounts of fat residue, we also recommend using a coffee fat remover. It is best to clean this part of the machine after each complete use of the beans it contains.

In order to clean the coffee machine properly, thorough cleaning of the so-called brewing group is very important. This is the heart of the fully automatic coffee machine and therefore requires special treatment. Ground coffee and hot water meet in the brewing unit – this is where the aromas unfold and the actual coffee is created. Of course, this process leaves residues, which can quickly develop into a source of fire for bacteria. Cleaning is usually done by removing the brew group. You can then rinse them thoroughly with warm water so that residues are loosened and fall off. Aggressive cleaning agents should not be used if possible, as they could affect the subsequent brewing process. Another important component of every fully automatic coffee machine is the milk frother. If the milk residues are not removed, a large number of bacteria and germs will form here. As is so often the case, warm water and detergent helps with regular cleaning. When you clean your coffee machine, you should do it piece by piece and clean each component individually. In this way you prevent the formation of germs and pathogens in the long term.

Despite all the points that speak for a carefully cleaned coffee machine, we know how difficult it can be to keep a coffee machine clean. Especially when many different colleagues or customers are drinking coffee, not everyone feels equally responsible for cleaning and so it is inevitable that the cleaning will be forgotten or not done properly. A cleaning plan can help you with this. Simply hang it in a conspicuous place near the coffee machine – and nobody will overlook the cleaning anymore.

Vegans don’t always have it easy when it comes to baked goods. Because even if some bakeries now offer vegan alternatives, many cakes, biscuits and even breads still contain animal products such as butter and eggs. So how about just baking it yourself? This article will show you exactly how vegan baking works and what to look out for.

Why bake vegan at all? Being vegan means consistently avoiding products of animal origin. According to statista.de, more than 1.13 million people in Germany now live vegan – and the trend is still rising.

While a large number of meat substitutes and milk substitutes have long since found their way onto supermarket shelves, vegan baked goods are still the exception rather than the rule. Vegan baking is actually quite easy, is neither more complicated nor more expensive than traditional baking and the results are just as delicious. So why not just do it yourself?

Baking Vegan: Tips & Tricks

It doesn’t matter whether you’ve been vegan for a long time, want to please vegans in your circle of acquaintances or simply want to try out vegan baking recipes – with our tips you can make your favorite baked goods without animal products.

Rely on vegetable fats: Butter is a dairy product – and therefore taboo in vegan baking. Instead, use purely vegetable, preferably palm oil-free (organic) margarine. Of course you can also use oils. The following applies: 100 grams of margarine are replaced with 75 to 80 milliliters of oil (e.g. rapeseed or sunflower oil). Nut butter, such as almond butter, is also an interesting alternative to conventional butter – make sure you use organic and fair trade quality. If you want to improve your ecological balance and save calories at the same time, simply replace 100 grams of butter with a mixture of 120 grams of oat yoghurt and a tablespoon of semolina. Another option is to make your own vegan butter.

Egg substitute instead of eggs: In traditional baked goods, eggs are used to bind the dough better. As you will quickly find out when baking vegan, this is often not absolutely necessary. If you still want to use an egg substitute, you can buy one in most organic stores and some supermarkets – or you can simply make your own egg substitute using simple ingredients that you probably have at home anyway: banana , applesauce or flaxseed can effectively replace eggs in baking. Read more: Make your own egg substitute: 6 ideas for vegan eggs
Plant-based drinks instead of cow’s milk: plant-based milk alternatives have long been found in every supermarket and most drugstores, often even in organic quality. Depending on what you’re baking, cow’s milk can usually be easily substituted one-to-one with milk alternatives such as oat milk, soy milk, or almond milk.
Plant-based cream: Plant-based cream substitutes can also be found in most supermarkets, for example based on oats, soy or rice. Alternatively, you can easily make vegan cream yourself. More on this: Vegan Cream: Recommended Alternatives
Aquafaba instead of egg whites: There are some baking recipes that use egg whites. This is the case, for example, with biscuit doughs. But there is also a vegan variant here: aquafaba. Aquafaba is the soaking liquid from chickpeas and beans. Aquafaba is whipped into the perfect vegan egg whites and is even suitable for mousse au chocolat.

Baking with vegan chocolate: What would chocolate chip cookies be without delicious pieces of chocolate in the batter? In general, many dark chocolates are vegan by nature, although you should pay close attention to the list of ingredients. Those who value sustainability and fair production conditions should choose organic and fair trade chocolate. In the (organic) supermarket you will also find vegan white chocolate and purely plant-based “milk” chocolate with different cocoa contents.
Agar-agar instead of gelatine: Anyone who bakes fruit cakes sometimes seals the fruit layer with a gelatine-based icing. However, since gelatine consists of animal bone and cartilage residues, among other things, this is not an option for vegan baking. Instead, you simply replace the gelatine with agar-agar, a purely vegetable powder made from red and blue-green algae. Here too, pay attention to organic quality in order to get a residue-free product. More on this: Gelatin substitute: vegan plant-based alternatives

What else should you keep in mind when baking vegan?

To ensure that the cruelty-free baked goods are 100 percent successful, you should not overdo it when mixing the ingredients, otherwise a vegan dough can quickly lose consistency and become tough. So sometimes it can be worth using the whisk, spatula or fork instead of the food processor to mix the ingredients.

Depending on the type of oven, your vegan pastries may also cook faster than traditional recipes state. It is best to set the timer 15 minutes before the regular end of the baking time to make sure that cakes, biscuits, rolls and the like do not become too crispy.

Incidentally, when baking bread and rolls, most recipes are already vegan – or can be veganized quickly. Instead of the honey used in some bread recipes, you can use some organic sugar beet syrup, for example, and replace the quark in quark rolls with vegan organic soy quark. Buttermilk is easily replaced with a plant-based milk alternative with a dash of vinegar.

Is Vegan Baking Healthier?

You can decide for yourself how healthy your vegan baked goods will be. For example, if you use whole grain instead of white flour and at least partially replace the sugar content in sweets with low-calorie sugar alternatives such as organic erythritol, you can definitely produce healthier baked goods.

In general, the major health benefit of vegan baking is that purely plant-based ingredients are virtually cholesterol-free, while animal products such as eggs, milk and butter contain a lot of saturated fatty acids and trans fats. With high and regular consumption, these can promote heart and vascular diseases.

Vegan is not always sustainable

While vegan ingredients are always free of animal components, they are not always sustainable, since some of the products have extremely long transport routes to the local shops (e.g. coconut oil, cocoa, chia seeds, Agr-agar) or come from conventional cultivation and are therefore are not free from environmentally harmful pesticides.

If you also want to implement the topic of sustainability in baking, you should therefore rely on fairly traded organic products and prefer regional and seasonal ingredients.

Veganized Recipes vs. Vegan Recipes

Veganized recipes are conventional recipes that are made with purely plant-based ingredients instead of the traditional ingredients. This is particularly recommended for vegan baking beginners and for everyone who would like to recreate the taste of baked goods they love. For example, have you ever baked vegan cheesecake, apple pie, vegan biscuits or purely plant-based stollen yourself? It’s easier than you might think – and the taste is in no way inferior to the original recipes.

Of course, vegan baking is also possible with a variety of more experimental, vegan recipes in which sugar is replaced with dates, for example, and unusual types of flour such as lupine, almond or coconut flour are used. These recipes are not replicas of well-known originals, but developed vegan from the outset and represent their own category. They therefore offer a less comparable, but precisely because of this, interesting taste experience. They are often all about “Clean Baking”. Due to the often exotic ingredients, you should pay close attention to the origin and, if possible, prefer regional products.

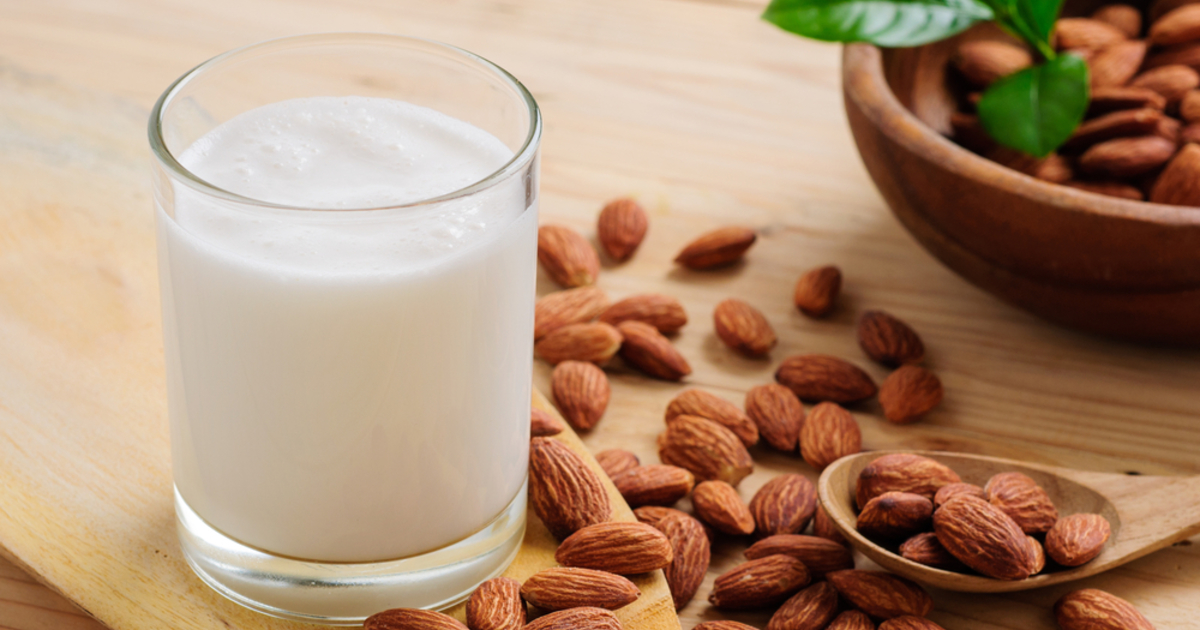
Unlike soy milk, for example, almond milk does not froth well. But with a few tricks or special barista versions, it still works. We will explain to you what is important when it comes to almond milk foam.

Almond milk is particularly popular among allergy sufferers because it is free of lactose, soy protein, milk protein and gluten. However, due to the cultivation of almonds, almond milk is not the most environmentally friendly milk alternative. Because of the taste, many still use almond milk. The problem: it usually doesn’t foam well because it lacks enough fat and protein.

There are now special barista versions of almond milk on the market that are suitable for frothing. We present selected products to you. We will also explain how you can make your own almond milk and how you can use a few ingredients to make it a barista edition.

Froth almond milk – you can do it with special products

In general, normal almond milk is not well suited for “latte-style” coffee: either it cannot be frothed at all or it forms unpleasant flakes in the coffee.

In the meantime, however, the trade has followed suit and offers some barista versions of almond milk that are especially suitable for frothing. However, most of these products contain additives and are not available in organic quality:

For example, there is Joya’s barista almond milk, which contains maltodextrin, the stabilizer gellan and lecithins as well as dipotassium phosphate as an acid regulator.
Alpro also has a barista almond milk in its range, but it also contains other additives: In addition to sugar, fructose, acidity regulators and the stabilizers gellan and guar gum, it also contains flavors.
EcoMil’s barista almond milk is available in organic quality and with higher-quality ingredients: it contains cane sugar, tapioca starch, sunflower oil, pea protein, natural vanilla flavoring and the stabilizer gellan gum.
The fact that Barista almond milk products require so many additives shows that “normal” almond milk is otherwise difficult to froth. With a good milk frother, you can also achieve good results with the spelled-almond drink from Natumi or the almond drink from Alnatura. Both products contain no unnecessary additives and are available in organic quality.

The most important tip: Only cold almond milk can be frothed at all. Almond milk is best straight from the fridge.

Make barista almond milk yourself: recipe ideas

If you want to froth regular almond milk, a few other ingredients can help. As a basic ingredient, you can either use store-bought organic almond milk or make your own almond milk.

To add more proteins and fats to the almond milk and give it more stability, you can try the following ingredients:

About 50 grams of soaked cashew nuts or a heaping tablespoon of cashew butter in one liter of almond milk give the vegan milk alternative more protein and fat. Then, blend the milk in a high-speed blender and strain it through a nut milk bag. Then the almond milk can be foamed a little better.
Alternatively, you can also add vegetable cooking oil. But it takes quite a lot for that – about 90 milliliters of oil to 1 liter of almond milk. Rapeseed oil or sunflower oil are suitable.
To increase the protein content, you can add a tablespoon of protein powder to the almond milk – preferably in addition to the vegetable oil. Pea protein or hemp protein, for example, are recommended.
Additionally, you can add 1/4 to 1/2 teaspoon of guar gum, locust bean gum, or gellan gum to almond milk as a stabilizer. This makes the almond milk creamier and easier to froth.
Tapioca starch, locust bean gum or psyllium husk powder are suitable natural thickeners.
You can also add lecithin to prevent the frothed almond milk from flaking in the coffee. This emulsifier prevents the individual ingredients from separating from each other. In addition to soy lecithin, you can also use sunflower lecithin.
It is also important that the almond milk is as cool as possible before frothing and that you use a good milk frother (e.g. from Memolife**). With the appropriate ingredients such as cashew butter, oil, protein powder and stabilizer, the almond milk should also be frothed with an ordinary mini milk frother.

Alternatively, you can also switch to another plant-based milk as a milk substitute: soy milk and spelled milk are particularly easy to froth. Oat milk is also available in selected barista editions that use few additives.

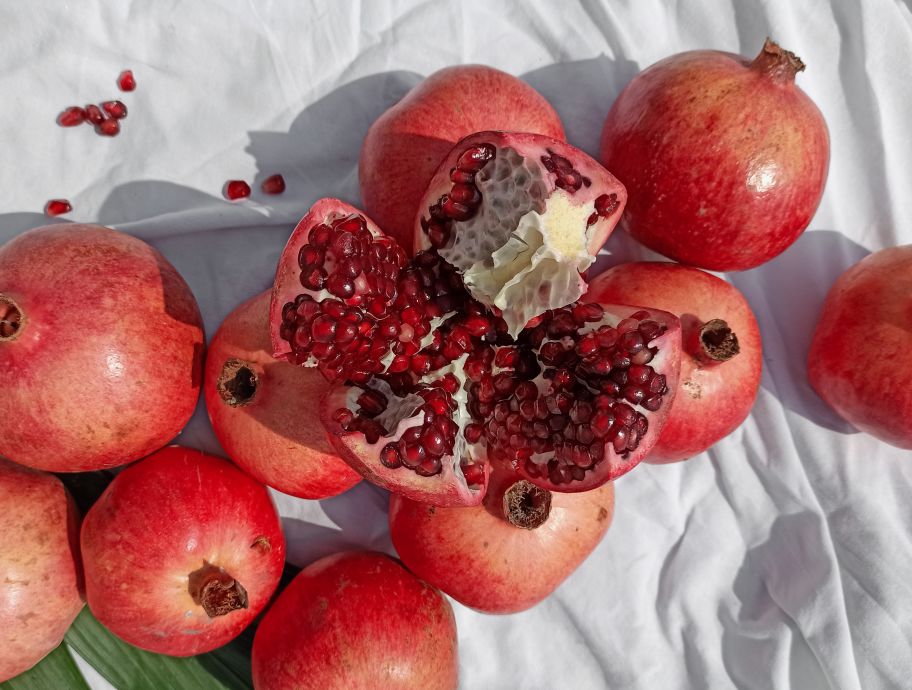
Opening a pomegranate doesn’t seem that easy. We’ll show you how to open and core a pomegranate without the mess – and thus benefit from the vitamins and minerals it contains.

Perhaps you have left numerous stains on your clothes or on the wall when opening a pomegranate. The bulging pomegranate seeds explode when you try to loosen them from the shell; stubborn red stains on clothing, furniture and walls are therefore not uncommon.

We’ll show you two methods on how to open and core the pomegranate – without any mess.

Open and core the pomegranate: the tapping method

For this you need:

a sharp knife
a spoon
a bowl
cutting board
With this method, you place the pomegranate on a cutting board and carefully cut it in half with a sharp knife.
Take one half and hold it cut-side down over the bowl.
Use the round side of the spoon to tap the shell vigorously (!) until all the seeds have come loose. This way the kernels won’t get crushed and will keep their shape.

Open pomegranate underwater

For this you need:

a sharp knife
a cutting board
a bowl of cold water
Halve the pomegranate with the knife.
Hold one half in the water.
There you carefully remove the cores with your fingers. Should a core explode due to the pressure when removing it, the water prevents the hard-to-remove juice from sticking to the wall and clothing.

Pomegranate: ruby red vitamin bomb

Once you have opened the pomegranate, its ruby-like pits are not only beautiful to look at, they are also very healthy. This is due to the ingredients, which – as with pineapple or cranberries – not only have an anti-inflammatory effect, but also have an antioxidant effect. You can enjoy the seeds, which are 85 percent water, raw or process them into juice.