Tag

how

Browsing

If you freeze leftover cooked rice, you don’t have to throw anything away. So that it still tastes delicious after surfacing, we explain how to freeze rice properly.

With rice, it can quickly happen that you misjudge the amount and there is a lot left over. You can keep cooked rice in the fridge for a few days for the next meal. Or you can freeze it and thaw it later when needed.

Rice freezes easily. We’ll show you what you should pay attention to so that the grains still taste good after surfacing and don’t become soft and mushy.

Freezing rice: These varieties are suitable

Perfectly cooked rice grains still have a slight bite. When you thaw frozen rice, the texture changes and the grains become a little too soft. Some types of rice are better for freezing than others because they retain their texture better. These varieties include:

jasmine rice
basmati rice
Patnareis
If you want to cook rice ahead of time, you can intentionally undercook it a little. When reheated, it reaches its perfect consistency.

How to properly freeze and thaw rice

Freeze rice properly

Do not cook the rice too soft, but so that it is still al dente.
Let the rice cool down.
When portioning the rice you have two options:
You freeze everything together. If your rice was still grainy enough after cooking, it will create a frozen clump that you can always break off pieces and thaw.
You’re already freezing it in portions equal to one meal. This is useful if your rice is not quite as grainy and would not be as easy to portion when frozen.
Freezer containers made of glass or stainless steel are suitable for freezing.

Properly defrost rice

It is best to let the rice thaw at room temperature.
Then heat it up with steam. If you boiled it again, possibly with additional water, it would quickly become too soft and gooey.
Instead, place it in a fine-mesh strainer that you hang over a saucepan of boiling water. The rice is heated by the rising steam. Stir the rice once during this time so that it warms up evenly.
You can also just add it directly to the sauce you made for your dish to thaw and let it simmer over low heat.

You leave work tired and hungry and head to the nearest supermarket with a growling stomach. When you see the full shelves, you feel a bit overwhelmed and you start to think: What am I going to cook tonight? Sometimes ingredients that are actually still in stock at home end up in the shopping basket, or you reach for a quick frozen pizza again. It quickly becomes clear: something has to change in shopping behavior! We will help you here and explain how you can save money, time and nerves when shopping for the week.

The advantages of a planned weekly shop are obvious: you save time and money, eat more balanced and less food falls victim to the rubbish bin. With a menu plan for the week and a well-thought-out shopping list (or a corresponding app on your smartphone), you can do your weekly shopping without impulse purchases and endless bills.

5 tips for successful weekly shopping

With our 5 helpful tips and a practical example for a successful weekly shop, nothing can go wrong!

But before you can go shopping for the week, you first have to clarify what should/must be in the shopping cart:

Tip 1: The stocks of staple foods should be checked regularly before you go shopping. Because standing in the supermarket and not knowing whether you still have enough pasta at home for the planned spaghetti Bolognese not only costs nerves and time but also money.

Tip 2: Setting a menu plan for the whole week in advance before going shopping prevents deliberations and discussions in the hectic everyday life and every family member knows exactly what to eat on which day.

It is also a good idea to make a list of dishes that all family members enjoy eating again and again. These favorite foods can then be regularly incorporated into the menu plan. Of course, it is also great fun to browse cookbooks or food blogs together and try out new recipes.

Once it is clear what needs to be bought, it is time to write the shopping list, which ideally should not be written when you are hungry:

Tip 3: A shopping list that is clearly visible on the fridge, or an app on your smartphone that you always have at hand, is particularly useful for everyday NORMAL writing down the groceries that have run out. These foods from the list can then easily be supplemented with the ingredients required for the weekly menu plan.

It is particularly practical to build up the finished shopping list in the order in which they can be found in the supermarket (e.g. first the fruit and vegetables, then the dairy products, last the bread and pastries).

Tip 4: The most efficient way is to do your weekly shopping in a supermarket that you already know well because here you will find what you need unerringly and without hesitation. The basic purchase in the supermarket can then be supplemented, for example, with individual products from the market. Most discounters already have a large range of organic products and a great selection of top-quality fresh fruit and vegetables.

Tip 5: Even small animals make a mess: When shopping for the week, it is definitely worth paying attention to discounts and promotions and planning them for the purchase. For example, if the butter is on sale right now, more of it is bought and frozen in stock for the coming weeks.

Maceration means “soaking in liquid”. You can read in this article how this works and for which foods it makes sense to macerate.

Maceration is a term from the kitchen. It was borrowed from the French “macĂ©rer” – “to soak/soak something” and goes back to the Latin “machrare” – “to soak”. It sounds fancy, but chances are you’ve already macerated while cooking or baking.

Why is maceration useful?

Preservation: Maceration makes fresh food last longer. Another side effect is that fruit does not turn brown.
Flavoring: You can add another flavor note to macerated foods.
Change consistency: Depending on the type of food being macerated, the consistency can remain the same, become softer or juicier.

You need this

Maceration is very easy. You need two components; it is up to you how much and what combinations it will be. Maceration is usually understood as meaning when fruit is marinated in alcohol with a little sugar, but there are many variations.

Ingredient One: Foods You Want to Macerate:

Fruit like strawberries or apricots
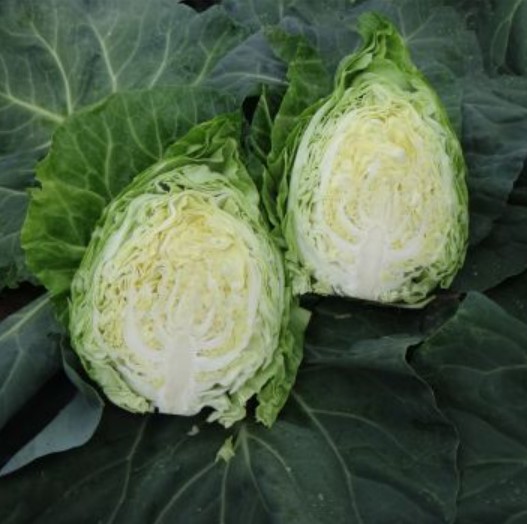
vegetables like onions
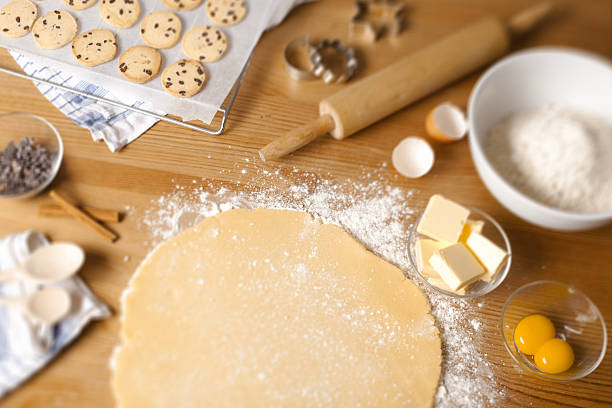
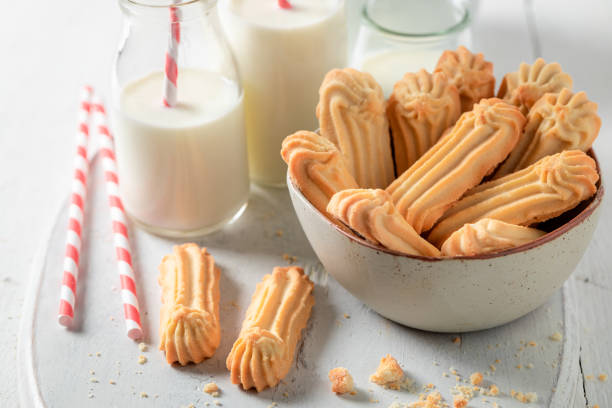
Pastry like biscuit
When macerating, you put the food in or sprinkle it over it in order to then process it further. For example, you dip ladyfingers in coffee to use for (vegan) tiramisu; or you macerate fruit in sugar to make jam. You can also macerate meat.

Ingredient Two: Liquid

Depending on the flavor you want and the purpose, you have different liquids to choose from in which to put the food:

Alcoholic beverages such as liqueur or sparkling wine
Oils such as olive oil or garlic oil (tip: make your own garlic oil)
Vinegar like balsamic
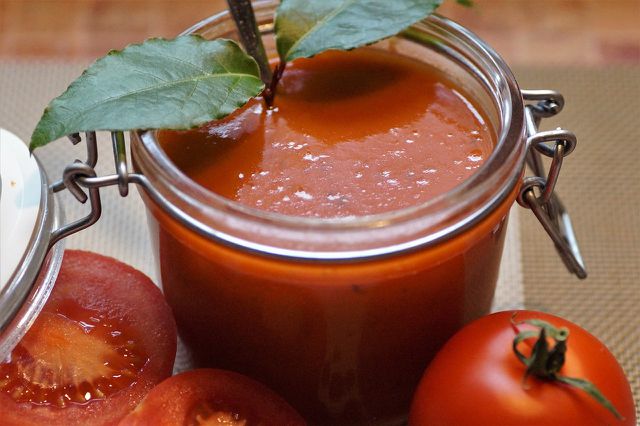
Juices (fruit or vegetable) such as orange juice or tomato juice
Broths like vegetable broth (tip: make your own vegetable broth)
Fairtrade coffee or tea such as black tea
Note: We recommend buying organic food. Then you can be sure that they are free of chemical-synthetic pesticides and come from environmentally friendly cultivation. If you use seasonal and regional fruit and vegetables, you can save CO2 emissions due to the shorter transport routes. Our seasonal calendar shows you when which fruit and vegetables are in season in Germany.

Maceration tips

Use a liquid of your choice for maceration. You can add extra flavor with spices. For example, when macerating fruit, add some cinnamon to the liquid. Herbs, on the other hand, often go well with savory pickles. You can try different flavors. How about a dash of lemon juice and some sugar in a fruit-juice maceration?

It is crucial that the flavors of the liquid harmonize well with those of the food. For example, drinks such as rum, wine or fruit juice go well with fruit, coffee or sweet liqueurs go well with baked goods and spice-oil mixtures, vinegar or broth go with vegetables.

Basically, you should macerate food cold (or at least lukewarm). Pre-heating only makes sense in some cases, for example to boil off residual alcohol or to obtain roasted aromas.

To macerate, simply place the food in the liquid and let it steep for a bit. How long that is varies. For example, soaking strawberries in sugar for 15 minutes may be enough. Others you leave for 24 hours, such as a punch. For pastries such as cake bases, it is sufficient to drizzle or dip them briefly. The aroma usually intensifies with a longer soaking time.

Incidentally, macerating works in a similar way to marinating. However, a marinade contains many spices, and marinated foods are often boiled, simmered, or fried afterwards. Food is often macerated longer than marinated. As a rule, the food’s own liquid and aroma are included in the maceration liquid, which is usually not the case with marinating. Therefore you can continue to use the maceration liquid.

It is not possible to generalize how long a food can be preserved through maceration. That depends on the liquid used and the preparation method. For example, olive oil preserves for up to six months and canola oil for up to a year, while sugar alone doesn’t really extend shelf life. However, if you further process fruit pickled in sugar by heating it to make jam or compote, the food can even last for several years. Also alcohol preserved for several months (for example Rumtopf). However, it is always important that the macerated food does not come into contact with dirt and bacteria and that you store it in a cool and dark place – otherwise the product will spoil.

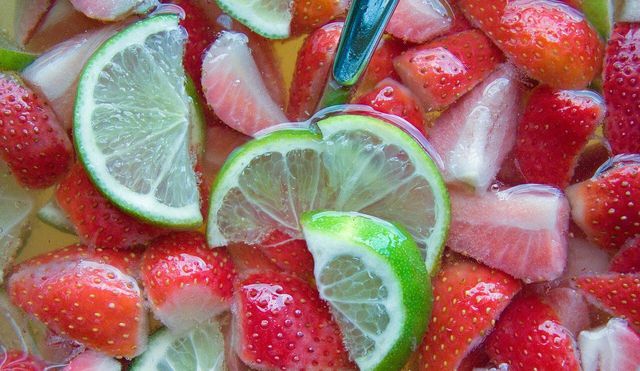
Recipes: Macerate strawberries with balsamic vinegar

Ingredients:

500 g strawberries
3 tablespoons balsamic vinegar
3 tablespoons sugar or agave syrup
some leaves of fresh mint

Directions:

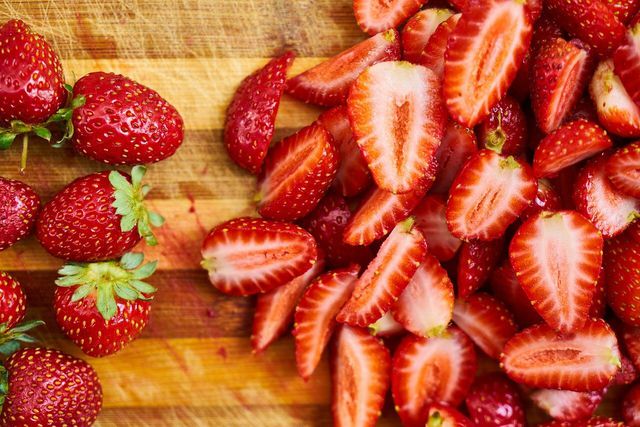
Wash the strawberries and pat them dry.
Cut the strawberries into small pieces – preferably in halves or quarters, depending on their size. Then place the strawberries in a sealable container.
Pour in the vinegar and sprinkle over the sugar (or agave nectar or other sweetener). You can either add the mint at the end when serving or add it to the bowl in small pieces.
Cover the bowl and place in the refrigerator for at least 3 hours. Get the strawberries out of the fridge in time so that they return to (almost) room temperature.
You can eat balsamic strawberries just like that, serve as an appetizer or dessert. You can also combine the macerated strawberries as a sweet and sour ingredient or side dish, for example in a salad or in a bowl.

You can eat pointed cabbage very well raw, because that way no vitamins are lost. We’ll show you how to prepare raw pointed cabbage in a tasty and digestible way.

Combine raw pointed cabbage correctly

Many types of cabbage are difficult to digest and can cause flatulence. However, to make the raw pointed cabbage tasty and digestible, you should combine it with digestive spices and vegetables. With caraway, aniseed, marjoram, ginger or fennel you can stimulate digestion and prevent flatulence. At the same time, your dishes with raw vegetables will taste more varied and easily digestible. In addition, pointed cabbage contains a lot of vitamin C and is available all year round from regional cultivation.

Raw pointed cabbage mixed with ginger

Raw pointed cabbage combines well with ginger in a smoothie. It goes perfectly with sweet dishes and has a lot of vitamin C, vitamin B, iron and copper. Ginger also has an antibacterial effect on the intestinal flora.

Ingredients:

2leaves pointed cabbage
1 piece of ginger
1banana
0.5 pieces of apples
200 ml water

Directions:

Tear the cabbage leaves into smaller pieces.
Cut up the apple. You don’t need to peel it. This way no vitamins are lost. So that the fruit is not sprayed and you can use it without hesitation, pay attention to organic quality when buying.
Then mix all the ingredients together well so that there are no chunks left.
Add a little more water if the smoothie has become too thick.

Eat raw pointed cabbage in a salad with cumin

Pointed cabbage and cumin seeds are a wholesome combination, because the cumin has an antispasmodic, calming effect and relieves flatulence. Together with carrots, the salad is rich in vitamins and delicious. In addition, they are all regional products that have a good CO² balance.

Ingredients:

1pointed cabbage
2carrots
5 tsp cumin
7 tablespoons olive oil
10 tbsp white balsamic vinegar
5 pinch(s) of pepper
4 pinch(s) of salt

Directions:

Cut the cabbage into fine strips, the thinner the better.
Then grate the carrot and put it in a bowl with the cabbage.
Mix together the other ingredients for the dressing and add them to the bowl as well.
Finally, stir the salad thoroughly and let it sit for an hour before eating.

Eat pointed cabbage raw: in a dip

You can also combine raw pointed cabbage with raw fennel to make it digestible and tasty. The fennel bulb is considered a medicinal plant and also relieves flatulence and gastrointestinal complaints. In addition, fennel is very healthy and contains vitamin C, iron and potassium. The fennel season is between June and October. You can use the cream cheese cream made from pointed cabbage and fennel as a spread or as a healthy dip.

Ingredients:

150 g pointed cabbage
100 g fennel
fennel green
200 g cream cheese
3 pinch(s) of chilli powder
3 pinch(s) of pepper

Directions:

Cut the cabbage and fennel into very small pieces. The smaller you cut the pieces, the better the consistency of the cream will be.
Then mix the pointed cabbage and fennel with the cream cheese.
Season the cream with chilli powder and pepper.
As a topping, you can chop the fennel greens and add them to the dip. The delicious and wholesome pointed cabbage dip is ready. You can keep it in the fridge for at least 2-3 days.

Tomatoes can be frozen, but they lose their flavor in the process. You can read here what you should pay attention to and when it makes sense to freeze tomatoes.

Freezing tomatoes: Only good quality, please

Tomatoes are wonderfully aromatic and a real treat in summer. If you have too many tomatoes, you can freeze them so they don’t break. Here, however, it is important that the tomatoes are not soft and have no rotten spots or bruises. You should also remove the green stalk.

Of course, it only makes sense to freeze tomatoes if you really can’t process them fresh. Because when they freeze, they lose their aroma – after defrosting, you can no longer eat them raw, for example in a salad, but should cook them. It is ideal if you process them into a tomato sauce, for example.

Three ways to freeze tomatoes

You now have several options for freezing tomatoes:

fresh and freeze whole
Freeze cut into small pieces
pureed (and seasoned) and freeze as a sauce
tomatoes in one piece

If you freeze the tomatoes whole, you should remove the skin first. During the freezing process, the water in the fruit expands and the tomato can burst. You can easily remove the skin by blanching the tomatoes briefly and then carefully peeling off the skin. (More info: Peeling and skinning tomatoes: easily with a simple trick)
Place the round tomatoes, which are still whole, on a small baking sheet or similar surface (e.g. cutting board) and place in the freezer.
As soon as they are frozen, take out the pads and put the tomatoes in a cotton bag, for example, and put them back in the freezer.
Sliced ​​Tomatoes

For the diced version, you don’t need to skin the tomatoes because slicing them gives them room to expand.
Dice the tomatoes, remove the core and place in a mason jar.
After the small pieces of tomato have thawed, they are particularly good for pizza toppings or sauces that you don’t want to have a completely smooth puree.
Pureed tomatoes

The easiest way to freeze tomatoes is to freeze them already pureed and ideally seasoned.
For example, you can use the plastic-free method with ice cube trays.
In addition, if it has to be quick, you have a ready-made tomato sauce immediately.
So prepare the tomatoes according to your favorite recipe, let them cool and then freeze them. Alternatively, you can cook them without spices and freeze them.

Making crushed ice yourself is easy and there is no plastic packaging. We’ll show you how to make the cool refreshment. This makes hot summer days more bearable.

You can buy crushed ice, but making it yourself isn’t difficult. Especially on hot summer days, it is a refreshing addition to drinks such as slush ice and summer (non-alcoholic) cocktails, or you can use it to cool other alcoholic drinks such as sparkling wine. All you need are ice cubes. With our tips you can easily make crushed ice yourself.

Make crushed ice yourself with a tea towel

Probably the most sustainable and easiest way to make your own crushed ice is with a clean tea towel and a solid object. So there is no plastic packaging and you don’t have to buy any additional new devices.

To do this, place ready-made ice cubes in the middle of a clean tea towel. Hold the open sides tightly together. Now you need a solid object. For example, a hammer, a rolling pin or something similar are suitable. Now break the ice cubes out of the kitchen towel with your solid object. Your homemade and sustainable crushed ice is ready.

Tip: Be careful not to break the ice cubes too small. This way you get more of your crushed ice because it melts more slowly.

Make your own crushed ice with a stand mixer

Another way to make your own crushed ice is with a stand mixer. However, this method only makes sense if you already own a stand mixer. In general, you should not buy any new equipment for the production of crushed ice to avoid wasting unnecessary resources. You can prevent this by using the dishcloth crushed ice method above.

If you already own a stand mixer, the crushed ice method with a stand mixer is the faster and less complicated method for you.

Simply put the ice cubes in a blender and crush them in batches. This makes it easier to crush the ice cubes than if you use the normal smoothie function. In addition, the blade of the blender does not wear out as quickly. Also make sure that your blender has enough power to crush the ice cubes.

Tip for sustainable ice cubes for your crushed ice

The basis for making crushed ice yourself are ice cubes. But you don’t necessarily need the classic plastic ice cube tray. A sustainable alternative is to simply make the ice cubes yourself in glasses. Make sure that you fill the water mainly in cone-shaped glasses and do not screw a lid on top. Let the ice cubes thaw briefly at room temperature before processing them into crushed ice – this is how you get them out of the glasses. Also, to avoid expanding the glass, you should only fill the glass up to three quarters full with water.

You can easily freeze zucchini and use it for cooking when it is not in season. You can do without plastic freezer bags – we will show you suitable alternatives.

Freeze zucchini: 12 months shelf life

Since zucchini is a seasonal vegetable, you should buy and freeze it from regional cultivation and organic quality during the season (June to October in Germany). So you can enjoy the summer squash all year round.

The courgettes will keep in the freezer the longest if you don’t cook them first:

Wash the courgettes and cut them into cubes or slices.
To keep your zucchini crunchy when defrosting, sprinkle them with a little salt. The salt draws moisture from the zucchini, making it easier to freeze.
After a few minutes, some water will form on the zucchini pieces. You can dab this off after five to ten minutes.
Then put the zucchini pieces in a screw-top jar and freeze them.
Frozen zucchini will keep for at least 12 months and retain their flavor.

Freezing zucchini cooked: what do you have to pay attention to?

Freezing cooked zucchini is especially worthwhile if you overcooked it. Then you don’t have to throw away the leftover zucchini. Again, you can put the zucchini in a screw-top jar to freeze them.

To prevent the zucchini from getting mushy when defrosting, you should defrost them very slowly at room temperature. Then heat them up briefly in a saucepan or pan.

The basis for the best biscuit classics

Baking biscuits without shortcrust pastry – unthinkable! The classic dough is just perfect for biscuits to cut out and decorate, not only the children are happy! Even adults like to let their creative streak play with the shortcrust pastry. Shortcrust pastry is also wonderfully versatile: with a little cocoa or with grated nuts, things look different – but they still taste incomparably delicious!

The classic shortcrust pastry ingredients for a sweet shortcrust pastry are cold butter, flour, sugar, eggs, and a pinch of salt. Knead quickly into a smooth dough and wrap in cling film and leave to rest in the fridge.

Are you new to baking? – No problem! This video explains how to prepare a basic shortcrust pastry.

Trick 17 for the shortcrust pastry: the cold does the trick

When making shortcrust pastry, all the ingredients and all the equipment used must be cold! It’s worth putting the kneading hooks of the hand mixer in the freezer for 30 minutes or washing your hands with cold water (then dry them thoroughly!). If you have a stone or marble worktop, put cold packs on it for 30 minutes, for example, and then even the worktop for kneading the dough will be chilled. You can even put the flour in a tightly sealed container in the fridge to chill!

In classic shortcrust pastry recipes, the dough is wrapped in cling film and placed in the fridge for at least 20 minutes. Especially when baking biscuits, it is advisable to prepare the dough the day before and let it rest in the fridge overnight so that the sugar crystals can dissolve better.

Help, my shortcrust pastry is on fire!? – What is a “burned” dough?

If you mean it too well with your shortcrust pastry and knead it for an extra-long time, it may become “burnt”. This means that the butter separates out and the dough does not bind well. It becomes tough and sticky and can no longer be rolled out well. Shortcrust pastry likes it quick and cool! To save your battery, you can try spooning a well-chilled egg white into the batter to help the flour and butter combine.

It is important that the fat used is by no means liquid so that the finished pastry – regardless of whether it is a small biscuit or a large tart – remains fluffy. If you want a very fine dough, it is best to use icing sugar instead of conventional granulated sugar for your shortcrust pastry!

In addition, baking powder has no place in shortcrust pastry! Do you feel like baking cookies now? With our tips for baking biscuits from a professional, it’s guaranteed to succeed. We have also put together a large selection of Christmas cookie recipes for you here.

If you were too eager and ended up with cookies, here are the best ways to freeze cookies.

Anyone who has ever taken a tray full of melted puddles of chocolate out of the oven instead of chocolate sticks is well advised to use these tips because fine shortbread cookies are not as complicated as you think if you pay attention to a few points!

Trick 17 for shortbread: The cold does it

Shortcrust pastry, for example, likes it cold. It is advisable to place the baking tray in the fridge for about an hour before you apply the dough, or if possible in front of the door or on the balcony. After the biscuits have been placed on the well-chilled tray, it is best to put them back in the fridge or on the balcony for an hour. Then they go straight into the preheated oven. This way the biscuits keep their shaped shape.

What eggs and butter might have to do with it… If the dough is much too soft, this may be because the eggs or yolks used are too large. If you get along well with your dough, you can try to use a little more flour in this case – but please dose carefully! Otherwise, the matter will become too tight and will not push well through the spout.

It might also help to use a little less butter next time. It is not advisable to use cornstarch in shortbread cookies, as the dough can become tough.

Hard is not hearty!

Shortbread is a sensitive dough that needs to be treated with a lot of attention. You should also give the butter enough time to become creamy. Depending on the temperature of the butter, it can take up to 20 minutes until it has really foamed well for a spritz dough. Of course, the easiest way to do this is with a food processor, but if you do it with a hand mixer, you have earned the sweet delicacy with plenty of butter in the end!

If the dough is too firm and cannot be pushed through the spout, it could also be because too much flour was used or the flour was mixed in for too long. Mix the butter and sugar very thoroughly until fluffy, then stir in the remaining ingredients (e.g. cocoa or grated organic lemon zest) and only briefly mix in the sifted flour at the very end.

It depends on the right tool

If it doesn’t work well with the piping bag, using the meat grinder with the matching cookie attachment will help. High-quality meat grinders are made of cast iron, which means that firmer dough can also be pressed through. In Spain, people like to eat “churros” with coffee, a shortbread baked in plenty of oil. In addition, you get your own churros presses, sometimes even made of sturdy metal.

Freezing pasta is a good solution if you misjudged your cooking. Here you can find out what you should keep in mind so that they still taste good after defrosting.

If you ever have pasta left over after cooking and eating, you don’t have to throw them away. They don’t last long in the fridge either. All the better that you can also simply freeze pasta.

Freezing pasta: This is how you prepare the pasta

Before you freeze pasta, there are a few things you should do to prepare.

Let the leftover pasta cool completely.
Pour into a container suitable for freezing. In order to protect the environment, you should not use single-use plastic utensils. You can easily freeze pasta without plastic using mason jars or stainless steel cans.
A cotton bag is best for freezing noodles: Fill it up and lay it flat in the freezer – this is how you get a noodle sheet. From this you can easily break out the required portions later.
Tip: To prevent the noodles from freezing into a large, indivisible lump, you can toss them in a little oil beforehand. Wet them well and then pour them into the jar.

Freeze and thaw pasta

Then store your pasta in your freezer or freezer.

By the way: If you are still looking for an energy-efficient appliance, take a look at our best list of freezers.

You then have a number of options for defrosting the frozen pasta:

Moisten the noodles with a little water and briefly heat them in the microwave.
Put the frozen noodles in lukewarm water and slowly thaw them.
To keep them tasting freshly cooked, simply place the frozen noodles in a pot of boiling water for 2-3 minutes.
Tip: You can also freeze leftover sauce in a separate container.