Tag

Ice

Browsing

What is Golden Gaytime Ice Cream?

Golden Gaytime is an iconic Australian ice cream treat that has been beloved by Australians since its introduction in the 1950s. This ice cream treat is made up of layers of creamy vanilla and toffee ice cream, covered in a crispy layer of chocolate and biscuit crumbs. The combination of flavors and textures makes it a unique and delicious treat that is enjoyed by people of all ages.

The popularity of Golden Gaytime ice cream has led to many variations over the years, including the introduction of other flavors such as honeycomb and chocolate, but the classic vanilla and toffee combination remains the most popular.

How to Make Golden Gaytime Ice Cream at Home

Making your own Golden Gaytime ice cream at home is easier than you might think. Here’s what you’ll need:

  • 2 liters of vanilla ice cream
  • 1 cup of toffee bits
  • 400g of dark chocolate
  • 2 cups of biscuit crumbs

To make the ice cream, soften the vanilla ice cream and add in the toffee bits. Mix well and pour into a 9×13-inch baking dish, smoothing the top. Freeze until firm.

To make the chocolate coating, melt the dark chocolate in a saucepan over low heat. Once melted, stir in the biscuit crumbs until well combined.

Remove the ice cream from the freezer and cut into squares. Dip each square into the chocolate mixture until completely coated, then place back in the baking dish. Freeze until the chocolate coating is firm.

Tips for Perfecting Your Golden Gaytime Ice Cream

To make sure your Golden Gaytime ice cream is perfect, there are a few tips to keep in mind. First, make sure your ice cream is softened before adding any mix-ins to ensure they are evenly distributed. Second, when making the chocolate coating, make sure to mix the biscuit crumbs in well to avoid any clumps. Finally, when dipping the ice cream squares in the chocolate mixture, work quickly to avoid melting the ice cream.

By following these tips, you’ll be able to recreate the delicious and iconic Golden Gaytime ice cream at home. Enjoy!

Lamington cake: An Australian classic

Lamington cake is a beloved Australian dessert that has been around since the early 1900s. It consists of a sponge cake that is coated in a layer of chocolate and then rolled in desiccated coconut. The cake is usually cut into small squares or rectangles, making it perfect for layering with other ingredients.

The origins of the lamington are somewhat disputed, but it is believed to have been named after Lord Lamington, who served as the Governor of Queensland from 1896 to 1901. It is said that his cook accidentally dropped a sponge cake into a bowl of chocolate and then coated it in coconut to hide the mistake. The resulting creation was a hit with Lord Lamington and his guests, and the rest is history.

Today, lamington cake is a staple in Australian bakeries and is enjoyed by people all over the world. Its unique combination of chocolate and coconut makes it a delicious and memorable dessert.

Vanilla ice cream: Cool and creamy layers

Vanilla ice cream is a classic dessert that pairs perfectly with lamington cake. Its cool and creamy texture provides a refreshing contrast to the rich chocolate and coconut flavors of the cake. When layering the cake with ice cream, it is important to let the ice cream soften slightly before spreading it over the cake. This will help to ensure that the layers are smooth and even.

To make the ice cream layer even more special, you can mix in some shredded coconut or chopped nuts. This will add some texture and flavor to the ice cream and make it even more delicious. Once the ice cream layer is in place, the cake can be placed in the freezer to set.

Raspberry sauce: The perfect complement

Raspberry sauce is a tart and tangy topping that perfectly complements the sweetness of the lamington cake and vanilla ice cream. To make the sauce, simply puree some fresh or frozen raspberries and add a bit of sugar to taste. The sauce can be drizzled over the top of the cake, or served on the side for individual portions.

In addition to its delicious flavor, raspberry sauce also adds a beautiful pop of color to the dessert. The vibrant red hue of the sauce makes the cake look even more tempting and appetizing. With its combination of rich chocolate, creamy vanilla ice cream, and tangy raspberry sauce, the lamington ice cream cake is a dessert that is sure to impress.

Homemade ice cubes can be found in almost every household in the freezer. But in addition to the variant with water, there are now more and more containers in which coconut milk ice cubes are stuck. They give smoothies a silky texture and add great flavor to iced coffees – perfect for spring and summer!

The exotic among the ice cubes

Coconut milk is made from the flesh of the coconut. The result is a creamy liquid that refines many dishes such as Indian curries. But coconut milk doesn’t just taste wonderful in hot meals: the latest trend is coconut milk ice cubes!

Instead of the usual water, the trendy ice cubes are made entirely from coconut milk. In terms of taste, this is particularly interesting for coffees or smoothies: the sweet coconut milk goes well with the bitter coffee aroma and ensures a creamier consistency and chilled drinks. In addition, the drinks are not watered down unnecessarily.

The coconut milk ice cubes are also easy to portion, so you no longer have to open and use up a whole can of coconut milk for a shot of milk. However, with a fat content of around 20 percent, commercial coconut milk is not lightweight. However, you can fall back on the reduced-fat version – which has twelve percent fat.

Make coconut milk ice cubes yourself – that’s how it works!

The ingredients:

  • 1 can of coconut milk
  • Ice cube molds of your choice

The Preparation:

  1. Shake the coconut milk well before opening to form a homogeneous mixture.
  2. Pour the coconut milk into the ice cube molds and place in the freezer for at least four hours.
  3. Depending on your needs, remove the coconut milk ice cubes from the mold and add them to creamy smoothies or cold iced coffees.

All those who are not currently working on their bikini figure should definitely try this sweet food trend: Donut Ice Cream Cone is the name of the threat that is getting a lot of attention on Instagram and Pinterest! Instead of a usual ice cream cone, you bite into a donut dough that has been rolled in cinnamon sugar and filled with ice cream.

Food trend Donut Ice Cream Cone

When you cross donuts with an ice cream cone, the result is a seriously sweet treat: the Donut Ice Cream Cone! The donut dough croissants are appetizingly filled, for example with nut nougat cream and ice cream or berry compote and cream.

The ice cream cone 2.0 and its variations are of course real calorie bombs – a donut alone has 258 kilocalories – but every now and then a small sin is certainly allowed. In Prague, the birthplace of the trend, not only ice cream lovers can be seen with the donut ice cream cones: many foodies travel to the Czech capital to try the latest trend for themselves.

Donut Ice Cream Cone vs Trdelnik

The Ice Cream Cone Donut is based on the traditional Trdelník pastry from Slovakia. It is a kind of tree cake that is rolled up on sticks, baked over an open fire, and then refined with chopped nuts and sugar. When the trdelnik has cooled, it is sliced ​​and served.

Whether it’s the traditional Trdelník pastry or the trendy Donut Ice Cream Cone: both treats promise sweet snacking fun that you should try – especially if you’re visiting Prague or Bratislava.

And everyone who can’t make it to the countries of origin of Trdelník or donut ice cream cone in the near future will also find a super delicious recipe for the Hungarian tree cake Trdelník here.

This is probably the most delicate temptation since ice cream has existed: wafer-thin ice cream rolls! The trend is spilling over from Thailand to more and more countries, and so in many German cities, delicate rolls are now being formed with a sharp spatula and served in an ice cream sundae.

Delicate rolls as an ice cream trend

Foodies no longer order their ice cream in the form of large balls, but rather as wafer-thin rolls: Ice Cream Rolls are the name of the latest food trend that is spilling over from Thailand and making ice cream lovers happy. Best of all: the ice rolls are prepared individually for the customer on-site – this guarantees freshness and there is something for every taste!

This is how ice cream rolls are made

The basis of the ice cream rolls is the crème anglaise – a cream made of egg yolk, sugar, and milk. This mass is placed on a metal plate at a temperature of around minus 20 degrees and refined with the customer’s favorite ingredients. This can be fruit, chocolate, or biscuits, for example, which are chopped up directly on the plate, mixed with the cream, and then spread thinly on top.

Healthy ice cream enjoyment?

Depending on the method of preparation, there are around 110 kilocalories in 100 grams of crème anglaise alone – plus the calories from the toppings you have chosen. For comparison: 100 grams of vanilla ice cream have about 200 calories.

Thus, none of the ice cream variants are really a figure-conscious choice. With the right toppings such as berries or nuts, however, some “empty” calories can be saved on the ice cream rolls. But the same applies here: Sweet sins are of course allowed from time to time and can then be enjoyed all the more!

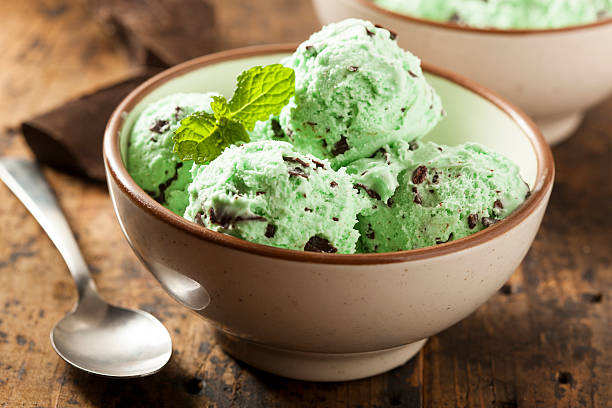
Summer, sun, sunshine – and ice cream! This vegan ice cream simply tastes like summer: fresh mint, crunchy chocolate, and creamy fine ice cream. We can’t get enough of this green avocado ice cream. And you don’t even need an ice cream maker. It’s so easy to make your own avocado ice cream.

Make your own avocado mint ice cream

You’ve certainly never eaten ice cream like this: fresh mint gives the creamy-green avocado ice cream a particularly refreshing note – and really helps to cool off on hot days. The crunchy pieces of chocolate give a certain crunch effect. And on top of that, it’s also vegan ice cream!

To make the avocado ice cream yourself, you only need a few ingredients: coconut milk, avocados, mint, chocolate, and possibly some agave syrup. Although avocados have a relatively high number of calories and a high-fat content, healthy polyunsaturated fatty acids predominate.

Mint and lemon provide vitamin C and at the same time provide a fresh kick. The whole thing is also done in no time at all: you only need 15 minutes until the ice is in the cooler – but then you have to wait. But anticipation is often the best joy!

We fell in love with the creamy avocado ice cream – just try it out and enjoy the fresh licking fun on hot days.

The recipe for the avocado mint ice cream with chocolate

For 6 servings

  • 1 can of coconut milk
  • 3 ripe avocados
  • 2 tbsp lemon juice
  • Agave syrup (optional)
  • fresh mint (or mint extract)
  • 100 g chocolate drop (or to taste)
  • Besides that
  • cling film

Preparation steps

  1. Open the coconut milk and scoop out the solid part at the top – don’t shake the can first – and pour it into a large bowl! Using a hand mixer, beat the solid coconut milk until fluffy, and then pour into a cake or casserole dish.
  2. Split the avocados, pit and scoop out the flesh, and place in a food processor. Blend together with the lemon juice, agave syrup, and mint leaves until smooth and creamy.
  3. Put the avocado mixture on the fluffy coconut cream, sprinkle the chocolate chips over it, and mix the mixture carefully but evenly.
  4. The surface of the mass should be relatively smooth. Now place cling film on top and press lightly so that there is no air between the film and the ice cream mass. Place the ice cream in the freezer for at least two hours.
  5. Let it thaw and enjoy.

In the far north of Spitsbergen, the “treasury of the world” is hidden deep underground in a bunker. What is in it and what is it used for?

Who built this treasury and why?

The “Global Seed Vault” was built in 2008 as a worldwide seed repository to preserve vital seeds. Deep in the bunker-like cold stores of this modern “Noah’s Ark”, the seed samples are protected from possible catastrophes, and are intended to secure the world’s food supply for future generations and avoid famine. The preservation of the genetic diversity of useful and cultivated plants, livestock and domestic animals and their wild relatives is also one of the sustainability goals of the UN Agenda 2030.

The “treasure” lies deep in a mountain in a former lignite and hard coal mine. Normally, the samples are cooled there to minus 18 degrees. Due to the location and the climatic conditions there, the temperature inside does not rise above minus 3 degrees, even in the event of a power failure. Over a million seeds from cultivated plants from all over the world are now stored there. The purpose behind it: Scientists want to protect these valuable biological resources from crises and disasters so that they can be made available to future generations.

They are packed in plastic boxes and waterproof aluminum bags and stored in the bunker, protected from earthquakes, flood disasters, acid rain, rocket attacks and radioactive radiation.

249 countries store seeds

Initially, African countries provided seeds for the Svalbard Global Seed Vault. Many more followed: amaranth from Ecuador, wild beans from Costa Rica and chickpeas from Nigeria, but also tomato varieties from Germany are stored there. Today, 249 countries store seeds there. The samples are mostly old and rare varieties that have been bred by farmers over a long period of time. The samples are always secured in three ways:

The state, i.e. the owner of the seeds or seedlings, keeps a sample
A sample goes to an international gene bank
The third after Spitsbergen
On the occasion of the tenth anniversary of the seed vault, the Food and Agriculture Organization of the United Nations (FAO) estimated that around 40 percent of the agricultural seed used worldwide is stored in the vault on Svalbard.

Who can enter this treasury and what does the climate catastrophe have to do with it?

Normally no one who is not directly involved in this treasure trove has access to it. Access is strictly forbidden for tourists or other visitors in order not to expose the valuable seeds to contamination or even destruction. Incidentally, the Norwegian government bears the costs for this facility, and seed storage is free of charge. The conversion to this seed store cost 18 million euros. To date, seed has only been taken once. In 2015, Syria had to fall back on the stored seeds because its own facility in Aleppo was destroyed during the war.

But the treasury was also threatened by the climate catastrophe. In 2017, water entered the entrance of the Svalbard Global Seed Vault. Unusually high autumn temperatures had melted the permafrost. Even if the water did not penetrate to the storage area, the bunker was extensively rebuilt over a period of two years and adapted to possible thaw weather. In view of the consequences of the climate crisis, it should now be able to survive for the next 200 years. The old entrance tunnel has been replaced with one made of waterproof concrete, cooling pipes support the frost. Technical systems were relocated to a new building to keep unwanted heat away from the storage. The seed is now also received there.

This facility can be seen as the last resort for feeding humanity. In an emergency, the seeds stored there can be used to grow new seeds in order to ensure the food supply of individual countries or worldwide. Let’s hope we never have to resort to it to this extent.

Refreshing, delicious, and guaranteed without artificial additives. The quark and berry frost is almost like homemade ice cream, the shift change looks pretty and the dessert melts in the mouth of children and adults alike.

Hot weather, no ice cream machine, and the ice cream parlor the other day tasted more like aroma than real ingredients? Then just try this dessert. By the way, it also makes a great end to a nice dinner! The recipe itself is easy, but it will take some time.

Ingredients for 4 persons

  • 500g low-fat quark
  • 6 tbsp lemon juice
  • 80g and 3 tablespoons of sugar
  • 1 pinch of salt
  • 250g whipped cream
  • 300g frozen berries (wild fruit mix or raspberries taste best)
  • 75g butter
  • 150g butter biscuits

Preparation

  1. First, let the berries thaw sufficiently so that they can be pureed.
  2. Add 3 tablespoons of lemon juice and 3 tablespoons of sugar to the berries and then puree the berries with a hand blender to a fine pulp.
  3. In another bowl, mix the quark with the remaining lemon juice. Add 80g of sugar and a pinch of salt.
  4. Then whip the cream until stiff and fold it into the quark mixture.
  5. Everything is now piled up in a freezer-safe, preferably square container: Start with 4 tablespoons of quark mixture and smooth it out. Place the container in the freezer for half an hour, then take it out again and pour 2 tablespoons of berry mixture over it, smooth it out, and so on until the quark and berry puree is completely used up.
  6. When everything is layered, crumble the butter biscuits and toast them in the butter. Top the layered dessert with the crumbs and freeze completely.
  7. If you have completely frozen your quark berry ice cream, let it thaw for a few minutes before serving. But it can also be enjoyed semi-frozen.
  8. In any case, it should be firm enough to be able to cut it into 1.5 cm thick slices in the container and then serve them. Delicious!

Useful additional knowledge

You can also always apply a thin layer of liquid couverture after alternating quark and berries and let it freeze before you start with the next layer of quark. It looks lovely when sliced ​​and gives your dessert a vendetta effect. If you enjoy garnishing, you can do that with sprigs of mint or lemon balm.

Useful tips for making ice cream and making simple ice cream recipes yourself. For your own ice cream making in summer or for a great dessert with homemade ice cream.

Cool ice cream in the summer is one of the best rewards after a long day at work or school. If there is no ice cream in their own freezer, families can now easily make their own ice cream. It can be made either with an ice cream machine or simply in the freezer.

What is an ice machine?

An ice machine is generally a device that produces an ice cream mass from a liquid. The ice cream machines all have a very similar structure. They usually consist of a large bowl into which the liquid is filled. There is a cooling liquid on the rim of the bowl. The bowl is chilled in the freezer for about 10 hours before making. The cooling liquid on the edge then continues to cool and freeze the ice mass.

A small motor with a dough hook ensures the movement of the mass and the even icing of the entire liquid. An ice machine can usually be purchased for 50 euros. However, it must be stored in the freezer for around ten hours before each use so that the walls of the key are permanently cooled.

What ingredients do you need to make ice cream?

There are countless recipes for making ice cream, but most of them are based on the same ingredients. These include milk or cream, sugar, fruit, or chocolate. The best flavors of ice cream can be made with these simple ingredients. The milk or cream provides the creamy consistency of the ice cream. Although cream naturally tastes better, milk has far less fat and fewer calories.

So if you want to make low-calorie ice cream, you should choose milk instead of cream. Sugar is also an integral part of ice cream. It makes the ice cream sweet and makes it taste better. Sugar is a natural flavor carrier and intensifies the taste of the ice cream. Although sugar increases the calories, of course, it should still be present in the ice cream. Most ice cream flavors contain fruit or chocolate (or both). The fruits are usually pureed or chopped.

Which fruits are suitable for making ice cream yourself?

The fruits, which can be easily pureed and chopped, are particularly suitable for making ice cream. Hard fruits like apples are not suitable for making ice cream yourself. So if you want to make your own ice cream, you should use fruits such as bananas, blueberries, raspberries, or strawberries. But exotic fruits such as mangoes or watermelons can also be used. Frozen fruit is also ideal for ice cream. These are already chilled and just need to be pureed.

Which chocolate when making ice cream?

Here the user has a free choice. You can use the chocolate you like best. If you add chocolate to the ice cream, you no longer need additional sugar because it is already contained in the chocolate.

What to look out for when making ice cream yourself?

Actually, all the ingredients are simply pureed together to create a creamy mass of milk/cream, sugar, and fruit/chocolate. This mass should then rest in the fridge for at least an hour to get a lower temperature. If you immediately put the warm mass in the ice cream machine, you will not get a satisfactory result. When using frozen fruit, this step is no longer necessary, the mass can be put into the machine immediately. Make some recipes for ice cream yourself

General fruit ice cream (for two people):

  • A cup of cream or 250 milliliters of milk
  • Two tablespoons of sugar
  • Approximately 250g grams of fruit (strawberries, bananas, blueberries…)

All ingredients are pureed together until a creamy mass is formed. This is chilled for about an hour and finally added to the ice cream maker. After about thirty minutes in the machine, the ice cream is ready.

Chocolate ice cream (for two people):

  • A cup of cream or 250 milliliters of milk
  • Half a bar of chocolate (about 50 grams)
  • Possibly nuts

The chocolate needs to be liquefied. To do this, liquefy the chocolate either in a water bath or in the microwave. This is then added to the cream or milk and mixed with the nuts. Be sure to refrigerate afterward as the chocolate will be hot. After cooling, simply put in the ice cream maker, after about 20 minutes the ice cream is ready.

Unusual coffee creations are increasingly becoming part of everyday life. However, filling a waffle with coffee at coffee time is something very unusual.

Scenic hipster trend or soon in your favorite café next door?

Coffee in an ice cream cone sounds like a pretty simple idea. Nevertheless, it is an extremely successful coffee trend on the Internet. Millions of images can be found on various user profiles on Instagram and Facebook. And as the name already suggests: Here the coffee is really in the cone – or rather in the ice cream cone. It doesn’t get any more unusual than that, does it? But what does it all look like and who comes up with such a strange idea? We will now get to the bottom of these questions.

The inventor of the CoffeeInAConeâ„¢

Let’s start at the beginning. Dayne Levinrad comes from South Africa, is a barista and at the same time the inventor of coffee in an ice cream cone. Meanwhile, he diligently sells his creation to various cafes and restaurants around the world. He has managed to draw the attention of coffee lovers around the world to him and the coffee in ice cream cones. You no longer have to decide whether you want to drink a coffee or eat an ice cream. The answer is the coffee in the ice cream cone – CoffeeInAConeâ„¢! This invention made the South African famous around the world and made him a highly respected barista in the coffee industry.

But how exactly does the CoffeeInAConeâ„¢ concept work? Let’s take a closer look at the structure of the ice cream cone: The conventional ice cream cone is lined with chocolate on the inside. To be more precise, the waffle is covered with four layers, each with a different cocoa content. These layers protect the waffle from soaking for quite some time. The coffee inside quickly melts the chocolate. You should consume your coffee in the ice cream cone within about ten minutes. No problem for true coffee lovers, of course.

Incidentally, the secret of the CoffeeInAConeâ„¢ lies not only in the chocolatey coating itself, but also in its consistency. Trying such a creation yourself would in most cases end in a true disaster and demand a lot of dirt and mess from the kitchen at home.

Especially in Johannesburg, the personal experiences and moments are shared on Instagram and Co. under the hashtag #coffeeinacone. Of course, this is no coincidence, since the coffee trend is particularly widespread here and sometimes finds its origin.