Tag

instructions

Browsing

Lots of tips and tricks for cooking eggs properly with instructions for cooking perfect eggs. All household tips for Boiling eggs with tricks for hard and soft eggs. With fresh eggs test.

Household tips for boiling eggs

So you have perfect breakfast eggs and know the tricks for optimal cooking times for an ideal boiled egg. Also, note the tips for storing eggs and preserving eggs.

  • Marking with a pen helps to distinguish between boiled eggs and fresh eggs in the refrigerator. All boiled eggs get a black dot on the egg.
  • Quenching the eggs in cold water immediately after cooking will prevent the yolk from turning green.
  • Use up and boil older eggs first. The older the eggs, the more important it is to quench them in cold water.
  • Don’t boil eggs for too long and don’t boil over 90°C, otherwise, the iron in the yolk and sulfur in the egg white will start to dissolve, and then this greenish edge will appear on the hard yolk.
  • You can also reuse the eggshells very well as organic fertilizer for the flowers and plants in the household.

Instructions for cooking eggs

For the perfectly boiled breakfast egg, we have collected the most important points in instructions for boiling eggs: Ideally, use room temperature eggs for cooking. If you get the eggs fresh from the fridge you have to add that to the cooking time. The boiling water in the pot should be high enough to completely cover each egg. Alternatively, you can also cook the eggs in steam, but then you need a lid on the top. you have to be careful that not too much water evaporates before the eggs are ready according to the cooking time.

Optimal cooking times for eggs

For an ideal boiled egg, a distinction is made between soft, waxy, and hard eggs. Do not cook the eggs too long or too hot, as the eggs usually continue to cook. The following cooking times apply to eggs in already boiling water. If you boil an egg in cold water, just add 2 minutes.

Always carefully put the eggs in the pot

When the water boils, carefully place the egg in the saucepan with a spoon. After boiling, use the same spoon to fish the eggs out of the water again. Then rinse under the tap with cold water until you feel a cool peel. Quenching prevents further cooking, especially with soft eggs. If you leave soft eggs alone, the yolk will continue to set.

What to do if eggs burst

When eggs burst, the temperature difference between egg and water is too high. In these cases, take the eggs out of the fridge early so that they can warm up to room temperature. Or preheat under lukewarm water beforehand. Vinegar and salt in the cooking water will help coagulate. Then at least burst eggs will not appear. So just add vinegar or salt to the water.

The fresh egg test

You can test whether eggs are fresh by looking at the raw egg from the outside or by breaking it open and analyzing the egg contents. With broken eggs, you can test and identify fresh eggs as follows:

  • Fresh eggs have the yolk in the middle of the albumen. The thick egg white forms a kind of ring around the bulging yolk. In old eggs, the albumen liquefies, and the yolk shifts to the edge or becomes flatter or wider.
  • If the chicken feed contains a lot of corn, the egg loses its tension and becomes runny. On hot days, the animals drink a lot of water. As a result, the eggs lose their consistency and also become thinner.

Test fresh eggs with the egg closed

  • The swim test involves placing the whole egg in cold water. If the egg is fresh, it stays on the ground.
  • In the shake test, you hear a gurgling noise when you shake the egg. Then the egg is no longer fresh.

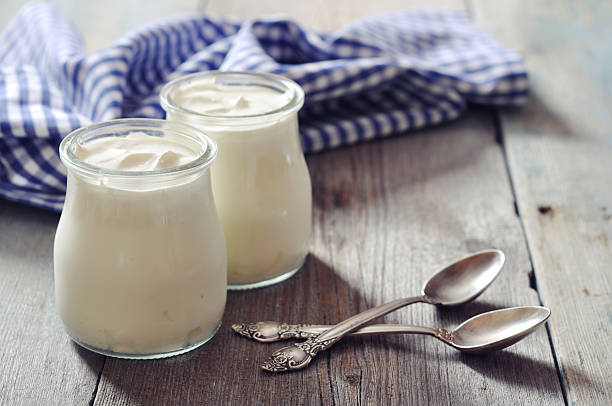
Yogurt is delicious and healthy. There is a huge selection on the supermarket shelves. But making yogurt yourself is also very easy.

Just make your own yogurt

The advantage: the yogurt ingredients are free of artificial flavors and preservatives. But you can refine your homemade milk product with a wide variety of ingredients such as almonds, honey, or fruit according to your personal preferences. But there are many more yogurt recipes. We will tell you how the in-house yogurt production works. You will be amazed at how easy it is to prepare.

There are several ways to be able to make yogurt. For newbies, it’s probably easiest to use a store-bought probiotic dairy product to start with. Once complete, simply save some of the product to grow your own yogurt cultures in the future. But you can also use store-bought cultures. You can then make your own tzatziki with dehydrated yogurt.

Yogurt cultures

The following cultures are particularly suitable for yogurt production and can ensure a healthy intestinal flora:

  • Lactobacillus acidophilus
  • Bifidobacterium lactis
  • Streptococcus thermophilus

You also need milk, milk powder, and optionally inulin, which provides more creaminess. You don’t necessarily need a yogurt maker, which is often mentioned in recipes, to be able to make your own yogurt.

Yogurt production without a preparer

Ingredients:

  • 1 liter of milk
  • 150g natural yogurt or optionally a pinch of yogurt cultures
  • milk powder
  • optionally a pinch of inulin

Step 1:

The milk must first be boiled to kill germs. Then let the milk cool down to around 50 degrees.

Step 2:

Now you can stir the natural yogurt or the cultures into the milk. If you want to make a firm yogurt, use about four tablespoons of powdered milk. And to increase the creaminess, you can use prebiotic fiber inulin. Inulin is also a useful source of food for the good intestinal bacteria and this, in turn, leads to a healthy intestinal flora.

Step 3:

The finished milk product can now be filled into jars and then placed in the middle rack of the oven at 50 degrees for 30 minutes. It is important that you no longer move the glasses.

Step 4:

After 30 minutes you can switch off the oven. But the glasses are left in the oven overnight. The next day the jars are closed and can be put in the fridge. You should have used up the yogurt within 3 to 4 days.

Make lactose-free yogurt

To produce lactose-free yogurt, the yogurt ingredients hardly change. Simply use goat’s milk or soy milk instead of cow’s milk.

Yogurt smoothie recipe with raspberries

Ingredients:

  • 250 grams of raspberries
  • 300 grams of homemade yogurt
  • 1 packet of vanilla sugar
  • 40 grams of sugar

Step 1:

You can use either fresh or frozen raspberries. Fresh fruits should be washed first. If you are using frozen raspberries, allow the fruit to defrost a little.

Step 2:

Now puree the raspberries and then strain to get rid of the pits.
Half of the mark can now be filled into glasses.

Step 3:

The other half is stirred together with yogurt and sugar and then poured onto the raspberry pulp in the glass. You should make sure that both components do not mix with each other in order to maintain the two-color effect.

Yogurt Ginger Dressing

Ingredients:

  • 20 grams of ginger
  • 150 grams of yogurt
  • 2 tbsp lime juice
  • 1 tablespoon apricot spread
  • 1 pinch of salt
  • chili
  • cane sugar

Preparation

  1. Peel ginger and cut it into small cubes
  2. Mix all the ingredients well and you’re done.
  3. The dressing is wonderfully refreshing and goes well with leaf salads and raw vegetables.

This is how you simply cook potatoes. We give you tips for cooking potatoes and for cooking tests. Also for boiled potatoes with rules of thumb for the duration. Here’s our quick guide!

The cooking time of potatoes varies depending on the variety and size of the potatoes. For this reason, every time you cook, you have to carry out a cooking test to find out whether the potatoes are done or not. The cooking time also changes depending on the potato dish. Unfortunately, some people don’t know this and so the result is floury or too hard potatoes for many. We will help you and give you some rules of thumb so that the potatoes turn out well.

1) Boil potatoes

To boil potatoes you need boiling water and a saucepan for cooking. The ideal is to cover potatoes with cold water and gradually warm it up. The reason is that at around 70 degrees, the starch particles in the potatoes burst open. So if you immediately put them in hot water, the starch on the edge of the potato will gelatinize and the result will be potatoes that are cooked on the outside and hard on the inside. When the water starts to boil, you should season them with a pinch of salt. As soon as the potatoes are boiling, reduce the temperature until it is just simmering. Also, note our tips and home remedies for potatoes.

2) Potato cooking test

If you think the potatoes are good now, you should do the cooking test. To test the cooking, you take a fork or a needle and stick it in the potato floating in the water. It is best to use the largest potato for this. If the fork penetrates the potato without resistance, then it is done. However, if there is still greater resistance or piercing is difficult, the potatoes must continue to cook. Here you will find an overview of different types of cooking and cooking methods with water.

3) Potatoes and their duration

Depending on the size and saucepan, there are different cooking times for the potatoes. Waxy potatoes will take a few minutes longer. Mealy a few minutes less. Potatoes turn out very quickly in the microwave and can be ready in just 5 minutes. There are special containers or potato bags in which even boiled potatoes can be cooked in the microwave. Baked potatoes, on the other hand, take about 45 to 74 minutes at 200°C. The same time applies to potatoes on the grill. Here you will find more tips for grilling vegetables properly.

4) Rules of thumb when cooking potatoes

The smaller the potatoes are, the quicker they will be cooked and ready. Cutting the potatoes will reduce the cooking time. Small cubes don’t even take half the time. Always try to choose similarly-sized potatoes for a portion, because the more uniform the potato size, the better the cooking point of all potatoes will be reached. Salt in the water does not affect the cooking time. Peeled potatoes cook faster than unpeeled jacket potatoes. By the way, the average cooking time of potatoes is about 25 minutes. Did you like our tips? You might also be interested in our tips and instructions for cooking eggs.

5) Potato Varieties and Recipes

Potatoes have different properties. We will show you which dishes they are suitable for. The following applies here: The smaller and thinner the potato pieces are in a dish, the faster they are ready. Incidentally, a rösti in the pan only takes 15 minutes.

Unfortunately, daily use of the sink cannot prevent water stains and unwanted deposits from forming. That’s why we’ve put together useful tips for you on how to properly descale and polish the sink using simple means.

Home remedies for descaling the sink

Of course, the various materials must be taken into account during implementation in order to avoid fatal consequences. But most simple home remedies can be used to descale the sink at home. Consequently, cleaning works by using one of the following home remedies:

1. Use vinegar to descale

It is best to take a cloth and dip it in diluted acetic acid. This trick has already proven itself with our grandparents, especially since this acid can be broken down easily. Thus you work with an environmentally friendly means in the household. Incidentally, acetic acid is found in many cleaning supplies that you can get at drugstores. Only a few more fragrances have been added to create a pleasant smelling blend.

Alternatively, you can try descaling with citric acid or scouring milk. That works the same way. You can then carefully wipe over the sink with the cleaning rag or cloth, with stubborn dirt you can also use a little more pressure. In this way, limescale stains disappear. So often you don’t need to spend a lot of money and buy expensive products. It is enough if you have vinegar in the house.

2. Leave the baking soda on overnight

You read that right. If all else fails, you can sprinkle regular baking soda on the particularly stubborn spots. Please leave it untouched for a while. The following day it is enough to clean these places. Do not forget to rinse the stainless steel sink with water after processing. Don’t use a scratchy sponge. You will be pleased with the effect of baking soda. If no baking powder is available, you can also use baking soda. This achieves the same goal.

3. Heavy-duty detergent works on granite sinks

It sounds strange, but your heavy-duty detergent also serves to clean your sink. Why? That’s because of a simple explanation. A heavy-duty detergent consists partly of bleach. However, it is necessary to let the effect develop for at least 3 hours. Or even a night. The pool can then be rinsed out with water. If you don’t trust the detergent, you should use normal washing-up liquid.

4. Don’t forget overflow holes

Holes and cracks are often ignored during a thorough cleaning. These should be cleaned, if only because of the hygiene in the kitchen. Simply wipe all gaps with a new toothbrush. It’s always amazing how much dirt has accumulated in it. In general, it is advisable to repeat this regularly so that the dirt cannot dry up.

5. Use starch as a polishing agent

The starch used in this tip can be found in potatoes, for example. To do this, simply cut the potato into suitable pieces, which you can use to polish your sink. You can also use potato peelings, but they are unwieldy. During the process, you have to scrub patiently. Then it is necessary to remove the starch from the plastered surface. We recommend wiping the sink dry with a kitchen towel. The result is impressive!

6. Oil can also be used for polishing

This information is intended to facilitate long-term care. To make the sink shine and gleam, you should gently treat the basin with salad oil. By the way, you can also take off-the-shelf baby oil or other polishing products. Test your favorite. This method allows dirt and unpleasant marks to disappear. A glossy layer is formed.

An exciting vegan trend is “pea milk”: The vegan milk substitute is gluten-free, lactose-free and uses less water in production. But how sustainable is the alternative really?

Milk substitutes for people with food allergies or vegan lifestyles are made from a variety of plants: soy, almonds, hemp, rice, oats and some other grains and nuts. But another alternative has been conquering the market for a number of years: pea milk.

Pea milk: what is it actually?

The milk alternative is therefore a highly processed product made from many, albeit organically produced, ingredients. Pure pea milk (original or original without sugar) is a creamy, white or yellow liquid that looks and tastes almost like cow’s milk. And thanks to the peas, it’s relatively sweet even without the added sugar.

The vegan milk substitute made from peas is free of lactose, gluten, soy, nuts and GMOs, contains no milk protein or and, according to Ripple, can help reduce the ecological footprint through sustainable production.

Pea milk as a milk substitute: the nutritional values

When it comes to nutritional values, pea milk clearly trumps, not least thanks to the many added substances. With a protein content of 8 grams per 240 ml for Ripple Milk, 8 grams per 250 ml for Princess and the Pea, the vegan milk substitute contains about as much protein per liter as cow’s milk (3-3.4 grams per 100 ml).

In the unsweetened version, however, milk from peas only has 70 kcal per glass, while low-fat milk has around 86 kcal. However, the sweetened variant already has 100 kcal, vanilla 130 (unsweetened 80) and chocolate 150 kcal. That’s a lot compared to other milk alternatives, but they contain far less protein and calcium.

Make pea milk yourself: this is how it works

The preparation of pea milk is similar to that of other plant drinks. You need for this:

100 g yellow split peas
500 ml water plus water for soaking
optionally 5 dates or 10 ml liquid stevia to sweeten
Then you do the following:

Soak the split peas in enough water overnight.
Rinse them off with fresh water the next day.
Place the soaked peas in a blender with 1/2 cup of fresh tap water. You can now add dates or stevia for more sweetness. Blend everything until you get a homogeneous mass.
Filter the pea drink through a nut milk bag or a fine cloth.
Store the liquid in the refrigerator. If deposits form, simply shake the pea milk again.
Note: The homemade pea drink tastes different than the commercial products as it is much less processed. Therefore, test with a smaller amount to see if you like the pea milk.

Pea milk and other plant-based milks

By the way: According to EU legislation, suppliers are not allowed to speak of “pea milk” because the term “milk” is reserved for animal milk from cows, sheep, goats or horses. In German trade, the milk substitute is therefore referred to as a pea drink or pea drink. But that only applies to manufacturers: In this article, we use the term “pea milk” as it is used by normal consumers.

This is how you make mayonnaise yourself quickly and easily. Homemade is the healthiest and definitely tastes the best. With instructions for preparing mayonnaise as well as recipes and tips for shelf life and storage.

It goes well with fries, on sandwiches and also in potato salad. They are available in simple, delicacy, and salad versions. We’re talking about mayonnaise. However, making it is not that easy. So that it still succeeds flawlessly, here are five tips on the basic ingredients and preparation, as well as great recipes.

The Origin of Mayonnaise

Mayonnaise is a must in German and international households. There are various theories as to where mayonnaise comes from. There is a widespread belief that the thick, creamy mass comes from the Balearic Islands and derives from the word Mahón, a port city. There it is said to have been created to celebrate the French victory. The resulting word was ‘Mayonnaise’. However, the French origin of ‘mailler’, which means ‘to hit’ in German, is more likely. Another origin says that mayonnaise descended from the Catalan aioli, which is prepared in a similar way. Aioli is mentioned in writing as early as 1024.

Natural ingredients are important
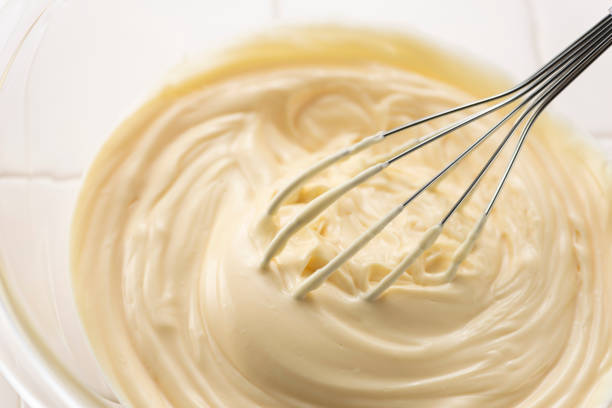
Actually, mayonnaise consists only of egg, oil, lemon juice, mustard, and spices. Fresh eggs are very important in homemade mayonnaise. Usually, only the yolk is used, but whole eggs can be used for your own production – if possible in organic quality and free-range. Mild and neutral vegetable oil such as rapeseed or sunflower oil can be used for the oil. If you want to intensify the taste, nut or olive oil is suitable. Good quality is also required here: It is better to buy the oil in glass bottles and with a low degree of acidity, which is usually shown as a number on the bottles. Here you will find olive oil tips for use as a home remedy.

Lemon juice is responsible for acidity. You can also get good lemon juice from a glass bottle or from real lemons, of course. For a homemade portion of mayonnaise, you need a fresh egg yolk or a whole egg, 200ml oil, ½ squeezed lemon, a teaspoon of Dijon mustard, and, if necessary, salt and pepper for seasoning. The ingredients should all be at about the same temperature. Here you will find instructions on how to make your own mustard.

The ideal preparation of mayo

To make mayonnaise yourself, first put the egg yolk and mustard in a tall container. The oil must be added very slowly during preparation and preferably drop by drop. Actually, oil and water do not bind, but the lecithin in the yolk serves as an emulsifier. This allows the mass to be bound by vigorous stirring. Either the whisk by hand is suitable for mixing, whereby the muscles are properly trained, the stand mixer or food processor (food processor) or the hand blender.

When preparing with a whisk, the ingredients must be whipped very quickly until the mayonnaise succeeds. Typical mistakes made when preparing mayonnaise are stirring too slowly, adding the oil too much or too quickly, or ingredients at different temperatures. Incidentally, the egg yolk and mustard often turn authentic mayonnaise yellow. So you’re not doing anything wrong if you end up with yellow mayonnaise. After all, your mayo is homemade and not an industrial product. The industry tends to use more water and less egg, and whole eggs rather than separate yolks, which results in the white color. Mayo is delicious in any color. Our recipe idea: potato and tomato salad with cheese.

Manual work or rather devices?

If you decide to use the whisk and good old-fashioned handwork, you’ll need to add the oil slowly, pouring it constantly. Best in droplets. The mass is then vigorously beaten with a whisk in a mixing bowl until it is firm and creamy. It is important that you are very quick and do not take a break. This is in the arms! Trained cooks can conjure up the result in about three minutes, but untrained cooks can take much longer, depending on their arm strength. However, apart from a mixing bowl and whisk, no additional equipment is required for this.

It’s much easier in a blender: Put all the ingredients except for the oil in the blender and switch it on. Gradually add oil. Some have a food processor at home because it is also suitable for many other things such as kneading dough, chopping nuts, making pesto, grating cheese, and much more. The easiest way to make mayonnaise yourself is to use a hand blender. It is not expensive, handy and fast. Just as with the previous descriptions, the oil is added here gradually. Here you will find 12 clever kitchen helpers and gadgets for cooking.

Tasty ideas and mayo variants

There are many ideas for refining the mayonnaise. You can’t taste a pinch of sugar or half a teaspoon of honey, but they intensify the other flavors. With garlic, you conjure up a garlic mayo, while with chili you can create a chili mayo. Have you ever heard of wasabi mayo? You can do this by mixing in wasabi powder. With some yogurt in the mayonnaise, you add some freshness and lightness. Ideal for the summer or for nice salads on the grill. You can also experiment with different spices: either the Mediterranean with herbs or curry mayo. Mix salt, water, lime juice, Dijon mustard, cumin, and curry powder. Gradually add the oil. If you like, you can add some cayenne pepper or chili.

Curry mayo tastes a little spicy and deliciously exotic with crispy chicken and sweet potato fries. If you add some Dijon mustard and sambal oelek to the basic ingredients of water, salt, lemon juice, and canola oil, you get a great spiciness. This mayo tastes perfect with Asian dishes and also gives the tofu a special touch. You can also throw other ingredients into the blender during preparation or puree them with the hand blender. Soaked nuts, fresh or dried tomatoes, tofu, or even mango and apple to mackerel go well with this. Try tuna dip for parties and snacks.

Vegan variants without egg

The vegan version uses mayonnaise without eggs. This variant is therefore also good for everyone who has to watch their cholesterol and for people who do not tolerate or do not like eggs. Here you will find more foods and recipes as egg substitutes. The classic is vegan mayo with soy milk: Simply mix 130ml soy milk and 1-2 teaspoons table or apple cider vinegar with lemon juice and 200g vegetable oil with a hand blender until the mixture becomes thick and firm. Season to taste with mustard, salt, and pepper. Another variant is vegan mayo made from chickpea water, the so-called aquafaba. Simply buy a can of chickpeas and pour the water through a sieve into a bowl. Set the chickpeas aside for later dishes. Briefly heat the chickpea water on the stove for five minutes and allow it to cool thoroughly.

Then add lemon juice and a tablespoon of chickpeas. Add the mixture to the blender along with the Dijon mustard and blend well on high. Add the oil very slowly. Season with salt and pepper – done. Many vegans use untreated cashew nuts for their mayo because of the healthy, plant-based fat content. You should soak them in water for two hours, then drain the water and then put the soaked cashews in the blender. Then add white wine vinegar, mustard, oil, water, and lemon juice. You can also omit the oil, as cashews are already very greasy. You can season the whole thing with salt, pepper, and optionally turmeric.

Durability and storage

When warm or hot, mayonnaise is very short-lived due to the egg. It’s best not to eat them after they’ve been warm for a few hours. Homemade mayonnaise should also only be consumed in a cool place for up to three days. Finished mayonnaise in jars or tubes can be kept refrigerated for up to nine months. You can tell that mayonnaise is spoiled by its appearance and smell: rancid smell and very sour taste as well as slight lumps are signs of mayonnaise that is no longer edible. Here are tips for storing and preserving eggs.

Making a sprout glass yourself is not difficult and also much cheaper than buying one. You can easily make the sprout jar from an old pickle or jam jar.

Make sprout glass yourself: you should know that

Many online shops and supermarkets offer sprouting glasses. But why spend money on it when you can easily make the glass yourself? We will show you a method without plastic or special equipment.

You need this:

a glass
a felt-tip pen to mark holes
a small drill or a can prick
sandpaper or a file
sprout seeds of your choice
possibly a thick piece of cardboard as a holder
By the way: Many instructions use tulle or fly screen fabric for DIY seed jars. Our method is more sustainable for three reasons: firstly, tulle is often made of plastic, secondly, you can use the lid of the jar with our method, and thirdly, you don’t have to buy any new materials.

Make your own seed jar: Here’s how

The first thing you should do is sterilize the jar. For example, put it in boiling water for ten minutes.
On one side of the lid, mark out holes about ½ to 1 inch apart. You don’t have to work on the other side, as the sprout glass will be crooked later.
Then get your pick or a small drill. Poke or drill small holes in one half of the lid. The water later drains off this. Make sure that the holes are not too big, otherwise the sprouts can slip out of the sprouting jar.
Now use some sandpaper or a file to smooth out sharp edges on the holes.
Note: Readers have reported that the cut edges can rust at the holes. So sand them down very carefully. Alternatively, you could use a piece of plastic mosquito net or a piece of loosely woven cotton cloth that you can then wash out.

Fill the sprout glass and set it up

Thoroughly wash the sprout seeds and put them in the jar. If you have something you can use to set the jar up at a 45 degree angle, skip the following step.
Now build a holder for the sprout glass:
To do this, place the bottom of the glass on a thick piece of cardboard. Place it so that it is only halfway up the box. Now trace the outline of the floor with the felt-tip pen.
Cut out the resulting semicircle.
Now draw an elongated rectangle on the cardboard with the hole. The semicircle should form one of the short sides. You will later place the glass in this semicircular bulge.
Cut out the rectangle.
If you fold the resulting strip in the middle, you can use it as a support for the glass. This standing aid ensures that all water drains from the glass and that no mold forms.
Place the sprouting glass in a can or in the sink for the first few hours. This allows the water that is still clinging to the rungs after washing to drain off. Later it is sufficient to place a kitchen towel under the can.

Now place your homemade sprout glass in a bright and warm place. After just a few days, your sprouts should have grown enough for you to harvest them. You can use the glass over and over again.

Lupine seeds are a valuable and at the same time regional source of protein. You can plant the plants yourself and harvest the lupine seeds annually – we will explain to you which nutrients they contain.

The lupine is a native plant and has recently become popular as a high-protein alternative to soy. You can easily cultivate the protein-rich legumes in your garden, because they thrive in this country. They do not make any great demands on their location: they only need a little sun and not too much lime in the soil. Then nothing stands in the way of a bountiful harvest.

Harvesting lupine seeds: timing and procedure

Lupine seeds contain up to 40 percent protein, which is about the same as soybeans. But that’s not the only thing they have to offer: They also contain a lot of amino acids, vitamins, calcium, magnesium, iron and phosphorus.

You can also harvest the seeds yourself, but you have to be a little careful. Because you should only eat the seeds of certain breeds – the sweet lupine. Other varieties have a very high content of special bitter substances that are toxic to humans and animals. Under no circumstances should you harvest and eat unknown, wildly growing lupins in the forest or on meadows.

If you want to harvest lupine seeds yourself, you must not cut off the inflorescences of the plants after flowering. The pods, which contain the valuable seeds, are formed from these. As soon as these are dried and dark, you can start harvesting. This is usually the case in late summer. You do this as follows:

When the pods are ripe, you can simply cut them off and collect them.
You get the seeds out of them by simply squeezing them out.
Then you should clean them with water and dry them.

Sow lupine seeds yourself

You can sow the dried lupine seeds yourself. If you store them properly, i.e. in an airtight and dark place, they will remain viable for up to three years. How to sow them:

The best time to sow seeds is between March and May if you want to sow the seeds directly into the bed. Alternatively, you can grow them indoors in a pot. In this case, January is recommended.
Before sowing, you should roughen the seeds slightly with sandpaper and then let them soak in water for a day.
Then you press the seeds about two to three centimeters deep into the soil. You should leave about 15 centimeters of space between the rows.

Utilize lupine seeds

You can use lupine seeds in many ways in the kitchen. For example, you can process them into lupine flour or grist, use them as a basis for vegetarian or vegan burger patties and vegetable patties, or snack on them whole. You can also bake them, make them into spreads or use them in salads.

A guide to cleaning the kitchen. With many useful tips for easy kitchen cleaning and quick cleaning of the kitchen. Because a frequently used kitchen gets dirty quickly. So use our checklist for clever cleaning with a system.

When the tomato sauce thickens, there are red spatters on the wall. And a leaky yogurt makes a big mess in the fridge? But the most stubborn fat that spreads with the food steam settles in the whole kitchen. What can you do about these impurities?

Kitchen cleaning checklist

If you want to clean your kitchen from front to back, it is worth making a checklist. Otherwise, it can happen that you start somewhere and later have to clean up again at this point. This will make you brush longer than necessary. That’s why we’ve created a step-by-step guide for you. You should also effectively eliminate germs when cleaning. Thus, the cozy family kitchen is clean again.

1) Clean kitchen shelves

First, clear out the kitchen shelves. Then you can wipe the shelves with a damp cloth. You can add some dish soap if you want. If the shelves smell musty, you can use the household remedy vinegar. To do this, mix equal parts vinegar and water. You can then use this to clean your cupboards from the inside. If you find jammed glasses while cleaning, don’t panic! We have collected clever tricks for you to separate wedged glasses.

2) Defrost ice compartments and freezers

Ice compartments or freezers should be defrosted 1-2 times a year. Because a thick layer of ice insulates and the device has to cool more. If you put a pot of hot water in the empty cabinet, defrosting will go faster. If there is no integrated collection container for the resulting condensation, you should put a cleaning rag in it. You can then wring it out over a bucket.

3) Clean the fridge

You should defrost and clean your refrigerator from time to time before it takes on an unpleasant odor. If your fridge already smells bad, there are some home remedies to get rid of the smell in the fridge. For cleaning, take out all moving trays and plates. Then clean them in the sink. Then you can wipe the inside of the fridge with a soft cloth and a vinegar-water mixture. Finally, you can put a coffee pod in the fridge. Because that prevents odor development.

4) Clean work surfaces and kitchen fronts

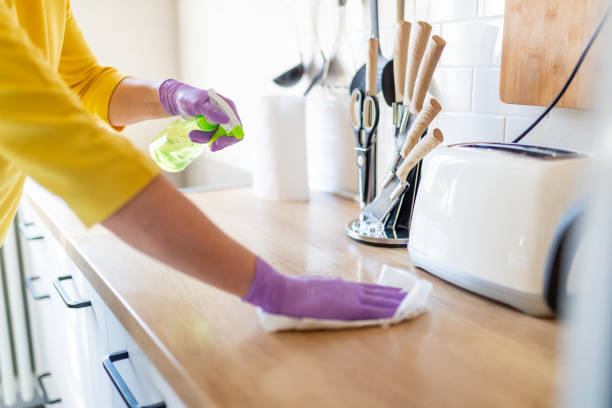
It is best to wipe up spilled drinks immediately. But in addition to regular wiping, you occasionally need to do a thorough cleaning of worktops and kitchen fronts. With plain dish soap, you’ve been scrubbing for a long time to get rid of the grease. Therefore, you should rather use special kitchen cleaners. You can also use the home remedy washing soda or the tried and tested liquid gall soap. You will also need a rough sponge or brush. You can rub the wiped metal surfaces with half a lemon. Then rinse off the juice with clear water after allowing it to act for a short time. Then fittings and sinks will shine beautifully again.

5) Prevent dirt

When chopping vegetables and fruit, breading schnitzel or fish, etc., you can put old newspapers underneath. Then no dirt gets on the worktop. And you can simply transport the waste along with the newspaper to the organic waste. You should also always have a small broom and a shovel within reach, which are only used on the countertop.

6) Home remedies for cleaning the kitchen

You don’t always need expensive, chemical cleaning agents to clean the kitchen. You can also use tried and tested home remedies. Because these are often just as effective. In addition, they are usually readily available and cheap.

Clean the kitchen with baking soda

Using baking soda is good for any cleaning job. You can use it to unclog clogged drains. You can also use it to remove grease stains from surfaces and burnt food in pans and pots.

You can find out how to counteract the development of verdigris in different materials and how to remove verdigris in our helpful guide. Whether it’s a wooden bench or copper coins – with our housewife’s tips against verdigris, you will no longer get verdigris in your house. And: Is verdigris poisonous?

Even if verdigris lends the right mystical flair to many a setting, it is generally not welcomed in the home. Verdigris is actually small crystals that form from a copper salt of acetic acid due to weather influences and lead to a green to blue-green discoloration of an object. They are therefore small color pigments.

What exactly is verdigris?

When we talk about verdigris in everyday life, we mean two things: On the one hand, we speak of verdigris when copper or brass objects turn a green-blue color. On the other hand, we also speak of verdigris when it is actually green growth on stones, wood, plastic, or other materials. Green growth is usually organic material such as moss, lichen, and algae, while the discoloration that occurs in copper and brass objects takes place in the copper or brass itself. Both types of verdigris infestation require different strategies to control and get rid of them. You can find out how here.

Removing verdigris from copper and brass

Verdigris infestation is most common on copper and brass items, such as coins and ornaments. Various home remedies will help you to remove the verdigris and restore the affected piece to its former glory.

1) Cleaning in a vinegar bath

Cleaning small objects is relatively easy: a bath in vinegar water helps here. Simply mix enough vinegar in a bowl and let the items be cleaned and soak for a few hours. The objects must then be rinsed off with clear water and they will shine in their old glory. Stubborn spots can be treated with a toothbrush dipped in vinegar.

2) Polish with vinegar

For extra polish, simply rub the object with a soft cloth that has also been moistened with the universal household remedy vinegar and place it in the sun. The vinegar has an effect on the copper and brass structure and the verdigris cannot spread again so quickly. You can bring new splendor to your home easily, quickly, and without much effort and banish the verdigris from your four walls.

3) Mixture of salt and ammonia

No vinegar on hand? Salt and ammonia solutions will also help. Dissolve a teaspoon of salt in 125 ml ammonia solution and rub the object to be cleaned with the mixture. Then you should leave it on for about an hour. Then simply rub off the solution with a soft cloth and copper and brass will shine like new again. Please also note our general tips on how to clean and care for the copper.

4) flour, salt, and alcohol

But what if the objects to be cleaned are built-in cranes or fittings? Then a paste of flour, salt, and alcohol will help. To do this, fill a coffee cup with 2 tablespoons of flour, 3 pinches of salt, and some alcohol. The paste has to be thick and sticky so that it sticks to the appropriate parts of the object… even in hard-to-reach places. The longer the porridge can work, the better the result will be. You can then rinse off the paste with clear water and polish the area with a dry cloth. Also, note our tips for cleaning awnings.

5) Softsoap and lye solution

Here we recommend a soft soap or lye solution to treat the area affected by verdigris. You can simply wet the object generously with the solution, an old kitchen sponge is suitable for this. After a few days, you will notice a change in the wood, and the verdigris will recede or fall off. If necessary, you can repeat the process.

6) High pressure against verdigris

If the verdigris infestation is already more advanced, reaching for the high-pressure cleaner will help. Such a device can be rented for a day from any standard hardware store. Or maybe you share a high-pressure cleaner with your neighbor? Since the high-pressure cleaner involves a large amount of water, it is best to take this measure on a warm, sunny day so that the furniture and other affected objects can then dry thoroughly. Subsequent wood care is also advisable.