Tag

instructions

Browsing

You don’t have to buy speculaas spice in the store: you can easily mix it yourself at home. Here you can find out what ingredients you need and how to do it.

Speculaas Spice: You need these ingredients

Christmas time is speculation time! What makes the crispy brown biscuits so popular is their unmistakably spicy note. A special spice mixture is responsible for this taste, which you can not only use for speculoos: speculoos spice is just as good for refining Christmas dessert creams, cakes, tarts or hot chocolate.

You can find ready-made speculaas in most supermarkets. But you can also mix it yourself: You probably have most of the spices you need at home. Tip: To save yourself more effort, it is best to use spice powder when mixing. Of course, you can also grind or grate ingredients such as pepper or nutmeg yourself.

For homemade speculoos spice you need the following ingredients:

7 tsp cinnamon
2 tsp nutmeg
2 teaspoons ground cloves
0.5 tsp ginger powder
1 tsp cardamom
1 tsp white pepper
Buy the spices for the recipe in organic quality and it is best to pay attention to a fair trade seal. This way you can be sure that your spices are free of chemical pesticides and have been fairly traded. If you’re not sure where to find what you’re looking for – this way: Buy organic spices: the most important brands and online shops.

Tip: You can easily modify the speculoos spice to suit your taste. For example, if you don’t like ginger, you can just leave it out. You can add some anise instead.

Making speculoos spice: Here’s how

Making speculaas spice is easy: once you have all the powdered spices you need, it will only take you a minute.

Put the spices in a small bowl and mix them together thoroughly.
Then pour the speculoos spice into a container with a lid – for example a screw-top jar. Close the lid and then shake the jar vigorously again. So the ingredients are definitely well mixed.
If necessary, you can add a sticker to the glass. This way you will know immediately which spice is in it in the future.
If you don’t have some ingredients in powder form at hand, but for example a whole nutmeg or coarse peppercorns, the preparation will take a little longer: You then have to pulverize these spices before you mix them with the speculoos spice. If you have a good food processor, you can let it do this step. Otherwise, you can easily grate the nutmeg with a kitchen grater. You can grind the peppercorns in a pepper mill or in a mortar.

Tip: You can also easily powder ginger yourself. To do this, leave a piece of ginger in a warm place until all the moisture has evaporated. Then you can crush the ginger in a food processor or in a mortar and use it in the speculoos spice.

Simple tips and instructions for repairing loose stitches and pulling threads. Even inexperienced people can mend garments themselves without much effort and thus avoid major damage to the garment.

Causes of thread pullers

A variety of causes lead to thread pullers or loose stitches. A blunt needle can cause the thread to catch. But other sharp objects in everyday life can also be responsible for pulling threads. As soon as you get caught somewhere with your clothes, damage can occur. But you don’t have to throw away the garment right away. Better try to fix the pulling threads. Below is a simple guide.

Instructions for repairing pulling threads

For sewing professionals, it is no problem at all to repair pulling threads and mend loose stitches effectively. But when you first learn to sew, even a small thread can be a challenge. So we have a simple guide that can help even the most inexperienced person save the garment.

Mending the thread puller

If you discover a thread puller in your clothing, you will need to use a needle threader to thread it through the fabric to the inside. Then you have to sew this with a thread on the inside. This way the fabric doesn’t rattle any further. The same goes for loose stitches. In addition, note how to sew small holes in t-shirts.

Repair pulling threads

In contrast, you can simply knot pull threads. Or bring these to the inside as well and tie them there. As a result, pulling threads can no longer be seen and even the loose stitch can no longer cause any harm. Also, note how you can avoid loose buttons. And if you get a tug in the stitch while knitting, you can fix it by redistributing the fabric.

Simple instructions and clever tips for mopping the floor. Now wipe the floor with home remedies instead of chemical cleaning agents. As a result, you care for every type of floor ideally and prevent new soiling. The purchase of modern floor wipers is also useful.

One of the most annoying but unavoidable housework is mopping the floors. All sorts of dirt accumulate here, such as breadcrumbs and greasy sauce splatters in the kitchen, trampled-on mud and mud in the hallway, long hair and toothpaste stains in the bathroom, or balls of fluff in the bedroom.

Wipe the floor with what?

When it comes to removing the dirt from the floor, which is often difficult, it is unfortunately not always possible to work with the aggressive chemical mace. For the sake of sensitive surfaces and our health, you should choose alternative methods and at the same time protect the environment in the household. If you don’t already have a modern helper to mop the floor, you can do the cleaning of your floors the traditional way just as well. With our tips, wiping the floor is quick and easy thanks to home remedies or floor wipers.

1) Use of vinegar

If you have floors with a smooth plastic surface, such as laminate or PVC, you can clean them with the household remedy vinegar. Because these floors are usually not sensitive and hard-wearing as others. So, fill a bucket of lukewarm water with vinegar in a 1:10 ratio. The vinegar water not only cleans dirt but is also good for removing limescale deposits. In addition, it has an antibacterial effect.

2) Citric acid for cleaning

To clean tile floors in the bathroom or kitchen, you can mix 1 liter of water with 30 grams of cleaning citric acid. This mixture gives a fresh scent and removes limescale stains. If you have particularly dirty spots, you can treat them with a sponge and the mixture. Citric acid also has a disinfecting effect. But you shouldn’t use acidic cleaners to clean marble floors!

3) Wipe the floor with soap

Natural stone floors, such as marble or granite, clean well with soap instead of chemical detergents. Accordingly, dissolve some curd soap in lukewarm water and then you can wipe your floor really clean with the home remedy soapy water. To prevent a greasy film from forming afterward, you should wipe it with clear water when using this method. Also, note our usage tips for gall soap.

4) Detergent for floor cleaning

You can also add some pH-neutral washing-up liquid to your cleaning water and wipe the floor with it. This method is particularly suitable for linoleum floors. Two splashes of detergent are usually enough to ensure cleanliness and freshness. In addition, note useful tips for carpet cleaning.

5) Mop floor with buttermilk

Sounds very unusual at first! However, you can do this if your buttermilk at home has already expired. Because you can use it to clean dull-looking tiles. Since the buttermilk effectively removes limescale and stains, your tiled floor will shine like new afterward. Incidentally, you can also clean and care for linoleum floors with milk and water (ratio 1:1).

Instructions for clever floor mopping

One of the most important, but also the simplest tips is to follow the correct order when wiping the floor in your apartment. This saves you time and annoying wiping. If you heed the following order, the wiping will be quick and you can turn to other important things, e.g. creative furnishing ideas for the apartment.

The secret of almost every grandmother or housewife is that special something in their sauces. A roux is usually the basis of the sauce. Therefore, we have a guide to making a roux.

So that you can conjure up a sauce for your dish or you want to refine your sauce, you can make a roux. Because this is quick and easy without many ingredients.

Preparation of the roux

The preparation is simple and easy to remember. Because all you need is fat, such as butter, margarine, or oil. Butter tastes best in the roux. You will also need flour and some broth. You can use vegetable or beef broth, depending on your preference. Then you proceed as follows. Also, note the delicious recipe for homemade Bolognese sauce.

Make roux as a base for any sauce

After making the roux you have a harmonious basis for your sauce. You can then use it in its pure form as a sauce. Because this already tastes very delicious thanks to the butter and broth. In addition, you can refine them. To do this, stir your normal sauce into the roux and then refine it with spices and herbs as usual. Also, note useful tips for drying herbs.

Make different variations yourself

The usual roux is rather light. However, you can also make a dark version of the roux. You just have to let the sweat toast a little longer. Because the longer you heat it, the darker it gets. And the lighter you want them, the sooner you have to add the liquid. It’s a bit difficult to make the dark sauce at first, as it can easily burn.

Instructions and tips for properly frying a steak. Frying the perfect steak is a mystery to many chefs. With our practical instructions and numerous tips, every steak is just right, just the way the guest wants it.

Fry the steak properly

If you want to sear a steak properly, there are a few things to keep in mind. You should not only pay attention to the right temperature and frying time. The quality of the meat and the pan can also be important for a successful result. Individual wishes and tastes should also be taken into account. Because not everyone likes their steak “well done”. Thus, the preparation of a steak seems like a big challenge to some. But don’t worry, with the following tips you will succeed in frying the steak:

1) Know the most common types of steak


Finding the right meat for a steak is not always easy. With beef steaks, a distinction is made between the different parts of the animal. The most common types of steak are rib-eye steak, fillet steak, rump steak, T-bone steak, porterhouse steak, rump steak, sirloin steak, flank steak, and boiled beef. The difference lies in the fat and bone content and the size of the meat piece. In addition, a fillet steak, for example, is far more tender than a T-bone steak, which has more roast beef than a fillet.

2) Buy the right meat

For a real gourmet steak, it is advisable to choose a flank steak, rump steak, or fillet steak. In any case, the meat should be tender and juicy. Depending on your taste, you should cut the steaks at least 2 cm and at most 4 cm thick. It is advisable to buy the meat fresh from the butcher or at the meat counter in the supermarket. Because ready-packaged steaks are not necessarily cheaper, they are far behind freshly cut meat in terms of quality. Also, note how you can identify and preserve fresh fish.

3) Fry the steak properly in the pan

A cast-iron grill or frying pan, which ideally can be used on a gas stove, works best. Of course, ceramic hobs and induction cookers are also suitable for frying. In the summer season, a charcoal grill is recommended, because it can generate enough heat and is also really fun. Also, read delicious menu ideas for grilling. Meanwhile, cast aluminum pans are more suitable for low frying temperatures, as coatings may otherwise come off. This is not a problem but takes longer.

4) Which fat to use for frying?

Butter, peanut oil, or rapeseed oil are particularly suitable as fat. Because these have a high smoke point, which is not the case with olive oil or butter, for example. At high temperatures, bitter substances can be released here. And you should avoid that when frying your steak properly. In addition, you can freeze and thaw meat well, so that leftovers do not have to be thrown away.

5) Tips on preparing to fry steak

The steak should always be at room temperature before frying. To do this, take the meat out of the fridge early enough. Half an hour before cooking is usually sufficient. If the steak is to be pulled into the oven, the oven must first be switched on at a maximum of 160 degrees circulating air or top and bottom heat. Cooking the steak in the oven at lower temperatures will make it more tender. However, it takes longer accordingly. Read also how you can then remove the oven smell.

There are two ways to prepare meat. Either the fat is added to the pan or it is massaged into the meat beforehand. In the latter process, you should let the meat rest for 10 minutes after massaging it. The pan must be heated to a high temperature before frying. If you put a drop of water in the pan, it must immediately evaporate. Then you know that the right temperature has been reached.

6) What cooking levels are there?

Cooking is an important issue when frying a steak properly. Depending on your taste and preference, you can choose between different cooking levels. And depending on the degree of doneness, a different core temperature is required. It is advisable to place the steak in the preheated oven after searing. Depending on the thickness of the meat and how well done you want it to be, the cooking time in the oven can range from 5 minutes to an hour if you prefer the slow cooking method. It is important to know that a steak becomes more tender the longer it is cooked at low temperatures.

7) The perfect cooking point and the perfect cooking time

You should always ask guests in advance how they want their steak. And then pay attention to the respective core temperatures during preparation. Then you need to sear the steak for a minute on each side. This creates a delicious crust and the meat’s own juices remain in the steak. So it doesn’t get dry.

You can use the finger test to determine the doneness. Because you can estimate the degree of doneness on the heel of your hand. If you hold your hand loosely and press on the heel of your hand, it feels like a steak that has been “rare” cooked. “Medium” corresponds to the firmness of the heel when you hold your thumb and middle finger together. A steak feels “well done” like the heel of a hand when the thumb and ring finger are held together. A little helper in the kitchen is useful for the cooking time in the oven – a roasting thermometer.

Cooking pasta is made easy with our clever tips for cooking pasta and spaghetti. A guide to cooking pasta and important things to watch out for when cooking pasta.

Noodles can be prepared very quickly and in many different ways for a wide variety of meals. Here we have put together the best tips that will guarantee that the noodles will turn out well. Not too soft and not too hard – they should be al dente!

Cooking pasta made easy – in three steps

With just a few simple steps, you can achieve the result of a perfectly cooked pasta. If you follow these instructions, nothing can go wrong even when preparing pasta for the very first time. The three steps make cooking pasta easy.

Step 1: Water and Salt

When cooking noodles, you should always choose a sufficiently large pot in which 1 liter of water is heated for every 100g of noodles (125-150g of dry noodles correspond to approximately one portion at a meal). As soon as the pasta water is boiling, add a teaspoon of salt per liter of water. After a few seconds, the noodles can be added. Be careful not to burn yourself.

With long noodles, such as spaghetti, it usually takes a moment before they are soft enough to be pushed completely into the water. However, it is not necessary to break through these – on the whole, they are easier to eat.

Step 2: Stir and avoid overcooking

Constant stirring to prevent the pasta from sticking or sticking to the bottom of the pot is very important. No oil needs to be added to the cooking water. The pasta water should be constantly simmering with the heat turned down. To prevent the water and foam from boiling over, you can simply leave a wooden spoon in the saucepan. If the water boils over, add some cold water.

Step 3: Drain at the right moment

With the help of a timer that is set to the specified minimum cooking time (see package), you are guaranteed not to miss the moment when you should try the pasta. Incidentally, homemade noodles take much less time than dried noodles. In this case, it is best to stick to the recipe – often just a few minutes are enough to get the right cooking point.

Whether al dente or soft – this is the moment when you have to decide whether the noodles can be carefully drained in a colander – which is ideally already in the sink. There is no need to quench the noodles, which only makes the noodles cold faster, and it also rinses off the starch in the noodles so that the sauce can no longer stick to them. Oil also prevents the sauce from sticking to the pasta. So it’s most recommended to add the noodles straight to the hot sauce, untreated.

Don’t throw away the pasta water, use it in a variety of ways

Pasta water is a true all-rounder. It’s a shame if the water ends up in the sink after draining the pasta. More than ten kilos of pasta were consumed per capita in Germany in 2020, according to the Statista survey portal. The corona pandemic has accelerated the purchase of goods. And the pasta water used can be reused in many areas because the boiled pasta water contains a lot of starch and minerals.

  • Mixing sauces and pesto becomes creamier with pasta water. Since the pasta releases starch into the water, the liquid is suitable for thickening sauces. As long as the water is still hot, it should be processed further.
  • Adding pasta water to soups and stews. This means that vegetable broth or clear water is often no longer necessary. The starch in the water makes the soup thicker and richer. The water also acts as an aromatic ingredient in other meals.
  • Use for pizza and bread dough. Both doughs need water with salt. This is already contained in the pasta water and gives the pastry a special touch. In addition, note a simple guide to making roux yourself.
  • Use pasta water to soak beans, lentils, and peas. To do this, soak these products overnight. Then the pasta water creates a special taste.
  • Food steaming with the water. So then simply hold the vegetables over the steaming water with a sieve. You can also learn more about healthy steaming of food.
  • Water plants with cold pasta water. If you do not want to use pasta water for further cooking, you should let your plants benefit from it. They are happy about the minerals in the water.

Pasta prepared faster

If you need something quick, you can also use fresh pasta from the refrigerated section. You usually only need a few minutes for such noodles to have them ready to serve. Often even heating in the sauce is sufficient.

Alternatively, very thin spaghetti is recommended, which is also cooked in a very short time. These also have the advantage that – in contrast to fresh pasta – they usually do without eggs. This makes them suitable for both egg allergy sufferers and vegans.

Cook pasta differently

TV chef Stefan Marquard shows on YouTube how pasta can be cooked in a somewhat more unconventional way. He promises: that his method does not require any water to be drained off at the end of the cooking process. So don’t mess up the sieve, don’t scald your fingers on the hot steam… Sounds child’s play, give it a try!

A cheap alternative to conventional coffee preparation is the French Press. We will explain how the French press works and what the pot has to do with France, Denmark and Italy.

What is a french press?

With a French press, also known as a press pot or coffee press, you can easily prepare coffee with hot water and ground coffee. The hot drink is prepared directly in the pot, which can also be used as a serving vessel. This method is called the full immersion method. In contrast to the pour-over method, in which water is poured over the coffee powder, with the full immersion method the ground coffee is directly in the water.

Where does the stamp pot come from?

As the name suggests, the device was invented in France around 1850. However, the pot was not patented until 1929 by the Italian Attilio Calimani. The shape we know today was only introduced to the market in the 1970s by the Danish manufacturer Bodum.

How is a French Press constructed?

Every French press is basically the same. Only the design varies from model to model. In most cases, a French press is made of glass, but there are also variants made of stainless steel or directly as a thermos flask. French presses are commercially available in different sizes from 0.35 to 1.5 liters filling volume. It consists of a holder in which a mostly glass, removable jug sits. A press stamp is integrated in the lid, on which a metal sieve is located. When preparing the coffee, the plunger is pressed down and the coffee grounds are separated from the finished coffee through the sieve.

How does the preparation of coffee in a French press work?

With the French Press, the coffee is ready to serve within minutes. All you need is hot water and ground coffee.

Ingredients required for 1 liter of coffee from the French Press:

Coffee beans for 60 grams of coffee powder
1 L of water with a temperature of about 96 degrees

Step 1: grind the coffee beans

The degree of grinding should not be too fine for preparation in a French press. Choose a medium to coarse grind. As a guide: The degree of grinding should be similar to that for filter coffee. If you don’t have a coffee grinder, you can also buy ready-made coffee powder. However, be sure to pay attention to the degree of grinding when buying.

Step 2: Boil the water

Before the water comes into contact with the ground coffee, the temperature should be around 86 to 96 degrees. Too high a temperature would result in a bitter taste.

Step 3: Fill in the coffee powder

Check the capacity of your French Press and how much coffee you want to prepare. As a guideline: If you have a pot with a capacity of one liter, put 60 grams of coffee powder in the French press. Then pour the appropriately tempered water completely into the pot. Make sure all the powder is wetted and don’t stir the mixture.

Step 4: Break open the crust

After four minutes, break up the crust that has formed on the liquid with a spoon. This process interrupts the extraction and most of the coffee powder sinks to the bottom.

Step 5: Continue Infusing (Optional)

Then wait five to eight minutes again. During this time, the fines (fine coffee particles) and the coarse particles of the coffee grounds sink to the bottom. This will make the cup a little clearer. However, this is only a recommendation and not a must. The coffee itself is ready to serve after four minutes of extraction (step 4). The longer you let the coffee steep, the stronger it gets. Of course, you can also influence the intensity of the coffee by choosing the coffee beans.

Step 6: Press down the stamp

Place the lid on the jug using the stamp press. Press down slowly and steadily using only the weight of your arm. This prevents the coffee powder from being stirred up again and nothing sloshing out.

Freezing chard is the best way to preserve the leafy greens. But how does one do it? We’ll explain how to do it best.

Chard is a seasonal vegetable. If you grow it in the garden, you often have more at once than you can use. In this case, you can give away excess harvest or freeze for self-sufficiency. That is how it goes.

Freezing chard: the preparation

Before you can freeze the chard, you need to prepare it well:

Cut off dried stem ends.
Wash the chard thoroughly, preferably several times, as there are often a lot of earth residues attached.
For varieties with thick stems, you should remove them and cut them into pieces.
Cut the chard into small pieces. You can cut it a little coarser or finer according to your taste.

Blanch chard before freezing

Before freezing, you should blanch your chard. This means it keeps its color and can also be frozen to save space. Leaves and thicker stems should be blanched separately:

Put a large pot of water on and bring it to a boil. Lightly salt the cooking water.
While the water is getting hot, prepare a large bowl of ice water.
As soon as the water boils, first blanch the chopped chard stalks for one to three minutes.
Remove the stems from the water with a slotted spoon and shock them in ice water.
Blanch the leaves as well, but only for a minute.

Freeze chard

You can now freeze the prepared chard:

Drain the blanched chard thoroughly. You can also pat it dry with a cloth. It is important that it is completely dry.
Put the chard in portions in freezer containers, preferably made of glass or stainless steel. How to avoid plastic when freezing.
Place the containers in the freezer or freezer.
The chard can be frozen for around eight to twelve months.

With its lovely aroma, raspberry vinegar refines many hearty dishes and fresh salads. You can easily make the raspberry vinegar yourself and use it to flavor your dishes. Our guide will help you with that.

Raspberry vinegar is a very mild and sweet vinegar. As such, it not only goes well with many types of salad, but is also a suitable accompaniment to a hearty cheese platter. The sweet vinegar is also used in cocktails, vegetable pans and in vegetarian and vegan sauces for hearty dishes.

If you want to make raspberry vinegar yourself, you can either use ready-made white vinegar or make the vinegar yourself from wine and vinegar essence. When buying raspberries, you should definitely pay attention to organic goods in order to avoid chemical-synthetic pesticides.

Make raspberry vinegar yourself: Simple recipe with ready-made vinegar

You need the following ingredients for about 800 milliliters of raspberry vinegar:

300 g raspberries (preferably fresh local raspberries)
500 ml white vinegar (e.g. homemade apple cider vinegar or white wine vinegar)
1 – 2 tbsp honey (local)
We recommend that you use all organic ingredients. In this way you avoid unnecessary pesticides in food and in the environment – good for you, the plants and the animals.

How to cook it:

Divide the raspberries between two sealable, boiled jars.
Then fill the glasses with the vinegar.
Add a little honey to each jar.
Now let the mixture steep in a cool, dark place for about two weeks. After two weeks, the vinegar will have turned a bright red color.
Then, pour the vinegar through a sieve to strain the raspberries.
The raspberry vinegar should be stored in the refrigerator for a better shelf life. It stays there for at least half a year.
Tip: You don’t have to throw away the sifted raspberries – that would be a waste of food. We recommend that you first carefully puree the raspberries in the glass and only then press them through the sieve. The raspberry vinegar is then not as clear as without the pureed fruit, but it is creamier and even more aromatic.

If you have to be quick: For a faster version, you can simply put 500 milliliters of white vinegar with four to five teaspoons of raspberry syrup in a sealable glass and shake it well until both liquids have combined.

Make your own raspberry vinegar from wine and vinegar essence

You will need the following ingredients for this slightly more complex recipe:

50 ml vinegar essence (25 percent acid)
100 ml of rosé wine
100ml of water
100 grams of raspberries
honey to taste

Here’s how you do it:

Mix the vinegar essence with wine and water and pour the mixture into a large jar or bottle.
Now add the raspberries to the vinegar mixture.
Let the mixture steep for about two weeks until the vinegar has turned an intense red color.
Then pour the vinegar through a sieve.
If you want to make the vinegar a little sweeter, you can sweeten the mixture with a little honey or sugar.
Tip: You can also puree the raspberries for this raspberry vinegar and press them through the sieve instead of throwing them away.

Proper fasting can be interpreted in very different ways depending on the nutritional approach. We will show you which forms of fasting there are and how you can implement them yourself at home.

Proper fasting: There are these types of fasting

Fasting is originally a purely religious ritual that believers practice to free themselves from any distraction and thus establish contact with God. The interpretations are very different, but mostly the renunciation should serve the purification of the soul, penance, the defense against evil, the striving for concentration, enlightenment or salvation.

In addition to religious fasting, there is so-called therapeutic fasting. The Greek doctor Hippocrates is said to have spoken of this healing method almost two and a half millennia ago. The therapeutic fasting cure is intended to purify the body and/or cleanse the soul.

Therapeutic fasting has become a trend in recent years and fasting cures are becoming more and more popular. In Germany, some hospitals and clinics offer therapeutic fasting as fasting therapy. Today, many people resort to fasting, primarily to do something good for their health.

Different types of fasting have become established:

With so-called full fasting, the body is not supplied with any calories at all. The fasting drink only water and tea. This form of fasting is extremely risky and therefore not recommended from a medical point of view.
Buchinger fasting also integrates vegetable broth and juices.
Juice fasting focuses on various fruit and vegetable juices that you consume throughout the day.
While you should only go through the types of fasting mentioned so far for a limited period of time, you can firmly integrate what is known as intermittent fasting into your everyday life. You’re still eating regularly, but there are longer periods when you don’t eat at all and really fast. This includes, for example, dinner cancelling.

When is Lent in 2022?

In Christianity, people traditionally fast the 40 days before Easter, i.e. from Ash Wednesday up to and including Holy Saturday.

This year, the six-week Lent begins on March 2nd and ends on April 16th, 2022.

It is not advisable to strictly fast for the entire duration of “Lent”. Anyone who takes a fasting cure, a fasting holiday or a fasting day usually does so independently of the traditional fasting period.

What does fasting bring?

The supposedly positive effects of proper fasting have not yet been adequately scientifically proven. So far, there have mainly been studies that are based on animal experiments or a comparatively small number of participants. However, according to the Federal Ministry of Nutrition, there are indications that (intermittent) fasting has a positive effect on the brain, heart, fat cells, muscles, intestines, liver and blood.

Possible effects are, for example:

Reduce and prevent inflammation in the body
improved cognitive functions
higher muscle effectiveness
higher stress resilience
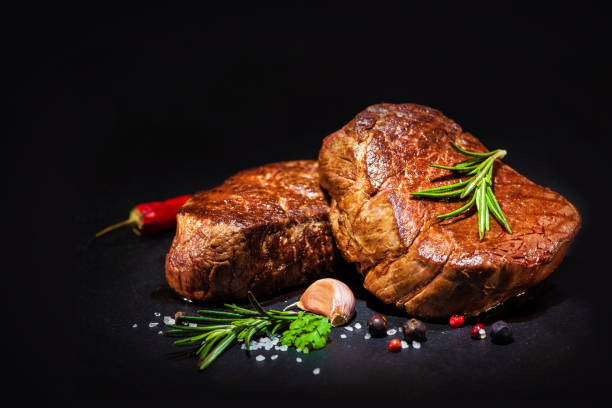
However, fasting is not a way to lose weight in the long term. During a zero diet, the body first reduces muscle mass and not fat. In addition, our organism wants to replenish its stores as quickly as possible after a zero diet, so that the well-known yo-yo effect easily occurs here. According to the DGE, only certain forms of intermittent fasting may prove to be a favorable aid for weight reduction.

Strict fasting methods are not suitable for older people, children, young people, pregnant women or people who suffer from certain diseases – they could even worsen the health situation. Uncontrolled fasting should also lead to a nutrient deficiency, cardiac arrhythmia or other complaints. So if in doubt, talk to your doctor. You can also inquire if there are reputable facilities in your area where you can practice proper fasting under supervision.

Correct fasting according to Buchinger: the basic rules

The so-called “Buchinger fasting” was developed by the doctor Otto Buchinger and is one of the most well-known types of fasting today. If you do the program independently at home, you should do it for about seven days.

Proper fasting according to Buchinger includes the following rules:

Lent begins with a day or two of rest to prepare you physically and mentally for the days to come. You take in about 600 kilocalories, mainly in the form of carbohydrates. For example, you can eat mostly brown rice or oatmeal with some fruit and vegetables throughout the day.
The first day of fasting is followed by defecation with the help of Glauber’s salt, laxative drops or laxative tea.
During the fasting period of about five days, you drink about 250 milliliters of tea with a little honey in the morning and afternoon. A quarter liter of fruit juice (freshly squeezed if possible) is on the menu for lunch and 250 milliliters of vegetable broth in the evening.

In addition, you should drink at least two liters of mineral water or unsweetened tea every day.
In some cases, you can also integrate oat or rice gruel as well as buttermilk and skimmed milk (or plant-based alternatives) into the fasting plan.
Use the time when you really fast to calm down inside. So you can do relaxation exercises and breathing exercises or meditations every day.
You should also move every day. So you can do light sporting activities such as walks, yoga or a short jog. Make sure not to overexert yourself physically, especially now, but to listen to your body’s signals.
To avoid a yo-yo effect after fasting and to slowly reintroduce your digestive system to solid food, you should only slowly increase the number of calories each day for the next five to seven days. At the beginning, use foods that are gentle on the stomach, such as potatoes and (steamed) fruit and vegetables, and later also whole grain products and yoghurt or quark. Animal protein should be reintroduced slowly.
Proper fasting also includes avoiding coffee, alcohol, sweets, and nicotine.

This is how intermittent fasting works

You have various options for designing intermittent fasting and adapting it to your lifestyle. The 16:8 method is particularly popular, i.e. fasting properly for 16 hours and eating within a period of eight hours. You simply extend your nightly fasting period, for example by stopping to eat at 7 p.m. the day before and having your first meal at 11 a.m. the following day.

Another well-known strategy involves eating as usual five days a week and then fasting two days straight. The Federal Ministry of Nutrition provides the following information for the fasting days:

Drink at least two liters a day. Use (warm) water, tea, vegetable broth or highly diluted fruit juices or spritzers.
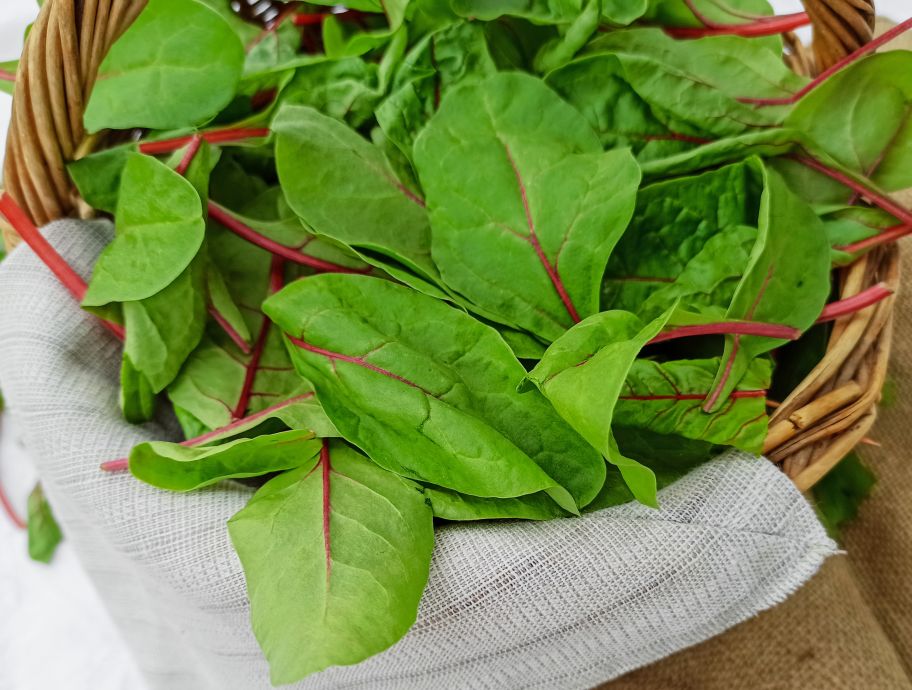
Eat lots of vegetables on fasting days.
Also, include healthy sources of fat, such as vegetable oils (like olive oil or flaxseed oil), nuts, and seeds, in moderation in your fasting diet.
Avoid fatty animal foods. Instead, opt for protein sources with fewer saturated fats, such as legumes and nuts.
Replace white flour products with whole grains if possible. You can use oatmeal, whole grain pasta, spelled or brown rice, among other things.
To enhance your meals and save salt, you can use dried and fresh kitchen herbs, balsamic vinegar, mustard or horseradish, for example.
Also, make sure you get enough sleep and moderate physical activity.
In order to fast properly, you should also avoid stress as much as possible or develop strategies to better cope with stress.

8 tips for sustainable fasting

Instead of giving up all food, you could simply use the fasting period to avoid certain foods.

Here are eight sustainable suggestions:

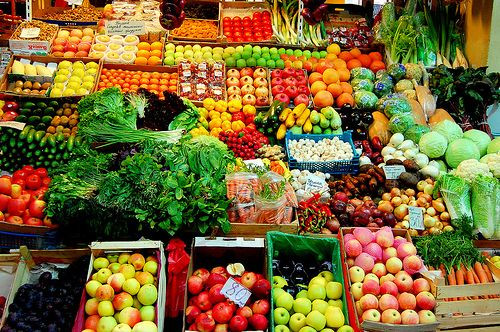
Eat only regional foods – preferably only those that are in season or come from regional storage. Think about which region you want to limit yourself to: your district, a radius of 150 kilometers, your federal state or the whole of Germany? If you are consistent, you will have to do without a lot – but you can also use this opportunity to consciously find out what is growing and being produced around you and when. Take a look at our seasonal calendar to see what’s freshly available!
Don’t eat meat. Eating less meat is good for the environment and doesn’t harm your health either. Here are 10 tips to go a little more vegan.
Or you can go one step further and try out the vegan diet for a few weeks. It’s worth a try, isn’t it?
Buy only organic products. Far too expensive, you might think now. But is that really true? Just try it.
Don’t eat processed products. Fresh home-cooked food is more environmentally friendly, tastier and healthier than ready-made meals. And you can also easily make finished products such as vegetable broth yourself.
Stick to the 5-a-day rule: two handfuls of fruit and three handfuls of vegetables every day. It’s actually a very simple rule!
Only buy fair trade products. Surely your purchase will be a bit more complex and maybe you have to do without a few things. But fasting is about conscious renunciation!
Only buy unpackaged groceries – plastic fasting, so to speak. This requires a little bit of effort and preparation, but with these 4 simple tips for bulk shopping it will definitely work. Also interesting: plastic-free shopping in online shops

Proper fasting: It’s in your hands

In the end, you have to decide for yourself what “properly fasting” means for you personally and adapt it to your individual situation. If the conventional types of fasting are too radical for you, you can only do without sugar, alcohol, ready meals, meat or cigarettes for a certain period of time.

Fasting doesn’t have to be just about diet either. In the sense of a “digital detox”, you can do without social media, television or your smartphone for a while and thus consciously make time for other things that are often neglected in everyday life. Such a “strict” fasting period can then be the beginning of dealing with yourself and your fellow human beings more consciously and mindfully.

Many people also want to combine fasting with a break from everyday life. A fasting holiday offers the opportunity to consciously calm down and find oneself without the stress of everyday life – for example fasting hiking: for a few days you go without food and hike through nature. Fasting is often done according to Buchinger, but some organizers also offer raw food fasting, smoothie fasting or alkaline fasting. Just do some research on the internet.