Tag

longer

Browsing

If you want to dry thyme, you can do this very easily in the air under the right conditions. It’s worth it, because thyme has a very long shelf life when dried, so you can use the spice for a long time.

In order to be able to use thyme for as long as possible, you should preserve it. The best way to do this is to dry it. In the dried state you can use it for seasoning, for example for potatoes, tomato sauce, various soups and vegetables such as eggplant or zucchini. You can also use dried thyme as a tea. Thyme tea is said to have a positive effect on colds. Simply pour hot water over the thyme. This works with both fresh and dried herbs.

Thyme is at its most aromatic when you harvest it just before it blooms, between May and September. You can also create your own small herb garden, there is even enough space on the balcony or windowsill.

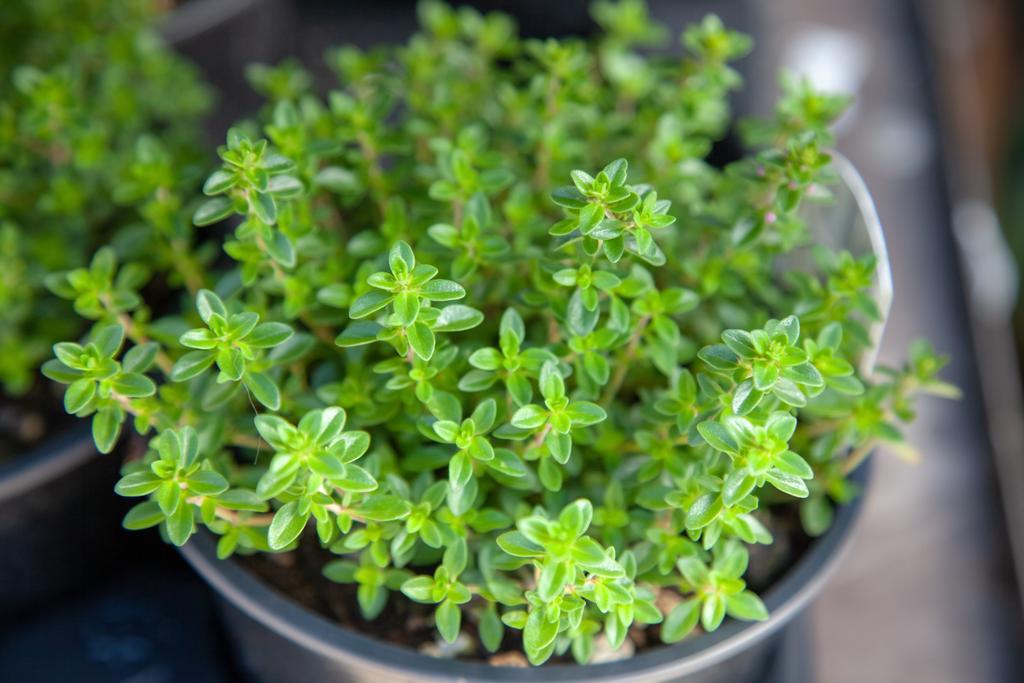
Drying Thyme: Instructions

To dry thyme, use scissors to cut off several branches of the plant. If your thyme is outside, it is best to choose a day when it is not raining. Because if the thyme is very damp, the risk of mold increases. That’s why you shouldn’t wash the thyme if possible. If there are wilted leaves on the branches, remove them before drying.
Now take a piece of twine and tie several sprigs of thyme together in bundles.
Hang the bundles so the thyme hangs upside down. Choose a warm, dry place to hang. This place should be as dark / shady as possible. Make sure the bunches of thyme aren’t hanging too close together so they get enough air from all sides.
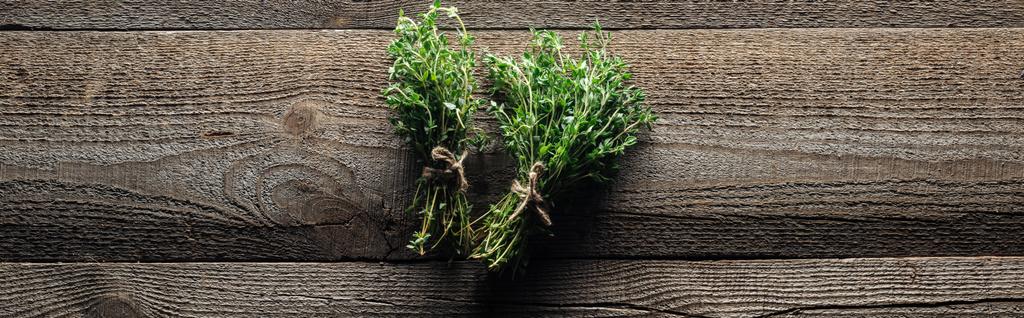
After two to four weeks you can remove the thyme, it is then well dried. You can tell by the fact that you can easily crumble the leaves between your fingers.
Separate the leaves from the stems and fill them in screw-top jars.
Store the spice jars in a dark and dry place. This way you can use the thyme for several months.

Freezing yeast makes sense if you have leftover yeast after baking or you bought it in advance. Here we explain how you can freeze the fresh yeast.

Freeze yeast: in jars and in cans

Would you like to stock up on fresh yeast or did you only need half a yeast cube for your yeast dough? Then simply freeze the fresh yeast. Frozen yeast keeps for several months and you don’t have to waste food
Place the yeast cube in a small tin or jar

Thaw yeast after freezing

If you want to use the frozen yeast, thaw it ahead of time. There are two variants:
Defrost gently: Put the yeast in the fridge the day before you want to bake and let it thaw slowly.
If you’re in a hurry: Thaw the yeast in a warm liquid if your recipe uses that liquid. Note, however, that yeast does not tolerate temperatures above 45°C, as the yeast then loses its effectiveness.
The yeast may become slightly softer and runnier after thawing than before freezing. But that’s not a problem, you can use them normally for baking.

We recommend organic yeast

Organic yeast is the ecologically better yeast:
While conventional yeast is produced using chemical substances that have to be washed out afterwards, organic yeast is much more sustainable. Because organic yeast does not have to be washed out, it requires less water during production and no unnecessary chemical substances get into the waste water.
In addition, genetically engineered enzymes can be used in the production of conventional yeast. Since there are no long-term studies on the use of genetic engineering, it can harbor undiscovered risks. The production processes of organic products do not contain any genetically modified substances.

Strawberries are very delicate and perishable. Therefore, it is important to store strawberries properly. You can find out here how they stay fresh the longest.

Freshly picked strawberries are very aromatic and rich in vitamin C, folic acid and other important nutrients. Unfortunately, they are also easily perishable and quickly lose their aroma. That’s why you should always buy them fresh from the region or pick them yourself. In addition, it is important that the strawberries are not crushed during transport and get fresh air.

It is best if you store the strawberries at room temperature and eat them the same day. Since water strips the flavor of the fruit, wash it and remove the stems and leaves just before eating. You should always cut out bad spots immediately, as mold in strawberries spreads quickly due to the high water content.

Store strawberries in the fridge

Strawberries will keep in the crisper drawer of the refrigerator for up to two days if you store them properly. For this it is important that you keep the strawberries unwashed in the fridge. Additional moisture would cause the fruit to spoil faster.

So that the strawberries get enough air, it is best to put them in a large sieve. But be careful not to stack them too high. It also makes sense to line the bottom of the crisper with kitchen paper, as it will absorb excess moisture. If you don’t have a large colander, you can store the strawberries on a large plate or tray lined with paper towels.

Freeze strawberries

If you want to store the fruit longer, you can also freeze the strawberries. Unfortunately, they get a bit mushy when defrosting, but you can still make a delicious strawberry sauce or a smoothie out of them, for example.

Tip: In order to be able to portion the fruit better later, you can freeze them individually before you freeze them properly. To do this, place them on a tray or large plate and freeze them for a few hours. Then fill them together in a freezer.

canning strawberries

Instead of freezing them, you can also cannish the strawberries. It works like this:
Wash the strawberries thoroughly and remove the pulp.
Place them in clean, boiled mason jars.
Boil water with sugar in a ratio of 3:1 in a saucepan.
Allow the resulting sugar water to cool.
Pour the sugar water over the strawberries up to the rim of the jar and seal tightly.
Now you boil the jars. If you don’t have a pressure cooker, you can also do this in the oven:
Place the mason jars on the rack in the oven.
Fill a baking sheet two inches high with water and slide it onto the rail under the rack.
Heat the oven to 130 degrees until the water on the tray starts to boil.
Turn off the oven and let the jars cool in the oven for about 30 minutes.
When the jars have cooled, you can remove them from the oven, label them, and store them in a cool, dark, and dry place.

Cookies only taste good when they are fresh and crispy. You should store shortcrust biscuits as airtight as possible. Otherwise, they will absorb moisture and taste sticky. Butter biscuits, black and white pastries, vanilla crescents, and other Christmas biscuits stay crispy and fresh in the tin for up to four weeks.

With the right tips for storage, you can ensure that your Christmas cookies last a long time and give your Christmas cookies a unique aroma. For example, it is important that the cookies are cool and the decorations are dry before wrapping, otherwise, the cookies will stick together.

Shelf life for Christmas cookies

Baking delicious Christmas cookies is part of Christmas. But with a large number of biscuits, the question arises as to how they stay fresh for a long time. Dry Christmas cookies will stay crisp and fresh in airtight metal or plastic jars at room temperature for four weeks or more. Cookies filled with cream only keep for a week.

You can neither freeze Christmas cookies with chocolate nor store them in the fridge, otherwise, the chocolate will turn gray and unsightly. These cookies should only be stored at room temperature in the cookie jar for a week or two.

Gingerbread, cinnamon stars, honey cake, Printen, and fruit bread taste best after 2-3 weeks of storage in a tin with a piece of apple, orange, or lemon peel. In this way, the pastries can be kept for several months. Our ideas for keeping the Advent wreath fresh longer are also interesting.

Store biscuits correctly in the tin can

Airtight tin or plastic containers are suitable for storing biscuits. You should place the greaseproof paper on the bottom of the tin so the cookies don’t rest directly on the metal. It is worth storing the biscuits separately according to type if they are seasoned differently. They will then better retain their aroma.

It is very important that you store crunchy and soft Christmas cookies separately. Between cinnamon stars, macaroons and gingerbread, a speculoos would quickly become soft and the soft biscuits in turn rock hard. You should put crispy biscuits in the cans immediately after they have cooled down. With soft biscuits such as gingerbread, you should only close the lid of the tin tightly when the Christmas biscuits have softened (after about 1 week). Also, note helpful tips on storing food correctly.

Make dry biscuits and hard gingerbread soft

Another good tip. Dried cinnamon stars or hard gingerbread become soft again if you put a piece of apple, lemon, or orange peel in the tin. The fruit bowl also gives the biscuits a fruity aroma. If you want it tasteless, you can also put a slice of fresh bread in the cookie jar. But be careful, change the fruit bowl or the bread every 2 days so that no mold forms.

Freeze Christmas cookies

If you want to start Christmas baking long before Christmas, you can also freeze your Christmas cookies so that you can give them away from fresh and crispy later. You can easily store gingerbread in the freezer. In addition, shortcrust pastry is particularly suitable for freezing. The shortcrust pastry category includes, for example:

  • butter cookies
  • Vanilla crescents
  • Hilda rolls
  • Linzer biscuits
  • Shortbread cookies without the chocolate icing
  • heath sand

Black and white cookies

Freeze the cookies in portions in freezer bags or freezer containers. After defrosting, bake them for 5 minutes at 180°C. In this way, you can keep large quantities of Christmas cookies crispy and fresh for longer. You can always decorate the cookies afterward. In addition, note our tips for freezing bread.

Loose buttons are often a problem. You often lose them on the way and your favorite piece of clothing is broken. So that this doesn’t happen to you again in the future, you have to fix buttons with a simple trick. Because buttons last longer and don’t get lost.

Trick to fix buttons

You’re in a hurry and need to change quickly for the meeting. That’s when it usually happens – a button tears off! Bad luck! But there is a great trick to prevent this in the long run. This button trick worked in the self-test. All you have to do is to fix the button correctly, for this take the following tools at hand and fasten your buttons:

1) Buttons last longer with nail polish

With nail polish, you not only get beautiful nails but you can also fix your buttons. To secure the button, dab the yarn under the button with clear nail polish after purchasing the new item of clothing. Then the buttons are guaranteed to stay on longer thanks to the “sealing”. Try to put the clear nail polish in the holes of the button without getting your clothes dirty. You can also use nail polish to repair minor paint damage that affects the appearance of your household appliances.

2) Sew the button again

Small sewing jobs are not rocket science. Whether patching small holes in T-shirts, repairing loose stitches, or sewing on buttons. In order for your buttons to last longer and not come loose, you should react quickly and sew the button back on firmly. Sewing on the button is very easy and a good tip even for sewing beginners.

Bread intolerance does not always have to have something to do with gluten or wheat. According to a study, the resting time of the bread dough has an impact on how digestible bread is.

Flatulence, diarrhea or abdominal pain – many people have these and other unpleasant symptoms when they eat bread. Many of those affected assume that they have gluten intolerance and therefore avoid gluten-containing foods, especially wheat. It’s not always the wheat itself. According to a study by the University of Hohenheim, the rising time of bread plays a particularly important role.

Types of sugar in bread dough

The background: There are certain types of sugar called “FODMAPS” in the grain of wheat. The abbreviation stands for “fermentable oligo-, di- and monosaccharides and polyols”. However, the substances are difficult to digest – and therefore cause many people stomach problems.

However, the proportion of FODMAPS in the bread can be reduced: if the bread dough rests longer, the types of sugar are broken down. The researchers of the study found this out in an experiment. They let different bread doughs rest for different lengths of time and then analyzed the FODMAPS content.

After one hour of resting time, all types of dough contained the most FODMAPS. After four hours, there were only ten percent of the types of sugar originally contained.

The rising time is shorter for cheap industrial bread

The explanation: the yeast in the dough ferments during the rest period and feeds on the sugars. It kind of pre-digests the dough. The longer the dough rests, the more FODMAPS the yeast can convert.

For people with bread intolerance, this means that it is better to avoid industrially produced bread. With cheap bread from discounters and bakery shops, the dough has little time to rise, and the ready-made baking mixes are also enriched with artificial enzymes and additives.

Buy good bread or bake it yourself

Local artisan bakers and especially organic bakeries are better: they use organically certified ingredients and traditional production methods and give the bread dough enough time to rise. High-quality bread may cost a little more than in discounters or bakery shops, but it is more digestible and not an assembly line product.

You can easily freeze strawberries without losing much of their flavor. Not only whole fruits are suitable for freezing, you can also preserve strawberry puree in this way. You can find out more about the various options here.

You can freeze strawberries after the strawberry season and thus preserve them. Depending on the weather, the strawberry season varies slightly from year to year. However, the bright red fruits can usually be harvested between May and July. Then they also have high season in supermarkets and organic shops. In order to have delicious strawberries for the rest of the summer and even in winter, we show you different ways to freeze them.

Freeze strawberries: instructions for whole fruits

You can easily freeze fresh strawberries – whether from the organic market or harvested yourself – as whole fruits:

It is important that you wash the strawberries thoroughly before freezing. It is best to clean them in cold, standing water, for example in a large bowl or in the sink, so that you do not damage the fruit.
Now remove all stems and remaining foliage.
Then pat the berries dry with some kitchen paper or a towel. They must not be wet when freezing, so that a layer of ice does not form.
To prevent the fruit from sticking together later when defrosting, freeze them first: place berry by berry next to each other on a flat plate or tray. The berries should not touch each other. Then place everything in the freezer for an hour or two.
To make room again, you can then fill the strawberries into their final freezer container. Place the pre-frozen berries in a stainless steel freezer box and store in the freezer. Frozen fresh strawberries will keep for about eight months.

Tip: Only use freshly harvested soil without dents or holes for freezing. Damaged fruit spoils faster even in the freezer – better eat it now.

Freeze strawberries as a puree

You can also puree the strawberries before freezing them. After defrosting, you have fresh strawberry puree at hand that is perfect for pancakes, with homemade Bircher muesli or to be enjoyed on its own. You can also cook strawberry jam or combine it with rhubarb to make strawberry rhubarb jam.

Wash the undamaged, fresh fruit in standing, cold water (as described above).
Remove the stems and foliage, then gently pat the strawberries dry with a towel.
Place the strawberries in a tall container and puree them into a smooth cream.
If you want the puree to be even creamier and finer, spoon it through a fine sieve before freezing. So you can easily catch the small seeds.
Pour the strawberry puree into a freezer bowl or glass.
Tip: You can also pour your pureed strawberry puree into ice cube molds. Frozen strawberry ice cubes taste wonderful in sparkling wine, mineral water or homemade cocktails.

You can easily freeze parsley. So you don’t have to throw anything away after a lush harvest, because fresh parsley cannot be stored for long.

Parsley is at its most fragrant just before flowering. In May or June you can cut them just above the ground. Unfortunately, fresh parsley does not keep very long. To use parsley outside of harvest time, you can preserve it. In the event of a harvest surplus, you also avoid throwing away food.

In principle, you have the option of drying or freezing herbs. Since the parsley loses a lot of its aromatic substances when it dries, we recommend that you freeze the herb.

Freeze parsley: how it works

Wash the parsley with water.
Dry them gently with a kitchen towel.
Place the parsley in a sealable, frost-proof container. We recommend, for example, containers made of glass, stainless steel or cotton bags. For the sake of the environment, you should avoid using plastic fresh storage bags. (More information: Freezing food without plastic)
Another alternative are ice cube molds. Simply fill them with chopped parsley and some water.
Finally, place the parsley in the freezer.


As long as the cold chain is not broken, the frozen herbs will keep for several months. You can take them out of the freezer when needed and simply crumble them with your fingers.

Freezing gooseberries is a good solution if you’ve harvested too many to eat them all fresh. Here you can find out what you should pay attention to.

Freezing gooseberries works very well if you pay attention to a few things. The green, smooth gooseberries are particularly suitable for freezing. The berries don’t have to be quite ripe yet, because that way you reduce the risk of them bursting later.

Unlike other fruits, you don’t have to freeze gooseberries immediately after picking them – you can store them for a few days beforehand.

Freezing gooseberries: the preparation

Wash and trim gooseberries

Wash the gooseberries in the sink or a bucket, then remove their flowers and stems. The water should only be lukewarm or even cold.

Blanch gooseberries

To prepare, you should also blanch the gooseberries. To do this, put them in a pot of boiling water for about two minutes and then take them out again. Then pour cold water over them.

Sugar or not?

Optionally, you can sugar the gooseberries before freezing. This is not a must, but sugar makes the berries even more durable. Simply sprinkle the berries with a little sugar or boil it in some water and then pour the liquid over the berries.

Recommendation: shock-freeze gooseberries

Fruit often freezes together in the freezer and you can no longer remove it in portions. To prevent this, you should flash freeze the gooseberries before freezing:

Place them individually next to each other on a baking sheet or large plate.
Then store them in the freezer for two hours.
Important: The gooseberries should not touch each other and the freezer compartment should be set to the highest level for a short time.

The actual freezing

The last step follows: Freezing.

Take the shock-frozen gooseberries out of your freezer after two hours and store them in containers.
Make sure not to use plastic bags, but rather more environmentally friendly variants. Old jam jars or stainless steel cans, for example, are well suited. You can find out what other options are available here: Freezing food without plastic: 5 tips.
Store the jars in the freezer or freezer compartment.
The berries can now be kept for eight months. You can even store them in the freezer for up to a year.

If you have a surplus harvest or simply want to prepare cauliflower out of season, you can freeze it and preserve it that way. We’ll show you how.

Cauliflower is in season in Germany from June to October. Then you can harvest the vegetables in your garden or buy them at the market. But you shouldn’t freeze it raw – otherwise it will probably become soft after thawing. We will show you how to proceed as gently as possible and how to preserve the important nutrients in the vegetables.

Before freezing: chop the cauliflower

  • Wash the cauliflower and remove any leaves.
  • Cut the cauliflower into pieces. Depending on the intended use, you can decide how big the pieces should be. We recommend cutting the cauliflower into bite-sized pieces.

Freezing cauliflower: this is how it works

To preserve the nutrients in cauliflower, you need to blanch it before freezing.
Bring water to a boil in a saucepan.
Meanwhile, have a bowl of ice water ready.
When the water boils, add a squeeze of lemon juice. This prevents the cauliflower from turning brown.
Place the cauliflower in the boiling water for about three minutes.
Then take the cauliflower out of the hot water with a slotted spoon and place it in the ice water.
Remove the cauliflower from the ice water and gently pat dry with a towel.


Place the cauliflower in freezer-safe containers and place them in the fridge. It’s important to portion the cauliflower or it will freeze together. This makes it difficult to separate and portion.
The cauliflower will keep for several months. When you prepare the cauliflower, add it to the cooking water from frozen. If you thaw it beforehand, it will quickly become mushy.