Tag

machine?

Browsing

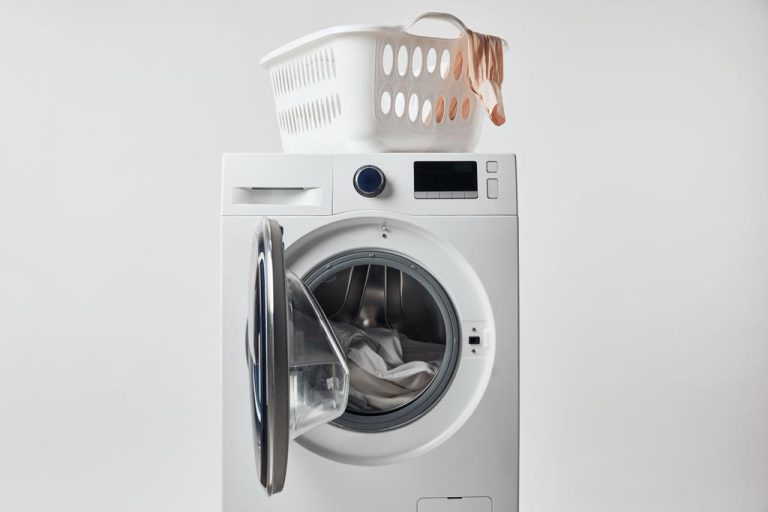
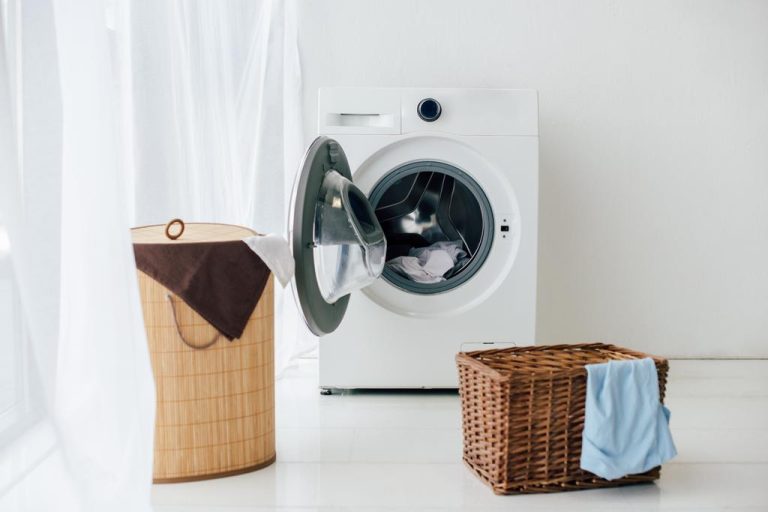
You put a load of laundry in the washing machine. At first everything works perfectly, but then: The washing machine no longer drains. What has to be done now?

Washing machine won’t drain: what you can do now

Sometimes a few little tricks or checks help. First of all: does the machine have electricity? Simple but not negligible. Just turn it off and on again. Are the lights on the machine lit? If not, is the plug in correctly? The next easy step is to check the fuses in the fuse box. If not, these can be reactivated, but this may indicate an electrical problem in the wiring system and may require investigation.

Most modern washing machines have a display. Looking at it can help one identify a possible problem if an error code is displayed. Depending on the manufacturer, this code consists of various lines, a pictogram or a combination of letters and numbers. You can then check this code in the operating instructions or on the manufacturer’s website and narrow down the error.

You can also help yourself without an error code by performing some fairly simple checks. If you set the machine to “pump out”, just listen to see if the pump is running. Does she rattle? Or makes strange noises? Then it may be defective. However, if it sounds normal, the drain hose could be the first cause. Due to the vibrations, it can happen that it is kinked. That could be the cause. Or it can be a button, a coin or something else that prevents free flow. You can check this yourself with a little skill. You pull it out of the pipe into which it ends, possibly unscrew it on the machine. Then, if you pour water in at one end, it should flow out at the other end. If this is not the case, remove the blockage, screw it back on and try it out. It may also be necessary to place the hose in a water bath that has been enriched with a fat-dissolving agent to remove deposits. A compressor and a lot of air can also be helpful. Just blow it out.

Still not pumping? Now it gets a little more difficult

Another problem can be a clogged lint filter. This separates the pump from the drain area and should be cleaned at least once a month. On most machines, this screen is located behind a flap at the front. You open this, then you can unscrew the sieve and clean it. But a certain amount of caution is required here! If the machine stopped during the washing process, the water content in the drum will drain out immediately. It is therefore essential to have suitable collecting vessels ready. Clean the fluff filter, put it back in and try it out. By the way, since the water has run out of the machine in this case, you can now also take out the laundry. If nothing has helped up to that point, it gets more complicated. You should only try the following suggested solutions if you have a certain level of manual dexterity and possibly also the appropriate tools.

Another possibility is that the drum V-belt has come off or snapped. As in a car, where it drives the alternator and various other units, this belt is there to connect the washing drum and the engine. If it breaks, the drum stands still. To check this, first disconnect the device from the power supply. Depending on the machine, you then have to remove the rear wall, which is firmly connected to the machine with several screws. If it is removed, you can see immediately whether the strap is present. You then press the strap together with your hand. Is he tight? Or can you push it far through? In this case it is worn out and no longer transmits the power of the motor to the drum, in which case it must be replaced. A look at the manual can tell you which part you need. If necessary, you must also contact the manufacturer. However, since this can be a tricky matter under certain circumstances, you should consider having a specialist carry out this repair.

If the drain pump is defective, there is no way around repairing or replacing it. However, a lot of expertise and skill is required here. If you are unsure, you should only hire a specialist there. Here, however, the factor of economic efficiency already comes into play. A final possibility is an electronic defect. As already mentioned, this can be indicated by an error code on the display. He checks the electronics and can tell you what is defective and what the costs are. In this area in particular, repairs often become very expensive very quickly. Then you have to consider whether a repair is still worthwhile if the machine is already well outside the warranty period, or whether buying a new one is a more economical alternative.

Probably everyone knows the phenomenon of the “eaten” sock in the washing machine. But why do so many socks actually disappear when washing – and what can I do about it?

Why do socks disappear in the washing machine?

Sometimes we blame the washing machine even though we misplaced the sock ourselves or it disappeared among the other clothes we were washing. In fact, the machine is often really the culprit. The so-called bellows are responsible for this, i.e. the rubber seal between the laundry drum and the washing machine door. This actually prevents liquids from leaking out during the washing process. When the drum is spun at around 1000 revolutions per minute, high forces are generated. To prevent water, detergent or foam from getting into the housing, there is a rubber ring between the moving drum and the front of the washing machine.

If the washing machine is too full, the laundry cannot move freely when turning and small items of clothing, such as socks, are pushed through the gap between the rubber and the drum. Larger items can also get caught there, but they pull the rest of the laundry back into the drum.

The swallowed sock, on the other hand, now wanders through the inside of the machine. Should she reach the bottom of the case, she will wait there until the washing machine is unscrewed for inspection and the missing items of clothing are collected. But when the sock gets to the heating element, it usually gets caught there and actually dissolves over time. The only strange thing is that usually only one sock is “eaten” by the machine and the corresponding counterpart reappears between the rest of the laundry.

Tip: how to never lose your socks again in the wash

By the way: Old washing machines are more susceptible to the phenomenon than newer models. But you don’t have to buy a new machine straight away. It would be helpful to put a new rubber seal between the door and the drum.

An easy-to-implement trick is to always pay attention to the correct filling quantity when loading in order to avoid the drum being too full. You can also tie the socks together before washing so that you end up with a complete pair.

To be on the safe side, a laundry bag in which you can pack your clothes is ideal. This is also recommended for bras, by the way, to prevent them from getting caught in the machine. Alternatively, there are sock clips or holders that make the tiresome sock drama a thing of the past.

Are you wondering why the washing machine display shows another minute but just can’t finish? These are the reasons.

Washing time takes longer than indicated – these are possible reasons

The first reason for the delay in duration is the wrong dosage of detergent. If this is too high, it will take longer to completely rinse out of the wash. The water only stops rinsing when the sensors no longer detect foam formation. Only then can you spin and finally end the wash program.

Furthermore, the water pressure plays a decisive role. It should be as high as possible so that the machine can be filled with enough water quickly. This is sometimes not the case with old lines. Even if water is taken from the main line at too many points at the same time. The water pressure can drop or fluctuate and the device therefore takes longer to draw the required amount of water from the pipes.

The water temperature also increases the duration of the washing program. If the machine is connected to the cold water line, the water must first be heated, which takes some time.

Imbalance due to incorrectly loaded drum

If you load the drum correctly, you don’t have to wait in vain for the last minute. Then the contents are pressed evenly against the drum during spinning and the textiles arrange themselves in a ring. This will rotate the drum evenly.

However, spin imbalance can occur if there are too few items of clothing or a single large piece of fabric in the spin cycle, as the contents will only be pushed to one side. The sensors detect the resulting imbalance and try to correct it. For example, the drum then rotates backwards to distribute the laundry more evenly. After the last spin cycle, the sensors must first measure whether this and thus also the wash program can be ended. This can take up to several minutes.

Irregular loading ultimately means that the sensors have to take longer to ensure that the water has been completely spun out of the textiles and pumped out of the machine. It is also possible that lumps form in the machine due to the damp laundry. It is therefore advisable not only to wash individual large items, but different sizes. This avoids an imbalance and the textiles can be better distributed.

Tricks to respect the washing time

It is also worth noting that the time display often only shows an approximate value. This calculates the time required for optimal loading when the program starts. The duration of the program is determined by factors such as the water pressure, the degree of soiling, the weight of the laundry and the amount of detergent.

There are a few tricks you can use to meet or even shorten the calculated time. It is important to pay attention to the detergent dosage and not to overload the drum. As a result, the laundry is also clean, the fibers are protected during washing and the indicated washing time is adhered to. It is also important to pay attention to which compartment of the washing machine is intended for which agent and what function the right chamber actually fulfills.

You can also connect the washing machine to the water connection, which means that the water does not have to be heated first. You also save on electricity costs. Finally, it is helpful during the rinsing process to prevent large amounts of water from being drawn from the pipe during the rinsing process through watering the garden, showering or the running dishwasher. This reduces the pressure in the water pipes and shortens the washing time.

Most people know where to put the detergent in the washing machine. But what about the right compartment in the drawer? What is it for? Here you will find the solution to the riddle.

What are the three compartments in the washing machine for?

A common washing machine has a total of three compartments, which are labeled differently depending on the type of washing machine. As a rule, the following symbols apply: main wash (II), fabric softener (III or a flower symbol) and prewash (I).

The compartment on the far left is for the detergent, whether in liquid or powder form. The washing machine draws detergent from this so-called washing-in compartment for each wash cycle. This compartment is usually the largest and can be filled with heavy-duty detergent, color detergent, mild detergent or water softener. The temperature of the washing cycle is not decisive.

Even with the middle compartment, the temperature of the wash cycle is not decisive. This compartment is for the fabric softener. You can also fill in disinfectant detergent, vinegar for descaling the washing machine or scented oils.

The forgotten right compartment of the washing machine: that’s what it’s for

So the first two subjects are clear. But what is the third compartment on the far right for? The answer is not that difficult: It is used for the pre-wash, for which you can fill the compartment with liquid detergent, powder or special detergent.

But watch out! Some washing machines have the main wash compartment in the middle and the fabric softener on the left.

It is best to always pay attention to the symbols of the compartments in order to use them correctly. For the pre-wash, the symbol is a tub with a vertical line in the middle.

Prewash – when to use it

Prewash is an additional washing program used to soak stains and dirt on clothes. You can use it with front-loading and top-loading washing machines as well as tumble dryers. To do this, fill the detergent in the prewash compartment and select the program provided for this, usually “+ Prewash”.

At the end of the washing process, the fibers of the textiles inside the washing machine are loosened by a short spin cycle. This allows the detergent used in the main wash to work better.

A pre-wash is rarely really necessary. However, it can be useful for heavily soiled clothing or textiles with stubborn stains. There are also some garments for which the washing label recommends prewashing. Otherwise, it’s better not to use it unless it’s really necessary. This saves you electricity, water and detergent and the laundry is finished faster. Normally soiled clothing gets clean without pre-treatment and you also protect it and can wear it longer.

Prevent mold – clean washing machine compartments regularly

Incidentally, all compartments, including the washing-in compartment, should be cleaned every two months. After each wash, dirt settles there and detergent residues stick.

You should pay particular attention to this, as the existing water residue can also cause mold to form. For thorough cleaning, take out the entire drawer and clean it with detergent or vinegar. The chambers can simply be made to shine with a cloth and cleaning agent.

Washing machines are among the biggest power guzzlers in the home. But with these 3 tips you can save money when doing laundry.

Save electricity with the washing machine: This is how you save money

Tip 1 – Wash laundry at low temperatures

Most people always wash their clothes with the same program and at the same temperature. But that is often higher than necessary. There are tons of detergents in the drugstore these days. Thanks to advances in the detergent industry, most of them have one thing in common: the washing power of the detergents is so high that they can fully develop their cleaning effect even at low temperatures. Many remove light soiling and the smell of sweat even at 20 degrees. As far as the cleaning effect is concerned, it makes no difference whether you wash laundry at 30 or 40 degrees.

Therefore: If possible, wash at 30 instead of 40 degrees. In this way you can save an average of 17 euros a year and at the same time avoid around 25 kilograms of CO2. The Federal Environment Agency has also calculated that private households can reduce their electricity consumption by around 37 percent if they consistently use lower temperatures. In view of the current price increases in the energy sector, this should definitely be worth considering.

In a few cases, however, you should make an exception to washing at low temperatures. Laundry from sick or immunocompromised people, bed linen and towels should be washed hotter. The Federal Environment Agency also recommends washing at least once a month with a detergent containing bleach at 60 degrees to reduce the formation of germs in the washing machine.

Tip 2 – Load the washing machine fully

Many washing machines are now equipped with a sensor that measures the amount of water and doses the amount of water accordingly. If your machine is not one of these high-tech specimens, you should only switch it on with a full load if you want to save electricity with the washing machine. Compared to a half-full machine, you can save 24 euros a year. You also avoid 35 kilograms of CO2.

Tip 3 – Use the washing machine’s energy-saving program

Bad news for impatient minds: the longer a washing program lasts, the less electricity is used when washing. So-called “eco programs” use only half as much water as the normal standard programs and they heat up the water less. But they run longer. If you use the energy-saving program regularly, you save an average of 33 euros in electricity costs and 5400 liters of water when doing laundry. In addition, you avoid 48 kilograms of CO2 compared to a conventional 60-degree program.

Conclusion: Saving electricity when washing – easier than you think

The washing machine does not have to be a power guzzler. If you do everything right and follow these three tips, you can save a lot of money on the wash cycle. Especially in the current time, it is important for most people to pay attention to their power consumption – and that doesn’t necessarily have to be difficult.

Now descale the washing machine and dishwasher with natural home remedies. With our instructions, you can descale your washing machine and dishwasher properly and prevent damage. Consequently, you should remove limescale deposits regularly.

Calcified household appliances no longer work properly, they consume more electricity and break down more quickly. You should therefore descale your washing machine and dishwasher regularly. This saves hassle, time, and money. Remove limescale deposits with vinegar, lemon, and co.

Hard water leads to limescale deposits

Hard water can attack electronic devices. Especially after a long period of time, limescale deposits on all components that come into contact with tap water: hoses, heating elements, spray arms. The hotter a component gets, the faster it calcifies. The heating elements in washing machines and dishwashers are therefore particularly affected. How strong depends on the temperature and the degree of hardness of your tap water.

How often do you descale the machines?

If you have hard water, you should descale your devices two to three times a year. But if your water is soft, it is sufficient to remove limescale deposits from the washing machine and dishwasher once a year. This usually does not require any special cleaners or decalcifiers, simple and natural household remedies can often remove limescale effectively. Please also note our tips for cleaning the bathroom and removing limescale.

Prevention of limescale deposits

A dash of vinegar with each wash protects against limescale deposits and makes your laundry fresh and soft. In addition, you can occasionally add a packet of baking soda or baking soda to the normal wash or rinse cycle. The following applies to the dishwasher: Even if you use dishwasher tabs that already contain water softeners, you should always use coarse special salt.

Instructions for descaling the washing machine

It doesn’t take much to descale your washing machine. You can follow our simple step-by-step instructions for this. You should also clean your washing machine regularly.

Home remedies to remove limescale

If you want to do without too many chemicals in the household, you can use environmentally friendly and inexpensive household remedies. Because it can be used to remove limescale from your devices just as easily. You can also use natural home remedies to descale your kettle. Or clean and descale your sink with simple household items. The following home remedies are good for removing limescale deposits:

1) Descale with citric acid

The use of citric acid can effectively dissolve limescale deposits on household appliances. You can buy lemon juice concentrated cheaply in small yellow plastic lemons at any grocery store. Then, to descale the washing machine, dissolve the contents of a plastic lemon in 0.5 liters of water and pour the mixture into the drum as described above. To descale the dishwasher, fill the undiluted concentrate into the powder compartment up to the edge.

2) Vinegar against limescale

Using vinegar can also descale your washing machine. But it also has disadvantages. Because most manufacturers of washing and rinsing appliances point out that vinegar could attack the seals and plastic hoses of the appliances. Nevertheless, many swear by the inexpensive limescale remover. To descale, pour 0.5 liters of household vinegar directly into the machine, as described above, and start a washing or rinsing program that is as hot as possible. When using vinegar essence, a quarter of a liter is enough.

3) Use the home remedy baking soda

Although using the household remedy baking soda alone does not dissolve limescale, it does make the water softer. This way you can avoid limescale deposits. In combination with vinegar, baking soda becomes a sparkling clean. Soda strengthens the lime-dissolving effect of the acetic acid and also frees the machine from soap and grease residues. Consequently, a good household remedy for washing machines and dishwashers.

4) Commercial descalers

You can also descale your devices with special cleaners. Because the specialist trade offers a variety of descalers that can remove limescale deposits from your device quickly, efficiently, and thoroughly. You should definitely observe the respective instructions for use. You can also find many types of descalers on the Internet, such as descaling coffee machines.

Washing machines are an integral part of everyday life, as they make housework a lot easier. When it comes time to buy a new washing machine, it is important to consider certain criteria. We give you the most important information about buying a washing machine and help you to find the best model.

Buy a new washing machine cheaply

A household can hardly do without a washing machine, especially families are dependent on this household helper. There are many reasons for buying a new one. If your washing machine stinks, try home remedies to clean it first. But when the old model slowly gives up the ghost or the energy efficiency class is no longer sufficient to save energy, it’s time for a new machine.

Because in a three-person household, this can account for around three percent of the electricity consumption. As a result, you can save a lot on electricity costs with a new model. But which model is the right one? We have the most important tips for buying a washing machine, as well as a comparison of test winners for you.

What type of washing machine?

Before you buy a new washing machine, you have to decide whether you want to buy a front-loading or top-loading machine. The difference between front and top-loading is pretty simple. Because you can fill the top loader from above and you fill the front loader from the side, from the front. Also, note other decision criteria.

The manufacturers of the best washing machines

There are a plethora of suppliers of washing machines. It’s easy to lose track of things. So that you can benefit from the best manufacturers, we have selected a few for you. These providers convince not only through years of experience but also through the high quality of their household products. Also note our practical kitchen helpers at a glance.

1) The Bauknecht brand

Bauknecht manufactures very ecological washing machines that are roughly in the middle price range. Good workmanship and smart technology are special features of the Bauknecht models. The following model has the energy efficiency class B, which is very good and has a positive effect on energy costs in the long run.

2) Bosch washing machines

If you are looking for a new washing machine that should work for a very long time, then you have come to the right place at Bosch. Because the production is always noble, the handling is easy and the price is fair. The following model did very well in the comparison test. This model runs very economically and quietly. It also impresses with its 10-year motor guarantee. And if you are looking for other high-tech devices, it is also worth making intensive comparisons here.

3) Siemens models

Of course, Siemens is also a very, very good choice. The prices are slightly higher, but still far below those of Miele. In our washing machine test, we always rated devices from Siemens as good to very good. The following model is in the higher price segment, but it offers energy efficiency class A. If you want to buy a cheap washing machine, you can choose a lower energy efficiency class.

4) Miele washing machines

The family company Miele has also made a name for itself and stands for high quality. If you are looking for a powerful and at the same time economical model, you can choose the following device from Miele. In addition, it is easy to use and offers many washing programs. In addition, find out about other clever everyday helpers that make your work easier.

5) Beko machines

The Beko models have been among the most well-known for years. Very good customer opinions on various washing machine tests prove that this brand is a very good choice. A Beko machine is also a winner in our test. In addition, the models are inexpensive in comparison.

6) Value for money winner Haier

The Haier brand is becoming more and more popular because it is often the price-performance winner in comparison tests for household appliances. The models not only impress with their design but also with their fair prices and great quality. The following model has an energy efficiency class of A and is therefore very economical in energy consumption. And to be able to save even more electricity with the washing machine, you have to follow other tips.

What else is important when buying a washing machine?

Water and electricity consumption are also important points of criticism that you should consider in advance. If you would like more information about the respective devices, it is advisable to study the test pages on the Internet, so you can find out more about the different models from the manufacturers. In addition, also note the best microwaves in comparison.

The cup of coffee is part of the daily morning ritual for many people. But a coffee machine also needs care and should be descaled and cleaned regularly. Because without descaling there is no taste perfect coffee and damp coffee residues are also an ideal breeding ground for mold and other germs.

But how do I know that the coffee machine has to be descaled?

Many coffee machines now show this using a control light. But there are also other signs that the machine has to be descaled:
White deposits are formed
The coffee machine runs slower
The machine is exceptionally loud
The coffee doesn’t get really hot and does not taste good
How often you have to clean your machine depends on how often you use it, how strong the water hardness is and how quickly it calculates. On average, however, a coffee machine should be cleaned every 1-2 months.

Decalate the coffee machine with professional cleaning agents:

A large number of different descalcers are offered in stores. Almost every coffee machine manufacturer also offers suitable descaling agents for their machine. But there are also some brand -independent products.

Basically, you cannot do anything wrong with these descaling agents – simply put the descaler into the machine according to the manufacturer’s specifications and start descaling. After that, the coffee machine is perfectly descaled and ready for further use.

Decalate the coffee machine with home remedies – this is how it works:

However, professional cleaning products from the trade have a big disadvantage: they are quite expensive. But there are also cheaper ways to decalify and clean the coffee machine – for example, some home remedies are perfect for this. This makes the coffee machine cleaning not only cheaper, but also more environmentally friendly.

The classic: coffee machine decalcify with vinegar essence

A very widespread method is to clean the coffee machine with vinegar essence. But how exactly does it work? We show you step by step what you have to do to clean your coffee machine with vinegar essence:
First of all, it is important that the vinegar essence with water is diluted in a ratio of 1: 4. Because undiluted and highly concentrated, it can harm rubber seals and other sensitive parts in the machine.
Once you have diluted the vinegar essence, put it in the water tank of the coffee machine, let it work briefly and start the descaling process according to the specifications of the respective manufacturer.
It is important that you let water run through the machine for 2-3 times after descaling so that the next coffee does not taste like vinegar.
The descaling is ready and the coffee machine is ready to go again.

For particularly environmentally conscious descaling: descaling with citric acid

You don’t have any vinegar essence at home right now? No problem – you can easily clean your coffee machine with a simple lemon. This has the advantage that citric acid is particularly environmentally friendly. And you only have to take the following steps:
Clean the surfaces of the coffee machine:
Halve a lemon and remove the seeds
Squeeze some lemon juice over a sponge. With the sponge you can then wipe over lime deposits, leave the whole thing on for about 30 minutes and then wipe it moist.
Discalate the coffee machine:
To clean the inside of the coffee machine, you have to press the lemon completely.
Then it is important to give the lemon juice through a sieve so that no pulp gets into the machine.
Now you can dilute the juice of a whole lemon with about one liter of water and then put the mixture into the water tank.
Now you can start descaling again according to the manufacturer.
Once the descaling has ended, think about rinsing the coffee machine with water 2-3 times.
You already have a perfectly descaled coffee machine and the coffee tastes great again.

Special caution is required here: descaling coffee machine with amidosulfonic acid

If the coffee machine is once particularly dirty, there is also the possibility to decalcify the coffee machine with amidosulfonic acid. Available, for example in the hardware store.

But here you have to be particularly careful! This acid has a caustic effect. Therefore, you should wear mouth protection and safety glasses with the application.

This is how it works: Mix ten grams of amidosulfonic acid with one liter of water and then start descaling as usual.

It is particularly important here that the machine is washed through water several times after cleaning.

Baking powder – descale the miracle cure for the coffee machine

There are many home remedies that are suitable for descaling. Baking powder is also ideal for cleaning. Simply dissolve baking powder in one liter of water and then let this solution run through the coffee machine. The machine is clean again and the coffee tastes flawless again. The descaling is so easy with baking powder.

The descaling with home remedies is therefore not only significantly cheaper than decalcifying with buyable solutions, but also more environmentally friendly.

How can I protect my coffee machine against lime?

Unfortunately, the formation of lime cannot be completely avoided. You can take some preventive measures, but these will not completely prevent lime formation. One way to restrict the formation of lime to do without tap water. Instead, use still water from bottles (i.e. water without carbon dioxide), this is far from the water from the tap. It may be enough if you descalate the coffee machine every 6 – 12 months.

If the fully automatic coffee machine goes on strike again, this is often due to poor quality and lack of service. We would be happy to help you here.

Choosing the right fully automatic coffee machine is crucial. We will show you some factors that you should consider.

When choosing the right fully automatic coffee machine, there are some things to consider. If you choose a cheap or poorly processed device, defects and unwanted functional errors quickly occur. The long -awaited coffee enjoyment moves far away – frustration and disputes with the manufacturer or dealer remain. Coffee machines represent complex machines that can conjure up all sorts of coffee specialties. Therefore, you should inform yourself well before buying and, in addition to choosing the right system, also pay attention to a comprehensive service. So you can enjoy your favorite coffee every day and don’t have to worry about defective components or malfunctions.

Choosing the right fully automatic machine

A fully automatic machine is more popular than ever before. Whether in private households or in the company – everyone wants to call one of the innovative all -rounders their own. According to the great demand, there are also countless providers and models. In order to make the right choice here, you must be able to orientate yourself to the quality of the fully automatic coffee machines and be able to rely on an excellent service. High -quality fully automatic coffee machines naturally cost a lot more than smaller and worse machines. If you want to enjoy the full coffee enjoyment, you shouldn’t make compromises here – a good alternative is also the rent. This way you save the high acquisition costs and get good service depending on the provider.

Anyone who thinks about the purchase of a
Fully automatic coffee machines, for the exquisite pleasure, should make up the yardstick. Discounter devices and coffee machines from no-name manufacturers can definitely convince with one or the other functionality-but if you want to enjoy any coffee specialty in perfection, you have to invest in a high-quality fully automatic coffee machine.

The criteria at a glance:

The diversity in particular makes the fully automatic machine so admirable: cappuccino, latte macchiato, Café au lait, café crème, espresso, caffè ristretto and much more. This pays off in particular for many users and is satisfied with every coffee lover.
With a promising and well thought -out design, your fully automatic machine also visually convinces. Here, of course, it is with you which look you choose, the tastes are different.
If you like your coffee individually and always to the point, you should rely on a fully automatic coffee machine with a large variety of functions. There are machines here that still work in a very standard basis – others have a large display and lead the user through a list of different settings. For example, with just a few clicks, you can also make individual settings regarding the milk supply, coffee strength and much more. Current fully automatic coffee machines with so -called telemetry modules can also be conveniently controlled from the computer. This can even be configured with prices, maintenance work and much more.
User -friendliness plays an increasingly important role. With a variety of coffee lovers, this is also essential and makes the entire operation easier. So the coffee tastes a little better.
As the last point, you should pay attention to the equipment of your fully automatic coffee machine. Defective components can quickly lead to problems and elaborate cleaning despite good technology inside. For example, a good fully automatic coffee machine has a water filter and an innovative water pump. Further accessories are milk frother or suction systems. Modern components also increase the quality of your coffee and promise a high durability and an error -free functionality.
Rapidly get a coffee at the fully automatic coffee machine and should you go on? A nice idea in itself and in the best case it should also look the same. However, if you have chosen the wrong fully automatic coffee machine, then it can happen that the grinding is on strike, the pomace tank is full, a longer cleaning must be carried out or just illuminates a fault lamp. Unknown error codes and time -consuming repairs can quickly destroy coffee enjoyment. Therefore, do not get involved in any experiments and prefer to rely on award -winning models and renowned manufacturer brands.

Cleaning the coffee machine made easy: In our instructions we will show you which steps are involved and what you have to consider.

With the right steps to a thoroughly cleaned fully automatic coffee machine.

With a coffee machine you can conjure up delicious and enjoyable coffee. Whether it’s a caffè latte, cappuccino, milk coffee or a simple black coffee – the all-rounder machines deliver all kinds of delicacies at the touch of a button. However, so that you can always enjoy your coffee free of bacteria and germs, you should make sure that your fully automatic coffee machine is properly cleaned. The mostly extensive technology offers many points of attack, which represent sources of fire for dirt and pathogens. With the help of regular and professional cleaning, however, you can enjoy your daily coffee absolutely free of any pathogens.

Thorough cleaning of the different components

If you want to clean your coffee machine properly, you should do each component individually. Pathogens such as fecal streptococci, pseudomonas and E. coli bacteria quickly collect in uncleaned machines. The growing breeding ground also provides an excellent environment for fungi, salmonella and algae. What seems quite frightening at first glance is not really dramatic. Most germs are not pathogens and can only harm small children and people with weakened immune systems. However, preventing mold growth should always be taken seriously. If you haven’t cleaned your fully automatic coffee machine for a long time, a crust can even form on the outlet. This is a clear sign of the spread of germs. Certain components should therefore be cleaned daily. Depending on the container, simply cleaning with hot water is not enough and you should use washing-up liquid or suitable cleaning agents.

The easiest part of a fully automatic coffee machine to clean is the water tank. Depending on the water quality, limescale can quickly build up in the tank. With most devices, the water tank can be removed without any problems. Here it is then necessary to descale the container. Whether you use simple cleaning agents or descaling tablets is entirely up to you. With constant cleaning, however, warm water and washing-up liquid should be completely sufficient. The next step is to take care of the coffee bean container. In addition to dust and all kinds of germs, grease residues can also settle. Here, too, you can use warm water and washing-up liquid to remove dirt. If there are large amounts of fat residue, we also recommend using a coffee fat remover. It is best to clean this part of the machine after each complete use of the beans it contains.

In order to clean the coffee machine properly, thorough cleaning of the so-called brewing group is very important. This is the heart of the fully automatic coffee machine and therefore requires special treatment. Ground coffee and hot water meet in the brewing unit – this is where the aromas unfold and the actual coffee is created. Of course, this process leaves residues, which can quickly develop into a source of fire for bacteria. Cleaning is usually done by removing the brew group. You can then rinse them thoroughly with warm water so that residues are loosened and fall off. Aggressive cleaning agents should not be used if possible, as they could affect the subsequent brewing process. Another important component of every fully automatic coffee machine is the milk frother. If the milk residues are not removed, a large number of bacteria and germs will form here. As is so often the case, warm water and detergent helps with regular cleaning. When you clean your coffee machine, you should do it piece by piece and clean each component individually. In this way you prevent the formation of germs and pathogens in the long term.

Despite all the points that speak for a carefully cleaned coffee machine, we know how difficult it can be to keep a coffee machine clean. Especially when many different colleagues or customers are drinking coffee, not everyone feels equally responsible for cleaning and so it is inevitable that the cleaning will be forgotten or not done properly. A cleaning plan can help you with this. Simply hang it in a conspicuous place near the coffee machine – and nobody will overlook the cleaning anymore.