Tag

make

Browsing

Introduction: The Classic Meat Pie

The classic meat pie is a staple in Australian cuisine – a savory pastry filled with meat and vegetables, often enjoyed as a quick snack or a hearty meal. This beloved dish can be found at cafes, bakeries, and even sports stadiums throughout Australia, and has become a favorite among locals and tourists alike. Making a homemade meat pie is a great way to enjoy this iconic Australian dish, and with a little practice, it’s easy to recreate the delicious flavors and textures of a classic meat pie at home.

Crafting a Savory Meat Filling

The filling is the heart of any good meat pie, and there are countless variations to suit different tastes. A classic meat pie filling typically consists of ground beef or lamb, onions, carrots, and peas, cooked in a flavorful sauce. To make the filling, start by browning the meat in a large pan, then add diced onions and cook until they are soft and translucent. Next, add diced carrots and cook until they are slightly softened, then stir in frozen peas and a tablespoon of tomato paste. Season with salt, pepper, and your favorite herbs and spices, then simmer the mixture until the vegetables are tender and the sauce has thickened.

For a more adventurous filling, try adding diced potatoes, mushrooms, or even bacon bits. You can also experiment with different seasonings such as Worcestershire sauce, mustard, or curry powder to add depth and complexity to the filling. Once you’ve perfected your meat filling, it’s time to encase it in flaky pastry.

Encasing the Filling in Flaky Pastry

The key to a perfect meat pie is the pastry – it should be buttery, flaky, and able to hold the filling without getting soggy. You can use store-bought puff pastry or make your own from scratch using a recipe that combines flour, salt, butter, and water. Roll out the pastry on a floured surface until it is thin and flat, then cut it into rounds or squares using a cookie cutter or a knife. Spoon the meat filling onto one half of each pastry shape, leaving a small border around the edges. Brush the edges with beaten egg, then fold the pastry over the filling and press the edges together to seal. Use a fork to crimp the edges and create a decorative pattern.

Brush the tops of the pies with more beaten egg, then bake them in a preheated oven at 400°F for 20-25 minutes, or until the pastry is golden brown and flaky. Serve the meat pies hot, with a dollop of ketchup or barbecue sauce if desired. With a little effort and a lot of love, you can create a delicious and satisfying classic meat pie that will transport your taste buds to the heart of Australia.


Introduction: The Australian Bush Bread, Damper

Damper is a traditional Australian bread that has been a staple of the country’s cuisine for centuries. This bread was originally created by the early settlers who lived in the outback, where access to fresh bread was limited. The damper is made from a simple combination of flour, salt, and water, and is cooked over a campfire. This bread is easy to make and is perfect for camping trips, outdoor gatherings, or as a side dish for a hearty meal.

Ingredients: Self-Rising Flour, Salt, and Water

The ingredients for making damper are simple and easy to find. Self-rising flour is the key ingredient for this bread, as it contains baking powder, which helps the bread to rise. You will also need salt to enhance the flavor of the bread. Finally, you will need water to mix the dough. The amount of each ingredient you need will depend on how much bread you want to make.

For a basic recipe, you will need two cups of self-rising flour, one teaspoon of salt, and one cup of water. Mix the ingredients together until they form a dough. Knead the dough for a few minutes until it becomes smooth. You can add additional ingredients like cheese, bacon, or herbs to the dough to add extra flavor to the bread.

Method: Cooking Damper Over a Campfire

To cook the damper, you will need to have a campfire or a fire pit. The traditional method of cooking damper is to wrap the dough in foil and place it in the coals of the fire. Alternatively, you can place the dough on a stick or a metal skewer and cook it over the fire.

Cook the damper for about 30 minutes or until it is cooked through. The bread should sound hollow when tapped on the bottom. Once the damper is cooked, remove it from the fire and let it cool for a few minutes before slicing and serving. This bread is best served warm with butter or jam.

In conclusion, making damper is a fun and easy way to experience traditional Australian cuisine. With just a few simple ingredients and a campfire, you can create a delicious and hearty bread that is perfect for any outdoor gathering. Give this recipe a try and enjoy the taste of the Australian outback.

What are Anzac Biscuits?

Anzac biscuits are a traditional Australian biscuit that has its roots in the First World War. The biscuits were originally baked by the wives and mothers of the Australian and New Zealand soldiers who were fighting in Gallipoli. The biscuits are made from a combination of oats, flour, coconut, and golden syrup, and are known for their hard texture and long shelf life.

Ingredients and Recipe for Anzac Biscuits

To make Anzac biscuits, you will need the following ingredients:

  • 1 cup of rolled oats
  • 1 cup of plain flour
  • 1 cup of desiccated coconut
  • ¾ cup of brown sugar
  • 125g of butter
  • 2 tablespoons of golden syrup
  • 1 teaspoon of bicarbonate of soda
  • 2 tablespoons of boiling water

To make the biscuits, preheat your oven to 160°C and line a baking tray with baking paper. In a bowl, combine the rolled oats, flour, coconut, and brown sugar. In a saucepan, melt the butter and golden syrup together over a low heat. In a small bowl, mix the bicarbonate of soda with the boiling water, and then add it to the melted butter and golden syrup mixture. Pour the wet ingredients into the dry ingredients and mix well. Roll the mixture into balls and place them on the baking tray, flattening them slightly. Bake for 12-15 minutes or until golden brown.

History and Significance of Anzac Biscuits

Anzac biscuits are named after the Australian and New Zealand Army Corps (ANZAC) who fought in the Gallipoli campaign of the First World War. The biscuits were originally known as “Soldier’s Biscuits” as they were made by the women back home and sent to the soldiers as a form of care package. The biscuits were designed to have a long shelf life and survive the journey to Gallipoli. Today, Anzac biscuits are a symbol of remembrance for those who have served in the armed forces and are commonly eaten on Anzac Day, which is a national day of remembrance in Australia and New Zealand.

Introduction: The Unique Flavor of Crocodile Meat

Crocodile meat is a unique delicacy that is becoming increasingly popular among foodies. It has a tender texture and a distinct flavor that is similar to chicken, but with a slightly gamey taste. Crocodile meat is also low in fat and high in protein, making it a healthy alternative to beef or pork.

One of the best ways to enjoy crocodile meat is by making a juicy crocodile burger patty. Not only is it delicious, but it is also a great way to introduce this exotic meat to those who may be hesitant to try it. With the right recipe and toppings, you can create a mouth-watering dish that will have everyone asking for seconds.

Recipe: How to Make a Juicy Crocodile Burger Patty

To make a juicy crocodile burger patty, start by purchasing high-quality crocodile meat from a reputable supplier. You can use either ground crocodile meat or finely chopped crocodile meat for your patty.

In a mixing bowl, combine the crocodile meat with bread crumbs, minced garlic, chopped onions, salt, pepper, and your favorite seasonings. Mix well and form into patties. Heat a skillet over medium-high heat and cook the patties for 4-5 minutes on each side or until cooked through.

Make sure to handle the crocodile meat with care and follow proper food safety guidelines. The internal temperature of the meat should reach 160°F to ensure it is safe for consumption.

Serving Suggestions: Toppings and Condiments for the Perfect Crocodile Burger

The toppings and condiments you choose for your crocodile burger can make all the difference in its flavor. Try adding sliced avocado, caramelized onions, bacon, or a fried egg on top of your patty. You can also use a variety of sauces, such as BBQ sauce, aioli, or spicy mayo to enhance the taste of your burger.

Don’t forget to choose the right type of bun, too. A soft brioche bun or a sturdy sourdough bun will hold up well against the juiciness of the crocodile patty and all the toppings.

In conclusion, a crocodile burger is a unique and delicious way to enjoy this exotic meat. By following the right recipe and using your favorite toppings and condiments, you can create a mouth-watering dish that will have everyone talking. Give it a try and add some adventure to your next meal!

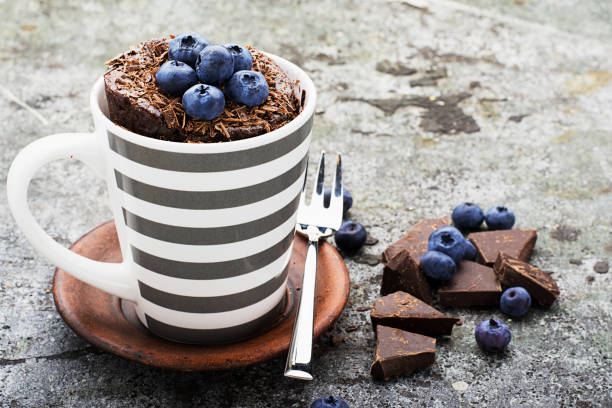
They are THE absolute trend among cake fans who don’t have much time but still want to enjoy a delicious pastry: mug cakes. The mini cakes from the cup have their origin – how could it be otherwise – in the USA and are now becoming increasingly popular in Germany, so well-known food companies have already included the cupcake in their range and offer various baking mixes in the supermarkets. But of course, you can also make the delicious creations yourself. We’ll tell you how to make mug cakes yourself.

They succeed in no time at all and taste simply delicious: mug cakes are the latest craze and are extremely popular with baking fans worldwide! The mini cakes, which are cooked in the microwave, are considered a real treat and can be spooned straight out of the cup. You don’t need a scale or a mixer to prepare it. All you need is a little imagination! Would you like to make a mug cake yourself? Then get started right away.

It does not require many ingredients – you can design and develop the cakes according to your preferences. And best of all: A mug cake is only one portion, which is extremely figure-friendly. Because unlike with an ordinary cake or a tart, you can’t just order a second helping…

Make mug cake yourself – the basic recipe

For 1 portion or 1 mug of cake

  • 30 grams of butter
  • 1 egg (M)
  • 2 tbsp sugar
  • 1 vanilla bean
  • 1 tbsp cream
  • 5 tbsp flour
  • 1/2 tsp baking powder

For the topping

  • powdered sugar
  • optional chocolate glaze.

Preparation

1. Melt butter in the microwave. Split the vanilla pod lengthways and scrape out the pulp. In a large mug, beat the egg vigorously with the sugar and the vanilla pulp; Gradually add all the other ingredients, including the melted butter, while stirring constantly.

2. Place the cup, including the liquid content, in the microwave at 800 watts for around 2 minutes so that the dough rises.

3. Take the mug out of the microwave (caution: the handle is hot) and sprinkle chocolate icing or some icing sugar over it.

The nice thing about this basic recipe is that you can adapt it to your own preferences – for example, add cocoa powder (3 tablespoons), work a few drops of chocolate into the dough, use colorful sprinkles or brittle as a topping, and and and… If you want, you can use the cake also put on a little cream or garnish it with a fruity sauce. There are no limits to your ideas! Another tip: If the mug cake appears a bit dry, this is usually due to the individual microwave setting. Here it helps to approach the ideal result or to add a little milk (2 teaspoons) when preparing the dough. Work out your favorite mug cake creation and tell us your favorite recipe! We are excited…

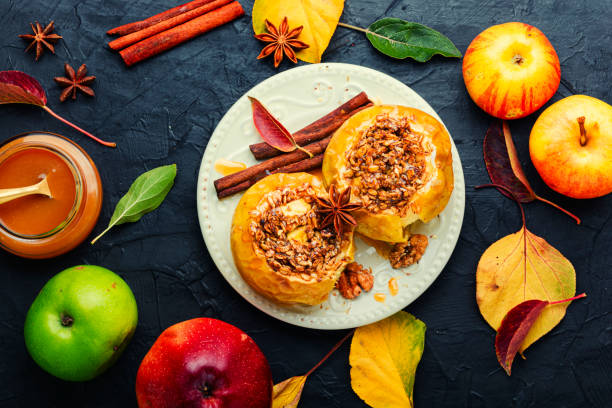
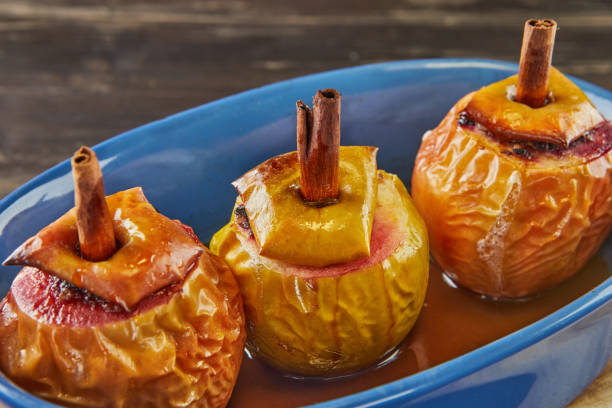
From a culinary point of view, the pre-Christmas period offers many delicious delicacies: Whether tree cake, cookies or gingerbread – you are spoiled for choice when it comes to Advent coffee. But now we would like to offer you a tasty and, above all, healthy alternative: how about a hot baked apple in vanilla sauce? The fruit can be prepared in the oven or quickly in the microwave. Make baked apples yourself – it’s easier than you think!

Not a baked apple fan yet? That should change soon. Baked apples are a wonderful alternative to cakes and cookies, especially in winter. What’s more, this wintery delicacy is easy to prepare yourself. But read for yourself…

To prepare baked apples, you should first use firm and tart apple varieties. The red Boskoop, Gravensteiner, or Cox Orange are excellent.

Years ago, you just popped the apple into the hot oven and waited for it to pop before sprinkling the cinnamon and sugar on it. Today, on the other hand, the core of the apple is removed and the resulting cavity is used to add delicious ingredients. There are actually no limits to the imagination. What you like is allowed in terms of ingredients. In addition to almonds, raisins, muesli, oatmeal, some honey, and hazelnuts, you can also add nougat, marzipan, jam, or winter spices to the baked apple. A few knobs of butter ensure that the apple does not become too dry. And the savory version of the treatment also causes a stir!

By the way: If you don’t have much time and don’t want to do without your baked apple, you can also prepare the wintry dish in the microwave. Depending on the size, the apple can be heated in a bowl for three to five minutes at around 600 watts and then left to cool for two minutes. We wish you Bon appetite!

Make baked apple yourself

Ingredients for 2 servings:

  • 1 tbsp dried cherries
  • 1 tbsp dried cranberries
  • 1 tbsp sultanas
  • 6 tbsp apple juice
  • 2 tart apples (200 g each)
  • 1 tbsp chopped almonds
  • ½ vanilla bean
  • 1 tbsp cane sugar
  • 150 g yogurt (0.3% fat)
  • 2 tbsp eggnog (optional)

You will need these kitchen appliances:

  • 1 casserole dish
  • 1 bowl
  • 1 small bowl
  • 1 work board
  • 1 small knife
  • 1 tablespoon
  • 1 teaspoon
  • 1 core cutter

Preparation steps:

  1. Place the dried cherries, cranberries, and sultanas in a small bowl with 2 tablespoons apple juice and soak.
  2. Wash the apples and remove the core with an apple core.
  3. Add the chopped almonds to the cherries, cranberries, and sultanas and mix everything together.
  4. Using a teaspoon, spoon the mixture into the apples and place in a casserole dish.
  5. Pour over the remaining apple juice. Bake in a preheated oven at 200 °C (fan oven: 180 °C, gas: mark 3) for 30-35 minutes.
  6. Meanwhile, split the vanilla pod lengthways, scrape out the pulp with a sharp knife and mix with the sugar.
  7. Mix the vanilla sugar with the yoghurt and, if you like, eggnog until smooth. Place on plates, place 1 baked apple on each and serve.

Baked apple with ginger

Ginger is a wonderful ingredient that relieves colds and adds a wonderfully savory touch to baked apples. If you like ginger, you should definitely try this baked apple variant! Ingredients for 4 people: 4 yellow apples 2 tbsp. sugar ½ tsp. cinnamon 1 pinch ginger powder 1 piece of fresh ginger 4 tsp. icing sugar 400 ml apple juice (or white wine) 1 cinnamon stick ½ vanilla bean 2 tbsp. Remove the core with a melon baller.

Mix the sugar with the cinnamon and ginger powder, sprinkle into the opening, and put the lid back on. Peel the ginger, and cut it into fine strips. Caramelize the icing sugar in an ovenproof pan, and deglaze with the apple juice. Add the cinnamon stick, ginger, and the sliced ​​vanilla bean, and simmer briefly. Put the apples in and bake in the oven at 180 °C for about 25 minutes. Take the apples out of the sauce and keep them warm. Stir cold butter into the caramel sauce. Spread the sauce on dessert plates as a mirror, place the apples on top and sprinkle with icing sugar.

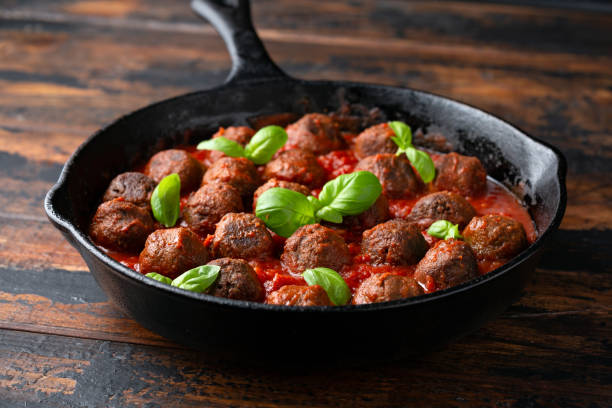
Big or small: Almost everyone likes meatballs. And the meatballs are versatile too. They cut a fine figure as a small snack between meals, but also as an accompaniment to potato salad. EAT SMARTER shows you how to make meatballs yourself. We also present a vegetarian alternative.

All of Germany is crazy about meatballs. While the ingredients remain largely the same, the name of the ultimate classic of German home cooking varies from region to region: in the north, they are talking about meatballs, in the east, the meatballs are called the button and in the south, they are called meatballs. Meatballs are even available in many variations abroad: in Greece as cevapcici, in Turkey as kofte and in Sweden as köttbullar. And one thing applies to all meatballs in the world: they taste best when you make them yourself!

Make meatballs yourself – general tips

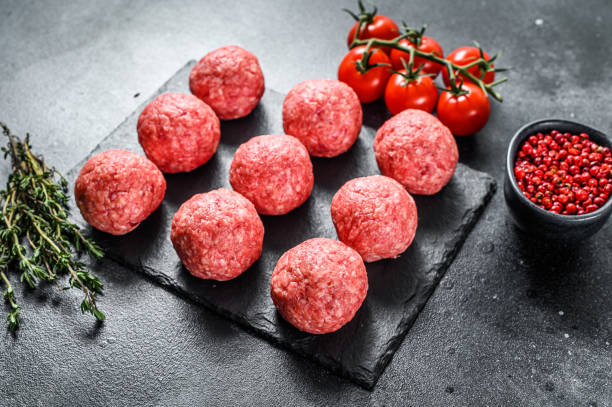
Meatballs are made from minced meat – it doesn’t really matter whether it comes from beef or pork. Ground beef is a little lower in fat, but ground pork makes the meatballs juicier. It is therefore recommended to use the mixed hack. This has another advantage: You only need a little fat or oil in the pan to fry the meatballs.

Make meatballs yourself – this is how it works

Ingredients:

  • 1 stale white bread roll
  • 2 onions
  • 800 g mixed minced meat
  • 2 eggs
  • 75 g low-fat quark
  • Salt
  • pepper
  • 2 tablespoons oil

Preparation:

  1. Soak the rolls in lukewarm water.
  2. Peel and very finely dice the onions.
  3. Put the ground beef in a bowl. Squeeze out the rolls thoroughly, add to the meat with the eggs and quark and mix everything thoroughly.
  4. Add onion cubes and mix in.
  5. Season with salt and pepper and shape into 12 small rounds with wet hands.
  6. Heat oil in a coated pan. Fry the meatballs in it for 4-5 minutes on each side over medium heat.

Admittedly, Matcha Latte with its green color takes a little getting used to. But the green tea drink is not only healthy but also delicious and very popular with celebrities. We reveal how you can make Matcha Latte yourself.

Matcha was originally prepared by Buddhist monks, later it became the favorite drink of the samurai and then an integral part of the Japanese tea ceremony – even today.

With us, the ground green tea from the delicate leaf tips of Tencha tea has become more and more popular and well-known in recent years. Last but not least, Hollywood celebrities strolled through the streets with a matcha latte and were photographed by the paparazzi.

Of course, matcha tea can also be drunk pure, i.e. only infused with water, but it becomes an in-drink and coffee substitute with milk. The drink is then called Matcha Latte and is super easy to prepare. Health-conscious people, people with lactose intolerance, and vegans use soy milk. However, it also works with cow’s milk.

Make Matcha Latte yourself: This is how it works

  • ½ tsp matcha powder
  • 50ml hot water
  • 200 ml frothed soy milk

Put the matcha in a small bowl and stir in 50 ml of hot water. It gets lump-free with a matcha whisk. Pour liquid into a glass or mug and then add frothed soy or cow’s milk. If necessary, sweeten the Matcha Latte with honey or agave syrup (vegan). You can find more great Matcha recipes such as waffles with Matcha filling or tiramisu with Matcha here

Matcha is healthy

A bowl of Matcha contains about 3% caffeine. However, the drink does not make you jittery or nervous, but the green tea powder has a pleasantly invigorating effect.

Matcha is also said to have an anti-inflammatory effect and strengthen the immune system. You can find out everything you need to know about matcha and why it is so healthy in our product information about matcha.

Matcha: An expensive affair

Matcha powder can be bought in tea shops or health food stores. However, it is not cheap due to its complex production. Apart from growing and picking, it takes about an hour to get around 30g of matcha powder from tencha tea. Therefore, you pay at least 15 euros for a small can (30 g). Be careful with cheaper products. It is not uncommon for this not to be real matcha. Store Matcha in an airtight container and protected it from light. The Japanese also like to keep their matcha in the fridge after opening.

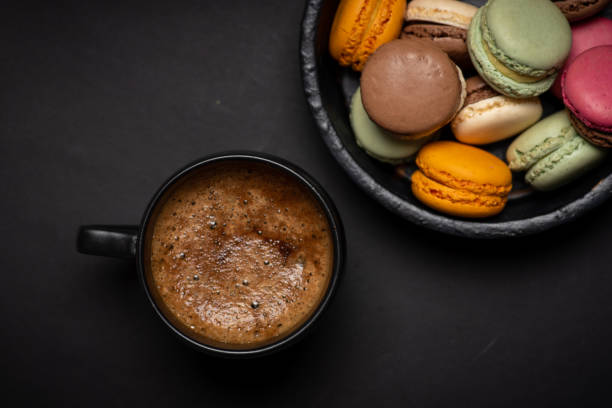
They’re colorful, cute, and damn delicious. And although macarons are becoming more and more popular with us, they are far from being available for purchase everywhere. We, therefore, reveal how to make macarons yourself. Et voilà!

Almond flour, egg white, and sugar – are the main ingredients for the fine Macaron dough. They are filled with fresh fruit puree, ganache, or buttercream, and there are countless macaron versions. The little delicacies are usually made red, yellow, or green with the help of food coloring. However, our two macarons variants get their color from natural foods such as matcha and cocoa. The two halves of the pastry are baked separately before they become a delicious double-decker with the filling.

While macarons aren’t as easy to make as a sponge cake, they’re worth the effort. Since macarons tend to be eaten with tea and coffee and not 10 pieces are eaten at once, the relatively high number of calories can be overlooked. After all, sometimes you have to treat yourself and enjoy something, right? If you don’t have the time to make macarons yourself, you can also order the delicious, colorful macarons online (www.feine-macarons.de).

Make macarons yourself: the recipes

Pistachio Macarons (ingredients for 35 pieces)

For the macarons:

  • 140 g peeled, unsalted pistachios
  • 2 egg whites
  • 1 tsp lemon juice
  • 150g powdered sugar
  • 1 tbsp matcha

For the cream:

  • 150 grams of butter
  • 60 g powdered sugar
  • 120 grams of cream cheese

That’s how it’s done:

  1. Preheat the oven to 120°C circulating air. Line a baking sheet with parchment paper.
  2. In a blender, grind the pistachios very finely and set aside 3 tbsp.
  3. Beat the egg whites with the lemon juice until stiff and gradually sprinkle in the icing sugar. Continue beating until you have a firm, shiny mass, then carefully fold in the pistachios and matcha.
  4. Put the batter in a piping bag with a large round nozzle. Squirt evenly distributed meringue dots onto the baking sheet and bake in the oven for about 10 minutes so that they are crispy on the outside and still soft on the inside. Take out of the oven, remove from the tray and let cool.
  5. For the filling, cream the butter with the icing sugar and gradually stir in the cream cheese and the remaining finely ground pistachios. Fill the mixture into a piping bag with a small star tip and cover half of the macarons on the flat side with it. Cover with a suitable counterpart, press down lightly, and serve.

A pistachio macaron has 92 calories and 7 grams of fat.

Chocolate Macarons (ingredients for 30 pieces)

  • 4 eggs
  • ½ lemon
  • 250 g of very fine sugar
  • 125 g ground almonds
  • 30 grams of cocoa powder
  • 100 g bittersweet couverture
  • 2 tbsp whipped cream
  • 30 grams of butter

That’s how it’s done:

  1. separate eggs. Squeeze half a lemon. Beat the egg whites with 2 teaspoons of lemon juice until very stiff (use the yolks for something else). Gradually drizzle in the sugar and continue beating until you have a smooth, shiny mass. Gently fold in the almonds and cocoa powder.
  2. Fill the mixture into a piping bag with a large, round nozzle and pipe small hemispheres (approx. 2 cm in diameter) onto a baking tray lined with baking paper. Bake the macarons in a preheated oven at 160 °C (convection oven 140 °C; gas: level 2) for approx. 25 minutes. Important: Leave the oven door slightly open.
  3. For the cream filling, chop the couverture into small pieces and carefully melt in a hot water bath. Mix the cream and butter into small pieces with a whisk. Let the mixture cool down a bit. Spread half of the macarons with the filling, then assemble with the rest.
  4. A chocolate macaron has 86 calories and 4 grams of fat.

Since the French candy hardens after just two days, it should be eaten quickly. The colorful delicacies are also wonderful as a souvenir or culinary gifts.

Chutneys are a fine thing: they give cheese, meat, and savory bread that certain sweet and sour note. A great chutney can also be conjured up from plums. Today we will show you how to make your own plum chutney with a little ginger spiciness.

Plum cake, plum compote, plum jam: the variety is great when it comes to processing fresh plums. Try this fine plum chutney!

The mild sweetness of the ripe plums harmonizes wonderfully with chili, ginger, and onions. The chutney is also a hit as a lovely souvenir from your own kitchen.

Make plum chutney yourself: the ingredients

  • 150g shallots
  • 1 piece of ginger root (approx. 20 g)
  • 1 red chili pepper
  • 2 oranges (1 of them organic)
  • 3 anise stars
  • 500 grams of ripe plums
  • 50 grams of brown sugar
  • Salt
  • 1 tbsp balsamic vinegar (a little more if necessary)

Make plum chutney yourself: preparation

  1. Rinse the screw-top jars (for a total of 750 ml content) with the fitting lids with boiling water and drain them upside down on a kitchen towel. Peel shallots, halve, and cut into fine wedges. Ginger peel and finely chop.
  2. Cut the chili pepper lengthwise, deseed, rinse and cut crosswise into thin strips.
  3. Wash the organic orange in hot water, rub dry and peel half thinly with a vegetable peeler. Cut the orange zest crosswise into very fine strips.
  4. Halve both oranges, squeeze and measure out 200 ml of juice. Bring the orange juice to a boil in a saucepan with the shallots, ginger, chili, strips of orange peel, and anise stars. Cover and cook on low heat for 15 minutes.
  5. Meanwhile, wash the plums, drain, halve, stone, and cut into thin wedges.
  6. Add the plums and sugar to the shallots, bring to the boil again, and cook covered over low heat for another 10 minutes. Remove anise stars.
  7. Season the chutney with salt and vinegar and pour immediately into the prepared glasses. Seal, flip and let stand upside down for 5 minutes. Turn the glasses over again and let them cool down. Closed and stored in the dark, the chutney will keep for about 2 months.

Enjoy your meal!