Tag

make

Browsing

In this article, you will find the instructions for making and preserving jams yourself. You will find a basic recipe for a simple jam recipe from grandma’s time. We’ll also tell you what you need to pay particular attention to when making jam so that everything works out. Have fun making the jam.

It exerts a great attraction on many people to make their own jam. You can’t usually save money – unless you use the fruit you have picked yourself from your own garden as a starting point – but preparing the popular spread yourself is definitely fun.

5 good reasons to cook for yourself

Making and preserving jam yourself is fun. In addition, homemade jam is healthy because the ingredients are known and freshly processed. It also allows you to create new flavors that may not be commercially available. In terms of taste, the homemade jam often offers a pleasant change from the dozens of products from the supermarket. And last but not least: a jar of homemade jam is a nice gift for family and friends.

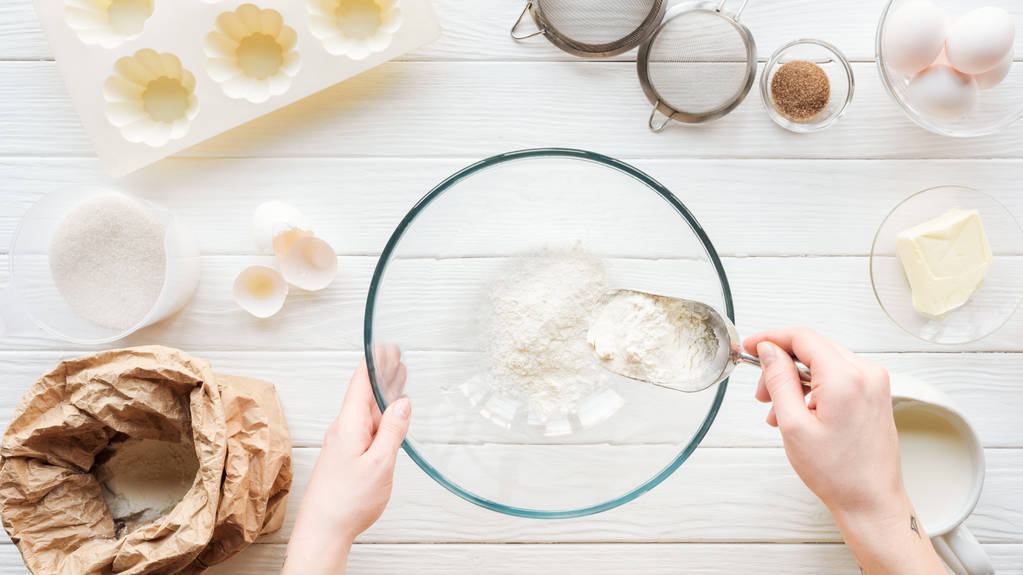
Must-haves for making jam

Ordinary kitchen utensils found in any good kitchen are enough to make simple jams. A stove, a kitchen scale, a measuring cup, and a whisk, and you are well equipped for jam making. You will also need jars to fill the jam into. This is the list of essentials. You need:

  • A large saucepan and a wooden spoon
  • A clean jam jar
  • 125 g preserving sugar (2:1)
  • 250 g fruit and/or berries
  • label sticker

With regard to the ingredients, the gelling sugar is important in addition to the fruit. Although you can also make jam with normal sugar, this requires a little experience and is not promising with all types of fruit. In the worst case, the jam then remains liquid or becomes rock hard when it cools down. The beginner should therefore resort to gelling sugar. In addition to the sugar, this also contains pectin as a gelling agent. With it, you can usually get useful results right away. Preserving sugar is available in most supermarkets. It is important to pay attention to concentration. However, with a little experience, it is also possible to cook jam without sugar.

The basic recipe for making jam

Classic jam sugar is mixed 1 to 1 with fruit. That means 100g of fruit and 100g of preserving sugar make a jar of jam. This variant naturally leads to very sweet jams, especially if the fruit itself already contains a lot of fructose. For those who prefer less sugar, there are also jam sugars for mixing ratios of 1:2 or 1:3 in well-stocked shops. With the latter, however, it may be that the jam only sets poorly. Beginners should therefore use the 1:1 or 1:2 variants, depending on their taste.

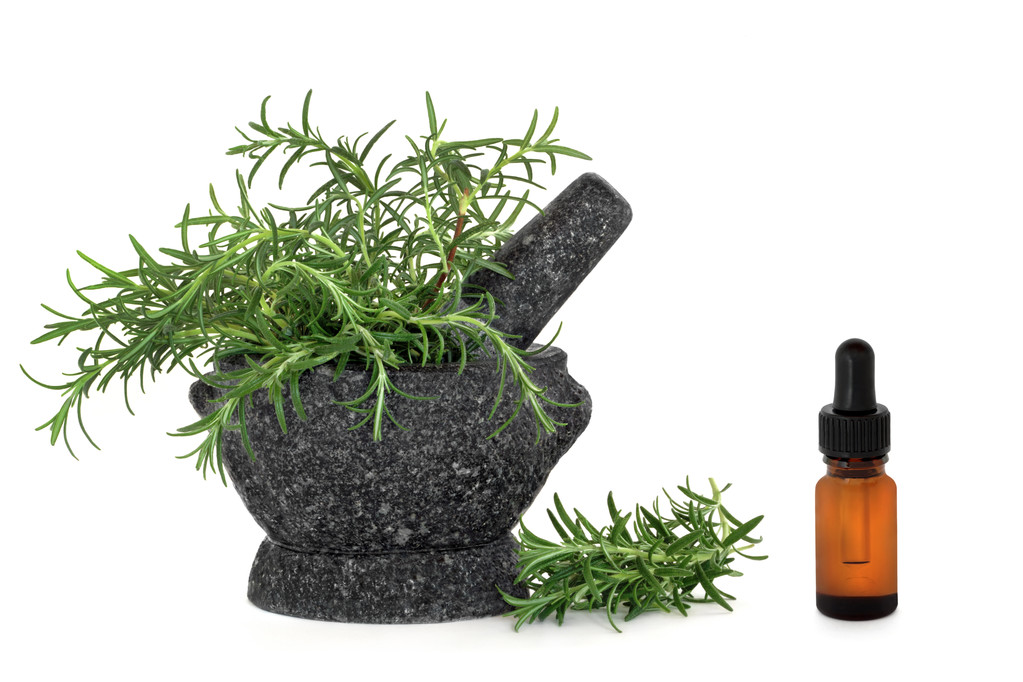
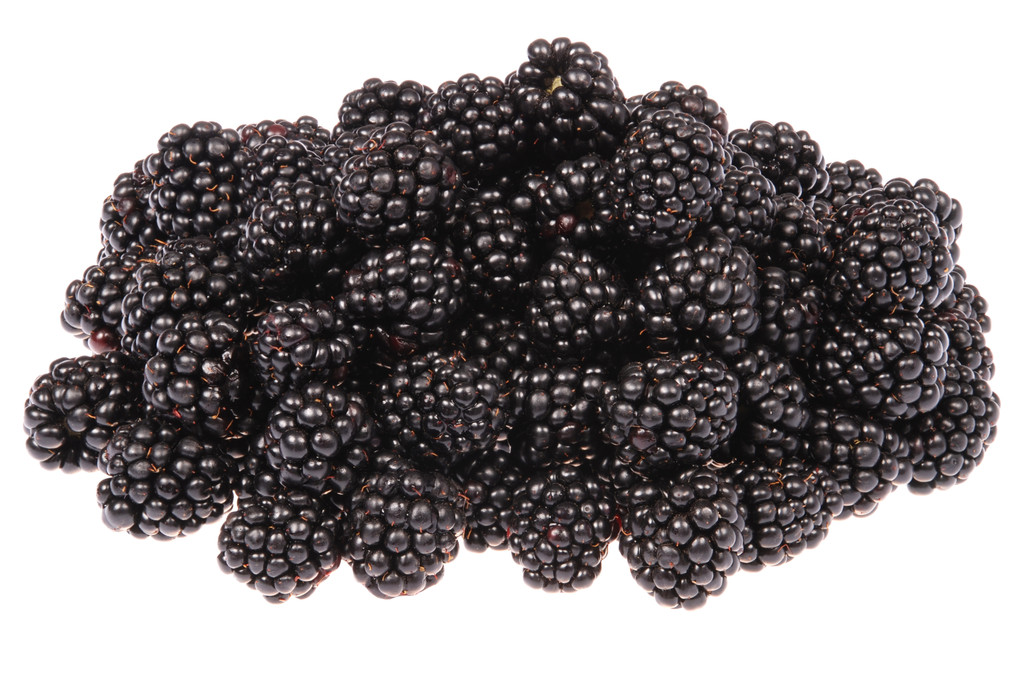
Finally, you need fruit. Frozen or fresh strawberries are recommended for beginners. They are readily available and easy to work with. In addition, this jam gels excellently, you can hardly go wrong. But also blackberries, gooseberries, apples, apricots, rhubarb, and many other fruits and berries are suitable for making jam, marmalade, and jelly.

Book tip for jam fans

This strawberry jam is delicious. If you would also like to try three healthy jam recipes to cook yourself, you will find what you are looking for with us. and for jam fans, there are jam recipes from grandma’s time as a recipe booklet. Well then, have fun with your own jam creation!

This is how to jam production succeeds

In the beginning, you should clean the jam jar with washing-up liquid, rinse it, and finally fill it with boiling water to disinfect it. This is very important for the later shelf life of the jam. The lid should also be cleaned with hot water or, even better, boiled. Then drain everything into the sink.

First, you should remove the greens from the strawberries and wash them. Then cut in half. Then they are weighed. For our example, we choose 250 g of strawberries. This is enough for a small jar of jam.

The strawberries are then placed in a saucepan and slowly heated. They are lightly crushed with a wooden spoon or whisk. Now the jam sugar can be added. 250 g for the 1:1 variant or 125 g for the 1:2 variant. The sugar must now be mixed well. Once it has dissolved, the temperature can be increased and the mass brought to a boil. Stir occasionally during cooking.

Instructions for making a gel test

After the jam has boiled for three to five minutes and is slowly thickening, you should do a gelling test. To do this, put a teaspoon of the boiling jam on a plate and leave it to cool. If the consistency is jelly-like, the jam is ready and can be filled. Close the jars tightly and turn them upside down. It will take a while for the jam to cool down and set completely. Then you can attach beautiful label stickers and write on the glasses. It’s that easy to make and preserve your own jam.

Useful for making jams yourself

With beautiful jars, making jam is twice as much fun! And pretty labels also look great. These things are especially useful if the finished jam is to become a gift. A jam funnel is ideal for filling the jam into the jars. Thus, the jam is filled much better in the jars. There are beautiful stainless steel funnels that are rustproof and dishwasher safe.

Easy preparation of applesauce and lots of tips for cooking the apples. We give you recipes and ideas with which you can easily make applesauce yourself with or without sugar.

Cook applesauce yourself

In autumn the trees bear many apples and the kilo of apples is also sold cheaply at the weekly markets. But what do you do with all the apples? Is there a better idea than making applesauce out of it and refining it according to your own taste? What would grandma’s potato pancakes be without the delicious mousse on cold days? Whether the classic recipe or a variant without sugar. Autumn just tastes better with the golden, warm happiness. We’ll show you how.

Quick instructions for applesauce

Separate the apples from the so-called core and cut them into small pieces. If desired with peeled apples. The smaller the pieces, the faster they will cook. Boil all the apple pieces in hot water until the apples are cooked through. Then puree the apple pieces with a food processor or a blender and then season with cinnamon and sugar. Try it as rice pudding with cinnamon, sugar, and apple sauce.

The basic applesauce recipe

Peel all apples and cut them into small pieces. Cut the apples into eighths and remove the core from each apple. Then put the apple pieces in a saucepan and heat up vigorously. Pour about 0.2 liters of apple juice per kilo of apples. Then cover and simmer until all the apples are completely soft. Puree all the apples with a masher or with a hand blender. Thin with a little apple juice as you like and season with sugar, cinnamon, and lemon juice. The applesauce tastes particularly good with pancakes with applesauce.

Useful information and special tips

Apples can also be cooked whole. After cooking, you can simply pass these whole apples through a sieve using a food mill. Depending on the apple variety, the applesauce can turn yellow to rust-red. This is due to the different fruit acids of the apple varieties and the color of the skin. The Boskoop apple is often used because it decays evenly and has a natural yellow color. The Berlepsch is suitable for apple allergy sufferers. Applesauce also tastes good as an accompaniment to sauerbraten and Christmas goose as well as in muesli and fresh grain porridge. A classic is also Kaiserschmarrn with cinnamon and sugar.

Refine applesauce deliciously

Instead of sugar, you can also use honey to taste. Some recipes add raisins or vanilla. You can also cook cloves with it. We recommend two cloves per kilogram of apples. This can be added very nicely with a tea egg in the saucepan. With pears, the apple sauce becomes an apple and pear sauce. Other fruits such as apricots or quinces are also good for refining. Apple foam is a dessert variation with applesauce. Here cream is mixed with the mush. Or you can mix it with beaten egg white to create even more foam. Apple foam is lighter and fluffier than normal mousse. Another great idea is Christmas applesauce.

Sugar-free variants save calories

You can also cook applesauce without sugar. You only use apples, water, vanilla, cinnamon, and lemon. Particularly gentle and with far fewer calories and is also suitable for diabetics. If you want a little more sweetness, but still want to save calories and remain tooth-friendly and suitable for diabetics, you can use sugar alternatives such as birch sugar xylitol or erythritol. Coconut blossom sugar also has slightly fewer calories than table sugar and gives the applesauce a slight hint of caramel in taste. Maybe you are also interested in a jam without sugar.

Preserve in screw-top jars

To preserve it, you can either freeze it or fill it in screw-top jars. For the variant with glasses, fill the still hot mush into jam jars. Then turn the glasses upside down. Once the jars have cooled, return them to their normal position, as you would with jam. The shelf life is at least one year if you work cleanly according to the rules of kitchen hygiene. Did you like our tips on applesauce? You might also be interested in cooking plum jam and making plum jam yourself.

Tips for making pudding yourself and recipes for a delicious vanilla pudding and chocolate pudding. Now make your tasty pudding yourself.

Who hasn’t bought and eaten a ready-made pudding in a cup or a powder mixture to mix? But what ingredients are actually in these finished puddings? Better to make it yourself! This is the only way we know the ingredients 100% and can cook the pudding according to our preferences. Whether vanilla, chocolate, nut or strawberry, or raspberry – every type of pudding is possible.

The pudding ingredients basic recipe

For a good pudding, we need a few basic ingredients: milk, cornstarch, sugar, and egg should not be missing in any pudding. For the individual pudding design, we then add vanilla, chocolate, raspberries, or, depending on your preference, strawberries to the pudding. The imagination knows no limits. Do you like to make your own desserts? Here you will find tips and recipes for making ice cream yourself.

Recipe for a vanilla pudding

  • 300ml milk
  • 200ml cream
  • 1 vanilla bean (a packet of vanilla sugar)
  • 60g sugar
  • 2 egg yolks
  • 40g cornstarch

Preparation for vanilla pudding

First, put 200ml of milk together with the cream in a saucepan and slowly heat it up on the stovetop.
Either add the packet of vanilla sugar or slit a vanilla pod lengthwise with a sharp knife and add the pulp and pod to the saucepan with the milk mixture. Then gently boil the milk mixture. Slowly stir in the remaining ingredients such as milk, sugar, the two egg yolks, and the cornflour. No lumps should form. Remove the vanilla bean from the boiling milk mixture and reduce the heat.

Then slowly stir the mixture of sugar, egg, and cornstarch into the hot milk and bring to a boil while stirring constantly. When the mixture thickens, remove the pudding from the heat and divide it evenly into small bowls. Incidentally, low-fat types of cow’s milk, constant stirring or stretching a cling film over the pudding help to prevent the skin on the pudding. The delicious pudding is placed in the fridge for an hour to cool down. Enjoy the meal! It tastes particularly delicious with hot raspberries or a delicious chocolate sauce. Did you like the recipe? Also, try our semolina porridge with cinnamon and sugar.

Variant for chocolate pudding

  • 50g dark chocolate
  • 300ml milk
  • 200ml cream
  • 50g sugar
  • 1 tablespoon cocoa powder
  • 2 egg yolks
  • 40g cornstarch

Preparation for chocolate pudding

Do you love the taste of chocolate? You can not only make chocolate yourself, but also chocolate pudding. Roughly chop the dark chocolate and slowly heat in a saucepan with 200ml milk and cream. While the mixture slowly begins to boil, use a whisk to mix the remaining milk with the cocoa powder, starch, and egg yolks in a bowl. Again, make sure there are no lumps left. Then slowly stir the mixture of sugar, egg, and cornstarch into the hot, boiling milk and bring to a boil while stirring constantly. When the mixture thickens, remove the pudding from the heat and divide it evenly into small bowls.

Rosemary tea not only tastes delicious, but also has a positive effect on your body and mind. In this article you can read how to prepare the healthy tea and how it works.

Nowadays, rosemary is mainly known as a spice. Rosemary is much more than a tasty kitchen herb that goes well with potatoes. Rosemary was already valued as a medicinal plant by the Greeks and Romans. Rightly so, as modern research shows. The healing properties of rosemary are versatile.

A popular way to benefit from the health benefits of rosemary is with rosemary tea. Here you can read how rosemary tea works and how to prepare the tea.

This is how rosemary tea works

Various essential oils are primarily responsible for the effect of rosemary tea. Furthermore, depending on the location, the following active ingredients are included:
Tannins such as rosmarinic acid
Diterpenes such as carnosic acid
flavonoids
glycolic acid
saponins
antioxidants
Rosemary has a variety of positive effects on our body, as various studies have shown:
Antioxidant: Researchers from Basel examined the antioxidant effect of rosemary in a comprehensive study in 2018. Antioxidants support your body in cell renewal, fight oxidative stress and free radicals.
Antibacterial: The same study also found that the active compounds in rosemary successfully eliminated various strains of bacteria, such as E. choli, in the laboratory.
Anti-cancerous: In the laboratory and in the first animal experiments, the active ingredients of rosemary were able to demonstrably inhibit the growth of tumor cells and thus reduce the size of tumors.
digestive: In addition, the ingredients have a positive effect on our digestion. Rosemary can relieve bloating and flatulence.
Stimulates blood circulation: Our circulation and blood flow can also benefit from rosemary.
Diuretic: Rosemary has also been shown to have a slightly diuretic effect. This can be used especially in the treatment of cystitis.
For the medicinal effects of rosemary, you can use rosemary oil as well as rosemary tea.

Rosemary tea for your memory

Not only the body can benefit from the healthy ingredients of rosemary. The effect of rosemary is also beneficial for our mind:
The carnosic acid it contains fights free radicals and toxins in the brain that are associated with the development of dementia. It contributes to the health of the human brain, as researchers at the Burnham Institute for Medical Research found.
In further investigations, researchers were able to prove in experiments with humans that 1,8-cineole, the main component of the essential oil in rosemary, has a positive effect on cognitive performance simply by absorbing it through smell and nose.
A study from 2016 therefore dealt with the therapeutic potential of rosemary in Alzheimer’s disease. Since the causes of dementia are still not fully understood scientifically, further research is required. Results so far indicate that rosemary could be a valuable component in the treatment of Alzheimer’s.
A study with students in 2018 not only found improved memory performance, but also a positive influence of rosemary on anxiety and depression. The quality of the subjects’ sleep could also be increased by rosemary.

Make rosemary tea yourself

So there are numerous reasons to drink rosemary tea. The preparation of the healthy tea is very simple:
For 1 cup (250 milliliters) you will need about 1 teaspoon of crushed rosemary leaves or a fresh sprig of rosemary.
Pour boiling water over the plant parts and let the tea steep for eight to ten minutes.
Then remove the boiled plant parts.
Rosemary tea also goes well with dried lemon or orange peel. Make sure the citrus fruits are organic to avoid pesticides.
Important: The daily dose of rosemary leaves should be between four and six grams maximum.

Blackberry leaf tea is a tried and tested home remedy for diarrhea. The leaves also contain valuable antioxidants. You can read here how the tea works and how you can make it yourself.

The real blackberry (Rubus fruticosus) belongs to the rose family and has long been used as a medicinal plant. The leaves of the climbing shrub are used for medicinal purposes. Blackberries originally came from the Mediterranean region, but are now widespread throughout Europe and large parts of the northern hemisphere.

In this article you will find out how blackberry leaf tea works and what ailments you can use it for. We have also summarized for you what you should pay attention to if you want to collect blackberry leaves yourself and use them to prepare tea.

This is how blackberry leaf tea works

Blackberry leaves are a valuable source of antioxidants. These substances support the body in cell renewal while fighting free radicals and reducing oxidative stress. These properties can also prevent cancer in the human body.
Due to the tannins it contains, blackberry leaves have an astringent effect. Therefore, blackberry leaf tea is used to treat acute diarrhea.
The leaves also have strong antimicrobial properties. They fight various bacterial strains, such as Helicobacter pylori, according to another study from the International Journal of Antimicrobial Agents.
Blackberry leaves have also traditionally been used to treat diabetes. Animal experiments with rats suffering from diabetes were able to demonstrate a blood sugar-lowering effect.
Blackberry leaf tea can also be used as a gargle to treat sore spots in the mouth and throat.
The following ingredients are mainly responsible for the medicinal effects of blackberry leaves:
Tannins, including tannins
flavonoids

There are no known side effects for blackberry leaf tea.

Prepare and use blackberry leaf tea
Blackberry leaf tea can help you with acute diarrhea and inflammation in the mouth and throat.

If your symptoms don’t improve after two days, you should still see a doctor. If you have other symptoms such as a high fever or blood in your stool, you should go to the doctor right away instead of resorting to home remedies.

For inflammation in the mouth and throat, you can drink blackberry leaf tea or gargle lukewarm.

How to prepare blackberry leaf tea:
Pour 250 milliliters of boiling water over 2 teaspoons of dried blackberry leaves.
Let the tea steep for five to ten minutes.
Then remove the plant parts.

You can get the dried leaves for blackberry leaf tea in any pharmacy. If you have planted blackberries in your own garden or a blackberry bush near you, you can easily collect and dry the leaves yourself.

You should pay attention to this if you want to make blackberry leaf tea yourself:
The bramble must under no circumstances be treated or left by the road if you want to benefit from its healthy ingredients.
Collect the leaves in spring when they are freshly sprouted. According to the Pharmacognosy Review, the young leaves have the highest active ingredient content.
Pick the fresh leaves and place them in a cotton bag. But be careful not to take too many from one branch.
Spread the picked leaves out on some newspaper in a dark place (attic, closet) to dry. It is important that the leaves do not get direct sunlight so that the active ingredients are preserved and no bitter substances are produced.
If you can easily crumble the blackberry leaves with your fingers, they’re dry. Then you can chop them up and store them in a jar in a dark place. The blackberry leaves can be kept for about a year in this way.
Blackberry leaves are also great for tea blends. The taste goes particularly well with fruity teas such as rosehip tea or apple tea.

Yeast from beer is an easy secret recipe for when you don’t have yeast at home. Be it for pizza, yeast braid or cake – we’ll show you how you can make yeast from beer yourself.

Yeast consists of microscopic organisms that make dough rise. Yeast is also an essential ingredient in beer – here it ensures that beer ferments. You can take advantage of this if you don’t have any yeast in the house and still want to bake something.

Note: Even though yeast consists of small organisms, yeast is vegan: they are unicellular fungi.

You only need three ingredients to make yeast from beer

The following ingredients replace about one cube of yeast. This amount is therefore suitable for about 500 to 1000 grams of flour.

What you need:
100 ml beer: Here you can use a beer of your choice, preferably naturally cloudy.
1 tbsp flour
1 tsp sugar
Recommended kitchen utensils:
1 small bowl
1 fork or 1 small whisk for mixing
1 kitchen scale or 1 measuring cup
1 jar or other container that you can seal

Make yeast from beer yourself: It’s that easy

Pour 100 milliliters of beer into a small bowl.
Slowly pour in the flour and sugar while whisking constantly. This will prevent lumps from forming.
If there are small lumps, try to crush them with a small fork and stir to break them up.
Pour the whole thing into a screw-top jar and seal it tightly. If you don’t have a screw-top jar handy, you can use another container like a food storage box or a bowl covered with a plate.
Set the beer-flour-sugar mixture aside and let it sit for several hours, preferably overnight.
Note: Use 100 milliliters less liquid for the recipe you want to use the yeast for.

Tip: You can use the rest of the beer to prepare a dish with beer batter, or you can mix up a tincture for your skin or hair – because brewer’s yeast is also good for this thanks to its healthy effects. Or you simply enjoy the rest on the balcony or by the window.

Yeast from beer or “normal” yeast?

Yeast that you can buy at the grocery store is a type of pressed yeast, and there are about ten billion yeast cells in a gram. In beer, yeast converts sugar contained in the beer ingredient malt into alcohol and carbonic acid. Yeast also contributes to the flavor of beer.

It doesn’t matter whether you use “normal” yeast from the supermarket or make yeast from beer yourself, there is no difference in taste. But the difference between the two types is the driving force: that of brewer’s yeast is somewhat weaker. So your dough will need a little more time to rise. Optionally, you can prepare a pre-dough that you let rise several times over several hours or freeze.

If you don’t yet know what you can do with the homemade beer yeast: how about a yeast braid with raisins or a plum cake? If you don’t like plums, you can also prepare a simple yeast dough and top it with fruit of your choice. If you want it hearty, we also have a recipe for pizza dough for you.

Another way to make your own yeast is to use dates or other unsulphured dried fruit to make yeast water. However, this alternative must rest for up to a week. Yeast substitutes such as baking powder are also suitable for some recipes. Making your own yeast from beer is easy and also quickly ready for use, which is a clear advantage for us over other variants.

Hop tea is not beer, but rather a tried and tested remedy. Hops have a calming effect and have a positive effect on our sleep.

Hops belong to the hemp family. Long before the plant was used to brew beer, it was valued as a medicinal plant.

Hops are now cultivated throughout Europe and in parts of Asia and America. The plant sprouts anew every year and climbs up to twelve meters. Hops are dioecious. This means there are male and female flowers. For hop tea you only use the female flowers.

This is how hop tea works

The most important active ingredients in hop tea include:
Bitter substances: humulone and lupulone
flavonoids
tannins
essential oils
The bitter substances in particular are said to have a calming and sleep-inducing effect. In the meantime, the effect of hops and its ingredients has also been extensively scientifically investigated:
The positive effect of hops on the human psyche was proven in a pilot study. Test persons who consumed dried hop extract daily for four weeks reported reduced anxiety, depression and a lower stress level compared to the placebo group.
In an animal experiment with quail, it was shown that hops regulate the day-night rhythm and improve sleep at night. The birds should have a comparable sleeping rhythm as we humans. However, it is unclear to what extent the data can be transferred to humans.
In addition to the calming effect, hops also have antibacterial and antioxidant effects, according to a 2019 study. The authors of the study conclude that hops extract could help against acne. Because of the same properties, hops are also often used in folk medicine for digestive problems and other complaints such as loss of appetite. However, research is still needed here.

Hop tea and other hop products

The main uses of hop tea include:
nervous restlessness
sleep disorders
anxiety states

In addition to hop tea, there are other ways in which you can benefit from the effects of the medicinal plant:
In the pharmacy you can get capsules or tinctures made from hops. Hop essential oil is used in aromatherapy.
Hops are also suitable for a soothing bath for mind and body. To do this, boil a liter of water, pour it over 20 grams of hop blossoms and mix it into your bath water.
Another option for better sleep is a scented pillow filled with hop blossoms. You can just put that next to your pillow.

How to prepare hop tea

For the soothing tea you use the female flowers of the hops. You can recognize them by growing cone-shaped, spike-like bud sites, while male flowers hang more loosely. You can easily prepare hop tea yourself:
Pour 250 milliliters of boiling water over 2-3 teaspoons of dried female hop flowers.
Let the tea steep for five to ten minutes.
Then remove the plant parts.
You can have three cups a day. To help you sleep better, you should drink the tea about half an hour before you go to bed.

To increase the calming effects of hops, you can combine them with valerian or St. John’s wort. Lavender and chamomile are also good.

Self-made manure plants can be used in many ways. Used correctly, they fertilize the soil, strengthen your vegetables and drive away pests such as aphids.
Plants that are well suited for preparing liquid manure are, for example, nettles, comfrey, field horsetail or tansy. Onions or nasturtiums from your vegetable garden are also suitable.
These plants nourish your garden soil and the heavy-duty plants in your garden, like tomatoes, squashes, and zucchini, with nutrients like nitrogen, calcium, iron, and magnesium.

At a glance – fertilizing with nettle manure

Nutrients included: nitrogen, calcium, iron, magnesium
Ideal for: tomatoes, squash, courgettes, peppers, cauliflower, cucumbers, potatoes, many other types of cabbage
Slurry not suitable for: peas, beans, lamb’s lettuce, all herbs
Quantity: Ratio of liquid manure to water 1:10; Use approx. 2-3 times per season

Prepare nettle manure

Fill a barrel or barrel about two-thirds full with the coarsely chopped nettle plants and pour in rainwater to about a hand’s width below the rim. Cover the jar with wire mesh or cloth to keep birds from falling in, or place a large branch or board in the bin to help birds find their way out. The addition of a handful of rock flour can bind the odor development somewhat. Stir the manure every 2-3 days. If the liquid has turned dark after about two weeks and no longer foams when stirred, your liquid manure is ready.

After just a few days, the fermentation process begins, which, however, is accompanied by a significant odor development. If you have the opportunity, you should set the vessel a little apart.

Field horsetail – use the stubborn weed as manure

Where horsetail grows, it is a very stubborn herb. Field horsetail can only be driven away through long-term and intensive tillage. During this time, however, you can make the herb usable by using it for a plant manure. The high content of silicic acid makes it an effective remedy against aphids and also as a preventative against fungal attack on e.g. roses.

Put the horsetail manure in the same way as the nettle manure and fill a bucket with two thirds of the plant and fill the bucket with rainwater up to just below the edge of the bucket. Leave the brew for 24 hours and boil the liquid with the herb for 20 minutes. When boiling, the silicic acid is released from the field horsetail and is thus contained in the irrigation water. Let the brew cool down and use it to fertilize your plants or spray them to protect against pests.

Spread liquid manure

Dilute the manure with water in a ratio of 1:10. It is best to use the watering can without a watering attachment so that you can apply the liquid manure at the point where the plant comes out of the ground.

Plant manure should not be applied in sunshine, as it can otherwise burn the plants. The best time to apply liquid manure is early in the morning.

Fight pests with nettle manure

Manure or a brew made from stinging nettle or field horsetail is also suitable as a remedy against aphids because of its high proportion of silica if you spray your plants with it as a preventive measure or after the infestation has started in the appropriate places. You should definitely dilute the liquid manure, otherwise it will be too strong and burn your plants.

A brew consists of the same ratio of plants and water as a liquid manure. However, this only takes about 12 hours and is therefore better suited for generously spraying the leaves.

Caution: If it rained shortly after spraying your pest infestation, the effect will have worn off and you should apply the diluted manure again and spray your plants.

Buckwheat milk is a sustainable alternative to cow’s milk. Buckwheat is also not a nut and is therefore an ideal substitute for nut milk for allergy sufferers. We’ll show you how you can easily make the plant drink yourself.

The healthy pseudo-grain buckwheat is a good source of vegetable protein. With its essential amino acids, fiber and minerals as well as flavonoids, buckwheat is good for digestion and blood vessels.

Buckwheat milk is a good alternative to animal milk and plant-based drinks made from nuts. It is also gluten and lactose free. People with an intolerance or allergy can therefore drink and use buckwheat milk without any problems. In terms of taste, buckwheat milk can be classified as slightly nutty.

Ingredients: You need this for your own buckwheat milk

For 500 milliliters of buckwheat milk you need:
50 grams of buckwheat
about 500 ml water (the amount of water affects the thickness of the milk)
2-4 dates or another sweetener like maple syrup
1 pinch of salt
Optional: spices such as vanilla, cardamom or cinnamon
recommended kitchen utensils:
Key
measuring cup
food processor, blender or blender
Nut milk bags (you can also make nut milk bags yourself) or cheesecloth
Glass bottle with lid for storing the milk

Preparation: It’s so easy to make buckwheat milk yourself

You can make buckwheat milk in just a few steps:
Soak the buckwheat in water for several hours, preferably overnight. Put the buckwheat in a bowl and fill it up with enough water.
Drain the water and rinse the buckwheat well.
Blend the buckwheat on high until it forms a kind of puree.
Add the dates, season to taste and briefly mix the mixture again.
Prepare a bowl and hold the nut milk bag or strainer over it. Fill the mixture into the bag and squeeze it until all the liquid has dripped out of the bag into the bowl.
Pour the liquid into a sealable glass bottle.
Store the homemade buckwheat milk in the fridge. It stays there for a few days.

Tip: You can process the remaining buckwheat. Spread it out on a plate or cloth and let it dry. If you want, you can mix the dried buckwheat again. You can then use the result as a kind of buckwheat flour in recipes such as buckwheat bread or buckwheat pancakes.

Conclusion: Every milk alternative has different properties. Some are sweeter or nuttier in taste, have a creamier or waterier consistency, are better for coffee or baking, and have different ingredients. Every plant drink has its own advantages and disadvantages. It is not possible to say exactly which milk is the most sustainable. It is important that you pay attention to the country of origin and an organic seal for the raw materials.

Rice flour is a gluten-free type of flour that you can use for cooking and baking. In this article you will find out what you should consider when using it and how you can make your own rice flour.

Rice flour: properties and uses

When making rice flour, machines grind raw rice grains into a fine flour. If polished rice is ground, you get a snow-white flour. Brown rice flour, on the other hand, is made from whole grain rice. Since the shell is preserved here, this flour is richer in minerals and vitamins.

Rice flour is often used as a binding agent in Asian dishes, especially for sauces and desserts

Rice flour is only suitable to a limited extent as a substitute for wheat flour. It is not suitable for fluffy pastries such as muffins, biscuit bases etc. Since the flour lacks gluten, the dough would not rise in the oven. However, you can use rice flour for flat pastries like flatbread.

If you want to bake gluten-free bread, it is advisable to combine rice flour with other gluten-free flours. So wheat flour cannot be replaced 1:1 with Asian flour. It is therefore best to consciously use gluten-free recipes when baking.

How healthy is rice flour?

According to the Federal Institute for Risk Assessment (BfR), rice and rice products contain relatively high levels of inorganic arsenic compounds. These are considered carcinogenic. The BfR therefore recommends consuming rice in moderation and alternating it with other types of grain as part of a balanced diet. Parents in particular should take this into account when feeding small children.

Also make sure to buy organic rice flour. So you can be sure that farmers did not use synthetic pesticides during cultivation.

How to make your own rice flour

You can easily make rice flour yourself. It is up to you which type of rice you want to use. Usually rice flour consists of long grain rice. A grain mill is best suited for the production. However, since rice is softer than wheat, the grinder should be able to grind very finely. Otherwise the grains will be too large and the flour will become crumbly.

If you don’t have a grain mill, you can also grind rice flour in a stand mixer. Be careful not to add too many grains of rice to the blender at once. Otherwise, less powerful devices in particular can quickly become clogged. Therefore, only add one to two cups of grains of rice to the blender at a time. Then, on high, grind the grains into a fine flour.

Alternatively, you can grind rice in the coffee grinder. Slowly add the rice to the mill, spoonful by spoonful, so that nothing gets clogged here either. Then put the flour in an airtight container (e.g. a mason jar) and store it in a dry and cool place.