Tag

make

Browsing

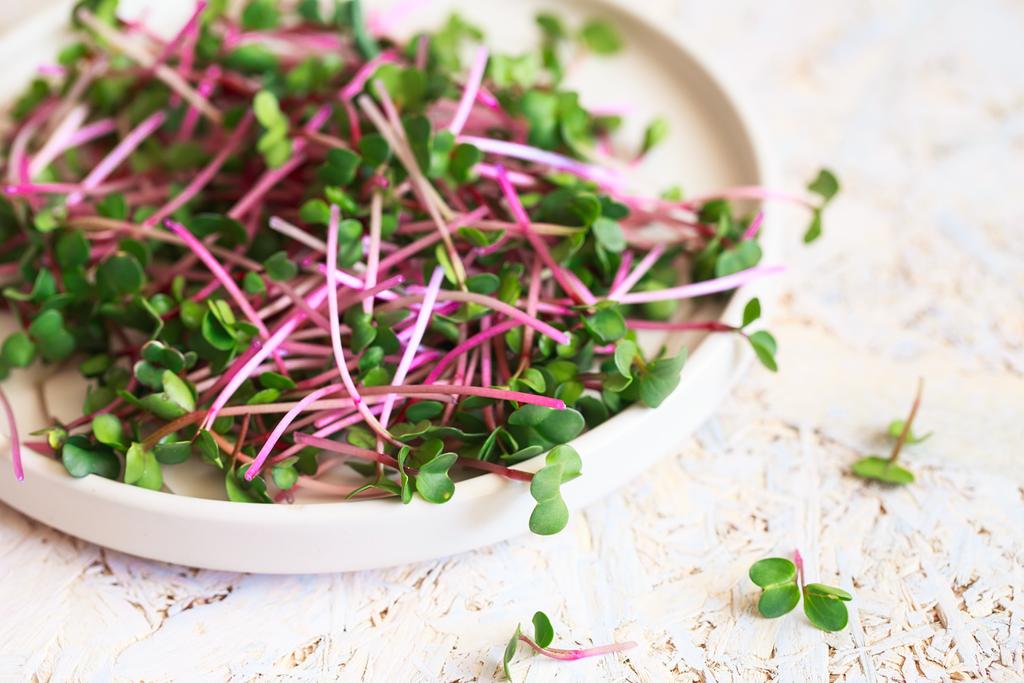
Making a sprout glass yourself is not difficult and also much cheaper than buying one. You can easily make the sprout jar from an old pickle or jam jar.
Make sprout glass yourself: you should know that

Many online shops and supermarkets offer sprouting glasses. But why spend money on it when you can easily make the glass yourself? We will show you a method without plastic or special equipment.

You need this:

a glass
a felt-tip pen to mark holes
a small drill or a can prick
sandpaper or a file
sprout seeds of your choice
possibly a thick piece of cardboard as a holder
By the way: Many instructions use tulle or fly screen fabric for DIY seed jars. Our method is more sustainable for three reasons: firstly, tulle is often made of plastic, secondly, you can use the lid of the jar with our method, and thirdly, you don’t have to buy any new materials.

Make your own seed jar: Here’s how

The first thing you should do is sterilize the jar. For example, put it in boiling water for ten minutes.
On one side of the lid, mark out holes about ½ to 1 inch apart. You don’t have to work on the other side, as the sprout glass will be crooked later.
Then get your pick or a small drill. Poke or drill small holes in one half of the lid. The water later drains off this. Make sure that the holes are not too big, otherwise the sprouts can slip out of the sprouting jar.
Now use some sandpaper or a file to smooth out sharp edges on the holes.
Note: Readers have reported that the cut edges can rust at the holes. So sand them down very carefully. Alternatively, you could use a piece of plastic mosquito net or a piece of loosely woven cotton cloth that you can then wash out.

Fill the sprout glass and set it up

Thoroughly wash the sprout seeds and put them in the jar. If you have something you can use to set the jar up at a 45 degree angle, skip the following step.
Now build a holder for the sprout glass:
To do this, place the bottom of the glass on a thick piece of cardboard. Place it so that it is only halfway up the box. Now trace the outline of the floor with the felt-tip pen.
Cut out the resulting semicircle.
Now draw an elongated rectangle on the cardboard with the hole. The semicircle should form one of the short sides. You will later place the glass in this semicircular bulge.
Cut out the rectangle.
If you fold the resulting strip in the middle, you can use it as a support for the glass. This standing aid ensures that all water drains from the glass and that no mold forms.
Place the sprouting glass in a can or in the sink for the first few hours. This allows the water that is still clinging to the rungs after washing to drain off. Later it is sufficient to place a kitchen towel under the can.

Now place your homemade sprout glass in a bright and warm place. After just a few days, your sprouts should have grown enough for you to harvest them. You can use the glass over and over again.

We often wash our laundry with the usual chemical detergents. But most of them are not good for our environment. That’s why we’ve collected ideas for making your own laundry detergent. For environmentally friendly detergent alternatives.

If you no longer want to use chemical detergents, then the following alternatives to making your own detergent are just right for you. At the same time, you are doing something good for yourself and your environment. In addition, these are cheap and quick to make yourself.

Washing clothes with great detergent alternatives

Environmental awareness is growing steadily and with it the interest in alternatives to chemical detergents. A customer survey by the German Institute for Service and Quality also revealed that customers have high expectations of their detergent. Many consumers are dissatisfied with the environmental aspects of their detergent. That is why we have collected effective and environmentally friendly detergents that you can make yourself.

1) Detergent made from baking soda

A well-known household remedy is a baking soda. Because it can be used in many areas. So also for washing clothes. There are different possibilities of application. You can simply put the baking soda in the detergent drawer and start the wash cycle. Or put the powder directly into the laundry drum. Accordingly, it cleans your laundry and neutralizes bad odors. It also serves as a fabric softener. The miracle powder also softens the water and prevents calcification. Also, note our article on descaling washing machines and dishwashers.

2) Clean clothes with vinegar

You can also use the popular household remedy vinegar. Because you can use it to remove unpleasant odors. In addition, vinegar can remove limescale residue from your clothes. This makes it cuddly soft and you can do without a chemical fabric softener. The use of vinegar is particularly suitable for effectively washing and caring for bed linen. To do this, add half a cup to a full cup of vinegar to the fabric softener compartment.

3) Washing clothes with ivy

Slightly soiled clothes are excellent for washing with ivy. Because the saponin contained in ivy ensures radiant cleanliness. Consequently, you can collect dark ivy leaves on your next walk. You can then put the leaves in the washing machine. To do this, put about 10 leaves in a laundry bag or sock. Then put them in the laundry drum. This detergent alternative is particularly suitable for dark and colored laundry. Also, note our article on making ivy offshoots quickly and easily.

4) Soap nuts as an alternative detergent for allergy sufferers

The cleaning soap nuts of the soap tree come from Asia and have been used for cleaning in India for some time. They are therefore an effective, environmentally friendly alternative. You can use them to remove light dirt and grease from your clothing. At the same time, they are well tolerated. Therefore particularly popular with allergy sufferers and recommended for neurodermatitis diseases. They can also be used at all temperatures. Only in the case of very stubborn dirt should you use our other alternatives. The only drawback is their carbon footprint. Because the transport routes are long.

5) Washing clothes with chestnuts

The chestnuts growing here have a better CO2 balance. Because you can collect them in autumn. And use it to do laundry all year round. Chestnuts serve as an alternative to detergent because they contain soap-like substances, saponins. So gather the chestnuts and break up a handful of them with a hammer or nutcracker. Then put them in a jar. Then pour boiling water over them. And let the mixture work overnight. You can now wash your clothes with the resulting liquid suds. Also read our article on the most common mistakes when doing laundry.

6) Make liquid detergent yourself

DIY detergents are becoming more and more popular. The best-known recipe for making your own detergent is liquid detergent. For this, you need 4 tablespoons of washing soda or baking soda, a small handful of grated curd soap, water, and a few drops of essential oils. Then you first have to heat the water in the kettle or pot. Then mix the ingredients together while stirring constantly. After everything has cooled down, you can fill in the homemade detergent and add the essential oil. Also, note our tips for washing and caring for laundry.

7) Make washing powder yourself

If you prefer washing powder, you can also make your own. For this, you need baking soda and an effective pure washing soda. Depending on how much stock you want to prepare, take two equal parts (e.g. 150g baking soda and 150g washing soda) and 100g grated curd soap. Then mix the ingredients and add about 15 drops of essential oil. This will give your washing powder a fresh scent. If you like, you can also add 100g of dishwasher salt. Because that should ensure softer water. Then put the finished powder in an airtight container. For washing clothes, put 1-2 tablespoons in the detergent compartment.

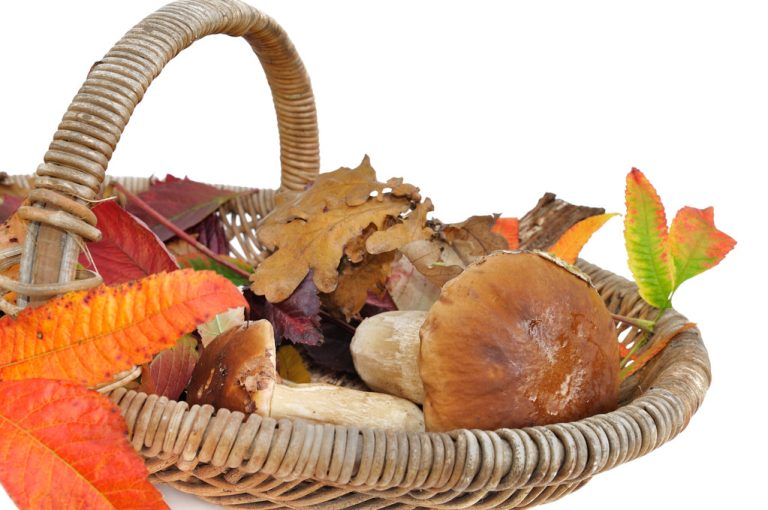
Porcini mushrooms cannot be grown commercially, so they are not available fresh all year round. However, if you dry porcini mushrooms, you can preserve them. We’ll show you how.

Drying porcini mushrooms: the right preparation

Before you dry the porcini mushrooms, you should take the following precautions:

Dry the mushrooms as soon as possible after picking. This is the best way to preserve their aromatic taste.
Wet porcini mushrooms are not suitable for drying, as they easily mold. Therefore, only clean the mushrooms with a slightly damp cloth before drying. You can also scrape off dirt with a sharp knife.
Cut out any eaten spots on the porcini mushrooms. The best way to dry porcini mushrooms is to cut them into slices three to five millimeters thick.
Now you can decide, because there are two ways to dry porcini mushrooms without a professional dehydrator: in the air or in the oven.

Air dry porcini mushrooms

Air-drying porcini mushrooms is the easiest and most environmentally friendly option. However, you need the right weather for it. The air drying process only works when the weather is dry and as hot as possible. How to do it:

Thread the porcini slices on a thin thread or spread them out on a baking sheet. The mushroom pieces should not touch each other.
Dry the porcini either in full sun or in the shade. The former speeds up the drying process, but the latter is gentler and better preserves the aroma of the mushrooms.
If the mushroom slices are on a baking sheet, you should turn them several times a day. If you dry the mushrooms outside, you also have to bring them inside in the evening, otherwise they could absorb moisture from the cool night and morning air.
The duration of the drying process varies depending on the weather. The dried porcini mushrooms are ready as soon as they are dry on the inside but can still be bent. They also rustle like dry leaves.

Drying porcini mushrooms in the oven

Drying in the oven requires more energy. Proceed as follows for the drying process in the oven:

Spread the porcini slices on a baking sheet and place in the oven.
Then let the mushrooms dry at a maximum of 50 degrees and circulating air. Important: Hold the oven door ajar with the handle of a wooden spoon so that the moisture in the mushrooms can escape into the oven.
With this drying variant, too, the duration of the drying process varies depending on the performance of the oven.
Tip: If you have a stove with a stone plate, you can also let the porcini mushrooms dry on this plate while the fire burns in the stove. This way you don’t use any additional energy.

Properly store dried porcini mushrooms

You should store dried porcini mushrooms in airtight jars in a dark, dry place.

Stored in this way, dried porcini mushrooms will keep for several years. If they get a slight gray tinge after a while, this is harmless: they are leaked minerals.

Useful tips for caring for faded plastic in the car and making plastic parts look new. With these home remedies and professional tricks, your plastic parts will be beautiful and presentable again.

Who doesn’t know this: Over time, the plastic parts on and in the car fade. But this problem is easy to prevent and fix. In the following, you will find out what you need for this and how you can help your plastic parts to shine again.

1) Clean plastic parts

First, you should clean the bleached plastic. Wet cleaning cloths, for example, are suitable for the plastic parts in the interior of your car. There is also special cockpit cleaning wipes for this purpose. Then it’s best to wait until everything has dried really well.

Make your own cleaning spray with home remedies

If you like, you can also make your own cockpit care spray for the faded plastic in the car. Here you can use the universal household remedy vinegar for cleaning. It is best to dilute it with a little water and fill it in a spray bottle.

For a more pleasant smell, you can use essential oil with a scent of your choice or air the car well after cleaning. Alternatively, you can use diluted washing-up liquid to clean your car’s interior. This is more pleasant in smell and you don’t have to buy extra essential oil if you don’t already have it at home.

In combination with a soft cloth, you can use the spray to clean all plastic parts in your car: Spray on, leave to work for a short time and then wipe off with a damp cloth. Afterward, you can take a little vegetable cooking oil, for example, linseed oil or sunflower oil, and rub the cleaned fittings with it.

2) Processing and maintenance of the plastic

After cleaning the plastic, the processing and care begin. It is best to use a clean cloth for this. Which remedy you apply now depends on the condition of your amateurs. If the plastic is only faded and shows slight signs of wear, you can make your car interior presentable again with a simple silicone spray or special oil. Simply rub the plastic parts with it and let it take effect.

Buy silicone spray

As with all products, there are differences in handling and quality with silicone sprays. If you like, you can get advice at the hardware store and shop locally. The comparison winner in some tests is otherwise a silicone spray from Würth, which you can buy online here. At the same time, you can buy a special disinfectant spray as a remedy for a smelly air conditioner. In case your air conditioner stinks.

3) Refresh color

If the color of your plastic parts has faded so much that silicone sprays and other care products are no longer sufficient to achieve the color you want, you can also buy a special plastic dye. You should apply this evenly to the previously cleaned fittings according to the instructions on the package. Already you get a depth of color that achieves a new-looking effect. When using plastic dye and glue, be careful to avoid toxic fumes.

The yellowed laundry looks unkempt. But how can you effectively clean yellowed laundry and make yellowed clothing white again? To make this work, we have collected the best home remedies for removing the yellow cast. As a result, yellowed shirts and dresses are a thing of the past.

Especially on special occasions, white and clean shirts are needed. Of course, it’s uncomfortable when the suit has been hanging in the closet for years and the shirt collar is now yellow. Then it’s time to clean your yellowed laundry.

Why does laundry get a yellow tinge?

Yellowed laundry or a gray haze over the white laundry is annoying. Because we prefer our laundry to be sparkling white and clean. But why is my laundry yellowing? The reasons for yellowed and gray laundry are mostly the wrong care. It is possible that you use the wrong products for your laundry or wash them incorrectly. Too low a temperature when washing or a washing machine that is too full can also prevent your laundry from being brilliantly white. Also, note that you should wash sensitive clothing by hand.

Home remedies for cleaning yellowed laundry

But not only the wrong care can cause a yellow cast. Long storage in the closet also causes yellowed shirts. Shirt collars in particular discolor quickly. Then simple home remedies will usually help you get your yellowed laundry white again. Also, note the tips for washing yellowed curtains and curtains.

1) Use of vinegar

If you want to get yellowed laundry white again, then clean it with the household remedy vinegar. To do this, fill the sink with water and add half a cup of vinegar. Then let the affected laundry soak in for about 30 – 40 minutes. Then wash everything with clear water. During the whole process, you should pay attention to the washing temperature. Because it shouldn’t get too hot.

2) White laundry thanks to baking soda

You can also use the all-rounder baking soda instead of vinegar. Accordingly, put half a cup of baking soda in the full sink. You can also put the baking soda directly into the detergent compartment of your washing machine and thus clean the yellowed laundry. You can also use the home remedy baking powder.

3) Clean yellowed shirts with soda

Soda is an environmentally friendly detergent alternative. Since washing soda is alkaline, you can use it to make your yellowed laundry white again. However, you should not use it to wash animal fibers such as wool or silk. Because they can break it. Consequently, only wash synthetic fibers or cotton with this product. For this, add a teaspoon of the soda to the usual detergent. In addition, read our tips on washing and caring for wool.

4) Citric acid against yellowing

The use of citric acid also helps you to clean your yellowed laundry. To make your laundry bright white again, fill the sink with water and put the yellowed laundry in it. Then add 1/2 to 1 cup of citric acid and let it sit. Finally, wash your laundry as usual.

5) Milk as a natural bleach

You can also turn yellowed clothing white again with a mixture of milk, water, and ice cubes. Even our grandmothers took advantage of this. To do this, you have to leave the yellowed or graying clothing in the mixture for several hours. However, you should only use this to clean shirt collars. Because the production of milk is usually associated with animal suffering and there are enough alternatives.

6) Clean shirt collar with shampoo

If you need to clean your shirt collar, you can use shampoo or shampoo. Because it dissolves the body fats from the clothes. So you are prepared for the next wedding invitation. So spread the shampoo on the collar with your fingers and let it work. Then put it in the washing machine.

7) Bleaching agents against yellowed laundry

With bleach, you can make your yellowed laundry white again and yellowed shirts can also shine in a new white. To do this, buy them in the drugstore and add them to the white laundry when you wash them. However, the use of bleach is controversial because it pollutes the environment. Therefore, it is better to choose environmentally friendly alternatives and note our other tips for environmental protection in the household.

8) Heavy-duty detergent for cleaning yellowed laundry

Whether yellowed shirts or T-shirts with the heavy-duty detergent you get them well cleaned. Because it contains bleach to lighten white laundry. If you use the heavy-duty detergent, wash your laundry at the highest possible temperature (stated on the label) or use an intensive program on your machine. Also, the machine should not be loaded too fully. This improves the washing result. In addition, also note the most important tips for doing laundry.

Clever tips for making carpet non-slip. If you fasten the carpet to the floor, you can ensure more safety in the household. You also prevent the carpet from curling.

Anyone who has children or animals in the house knows the danger of slippery carpets. The children quickly run over it and slide away. In the worst case, they can injure themselves. That’s why you should make your carpet non-slip.

Make non-slip carpet yourself

There are now many non-slip runners or anti-slip mats to buy. But what if your favorite carpet is not a non-slip carpet? Do not worry! Because you don’t have to throw it away right away. Instead, you can make your beautiful carpet non-slip yourself and thus ensure more safety in the household. You can use one of the many tricks for this. Also, use helpful tips for carpet cleaning.

1) Use rubber rings for more security

It is very annoying when the carpet keeps slipping. But there is a simple trick to keep your carpet from slipping. For this, use simple rubber rings, which you otherwise use for preserves. Then glue these to the corners of your rug. And he’s not slipping anymore. Also, note tips for getting carpet fringes neat.

2) Make carpet non-slip with double-sided tape

Similar to the rubber rings, the double-sided tape will help you. So stick the tape on several spots on the back of your carpet. You should definitely attach the adhesive tape to the corners. As a result, you have a non-slip and safe carpet. Also, note how you can freshen up carpet colors.

3) Use a special slip spray

You can use a special spray to prevent your carpet from slipping in the future. All you have to do is spray the back of your carpet with it. Then slipping is effectively prevented. Also, note effective tricks for removing long hair from carpets and tips for keeping carpets fresh for longer.

4) Buy a non-slip adhesive mat

You can also buy many different non-slip underlays for your carpet online. These are made of rubber and are cheap. And the good thing about these sticky mats is that you can easily cut them to fit your carpet. So it fits perfectly underneath. In addition, note the tricks for repairing dents in the carpet.

Findings from a new study by researchers from Bristol, London, Würzburg and Munster question the much-touted effects of caffeine. According to the research, coffee (or tea) does not provide consumers with an energy boost or a caffeine hit. Strictly speaking, coffee consumption in regular coffee drinkers only prevents the tiredness and listlessness that would result from caffeine withdrawal.

Does coffee really wake you up? The study was conducted with 379 participants, including both non-coffee drinkers and regular coffee consumers. After a 16-hour caffeine abstinence, participants were given either caffeine pills or placebo pills. Subsequently, the self-assessed attention and performance of the subjects were determined. Some of the regular coffee drinkers who had taken a placebo complained of headaches and felt tired. People who rarely or never drink coffee, on the other hand, had no problems after taking a placebo. Coffee drinkers who received a dose of caffeine felt normal afterwards, their levels were normal. Overall, none of the test groups’ performance values ​​were higher than those of the non-coffee drinkers with placebo. Accordingly, it can be concluded that there are no benefits for activity or performance from caffeine consumption.

Anyone who cannot start the day without coffee has made a mistake about the effects of caffeine. In principle, caffeine can wake you up because it docks onto receptors for the body’s own tiredness molecules called adenosine and blocks them. However, coffee no longer has a really stimulating effect, especially for regular coffee drinkers. On the contrary: a body that is used to regular caffeine consumption reacts to withdrawal with symptoms of fatigue, headaches or a feeling of reduced performance. So the caffeine only has a balancing effect on the symptoms that arise from “caffeine addiction” or habituation. The effect of caffeine on people who drink coffee regularly or a lot is reversed, the stimulation that coffee drinkers feel is felt. The scientists have thus reduced the illusion of coffee as a stimulant. However, this will hardly affect the popularity of the drink…

Masala Chai is a mixed drink originally from the Asian area. The Indian word “Masala” can be roughly translated with “spice mixture”, with the “chai” being derived from the Chinese word “Chá” for tea. Masala Chai consists of black tea, sugar or honey, milk and a special spice mixture and is particularly popular because of its stimulating effect. Chai is a good alternative for latte macchiato lovers.

Masala Chai – a special kind of tea drink
Masala Chai is the national drink in India and is also celebrating its trendy in Europe as a trend drink. In addition to self -preparation, the acquisition of tea bags in tea shops and coffee shops, Masala Chai can now also be obtained as a capsule for the Nespresso coffee machines.

Masala Chai – a drink with many recipes

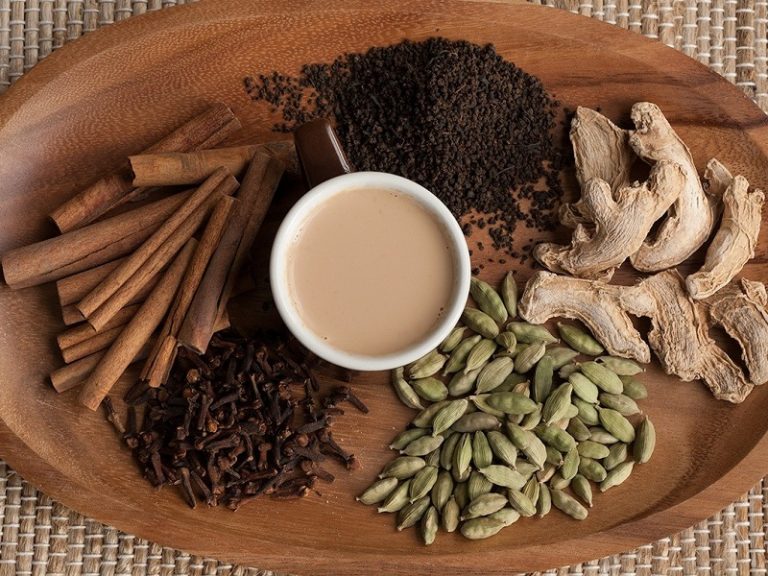
The classic ingredients for the Masala Chai include a strong black tea, which is often brewed from a strong assam, as well as milk, sugar or other sweeteners. However, the special aroma is awarded to the Masala Chai by the spice mix that varies from family to family in India. Traditional spices for the Masala Chai are cloves, cardamom, anise, fennel seeds, cinnamon and ginger that can be found in almost every recipe variation. The spices used, especially as a stimulating mode of action, develop. Cardamom in particular should have a positive effect on life energy and digestion after teaching.

The fact that almost every family has handed over their own recipe for the Masala Chai, peppercorns, Indian laurel leaves and nutmeg can also be considered as seasoning ingredients. Instead of sugar, honey is also used as a sweetener depending on the region and taste.

Traditional preparation of the Masala Chai

For the preparation of a Masala chai, the water is boiled with the milk, sugar or honey and spices. The tea leaves are only added after a cooking time of about a minute. After a drawing time of at least ten minutes, the Masala Chai is piled up and served through a sieve. Here is the recipe:

3/4 cup of water
2-4 green cardamom capsules to smash (comes from the ginger family family)
1-2 thin slices of fresh ginger
4 cloves
1 cinnamon stick
A pinch of anis
3/4 cup of milk
1 teaspoon black tea leaves
Sugar or honey to sweeten

However, before the Masala Chai is drunk in India, he receives its typical creamy consistency by creating several times with a trowel and the foaming. As a rule, you let it pull around 5 minutes in total. Furthermore, tea is generally poured in India from the cup to the saucer to cool and drink the drink. Tip for summer: prepare in large quantities and enjoy it cold.

Pumpkin Spice Latte is a popular hot drink, especially in the fall. We’ll show you how easy it is to prepare your own Pumpkin Spice Latte.

In order to drink Pumpkin Spice Latte, you don’t have to go to a joint of controversial multinationals like Starbucks. In this article we will show you how you can make the popular hot drink yourself.

Making Pumpkin Spice Latte yourself has many advantages:

You decide for yourself which ingredients you use.
There is less waste from disposable cups.
You can use less sugar.
you save money
Tip: You can prepare the Pumpkin Spice Latte particularly quickly if you have Pumpkin Spice and pumpkin puree in stock.

Pumpkin Spice

Mix all of the spices together according to the instructions in the Pumpkin Spice: Spice Blend Recipe article. Store the autumnal spice in tightly closed jars in a dark, cool and dry place.

pumpkin puree

You can also easily make the pumpkin puree for your Pumpkin Spice Latte yourself. In the article Fine pumpkin puree: How to make it yourself, you will find out how it works. Keep the fresh pumpkin puree tightly closed in the refrigerator. Stored cold, it stays fresh for up to five days. Alternatively, you can freeze it in small portions. Tip: Use ice cube trays to freeze, as you only need a tablespoon of pumpkin puree to make one serving of Pumpkin Spice Latte.

Pumpkin Spice Latte: The Recipe

Ingredients:

1 teaspoon nectar
1 tbsp Pumpkin Spice
1hot espresso
150 ml milk or foamable plant drink
1 tablespoon pumpkin puree

Directions:

Place 1 teaspoon of agave nectar in a small bowl. Note: If you like your Pumpkin Spice Latte unsweetened, you can omit the agave syrup.
Mix the Pumpkin Spice well with the agave syrup until you get a smooth spice syrup.
Prepare the espresso.
Warm the milk and froth it.
Mix the frothed milk with the espresso, the spice syrup and the pumpkin puree.
Pour your Pumpkin Spice Latte into a coffee mug and decorate with a dollop of frothed milk.
Sprinkle the milk foam with a touch of Pumpkin Spice and enjoy the autumnal hot drink.

Ingredients for Pumpkin Spice Latte: You should know that

Whenever possible, purchase high-quality, organic spices when preparing Pumpkin Spice Latte. You can find useful tips for this in the article: Buy organic spices: the most important brands and online shops. Since all four spices are exotic ingredients from Asia, Africa or South America, you should also look out for a fair trade seal. You are committed to fair wages, good working conditions and environmental protection in the growing countries.

Coffee, too, has a long journey behind it before it reaches the supermarket shelves in Germany. Therefore, buy fair trade coffee whenever possible. Or would you like to try one of the regional coffee alternatives instead? Regional food has shorter transport routes and therefore leaves a smaller CO2 footprint.

Tip: If you don’t have an espresso machine or pot, you can also brew a strong filter coffee.

You can also prepare your Pumpkin Spice Latte vegan by using a foamable plant-based milk as a milk substitute. As a local alternative to agave syrup, you can use a teaspoon of honey.

Lavender tea is a versatile and proven remedy. It has a calming effect on the nervous system and can help with various ailments. Here you can find out how to make lavender tea yourself and what you should consider when preparing it.

Lavender tea has an intense aroma and a delicate scent. In addition, lavender tea is a good way to benefit from the versatile healing properties of the plant. Even the ancient Romans used lavender as a medicinal plant and as a bath additive. And the colorful blossoms are still very much appreciated in monastery gardens to this day.

Lavender flowers are used to make lavender tea. You can find out how to make the tea yourself below. If you want to buy lavender tea, you should definitely use organic quality flowers. Öko-Test found increased residues of pesticides and other pollutants in conventional teas.

This is how lavender tea works

Lavender can not only enrich your garden, the medicinal plant also has a wide range of health effects. The valuable ingredients of the flower are responsible for this. These include, among others:

essential oils
tannins
bitter substances
flavonoids
saponins
Lavender has been extensively studied in both animal and human studies. A study from 2013 dealt extensively with the effects of lavender, especially on the nervous system. The following properties of lavender were proven:

antibacterial
antiviral
anti-inflammatory
calming
pain relieving
anxiolytic
mood-enhancing
antispasmodic
circulation-enhancing
You can use lavender tea for various ailments:

Insomnia: Lavender tea can calm and help you fall asleep better. The tea is even said to intensify sleep. The best way to do this is to drink a cup of lavender tea before bed. Even if you suffer from jet lag, you can use lavender tea.
Depressive moods and anxiety: Lavender can have a calming effect on our nervous system and relieves anxiety. In addition, it brightens your mood. It is best to drink two to three cups throughout the day.
Indigestion: Its calming effect also helps with indigestion and can relieve abdominal cramps. It is important that you only let the tea steep for a short time. The highly concentrated essential oils could also irritate your mucous membranes.
Menstrual cramps: Lavender tea can relieve abdominal cramps and has a physically and mentally calming effect.
Respiratory diseases: Lavender can relax the airways and helps against viruses and bacteria, especially in the case of coughs and diseases of the bronchi.
Blemishes and acne: You can use lavender tea as a bath additive for external use on blemishes and acne. To do this, boil a liter of lavender tea and add the tea to your bath.
Lavender tea is generally well tolerated and also suitable for pregnant and breastfeeding women. A 2015 study looked at the positive effects of lavender tea on new mothers. The participants felt less exhausted and depressed, and lavender tea had a positive effect on mother-child bonding.

In addition to tea, lavender is also often used as lavender oil for medicinal purposes. Here, the content of essential oils is significantly higher, so the effect is different.

Make your own lavender tea

Only the colorful blossoms are used for homemade lavender tea.

At best, lavender grows in your garden. You should make sure that it is real lavender “Lavandula angustifolia” so that you can benefit from the healing effect.

How to make lavender tea yourself:

Harvest lavender:

Depending on the weather conditions, lavender starts blooming between June and August. As soon as the first buds open, but not all have started blooming, you should harvest them.
The best time is midday on a sunny day. Then the dew evaporated.
Cut off the buds with their stalks, this will make drying them easier.
Dry lavender:

Tie the harvested buds together by their stems into bunches and hang them upside down.
Make sure the buds are not exposed to direct sunlight or heat while drying.
After a week or two, the lavender flowers are completely dry. Then you can easily rub them with your fingers.
Use a knife or sharp scissors to separate the buds from the stems and place in a jar.
Store the dried flowers in a dry and light-protected place.
Preparation of the tea:

For one cup (250 milliliters) of lavender tea you need about two teaspoons of dried lavender flowers.
Boil the water first and then let it cool down to about 80 degrees. The effective essential oils are very sensitive to heat and should therefore not be boiled.
Let the tea steep for 8-10 minutes before removing the flowers.
If the intense aroma of lavender tea doesn’t suit your taste, you can tone it down with a little milk or honey.
Lavender is also great for tea blends. To increase the effect, you can mix the tea with St. John’s wort or valerian. In terms of taste, lavender harmonizes particularly well with:

chamomile
licorice
Linden Blossoms
rose petals