Tag

make

Browsing

Need ice cubes but don’t have an ice cube mold? No problem! We have put together various ways for you to make ice cubes yourself at any time.

If you want to prepare ice cubes, the only option is usually to use molds made of plastic or silicone. You can also buy plastic ice cube bags everywhere, which end up in the garbage after one use. Both plastic and silicone are harmful to the environment and to your own health. Over time, for example, a silicone mold can release plasticizers into the ice cubes. Make sure that your ice cube mold is free of plasticizers such as BPA.

But if you don’t have such a shape or you want to produce ice cubes in an environmentally friendly way, you have to improvise. We have several ways for you to make ice cubes without an ice cube mold.

Make ice cubes without an ice cube mold

Use the shape of a box of chocolates. You can use any type of chocolate. We recommend buying chocolates made from fair trade chocolate. There are some seals for Fairtrade chocolate such as the Fairtrade seal. So keep the shape of a box of chocolates or you transfer the chocolates. You don’t have to throw these away, of course, but put them in a lockable box. The good thing about this variant is that you do not produce any additional garbage. Another plus is that you get ice cubes in special shapes. After all, chocolates often come in a wide variety of shapes. BTW: You can use other forms of candy as long as they are stored in a plastic mold.

Another option is to prepare glasses in advance that you want to drink from later or that you want to serve. To do this, fill in some water (a few centimeters high) and place it in the freezer compartment. But make sure that the glasses are freezer-safe. So don’t use glasses that are too thin. You can then simply pour the drink onto the thin layer of ice.

Crushed ice is also possible. You can use any type of container that is freezer-safe.

Cool drinks with alternative ice cubes

There are other ways you can cool drinks:

You can use frozen fruit as ice cubes: for example, put grapes in the freezer for about two hours and then put them in the glass. Alternatively, you can buy already frozen organic fruit. If the frozen fruit is no longer needed, you can simply eat it – it tastes delicious and you haven’t wasted anything.

You can also slice and freeze lemons or limes. It is best to use organic ones. Then you can be sure that they are free of chemical-synthetic pesticides.

Another option is to pre-chill the empty glasses or just the drinks yourself in the fridge. These are then cool from the start and remain so for a little longer thanks to the cool glasses.

Since the main problem is the material of conventional ice cube molds, you can use stainless steel molds, which can be bought online. There are also so-called whiskey stones made of stainless steel that you can freeze and use again and again.

Try making ice cubes out of liquids other than water. For example, freeze organic juices, yoghurt or fair trade coffee as cubes.

Making crushed ice yourself is easy and there is no plastic packaging. We’ll show you how to make the cool refreshment. This makes hot summer days more bearable.

You can buy crushed ice, but making it yourself isn’t difficult. Especially on hot summer days, it is a refreshing addition to drinks such as slush ice and summer (non-alcoholic) cocktails, or you can use it to cool other alcoholic drinks such as sparkling wine. All you need are ice cubes. With our tips you can easily make crushed ice yourself.

Make crushed ice yourself with a tea towel

Probably the most sustainable and easiest way to make your own crushed ice is with a clean tea towel and a solid object. So there is no plastic packaging and you don’t have to buy any additional new devices.

To do this, place ready-made ice cubes in the middle of a clean tea towel. Hold the open sides tightly together. Now you need a solid object. For example, a hammer, a rolling pin or something similar are suitable. Now break the ice cubes out of the kitchen towel with your solid object. Your homemade and sustainable crushed ice is ready.

Tip: Be careful not to break the ice cubes too small. This way you get more of your crushed ice because it melts more slowly.

Make your own crushed ice with a stand mixer

Another way to make your own crushed ice is with a stand mixer. However, this method only makes sense if you already own a stand mixer. In general, you should not buy any new equipment for the production of crushed ice to avoid wasting unnecessary resources. You can prevent this by using the dishcloth crushed ice method above.

If you already own a stand mixer, the crushed ice method with a stand mixer is the faster and less complicated method for you.

Simply put the ice cubes in a blender and crush them in batches. This makes it easier to crush the ice cubes than if you use the normal smoothie function. In addition, the blade of the blender does not wear out as quickly. Also make sure that your blender has enough power to crush the ice cubes.

Tip for sustainable ice cubes for your crushed ice

The basis for making crushed ice yourself are ice cubes. But you don’t necessarily need the classic plastic ice cube tray. A sustainable alternative is to simply make the ice cubes yourself in glasses. Make sure that you fill the water mainly in cone-shaped glasses and do not screw a lid on top. Let the ice cubes thaw briefly at room temperature before processing them into crushed ice – this is how you get them out of the glasses. Also, to avoid expanding the glass, you should only fill the glass up to three quarters full with water.

You can quickly make sunflower seed butter yourself with just a few ingredients. The mush can be used in a variety of sweet and savory dishes. We show you a recipe and what you should pay attention to.

Sunflower seed butter made from Europe sunflower seeds is a regional alternative to almond butter and other nut butters. This avoids long transport routes and packaging.

Sunflower seeds are healthy because they contain important nutrients. They are rich in vitamins, fiber, unsaturated fatty acids, minerals and vegan proteins. The seeds are therefore particularly suitable for a balanced plant-based diet. Processed as a mush, you can use sunflower seeds in a variety of ways in the kitchen.

Make sunflower seed butter yourself

When buying your ingredients, make sure that they are organic and, if possible, from regional cultivation. This makes your sunflower seed puree a sustainable alternative to conventional nut spreads and you avoid chemical-synthetic pesticides.

Ingredients:

200 gorganic sunflower seeds
1 pinch(s) of salt

Directions:

Soak the sunflower seeds in water overnight or for at least 8 hours. This makes them softer and easier to work with.
After soaking, drain the sunflower seeds through a sieve.
Place the sunflower seeds and salt in a high powered blender. Mix everything into a smooth mass.
If the mousse is still too chewy, you can add some tasteless oil.

Variation tips for sunflower seed butter

You give your sunflower seed butter a particularly nutty aroma when you roast the sunflower seeds. They shouldn’t be too dark.

Variants:

You can add some olive oil or oat milk. This makes the sunflower seed butter a little milder and creamier.
For a savory taste, you can add a clove of garlic.
For a sweet alternative, you can add a spoonful of honey or syrup, some cinnamon and vanilla to the mousse.
As a regional alternative to tahini sauce, you can add some salt, pepper, lemon juice, olive oil and fresh herbs to your sunflower seed puree.

Use sunflower seed butter

Sunflower seed puree can be refined as a sweet or savory puree. You can therefore use it in many ways. Here are some tips on how to use your sunflower seed butter:

As a hearty spread: If you refine your sunflower seed puree with fresh herbs and spices, you can use it as a delicious spread.
As a sweet spread: Alternatively, you can make a sweet variant of the spread from the sunflower seed butter. This goes particularly well with pancakes and fresh rolls.
As a dip: Use more liquid during preparation to create a sauce-like consistency. This dip goes great with raw vegetables, crackers or homemade falafel.
As a vegan butter substitute: neutral sunflower seed butter is an excellent vegan alternative to butter.
As a salad dressing: Use the puree to make a delicious salad dressing. Simply add a tablespoon of puree to your favorite dressing.
As a cooking cream: You can refine warm dishes such as soups or stews with the sunflower seed butter. The mush gives the dish a creamier consistency.
As a muesli topping: You can put sunflower seed butter on your muesli or porige for a wholesome breakfast.

A typical slow coffee is prepared – and that shouldn’t come as a surprise – slowly. With a hand filter, but also with the espresso maker or the French press, this is very easy and creates awareness for better coffee.

I have never understood why people prefer a coffee from the fully automatic machine to a freshly brewed one. When Nespresso suddenly moved into my friends’ homes, I almost lost my faith. Overpriced coffee in aluminum capsules that only work in an overpriced coffee machine and also cause a gigantic waste problem. Stiftung Warentest estimated the amount at 5,000 tons of capsule waste in 2015.

Instead of coffee at the push of a button, supporters of the slow coffee movement are already celebrating the preparation. Get up ten minutes earlier in the morning, breathe in the scent of whole coffee beans, grind the coffee and pour it into the espresso maker in good portions. This has a meditative character – and is also a wonderful morning ritual. It’s about giving yourself a lot of time and consciously perceiving this as well as the enjoyment of the coffee later.

The Slow Coffee movement also includes paying attention to fair production conditions and sustainable cultivation. You can often get good fair trade organic coffee directly from your trusted roasting house. You can also find recommended coffee in many supermarkets and health food stores. Just find out more in our best list for organic and fair trade coffee.

Classic slow coffee is brewed slowly. But other methods of preparation are also ideal for “slow coffee”. We introduce you to five ways to make really good coffee.

The espresso maker – an Italian original

The espresso maker is a classic that can be found in every Italian household. As the first espresso machine for the home, his invention triggered a small revolution in 1933: Until then, the popular hot drink in Italy could only be enjoyed in public coffee bars.

The espresso maker – also mocha pot – does not generate enough pressure for a real Italian espresso with a fine crema (and therefore shouldn’t really call itself espresso), the coffee still tastes good. A classic espresso maker generates around 1.5 bar. The Brikka – a further development of the classic espresso maker from the Bialetti brand – manages a total of 6.5 bar. For comparison: a portafilter machine works with a pressure of up to 15 bar.

The whole thing works very simply: Fill in water at the bottom, insert the sieve, fill completely with espresso powder and smooth out the powder. Place the pot on the stove over medium heat, when it hisses and bubbles, the espresso is ready.

Good to know: Biorama from Austria reported in March 2021 that a relatively large amount of aluminum can get into the coffee from standard espresso pots. Fortunately, the recommended limit values ​​are not exceeded by normal coffee consumption. However, you can easily work around the problem by using an espresso pot made of stainless steel (instead of aluminum).

French Press – for better coffee

Another environmentally friendly way of making coffee is the French press, also known as a stamp press pot or press stamp pot, push-through pot, Bodum pot or cafetière. The manual coffee maker was probably invented in France at the end of the 19th century. The Italian designer Attilio Calimani had it patented in 1929, and his compatriot Faliero Bondanini developed it further. It experienced a hype with us in the nineties – and with good reason.

The coffee from the French press tastes more intense, fuller and less “clean” than that from the filter machine. In this coffee preparation, a metal sieve takes over the role of the filter. Because the coffee powder is in contact with the water for longer, significantly more coffee oils and fats go into the finished coffee.

The preparation is also very easy here: fill the French Press with coarsely (preferably freshly) ground coffee powder, pour in hot water, leave to steep for four minutes, put on the lid and press down the sieve. Enjoy immediately, this is how the coffee tastes best.

Filter coffee – the simplest way to prepare coffee

The hand filter is undoubtedly a classic when it comes to coffee preparation. With grandparents you can usually still find it hidden somewhere in the closet, it had to make way for the modern filter coffee machine. Baristas swear by filter coffee – if you use the right technique.

To prepare coffee, use about 60 grams (9 tablespoons) of medium to finely ground coffee per liter of water. Before use, you can briefly rinse the paper filter with hot water from the kettle – this will eliminate any paper taste and also keep the filter at a good temperature.

After boiling, it is best to let the water cool down to 90 degrees for a few minutes to prevent fine coffee particles from burning and your coffee from becoming bitter in taste. First, pour just enough water on the powder to cover it and let it swell for 60 seconds. Then add water in 100 milliliter increments, advises the expert.

Karlsbader Kanne – coffee preparation with tradition

The Karlsbader Kanne is a real eye-catcher. It is also used to prepare filter coffee, is made entirely of porcelain and does not require a paper filter or other additives. There is also the Bayreuther Kanne, a new edition of the Karlsbader Kanne in a modern design. The Karlsbader or Bayreuther jug consists of four parts: the jug itself, a porcelain filter, a water distributor and the lid.

The preparation is very simple, the coffee is pleasantly mild. Heat the water to 95 degrees, coarsely grind the coffee (we recommend a grind of 9 or 10). Put the coffee in the filter – calculate about 10 grams or 1.5 tablespoons of coffee per cup – and spread it out. Put on the water distributor, pour in the water, let it swell for 30 seconds and then add more water.

Kamira – espresso maker for lovers

The Kamira can almost still be described as a novelty. The Italian inventor Nino Santoro used it to develop a very simple machine to bring the classic espresso from the portafilter machine into the home kitchen. The result is impressive: an espresso that, despite the relatively low pressure (about 3 bar), has a nice, slightly coarse-pored crema – and tastes good.

The application is quite simple. With the valve closed, you fill the storage tank with water, open the valve and let it run down into the water tank. Fill the portafilter with espresso powder, insert it and close the valve. Then the cooker comes on the stove and within a few seconds espresso flows from the portafilter directly into the cup. When the desired amount is reached, slowly open the valve to release the pressure, done.

The espresso maker is handmade in Italy, costs around 80 euros and, according to the manufacturer, is practically indestructible. Espresso fans will definitely have fun with it.

If, despite everything, you are not convinced by this type of coffee preparation, you will also find recommendations for coffee machines and alternatives to coffee capsules made of aluminum.

A rosehip tea made from the peel of the fruit brings many health benefits. Here you can find out more about the effect, application and own production of rosehip tea.

Rosehip tea: These active ingredients make rosehips a medicinal plant

Rose hips have been used in natural medicine for a long time. They owe this to their many valuable active ingredients. These include, among other things:

1. Vitamin C

Depending on the variety, 100g of rose hips (ready-to-eat mass) bring up to 1,500 mg of vitamin C. The native rose hip even beats exotics such as the kiwi, which in comparison has just 45 mg of vitamin C per 100g. Vitamin C is important for health because it:

strengthens the immune system,
protects cells from free radicals,
helps to form hormones and messenger substances,
supports the regeneration of skin, hair, nails and connective tissue,
is important for cholesterol and fat metabolism,
helps absorb iron better.

2. Lycopene

Lycopene is a plant pigment that is also extremely valuable for the human body. Because it has an antioxidant effect and thus prevents cell damage.

3. Pectin

Rose hips are rich in pectins. These are dietary fibers that can have a slightly laxative and detoxifying effect in the human body and therefore help with digestive problems and kidney diseases.

Due to these and other valuable ingredients (including vitamins A, B, E and K, flavonoids, calcium, magnesium, iron), the rose hip is considered a local super fruit with great healing effects and health-promoting potential.

Application of rosehip tea

Rosehip tea made from dried peel has a long tradition and is still very popular today. However, the effect of rosehip tea has not been sufficiently scientifically proven, but is based on the experience of folk and naturopathy. Without a doubt, rosehip tea is a wholesome drink. Rosehip tea is often used to:

Relief from digestive problems: The contained pectins increase the volume of the intestinal contents and help to move them quickly through the digestive tract.
Convalescence: Thanks to the many vitamins and minerals in the fruit, rosehip tea can help the body regain strength after illness.
Immune boost: The high vitamin C content makes rosehip tea healthy and stimulates the immune system. In this way, rosehip tea helps the body to fight off disease-causing viruses, bacteria or fungi.

Relief of gastrointestinal complaints: You can also use rosehip tea if you have diarrhea. The pectins in the shell bind water, swell and thus solidify the intestinal contents. Irritated gastric mucosa walls can be soothed with rose hip tea, because the pectins, flavonoids and tannins it contains have a protective effect on the mucous membranes.
Relief of urinary tract problems: There are a lot of fruit acids in rose hips. These have a diuretic effect and thus promote the excretion of pollutants and viruses that cause urinary tract problems.

Recipe: How to make rosehip tea yourself

Rosehip tea is very easy to make yourself. You can either buy already dried rosehip peels in a health food store or organic shop or harvest the rosehips yourself and make a tea. Homemade tea has the advantage that it definitely does not contain any additives such as colorings and artificial flavors.

Make your own rosehip tea

Harvesting rose hips: Rose hips are ripe in late autumn when the fruit yields slightly when pressed with a finger.
Wash and core the rose hips: First wash the rose hips, then remove the stalks and buds. Then cut the hips in half and remove the seeds. There are hairs on the seeds that may cause skin reactions. Therefore, as a precaution, wear (reusable) household gloves. After scraping, wash the shells thoroughly again to remove any hairs.
Drying the rosehips: Now you can dry the rosehip shells. This should be done as gently as possible and without too much heat. It is best to leave the rose hips spread out in a warm place for a few days until they are completely dry. Check regularly that the skins are completely dry.
Storing rosehips: After drying, you can chop the shells up a bit and store them in an airtight container.

Prepare rosehip tea

Brewing: Pour 250ml of hot water on about 2 teaspoons of dried rosehip peel and let the tea steep for 10 minutes.
Consumption: In order to benefit from the greatest possible health effects of rosehip tea, you should drink the tea regularly over a longer period of time. In this way you can strengthen your immune system in the long term.

Xylitol candies are a great alternative to sugary lozenges: sugar-free, tooth-friendly, and pleasantly minty-sweet. We’ll show you how to make and vary your own xylitol candy.

Xylitol is a sugar substitute that has long been used as a sweetener in chewing gum and toothpaste. According to the AOK, it is particularly suitable for this because it does not cause tooth decay and even protects the teeth from acid-related decalcification. It also contains about half the calories of regular sugar.

So just the right thing for you if you want to snack on your teeth in a way that is gentle on your teeth and low in calories. We’ll show you how to make your own xylitol candies from just two ingredients and how you can vary them.

Tips on ingredients and tools

Xylitol is also often called xylitol or birch sugar. It’s always the same substance, but it’s not exclusively made from birch. For industrial use, xylitol now comes mainly from corn, other types of wood or even straw.
Buy high-quality xylitol: Best fair-grown organic xylitol, like the one from Avocadostore**. This is obtained from corn.
Birch sugar candies are perfect for sucking on after a meal for dessert as they can prevent plaque build-up.
You can vary the taste with essential oils. You can get a good selection of organic essential oils at Avocadostore**. Make sure the oils are edible.
Instead of pouring the candies into a “board” as in the recipe and then breaking them into crystal-like pieces, you can also pour the heated mass into a suitable silicone mold in step four. You can get sweets in all sorts of shapes, such as on Amazon**.
Reusable silicone mats, such as those from Waschbär**, are not only a good alternative to baking paper for xylitol candies. You can use them without fat or oil for baking. Tip: Before you buy such a mat, think about whether the purchase is worthwhile for you. If you’re only going to use them once or a few times, then better borrow one from a friend. You can also use recycled baking paper, for example at Avocadostore**.
Xylitol itself has a virtually unlimited shelf life, but loses its flavor over time. Depending on what you added, your candy should last for several months if you haven’t eaten it by then.

Tooth-friendly xylitol candies: A simple recipe

Ingredients:

100 g xylitol
20 drops of essential oil

Directions:

Melt the xylitol in a small saucepan over medium-high heat.
Add the essential oil you want your candies to taste like. Candies without added oils taste just as sweet and fresh as xylitol. Of course, you can also mix the oils according to your taste.

Spread the mixture on sustainable baking paper or an alternative. Make sure you don’t spread it too thinly, otherwise the candies will easily splinter later.

Allow the xylitol mixture to cool for several hours or overnight. Then you can pop them out of the mold or break the board into small bite-sized pieces.

Tips to vary color and taste

Color: When you mix the candy mass, you can add non-toxic and tasteless colorants. We recommend turmeric powder for yellow, currant or rosehip powder for red, or matcha for green. You can get them all at the Avocadostore**. Depending on the powder, they also influence the taste. So make sure these flavors match the oils you use.
Taste: In step three, start mixing with the essential oils and find out what you like. Classic combinations often consist of a citrus component, such as tangerine, and a spicier component, such as cinnamon.

What are the benefits of xylitol?

Xylitol is a so-called sugar alcohol – the body metabolizes it without releasing insulin, so that the birch sugar does not significantly increase blood sugar. This is why xylitol is also a good substitute for sugar for diabetics.

By the way: sugar alcohols have nothing to do with conventional drinking alcohol.

Two other popular benefits of birch sugar: It doesn’t promote tooth decay. Instead, it is even said that it promotes dental health. If you consume xylitol instead of sugar, less plaque should form, it probably slows down the growth of caries bacteria and, according to the AOK, protects the teeth from acid-induced decalcification. Additionally, xylitol has about half the calories of table sugar. The Federal Institute for Risk Assessment rates xylitol as an acceptable additive and only points out that excessive consumption can have a laxative effect.

Caution: Xylitol is highly toxic to dogs and other pets. By the way, cats are not included. Be careful not to drop anything that the animals could swallow.

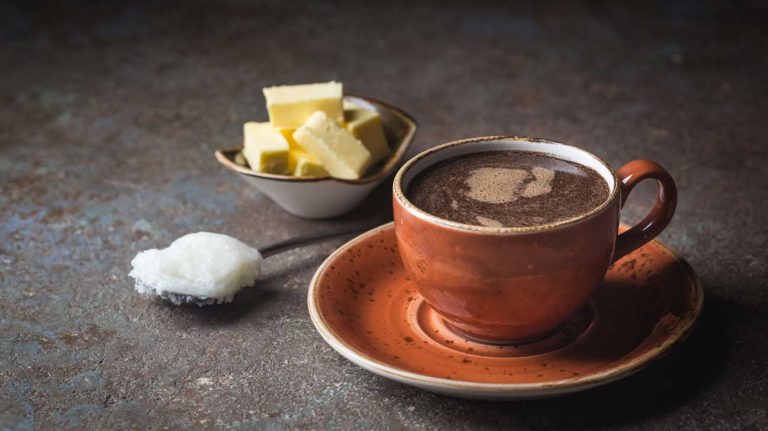
A large mug of coffee for breakfast: an absolute necessity for many. Sure, coffee wakes you up and increases your ability to concentrate – but have you ever heard of bulletproof coffee? If not, we have compiled the most important information for you and also present you with a classic bulletproof coffee recipe.

Bulletproof Coffee – the innovation from the USA

Bulletproof coffee has only recently become a household name among coffee lovers. It was made famous by the American biohacker Dave Asprey, who encountered yak butter tea on one of his journeys through the Himalayas and was so impressed by its effects that he decided to recreate the drink when he returned. Ultimately, he managed to optimize the original tea blend into an even more effective blend: Bulletproof Coffee was born.

But what is bulletproof coffee anyway? According to the Bulletproof recipe, the new drink consists of coffee, butter and MCT oil. You heard me right: the Bulletproof Coffee preparation calls for butter and oil in the coffee. Although it may take some getting used to at first, many swear by the high-performance drink – not only because of its effects, but also because of the interesting taste. In fact, many claim that the mixture is very similar to a creamy latte if frothed long enough with a high-speed blender.

Why is Bulletproof Coffee so popular?

Bulletproof Coffee is mainly drunk because of its special effect on the body. In addition to increasing performance, it should also support the body’s endurance. It is usually drunk in the morning and replaces breakfast, which is often high in carbohydrates. The coffee drink should release the energy slowly and steadily to the body so that it is supplied with sufficient nutrients by midday, but the sugar level does not drop again immediately after an initial high, as is the case with ordinary coffee with breakfast.

This is where butter and MCT oil come into play. The two components ensure that fat burning in the body is stimulated: by leaving out carbohydrate-containing food, the body has to fall back on fat reserves as well as butter and MCT oil in order to get energy. MCT oil consists of fatty acids that can be directly absorbed by the body and thus immediately converted into energy. A high-quality oil is essential here. MCT oil is often made from coconut oil, but the low-quality palm oil can also serve as a base ingredient for MCT oil.

Bulletproof coffee – Here’s how

Basically, it’s not difficult to make bulletproof coffee at home. The only non-commercial component is the MCT oil, but that too can be quickly ordered online. Here we present our Bulletproof Coffee recipe – guaranteed to taste great!

Ingredients:

  • 250 ml of high-quality coffee
  • 1-2 tablespoons grass-fed butter or ghee
  • 1-2 tbsp MCT oil

Many love it: the milk froth on your coffee from the coffee machine. The consistency of the milk froth has a major impact on the taste. But how do you make the perfect milk froth? With or without a coffee machine? And which milk is best for milk froth? What should you watch out for when frothing milk?

As a rule, the milk froth should be creamy. Milk foam that is much too firm actually has no place on the coffee from the coffee machine and is therefore also affectionately called construction foam. Nevertheless, there are certainly coffee drinkers who prefer this type of foam. Here you can find out how you can froth milk and thus create the perfect milk froth – with or without a coffee machine.

How is milk froth formed in the first place?

When frothing, air is lifted under the milk. The protein and fat molecules are mixed up and then enclose small air bubbles. Depending on the type of froth and duration, the milk froth will be creamier or firmer. The milk you use for the milk froth also plays a role. For a creamy and airy milk froth, both the fat and protein content are crucial. The milk should come cold out of the fridge before frothing. During heating, the milk should not reach more than 60 degrees, otherwise the proteins will curdle. As a result, the foam collapses very quickly. Your coffee machine knows this special feature, which is why it always prepares perfect milk froth that stays creamy for a long time.

What tools can you use to make milk froth? – From coffee machines to whisks

The selection of aids for frothing milk is large and very different. Some tools are easy to use, others require skill, practice and a little effort before you can create good milk froth.

Make milk foam with a whisk: If you don’t have a milk frother at home, you can simply use a whisk. To do this, first heat the milk. Attention: not warmer than 60 degrees. Then pour the milk into a large container and whip it with a whisk – similar to cream. If you do everything right, after a few minutes you will have great milk froth for cappuccino, latte macchiato and co.
Make milk froth with hand milk frother: The hand milk frother works similar to the whisk method. The cold milk is poured into the milk frother and heated on the stove. The milk is then foamed with the help of the existing sieve and by moving it up and down. The advantage of this milk frother is that you only need this one vessel.
Making milk froth with a battery-powered milk frother: If you use a hand-held milk frother to make milk froth, you start by heating the milk. Then you fill it in a glass or other tall container. Now dip the milk frother into the milk and froth it with up and down movements. With a little practice, you can easily create fluffy milk froth. The advantage of the battery-powered milk frother is that you can easily adjust the amount of milk to be whipped as needed.
Making milk froth with an electric milk frother: If you want to make milk froth with an electric frother, you don’t actually have to do much. Simply pour milk into the milk frother up to the mark and you’re ready to go. This is just as convenient as making milk froth with a coffee machine. The great thing: In addition to warm milk froth, some devices can also produce cold milk froth or simply heat the milk, e.g. for cocoa or a delicious children’s cocoa cappuccino.
Make milk froth with a coffee machine: If you want to treat yourself to a little luxury, you can afford a fully automatic machine. Most of these coffee machines can produce milk froth fully automatically. However, you actually choose a coffee drink, which the fully automatic machine prepares at the push of a button. So the fully automatic machines can make a great latte macchiato with three layers without you having to worry about anything.
Making milk froth with a steam nozzle: If you have a portafilter, you usually also have a steam nozzle or steam lance. When frothing milk, practice and perseverance are the main requirements. Although there are countless instructions and videos on the net, in the end you simply have to try and test it. Once you get the hang of the steam nozzle, you can always look forward to great, creamy milk froth.

Which types of milk are best suited for milk froth with the coffee machine?

Making milk froth with whole milk: Whole milk does not froth better than other types, but thanks to the high fat content it enhances the taste of the coffee or espresso.
Making milk froth with low-fat milk:: Low-fat milk can also be frothed well. However, since it contains less fat, it does not carry the coffee taste quite as well.
Make milk froth with fat-free milk:: It can also be frothed up, but here it is an absolute matter of taste whether you like the coffee afterwards.
Make milk foam with soy milk: Contrary to what is often claimed, soy milk is also suitable for foaming. However, it may well be that one variety foams better than another variety. Therefore simply test soy milk from different manufacturers.
Make milk froth with lactose-free milk: Anyone who suffers from lactose intolerance can also use lactose-free milk to conjure up super milk froth for cappuccino and the like.
Making milk foam with coconut and almond milk: Coconut milk and almond milk cannot be foamed. This is because the protein or protein content is too low. Although there are now frothable versions of these types of milk, fats and proteins have been added to them later. Everyone has to decide for themselves whether they want to drink these varieties.
Making milk froth with oat milk: Another way to make vegan milk froth is with oat milk. Because it is precisely here that many manufacturers have developed a barista version that makes it easy to create milk froth with and without a coffee machine.

However, if you have the feeling that your milk does not froth well, it is advisable to simply try a different brand. It may well be that the fat content of both milk products is the same, but the protein content is different. So you don’t have to bury your head in the sand immediately if you didn’t get the desired milk froth on the first try.

Latte art and how to decorate coffee from the coffee machine with milk froth

It’s all the rage, trendy cafés can’t do without it, and there are countless videos on the subject on YouTube: we’re talking about latte art – that’s the name of the design of coffee from the coffee machine with creamy milk froth.

It is an important discipline, especially for baristas, because it allows you to make a name for yourself and set yourself apart from the competition. Every year, baristas compete to see who can make the best latte art. Now some question marks will appear? Designing milk froth – please what? This type of design is part and parcel of trendy drinks such as the Flat White. Patterns also look great on a cappuccino.

What are the Latte Art Techniques?

The original variant of latte art is the artful pouring of milk froth into a cup of espresso. The milk froth should still be liquid and easy to pour. With the right technique you can create leaves, trees and hearts.

As with frothing milk itself, it also takes a little time to get the hang of the pouring technique. Once you have developed a knack for it, you can experiment and create imaginative patterns.

Another variant of latte art is the decoration with chocolate sauce. It starts frothing the milk. The milk froth is poured back into an espresso, but without a special pouring technique. Now chocolate sauce, toothpicks, stencils and other little helpers are used. You can also use caramel sauce if you like. Simply pour the sauce onto the milk froth and use the tools to decorate as desired. The imagination knows no limits. Just look on the internet for inspiration.

Can I make latte art myself?

Now, of course, the question arises whether you can do it too? Yes, with the right tools, anyone can become a latte artist at home. You need a milk jug, a coffee cup, espresso and of course milk froth. If you don’t want to pour, just decorate, you still need chocolate or caramel sauce and toothpicks.

If you have a portafilter with a steam wand, you will need some skill and practice to froth milk, but then you can create wonderfully creamy milk froth.

If you own a fully automatic machine, you can use the coffee machine to make the milk froth right away and then start your latte art project straight away.

With other types of froth, you need to test something that is the perfect consistency for latte art. And always remember: for latte art we need creamy and liquid milk foam, not foam!

And then it can start. Look around the internet, there are numerous videos and descriptions that are great for beginners. Try it out!

Anyone who deals with the topic of diet usually also comes across the topic of “green coffee”. A few years ago, green coffee became known as an alleged miracle cure for obesity. Without changing your diet and exercising, the pounds should fall off by themselves. “Green coffee extract” is mainly obtained in the form of capsules and powder. They are considered dietary supplements.

For some time now, however, it has also been available as a coffee for brewing. Coffee drinkers will probably be happy now: Prepare and remove coffee in the coffee machine or machine. But it’s not all that easy. Especially since green, brewed coffee tastes sour and doesn’t exactly stimulate our sense of smell. But there must be something to the hype.

What is green coffee?

Green coffee is nothing more than unroasted coffee or green coffee. Green coffee contains slightly less caffeine than when roasted. The beans contain more chlorogenic acid. Green coffee is not available in whole beans everywhere. As already mentioned, it is often found as an extract in powder or capsules. However, one should pay attention to the additional ingredients in this dosage form. Although green coffee is considered a natural product, this designation does not prevent some companies from mixing other preparations with the ingredients. Because as a powder this is not noticeable. Therefore, you should under no circumstances buy these preparations on dubious websites for a lot of money.

Anyone who finds raw coffee as whole beans can take a look at the content and be sure that only coffee beans and no other ingredients are included. This is definitely advisable, because if stones or small branches are also included, this can damage the grinder of the fully automatic coffee machine for companies.

How is green coffee made?

Can I prepare my green coffee with a fully automatic coffee machine for companies? In theory, you can put the beans in your coffee maker or vending machine, but whether you like the result is anyone’s guess. But you can also prepare it like a tea. Simply grind the beans, put the powder in a tea egg or tea bag and let it steep for a few minutes. Just try it out and compare the taste experience from your coffee machine or vending machine with the result when preparing tea.

How does green coffee work?

The high chlorogenic acid content is held responsible for the weight-reducing properties of green coffee. Since chlorogenic acid is also responsible for the sour taste, the beans are roasted. During roasting, this acid is largely broken down.

However, chlorogenic acid should also prevent the absorption of sugar in the intestine and have an influence on the blood sugar level. Some doctors believe green coffee can prevent diabetes. However, all these properties and effects are controversial. There are still no really scientific, well-founded results, since test groups were far too small or the period was far too short. In addition, manipulations came to light in some experiments, which in retrospect made the result of the study not exactly trustworthy.

Whether you believe in the power of green coffee or not, exercise and a healthy diet are essential for lasting weight loss. If you are not convinced of this, you should simply visit the fully automatic coffee machine for companies as usual and enjoy your aromatic coffee in peace. Because coffee from the coffee machine or the vending machine contains hardly any calories without milk and sugar.

Date sugar is made from dried, finely ground dates. You can also easily make the sugar at home in the oven. You can find out exactly how this works and why we can only recommend date sugar to a limited extent here.

If you want to sweeten in a healthier way, you can use date sugar. This consists only of dried and finely ground dates. Date sugar has a more subtle sweetening power than conventional sugar, but also has a fine caramel note that goes particularly well with sweet baked goods. On the other hand, if you want to sweeten drinks, date sugar is not suitable. The fine date powder does not dissolve in liquid.

Since date sugar consists only of dried dates, it still has some healthy ingredients. For example, it is high in fiber. However, the crystalline date sweetener is still a sugar, so you should use it sparingly.

Also with regard to the ecological balance of dates, it is advisable to use date sugar consciously. Dates come from far away areas like Egypt, Iran and Saudi Arabia, so they have to travel long distances in transportation. Dates are also susceptible to pest infestation, which is why pesticides are often used.

If you make your own date sugar, you have the option of buying dates that are as environmentally friendly as possible. We recommend dried dates from organic farming that does not use chemical-synthetic pesticides.

Make date sugar yourself: Here’s how it works

Making date sugar yourself is very easy. In addition to the dried dates, you only need an oven and a powerful blender. First let the dates dry completely in the oven and then use the mixer to pulverize them.

You can do this step by step:

Halve the dates and remove the stone if necessary.
Place the dates on a wire rack lined with parchment paper or a more sustainable parchment paper alternative.
Allow the dates to dry through at 100 to 120 degrees Celsius.
Depending on the oven and the residual moisture content in the dates, the drying time can vary, from 60 minutes to two or even three hours. Place a wooden spoon between the oven and oven door to allow moisture to escape.
The dates should start to harden in the oven, but not burn. So check them regularly and reduce the heat if necessary.
Let the dates cool down completely overnight in the switched off oven with the oven slightly open. This makes them very hard.
Put the completely cooled dates in a blender and process them into a powder.
The resulting date sugar may start clumping from the humidity, but you can still use it.
The date sugar can be stored in an airtight container for up to eight weeks.

Make date sugar yourself: Healthier, but energy-intensive

Because the oven time can get long and the oven door is left open during this time, constantly escaping heat, the power consumption of making your own date sugar is quite high. Therefore, drying the dates in the oven can not only be expensive, but also increase the ecological footprint.

With a few tips, however, you can make the eco-balance of homemade date sugar a little more positive:

Do not use so-called soft dates, but dates that are as hard as possible, for example the Deglet Nour variety. The harder the dates are, the less time they need in the oven.
Don’t just halve the dates, cut them into quarters. They also dry faster this way. Be careful not to burn the dates.
If you have a dehydrator, you can use that. Note, however, that while most dehydrators use less electricity than the oven when drying, the power consumption is not necessarily low here either.
In order not to have to dry them at all, you can soak the dates overnight and then puree them with a little lemon juice. This is how you get a date puree that you can use for many things just like the solid date sugar.