Tag

making

Browsing

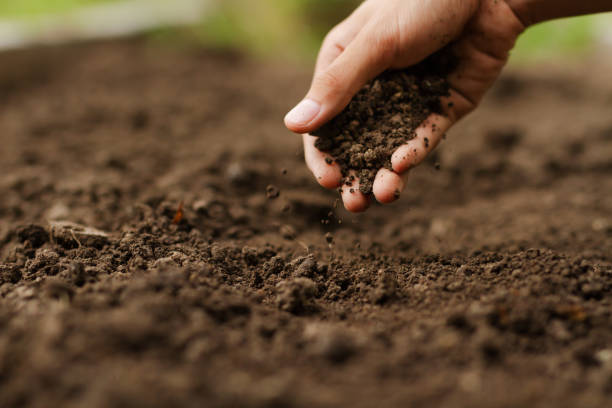
Good potting soil is a prerequisite for beautiful, healthy plants. We will show you how you can easily create good soil for your plants yourself.

There are different types of soil; include garden soil, blind soil, vegetable soil, and potting soil. Appearances are often deceptive because the quality of purchased soil is very important so that the plants can thrive at all. It is best to make your own nutrient-rich soil.

Benefits of homemade potting soil

Unlike commercial soil, you are not dealing with an industrial mass-produced product, but with a carefully selected mass. It goes without saying that your own soil will benefit the plants. They grow better, have less to do with pests, and appear healthier all around. Because the soil contains more nutrients, you naturally need less fertilizer. However, homemade potting soil can be excellently supplemented with home remedies such as plant fertilizer.

What has to go into the ground

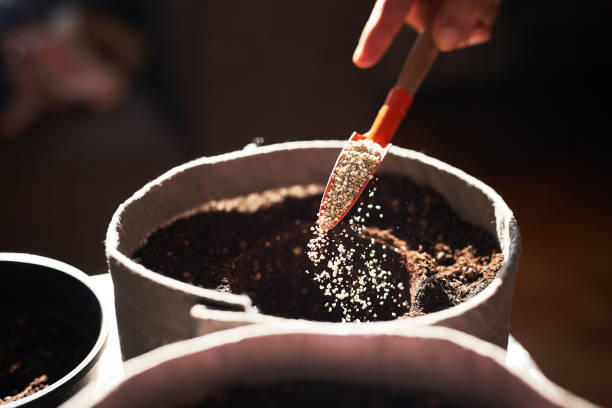
There are many different types of potting soil. In general, compost, sand, and leaf soil are suitable for potting soil. In addition, coconut fibers, humus bricks, garden soil, vermiculite, perlite, horn shavings, or cornmeal can work wonders. In general, it can be said that homemade soil consists of different components. You always need a base. For example, garden soil or coconut fibers. In addition, you always need nutrients, e.g. B. Compost. And possibly something for the water capacity and loosening. Vermiculite or perlite are used for this.

1) The universal soil for almost all plants

The all-around soil is well suited to supply plants with nutrients for a longer period of time. It is versatile and has a good structure and good water drainage. What you need for this earth:

  • 2/9 compost
  • 5/9 garden soil
  • 2/9 sand

In addition to suitable soil, you should also pay attention to the correct watering of your plants. Because there are a few things to keep in mind.

2) Acidic soil is suitable for heather and bog plants

This soil is also called azalea soil and is particularly suitable for heather and bog plants, i.e. for plants that need acidic soil. Also almost all softwoods, as well as z. B. Rhododendrons need such soil. What you need for this:

  • 2/4 compost
  • 1/4 sand
  • 1/4 leaf soil

3) A special herbal soil with many nutrients

This very lean mixture is also known as light soil. It is ideal for plants that hardly tolerate nutrients, as this soil hardly contains any. For this you need:

  • each 2/6 coconut fibers, garden soil, and sand
  • add 1/6 crushed lime if necessary (for Mediterranean herbs).

4) The perfect soil for fresh tomatoes

As with the other soil mixtures, you should pay attention to the required PH value of the plant so that it can grow well. Tomatoes do best in slightly acidic to almost neutral soil. The following components are good for this:

  • 1.5/10 earth
  • 4/10 perlite
  • 1/10 hummus
  • 1/10 sand
  • 2.5/10 compost

5) Production of own rose soil

Roses grow in a neutral to a slightly acidic environment. You should also pay attention to how you then plant the roses correctly. The soil must not be too acidic under any circumstances, so you need the following to make the rose soil:

  • garden soil
  • compost
  • sand
  • Fertilizer mixture made from rotted cattle manure
  • horn shavings
  • bedrock meal

6) The right potting soil for cacti (substrate)

A special potting soil is required for cacti. The same applies to succulents (succulent plants). These plants have adapted to special climate and soil conditions. For this, you need soil with more mineral substances, for example with more sand and clay as components. This also includes the actual place where cacti normally grow, deserts. These are characterized by dryness and sandy soil.

You should therefore pay attention to their natural proportions when producing cactus soil. You only need the following ingredients to make it:

  • coarse sand
  • peat
  • Clay
  • humus soil

7) Make garden soil with Bokashi

Bokashi comes from Japanese and describes a process in which organic material is fermented by adding effective microorganisms. You can then use the resulting compost for your potting soil, as it is great as a liquid fertilizer. Soil mixtures can also work wonders in other areas. The healing earth helps you as an effective home remedy, for example, to eliminate facial blemishes, but also complaints such as flatulence and with a diet.

Working with salt dough is a lot of fun. Great decoration can be created at cheap prices. The salty dough has to be really easy to work with. We show how easy it is.

Children love the salt dough to play with and paint, as do many adults. It is important that this is produced in a healthy way and we would like to show you how this can be done.

The salt dough only needs four ingredients

You only need four ingredients to make the salt dough yourself. Children love this salty dough because they can finally muddle and do handicrafts. Wonderful works can be created with salt dough. Toys can be made, pendants, decorations, and even ashtrays if you have a little patience. Salt dough definitely encourages children’s spirit of discovery. Basically, everyone has already tinkered with the dough, you just have to make sure that you make good salt dough.

For the perfect salt dough, you only need 2 cups of wheat flour, preferably type 405, plus 1 cup of salt, 1 teaspoon of vegetable oil, and then another cup of water. Everything has to be mixed well and you can knead the dough perfectly and use it for yourself. Children also have a lot of fun here, many a child loves to knead the dough until it is perfectly smooth. If the dough is still a little sticky, add a little more flour.

Another salt dough recipe

Yet another recipe for making salt dough would be 1 cup flour type 405, 1 cup potato starch, 1 cup salt, 1 cup water, and 1 teaspoon vegetable oil. The whole thing is kneaded well and can be used immediately. You could also just use potato starch if you want the items to last a long time.

Important for the salt dough

Salt dough is best stored in airtight containers. You can always take out as much dough as you need. The dough can be kept fresh in the refrigerator for up to several weeks without drying out. So children could do a little tinkering every day. By the way, the salt dough doesn’t always have to go in the oven. It can also be air-dried. But this can take several days. The oven is a bit faster there. But here, too, one should proceed with caution. It is best to set the oven to 50 degrees and let the finished works of art bake for an hour. The work then has to cool down and harden. Some people also set the oven to 120 degrees, but then the salt dough becomes darker, but also harder. Cracks can also be avoided in this way, which are annoying if you set the oven too hot.

Paint or pre-dye salt dough

If you want to let off steam creatively with the salty part, you can color the dough in advance or paint the finished works later. Children usually enjoy it more if they are allowed to paint the works of art later. If you want to color the dough, it is best to use food coloring or Easter egg coloring. Even cocoa can be used or beetroot. Curry and other spices also add color to the salt dough. After baking and cooling, the salt dough can be painted with watercolor, poster paint, or even acrylic paint.

Here are instructions and tips for making candles. Candle making and candle pouring are the most well-known techniques.

Candlelight for a more feel-good atmosphere

Candles provide a cozy living light and a special atmosphere. They are also nice for decoration and are well suited as small gifts. If you would like to make candles yourself, you don’t actually need much to create something really beautiful and individual. Depending on whether the candles are drawn or poured, different shapes and color patterns can arise.

Materials for making candles yourself

You can buy the wax you need in the form of granules, but you can also use old leftover candles that are then melted down again. White wax granules can be colored with special color pigments that you can get in craft supplies.

You also need candlewick and – if you want to pour candles – heat-resistant containers to fill them with.

The wax can be heated and liquefied in a tin or bowl in a water bath. You should make sure that the water does not boil and that the wax does not come into contact with the water. It is best not to use grandma’s good crockery for this, the wax residue cannot be removed so easily!

Candle making

A knot is first tied at the lower end of the wick so that it stays straight when it is immersed in the wax. The wick is then repeatedly dipped into a container of liquid wax in several passes. This creates several layers of wax. This technique works especially well for multicolored candles. For this, you need several containers with different colored wax. The length and thickness of the candles can be varied according to taste. The finished candle is hung up to dry by the wick. With thicker candles that are to stand without a candlestick, you can smooth the underside with a knife before the candle has completely hardened.

Candle making

When casting candles, the liquid wax is poured into a heat-resistant mold. For example, small glasses are suitable for this. The wick is first knotted to a skewer or something similar, which is placed over the glass so that the wick hangs down from the center. The liquid wax is then carefully poured into the jar.

Tip: To keep the wick straight, you can attach it to the bottom of the mold with some modeling clay. If you want to have several layers, you only fill the glass partway and let the first layer harden. It is important not to fill in the next layer too early, otherwise, the colors will mix.

You can be creative when choosing the shape. Various glasses or bottles, but also small flower pots, eggshells, paper cups, and other vessels can be used. Containers in different shapes, such as spheres or pyramids, are also available for purchase.
Except for the jewelry glasses, the molds are carefully removed from the candle after it has hardened.

Tips for making candles

If you not only make candles yourself but also want to design them in a very special way and add a highlight, you can add special scented oils to the wax. The finished candles can also be decorated with glitter powder and napkin glue. Here the imagination can run away with you a bit. Also, note ideas for making Christmas candles yourself.

What should you pay attention to?

You can also make candles with children. Since the liquid wax can get quite hot, children should never be left alone with it. When working with granules, it is also important to ensure that they are kept out of the reach of small children.

Great ideas for making Easter gifts. Easter is just around the corner and for many, it is family time. And making Easter presents yourself is also popular. We have collected some gift ideas for children and parents.

Easter gift ideas don’t always have to be expensive and out of business. Instead, try loving DIY Easter gifts. Because these come from the heart and give much more joy.

The Easter Festival

Easter is the most important festival for many believers. This is where the resurrection of Jesus is celebrated. Lent ends with Easter and the time of joy begins. Easter lasts from Maundy Thursday to Easter Sunday. But Easter is now also a welcome invitation for other people to celebrate with loved ones in the family and to enjoy time together. Traditionally, Easter eggs are searched for or Easter eggs are dyed. And they also like to nibble on chocolate eggs.

The best DIY Easter gifts

Long before Easter, we find chocolate bunnies and eggs in the supermarkets. And other shops are also tempting with various Easter discounts and gift ideas. But it doesn’t always have to be expensive and exclusive gifts for Easter. Much nicer is the time together that we can spend together at Easter. If you still want to give your loved ones a little something, then we have collected some ideas for you below. This is how you can make simple Easter gifts.

1) Easter gifts for children

Easter is a beautiful and exciting experience, especially for the little ones. Because coloring Easter eggs and looking for eggs and sweets is awaited with great joy. There is also a lot of tinkering going on during this time. Since no large and expensive gifts have to be given at Easter, chocolate, colored pencils, or small books are usually very popular. But other activities and Easter gifts to make yourself are also popular.

Coloring Easter eggs

Dyeing eggs have a long tradition and are fun for the whole family. For this, you need eggs, natural dyes, and some time. You can either color hard-boiled eggs or blow out eggs and paint them.

Make an Easter basket

Children are particularly happy about a colorful Easter basket filled with goodies. For this, you need a container. You can use a basket, a small box, or make a basket out of cardboard. Then you can do this with colorful construction paper or with Easter grass. Then you can fill this with homemade chocolate, chocolate bunnies, colored pencils, and a Pixi book. The little ones will be happy for sure. But when crafting the nests you always avoid toxic fumes, e.g. by using special glue.

Sweets in a jar

Making Easter presents is even easier with screw-top jars. Because you can fill them individually. Then you can paint the jar. You can also stick a cardboard Easter bunny on the jar or put a bunny figure in it or on the lid. The good thing about this Easter gift is that it can still be used after Easter.

Make your own Easter bunny out of socks

Stuffed animals are also a popular Easter gift. And matching the topic, rabbits are often given away. So just make the Easter bunny for your kids yourself. All you need is an old sock, string, stuffing (rice or cotton), and scissors. First, fill the sock halfway with the selected filling material. Then tie the sock with the string. Then fill the second part of the sock and tie it up again. But leave some fabric on the sock. Because that will be the ears. Finally, cut the end to make two ears. You can now also paint the Easter bunny’s face. Also, note our tips for sewing for beginners.

2) Easter gifts for parents and grandparents

Parents and grandparents are also happy about homemade Easter gifts. Because they come from the heart. The children also have fun doing handicrafts. Consequently, we have some Easter gift ideas for the big ones. Also, read our great idea for a weekend with children.

Eggnog as an Easter gift

The eggnog tastes good and is often served at Easter. So how about homemade eggnog this year? Everything you need for half a liter of eggnog can be found in the list. First mix the egg yolk with the vanilla sugar. Then slowly add the remaining ingredients. Finally, beat the mass for 5 minutes over a hot water bath.

  • 4 fresh egg yolks
  • 1/2 packet vanilla sugar
  • 125g powdered sugar
  • 170 ml condensed milk
  • 125 ml white rum

Even if the range of available Christmas candles is very large, a completely individual Christmas decoration can be created at home with the candle foundry. And when you make your own Christmas candles, you can create shapes and colors that match the rest of the atmosphere, resulting in a harmonious picture.

Beautiful Christmas candles for home

The Christmas decorations begin in the pre-Christmas period. Then Christmas accents and candlelight create a nice feel-good atmosphere. But candles are often expensive and it is not always possible to find the right candles for your own Christmas decorations. If you are a person with special ideas, then you should make your Christmas candles yourself in the future. So use this guide and perfect your Christmas decorations:

1) Tools for making Christmas candles yourself

No previous knowledge or manual skills are required for candle casting and making Christmas candles yourself. All you need are the following things from the handicraft supply and the hardware store:

  • candle wicks and candle wax,
  • heat-resistant vessels and skewers of metal,
  • two different sized pots,
  • Decorative wax, decorative foils, and candle pens.

2) The preparations for the candle foundry

If you want to make thick Christmas candles yourself, it’s best to save empty tin cans to save on the expense of the prepared candle jars from the craft store. The bottom of the jar needs a small hole in the middle. Pull the wick previously dipped in liquid wax and knot it. Then cover the hole. Then attach the other end of the wick to a skewer placed across the jar. You have to make sure that this knot is also in the middle so that the homemade Christmas candles don’t burn unevenly later.

3) Prepare wax to make Christmas candles yourself

To avoid damaging the wax, do not heat it above ninety degrees Celsius. Consequently, it is best to heat the wax in a water bath. To do this, put water in the larger pot and the stearin used for the candle crafting in the smaller pot. Then put the smaller ones in the larger pot. Before you put the stearin in there, you should line the pot with aluminum foil. So it can still be used as a cooking pot after the candle foundry. Also, note other tips for cleaning pots.

4) Pouring Christmas candles

First put just a few drops of liquid wax in the container so that the hole in the bottom is closed tightly when it cools down. Then you can fill the container with the liquid wax up to the desired height of the Christmas or Advent candle. This is how you can make the perfect candles for your personal Christmas wreath. There should always be some wax leftover because a hollow usually forms around the wick when it cools down. Consequently, you can fill them with the remaining wax. Nice shades are also created when filling wax shavings in different colors into the pouring vessel before the liquid wax is added.

5) Make individual layered candles

Making Christmas candles with multiple layers is also easy. To do this, stearin in different colors is gradually poured into the pouring vessel. To avoid mixing, let the individual layers cool down briefly. If the candles you have poured yourself cannot be removed from the molds straight away, a short stay in the refrigerator will help. Alternatively, you can rinse the outside of the watering vessel with hot water. For a better illustration, watch the following video on how to make candles yourself. You should also know tips for removing wax stains and candle wax.

Now simply make an individual perfume yourself and do without harmful fragrances. With natural ingredients, you can conjure up your own scent according to your taste and match your own body odor. Scent test helps to determine your scent type.

Good reasons to make your own perfume

We have found out for you how you can easily make your own individual perfume yourself. Because most perfumes often contain many chemical substances that are not good for the body or the skin. It is also the case that some of the ingredients in perfumes can trigger allergies, which is why fragrances should be increasingly regulated.

That’s why it’s best to create it yourself and avoid harmful substances. Some people also feel disturbed by the many fragrances in perfumes, air fresheners, and detergents. They then complain of breathing problems, migraines, or other health problems. We will show you how you can easily make your own perfume with just a few ingredients and how you can determine your fragrance type beforehand.

Determine the type of scent with a scent test

A good perfume has several advantages: it makes you feel more comfortable in your own skin and the different scents can influence your mood. However, it is not so easy to find a suitable perfume. But a scent test can help you to determine your scent type. The following selection criteria play an important role here:

  • The season. If you buy a perfume in summer, you should choose a light, fresh scent. Because wearing a heavy and warm perfume in the hot summer is not only uncomfortable for your own nose.
  • Lifestyle is a good guide. Because those who do a lot of sport prefer a light scent; elegant and classic women often feel comfortable with a warm fragrance that underlines their personality.
  • Age is another influencing factor. Young women generally prefer light fragrances, while they can get heavier with age. While a mature woman gets a youthful touch with a fresh scent, a warm and woody scent usually has a confusing effect on a teenager.
  • Your own body odor is decisive. Because every person has their own individual body odor, which together with perfume results in a personal composition. What smelled delicious on your best friend can lose its appeal on your own skin.

Basic knowledge about making perfume yourself: The perfume structure

Basically, you can imagine the structure of the perfume as a pyramid. The individual components can be divided into different grades. A distinction is made between three different scents. There is the base note, the heart note, and the top note. In order for the smell to be perceived as fragrant, the three fragrance phases must be harmoniously coordinated. Accordingly, these form a “pyramid” from the base to the top note.

Choosing the right scents for making your own perfume

There are different scents that you can use when making perfume yourself. The variety of scents is often confusing. So that it still works when choosing the right note, we have listed some fragrances and the associated fragrances for you. As a result, you will also be able to neutralize bad smells.

  • Floral scents: rose, jasmine, tuberose, lily of the valley, geranium.
  • Citrus scents: lemons, orange, bergamot.
  • Woody scents: sandalwood, cedar, patchouli.
  • Oriental scents: ambergris, musk.
  • Chypre scents: oakmoss.
  • Smoky scents: tobacco, incense.
  • Lavender forms its own fragrance family.

Make your own perfume with the right accessories

It is recommended to make your perfume from 20% base notes, 50% heart notes, and 30% top notes. It is important that you do not mix too many dominant scents together (maximum 3-4). Since the scents are usually not enough, carrier oil is used. Jojoba, almond, or grapeseed oil are often used for this. Also, note tips for making room fragrances yourself.

Then the oil forms a so-called starting point. The fragrance notes are instilled into it. But since oil does not bind, you have to add another substance. You should choose a substance whose smell dissipates quickly, otherwise, the smell can be affected. Consequently, high-proof alcohol such as vodka (40%-50%) or spirits (80%) is good. For a simple perfume in alcohol solution you will need:

  • at least 3 natural fragrance oils,
  • 20 ml high-proof alcohol (cosmetic alcohol, spirit of wine, or ethanol),
  • a few drops of odorless oil, jojoba oil (online e.g. at **Avocadostore) or avocado oil,
  • dark glass bottle,
  • Perfume funnel made of metal (e.g. at Amazon),
  • Perfume atomizer for using the perfume.

Simply make your own shower gel without plastic. Make a homemade shower gel quickly and easily with natural ingredients and do without chemicals. For more sustainability and softer skin.

We use shower gel for our bodies almost every day. Therefore, you should make sure that your shower gel is mild and environmentally friendly. But not all ingredients in the usual shower gels are good for our skin and the environment.

Benefits of a homemade shower gel

The shower gel is used almost every day. But often we don’t even know what’s inside. And even a look at the ingredients doesn’t make us any smarter. Although the conventional shower gels are mostly tolerable, the Öko-Test shows that not all shower gels are good. Because some contain the substance formaldehyde, which can irritate the skin.

The frequent use of so-called PEG compounds is viewed just as critically. Because these ensure that our skin becomes more permeable to other foreign substances. And besides all that, microplastic is still an issue. If you don’t want all of that in your shower gel, it’s time to make your own shower gel. We have collected recipes without plastic. Because this is a good way to promote environmental protection in the household.

Instructions for making your own shower gel

If you now want to make your own shower gel, there are a variety of recipes. The right shower gel is available for every skin type and taste. We have collected the best recipes for you. You can just as easily make homemade shampoo.

1) Easily make shower gel with soap

The classic do-it-yourself shower gel requires only a few ingredients and is free of harmful ingredients. You should have the following ingredients ready:

  • 50 g natural or curd soap (without palm oil)
  • 400 ml distilled water
  • 2 tablespoons vegetable oil (e.g. almond or coconut oil)
  • 1-2 tsp thickener (cornstarch or cornstarch)
  • a few drops of essential oil
  • container

The preparation is very simple: first, rub off 50 g of the soap. Then put the water in a saucepan and heat it up. Then you can slowly add the soap shavings and stir constantly. Then add the vegetable oil and thickener. Finally, if you like, you can add a few drops of essential oil of your choice. Then let everything cool down before pouring the mixture into your container. Old shower gel bottles or glass bottles are suitable for this. In addition, also note our ideas for making deodorant yourself.

2) Homemade shower gel without soap

Since soap can dry out the skin, people with particularly dry skin should make a non-soap shower gel. For this you need the following ingredients:

  • 220 ml distilled water
  • 40 ml betaine (from the internet)
  • 1 tsp cornstarch or cornstarch
  • 1 tbsp almond oil
  • 15ml aloe vera gel
  • container

Once you have all the ingredients, start by slowly mixing the starch into the water. As soon as a creamy mass has formed, you can add betaine and almond oil. Then you have to stir the pure aloe vera gel into it. Alternatively, you can also use the fresh juice of the aloe vera plant. All you have to do is puree them before use.

3) Almond oil and honey shower scrub

You can also prepare your skin with a homemade scrub made from almond oil and healing honey. All you need are these:

  • 50 grams of soap
  • 90 ml distilled water
  • 3 tbsp almond oil
  • 20 natural shea butter
  • 20 grams of sugar
  • 10 grams of honey

First, you have to bring the water to a boil in a saucepan. Then let it cool down a bit before you stir the grated soap into it. Then melt the shea butter and add it to the mixture. You can now also add the almond oil to the mixture. Then mix the whole thing with a hand blender and let it cool down. When everything has cooled you can stir in the sugar and honey. And your homemade peeling for the shower is ready.

Natural bath salts care for the skin and can alleviate health problems. Especially in winter, the body, and mind long for relaxation and a more comfortable atmosphere. Therefore use the positive bath salt effect and start making bath salts yourself.

The healthy bath salt effect

They should emulate bathing in natural springs. Natural bath salts care for and cleanse the skin. Depending on which bath salt you choose, it can have positive effects on your health. Alkaline full baths are used as a home remedy for over-acidification of the body. Bath salts made from Dead Sea salt can relieve psoriasis and neurodermatitis because they have an anti-inflammatory effect. In general, bath salts have a calming effect and can reduce the formation of wrinkles. It also moisturizes dry skin and helps fight colds.

Make your own bath salts and relax

For a more feel-good atmosphere and relaxation at home, take a full bath with homemade bath salts. The water should have the right temperature for this (approx. 36/38 degrees). And with the right music and a few tea lights, the bathroom can become a personal wellness experience. That’s why we have an overview of the best recipes for making bath salts with natural ingredients:

1) Strengthening bath salts

For the perfect skincare use a strengthening bath salt. For this, you have to mix the ingredients below in a bowl until it turns red-pink in color. Then put the bowl in an oven and let it dry at about 50 degrees. During the process, the salt crystals can clump together and loosen accordingly. Rub the rose petals together (by hand) and add. This bath salt effect is invigorating and makes a nice homemade Christmas present.

  • 6 tablespoons Himalayan salt
  • 1 tsp elderberry juice
  • 3 tablespoons Epsom salt
  • 5 drops of palmarosa oil
  • dried rose petals

2) Make your own bath salts to fight a cold

With the right ingredients, you can use a bath salt blend to help relieve a cold. You will need the ingredients below for this. To make bath salts, chop the dried rosemary into small pieces. Then add the sea salt and milk powder and stir well. Then pour the mixture into the glass and drizzle the rosemary oil over the bath salts. Then close the jar tightly and shake the contents vigorously. Finally, let the whole thing rest for a few days so that the active ingredients can soak into the existing salt. After a few days, the bath salts can be used to relieve a cold.

  • 1kg sea salt
  • 5 drops of rosemary oil
  • 1 handful rosemary (preferably dried)
  • about 90 grams of milk powder

It is important to note, however, that this type of bath salt should only be used by adults and should therefore be kept away from children.

3) Make winter bath salts

When the cold season is in full swing, a warm full bath with bath salts can reduce stress and prevent colds. To do this, mix the ingredients listed below (except eucalyptus oil) in a bowl. Then pour the mixture into a glass and drizzle the eucalyptus oil on top. Then close the jar and shake it vigorously. Finally, let the whole thing work together for a few days. For an application in the bathtub, it is recommended to use about 3 tablespoons of body-warm water. Consequently, the bath salt has a relaxing effect and helps against body aches.

  • 250 grams of very fine sea salt
  • 125 grams Epsom salt
  • 8 drops of sweet orange oil.
  • 1 tsp glycerin (liquid
  • 8 drops of eucalyptus oil.

4) Make lavender bath salt yourself

The scent of lavender oil soothes the senses. A lavender bath in the evening, in particular, helps to combat insomnia and ensures a good night’s sleep. Therefore, use the following ingredients to make your own bath salts. Consequently, you have to put them in a sealable jar and mix them well. And your natural bath salt is ready to use.

  • 400 g Dead Sea salt
  • 4 drops of lavender oil
  • 2 drops of sage oil

5) Make buttermilk bath salts

For beautiful skin and relaxation treat yourself to a buttermilk full bath. For this use the following ingredients. First, mix the salt with the vanilla oil. Then add buttermilk powder, cornstarch, and cleansing citric acid. Then the entire bath salt mixture belongs in a sealable jar.

  • 400 g Dead Sea salt
  • 100 g buttermilk powder
  • 2 tbsp cornstarch
  • 2 tbsp citric acid
  • 5 drops of vanilla oil

6) Use alkaline bath salts

If the body is acidic, it is advisable to take an alkaline bath. You can simply use Dead Sea salt or the popular household remedy baking soda as a bath salt. Accordingly, add one of the salts to your full bath and bathe in it for at least 30 minutes so that the salts can develop their effect. Ideally, you supplement the bath with an alkaline diet for greater effectiveness. Then you can fight listlessness and fatigue and start the day strengthened.

  • 200g baking soda or the Dead Sea salt
  • 5 drops of an essential oil

7) Take an oriental full bath

If you like something a little more unusual, you can use lesser-known essential oils. Here, too, the production of the salt is very simple. Mix the following ingredients together so that the oil is well mixed with the salt. You can then store it in a sealable jar and use it at any time.

  • 400 g Dead Sea salt
  • 2 drops of sandalwood oil
  • 1 drop of jasmine oil
  • 1 drop of plan ylang oil

Tips and instructions for making popcorn yourself at home. The best tricks and popcorn recipes for making popcorn yourself in a pot on the stovetop.

Popcorn is popular and delicious when a long evening of TV is imminent or a snack is missing for the party. And without much effort and fuss, this delicious treat can be prepared very quickly at home.

Tips for making popcorn yourself

Below are the best tips and tricks on how to quickly and inexpensively prepare popcorn that is tasty and fresh. Great cooking skills and complicated ingredients are not required for this. You need dried corn kernels, some cooking oil, and, depending on your taste, sweet or savory ingredients. No special machine or device is required other than a regular saucepan with a matching lid and a stovetop. And if you don’t have a cooking pot at hand, you can also prepare the popcorn in a pan with a lid.

How is popcorn actually made?

Popcorn is made from corn kernels. The corn kernels contain water and also some oil. If the corn kernels are now heated in the pot, these components change. From the liquid water and oil version in the grain, the components suddenly become gaseous. The corn husk breaks open due to the heat input. And with this small popping up, each individual kernel of corn automatically expands and the popcorn is ready.

In order to get a good result quickly, a pot temperature of around 180 degrees Celsius is required. Then the corn kernel shell tears open and water vapor escapes from the corn kernel. The corn starch gets out of the grain and offers a well-known popcorn shape.

Easy popcorn recipe for everyone

For the basic popcorn recipe, put some cooking oil in a saucepan. A small amount of cooking oil that wets the bottom of the pot is sufficient. Then put the corn kernels in the oil. Then you should definitely put a suitable lid on the pot. This is necessary so that the finished popcorn does not pop out of the pot when it pops up.

Then turn on the stove and heat the pot until a little over half the corn kernels have popped up. Most of the time, the grains pop up very quickly. For this reason, it is better to stay at the stove. After popping up, you should immediately turn off the heat supply. You must immediately remove the finished popcorn from the stovetop so that it does not burn in the hot pot.

Make sweet or savory popcorn yourself

Depending on your taste, the finished popcorn can now be seasoned. Mostly sweet variants with sugar are chosen. But hearty seasoning, for example with paprika, chili, tomato, or curry, is also possible and popular. It is important that the popcorn is still warm when it is seasoned. This way, the selected ingredients stick better to the popcorn.

A little tip for the slimline

The popcorn can be prepared very low in calories. If, for example, a coated pot is selected for the preparation, then no cooking oil needs to be added. The corn kernels pop up even without the addition of fat. However, the popcorn should also be seasoned heartily. Because all sweet variants with sugar or caramel contain a lot of calories.

It is the Maillard reaction that makes the golden brown crusts in fried and fried foods so irresistibly delicious. But what does that have to do with aging?

What is the Maillard reaction?

The Maillard reaction is not, as its name implies, a single chemical reaction. It’s a whole series of complex chemical processes. The name is just a collective term. It summarizes all the flavor-forming reactions that take place when you heat a food.

The Maillard reaction owes its name to the French biochemist Louis-Camille Maillard. In 1912 he was the first to describe the reaction that occurs when you heat carbohydrates and proteins together.

The Maillard reaction is a multi-phase reaction that leads to many different end products. For example, if you heat a steak, the proteins contained in the meat unfold and gradually break down into their individual amino acids. The released amino acids then attach themselves to free sugar molecules and form the so-called Amadori products.

Some of the Amadori products are then converted into flavoring and roasting substances, depending on the reaction conditions and the food. A well-known roasted product is maltol, for example, which tastes like caramel. It gives many baked goods and confectionery their characteristic aroma. 2-Furfurylthiol, one of the main aroma components of roast coffee, is also formed in this way. However, 2-furfurylthiol is not only found in coffee, it is also a key flavor component of fried meat, sesame oil and popcorn.

When Amadori products are broken down, not only are tasty flavorings created, but also compounds that are harmful to health. The best known are the substances classified as carcinogenic:
acrylamide
and hydroxymethylfurfural, HMF for short.
Acrylamide is found increasingly in:
French fries
roasted coffee
toast
Foods with elevated HMF levels include, for example:
sweet wheat bread
cereals sweetened with honey

What does the Maillard reaction have to do with aging?

The Maillard reaction also takes place in our body and plays a crucial role in diabetes and aging processes. Scientists discovered this in the late 1980s.

Proteins and sugar molecules can combine directly in your body at body temperature. This is similar to cooking. The reaction is much slower than in a 200 degree oven. Nevertheless, as you age, more and more so-called “Advanced Glycation End Products”, or AGEs for short, accumulate in your body. AGE is a collective term for all proteins in your body that are permanently congealed with sugar.

A particularly large number of AGEs are found in the body of diabetics because they have an elevated blood sugar level. This means, for example, that diabetics increasingly suffer from a clouding of the eye lens, the cataract. How cataracts develop is sometimes not fully understood. However, studies indicate that the AGEs formed in the course of the Maillard reaction could cause clouding of the eye. In addition, it is suspected that the increased concentration of AGEs in the body of diabetics is responsible for the fact that they suffer more and more early from typical diseases of old age.

The AGEs even have their own receptor in our body.  When AGEs bind to the RAGE receptor, an inflammatory response is triggered in our body. Chronic inflammatory conditions in our body can lead to the development of various civilization diseases such as diabetes, cardiovascular diseases, arthritis and allergies over the long term.

What can you do to reduce the build up of AGEs in your body?

The fact that AGEs form in your body is a completely natural process and is usually not harmful. However, it is scientifically assumed that our modern diet means that we ingest a large excess of AGEs with food. In grandmother’s time, soups and stews were still often eaten on a plant basis. This has changed with increasing prosperity. A piece of meat fried in oil or in the oven often represents the main part of a meal in our society.

The proportion of AGEs in a meal depends on two factors:
the origin of the food and
the preparation method.
The foods that have particularly high levels of AGEs mainly include products of animal origin such as:
Red meat
eggs
butter
Cheese
cream
This is because animal foods have a higher protein and fat content than plant foods. This makes them more susceptible to the formation of AGEs.

Preparation methods that favor the formation of AGEs include:
frying
Bake
Roast
Toast
sauté
grilling
These are all ‘dry heat’ and high temperature methods.

On the other hand, particularly few AGEs are
blanch
braising
steam cooking
educated.

The reason for this is that the temperature is significantly lower with these preparation techniques. Water cannot be heated above 100 °Celsius. The food is therefore gently cooked. But that doesn’t mean that the Maillard reaction doesn’t take place. Anyone who has ever burned the béchamel sauce can certainly confirm this. First, the milk creates a pleasant cooking aroma. But then it burns when the heat is too high and tastes bitter.

As a rule of thumb it can be said:
The darker the crust of a food, the higher its AGE content.

For the sake of your health, it is therefore better if you eat mainly plant-based foods. Also, avoid fried processed foods and sugary baked goods. As a result, you consume fewer AGEs and at the same time protect the environment. Animal foods have a much higher ecological footprint than plant foods.

Of course, you don’t have to do without grilling in summer or toasting your bread in the toaster. As described in the first section, the formation of Maillard products is also important for aroma formation. Nevertheless, you are doing something good for your health if you cook more stews or stews.