Tag

methods

Browsing

Introduction to traditional food preservation methods in Zimbabwe

Food preservation is an essential aspect of food security in any society. In Zimbabwe, traditional methods of food preservation are still widely practiced to ensure that food is available throughout the year. Some of the traditional methods used for food preservation in Zimbabwe include sun drying, fermentation, smoking, and salt curing.

Sun drying as a popular method for preserving food in Zimbabwe

Sun drying is a common method of food preservation in Zimbabwe, especially for fruits and vegetables. The process involves exposing food to sunlight to remove moisture, which is essential for the growth of mold and bacteria. Sun drying is a simple and effective method of food preservation and is commonly used to preserve foods such as tomatoes, mangoes, and leafy vegetables. Once the food is dried, it is stored in airtight containers to prevent moisture from seeping in.

Fermentation as a traditional method of food preservation in Zimbabwe

Fermentation is another traditional method of food preservation commonly used in Zimbabwe. The process involves allowing the natural bacteria in food to break down sugars into acids, which act as a natural preservative. Fermentation is commonly used for foods such as vegetables, milk, and grains. The most popular fermented dish in Zimbabwe is called “mukaka wakakora,” which is made by fermenting cornmeal and vegetables in a clay pot for several days.

Smoking as a traditional food preservation method in Zimbabwe

Smoking is a traditional method of food preservation that involves exposing food to smoke to preserve it. Smoking is commonly used for meat, fish, and cheese. The smoke acts as a natural preservative by inhibiting bacterial growth and preventing oxidation. The most popular smoked dish in Zimbabwe is called “nyama ye huku,” which is made by smoking chicken over an open fire.

Salt curing as a method of food preservation in Zimbabwe

Salt curing is a traditional method of food preservation that involves coating food with salt to remove moisture and prevent bacterial growth. Salt curing is commonly used for meats such as beef and pork. The meat is coated with salt and left to cure for several weeks, after which it is washed and stored in a dry place.

Conclusion: Traditional methods of food preservation are still practiced in Zimbabwe

In conclusion, traditional methods of food preservation are still widely practiced in Zimbabwe. These methods are effective in ensuring that food is available throughout the year, especially during times of scarcity. Sun drying, fermentation, smoking, and salt curing are some of the traditional methods used for food preservation in Zimbabwe, and they continue to play an essential role in food security in the country.

You can collect good ideas with various brainstorming methods. So that these are not lost, you should record your thoughts and ideas immediately. We’ve put together tips for collecting and holding on to you.

What is brainstorming?

Brainstorming is a specific way of generating ideas. This is now one of the classic creative methods for collecting and recording ideas. It should save valuable time and money in meetings and promote productivity. And the principle is very simple: a group of people get together and spontaneously share ideas on a specific topic or problem for a certain period of time. So it is a kind of mind game that is supposed to stimulate the brain and promote creativity. The lively exchange gives rise to numerous new combinations of ideas. After the first phase (30-45 minutes) a second phase follows at the same time. The ideas are evaluated here. This is also a good method for learning.

Important rules for brainstorming

In order for ideas to be collected and recorded within the group to work well, a few rules are needed. However, these should not restrict the participants, but give them the freedom to exchange ideas freely. You should therefore heed the following rules:

  • Criticism is undesirable. Every idea counts in the brainstorming process. Therefore there is no right or wrong.
  • quantity instead of quality. First, the quality of the idea does not matter. Because this can sometimes produce new ideas.
  • Ideas are for everyone. This means that someone else can and should use your idea and develop it further if necessary. Because this is how the best results can be achieved.
  • Set no limits. There should be no limits to creativity and imagination. Possibly the best solutions lie in the absurd thoughts.

What brainstorming methods are there?

There are different brainstorming methods that are suitable for collecting ideas within the group. The best known is to collect ideas verbally in a group and record them in writing. But also brainstorming methods, in which people try to solve the problem from the perspective of another person, are often used. As an individual, it makes sense to record ideas in writing with a mind map. Asking questions instead of looking for answers can also be effective. Try it on the topic of saving electricity or with the question of how you would like to organize your retirement provision.

How can I best capture ideas?

Good and interesting ideas often come as fast as lightning. But as quickly as they come, they’re gone if you don’t hold on to the ideas. Because the great ideas, creative and lateral thoughts know no time of day or night. Therefore, you should heed a few tips to capture your ideas:

  • Always have a small notepad and pen with you. Then immediately put the ideas down on paper.
  • Place a small notebook on the bedside tables. Short notes in keywords are often enough to remember the content later.
  • While driving, you simply tell the ideas to the person opposite you. Or consciously build mnemonic bridges in order to put them down in writing at the next best opportunity.
  • You can also save notes on your cell phone while you’re on the go. If you don’t have any other writing materials with you.

If you want to make jam or preserve fruit yourself, you should definitely sterilize your jars beforehand. We’ll show you three easy ways to get them germ-free fast.

If you want to try your hand at making jam or preserving fruit and vegetables, you can’t avoid using mason jars. You don’t have to buy these again – just collect your old jam jars, vegetable jars and other screw-top jars.

Before you reuse these jars, it’s important to rid them of any germs. Otherwise you risk that your filled compote etc. will become moldy or go bad. Glasses are sterilized with the help of heat, i.e. germs and bacteria are killed. Below we present three simple methods of how this works.

Sterilize jars in boiling water

The first variant is also the most well-known method of sterilizing glasses. All you need is a large pot.
Pour water into a large pot.
Place the open jars and lids inside. The glasses must be completely covered by water.
Bring the water to a boil and let the glasses boil in it for ten minutes.

Sterilize jars in the oven

You can also sterilize glasses in the oven. This is useful if you want to clean a lot of or large glasses. You do this as follows:
Rinse the glasses with hot water first. For example, pour water from the kettle over them.
Then place the jars in the oven. Caution: You should not put the lid down with you. These are only sterilized with hot water (step 1).
Then set your oven to around 130 degrees Celsius and put the jars in for 15 minutes.
Then let it cool down first or take it out of the oven with gloves on.

Sterilize glasses in the dishwasher

The third and last variant is also suitable for a larger number of preserving jars. What do you need for this? Just your dishwasher!

Put the glasses in your dishwasher like normal dishes. You put the lids in individually.
Choose the hottest level of the machine and start the program. You don’t have to add dishwashing detergent or dishwasher tabs.
Remove the glasses after the round and fill them up as quickly as possible.

Important: The preserving jars must be alone in the dishwasher. You should not put other dirty dishes in it.

Also: No matter which variant you choose – you should always clean the glasses immediately before filling them. This guarantees sterility.

Chilies add flavor to any meal and are easy to grow here too. To keep your chili peppers longer, you can easily dry them and use them in a variety of ways.

Drying the chili: This keeps the pods durable

Chili plants are easy to care for and high-yielding and are therefore becoming increasingly popular with hobby gardeners in this country. Depending on the variety, you can harvest the pods in late summer or autumn. However, if you grow the chilies to use in the kitchen, you will hardly use all the pods at once. To preserve them, you can dry chili. So you don’t have to throw away your harvest and you can stock up for the whole year.

Drying chili: the right method for the right pod

You can air dry chili peppers, in the oven, or in a food dehydrator. Which method is most suitable also depends on the type of chili. If you want to air-dry your chillies in an environmentally friendly and energy-saving way, you should take this into account when choosing the variety.

Air: You can thread the fresh pods onto a string and hang them up like a clothesline in a warm, dry place. After about four to six weeks, the chillies should be completely dry. This method is suitable for thin-fleshed, narrow chili peppers, such as Cayenne or Tabasco.
Oven: Halve the pods and remove the stalk. You can also dry the seeds if you like. Arrange the chillies on a baking sheet lined with parchment paper so that they do not overlap. Let them dry in a fan oven at 80 degrees for about 6 to 8 hours.
Dehydrator: Even when drying in the dehydrator, you should halve larger pods. After about eight hours, the pods should be dry – they should no longer bend and should be slightly brittle. The last two methods are ideal for thick-fleshed chili varieties such as jalapenos or habaneros.
Tip: Drying chillies in the oven or dehydrator uses a lot of energy. If you don’t preheat the oven first, it at least saves a little electricity. Never leave the oven door open while you are drying the chillies: this wastes a lot of energy and the pods have to stay in the oven longer.

Attention: In the oven or dehydrator, sharp vapors develop quickly that can irritate the eyes and nose. To avoid this, you can leave your kitchen window open during the drying process.

Drying chili: tips for storage and use

You can store the dried chillies as whole pods, process them into flakes or powder. They retain their aroma best as pods, while flakes or powder are easier to use as spices. If you later want to process the pods into chili powder, it is advisable to remove the seeds before drying.

You can roast whole, dried pods briefly before using them. This is how you enhance the sharp aroma. If you soak the dried pods for half an hour before you process them further, they almost return to their original shape: You can then fill them, for example, or use them to make a hot sauce. Dried chillies can be used in many ways and complement your spice rack.

The water temperature is crucial for the cooking method. You have the choice of boiling, poaching, blanching, steaming, steaming, or vacuum cooking.

When preparing food, it is important that it tastes good, is digestible, looks appetizing, and contains as many vitamins and nutrients as possible. With the right cooking method, you can positively influence the result.

The water temperature has an impact on taste and cooking time

The most common methods of cooking with water are:

  • boiling/simmering
  • Poaching/simmering
  • blanch
  • steaming
  • steaming
  • vacuum cooking

These methods differ in the water temperature and the amount of water required. The hotter the water, the shorter the cooking time. Use the right cooking method so that the vegetables are neither too hard nor too mushy. The meat should not be too dry either.

1) Boiling or simmering

We usually associate two different things with the term cooking. First, we think of the activity of cooking, the whole process of preparing a meal. In the second case, and this is what is meant here, it is about a cooking process in which the water is heated to over 100°C, i.e. it reaches the boiling point. You need to use enough water to completely cover the contents of the pot. Potatoes, pasta, or soups are usually prepared in this way.

2) Poaching, also called simmering

The water temperature when poaching should be around 70-90°C. It is important that the water does not boil. There shouldn’t be any steam either. Leave the food to soak in the hot water until the desired consistency is reached. This gentle method is particularly recommended for foods that break down easily. Examples of this are fish, tender vegetables, or the so-called poached eggs.

3) Blanching

In this process, you first bring the water to a boil and then put the food into the water. After a short time, about 1-3 minutes, take it out and shock it in very cold water. With this method, many nutrients are retained and germs are killed. The vegetables stay crisp and get a strong, bright color. Blanched foods are usually further processed afterward. You can ideally freeze these to cook or fry later.

4) steaming

Here the ingredient is not cooked directly by the boiling water, but by the steam. There are special steam cookers or pressure cookers for this. But you can also use a conventional saucepan for steaming. To do this, hang either a sieve or a special insert in the saucepan. It is important not to touch the water surface. Place the ingredient in the insert and cover the pot with a lid. The ingredient is cooked by the steam generated by the boiling water. This method is considered a particularly gentle process since the nutrients cannot be lost in the water.

5) steaming

Only a little liquid is needed for steaming. You put the vegetables, fish, or meat in the pot and close it with a lid so that the steam does not escape. The temperature should be above 70°C and below 100°C. During heating, additional liquid is extracted from the food. This food’s own juice mixes with the added water. With this method, too, only a few nutrients are released into the cooking water. The remaining liquid at the end of cooking is great for making a sauce.

6) Vacuum Cooking

A vacuum sealer is required for vacuum cooking. You can use it to enclose the food in an airtight plastic bag provided for this purpose. You should season the food beforehand. Place the plastic bag in a pot filled with water and cook the food at a water temperature of around 65-80°C. This method doesn’t work as well for poultry. At the relatively low temperature in the water bath, not all pathogens may die.
During this preparation, the food retains its nutrients and natural taste.

Extinguish the fat fire properly. If the hot oil or fat gets onto the stovetop or the ceramic hob while cooking, it can ignite. Or it suddenly starts to burn in the pot. Then you should keep calm and follow these tips to extinguish the burning fat.

Oil and fat fires can quickly break out in kitchens. And these are not harmless. That’s why you shouldn’t act rashly. You take your eyes off the hot stove for a moment and it’s happened. But how do I put out the fat fire properly? Consequently, we will tell you what you should pay attention to in such a situation.

How does an oil and fat fire develop?

Such a fat fire occurs when the oil or fat is heated too much. Because at over 280 degrees, the fat can catch fire and, in the worst case, spread. Since most stovetops can get above this number of degrees, fires often break out in the kitchen. This should be avoided by turning the stovetop temperature down a little after the pan has heated up initially.

Why you shouldn’t extinguish burning oil with water

You should never put out burning oil with water. Because if you pour water on the burning oil, there will be a deflagration. This causes the flames to leap higher and the hot oil squirts through the kitchen like a mini-explosion. Consequently, this can lead to severe burns on the skin.

How to extinguish burning fat?

How do I behave correctly if there is burning fat in the kitchen? There are several ways to get the fire and flames under control. Of course, it is important to weigh up how dangerous the situation is. If the fire is already too big, don’t hesitate to call the fire brigade. Such a fire can be very dangerous. But if it’s a small flame, you can put it out yourself.

1) Extinguish with a lid and a damp kitchen towel

If your stovetop is on fire, turn off the stove and douse the flames by throwing a damp kitchen towel over the flames. This deprives the fire of oxygen and suffocates it. If the only fire is in the pot or pan, put a lid on it. So the fire goes out quickly. Read the following article on how to remove burnt-in marks from the stovetop.

2) Fire blanket only suitable to a limited extent

A fire blanket made of flame retardant material can extinguish a fire. But if used incorrectly, there is also a risk of burns and unextinguished fat fires. If you don’t have a fire blanket at hand at home, you should definitely not use other blankets. Because these can burst into flames in high heat and additionally accelerate the fire. Also, read how to effectively remove the burnt smell.

3) Fight grease fire with extinguishing spray

So-called extinguishing sprays are a good means of extinguishing small fires. Although they don’t stand a chance with larger flames, these are easy to use and can be found in every kitchen. In addition, they are inexpensive. If your pan, the Advent wreath, or the hob starts to burn, you can use it quickly and easily.

4) Call the fire brigade in the event of a grease fire

Since a grease fire can be very dangerous, you should not hesitate to call the fire brigade. Especially if the fire has already grown large and threatens to spread. Because the most important thing is to get yourself and others to safety so that nobody gets hurt. You can see how dangerous such a fire can be in the following video. Also, note our tips on liability insurance for the family.

Why preserve? Everyone has a refrigerator, tins last forever and anyway you can buy fresh every day. So it’s no wonder that hardly anyone knows how to preserve food themselves. Preserving, pickling or drying makes sense – and fun.

If you research the internet about preserving food, you will come across many websites dedicated to self-sufficiency and people who think they need to prepare for the coming apocalypse. Of course, in this case, long-lasting foods are essential. But it also makes sense for the average consumer with a fridge and supermarket around the corner to preserve food themselves: That way you know exactly what’s in it – and what’s not.

Everyone decides for themselves what they process – regional and seasonal organic goods, for example. In this way, you can store your supplies without plastic and possibly save energy if they don’t have to be in the fridge. In addition, the trip to the supermarket just before closing time is no longer necessary if you have delicious supplies at home.

Here are three simple ways to make food last longer through canning:

1. Preserving Food: Boiling

This preservation method is particularly suitable for fresh fruit and vegetables as well as ready-cooked dishes and is a simple way of preserving seasonal foods for a long time. Ideally, the food preserved in this way will keep for several years. The principle: When preserving, the food is filled into clean jars, which are then closed and heated. When the glass is heated, an overpressure is created, and when it cools down, a vacuum is formed. This keeps the jar airtight and protects the contents from germs.

If you only briefly heat the food at around 60 to 90 degrees, bacteria are killed while vitamins and nutrients are retained (pasteurized). However, what has been cooked in this way does not last quite as long.

The second option: You heat the glasses to over 100 degrees Celsius for a long time (sterilize). This kills any microorganisms that could spoil the food. Disadvantage: the fruit and vegetables lose some of their nutrients and vitamins, for example vitamin C. On the other hand, the food cooked in this way can be kept for a very long time – if you follow the temperature and time specifications exactly.

In principle, for both methods you only need fresh fruit or vegetables of your choice (if possible free of bruises or stains) and clean mason jars or screw-top jars. You should prepare the food for preservation by pitting or pitting, peeling and/or chopping it, depending on the type.

They are then filled into the clean jars, either raw or pre-cooked. You should leave at least one centimeter of space at the top to the edge. Then the well-closed jars are placed in a large saucepan in such a way that they do not touch each other. Fill the pot with water until the glasses are about three-quarters covered and then boil – depending on the method for about 10 to 45 minutes. Let cool, done.

Tip: Find a suitable recipe for exactly the fruit or vegetables you want to preserve and follow the instructions exactly.

2. Preserving food: Pickling

Canning is the process of preserving food in liquid—usually vinegar, oil, or alcohol. Pickling works well with most fruits, herbs, and vegetables.

In addition to cucumbers, other solid vegetables such as beans, carrots, cauliflower, onions, peppers, pumpkin or beetroot can also be pickled in vinegar. The vegetables should not have bruises or discolouration. The best way to prepare it is to clean it and cut it into pieces; You can leave cucumbers sprinkled with salt for a few hours.

For one kilogram of vegetables you need about half a liter of 5% vinegar and a quarter to half a liter of water with spices (e.g. mustard seeds, coriander seeds, bay leaves, juniper berries, pepper). From this you cook a broth and cook the vegetables in it. You then fill this hot into prepared, clean screw-top jars. Bring the sauce back to the boil and pour over the vegetables. The vegetables should be at least an inch or two covered with liquid.

Seal jars tightly and then allow them to steep for about 4 to 6 weeks before eating the pickles. The vinegared vegetables usually last for at least a few months if you store them in a cool and dark place.

Possible variant: You can add some sugar to the vinegar mixture, this also has a preservative effect.

Soaking in oil is not quite as effective as in vinegar, because oil does not preserve as well, but mainly protects against microorganisms. That’s why pickling works best if you preserve the food in a different way beforehand (e.g. dry it) or at least boil or roast it.

Pickling in oil is well suited for vegetables such as peppers, aubergines, mushrooms or artichokes, but also for feta cheese or cream cheese. For taste, you can add fresh or dried herbs or pepper, for example.

Again, it is important that you use clean screw-top jars. In addition, it is best to use oil for pickling that does not have a very strong taste of its own.

To prevent air bubbles from forming, fill the glass alternately with the food and the oil. The whole thing should be covered with oil by an inch or two. Seal the jar tightly and then store in a cool, dark place. The contents will last for about three to four months.

3. Preserving food: drying

One of the oldest and easiest ways to preserve food is to dry it. This works particularly well with fruit, vegetables, herbs, seeds, nuts, fish and meat. When drying or dehydrating food, most of its moisture is removed. This removes the breeding ground for the microorganisms and enzymes responsible for spoiling the products – the food lasts much longer.

However: In our latitudes, air drying is rather difficult due to the weather – and we don’t think it makes sense to heat the oven for hours or even to use special electric drying and drying devices. Therefore: You should only try drying if you have a warm, airy, dry and ideally even sunny place where the food can be stored for some time until it is dry (e.g. balcony, attic, tiled stove).

It is best to only use flawless products that you have washed beforehand and cut into pieces, slices or strips. Blanching vegetables beforehand shortens the drying time. You can either tie herbs into bundles or pluck their leaves.

Then spread the food out on a grid or grid and cover it with a thin cloth (gauze) to protect it from insects and dust. You can also thread them onto cords and hang them up.

How long it takes to dry depends on the food: fruit and vegetables are dried when they feel leathery, are pliable and no liquid escapes. Herbs should rub easily between your fingers.

The dried fruits, vegetables or herbs can be stored well in storage jars or screw-top jars. If you store them in a dark and dry place, they can last for several years thanks to this preservation.

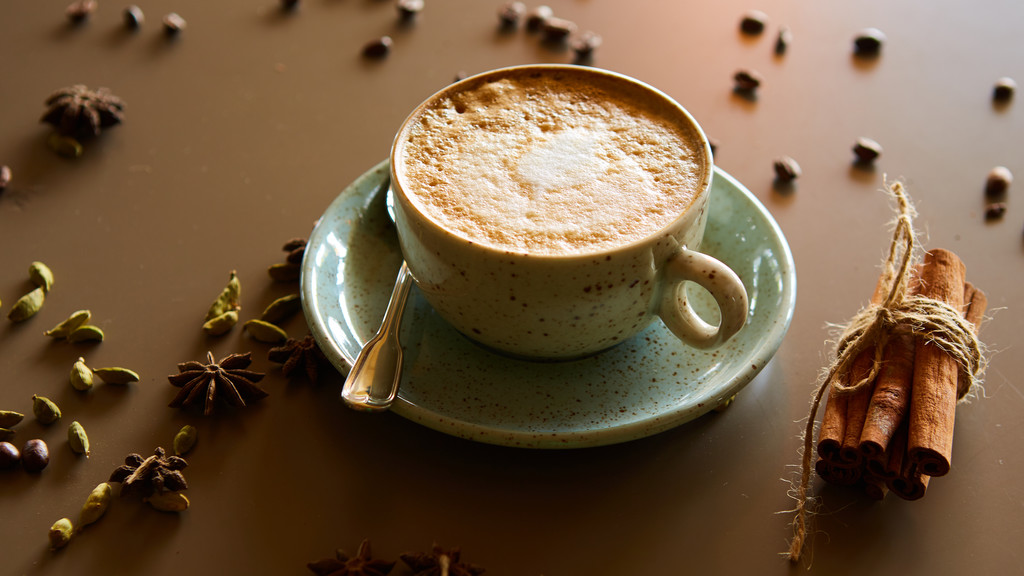
A hot and soothing coffee – that’s what hardly any of us can do without. No other drink can match the popularity of the pick-me-up.

Classic coffee machine with filter

Filter coffee is one of the most popular ways to brew coffee. According to the 2016 Coffee Report, about 71.8% of all coffee drinkers own a filter coffee machine. Thus, it takes first place by a wide margin and leaves all competitors far behind. By the way, filter coffee plays a pioneering role in the automation of coffee preparation. Until the 1950s, coffee had to be brewed by hand in the traditional way. With the invention of the filter coffee machine and vacuum-packed ground coffee, all households have been able to brew coffee quickly and easily. Thus, all modern coffee machines and fully automatic coffee machines represent a further development of filter coffee machines.

pressure brewing systems

The so-called pressure brewing system is an offshoot of the filter coffee machine. An attempt was made to prepare espresso as filter coffee. The result is rather unusual: strong, strong coffee is produced. It can best be compared to mocha coffee.

Stamping pot: pure flavor

Making coffee doesn’t always have to be boring. The stamping pot, also known as the cafetere, was invented in France in the mid-19th century. It offers its users a fragrant and full-bodied taste. Anyone who loves strong coffee has come to the right place. The working principle of stamping pot mainly combines aroma extraction and brewing.

Cona Pot: chemical coffee

The Cona pot looks like a chemistry experiment and apparently has little to do with making coffee. The unusual brewing method came from Germany and was widely used, especially in the old days. Nowadays, the equipment is often used for decorative purposes, but, of course, it can also be used for making coffee. In a broad sense, this is the so-called glass piston coffee maker. It owes its name Cona-Kanne to its manufacturer.

Unforgettable Karlsbader Canne

Karlsbader Kanne has been celebrating its market success for over 100 years. Even today, the production of classics does not stop. The secret to their success story lies simply in their simplicity. The pitcher filter is made of porcelain and does not affect the taste in any way. The best filtered coffee with pure aroma is prepared in a short time.

The Karlsbader Kanne is made up of four different parts. It consists of a coffee pot, a lid, a two-piece coarse-mesh porcelain filter, and a brewing attachment.

Coffee maker without espresso?

Contrary to what the name suggests, espresso is not actually made in an espresso pot. The so-called “percolator” uses only the principle of steam, which is also used to make espresso. However, this does not create the necessary pressure to really make a strong espresso. So “only” normal strong coffee is brewed.

Hot and soothing coffee is something that hardly any of us can do without. No other drink can compare in popularity with a tonic drink.

Original: porcelain coffee filter

The porcelain coffee filter has been one of the must-have items in every home. A somewhat older generation probably still remembers the original Melitta porcelain filter that you saw every day at your grandparents. Here, brewing was still done by hand by hand. There was a kettle of water on the stove. Then it was necessary to pour boiling water over a porcelain filter, which, in turn, stood on a coffee pot. In this way, the aromas of the ground coffee inside the filter have been dissolved and an incomparable aromatic coffee has been created. This brewing method is still used today to test the quality of many coffees.

Ibrik: Traditional Coffee Brewing Tour

Ibrik represents, so to speak, the beginning of all types of coffee making. Those who wanted to make coffee always used a small, inconspicuous coffee pot. About a third of all coffee drinkers still use this method. Especially in the Arab countries, Ibrik has a lot of fans. This is where he comes from. At the same time as coffee beans, the method of preparation came to us in Europe around the 16th century. Whether in China, in the south of Russia, in Turkey, Greece or anywhere else – the centuries-old cooking method is known everywhere.

Napoletana: coffee in the process of being turned

The Napoletana is a reversible pitcher that works on a very simple principle. It’s easy to recognize from the outside.
The jug consists of two small pots. They are located directly above each other and fastened with screws. There are handles on the upper and lower ends of the reversible jug – here you can immediately see the possibility of rotation.

State-of-the-art coffee technology: fully automatic machine

The fully automatic machine is an innovative all-rounder among coffee machines. No other device can make coffee in such variety and perfection. Less coffee is brewed here than coffee is “created”.

Espresso machine – coffee in its class

Who does not know them: espresso machine. Hardly any other coffee machine is as famous as a wonderful machine that brews delicious espresso. But unlike a fully automatic machine, you still have to do it yourself. This not only leads to some work, but also helps individual taste. The degree of grind, water, and use largely determine the taste of the coffee in the end. Of course, you should invest in a decent device beforehand. A good espresso machine is the key to first-class results. What you make of it is, of course, entirely up to you.

Lifestyle coffee discs and pods

With the invention of discs and pads, the coffee industry hit the nerves of our time. Small, filled containers contain exactly the amount of coffee needed to make a delicious and aromatic coffee drink. The founders of this movement are Philips and roaster Douwe Egberts. About 10 years ago, a new way of making coffee was invented.

World of coffee: pleasure for everyone

Anyone who wants to make coffee must, of course, choose the right kind of coffee in advance. Depending on the method, it is always worth varying individual varieties and tastes. A lamb pot, for example, is best filled with dark roasted coffee beans. On the other hand, fully automatic machines can handle any type of bean well.

It was already considered outdated and old-fashioned, but now it’s back! We’ll tell you why filter coffee is making a comeback and what different methods of preparation there are.

The filter coffee as a cult

Filter coffee has increasingly become a trend drink in recent years. It’s no longer just about the taste, but as with whiskey or chocolate, new questions arise here too: What are the working conditions like in the countries where the coffee is grown? Are the cultivation and harvest environmentally friendly? The bad reputation of filter coffee was pushed aside and the methods of preparation rediscovered. A single coffee bean has over 800 flavors. This is what makes filter coffee so exciting, because here it is important to get the right aromas out of the bean and to adjust the roasting profile of the bean. Because unlike latte macchiato or cappuccino, the drink is not covered by milk here, so that the special aromas can better come into their own.

The advantages of filter coffee

Even if filter coffee was perceived as outdated and bad coffee for a long time, the method of preparation has continuously evolved and thus helped the “new” filter coffee to achieve a renaissance. Forgotten is the outdated, stale stereotype of filter coffee. Now it tastes better than ever – and as a comparatively sustainable production method, it also embodies the spirit of the times:
Larger bottom opening in the filter holder: The coffee flows through more evenly and unwanted bitter substances and sediments stay outside. The taste of the coffee is not clouded. Some filters also have spiral ribs on their inner wall. The ribs are there so that the filter paper does not stick to the filter, the finished coffee can run off nicely and does not accumulate.
Tasteless filter paper: Fine-pored and tasteless filter paper gives the coffee an authentic, clear taste. If the coffee tastes too mild, you can use a cotton filter. This allows more oils to get into the coffee and the intensity of the aroma increases.
Environmentally friendly: The environment benefits greatly from the fact that filter coffee is on the rise again. Pad or capsule machines are faster than a filter machine, but leave a lot of waste. An additional capsule is required for each new coffee drink. And a capsule consists of two-thirds coffee and one-third packaging material. In addition, the capsules are a major cost factor in the long run.

This is to be considered with a filter coffee

The coffee beans: For filter coffee, it is important that the coffee beans are gently roasted slowly and only at low heat. This will prevent a bitter taste as the bean will not burn. Classically, the Arabica bean is used because, like the Canephora bean, it can be roasted very well. Of course, decaffeinated beans can also be used for filter coffee.
The degree of grinding: For filter coffee, the beans are best freshly ground. A wide berth should be avoided around ready-made coffee powder. The longer the coffee was roasted and ground, the more aromas the ground coffee loses due to oxidation. Accordingly, the grind should be as fresh as possible. A medium grind of the bean is ideal for this. According to the trend, the beans must be lightly roasted. With a dark roast, more acids are broken down and the coffee gets more bitter notes. The lighter beans, on the other hand, emphasize the fruity acids.
The water: As already described in the ingredients, the water should ideally be 86 to 96 degrees hot. It is at this temperature that the oils in the coffee beans combine best.

What are the options for preparing filter coffee?

Filter coffee from the coffee machine: Everyone has probably had the typical, conventional coffee machine at home. The principle is simple and learned: bend the paper filter, insert it into the holder, add the desired amount of coffee powder, fill in the right amount of water, press a button and off you go.
Hand filter coffee: The hand filter method is a bit more complex than the preparation in the coffee machine. It takes several steps to create the perfect coffee experience. But it is the most original way of making coffee.
Chemex: The Chemex is a not so well-known device for preparing filter coffee. It is a glass filter coffee maker invented by a German chemist. During preparation, particularly thick filter paper is used, resulting in a very pure coffee.
Moccamaster: The Moccamaster is comparable to an ordinary coffee machine. However, it has far more technical subtleties, which, according to its Dutch inventor, should create the perfect coffee experience.