Tag

perfect

Browsing

Creamy and yet fluffy – that’s how the perfect milk froth for a cappuccino or latte macchiato should be. Hobby baristas are currently trying their hand at creating their own works of art, such as hearts on their specialty coffees. But with which milk is the milk froth perfect? EAT SMARTER tells you.

The perfect milk froth

In order for the milk froth on cappuccino or latte macchiato to be perfect, the protein and fat content of the milk must be right. Both are responsible for enclosing the air bubbles that have been beaten in when whipping so that the popular foamy milk is created. “The protein makes the milk foam stable, the fat content ensures the creaminess,” explains nutrition expert Susanne Moritz to the Bavarian consumer center.

The right milk

If you love milk foam like in Italy, you should use whole milk – firm foam is achieved by using low-fat milk of at least 1.5 percent. As a rule of thumb, the higher the fat content, the creamier the foam will be.

The temperature also plays an important role when preparing milk froth: lukewarm or cold milk is best. However, if it is heated to over 60 degrees, the milk froth collapses and is no longer usable for a creamy coffee specialty.

Coffee is so healthy

Coffee in its pure form is calorie-free, has a diuretic effect, and slightly suppresses the appetite. It’s also rich in niacin and antioxidants that help the body neutralize free radicals and protect cells. However, most coffee drinkers love the drink because of its stimulating effect: caffeine has a performance-enhancing effect and stimulates brain activity.

Kim Kardashian, Beyonce and Jennifer Lopez – their trademark is their bottom. But what makes the perfect butt? We explain how you can calculate it.

British scientists claim to have found the formula for calculating the optimal hip-to-waist ratio. To do this, researchers from the “University of Lacashire” measured and examined more than 2,000 women. The result is a formula that attaches value to the female bottom. From this, an index was developed that contains a scale. The perfect scale value is 0.7. The fact that this value probably applies to very few women should not surprise anyone. The female society average moves around this value towards both extremes of 0.0 and 1.5.

waist circumference : hip circumference = bottom value

In words: The waist measurement is divided by the hip measurement and gives a butt result. Measurements are taken at the narrowest part of the waist and at the widest part of the hips. With the optimal value of 0.7, the perfect woman would have to have a waist circumference of 70 centimeters and a hip circumference of 100 centimeters, according to Adam Riese.

Which type is yours?

But even the optimal value of 0.7 on the index can take on a wide variety of characteristics. There are four categories that serve to classify: apple, pear, tomato and potato shape.
apple shape:
The smallest of its kind is the apple butt. Narrow, tight, but relatively small. Almost ten percent of all women are affected.
Pear Shape:
Characterized by a narrow waist and a wide pelvis is the pear bottom. Around 15 percent of all women have this bottom.
Tomato shape:
This variant is the most common! Based on the fruit, the tomato bottom is very round. Whether the curves are tight or rather slack depends on the woman.
Potato Shape:
This expression can be found in around 30 percent of all women. The potato bottom is relatively large and elongated.

Contrasting study from Texas

Scientists from the “University of Texas” do not agree with their British colleagues. Their point of view on the perfect butt refers to the curvature of the rear. An angle of 45.5 degrees between the spine and buttocks is optimal and is perceived as extremely attractive.

Oatmeal is traded by many as a real superfood. Because if you combine oatmeal with a certain fruit, you not only lose weight faster, but also do something good for your own health. This is the way to the summer body.

Oatmeal: The popular “oats” are really healthy for the body, skin and hair

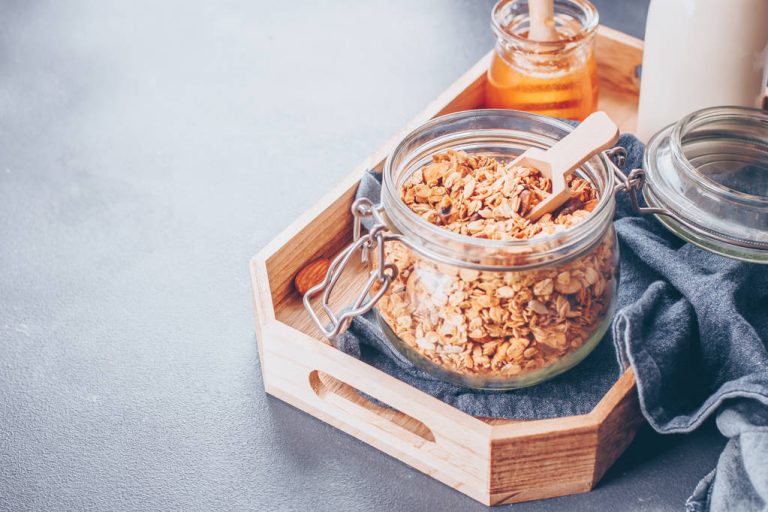
Oatmeal is no longer only popular with fitness freaks and athletes. Because they provide energy and contain numerous vitamins and nutrients that the body needs to stay healthy. We tell you what happens when you eat oatmeal every day and how you can promote your health.

According to the Federal Center for Nutrition, oats are one of the most important types of grain grown in Germany, along with wheat, rye and barley. Here, the oats trump the other types of grain with their ingredients: oats contain by far the largest proportion of fat, protein and calcium – but also numerous other nutrients such as manganese, phosphorus, magnesium, iron, zinc, folic acid and B vitamins.

According to the health portal Zentrum der Gesundheit, oats are considered the ideal supplier of minerals, vitamins and fats, which can be absorbed in large quantities by eating small portions in the body: 50 grams of oat flakes may not look like much – but they are surprisingly full
After harvesting, the oats are heat treated, pressed, dried and rolled – this is how rolled oats are made.

Important nutrients in bulk: Why oatmeal is particularly important for vegetarians

Iron: Oatmeal contains high amounts of iron – a whopping 2.4 milligrams per 40 grams of the grain flakes. The unbelievable: oats contain twice as much iron as meat. The only problem is the utilization of the iron from the oatmeal: In order for the body to succeed, you should consume foods with vitamin C – this is also a real nutritional tip for vegan or vegetarian people.

Eat oatmeal every day: Healthy thanks to B vitamins

Vitamin B7 (= Bioton, Vitamin H): Oatmeal contains a lot of biotin (0.2 micrograms per gram). According to the Center for Health, the amount of biotin in one serving (approx. 40 grams) corresponds to a quarter of the recommended daily dose. According to the consumer center, the consumption of biotin-containing products has a beneficial effect on maintaining healthy skin and hair – whether biotin also ensures strong nails is controversial. It is not necessary to take nutritional supplements – it is better to have a bowl of oatmeal for breakfast.

Vitamin B1 (thiamine): The high proportion of vitamin B1 is also remarkable, which with a value of 0.3 milligrams per 100 grams of oatmeal is a quarter of the daily requirement. The oats stand out: no other type of grain has such a high vitamin B1 content. In addition to vitamin B6, it is the absolute “nerve vitamin” that counteracts tiredness, dizziness, insomnia and neurological complaints. Oatmeal contains one milligram of vitamin B6 per 100 grams – twice as much as other grains.

In addition to healthy nerves, you also get healthy blood: Vitamin B6 is involved in the formation of hemoglobin. A lack of vitamin B6 can lead to problems with the cardiovascular system, among other things, since the homocysteine ​​levels increase

Slim down with oatmeal: No more cravings thanks to cereal flakes

Regular consumption of oatmeal, for example daily for breakfast, keeps you slim. Because the cereal flakes contain numerous properties that support you with a healthy diet, diet or muscle building.

The sun is finally shining outside and the birds are chirping in the trees. What could be nicer than a picnic with the family? Sitting together, enjoying treats and the kids can let off steam – and best of all – all in the fresh air! But what should you pay attention to so that nothing stands in the way of the picnic? Preparation is everything!

Make a picnic checklist

To be on the safe side that nothing is forgotten, a checklist in advance, on which all important to-dos are listed, proves to be very useful. This includes, for example, a shopping list; a meal plan; Things that need to be packed like games, blankets, dishes, etc.

Check the weather

The worst thing would be if dark clouds came up and the well-prepared picnic literally fell into the water! A look at the weather report and the weather forecast should not be forgotten! And if you are surprised by a storm, you should quickly seek shelter from the storm.

Picnic food and drinks

The most important thing at a picnic is of course the food. Food and drinks should be packed in cans and bottles that can be closed well. On the one hand, this naturally prevents leakage, on the other hand, by regularly closing the cans, you can reduce the attraction of a wide variety of animals. Who would want a flock of ants crawling between their fruit? And how can you even eat the food you have brought with you? Are plates and cutlery necessary or are serviettes enough? For a picnic, it is better to use finger food. These can be, for example, small meatballs, sliced ​​fruit, and vegetables, sandwiches, etc. Glasses or mugs may be required for drinks. When it comes to plates and cutlery, as well as glasses and mugs, everyone now has to decide for themselves whether they want the inexpensive but rather environmentally unfriendly cardboard version or the “real” crockery, which is not so easy to transport and dispose of.

Accessories for drinks

Do the drinks need special bottle openers? Is there sparkling wine, beer, or wine for the adults? Cool boxes or cool bags are very useful for transport. But of course, it should not be forgotten that the cold packs are in the freezer early enough. The cool box is the best place for drinks, which taste even better when chilled, or for fruit.

Number of people for the picnic

How many provisions do I actually need? Depending on how many people are taking part in the picnic, you should consider beforehand how much food and drink will be prepared. In the case of one’s own family, this can certainly be estimated relatively well. But what if other friends and acquaintances come along? In this case, it is better to prepare a little too much than too little. However, you can of course divide the work up so that everyone brings a little something with them. At the end of the picnic, the leftovers can then be distributed and everyone can take something different than what they brought with them.

Picnic essentials

The be-all and end-all for a picnic is of course a nice big blanket! Especially at the beginning and end of the year, it is advisable that it has a thermal coating on the underside to keep out cold and moisture.

  • When smaller children are around or when there is something to eat that is squishy or sticky, wet wipes can be very useful.
  • A small pocket knife always proves to be very helpful.
  • An umbrella and sunscreen protect you from the strong sun and to be on the safe side you should also bring an umbrella.
  • In the event that the picnic is to last into the late hours, candles in lanterns with lighter or small lamps or flashlights should not be missing.
  • Anti-mosquito candles can provide some peace and quiet, but a tick and mosquito spray should not be missing in any picnic bag, especially if the location is near a body of water.
  • And the tick and mosquito spray can also offer a little more protection for the children who play in the grass and bushes. At the end of the trip, everyone should be thoroughly examined for possible ticks.
  • So that the children can keep themselves busy, a few games should not be missing in their luggage. Of course, outdoor games such as badminton, Viking games, football or boccia are particularly suitable for this. But even small travel games or card games can be a lot of fun for everyone.
  • At the end of the adventure, of course, the place should be left as it was found. As a result, garbage bags must not be forgotten under any circumstances!

Top tips on how to throw the perfect dinner party. From the invitation to the food to staying cool with minor faux pas, we have collected the best tips for a successful evening for you.

Who doesn’t know them, the classic dinner parties from the American films? A smartly dressed hostess makes the organizational feat look as effortless as serving ready-made pizza. She also entertains the guests, smiles charmingly, and always looks freshly peeled.

Still, anyone who has ever organized a dinner for several people knows how difficult the dinner party can actually be. We have collected the best tips and tricks for a successful evening for you so that your guests feel comfortable and you don’t get stressed during the party.

Tip 1: The right guests

Before you decide to throw a dinner party, you should think about who you want to invite. That one neighbor who always finds fault with everything might not be the best choice if you want to make your party a success. You should invite close friends and family members, especially at your first dinner party, who will overlook one or the other faux pas – or who do not even notice it. In addition, you should consider whether the planned guests are good entertainers.

Tip 2: Successful invitation cards

In addition, the right flair for a successful dinner party begins with the invitations. Think of something that will delight your guests and get them interested in your party. A little insider tip: With high-quality invitation cards that you can design yourself, you can impress your guests with your individuality and ingenuity. But digital invitation cards can also have a great effect, enriched with a suitable GIF or image. Also, note the most important tips for party planning.

Tip 3: What will my guests eat?

A good hostess will ask guests about their preferences and allergies before the dinner party. This point is very important because nothing is more unpleasant than realizing that a guest suffers from a peanut allergy while eating duck in peanut coating. If you love a challenge, feel free to invite guests who eat vegetarian or vegan food – this increases the level of difficulty when cooking. Not everyone likes fresh fish. Therefore, before you plan the menu, you should know who is not eating what. Check out our housewife-approved recipes for inspiration.

Tip 4: What should be on the table?

In general, several things should be on the table: the food, but also the right dishes, and the right decorations. You can find out how to set the table correctly in the useful rules of conduct from Etiquette. You can match the decoration to the season (e.g. beautiful Easter decorations or festive Christmas decorations), but you can also decorate in a very classic way with just beautiful candles. The choice of tablecloth and napkins is just as important as the decoration. If you don’t consider yourself a professional decorator, it’s best to go for plain colors without big patterns.

Tip 5: keep calm!

Back to the dinner party goddess from the American film: There is a very simple trick to appear confident and to charmingly cover up any mishaps. Just pretend it’s meant to be! The dessert is slightly burnt? That’s how it should be, you learned in the French cooking class that light smoke aromas perfectly underline the taste. Good luck with the (almost) perfect dinner party!

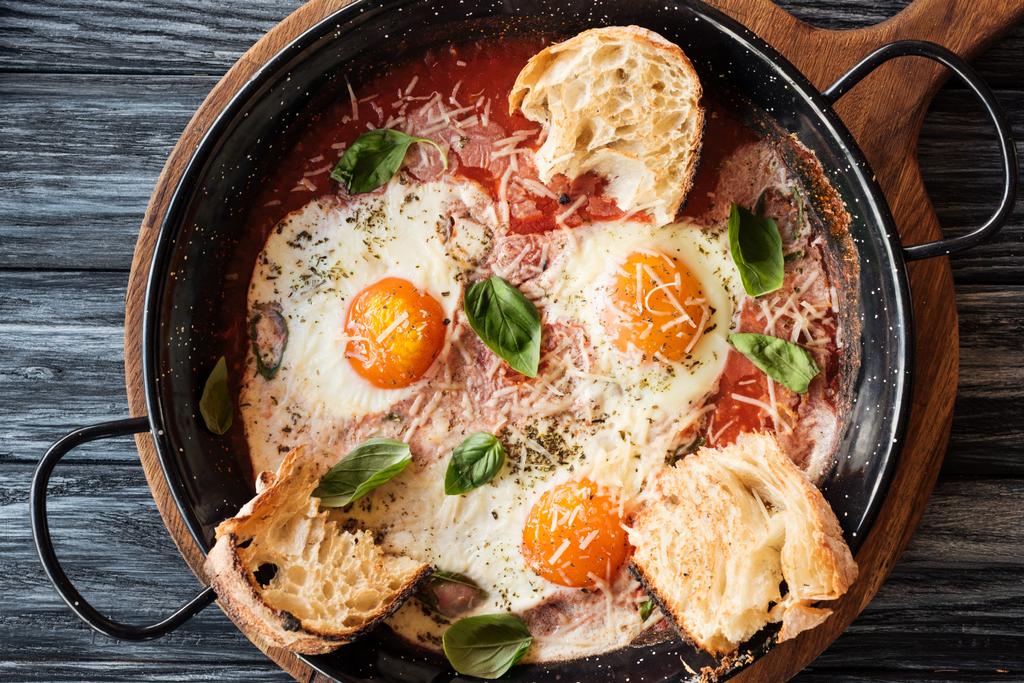
Frying fried eggs is quick and easy. Nevertheless, there are some tricks for the perfect fried egg. We’ll tell you here how to season it and fry it properly.

Fried eggs are popular for breakfast, lunch and dinner for a reason: It only takes a few minutes to fry a fried egg, it tastes delicious and is healthy. You can also put it on bread, but it goes just as well with fried potatoes and spinach. In order for your egg to be perfect, you not only need the right technique, but also the right ingredients.

Suitable oil and the right pan for fried eggs

The most important ingredient for a fried egg is of course the egg. Use fresh organic eggs. When eggs are older, the yolk will melt in the pan. You should also enjoy eggs that you have been storing for a long time that are well cooked. However, fried eggs taste particularly good when the yolk is still slightly runny.
It is best to use a cast-iron pan for frying. If properly cared for, the egg white won’t stick to it. You can also make the egg in a coated pan, but they are very expensive to produce, difficult to recycle and harmful to health if used improperly. Stainless steel pans have not proven themselves for fried eggs.
Both heatable, tasteless oils and butter are suitable as fat. If you’re frying your egg at high heat, you should use a high-heat frying oil.

This is how you fry the fried egg

Heat a little butter or oil in a pan. If you use butter, don’t overheat it: be careful not to brown it.
Crack the egg on the edge of the pan and slide it in.
Let the egg set over medium heat. It should not really sizzle, but be gently fried. After a few minutes, the egg white is already firm.
Remove the egg from the pan when you like the brownness of the white and the consistency of the yolk. You can put the lid on the pan again shortly before the end of the frying time and let the egg yolk thicken.
Season the egg with a little salt and, if you like, pepper and fresh herbs.
Tip: With the classic fried egg, either only the butter or only the egg white is salted. The yolk forms small lumps when it comes into contact with salt.

Also: You can get creative when seasoning your fried egg: Try fried eggs with curry, nutmeg, paprika or finely chopped chives.

variation tips

Of course, everyone has their own idea of ​​the perfect fried egg: maybe you prefer it well-done or still nice and soft and untanned? Here are a few tips on how to customize the fried egg to suit your taste:

If you don’t want the egg whites to brown, you can crack the egg directly into the greased but still cold pan. Heat slowly until the egg white starts to set. When the egg white is no longer transparent, you can put the lid on the pan for about a minute. This will thicken the yolk a bit.
If you prefer your egg cooked through, you can try the “Sunny-side down” variant. To do this, fry the egg as described above up to and including step 3. Then turn it over again for about a minute. This is how the yolk hardens.
Your fried egg will be particularly low in calories if you prepare it without any fat. Simply fry the egg in 1-2 tablespoons of boiling mineral water.
If you want to make a lot of fried eggs at once, you can also cook them in the oven. To do this, break the eggs into ovenproof molds and then add the spices. Now place the molds in the oven at 175 degrees top/bottom heat for 5 to 10 minutes. The fried eggs are cooked particularly gently in the oven.

Whether in the autumn sun on the terrace or for breakfast in bed: The cappuccino is more popular than almost any other coffee drink – rightly so, in our opinion. The good news: You don’t need barista training to make a good cappuccino, just a little practice. We’ll show you how to make the perfect cappuccino at home.

First things first: Cappuccino preparation

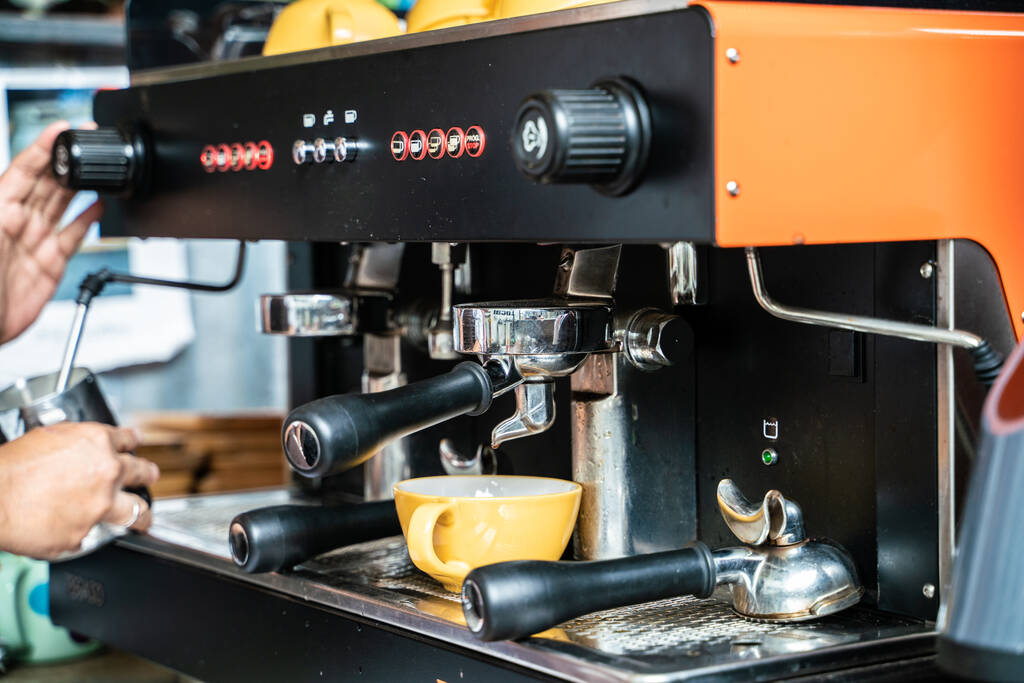
Froth 100 – 150 milliliters of milk: Professionals work here with the steam nozzle of the portafilter machine, but an electric or manual milk frother will also work
As soon as the milk has foamed finely, put the milk jug aside for a moment
Now prepare an espresso in a large, preheated cup
Now pour the frothed milk into the cup.
Already done – not that difficult, right?

Cappuccino on the coffee machine

Probably the easiest way to quickly get a cappuccino is to prepare it in a fully automatic coffee machine – one push of a button and the drink is in the cup. Unfortunately, one has to admit that the “finished” cappuccino often leaves a lot to be desired in terms of taste. If you still want to enjoy your cappuccino from the fully automatic machine, we recommend “separate preparation” – i.e. leaving the espresso and milk foam out of the machine separately.

So that you can enjoy the perfect coffee aroma, we have compiled some tips for improving it here.

The coffee doesn’t taste good? Then we have a few advice ready for you with which you can turn your coffee again.

Since the discovery of the coffee around 850, the hot drink has developed steadily: In the meantime, there have been countless taste varieties in all possible price ranges and with many types of preparation. Likewise, there are more and more devices on the market to help prepare the perfect coffee. Nevertheless, according to a survey in 2016, around 70 % of coffee drinkers would like a further invention that could improve coffee enjoyment.

Due to the ever progressing developments, it is easy to prepare a cup or pot of good coffee these days. And yet it does not always taste the way it is described on the package. It can even happen that one and the same cup tastes different today than yesterday. But what also causes strong fluctuations? On the one hand, factors cause the coffee aroma, which have nothing to do with the preparation of coffee and cannot always be controlled. For example, personal condition plays an important role, a meal or the time of day. This can significantly change your own taste, so that the coffee takes on a different flavors for a person. In addition to these aspects, however, there are more influence on which coffee pleasers have more influence.

The 3 golden rules

Even with the best coffee machine, the coffee aroma of the coffee takes on a different flavors and suddenly tastes acidic or bitter. In addition, the foam can be affected, so that it is no longer correct of the consistency or color. In order to fix these changes or to prevent at best, there are three simple but important rules.

Use as freshly roasted coffee as possible
At best, the coffee beans are powdered just before they are used. The aroma of coffee lasts very briefly and decreases more and more, the longer the preparation is from roasting and grinding. However, if the coffee beans are freshly ground and roasted, the full taste can develop in the cup. The deterioration of the coffee aroma is justified in the high sensitivity of the natural product. If the coffee beans come into contact with oxygen, this causes the process of oxidation. The contact of oxygen and the oils, fats and waxes contained in the coffee bean ultimately lead to the loss of the full coffee aromas.
Pay attention to the good quality of the water
Since the coffee drink can consist of up to 99 % of water, it is particularly important here to be careful with the right water quality. Good water can already be guaranteed by a simple water filter. The lime contained in the tap water is filtered by the water filter. This also has a further positive side effect: the less lime in the water, the less it can then settle into the device. This prevents stubborn limestone residues.
Clean your coffee machine regularly
Finally, all parts and containers of the machine should be cleaned regularly and freed from fats and oils that leaves coffee. If the machine is cleaned regularly and thoroughly, hardly any residues can settle, which affect the coffee aroma and the taste.

What else causes flavors?

If the three basic rules are observed, you should notice a significant improvement in the coffee aroma. However, it can still happen that the taste deviates and that the cup of coffee has, for example, little aromatic flavors or suddenly has a strange taste. If this is the case, there are some other things that should be controlled. Most of the time, a small checklist can be quickly remedied by changing the taste.

Check how long the grinding or roasting was.
Do you optimally store your coffee? Here it should be noted that coffee feels most comfortable on dark, dry and cool places and that its aroma strength keeps the longest.
Is the coffee dose too low or the grinding too coarse?
In the case of fully automatic machines, the optimal heat of the mill must be paid to them, with espresso machines and fully automatic machines, the brewing pressure must not be below seven bar.
Check the coffee beans. If a foreign taste occurs, it may be the case that it is a rare processing error in raw coffee or the quality of the beans is too low.
Do the filters work properly? If qualitative beans and pollution can be excluded in containers and parts of the coffee machine, the filters should possibly be checked.

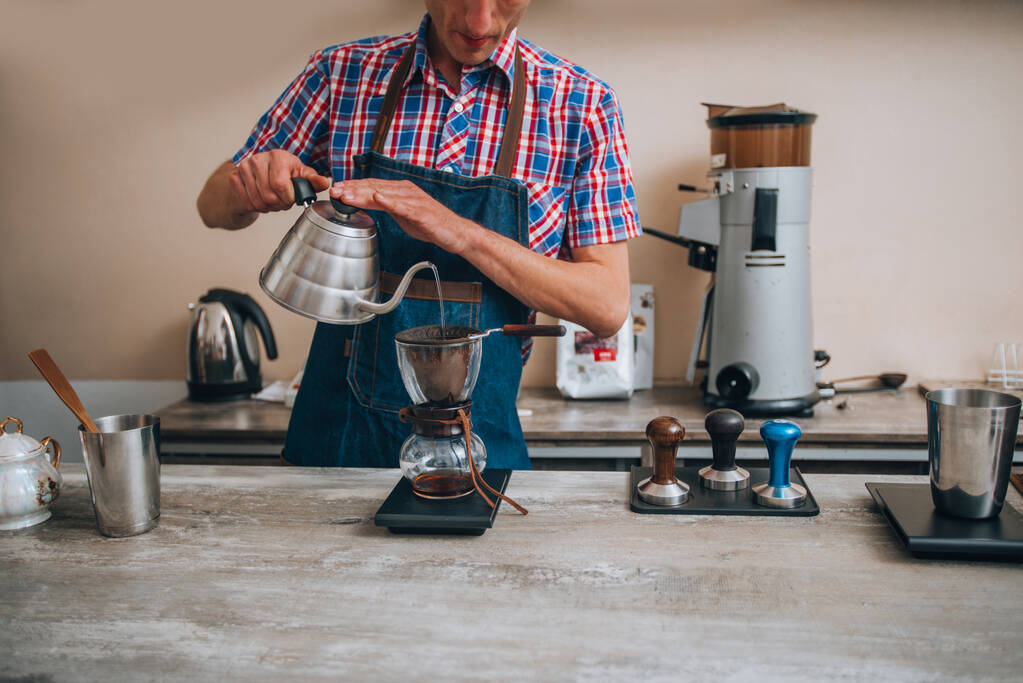
The perfect coffee should not fail simply because the right accessories are missing. Here is a small selection for making the perfect coffee.

Good coffee can be very simple. We will show you which equipment should not be missing.

Very early on, with the discovery of the coffee beverage, a real coffee culture centered around the coffee bean emerged. The first coffee house in Europe was built in 1554 in Constantinople, now Istanbul. Since then, many other coffee houses have opened – not only in Europe. With its creation, the focus was not only on the coffee drink itself. Rather, everything around it had to be right. It is not for nothing that coffee is the second most important commodity in the world, and is only trumped by trade in petroleum products.

So what does the coffee do credit to, if not the right coffee accessories that intensify the taste and enjoyment even more? With the right accessories, attempts are made to get the best out of the coffee bean – both in terms of taste and appearance. As is well known, the eye eats and drinks with you. As a result, there is now also a wide variety of coffee accessories for everything to do with coffee: it ranges from the coffee grinder for grinding coffee beans and espresso makers to the right container for every coffee beverage. Of course, the crema from the milk frother and the matching milk jug should not be missing for a grand finale. Here is a small list of relevant accessories so that you don’t miss anything when enjoying the perfect coffee. This must not be missing if you want to make the perfect coffee.

The right coffee accessories for the perfect coffee

Coffee pots, coffee filters, coffee machines, coffee grinders, milk frothers, espresso makers – the list of coffee accessories seems to go on and on. Nowadays there are a lot of coffee accessories that serve as tools to prepare a delicious cup of coffee. This accessory has been specially manufactured for the hot drink, so that coffee lovers can fully enjoy the particularly aromatic taste without much effort.

A common coffee accessory is the coffee grinder, for example. With the coffee grinder, the coffee lover is no longer tied to pre-made coffee powder. He can prepare the coffee beans himself at any time. In contrast to ready-made coffee powder, this has the great advantage that the bean still contains many aromatic substances. These disappear quickly if the grinding is too far away from the coffee preparation. Coffee grinders are available with different grinding systems, which are used in different areas depending on the purpose. Such a coffee grinder is ideal for using an espresso maker. The espresso maker is ideal for conjuring up the perfect espresso in just a few simple steps – according to your own preferences. Those who have decided to prepare their coffee with an espresso maker and not with a fully automatic machine experience the true spirit of traditional coffee enjoyment.

According to a study, 85.4% of the coffee drinkers surveyed in Germany between the ages of 18 and 64 drink their coffee with milk, cream or milk foam. So if you don’t want to be without a frothy topping on your delicious coffee drink, you definitely need a milk frother. Hardly any practice is needed to correctly froth milk, as you quickly get the hang of it and conjure up delicious milk froth in no time at all and enjoy your coffee to the fullest. Any type of milk can be used for frothing, but the easiest way is to use high-fat whole milk. Milk fans with a portafilter can fall back on the well-established milk jug, which also looks good in any room.

If you are expecting visitors or customers – or want to let your employees enjoy it right away, you can use a beautiful serving jug. It also offers space for several cups of coffee, so that new coffee does not have to be prepared as often. Stelton, Bialetti and KitchenAid, for example, are well-known brands that have proven themselves time and again in the field of coffee accessories. One last interesting coffee accessory is the portafilter tamper. With this, the ground coffee in the brewing sieve is regularly pressed so that the water flowing through can extract the ground evenly when the coffee is drawn off.

Valuable tips for making the perfect milk froth yourself for delicious milk coffee or cappuccino. The choice of the right milk and temperature is crucial, while the methods for frothing milk are versatile.

Tips for making milk foam yourself

Anyone who likes to drink milk coffee or cappuccino knows how important good milk froth is. Because the perfect milk froth rounds off your favorite drink. And really good coffee always tastes best when prepared the Italian way, using frothed milk instead of regular milk. However, good and solid foam can only be achieved if you follow a few rules. Therefore, we have collected the most important tricks for preparing frothed milk. These help you to enjoy a creamy coffee even without a practical fully automatic coffee machine or espresso machine.

Which milk to use for frothing milk?

To froth the milk for a coffee specialty such as cappuccino, latte macchiato, or milk coffee, you should definitely use milk with a fat content of at least 3.5% – no skimmed milk. Protein content of 3.1 – 3.5% is also ideal for making milk froth. Fresh milk from the farmer is best, as it contains even more fat.

Methods for making milk foam

After you have chosen the right milk with your favorite flavor, you can start frothing the milk. Now you have to heat the milk so that the froth stays firm and stable. You will also need various tools, depending on the type of foam preparation you choose. We have an overview of the three most common ways to make milk foam yourself:

Note the temperature of the milk

The milk for milk froth should never be heated above 80 degrees. About 70 degrees is ideal. If the milk and milk froth gets too hot, the milk molecules will be destroyed and the firmness of the milk froth will be reduced dramatically.

1) Use an electric milk frother

An electric milk frother is easy to use, inexpensive and effective. To do this, heat the milk in a saucepan or in the microwave. Then insert the whisk at the end of the frother into the milk and froth it up. This works well with smaller amounts of milk. The SEVERIN milk frother stick is battery-operated and easy to clean, making it a practical help in the kitchen.

2) Make milk froth yourself with a manual frother

You can also froth your milk manually. Use a manual frother for this. Because it’s easy to make milk foam yourself. Consequently, heat milk and put it in the manual device. Then take the lid on which a kind of sieve is attached. Now you can froth the milk with up and down movements and create a perfect milk coffee or cappuccino.

3) Froth milk with induction frother

Another way to conveniently produce delicious milk froth is to use an induction milk frother. This has the advantage that you can heat the milk directly in the vessel. The milk is then frothed automatically.
Make milk froth in a disposable glass

If you don’t have one of these devices at home, you can use a disposable glass. To do this, put the milk in the glass, close it tightly and shake well. Then put the jar in the microwave for about 30 to 45 seconds. The milk should now be a little frothy. Not perfect, but still.

Frequently asked questions and answers

  • What must be considered when frothing milk?
    The fat content, which should be at least 3.5%, is important in the preparation. And the protein content should ideally be between 3.1 and 3.5%. It is also important to heat the milk a little beforehand so that it remains firm and stable.
  • Which milk is suitable for making milk froth?
    Milk froth works best with (lactose-free) cow’s milk, oat milk, or soy milk. You can also use goat milk or hazelnut milk. Unfortunately, it doesn’t work with coconut, almond, or rice milk.
  • How can you make milk foam yourself?
    To prepare the frothed milk, use an electric or manual milk frother. In addition, an induction frother is very helpful for making milk froth yourself.