Tag

perfect

Browsing

Zavtrák is the name of the traditional Russian breakfast. If you like it hearty, this is the right place for you in this country, because things get really rich here early in the morning.

Milk porridge (kascha), sausages, fried potatoes, scrambled eggs, pancakes (blini), quark pancakes (syrniki), bread, butter, jam, kefir and much more are what Russians love to eat with their morning meal. In this way, despite the harsh climate, they are already equipped with enough energy for the day in the morning.

These Russian specialties are very popular at breakfast: a national dish called kasha, a porridge made with milk, mostly made from buckwheat, but also made from oats, barley or rye, and blini – also affectionately called blinchiki – the traditional Russian pancakes.

For all lovers of hearty, hearty cuisine, this delicious breakfast offers a really tasty and energetic start to the day.

Food culture in Russia

In general, Russian cuisine is very diverse: this is because in this large country different ethnic groups live together and mix their traditions. In addition, the food culture in the city differs greatly from that in rural areas: Most people in the country eat richer and heartier food, while people in the city are also influenced by international eating habits and eat a little more “globalized”.

How do you prepare a Russian breakfast?

get hungry and want to prepare a breakfast like in Russia? Then let’s see together how to do it and what ingredients you need for it.

The first thing you should do is open your fridge and see what’s left over from yesterday, because Russians often have leftovers from the day before for breakfast, such as rice, noodles or fried potatoes.

Now set up a hearty sausage and cheese platter, warm up a few sausages and prepare the eggs – either scrambled or fried, just as you like. Don’t forget the bread: white bread is fine, although the Russians themselves prefer black bread. Just like in Russia, your morning meal should not be without various dairy products such as cottage cheese, kefir and sour cream.

That was the easiest part, now comes the preparation of the Russian kasha (milk porridge) and the blini (Russian pancakes). For this we give you the following breakfast recipes:

1. Recipe kasha – Russian milk porridge:

Ingredients (2 people)
75 grams of buckwheat
250 ml milk (1.5% fat)
1 pinch of salt
2 tbsp poppy seeds
As you like: some sugar, butter, jam, fruit or meat preparation

preparation

Briefly toast the buckwheat in a saucepan and add the cold milk, salt and poppy seeds. Let the porridge cook on low heat for about 10 minutes. Stir the kasha from time to time.
Russians usually serve their kasha with sugar and melted butter, more often with fruit, or sometimes with meat dishes for a savory version.

2. Recipe Blini- Russian pancakes:

Ingredients (2 people)
150 grams of wheat flour
12 grams of yeast
250ml milk
12 grams of butter
1 egg
50 ml cream
1 tsp sugar
½ tsp salt
some oil
At will: jam, sour cream

preparation

Dissolve the yeast in the milk and add half the flour and the melted butter. Leave the mixture to rest for about 30 minutes. Now separate the egg and mix the yolk with the sugar in a bowl. Now whip the cream and then the egg white until stiff. Then fold it into the whipped cream. Stir the dough and add the remaining flour, salt, egg yolks with sugar while continuing to mix. Finally, add the cream and egg white mixture and let the dough rest for a few hours. Now heat some oil in the pan, add some batter and fry your Russian blinis on both sides.
In Russia, blinis are either filled with jam or served folded, then dipped in sour cream.

Cappuccino – the popular coffee and milk drink from Italy

A classic cappuccino consists of an espresso and milk and milk froth in equal parts. While cappuccino is drunk throughout the day in Germany, things are different in Italy. In the homeland of cappuccino, it is only consumed in the morning because it is considered to fill the stomach due to its milk content. From midday, the Italians rely on espresso, which awakens the spirits, makes you lively and is easier to digest.

In addition to cappuccino, latte macchiato is a popular drink in both Italy and Germany. Both coffee specialties are prepared with milk, but they look different and taste different.

The difference between cappuccino, latte macchiato and milk coffee

The mixing proportions between coffee and milk in a cappuccino are 1/3 espresso, which is poured into the cup, and 2/3 lightly frothed warm milk and milk froth are poured over it. The typical crema of the espresso settles on the milk froth of the cappuccino. The look of the cappuccino is white on the surface with a golden-brown crema, which is also often drawn into the milk froth with patterns using a spoon. There are now even competitions in which the most beautiful patterns that can be conjured up with the crema in the milk foam are evaluated. This can be leaves, hearts or even faces. A cappuccino is usually served in a bulbous cup.

With a latte macchiato, three layers can be seen in the tall glass. First, milk is poured into the glass, then the milk froth is poured over it. Finally, the espresso is slowly poured in through the milk froth. The layers are created by the air contained in the milk froth, which remains on the surface. The espresso stays on top of the milk, which is at the bottom of the glass, because it has a higher temperature and density.

Unlike cappuccino and latte macchiato, a classic latte does not use espresso to prepare it, but normal coffee mixed in equal parts with warm milk.

How to properly prepare cappuccino

Classic Italian cappuccino is now also at home in Germany and the times when coffee was whipped cream and then called cappuccino are long gone.

To prepare a good cappuccino, a metal jug is filled with cold milk. This is heated with the hot water nozzle. Care should be taken to ensure that the nozzle remains below the surface while the milk is being heated. If this is neglected, the milk may splatter.

The milk is frothed until it has doubled its volume in the jug. It is often observed with professional baristas that the jug is briefly knocked onto the table after the milk has been heated. This is done to get unwanted bubbles out of the milk.

The higher the fat content of the milk, the creamier and denser the foam. Whole milk or semi-skimmed milk is ideal for cappuccino. Almost fat-free milk is not suitable because the foam does not become firm and remains watery.

Of course, you can also prepare cappuccino at home in fully automatic coffee machines that already have an integrated milk container. Here the milk is frothed at the push of a button and automatically applied directly to the coffee. With fully automatic coffee machines, always make sure to clean the milk nozzle or the milk hose so that they do not stick.

You can also prepare cappuccino with pads and capsules. You either froth the milk separately or you have a device in which the appropriate milk capsules can be used to prepare coffee and milk drinks.

The crema is the crowning glory of every espresso. It should be light brown, dense and a few millimeters high. Unfortunately, it doesn’t always succeed. Sometimes the espresso has too much crema, sometimes not enough. Sometimes the crema is too light, sometimes too dark.

This characterizes a perfect espresso crema

A successful crema can be found on correctly prepared, fresh espresso and, just looking at it, makes you look forward to perfect enjoyment. It stands equally for the quality of the coffee and a skilful preparation.

With a good espresso, the crema settles by itself, so it is not poured onto the coffee. Ideally, it is light brown, thick and a few millimeters high. Connoisseurs swear by a good crema that it holds a teaspoon of sugar for about 3 seconds before the sugar settles to the bottom. The crema should then close completely on the surface.

The settling of the crema on the surface is particularly visible when the espresso is served in a glass. Then you can see how fine bubbles form, which collect on the surface to form a golden-brown layer of foam. The finer the bubbles settle, the higher the quality of the crema. In the best case, a kind of hood forms on the espresso in which the individual bubbles can hardly be seen.

How is the crema formed on the espresso?

Thanks to the high pressure of the espresso machine, coffee oils, proteins and sugar are released from the powder. They rise to the top and combine to form a dense foam with a velvety fine consistency.

Which machine brews the perfect espresso crema?

Crema is created by pressure during preparation, which is why it is not found on filter coffee. The higher the pressure of the machine, the better the crema succeeds. An overview of the different preparation methods for espresso crema:

Espresso maker: Crema cannot be formed with the classic version because the water pressure is not high enough. That’s why there are now espresso makers with a special crema valve that ensures perfect coffee enjoyment all round.
Fully automatic coffee machine: high-quality machines create a good crema at the touch of a button. But not every machine is equally good: cheap versions produce the crema through a valve that only foams the coffee.
Pad or capsule machines: These machines also deliver espresso with dense, crema-like foam at the touch of a button. Like some fully automatic machines, they have additional valves that foam the coffee.
Portafilter machines: They generate a very high pressure of nine to ten bar. Therefore, the crema for your coffee is perfect with these machines – and nothing is foamed here!
In general, the crema is a quality criterion for the coffee. Connoisseurs can tell whether the coffee is fresh or the beans are a bit older by their consistency, colour, dwell time on the coffee and the quantity. The fresher the coffee, the better the crema.

The bean used for the espresso is decisive for the consistency of the crema. With an Arabica bean, the crema becomes finer and lighter, it is velvety. With espresso made from Robusta beans, or with a proportion of Robusta beans, the crema is denser and firmer, so it stays on the surface longer.

Espresso crema too light? That’s the reason!

The color also provides information about the quality of the coffee. If the crema is too light, the coffee was probably made too quickly and with water that was too cold. Another reason may be that the beans used were too old and ground too coarsely. On the other hand, if the crema is very dark, then the water was too hot during the brewing process or the beans were ground too finely.

If the crema dissolves quickly, then too little pressure was used during brewing – or the espresso cup was too cold or too hot.

The most important factors for a beautiful crema

In order to create a nice crema, the following points should be right:

The ground coffee should be fresh. The aroma is best three weeks to three months after roasting. You can tell when this has taken place by the roasting date on the pack.
The degree of grinding also plays an important role.
The amount has to be right. For example, if you fill your portafilter machine with too little powder, the crema will be less dense.
The water temperature has to be right. It should be around 90 to 95°C.
The pressure should be about nine to ten bar.

Have you ever experienced this? The espresso tastes bitter even though you have used the best beans and invested in a high-quality portafilter machine? The solution to the riddle could be the degree of grinding. Because the correct degree of grinding of the coffee makes a significant contribution to the beans being able to develop their full aroma. Mamis Caffè explains what is important.

Aromatic or bitter: These factors influence the taste

How the coffee tastes depends on various factors. First of all, the type of beans and the growing area are essential. The type of roasting also determines how the aroma of Arabica, Robusta and Co. unfolds. Once you have found your favorite type and roasting method, it is up to you: the degree of grinding of the beans has a lot to do with how the finished coffee tastes.

This is how the degree of grinding affects the coffee

Whether you need fine, medium or coarse ground coffee depends on how you prepare your coffee. The decisive factor for the choice of roast is how long the powder comes into contact with the water.

If the coffee is very finely ground, it offers a lot of surface area and can develop its aroma quickly. A fine grind is therefore suitable for brewing methods in which water and coffee only meet briefly. If finely ground coffee stays in the water for too long, not only the delicious coffee aromas are released, but also bitter substances.

If, on the other hand, the coffee steeps in the water for a longer period of time, coarse grinding is recommended. The aromas dissolve more slowly from it.

Overview: Which degree of grinding suits your coffee?

There is no uniform numerical value that covers all coffee grinders. Basically, we differentiate between fine, medium and coarse when it comes to the degree of grinding. Not much can go wrong within these guidelines.

Fine grind

The consistency of the very fine degree of grinding is similar to that of flour.

It is suitable for:

mocha

portafilter machine

fully automatic coffee machine

During machine preparation in a portafilter machine or fully automatic machine, water is pressed through the coffee powder at high pressure. In the very short contact time, the aromas have to unfold as quickly as possible. This is only possible with a fine grind. If the coffee were too coarse, the water would flow through too quickly and the coffee would be sour and too thin.

Medium grind

The consistency of the medium degree of grinding roughly corresponds to that of sugar or fine sand.

It is suitable for

Bialetti (espresso maker)

hand filter

Classic filter coffee maker

Aeropress

When preparing a filter coffee or an espresso in a pot on the stove, the contact time between water and coffee is significantly longer. The water drips through the filter or slowly rises out of the jug. The ideal degree of grinding is correspondingly coarser than with the methods using mechanical pressure.

Coarse grind

Coarsely ground coffee is similar in consistency to coarse sea salt.

It is suitable for:

French Press (strainer pot)

Siphon coffee maker

Carlsbad pot

Coarse grinding is ideal wherever the coffee powder steeps in the water for a longer period of time. Finely ground coffee would release too much aroma here and end up tasting strong and bitter.

Whether from a tin, cut out, or dressed on baking wafers, gingerbread is an indispensable part of the Advent and Christmas season. What makes it special is the wonderfully fragrant mixture of spices and the fine honey taste.

Making gingerbread yourself is very easy if you follow a few rules and can be varied with Aranzini or orange peel, for example, or decorated with chocolate or sugar icing and topped with cherries, almonds, or the like.

If you want to be really creative, you can also dare to make a cute, beautifully designed gingerbread house or a mini gingerbread house for the rim of a cup with the help of our video instructions. Lovingly decorated gingerbread also makes a good impression as a Christmas tree decoration.

We have put together the 5 most important tips for making gingerbread a perfect success this year.

5 rules for the perfect gingerbread

1. Gingerbread needs rest

Gingerbread gets its unmistakable, dark color and unique taste not only from the rye flour but also from the right storage. It is best to leave the dough (storage dough) in the fridge at least overnight and only then knead it with spices and egg.

2. It all depends on the seasoning

Gingerbread spice can be bought ready-made or mixed together yourself. The traditional spice for gingerbread consists of cloves, cinnamon, allspice, coriander seeds, nutmeg, and anise. Finely grind the spices together and store them in an airtight container. Beautifully packaged homemade gingerbread spices are also ideal as a special handmade Christmas gift.

3. So that the gingerbread does not stick to the tray

Dust the parchment paper or tray with a little flour before baking the gingerbread on it. So it doesn’t stick.

4. Potash and staghorn salt

The traditional leavening agents that belong in a gingerbread dough are staghorn salt and potash. These should be dissolved separately and added to the dough separately, otherwise, their raising effect will be lost.

5. This is how the gingerbread becomes soft

Gingerbread is best stored in an airtight tin can. To make it nice and soft, you can add a slice of apple to the can. Stored cool and dry, gingerbread can last for several months and should be left to soak for several weeks before consumption, which is why it is usually one of the first Christmas baked goods.

Do you feel like baking cookies now? With our tips for baking biscuits from a professional, it’s guaranteed to succeed. We have also put together a large selection of gingerbread recipes and other Christmas cookie recipes for you. If you were too eager and ended up with cookies, here are the best ways to freeze cookies.

You little goslings are coming… The 1 x 1 of Martinigans – from purchase to carving
Traditionally, the Martinigansl is served as a juicy roast on November 11th. But a classic roast goose is also a popular holiday meal at Christmas! We reveal how the perfect martini goose succeeds!

1) Buy your goose from species-appropriate husbandry!

This is not very difficult in Austrian supermarkets, because the origin of the goose has to be labeled. Geese from Austria are subject to the law and may not be fattened or plucked live. In Hungary or France, however, stuffing is quite common, so check carefully, especially with frozen goods. It should also be borne in mind that free-range geese have more space to roam. This keeps the meat firmer and not as fatty. So it is better to grab pasture geese from Austria, if possible directly from the farmer!

2) Invite guests!

A species-appropriate, well-reared goose can weigh up to 6 kg as a roast. Calculate 400-500 g of roast goose per person. A large goose can easily feed 10 people, especially when you consider the side dishes.

And if more guests have announced, no problem: two geese can also fit in a standard 60 cm wide oven at the same time! In this case, we recommend placing the geese directly on the grid and sliding a deep baking tray (dripping pan) underneath.

3) Pay attention to the trappings:

By the way, classic side dishes for Martinigansl are red cabbage and potato dumplings. But other dumplings also taste great and are ideal for soaking up the spicy gravy!

“So that was the core of the little goose” – whether and with what you fill your roast goose is up to you. A filling made of bread rolls is best, which can be refined with chestnuts, cranberries, or dried fruit, depending on taste. However, stuffed geese take longer to cook through!

4) Take your time!

This is especially true for a frozen goose. Two days before preparation, let the frozen goose thaw, preferably in the refrigerator or in a cool cellar, preferably in the packaging so that nothing dries out.

A succulent roast goose should also take about 60 minutes per kg of meat; if the goose is stuffed, add another 30 minutes. When roasting, pour the roast juice over it from time to time or, if necessary, add some stock, soup, or water so that the roast stays nice and juicy. If the goose is too dark, cover it with aluminum foil, reduce the temperature and increase the cooking time. When the roast is done, let it rest a bit before serving.

To determine when the martini goose is ready, pierce the leg with a fork or skewer. If the meat is still firm and the juice that comes out is still reddish, the goose is not done yet; if the juice is clear and the meat is tender, the goose is ready.

Geese roasted at a low temperature take a little longer, for 5 kg of goose you can count on 8 hours at 120 °C (convection). However, this keeps the meat particularly tender! At the end of the roasting time, switch on the grill and briefly grill the goose at 250 °C so that it turns golden brown and crispy on the outside.

5) Correct carving needs to be learned

But it’s not that difficult, whether with a knife or poultry shears. First cut off the wings (if they are fried and not used for the stock), separate the legs and cut them into thighs and drumsticks, then cut the breast open in the middle, starting from the stomach to the left and right of the breastbone, scrape the breast meat from the bones and remove the filling.

A festival just for coffee? Fortunately, what sounds like a dream that is far too beautiful is reality! Various European cities have been holding such meetings for a number of years, where the coffee scene can present itself to interested customers. The offer ranges from tasting coffee specialties to lectures and panel discussions about coffee consumption. Producers show their goods, traders present various machines, mills and accessories. And visitors have the opportunity to look over the shoulders of the professionals while making great latte art.

The Vienna Coffee Festival in the Ottakringer brewery

People associate Vienna with coffee, so it stands to reason that a great coffee festival is taking place here. On the premises of the Ottakringer brewery there will be street food, coffee tastings and demonstrations of new fully automatic coffee machines as part of the festival.

While listening to the sounds of various DJs and live music, you can watch baristas practicing their art and actively participate in various coffee workshops. New flavors can be tested here for three days or you can sip a coffee cocktail at the bar.

Europe’s largest coffee festival: Istanbul Coffee Festival

In September, Turkey hosts the Istanbul Coffee Festival, where the leading coffee brands can present their coffee-related products for four days. Visitors also have the opportunity to get to know well-known coffee shops in the city.

There you can try different types of coffee and let the exhibitors demonstrate different methods of preparation. Of course, there are also one or two delicacies that have nothing to do with coffee. Barista shows, concerts and even art exhibitions are also on the program every day. At workshops, visitors can learn and try out coffee-making techniques themselves.

The Amsterdam Coffee Festival

The entire Amsterdam coffee scene at a glance: At the Coffee Festival in Amsterdam, the subculture of coffee lovers celebrates itself and invites guests to delicious food, tea, chocolate and – of course – coffee. On two days in March, the site is open to the public and in the relaxed atmosphere between art and music there is space to exchange ideas about the common passion:

In the Mississippi Bar Kitchen only coffee dishes are served and during the Espresso Martini Party you can try delicious high-proof coffee drinks.

Berlin Coffee Festival

Enough of other countries! Germany also has a lot of coffee festivals to offer and does not skimp on the programme: from the end of August to the beginning of September, numerous workshops and coffee tastings are organized throughout Berlin, which are both informative and a lot of fun. At the Large Coffee Market, visitors can talk about their favorite drink and get to the bottom of the bean.

Or they listen to lectures by master baristas and coffee farmers. A varied program that also takes guests to the best coffee shops in Berlin.

Coffee festivals are a must for everyone who loves the hot bean and would like to get more involved with production, preparation and new trends. There is a lot to discover and marvel at here, so it is guaranteed never to be boring.

Have fun!

We believe there are two things that drive us in life: First, the never-ending quest for perfection. Second: coffee. But what if you try to combine these two things? Imagine that you should make the perfect coffee – and not with a fully automatic coffee machine, which supposedly knows and can do everything better, but with a French press. Real craftsmanship, precision, weighing the coffee powder to the exact gram… does the thought of it already bring the first beads of sweat to your forehead? It doesn’t have to be – perfection is in the nature of French Press coffee, so it’s easier to achieve than you think.

Regardless of whether you want to use a French press in the office or prefer to devote yourself to the fine art of brewing coffee at home: Buying a French press is always a great idea. Why? Because you get maximum output (great coffee) with minimal effort (few accessories). The customization of taste. is the great strength of the French Press coffee maker. Of course, the basics include the French press as well as a coffee grinder, a scale, a kettle and the coffee beans of your choice. Real experts are also equipped with a water thermometer.

Coffee for the French Press: Which one is the right one?

To the frequently asked question of which coffee is best suited for the French Press, everyone has to answer with their own taste. For many coffee lovers, the French Press is an opportunity to try out particularly exotic types of coffee, others rely on coffee from the local small roaster and still others are guided by recommendations from their fellow human beings.

Much more important than the choice of coffee type, however, is the quality, i.e. the condition of the coffee when it is associated with the French Press. Here, the freshly ground coffee is a must for connoisseurs in order to be able to fully enjoy the desired aromas.

Making the coffee from the Frech Press

Fortunately, you don’t have to exhaust yourself to grind the perfect French Press coffee with the hand grinder – a coarse grind, similar to sea salt, is sufficient. Ideally, your coffee grinder should have a disc or conical grinder. This creates an even grinding result, which in turn makes the expected taste of the coffee from the French Press more predictable.

On to the next step: Rinse the French Press coffee pot with hot water beforehand and fill it with 60 to 70 grams of the black gold that you have just ground for each liter of water used. And now it gets exciting: The water that has been boiled in the meantime must now have a temperature of exactly 96°C before it is quickly poured onto the coffee – keyword water thermometer. And if you’re already handling measuring instruments, you can start the stopwatch right away, because after four minutes it’s time to stir. Immediately afterwards, begin to push the plunger of the French Press down in one smooth motion. Patience is truly a virtue here, otherwise if you press too fast and too hard, the coffee will end up everywhere except on the bottom of the French press.

What comes out now is the ready-to-drink, incomparable, aromatic, PERFECT coffee from the French Press – assuming you don’t leave it in the French Press. Then there is a great danger that the coffee will continue to brew and become bitter. Hence our tip: Only brew as much coffee as you want to drink, or transfer the coffee to another container. Coffee specialties from the French Press require a few extra steps, which you can certainly do with ease.

Coffee from the French Press compared to the fully automatic coffee machine

Fully automatic coffee machines adjust the brewing temperatures, proportions and degree of grinding of the beans to the desired drink, thus ensuring optimal coffee enjoyment. In comparison, French press preparation is a process that requires a little more attention. Espresso, latte macchiato, cappuccino, flat white, or café crèma – you can have your personal favorite coffee in no time at the touch of a button. Grinding with the French Press coffee grinder can be a bit more time-consuming.

The French Press coffee maker can be used flexibly, is mobile and light. In its basic form, the coffee machine is already equipped with all the technical requirements for coffee production and, depending on the model, has different additional functions such as the simultaneous preparation of several drinks or the energy-saving mode. However, this also requires a permanent, fixed place.

What basically happens after every cup of coffee is cleaning – there is no difference between the fully automatic coffee machine and the French Press coffee maker. However, when it comes to cleaning, the French Press coffee maker has to be cleaned thoroughly by hand. In most cases, the fully automatic coffee machine takes over the cleaning of its used components fully or semi-automatically. Some parts of the coffee machine have to be dismantled and cleaned by hand, but the self-cleaning functions require special cleaning agents that have to be bought and refilled at regular intervals. Thus, compared to the French Press coffee maker, the fully automatic coffee machine does not necessarily require more cleaning, but at least it involves additional costs for the cleaning agents.

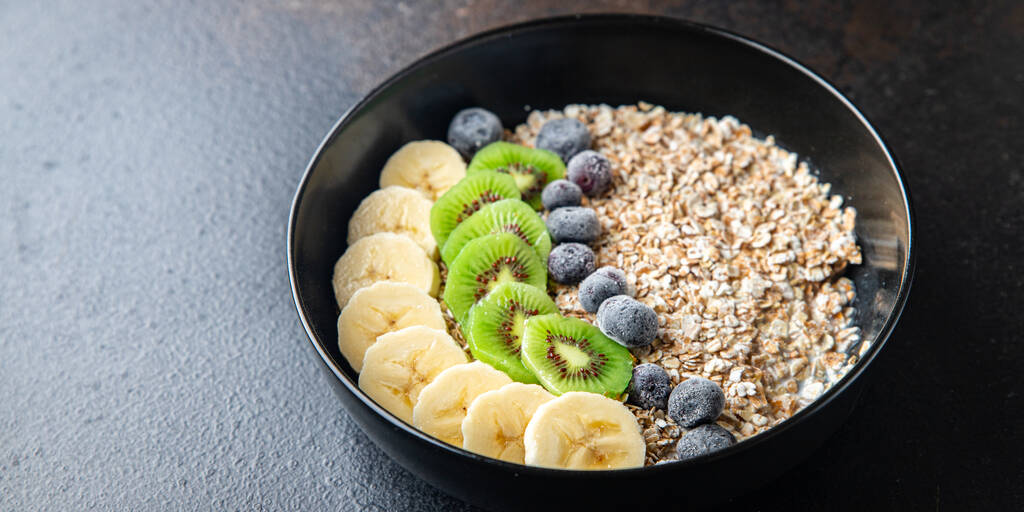
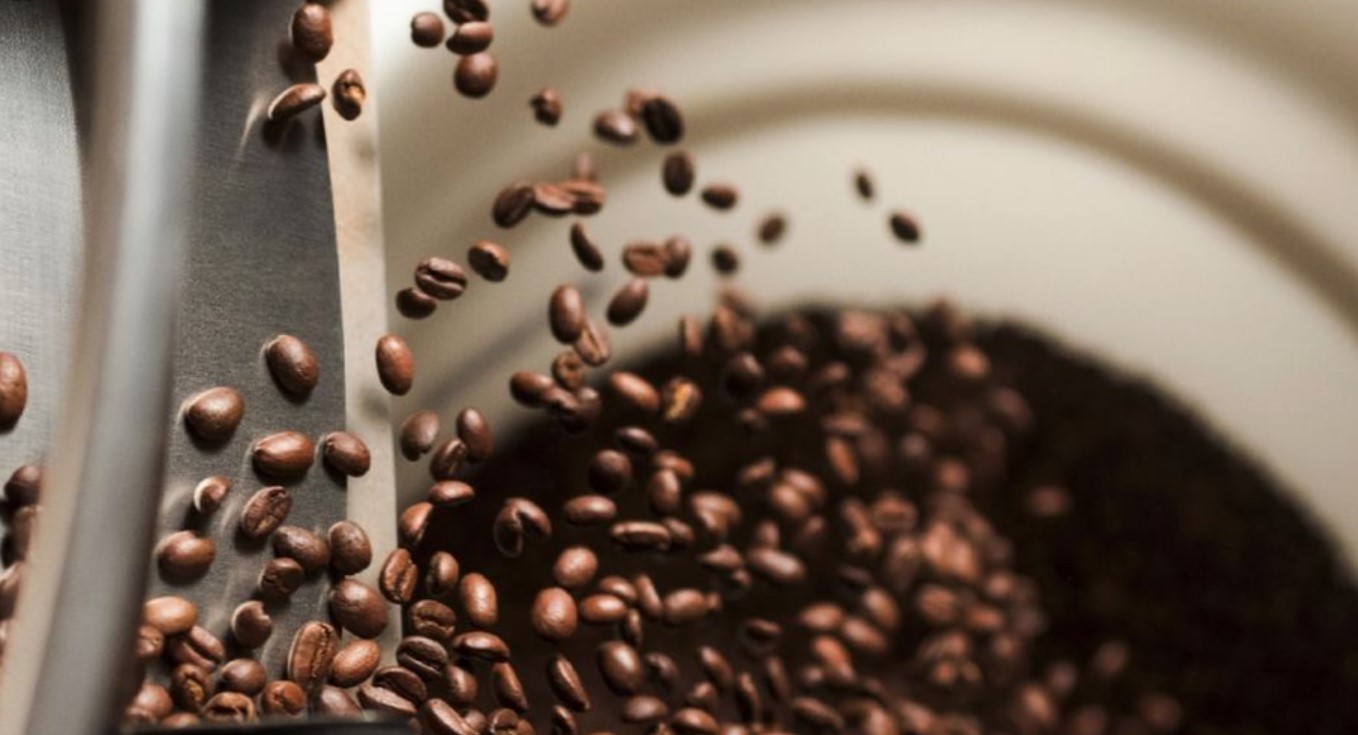
Many love it: the milk froth on your coffee from the coffee machine. The consistency of the milk froth has a major impact on the taste. But how do you make the perfect milk froth? With or without a coffee machine? And which milk is best for milk froth? What should you watch out for when frothing milk?

As a rule, the milk froth should be creamy. Milk foam that is much too firm actually has no place on the coffee from the coffee machine and is therefore also affectionately called construction foam. Nevertheless, there are certainly coffee drinkers who prefer this type of foam. Here you can find out how you can froth milk and thus create the perfect milk froth – with or without a coffee machine.

How is milk froth formed in the first place?

When frothing, air is lifted under the milk. The protein and fat molecules are mixed up and then enclose small air bubbles. Depending on the type of froth and duration, the milk froth will be creamier or firmer. The milk you use for the milk froth also plays a role. For a creamy and airy milk froth, both the fat and protein content are crucial. The milk should come cold out of the fridge before frothing. During heating, the milk should not reach more than 60 degrees, otherwise the proteins will curdle. As a result, the foam collapses very quickly. Your coffee machine knows this special feature, which is why it always prepares perfect milk froth that stays creamy for a long time.

What tools can you use to make milk froth? – From coffee machines to whisks

The selection of aids for frothing milk is large and very different. Some tools are easy to use, others require skill, practice and a little effort before you can create good milk froth.

Make milk foam with a whisk: If you don’t have a milk frother at home, you can simply use a whisk. To do this, first heat the milk. Attention: not warmer than 60 degrees. Then pour the milk into a large container and whip it with a whisk – similar to cream. If you do everything right, after a few minutes you will have great milk froth for cappuccino, latte macchiato and co.
Make milk froth with hand milk frother: The hand milk frother works similar to the whisk method. The cold milk is poured into the milk frother and heated on the stove. The milk is then foamed with the help of the existing sieve and by moving it up and down. The advantage of this milk frother is that you only need this one vessel.
Making milk froth with a battery-powered milk frother: If you use a hand-held milk frother to make milk froth, you start by heating the milk. Then you fill it in a glass or other tall container. Now dip the milk frother into the milk and froth it with up and down movements. With a little practice, you can easily create fluffy milk froth. The advantage of the battery-powered milk frother is that you can easily adjust the amount of milk to be whipped as needed.
Making milk froth with an electric milk frother: If you want to make milk froth with an electric frother, you don’t actually have to do much. Simply pour milk into the milk frother up to the mark and you’re ready to go. This is just as convenient as making milk froth with a coffee machine. The great thing: In addition to warm milk froth, some devices can also produce cold milk froth or simply heat the milk, e.g. for cocoa or a delicious children’s cocoa cappuccino.
Make milk froth with a coffee machine: If you want to treat yourself to a little luxury, you can afford a fully automatic machine. Most of these coffee machines can produce milk froth fully automatically. However, you actually choose a coffee drink, which the fully automatic machine prepares at the push of a button. So the fully automatic machines can make a great latte macchiato with three layers without you having to worry about anything.
Making milk froth with a steam nozzle: If you have a portafilter, you usually also have a steam nozzle or steam lance. When frothing milk, practice and perseverance are the main requirements. Although there are countless instructions and videos on the net, in the end you simply have to try and test it. Once you get the hang of the steam nozzle, you can always look forward to great, creamy milk froth.

Which types of milk are best suited for milk froth with the coffee machine?

Making milk froth with whole milk: Whole milk does not froth better than other types, but thanks to the high fat content it enhances the taste of the coffee or espresso.
Making milk froth with low-fat milk:: Low-fat milk can also be frothed well. However, since it contains less fat, it does not carry the coffee taste quite as well.
Make milk froth with fat-free milk:: It can also be frothed up, but here it is an absolute matter of taste whether you like the coffee afterwards.
Make milk foam with soy milk: Contrary to what is often claimed, soy milk is also suitable for foaming. However, it may well be that one variety foams better than another variety. Therefore simply test soy milk from different manufacturers.
Make milk froth with lactose-free milk: Anyone who suffers from lactose intolerance can also use lactose-free milk to conjure up super milk froth for cappuccino and the like.
Making milk foam with coconut and almond milk: Coconut milk and almond milk cannot be foamed. This is because the protein or protein content is too low. Although there are now frothable versions of these types of milk, fats and proteins have been added to them later. Everyone has to decide for themselves whether they want to drink these varieties.
Making milk froth with oat milk: Another way to make vegan milk froth is with oat milk. Because it is precisely here that many manufacturers have developed a barista version that makes it easy to create milk froth with and without a coffee machine.

However, if you have the feeling that your milk does not froth well, it is advisable to simply try a different brand. It may well be that the fat content of both milk products is the same, but the protein content is different. So you don’t have to bury your head in the sand immediately if you didn’t get the desired milk froth on the first try.

Latte art and how to decorate coffee from the coffee machine with milk froth

It’s all the rage, trendy cafés can’t do without it, and there are countless videos on the subject on YouTube: we’re talking about latte art – that’s the name of the design of coffee from the coffee machine with creamy milk froth.

It is an important discipline, especially for baristas, because it allows you to make a name for yourself and set yourself apart from the competition. Every year, baristas compete to see who can make the best latte art. Now some question marks will appear? Designing milk froth – please what? This type of design is part and parcel of trendy drinks such as the Flat White. Patterns also look great on a cappuccino.

What are the Latte Art Techniques?

The original variant of latte art is the artful pouring of milk froth into a cup of espresso. The milk froth should still be liquid and easy to pour. With the right technique you can create leaves, trees and hearts.

As with frothing milk itself, it also takes a little time to get the hang of the pouring technique. Once you have developed a knack for it, you can experiment and create imaginative patterns.

Another variant of latte art is the decoration with chocolate sauce. It starts frothing the milk. The milk froth is poured back into an espresso, but without a special pouring technique. Now chocolate sauce, toothpicks, stencils and other little helpers are used. You can also use caramel sauce if you like. Simply pour the sauce onto the milk froth and use the tools to decorate as desired. The imagination knows no limits. Just look on the internet for inspiration.

Can I make latte art myself?

Now, of course, the question arises whether you can do it too? Yes, with the right tools, anyone can become a latte artist at home. You need a milk jug, a coffee cup, espresso and of course milk froth. If you don’t want to pour, just decorate, you still need chocolate or caramel sauce and toothpicks.

If you have a portafilter with a steam wand, you will need some skill and practice to froth milk, but then you can create wonderfully creamy milk froth.

If you own a fully automatic machine, you can use the coffee machine to make the milk froth right away and then start your latte art project straight away.

With other types of froth, you need to test something that is the perfect consistency for latte art. And always remember: for latte art we need creamy and liquid milk foam, not foam!

And then it can start. Look around the internet, there are numerous videos and descriptions that are great for beginners. Try it out!

Johann Wolfgang von Goethe said: “No pleasure is temporary, because the impression it leaves is lasting”. Everyone who has traveled to western Sweden appreciates the enjoyable coffee break that is taken daily in cozy cafes with delicious coffee and excellent cake. The fika tradition is unique in the world. You can also take a Swedish coffee break. The coffee for your fika works particularly well with the French press, because this allows the full aroma to unfold. Feel free to leave the filter coffee machine in the cupboard.

Fika – a special coffee break requires the French Press

Swedes call their coffee break, which includes eating delicious biscuits, cakes or fine Danish pastries, fika. The Swedish coffee break is taken together and is an excellent way to intensify contact with colleagues or to spend valuable time with friends.

The Swedish fika is very different from the customs of other countries, where you drink your coffee quickly while standing or walking. Swedes take time for each other, reduce stress by drinking coffee together, intensify contacts and treat themselves to delicious pastries and excellent cakes. The time together, the culinary delights and the delicious coffee from a filter coffee machine or a French press are what make the Fika what it is. Find out more about the differences between the preparation with the French press and the filter coffee machine.

Coffee for the fika – brew with the filter coffee machine or with the French press?

Most Swedes brew their morning coffee in a filter coffee machine. Swedes drink a lot of coffee, so capsule and pad machines are not common. The Swedes are nothing like the filter coffee machine.

The coffee that is drunk with the fika in the afternoon is prepared with the Swedish pot or the French press. Anyone who boils their favorite hot drink will be rewarded by the full-bodied aroma. Brewed coffee is characterized by a lot of body. The oils and fats contained in the coffee are not filtered out during filterless preparation. When it comes to coffee enjoyment, it makes a difference whether you use the filter coffee machine or the French press. Filter coffee machines and French presses only offer two methods of preparation for the fika, among many others.

Coffee is offered in Sweden in the two degrees of grind “Kok” (cooking coffee) and “Brygg” (brewed coffee). Swedish coffee packaging contains both the designation of the degree of grinding and a coffee pot or filter symbol. This tells you whether you should brew or boil the coffee. With the French Press you can boil coffee and with the filter coffee machine you can brew brewed coffee.

In the coffee perfect online shop you can buy high-quality bean and filter coffee for the Fika.

Swedish coffee tastes less acidic and stronger than our coffee. The beans are roasted darker in the north and the beans are selected for types that are less acidic. You will taste these two differences, regardless of whether you prefer to prepare your coffee with the filter coffee machine or the French press.

How you make the coffee for the fika depends on what type of guy you are:

Cook boiled “Kok” in a pot or French press

Traditionally, Swedish coffee “Kok” is boiled with water in a pot. The coffee powder falls to the bottom of the pot and the hot drink is carefully poured into a cup. The coffee powder settles in the cup. After enjoying the coffee you can read the coffee grounds.

This method of preparation is preferred by many Swedes for the fika, but in this country it is not for everyone because of the coffee grounds, which unfortunately are always drunk.

If you want to have the full coffee experience without coffee grounds in the cup, prepare your favorite hot drink with the French press. Very fresh coffee “Kok” without coffee grounds is child’s play with the French press. Pour hot water over the coffee in the French Press, let the coffee steep and use a metal sieve to press down the coffee grounds. In contrast to the filter coffee machine, the metal sieve in the French press does not filter, but preserves the fats and oils that are in the coffee. The coffee is characterized by an aromatic fullness. If you want the full aromatic taste, you should prepare the brewed coffee with the French Press. Brewing systems cannot compete with the French Press.

Cooked out prepare “Brygg” in the percolator or in the filter coffee machine

Coffee that has the “Brygg” grind can be prepared in the filter coffee machine or in the percolator. In the percolator, the boiling water is pushed up through a pipe and runs into a perforated steel container containing the coffee powder. From there it drips back down into the water as coffee. The percolator is very suitable if you only pour a few cups.

If you opt for the filter coffee machine, you should dose the coffee powder less than you are used to. The Swedish coffee is stronger and darker than the German. The filter coffee machine is very suitable if you want to prepare several cups. Unfortunately, the coffee powder loses some of its aroma when brewed in the filter coffee machine, since the fats remain in the filter. However, it is useful when several people are doing the fika together.

Summary:

You can boil or brew the Swedish coffee for the fika.
The Swedish coffee varieties are called either “Kok” or “Brygg”.
For reheating, try the French Press. The aroma is not filtered out by the French press, but can be drawn into the hot drink, including the coffee fats and oils, and you can enjoy coffee without annoying coffee grounds in the cup. The French Press is far superior to the typical Swedish pot because the coffee stays in the press. The coffee is more aromatic in the French press than in the filter coffee machine.
The filter coffee machine is well suited to preparing many cups at the same time.
The coffee from the filter coffee machine offers a little less flavor than boiled coffee.
Brewing in the percolator offers excellent coffee enjoyment.
If you want a full aroma, the French press is the preferred choice.