Tag

Pizza

Browsing

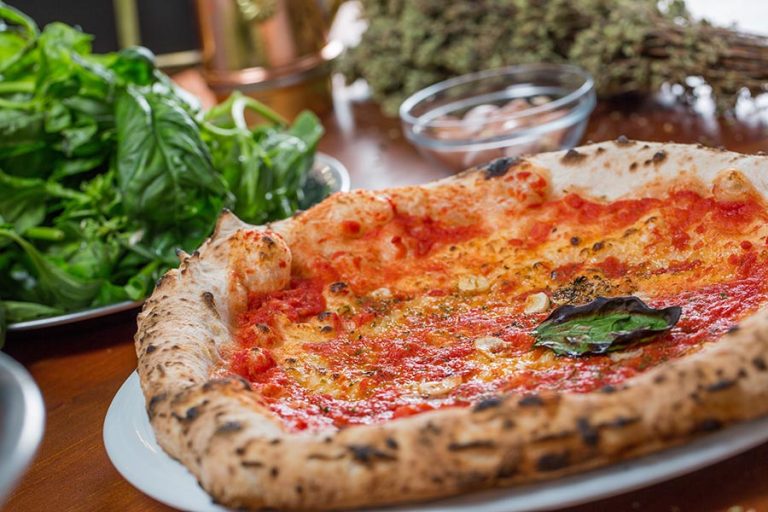
Pizza Marinara is one of the most original pizza recipes. With just a few ingredients, the vegan pizza variant is quick and easy to prepare. We show you how to prepare pizza marinara.

The secret of this pizza lies in its simplicity. Pizza Marinara is the way of preparing one of the simplest pizzas from Naples. This recipe is traditionally prepared in Italian cuisine without cheese and is therefore suitable for vegans.

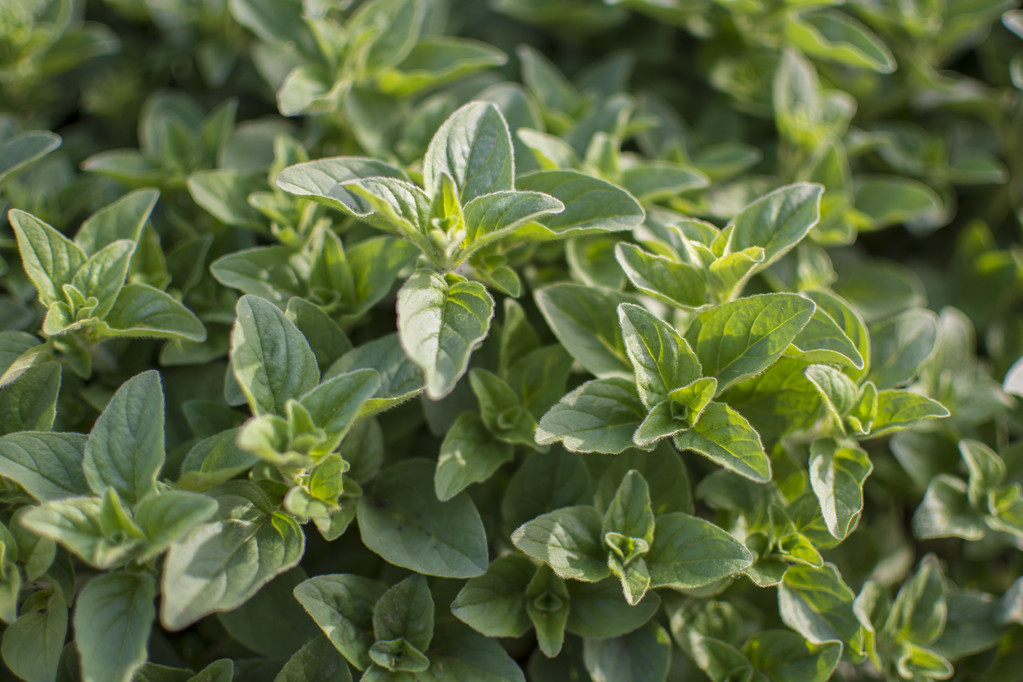
For the preparation, the fresh pizza dough is covered with tomato sauce, olive oil, oregano and garlic. When choosing your ingredients, make sure that they come from organic and regional cultivation.

The pizza tastes even better if you grow your own ingredients. You can easily plant garlic and oregano yourself, and tomatoes are also suitable for the balcony and garden.

Pizza Marinara: How to cook it

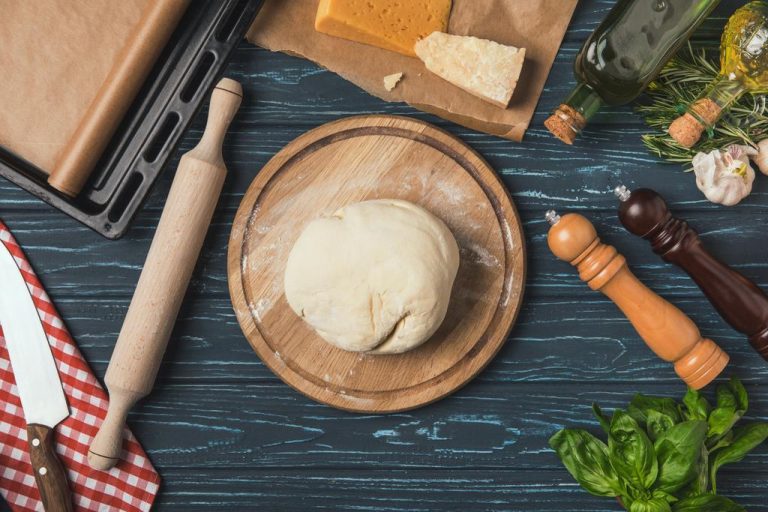
For this simple recipe you only need a rolling pin in addition to the ingredients. If you have problems with the dough, then read our article on yeast dough with valuable tips.

Ingredients:

250 g flour
125 ml warm water
0.5 pieces of yeast cubes
1 pinch(s) of salt
1 pinch(s) of sugar
125 ml tomato sauce
3 cloves garlic, chopped
2 pinch(s) fresh oregano, chopped
4 tablespoons olive oil

Directions:

Mix the flour with the warm water, yeast, and some salt and sugar in a large bowl.
Knead the flour mixture until you get an even mass. If necessary, add a little more water or flour if the dough is too wet or too dry.
Cover the dough with a damp kitchen towel and let it rise in a warm place for 60 minutes.
After the dough has risen, dust your work surface with some flour.
Preheat the oven to 200 degrees Celsius top/bottom heat. Preheating the oven is necessary here so that the pizza becomes crispy.
Roll out the dough evenly. Place the dough on your baking sheet without any toppings.
Spread the rolled out yeast dough with the tomato sauce.
Drizzle the pizza with olive oil, then sprinkle the chopped garlic and fresh oregano on top.
Bake the pizza in the oven for 10 minutes.

Tip: Every oven and every yeast dough is slightly different. Therefore the baking time can vary. If necessary, leave your pizza in the oven for another 5 to 10 minutes. It’s done when the edges turn a crispy brown color.

Pizza Marinara: Delicious variants

You can also spice up the pizza marinara with other ingredients. A few ideas for this are

Pizza Mediterranean: with zucchini, aubergine, and basil
Pizza Pesto: with fresh herbs and vegan pesto
Pizza Vegetariana: with corn, peppers, zucchini, and other fresh vegetables
Pizza Funghi: with mushrooms and oregano

Tip: Even with vegan pizza, you don’t have to do without cheese. After baking, sprinkle your pizza with a handful of yeast flakes or some vegan cheese.

If you want to bake pizza properly, you don’t need a stone oven. But there is a crucial trick how the pizza gets really crispy in the oven at home. We’ll tell you.

Baking pizza properly is an art in itself. A traditional Italian pizza has a crispy base and topped with fresh ingredients. The secret behind this is the preparation in the stone oven: a fire burns under the stone, which heats up its surface considerably. The pizza is then baked crispy brown directly on the hot stone.

But you can also imitate how a stone oven works at home. Most modern ovens have a setting where the pizza gets nice and crispy without burning. We’ll show you a simple trick to make pizza like it’s out of the stone oven.

Choose the right setting

In order to bake pizza properly, you should select the appropriate setting on your oven. So first familiarize yourself with the different oven symbols.

The setting, which mimics the brick oven, is convection with bottom heat. You can recognize this setting by the symbol of a fan with a line or a wave underneath it. This setting is perfect for properly baking pizza. It is baked crispy on the bottom, but only gently cooked on top.

Bake your pizza with this setting in the lower third of the oven at maximum temperature. Depending on the recipe, the pizza is ready in ten to twenty minutes.

If your oven does not have this setting, then alternatively bake the pizza at the maximum temperature on top/bottom heat. Place the pizza at the bottom of the oven. In this way, the heat comes directly to the dough and makes it crispy. The baking time also varies with this variant depending on the recipe.

By the way: This setting is also suitable for heating up pizza. The leftovers will still taste good the next day.

Pizza like from the stone oven: ideas for at home

With the right setting on your oven, you can also make a pizza with a crispy crust at home. It tastes especially good if you make the pizza yourself. Both the pizza dough and the pizza sauce are prepared quickly. Then choose your favorite ingredients and top the pizza with peppers, spinach, olives, cheese or fresh rocket, for example. Get inspired by these pizza recipes:

  • Cauliflower Pizza
  • Spinach pizza
  • Pizza Marinara
  • Arugula Pizza

Tip: Pizza as fast food does not have to be unhealthy. You can also bake a healthy pizza without yeast and white flour. We’ll show you how it’s done here: Fast and healthy pizza? It works with this ingredient.

The Pinsa Romana is similar to an ordinary pizza, but is said to be more digestible. We will explain to you what is behind the trend from Italy and how you can prepare Pinsa yourself.

For several years, a trend dish has been spreading from Italy that not only resembles pizza in name: the pinsa. They are also called Pinsa Romana, because the Romans are said to have enjoyed eating the pastry. But the recipe was forgotten until it was rediscovered in the last decade.

What makes the pinsa romana so popular? Above all, it is their dough that is said to be more digestible than pizza dough. It consists of a mixture of wheat, rice and soy or chickpea flour and Italian sourdough (“lievito madre”). The rice flour is supposed to loosen up the dough, the soy flour ensures good binding and proteins and the sourdough is supposed to make the pinsa romana easier to digest.

The long rising time also contributes to this: the dough of the pinsa should rest for up to 72 hours or more. The ongoing fermentation processes not only make the dough very airy, but are also supposed to relieve the digestive tract of some of its work. However, there are still no systematic scientific comparative studies between the digestibility of pinsa and pizza. More about this here: This is why many people can no longer tolerate bread.

In the next sections you will find out how you can bake and topping Pinsa Romana yourself without Lievito Madre.

Pinsa Romana: The recipe for the special dough

For four pins you need:

350 g flour type 405 or 550
50 g wholemeal spelled flour
75 g rice flour
25 g chickpea flour or soy flour
0.5g of fresh yeast or 0.2g of fresh yeast and 50g of Lievito Madre
approx. 300 ml cold water
1 tsp salt
1 tsp olive oil

Directions:

Mix the flours together in a large bowl.
Dissolve the yeast and salt each in a portion of the water.
Add yeast water, salt water, olive oil and, if necessary, Lievito Madre to the flour mixture. Knead the ingredients for about ten minutes until you have a smooth dough. Add some more water if needed.
Cover and let the dough rest for 30 minutes, kneading it briefly every ten minutes.
Place the dough in a large sealable container and refrigerate for 48 to 72 hours.
On baking day, take the dough out of the fridge 2-3 hours before you use it to let it come to room temperature.
Knead the dough briefly and divide it into four pieces of dough. Cover them with a tea towel and let them rise again for an hour.
Preheat the oven to 240 degrees circulating air. Note: For most dishes you can do without preheating the oven and thus save energy. Preheating the pinsa romana (just like pizza or tarte flambée) makes sense, however, because it only needs to be baked for a short time, but it should be nice and crispy. The ovens of professional pizzerias reach much higher temperatures.
Pull the dough pieces apart in an oval or round shape. Be careful to break as few air bubbles as possible. The dough does not have to be as thin as pizza dough.
Place the pins on an oiled baking sheet and top them with ingredients of your choice.
Bake the pins for about 10 to 15 minutes.

Tasty toppings for pinsa romana

You can eat the Pinsa pure or top it like a pizza, for example with:

  • tomato sauce
  • fresh seasonal vegetables
  • cheese or vegan yeast melt
  • fresh herbs
  • aromatic olive oil

The only thing to keep in mind is that the Pinsa Romana is only briefly in the oven, just like a pizza. This means that you should pre-cook vegetables or cut them very thinly. It’s also a good idea not to cover the pinsa too thickly, as that could make them mushy (and harder to eat).

Do you want to make pizza like in a pizzeria? We’ve collected tips to help you!

  1. Use a wooden baking spade or a thin, rimless baking sheet. You can also prepare your pizza on a sheet of aluminum foil or parchment paper on the back of the baking sheet. Then simply discard the pizza foil from this baking tray onto the preheated baking tray.
  2. Sprinkle a spade or baking sheet generously with cornmeal before placing the dough.
  3. Bake the pizza base without topping for 5 minutes. Press down large bubbles on the dough with a wooden spoon, then lay out the filling. You can fry the wet filling ingredients, such as spinach or mushrooms, a little, so that some of the water evaporates. (If using spinach, wring it out in a paper towel.) It is good to sprinkle the base with a thin layer of cheese before adding the sauce or brush the dough with vegetable oil before placing the filling. Place the filling on the crust just before baking. If the filling lies on the raw dough for a long time, it soaks the dough and the crust turns out to be unbaked.
  4. Wrap the base in foil or sprinkle generously with grated cheese. If the bottom of the crust burns, place the pizza on a higher rack in the oven. If the pizza burns on one side, turn it: the oven may not heat up evenly.
  5. Bake the crust without filling for 10-15 minutes, until the dough rises slightly and is browned. Add the filling and continue baking.

For several centuries, the technology of making pizza has hardly undergone any changes – except that the ovens became gas and electric. And everything else, including the obligatory manual preparation of the dough, remained traditional. Real Italian pizza, despite all the speed of its preparation, does not like fuss: all processes should proceed clearly and measuredly.

  1. Pizza is a rather simple product, and any housewife can bake it. At home, pizza is made in several ways: baked in the oven or in the microwave, stewed or fried – here the flight of your imagination is unlimited.
  2. If you decide to bake your pizza in the oven, it is best to knead the yeast dough. Let it stand for 30-60 minutes before baking. The dough must be precipitated 2 times and only then can it be laid out in the mold.
  3. You can bake pizza in the oven in 2 ways – on a baking sheet or in a frying pan, and its thickness should be at least 2 mm. Thin baking pans are not suitable! Grease the baking sheet with vegetable oil.
  4. The frying pan has a lot of advantages over baking on a baking sheet: the dough is easily removed, practically does not burn; you can bake different pizzas and put different toppings.
  5. When baking sweet pizza, you can also use cooking oil, which is then sprinkled with flour to prevent the dish from burning.
  6. You don’t have to roll out the pizza crust – the dough is laid out on a baking sheet and evenly stretched with your fingers over the entire surface so that its edges hang slightly over the edges. Before putting the dough in the oven, it needs to stand for 5-7 minutes.
  7. If you prefer to bake pizza in a frying pan – the classic round shape, generously grease the bottom and edges with vegetable oil, as the dough will rise a lot, and then sprinkle a little with semolina – so that the finished pizza can be freely removed from the mold. Put the dough in a skillet and place in a warm place for 10-15 minutes, and then in the oven.
  8. Before baking, the pan, like the oven, is heated to the required temperature, a small amount of vegetable oil is poured to lubricate the bottom and soak the pizza, and heated. Then spread the dough, fry on one side, and remove from the pan.

What is your favorite pizza topping?

  1. Classic pizza with ham. Cut sweet peppers into small strips, ham into slices, and salami into a semicircle. Spread the dough with tomato sauce, spread the ham, salami, pepper in a circle, and sprinkle generously with cheese.
  2. Pizza with mushrooms and onions. Cut the mushrooms as small as possible and fry them in a little olive oil, then add a little heavy cream. You should get a mushroom paste, which we distribute on the dough as a base, put thin onion rings on top, and sprinkle with Parmesan.
  3. Pizza with chicken, pesto, and cheese. You will need a boiled chicken breast, divided into small pieces by hand and laid out on a dough previously greased with pesto sauce. Before putting the pizza in the oven, sprinkle it with grated hard cheese so that it turns out not only delicious but also very juicy.
  4. Hearty pizza with ground beef. Peel and finely chop a small onion and a clove of garlic. Fry them in a frying pan in olive oil, add the ground beef. At this time, grease the dough with tomato paste, and then evenly distribute the meat filling on top. Sprinkle the finished pizza with fresh chopped herbs just before serving.

Everyone knows how good homemade pizza is. To make it successful, follow the advice of Dr. Etker.

  1. Do not be lazy to peel and fluff the flour before you start cooking. Use a sieve. The process fills the product with air – the pizza dough will be fluffier.
  2. Stick yeast is good, but freshness can be questionable. Use the granular version from the Etker collection.
  3. The awakening of yeast-like organisms requires conditions – warmth and a sweetish environment.
  4. Too much-granulated sugar makes the baked goods tough.
  5. A properly rolled layer of dough is the foundation of the art of a pizza maker. The base should not be high, but nobody canceled softness and airiness.
  6. Make a border around the perimeter of the cake before placing the pizza filling on it – the products will not spread out.
  7. By the way, the filling is different – from meat, smoked meats, fish, seafood, vegetables, fruits. Of the canonical components, the type of hard cheese and the taste of ketchup are important.
  8. The cheese for the dish should not be of sweet varieties. Choose spicy or creamy.
  9. Choose ketchup according to the type of filling. Spicy taste for meat and smoked meats, without spices for fish and seafood.
  10. The pizza in the oven doesn’t have to be giant in diameter. Make comfortable little cakes.

Pizza is a very popular, convenient, quick, and delicious dish. The pizza tastes good both cold and hot, and it’s easy to reheat from a cold state: you just put a piece in the microwave – and voila! You are already sinking your teeth into a hot and delicious bite. To make your pizzas even tastier – try the tips from this post!

  1. Place a glass of water in the microwave along with the pizza to avoid the appearance of a dry crust on the pizza.
  2. Make a pizza dough with Greek yogurt and yeast flour. 1 cup Greek yogurt and 1 cup yeast flour and your simplest pizza dough are done!
  3. Keep your pizza hot in the car too: turn on the heated seat wherever it lies!
  4. Tear the pizza box into “plates”
  5. Make pizza cupcakes at home. Step 1: Cut circles out of the dough. Step 2: Place them in cupcake tins. Step 3: Fill the dough with the filling. Step 4: bake!
  6. Make croissant dough pizza rolls. Prepare croissant, pepperoni, and cheese dough with chopsticks. Place pepperoni and a piece of cheese on top of each dough triangle. Tighten it well. Bake until the dough is brown and the cheese is melted. Wait a few minutes for the rolls to cool down and enjoy!
  7. When you are driving and your pizza is sitting on the seat, place a bottle of water under the box so that the filling does not slide off the cake.
  8. Heat the pizza with a hairdryer on the surface of the iron.

Thanks to these life hacks, you will get the most out of your pizza!

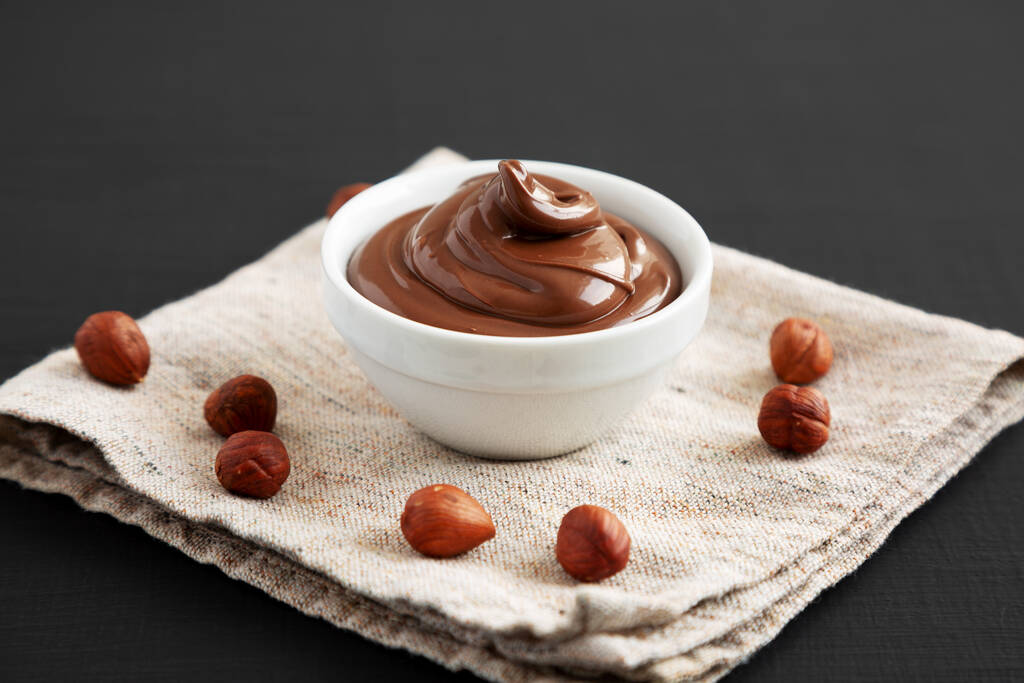
  1. Try making “dessert pizza” with Nutella.
  2. Make a pigtail pizza.
  3. Make pizza-style thin dough rolls.
  4. Turn an empty pizza box into a laptop stand.
  5. Prepare a “pizza in a jar” that you can always take with you.
  6. Reheat leftover pizza in a crepe maker.
  7. Make a huge rollout of a huge pizza, which is easier to take with you.
  8. Another idea is pizza chups!
  9. Finally, use the tiles to simulate a brick pizza oven!

Homemade pizza like from a pizzeria? Is quite real. To make the perfect pizza in the most ordinary oven, it is important to remember the following:

  1. The dough recipe is not so important, the sauce recipe and the type of filling are not so important as the baking temperature. Italian pizza is originally cooked in a wood-burning oven at a temperature of 450-550 C, no more than 1 minute, due to which it turns out to be crispy on the outside, with a thin elastic crust, it is not easy to simulate a wood-burning oven with such a high baking temperature at home, therefore such methods are used: preheat the oven to the maximum (250-300 C), instead of a baking sheet, use a special stone sheet, which is heated together with the oven. Pizza is baked on the stone for no longer than 10-15 minutes. Since I have no stone, I bake on a metal baking sheet, but at the highest temperature (250-300 C) in an oven very well preheated to this temperature. It takes 10-15 minutes to bake, depending on the size of the product. As soon as the sides of the dough are browned, and the cheese melts and begins to bubble, the pizza is ready. Take it out immediately! It is important not to overdry the pizza, this often happens if it is baked at medium temperatures (about 180 C) for a long time (20-30 minutes).
  2. The pizza dough is made according to the simplest recipe for lean yeast dough with the addition of olive oil, the ascended dough is not crushed a second time but immediately stretched with the palms of the cake to the desired size. It is believed that the rolling pin destroys air bubbles in the dough, so it is not used. I still roll out the dough with a rolling pin, but I let the base “breathe” for about 20 minutes so that air bubbles inside again form.
  3. To prevent the pizza base from becoming dry and greasy during baking, after rolling out the cake, place it on a baking sheet sprinkled with flour (you do not need to grease it with butter, only flour).
  4. To prevent the base from becoming wet from excess moisture in the filling and sauce, after placing the dough in a baking sheet, first of all, grease the side on which you will spread the filling with olive oil, only then distribute the sauce and filling.
  5. To make the pizza tasty and baked well in a short time, do not overload it with ingredients, distribute the cheese in slides at a short distance.
  6. When baking pizzas in new modern ovens, use the oven manufacturer’s recommendations. See instructions. Why is it so important? Old ovens are almost always a little leaky and natural ventilation (convection) is provided during baking. In the old oven, it is enough to set the maximum heating temperature, warm up the oven itself well and the pizza turns out to be perfect – with dry crispy sides and a juicy cheese center. Furnace effect. Modern ovens are hermetically sealed and therefore with standard heating (classic heating top + bottom) moisture does not evaporate and the pizza turns out to be moist. The result is not at all the same. Therefore, I recommend using the mode for baking pizza, which is offered in the instructions for your oven, usually, it includes powerful heating + fan mode. I have such a mode called “Heating from below + ventilation heating” while the baking sheet should be placed not in the middle, but closer to the bottom of the oven. I set the temperature to 220C. The pizza turns out to be perfect, not wet, very tasty!