Tag

planting

Browsing

Tomato plants are popular and available all year round. If you would like to do something for the environment, you can plant them yourself. You can then dry, freeze or pickle the tomatoes. We will show you how to do it and how to store tomatoes properly.

The red delicious balls are among the most popular types of vegetables. Because they taste good and can be used in many ways. From this, you can conjure up many different tomato recipes. We have collected the most important information about this plant.

The history of the culinary golden apple

The tomato plant originally comes from the Andes, an area in South America. Then Christopher Columbus brought the plant to Europe. At first, it looked a bit different. Because she was smaller and yellowish. Hence the name Pomodoro in Italian means golden apple. But back then, people were skeptical, probably because people thought it was Adam and Eve’s apple of paradise. Thankfully, that has long been overcome and we now find them in a variety of recipes. We have collected the most important tips for tomatoes so that you too can take care of and use the plants properly at home.

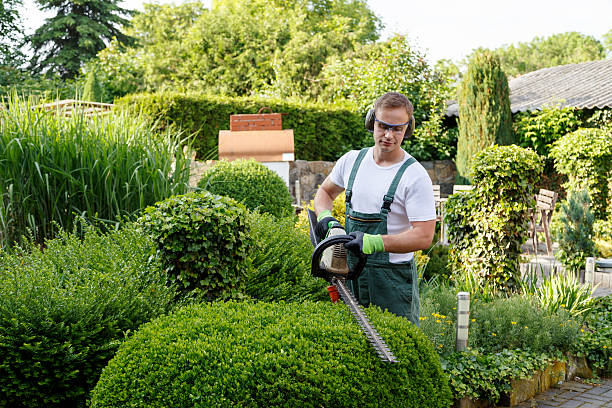
1) Tips for planting tomatoes

The plant can grow between 20cm and two meters high. They like nutrient-rich and humus-rich soil that is well loosened. If you want to plant tomatoes, you can grow them in tubs, large pots, or in a greenhouse. Also, note the use of a growing mat for plants. You can also plant them outdoors, but then special hoods are recommended. You should also note the following things and read our tips on growing chili yourself.

  • Keep the plant airy. This means that you should remove the leaves in between. But not too many at once or the tomatoes may burst.
  • Water regularly at the bottom, but be sure to avoid waterlogging.
  • Tomatoes hate rain. When the raindrops fall on the tomato leaves, leaves will wither.
  • They love the sun. The more sun exposure, the bigger the fruit will be.
  • Harvest time from the plant is 7 to 8 months after planting.

2) Store tomatoes properly

Don’t store tomatoes in the fridge. Because the longer and colder the plant is stored, the higher the probability that it will not taste good. But with a relative humidity of 75 to 80, you can store the tomatoes well. Then the last one to six weeks, depending on the variety and degree of ripeness. You should also store them at the following temperatures. In addition, note our tips on storing food correctly.

3) Tomatoes simply dry

There are three different ways you can dry your tomatoes. So it works in the oven, in the sun, or with a dehydrator. For all methods, you should core the fruit and cut it to the right size. So cut them into large slices and halve the small ones. Then you have to grease the grid of the oven or the dehydrator.

Then place them on the grid and season them to taste. In order for the tomatoes to dry successfully, you can heat them at between 50 – 90 degrees for about 6 – 10 hours, depending on the device. You should turn the tomato pieces several times. And in the oven, it is important that the moisture can escape. So leave the door open a crack. Also, note our tips for dehydrating and drying food.

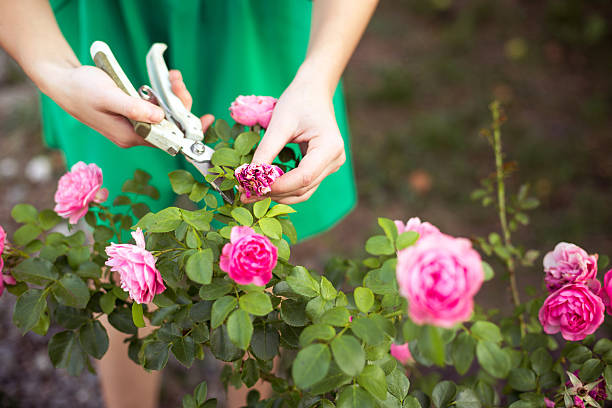
4) Pickling tomatoes

You can also pickle your tomatoes after harvesting. So they last a long time. And you still have some of the tomato fruits you planted yourself in winter. You can insert them according to your taste according to different recipes. For this, you need water, vinegar, sugar, salt, peppercorns, and mustard seeds for the brew.

5) Can you freeze tomatoes?

Yes, you can freeze these. If you want to freeze tomatoes, you should choose ripe and firm fruits. Then you should wash and dry them thoroughly. You should also remove the stems. You can also freeze them whole or in pieces. Before you put them in the freezer, pack them in a jar or freezer bag. However, once thawed, you can only use them for cooking. Because they are very mushy. Since they lose their flavor in the cold, our tip is to process them directly into a delicious sauce and then freeze them. Or season them accordingly 10 minutes before freezing. Please also note our tips for freezing beans.

A useful guide to planting a hedge in the garden. Our detailed step-by-step instructions will help you with the preparation and implementation of the garden hedge.

Properly plant a hedge

A hedge fulfills several functions in the garden. On the one hand, it offers a natural privacy screen, on the other hand, it serves as a shelter for various animal species – for example, beneficial creatures such as birds and insects. However, there are a few things to consider when planting a hedge.

Step 1: Find a suitable hedge for the garden

You can use many different plants for a hedge. Which ones are most suitable depends not only on your own taste, but also on the soil conditions, the growing season, and the location. Depending on the type of plant, it can take several years for a hedge to reach the desired size.

In addition to the popular boxwood, which only grows about ten centimeters a year, and the false cypress, fast-growing and easy-care hedge plants are enjoying increasing popularity. Most plants thrive in both shade and sun. Examples of fast-growing hedge plants are privet and hornbeam. The latter is a good choice for a hedge up to 3 meters high and is also easy to cut. In autumn, the green leaves turn golden yellow and remain on the shoots for a long time.

Privet is also very suitable as a cut hedge plant. Both the gold privet with yellow-colored foliage and the black-green privet with dark green foliage have an upright, loose habit and are also easy to trim. The common beech is also often used for hedge planting. Its bright green leaves turn reddish-brown in autumn. Other popular hedge plants include thuja, cherry laurel, and the red hedge barberry, which is good both as a natural hedge and as a small cut hedge.

Step 2: Choose the right time to plant

The autumn months are the ideal time for planting a hedge because then you can hardly expect longer dry and hot phases. Furthermore, the plants have enough time until winter to form strong roots. Alternatively, you can also plant your hedge in spring. However, keep in mind that plants need more water at this time of year, especially if there is little rain in the following summer.

Step 3: Trim the hedge regularly

Depending on the type of plant, hedges offer good privacy protection within a short period of time. In order for your hedge to have the appropriate density, the hedge plants must be cut back regularly. A pruning also prevents the hedge from growing too wide, but instead upwards. But you should also use hedge trimmers from time to time in the upper area so that the hedge does not thin out too much there. Be sure to wear suitable work clothing and safety shoes for this work to reduce the risk of injury!

The natural hedge as an alternative to the cut hedge

A dense cut hedge is not suitable for every garden, as it often takes up a lot of space. Interesting effects can also be achieved, for example, by staggering the planting of fast-growing hedges and shrubs. These also offer good privacy protection and make smaller gardens appear larger. Another alternative to the green hedge can be to line up flowering, leafy and fruit-bearing shrubs (e.g. lilac, elderberry, hazelnut, firethorn, viburnum). The so-called natural hedge wraps the garden in beautiful colors and scents and can be put together individually all year round.

The rose is one of the most popular and beautiful flowers. And the great thing about roses is that they thrive in almost every garden and there are many different varieties. Planting and caring for roses is not particularly difficult, provided you calm down a few rules.

Proper care for roses

If you want to have magnificent rose blossoms in the garden, it depends on the right care of these flowers. The rose belongs to the rose family and comes in many varieties. Above all, their different colors are magical and attract numerous rose lovers. A bouquet of roses has always served not only in the garden but also as a particularly romantic gift. So that you too can plant perfect roses, we have the most important tips for growing and caring for them.

1) Plant roses properly

The rose loves it sunny, you should take that to heart when planting roses. But it also thrives well in partial shade. Before planting, you should water the rose root sufficiently, for example by placing the whole pot or the root ball in a bucket of water for a few hours.

2) Spring pruning for roses

When the forsythia bushes bloom bright yellow, it’s time to dare to cut the roses. Bedding and hybrid tea roses in particular should be cut back every spring. As a result, you can stimulate them to bloom lushly, because the flowers only form on the fresh branches of these varieties. Those who orient themselves to the forsythia blossom are guaranteed to get the right time and risk no damage to the roses. Also, note tips for planting tomatoes.

3) Caring for roses with the right rose cut

There is a lot to consider when it comes to pruning roses. The most important thing is to remove the old and dead parts during spring pruning. Otherwise, you can also remove thinner branches generously, especially if the rose has not bloomed in the past year. A cut always runs just above a branch pointing outwards. Especially when pruning in spring, you can prune the rose vigorously.

4) Use a suitable tool for cutting

The right tools and great gadgets for gardening should not be missing. In order not to damage the rose, the scissors should be very sharp. Then the branches will not be crushed. Also, make sure that the edge is rather slanted when cutting. As a result, no rainwater will remain on the injured area and the edge will close cleanly. In addition, the surface of the cut edge should be as small as possible.

5) Water roses moderately

Watering tips should always be followed. Roses aren’t too thirsty, so don’t overdo it with the water. Watering them once or twice a week is often enough. If it rains, of course, there is no watering. It is more important to water the rose directly at the roots. In addition, the greatest dangers are lice and fungal diseases. But you can prevent them with moderate moisture and proper watering.

6) Nutrients for a lush rose bloom

Especially in spring, from the first cut, you should supply the rose with nutrients. A special rose fertilizer gives the roses everything they need. You can also use horse manure and compost for fertilizing. Horn shavings can also be used as fertilizer. You can then fertilize twice more in the course of the year – ideally also after the first flowering. It is very important not to fertilize too late. Fertilization can still be done in late summer. If you fertilize too late, the branches will not lignify enough and they could suffer frost damage.

7) Stimulate flowering

In order to enjoy the rose for a long time, you should regularly cut off faded flowers. After the first bloom ends, you can cut back a bit. The cut runs over the strongest bud. You should also water regularly and sufficiently in summer when it is hot to stimulate flowering.

8) Keep roses weed-free

To keep the soil weed-free, it is a good idea to combine the roses with other plants. Accordingly, a well-established neighbor is a beautiful lavender, as it goes perfectly with the roses. You should also regularly rake the soil around the rose, being careful not to damage the roots.

9) Winter protection for roses

Suitable winter protection for plants is essential for many plants. Although bed roses usually survive the winter without any problems, it can be helpful to take special care of roses in winter. Therefore, protect the root area from too much cold. To do this, pile leaves or brushwood about 30 cm high in the lower area. But be careful not to make the pile too dense.

10) Potted roses for the home

If you don’t want to do without beautiful roses at home, then choose potted roses. They should be as cool and bright as possible. Nevertheless, the roses usually suffer from a lack of light after a while. After flowering, it is often best to cut back the rose and place it outside or plant it directly in the bed. Then the rose can bloom again in the same year, provided you planted it in time.

Planting runner beans is easy. The plants are undemanding and bring good yields. We explain to you what you have to pay attention to when growing.

Planting pole beans – you should know that

If you want to provide yourself with vegetables, runner beans should not be missing in your garden. They are easy to grow and produce good yields over a long period of time. The plants keep forming new pods and you can harvest regularly over a long period of time. Because they mainly grow tall, you can harvest a lot of vegetables from a relatively small area in your garden.

Planting runner beans – These points are important

If you want to grow runner beans, you have to consider several points:
Beans are weak eaters – meaning they only need a small amount of nutrients. Pole beans, however, have slightly higher requirements than other types of beans. Therefore, it makes sense if you prepare the bed with some compost.
Runner beans live up to their name: they need a pole to help them climb. Depending on the variety, they grow 1.5 to 4 meters in height.
A good climbing aid are long bamboo sticks. Plant four equally spaced in the ground and tie the top ends together. If you want to grow more beans, you can set up the poles in two rows using the same principle. Then tie two together at the top and connect them to each other with a crossbar at the top.
Pole beans only germinate above 12 degrees Celsius. Therefore, only plant them when the soil has warmed up and no more frosts are to be expected. From the “Ice Saints” in mid-May you are on the safe side.
The beans need a sunny, warm location if possible.

Prepare the bed for runner beans

Even if runner beans are quite undemanding, you should prepare the bed properly. In this case, this means that you have to loosen the soil well. Now you should set up the climbing aids. Make sure the trellises are long enough for your type of bean. Set up the poles at a distance of 50 to 70 centimeters from each other.

Then place five beans three centimeters deep in the soil at equal intervals around each pole. The warmer it is, the faster they germinate.

Maintain runner beans

Pole beans begin to germinate just a few days after sowing. Once they are about 6 inches tall, cover them with soil. This makes them more stable and forms additional roots. As a rule, the young shoots quickly find their way to the climbing aid. If that doesn’t work, you can easily tie them up with a piece of string.

Runner beans grow incredibly fast. You will be amazed. Once the beans have sprouted and found support on the trellis, your task is limited to regular, thorough watering. Pole beans need a lot of water.

Harvest runner beans

It won’t be long before your runner beans start producing flowers, which eventually become pods. Harvest time is from the end of July. The young beans are particularly tender. When ripening, the individual beans form a hard skin in the pod.

You should always use two hands to harvest beans. With one hand you hold the tendril just above the pod, with the other you pluck off the pod.

IMPORTANT: Raw beans are poisonous! They contain the protein phasin. The substance is only broken down by cooking.

Regular harvesting and thorough watering ensure you high and consistent yields. As the gardening season draws to a close, allow some pods to fully mature. When the husk is brown and dried up in late fall, you can harvest it and have your own seed for next year.

Planting chamomile is also very easy in your own garden. In this article you will find out what you have to consider and how to use the medicinal plant.

From a soothing chamomile bath to classic chamomile tea to hair coloring: you can use chamomile in many ways.

You don’t have to collect or buy the medicinal plant: you can also plant chamomile yourself, for example in your garden or in a pot on the balcony. In this article you will learn everything you need to know from sowing to harvesting.

Planting chamomile: the preparation

The real chamomile belongs to the daisy family and reaches a height of up to 50 centimeters. If you want to plant chamomile, note the following points so that it thrives in your garden:
Location:
Chamomile originally comes from southern Europe. Therefore, the plant prefers a warm and sunny location.
Floor:
The real chamomile thrives best on permeable and dry soil. You should definitely avoid waterlogging.
Chamomile gets by with few nutrients. It is enough to spread a little mature compost at the beginning.
If the soil is too hard, you can fold in some sand to loosen it up.
mixed culture:
Basically, the real chamomile is a frugal neighbor in the vegetable patch. It thrives particularly well next to:
Kohlrabi
onions
Leek
celery
potatoes
Nasturtium

Planting and caring for chamomile

Real chamomile is an annual plant. The medicinal herb is frugal and easy to care for.

Sowing:
Chamomile belongs to the light germs. Therefore, when planting chamomile, it is sufficient to press the seeds to the soil instead of covering them completely.
From the end of April you can sow chamomile outdoors. Before doing this, you should loosen the soil and remove weeds.
You can also plant chamomile in a pot, as it does not have particularly deep roots.
In the field you should keep a distance of 40 centimeters between the individual rows.
After a week or two, the seeds will begin to germinate.
After a month you should thin out between the young plants if necessary so that they have about 20 centimeters of space.
Care:
Chamomile makes few demands on the soil and therefore does not need fertilizer.
You should water chamomile occasionally, but not too frequently. The soil should only be slightly damp – under no circumstances should the water accumulate.
To encourage the growth of additional shoots, you can prune the plants after flowering.
Harvest:
When the flower heads are two-thirds dead, you can harvest the flowers.
The best time is a sunny day after the dew has dried. This is when the essential oil content of the flowers is at its highest.
You can use the fresh buds or dry them beforehand. You should definitely dry and store chamomile away from light so that the active ingredients are preserved.

This is how chamomile works

It is worth planting chamomile: As a medicinal plant, it has a broad spectrum of effects and can be used to treat various ailments. A study from 2011 dealt extensively with the healing properties of chamomile:
Anti-inflammatory properties: The essential oils and flavonoids contained have an anti-inflammatory effect. You can cleanse wounds with a strong infusion of chamomile. For small injuries or inflammation of the gums, you can use the infusion as a mouthwash. You can also inhale chamomile to relieve symptoms when you have a cold.
Soothing for the stomach: chamomile tea soothes the intestinal mucosa and has an antispasmodic effect. That’s why it helps with diarrhea or nausea, for example. The antispasmodic effects of chamomile can also relieve menstrual cramps.
Good for the skin: wraps or ointments with chamomile are used as home remedies for inflammation and skin irritation. You can also treat eczema with chamomile. A facial steam bath can also help with blemishes.
Anti-cancerous properties: Especially in skin, breast and prostate cancer, chamomile was able to significantly reduce the cell growth of cancer cells.
Prevents colds: Chamomile as a tea or in a cold bath relieves cold and flu symptoms.
Good for the psyche: chamomile also has a calming effect on the human psyche. For example, it can provide relief in the event of tension, anxiety disorders or sleep disorders.

With these simple instructions you will learn to plant and harvest your own potatoes – whether on the balcony or in the garden. So you can get a rich harvest in autumn with just a few potatoes in spring.

Plant potatoes yourself: the right location

When it comes to choosing the right location for your potato patch, there are only a few limits. However, you should keep these things in mind if you want to plant potatoes:
The potato plants need daylight, so they should be planted outside.
Enough space: you need a bed or a tall planter or a flower pot measuring approx. 30 cm x 30 cm.
The bottom should have holes to prevent waterlogging in the planter or pot.
Use high-quality, sustainably sourced, peat-free potting soil.
If you have neither a balcony nor a garden, you can also plant a green space in your neighborhood using urban gardening methods.

Plant the right type of potato

You also have many options when it comes to the choice of potatoes. Cultivation is easiest with special seed potatoes. You can order these from the garden trade and should choose according to these criteria:
early or late harvest
firm or mealy boiling
storage suitability
You can even choose the color of your potatoes:
purple potatoes
Red Potatoes
Blue Potatoes
You can also use potatoes from the supermarket. However, varieties from conventional cultivation in particular are often treated with germ inhibitors or are more susceptible to diseases because they are bred to grow up with chemical aids.

Planting Potatoes: Season, Soil and Harvest

Whether you just want to plant a flower pot or an entire bed – the following steps are important if you want to plant potatoes yourself:
Germination: Pre-germinating potatoes is important. From the beginning of March, leave them in the light until they start to germinate and become shriveled. You can then plant them in the ground about six weeks later. Make sure that the nights are already frost-free.
Planting: Loosen the potting soil and remove weeds and roots if necessary. Dig the sprouted potatoes about two inches deep—you’ll need to keep the soil moist from there.
Covering with soil: As soon as the first small plants of ten centimeters have formed, you should cover them with soil again and again (“cover”) with soil so that only the top part is exposed. The plant grows higher and higher and the growing potatoes have more space in the ground and can thrive better.
Harvest: Depending on the variety, the plants begin to wither after three months at the earliest. About two weeks after the plants have withered, the first potatoes can be harvested. You can simply search the earth below the plant remains with your hands or a digging fork.
Tips:
If the potatoes are to be stored for a longer period of time, it is better to leave them in the ground a little longer. This gives them a more robust shell that protects them better against rot.
To prevent disease, potatoes should only be planted in the same spot every four years.
Once you’ve got a taste for your own potatoes and you’ve internalized the basic techniques, you can experiment with different varieties and thus also contribute to the preservation of seed diversity.

Planting peppers works in the garden and even on the balcony. Here you can find out how you can plant peppers yourself and what you have to pay attention to.

The pepper originally comes from Central and South America. But you can also plant peppers with us. The vegetables just need a lot of heat and light. With the right care and a few tricks, you can also grow them in your own garden or on the balcony.

Plant peppers – the cultivation

You should not sow pepper seeds directly outdoors. You make it easier for the little plants if you prefer them in the greenhouse or on the windowsill from the end of February:
To do this, plant the pepper seeds evenly in potting soil and only lightly cover them with another layer of soil.
You can cover the seed pots with a transparent hood to germinate.
Prick out the young plants as soon as they develop the first leaves. Transplanting means transplanting dense seedlings to give them more space.
If no more frost is to be expected, the pepper plants can move outside from mid-May. To do this, you only put them outside during the day for a while – a little longer every day. This is how you make the temperature change as comfortable as possible for them.

The right location for the pepper plants

Location: The right location is essential for the growth of your peppers. Peppers are very sensitive to cold and need a warm, wind-protected place with plenty of light and direct sunlight. Whether in the garden or on the balcony – a wind-protected south wall is ideal. The warmer the location where you plant your peppers, the faster they will ripen.

Soil: Use sandy, loose and nutrient-rich soil. Feel free to add compost too. This saves you additional fertilizer in the first few weeks. When the first peppers appear on your plants, you should fertilize again. To do this, you use a potassium-rich homemade fertilizer for plants. You can also make nettle manure as an additional fertilizer.

Cultivation: Be careful not to place the young plants too close together. Adult pepper plants need a distance of at least 50 centimeters from each other so that the leaves and fruit can develop unhindered.

Tip: Plant peppers as a mixed culture with tomatoes or cucumbers. All three types of vegetables love warmth and need a lot of water. Plant different plants at a sufficient distance from each other or use separate containers. So you always have fresh ingredients in late summer – for example for a delicious salad.

Plant and care for peppers

With your mature plants, you should pay attention to a few things so that the peppers grow quickly:

Watering: Peppers need a lot of water. You should water the plants twice a day, especially in sunny locations. Make sure, however, that no waterlogging forms and that you do not water in direct sunlight. Morning and evening are good times. You will give your pepper plants a special treat if you water them with collected rainwater or other stagnant water.
Support: Stabilize tall peppers with sticks, such as those made of bamboo. Tie the stems loosely to the support. This will ensure that the twigs with the fruit cannot snap.

Harvest your own peppers

Depending on the variety, your pepper plants will reward you with colorful pods between July and October. During the ripening process, the fruit changes from green to yellow to red.

You can use the young, green fruits as paprika.
Red, fully ripe fruits taste the sweetest.
Tip: Don’t just pick your fruit, it’s better to use a sharp knife to harvest it.

Overwinter peppers

Most pepper varieties are perennial. In the second year after you planted the peppers, your harvest is often even better than the year before. You should cut back your plants for the winter. To do this, trim the twigs at each branch above the first knot. Also rid them of dead leaves.

Now the peppers can reduce their energy and sprout fresh in the spring. Place the plant in a bright room with an average temperature of 10 degrees Celsius during the cold winter months. Water the dormant plant twice a week and be sure not to let it dry out. You can then plant them out again in the spring.

You don’t need a spacious garden of your own for a columnar cherry, because the plant also fits on a balcony or terrace. You can read here what you should consider when planting and caring for the special cherry tree.

If you don’t have too much space in the garden or if you don’t want to do without sweet cherries without your own garden, a columnar cherry is the ideal solution. The fruit-bearing trees grow narrow and low and can therefore also be kept in pots on balconies, roof gardens and terraces.

Pillar cherries and pillar fruit in general are the result of clever breeding. The trees grow to a maximum height of two to three meters, but beyond that they are normal cherry trees.

Tip: If you want to get a single cherry tree, you should use a self-pollinating variety. These do not need another tree for pollination. Example varieties include Campanilo, Claudia, Sara, Stella and Victoria.

Pillar cherry: The optimal location

As far as location is concerned, the cherry tree has the same preferences as conventional cherry trees. In the best case, you will find a location in full sun – the more sun the tree gets, the sweeter and tastier the fruits will be. A place that is sheltered from the wind and not at risk of frost is best.

The soil should be loose, humus and moist. Pillar cherries do not tolerate wet, heavy soil. The plants also prefer medium-heavy, slightly acidic to slightly alkaline soil.

Planting cherry trees: Here’s how

When you have found a suitable location for your columnar cherry, you can already plant it. The best way to do this is as follows:

Dig a planting hole about twice as deep and wide as the diameter of the plant’s root ball. Tip: If you want to plant your cherry tree in a bucket, it should have a capacity of at least 30 to 40 liters.
If your soil is very poor in nutrients, you can mix in some humus or compost before planting the plant. By the way: If you don’t know what your soil is like, you can take a soil sample and have it analyzed.
Put the plant in the hole. The root ball should be flush with the soil. The plant should therefore be planted neither deeper nor higher than the ground.
Fill the hole with dirt and trample it down with your feet.
Water the plant generously.
Tip: If you want to plant several columnar cherries, you should keep a distance of at least 80 centimeters between them, preferably one meter.

It is also advisable to use a support rod. You can dig this about 30 centimeters deep before you put the plant in the hole. Then tie the cherry tree to it with a piece of string.

Caring for the cherry tree properly

Pillar cherries are quite easy to handle and do not require much maintenance. Just stick to the following tips and you should be rewarded with a rich harvest:

In summer and when it is dry, the cherry tree needs enough water. Then water them regularly and generously. But be sure to avoid waterlogging.
In spring, as soon as the first shoots appear, you can provide the plant with some compost to provide it with nutrients. Finally, you should fertilize in August so that the new shoots can still sprout before frost.
You can protect columnar cherries in tubs from frost in winter with fleece, jute or coconut mats. Also place the pot on a piece of wood so that not too much cold gets in from below.
If you cultivate the plant in a pot, you should repot it every two to three years.

Cutting cherry trees: tips and tricks

In principle, sweet cherries, which also include columnar cherries, often sprout strongly and are very vigorous. Therefore, you should make a pruning every year after harvest.

Remove all weak and diseased as well as very old and heavily woody shoots.
All side shoots should be cut back to two or three eyes. Eye is a synonym for bud – so you can recognize eyes by thickenings on the shoots where the tree sprout. The side shoots should remain about 20 to 30 centimeters long.
If some shoots grow very dense or cross each other, you can trim those too.

You don’t need a garden to plant cress: the popular herb also thrives on the windowsill. We tell you what you have to consider.

Cress: Tasty, healthy and undemanding

Cress spices up soups, salads and sandwiches. Not only does it taste spicy, the cruciferous plant is also healthy. Cress contains vitamin C, folic acid and iron.

The undemanding herb grows almost everywhere because it only needs water and light. Cress likes it warm and bright, but you should avoid direct sunlight. Temperatures between 15 and 25 degrees Celsius are ideal. Therefore, you can grow her indoors all year round and outdoors between May and September. The first cress sprouts can be seen after four days, after eight to twelve days you can harvest cress. To do this, carefully cut off the herb with scissors.

We’ll tell you the best way to grow cress on your windowsill at home. There are two methods for this: either with soil or cotton wool.

Plant cress in soil

With the zero-waste method, you plant your cress in soil. Anything left over after harvesting can go to the compost.

Rinse the container in which you want to sow the watercress thoroughly. This can be a small flower pot, a glass or a flat bowl.
Add fine garden soil. You should fill the pot with soil so high that the cress gets enough light.
Thoroughly moisten the soil.
Sow the cress evenly and carefully press down the seeds.
During the germination period you have to make sure that the soil stays moist. Pour off excess water carefully, otherwise there is a risk of mold.

Plant cress on cotton

Since cress lives on the nutrient depot of the seed for the first few days, you can even sow it on cotton. The whole thing works with any cotton – even with the make-up remover. It is important that the cotton wool is made of organic cotton.

Put the cotton in a bowl of water until it’s soaked.
Then gently squeeze out the wet cotton wool.
Lay the cotton out generously in a container. As with the earth method, this can be a flower pot or a glass, but also eggshells.
Distribute the cress seeds generously. There should be no “seed heaps” forming.
The seeds remain uncovered because they would not get enough light through the thick layer of cotton wool.
You can keep the cotton wet with a water sprayer. Just don’t overdo it.

Nevertheless, it is worth considering whether you can simply plant your cress in soil. This way you avoid waste and save money.

Tip: Cress is a delicious, edible decoration for Easter.

Wild apple is a small tree that attracts attention in summer with its lush flowers and provides you with numerous fruits in autumn. Here you can find out what you should consider when planting, caring for and eating.

The winter apple (also known as the crab apple) is a native plant: it has been cultivated regionally and its fruits eaten for centuries. Today, however, the winter apple is rarely found in Germany. It is also a popular refuge for birds and mammals and an important food source for various insects.

Characteristic is the thin trunk, which only reaches a diameter of two to four centimeters, and the slightly woody consistency. Some branches have thorns. Some varieties also have slightly wrinkled skin. However, this does not affect the health of the tree or the taste of the apples.

The flowering period of the tree extends from April to May and lets it shine in a white to light pink splendour. The apples ripen in early autumn and are yellowish to reddish in color, depending on the variety. Be sure to choose local varieties for planting.

Plant wild apple: The basic conditions

Before you plant wild apples, you should think about the time and place of planting. Please note the following:

Timing: Autumn is the best time to plant. In principle, however, it is possible all year round.
Location: Choose a sunny to partially shaded spot. The tree likes sun and warmth and should not be overshadowed by other plants. Otherwise it is quite robust, so that wind and rain cannot harm it. Note that the apple tree can grow between 3 and 6 meters tall. However, this varies depending on the variety. At the same time, the roots grow quite extensively and close below the surface of the earth. There are also varieties that are suitable for hedge planting.
Soil: Since the wild apple tree is a wild tree, it can get along with almost any soil. He just doesn’t particularly like extremely wet soil like moor. Nevertheless, you can enrich the particularly nutrient-poor soil with nutrients and sand.

This is how you plant the wild apple

Planting a wild apple is not difficult. To do this, follow the steps below:

Place the young tree in a bucket of water so the roots can soak.
Dig a planting hole. This should be at least twice as large as the plant ball of the wild apple tree.
Enrich the soil with some compost or other organic fertilizer.
Place the small tree in the hole and refill the soil. Squeeze them tight.
Water the freshly planted wild apple tree properly.
Depending on the location, it may make sense to initially secure the young tree with a stake.
If you sprinkle bark mulch around the tree, you prevent weeds and at the same time protect the tree from unwanted competing plants.

Caring for a tree: tips and hints

The wild apple tree is robust and quite undemanding. For care, it is sufficient if you observe the following tips:

The most important thing is that you protect the wild apple from drought. Especially when young, you should water the tree regularly during long periods of drought. We recommend collecting rainwater and using it to feed your plants.
If you want to do something good for your wild apple, you can fertilize it in the first half of the year (spring to June), preferably with compost.
Basically, it is not necessary to trim the wild apple tree. However, if it is not developing in the way that is best for your garden and other plants, or if you want to shape it, you should cut it from time to time. You can read here how to best make the cut: Cutting an apple tree: The right tree cut in spring and autumn
Wild apple is hardy. So you don’t have to take any special precautions for the cold season.
If you want to propagate the apple, the best way to do this is by sowing: Scatter the seeds of the fruit in a pot outside in autumn and keep it moist. Cutting a cutting and cultivating it is often not successful.
Diseases and pests do not worry the wild apple tree for the most part. However, typical apple tree diseases such as apple scab or fire blight can sometimes occur.

Here’s how you can use the wild apple

Wild apples are edible. However, young apples of the tree are rather sour and tart because they contain a lot of tannin. You can cook them to tone down the flavor. In addition, the kernels of wild apples, like other apples, contain the substance amygdalin, which is converted to toxic hydrocyanic acid in the body. Even if you bite into the seeds, they are harmless in small amounts.

Wild apples contain a comparatively large amount of pectin. You may know the substance as a vegan gelling agent. They also have a firmer consistency than cultivated apples. You can take advantage of these two properties by using the fruit for homemade applesauce or apple jelly. You can also make tea, juice or syrup from wild apples.

The fruits are also often used as a decorative element in arrangements or wreaths.