Tag

prepared?

Browsing

Have you ever made coffee with the Chemex? No? No problem, we’ll explain how you can use the glass filter carafe to make a particularly clear and aromatic coffee.

What is a Chemex?

The Chemex is a traditional way of preparing filter coffee. The German chemist Peter Schlumbohm invented the filter carafe in the mid-20th century by building a glass funnel onto a simple Erlenmeyer flask. You may remember the latter from your school lessons, because the Erlenmeyer flask is normally used for chemical experiments. Schlumbohm traveled to the United States to sell patents for other inventions there. In 1941 Schlumbohm registered the patent for the invented filter carafe. To this day, the Chemex and its special filters are manufactured by the Chemex Corporation in Chicopee (Massachusetts, USA) and distributed worldwide.

At the time, Schlumbohm was probably not aware that he had invented a real cult device. The shape of the machine is reminiscent of an hourglass. The heat-resistant wooden belt that connects the two pieces of glass and also serves as a handle is striking.

What is special about a Chemex?

In 1958, thanks to its design, the Chemex even made it into the New York Metropolitan Museum of Modern Art, one of the most important art museums in the world, and it is still there today. However, the long-standing popularity of the machine can be explained above all with the consistently high-quality coffee result. Its secret lies in the extra thick coffee filter, in which oils, suspended matter or sediments are retained. This gives you a very pure and tasty coffee without a lot of bitter substances. In addition, the filter is shaped like a cone, which means that the coffee is extracted very evenly with this pour-over method. You usually have to buy the coffee filters separately.

How to make coffee with a Chemex

Preparation with a Chemex is quick and easy. Nevertheless, it is important that you follow the individual steps in order to be able to enjoy the full coffee aroma at the end. This is the pour-over method with a filter, which we will now present in more detail.

Ingredients needed for one liter:

60 grams of ground coffee with a medium to coarse grind
1 L of water with a temperature of 96 degrees

Step 1: Heat the water

The ideal water temperature is about 96 degrees. If you don’t have a thermometer, heat water in a kettle and then wait two minutes. The water is then almost at the perfect temperature.

Step 2: Unfold and insert the filter

When you unfold the filter, you get a page with three layers of paper. It is very important that this side is on the Chemex spout. This makes the filter paper more stable on this side and prevents it from getting stuck in the spout during extraction and preventing air from escaping from the carafe.

Step 3: Rinse the filter

Pour hot water into the filter without coffee in it. In this way, you already warm up the filter and can use the water that has passed through to remove any residue from previous preparations. At the same time, the inherent odor of the filter disappears. Then throw away the water that has run through. Then reinsert the filter.

Step 4: grind coffee

Grind the coffee on a medium to coarse setting. After grinding, the coffee should resemble the structure of sea salt.

In general, the more coffee you use, the coarser the grind should be.

Maybe try a little bit here. You have found the best result when the extraction of the coffee, i.e. the process in which the coffee runs through the filter, takes between four and five minutes.

Step 5: Start blooming process

Put the appropriate amount of coffee  in the filter and add some water. The amount of water depends on the amount of coffee. For blooming, you should always take twice as much water as coffee. It is advisable to add the water slowly and in circles from the inside out. The ground coffee should be completely covered with water. Now wait about 40-45 seconds. During this time, the remaining CO2 escapes and the coffee soaks up the water. By allowing the CO2 to escape, blooming ensures a more even extraction and a more stable coffee bed.

Step 6: Add water

Slowly pour in the rest of the water in a circular motion. There should be at least an inch of space between the water and the top of the funnel. Avoid pouring water directly onto the filter. In this case, the water would pull through the paper and not come into contact with the coffee. You may have to refill several times.
If the coffee has seeped into the lower part of the Chemex, remove the filter. The Chemex coffee is ready!

Introduction to Kedjenou

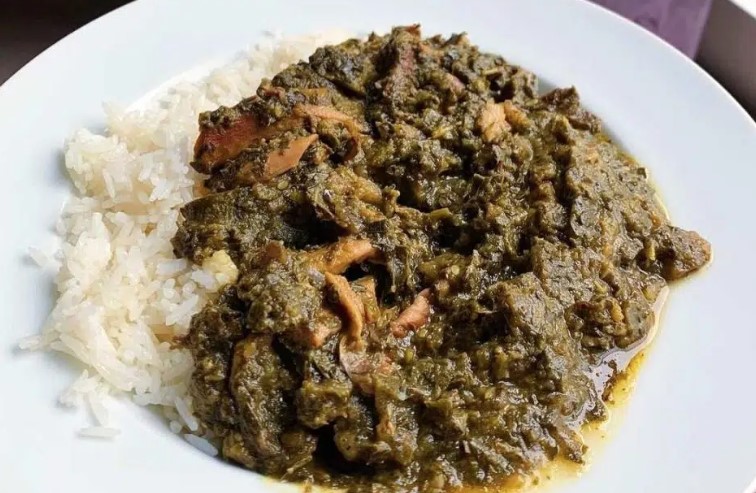
Kedjenou is a traditional Ivorian dish that is popular among the Baoulé people in the central region of the country. The word Kedjenou means “to shake” in Baoulé language, which refers to the way the dish is cooked. The dish is known for its rich flavor, tenderness, and juicy texture. It is usually served with rice or fufu, a starchy food made from cassava, yam, or plantain.

Ingredients of Kedjenou

The main ingredients of Kedjenou are chicken or guinea fowl, onions, tomatoes, peppers, garlic, ginger, and oil. Some recipes may also include carrots, eggplant, or potatoes. The vegetables are chopped into small pieces and mixed with the spices to make a marinade. The poultry is then marinated in the mixture for a few hours to overnight, depending on the recipe. The marinade is the key to the flavor of the dish, as it infuses the meat with all the aromatic and savory flavors of the spices.

Selection of Poultry for Kedjenou

To make a good Kedjenou, it is important to choose the right poultry. Chicken or guinea fowl is the most commonly used meat for Kedjenou. The meat should be fresh and preferably free-range, as it tends to be more flavorful and tender. The size of the poultry also matters, as larger birds may require longer cooking time. Some recipes recommend using bone-in meat for added flavor, while others use boneless meat for convenience.

Preparation of Poultry for Kedjenou

Before marinating the poultry, it should be cleaned and cut into pieces. The pieces should be small enough to fit in a pot or a fireproof dish. The skin should be left on to keep the meat moist and flavorful. Some recipes recommend browning the meat first, while others skip this step. The marinade should be prepared separately by mixing the chopped vegetables, spices, and oil in a bowl. Once the marinade is ready, the poultry pieces should be coated with the mixture and left to marinate in a cool place for at least 2 hours.

Cooking Kedjenou in a Pot

To cook Kedjenou in a pot, a heavy-bottomed pot with a tight-fitting lid is needed. The marinated poultry pieces are placed in the pot, along with any leftover marinade. The pot is then sealed tightly with a lid and placed on low heat. No water is added, as the marinade and the moisture from the meat are enough to create a steamy environment for cooking. The pot is shaken periodically to prevent sticking and to distribute the juices evenly. The cooking time varies depending on the size of the poultry pieces, but it usually takes around 1 to 2 hours.

Cooking Kedjenou over a Fire

Cooking Kedjenou over a fire is a traditional way of making the dish. A fireproof dish, such as a clay pot or a cast-iron pot, is used to cook the marinated poultry pieces over an open fire. The dish is covered with a tight-fitting lid or a banana leaf to keep the steam in. The pot is then placed directly on the glowing embers or on a tripod over the fire. The cooking time is similar to cooking in a pot, but it may require more attention to prevent burning or uneven cooking.

How to Serve Kedjenou

Kedjenou is usually served with rice or fufu. The dish can be spooned directly onto the plate or served family-style in a communal dish. Some people like to top their Kedjenou with fresh herbs, such as parsley or cilantro, for added freshness. Kedjenou is a hearty and satisfying meal that is perfect for sharing with family and friends.

Variations of Kedjenou

There are many variations of Kedjenou, depending on the region and the cook. Some recipes use different spices, such as thyme or curry powder, to give the dish a unique twist. Others may use different meats, such as goat or fish, to make a different version of the dish. Some recipes may also include vegetables that are not commonly used in Kedjenou, such as okra or cabbage. Regardless of the variation, Kedjenou is a versatile and delicious dish that is sure to satisfy any appetite.

Introduction: What is attiéké?

Attiéké is a traditional dish made from grated cassava that is popular in West African countries such as Côte d’Ivoire, Ghana, and Togo. It is a staple food in these regions and is commonly served as a side dish or used as a base for stews, sauces, and salads. The dish has a unique texture and flavor that makes it a favorite among locals and visitors alike.

Origin and history of attiéké

Attiéké originated from the Abidjan region of Côte d’Ivoire, where it has been a part of the local cuisine for centuries. The dish was traditionally prepared by grating cassava, soaking it in water, and then fermenting it for a few days. This process helped to break down the cassava’s tough fibers, making it easier to digest. Over time, attiéké began to spread to other West African countries, where it was adapted to suit local tastes and cooking methods.

Ingredients used to prepare attiéké

To prepare attiéké, you will need grated cassava, water, and salt. The cassava is usually grated by hand or using a food processor and then mixed with water to form a dough. The dough is then shaped into small balls and left to ferment for a few hours. Once the fermentation process is complete, the balls are broken up and dried in the sun or oven until they are crispy and golden.

Step-by-step guide to preparing attiéké

  1. Grate cassava into fine pieces
  2. Soak the grated cassava in water for a few hours
  3. Drain the cassava and spread it out on a cloth to dry
  4. Once dry, break up the cassava into small pieces and place in a bowl
  5. Add salt and water to the bowl and mix until the cassava is moist
  6. Shape the cassava into small balls and place in a container
  7. Cover the container and leave the cassava to ferment for a few hours
  8. Once the fermentation process is complete, break up the balls and dry in the sun or oven until crispy and golden.

Common methods of cooking attiéké

Attiéké can be cooked in many different ways, depending on the dish it is being served with. It can be boiled, steamed, or fried and is often used as a base for stews and sauces. It can also be served as a side dish, either hot or cold.

Pairing attiéké with different dishes

Attiéké is a versatile dish that can be paired with a wide range of foods. It can be served with grilled fish, meat, or vegetables and can also be used as a base for salads and stews. It is often paired with spicy sauces, giving it a bold and flavorful taste.

Nutritional value of attiéké and its health benefits

Attiéké is a nutritious dish that is rich in carbohydrates, fiber, and vitamins. It is also low in fat and calories, making it a healthy option for those watching their weight. Cassava, the main ingredient in attiéké, has been found to have several health benefits, including improving digestion, boosting immunity, and reducing inflammation.

Conclusion: Incorporating attiéké into your diet

Attiéké is a delicious and nutritious dish that can be incorporated into your diet in many ways. It can be used as a replacement for rice or pasta and can also be added to soups and stews for extra flavor and nutrition. With its unique texture and taste, attiéké is sure to become a favorite among those who try it.

Introduction

Cachupa is the national dish of Cape Verde, an island country located off the coast of West Africa. This hearty and flavorful stew is a staple in Cape Verdean cuisine and is enjoyed by locals and tourists alike. Its rich history and unique preparation method make it a true representation of the culture and traditions of Cape Verde.

What is Cachupa?

Cachupa is a slow-cooked stew made with corn, beans, and a variety of meats or fish. It is often referred to as the soul food of Cape Verde and is an essential component of any traditional Cape Verdean meal. The dish is typically prepared in large quantities and served with rice or bread.

History of Cachupa

Cachupa has its roots in the history of Cape Verde as a former Portuguese colony. The dish was originally made with leftover ingredients that were combined in a large pot and cooked together. Its popularity grew over time, and it eventually became a symbol of Cape Verdean identity and culture. Today, cachupa is a beloved dish that is enjoyed by people from all walks of life in Cape Verde and around the world.

Variations of Cachupa

Cachupa can be prepared in a variety of ways, depending on the region and the availability of ingredients. There are two main types of cachupa: cachupa rica, which is made with meat, and cachupa pobre, which is made with fish or just vegetables. The dish can also be made with different types of beans, vegetables, and spices, giving it a unique flavor profile.

Ingredients of Cachupa

The ingredients of cachupa vary depending on the type of cachupa being prepared. Common ingredients include corn, beans, onions, garlic, tomato, cabbage, and different types of meats or fish. Some recipes also call for the addition of sweet potatoes, cassava, or pumpkin. The dish is typically seasoned with salt, pepper, and bay leaves.

Preparing Cachupa

Preparing cachupa is a labor-intensive process that requires patience and attention to detail. The first step is to soak the corn and beans overnight to soften them. The next day, the ingredients are added to a large pot and cooked over low heat for several hours until they are tender. The meats or fish are added towards the end of the cooking process to prevent them from becoming tough.

Serving and Pairing Cachupa

Cachupa is typically served with rice or bread and is often accompanied by hot sauce or pickled vegetables. It pairs well with a variety of beverages, including Cape Verdean beer or wine. Cachupa is also a popular dish for special occasions and celebrations, such as weddings and festivals.

Conclusion

In conclusion, cachupa is a delicious and hearty dish that is beloved by the people of Cape Verde. Its rich history and unique preparation method make it a true representation of the culture and traditions of Cape Verdean cuisine. Whether enjoyed on its own or as part of a larger meal, cachupa is a must-try dish for anyone interested in exploring the flavors of West Africa.

Introduction: Ethiopian coffee culture

Coffee is an integral part of Ethiopian culture. Ethiopia is the birthplace of coffee, where it was first discovered in the ninth century. Coffee is deeply ingrained in Ethiopian society and is used as a tool for socialization, spiritual expression, and hospitality. Ethiopia is famous for its unique coffee ceremonies, which are steeped in tradition and ritual.

The origin of Ethiopian coffee beans

Ethiopian coffee beans grow in high altitudes and are known for their rich flavor profiles and distinct aromas. The two main types of Ethiopian coffee are Arabica and Robusta. Arabica coffee, which originates from the southwestern region of Ethiopia, is revered for its high-quality taste and is known for its floral and fruity notes. Robusta coffee, which grows in the eastern regions of Ethiopia, is known for its strong, bold, and earthy flavor.

Processing methods for Ethiopian coffee beans

Ethiopian coffee is produced using both the dry and wet processing methods. In the dry method, coffee cherries are left to dry naturally in the sun, which imparts a fruity and complex flavor. In contrast, the wet method involves removing the outer layer of the coffee cherry and fermenting the beans in water, which results in a cleaner and more acidic taste. After the beans have been processed, they are sorted and shipped to coffee roasters around the world.

Traditional Ethiopian coffee brewing techniques

The most traditional way of brewing Ethiopian coffee is using a jebena, a clay pot with a long neck and a spherical base. The coffee is brewed using charcoal or wood, which adds a smoky flavor to the coffee. During the coffee ceremony, the beans are roasted, ground, and brewed in front of guests, who are invited to participate in the process. The resulting coffee is served in small cups and is often accompanied by snacks such as popcorn and roasted barley.

The role of ceremony in Ethiopian coffee culture

Ethiopian coffee ceremonies are a significant part of Ethiopian culture and are often used as a way to welcome guests or mark important occasions. The coffee ceremony is considered a sign of respect and hospitality, and it is customary to offer coffee to guests, even if they arrive unannounced. The coffee ceremony is also seen as a way to connect with others, and it is often accompanied by music, storytelling, and conversation.

Ethiopian coffee tasting and serving etiquette

In Ethiopian coffee culture, it is important to serve coffee with grace and respect. It is customary to serve the eldest person in the room first, and the youngest person serves coffee last. When drinking coffee, it is customary to hold the cup with both hands as a sign of respect. Ethiopian coffee is often served with sugar, but it is never served with milk.

Grounding and roasting techniques for Ethiopian coffee

Ethiopian coffee is roasted using a traditional method called “hearth roasting,” where the beans are roasted over an open flame. This method imparts a smoky flavor to the coffee and is considered an essential part of the coffee-making process. The beans are then ground using a mortar and pestle, which produces a fine and consistent grind that is perfect for brewing.

Popular Ethiopian coffee beverages and recipes

One of the most popular Ethiopian coffee beverages is macchiato, which is made by adding a small amount of steamed milk and foam to a shot of espresso. Another popular drink is shai buna, which is a spiced tea that is often served during coffee ceremonies. Other popular Ethiopian coffee recipes include coffee cake, coffee ice cream, and coffee-flavored liqueurs. Ethiopian coffee is a versatile ingredient that can be used in a variety of sweet and savory dishes.

Introduction: What is Tibs?

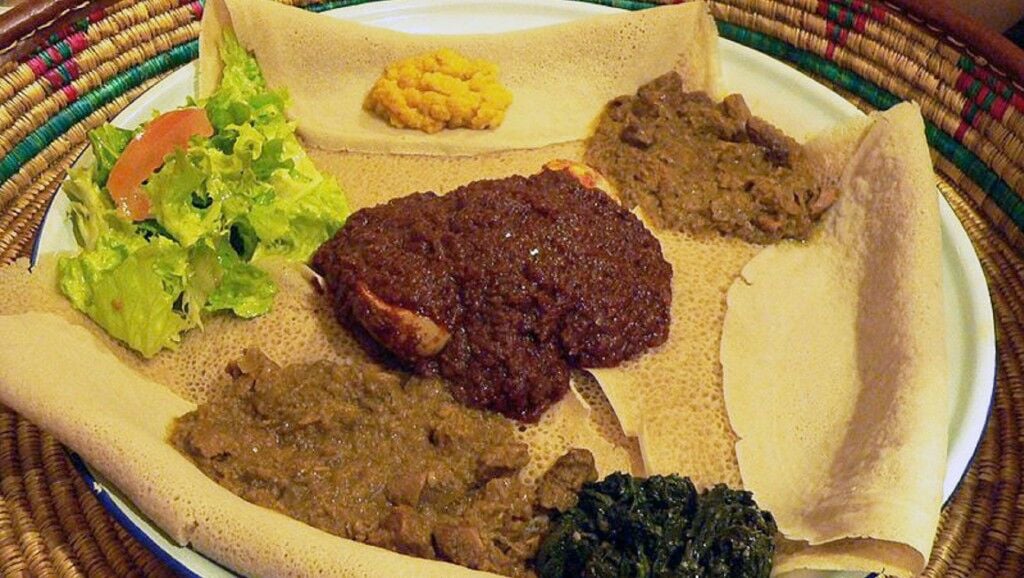
Tibs is a popular Ethiopian dish made with sliced or cubed meat, typically beef, sautéed with spices and vegetables. It is a staple in Ethiopian cuisine and is often served with injera, a sourdough flatbread made from teff flour. Tibs can be prepared in various ways, from mild to spicy, and can be enjoyed as a main dish or as a side dish.

The History of Tibs

Tibs has been a part of Ethiopian cuisine for centuries and is believed to have originated in the northern part of the country. The dish was traditionally prepared by roasting meat over an open flame and then slicing it into small pieces. Over time, the preparation of tibs has evolved, with different regions of Ethiopia adding their own unique spices and ingredients. Today, tibs is a beloved dish throughout Ethiopia and is enjoyed by people of all ages.

Ingredients for Preparing Tibs

The main ingredient for tibs is meat, typically beef, but it can also be made with lamb, goat, or chicken. The meat is cut into small pieces and marinated with spices such as berbere, a blend of chili peppers, cumin, and other spices, and niter kibbeh, a clarified butter infused with spices. Other ingredients used in tibs include onions, garlic, tomatoes, and green peppers.

Preparing the Meat for Tibs

Before cooking, the meat is marinated with the spices and left to rest for a few hours. This allows the flavors to penetrate the meat and makes it more tender. The meat is then sliced or cubed into small pieces, and any excess fat is trimmed off. The meat is then ready to be sautéed in a pan.

Cooking Tibs: Methods and Techniques

Tibs can be cooked in a variety of ways, depending on personal preference. Some people like to cook it on a grill or over an open flame, while others prefer to sauté it in a pan. The key to cooking tibs is to make sure the meat is cooked through but still tender. This is achieved by cooking it over high heat for a short period of time, stirring frequently to prevent the meat from sticking to the pan.

Serving Tibs: Traditional Accompaniments

Tibs is typically served with injera, which is used to scoop up the meat and soak up the flavorful sauce. Other traditional accompaniments include ayib, a type of cottage cheese, and gomen, a sautéed spinach dish. Tibs can also be served with rice or bread.

Health Benefits of Tibs

Tibs is a nutritious dish that is rich in protein, iron, and other essential vitamins and minerals. It is also low in fat and calories, making it a healthy choice for those watching their weight. The spices used in tibs, such as turmeric and cumin, are also believed to have anti-inflammatory and antioxidant properties.

Conclusion: Tibs, a Delicious and Nutritious Dish

Tibs is a delicious and nutritious dish that has been a part of Ethiopian cuisine for centuries. Its unique blend of spices and vegetables make it a flavorful and satisfying meal, while its health benefits make it a smart choice for those looking to eat healthier. Whether enjoyed as a main dish or as a side dish, tibs is sure to delight and satisfy any palate.

Introduction: The Tradition of Kava in Fiji

Kava is a traditional drink in Fiji that has been consumed for centuries. It is made from the root of the kava plant, which is grown throughout the Pacific Islands. Kava is enjoyed in social settings and is often served during ceremonies and special events. The drink has a calming effect on the body, and it is said to promote relaxation and reduce anxiety.

Harvesting Kava: From Root to Drink

The kava plant is harvested when it is around 3 years old. The root of the plant is dug up and cleaned of any dirt and debris. The root is then chopped into small pieces and dried in the sun for several days. Once the root is dry, it is pounded into a fine powder using a mortar and pestle.

Processing Kava: Grinding and Straining

The kava powder is then mixed with water and strained through a cloth or mesh bag. The resulting liquid is a murky brown color and has a slightly bitter taste. The strength of the kava can be adjusted by adding more or less water to the mixture.

Mixing Kava: Combining Water and Powder

Kava is traditionally mixed and served in a large wooden bowl called a tanoa. The powder is added to the bowl, and water is slowly poured over it while it is stirred. The mixture is then strained through a cloth or mesh bag and served in coconut shells.

Serving Kava: The Importance of Ceremony

Kava is an important part of Fijian culture, and it is often served during special events and ceremonies. The preparation and serving of kava is a ritualistic process that is steeped in tradition. The person serving the kava is known as the “tudraki,” and they are responsible for filling the coconut shells and passing them around to guests in the order of seniority.

Drinking Kava: Effects and Etiquette

When drinking kava, it is important to follow certain etiquette. The first drink is usually offered to the chief or highest-ranking person in the group. The drink is then passed around in a clockwise direction. It is customary to clap once before drinking and again after finishing the drink. Kava has a calming effect on the body and can make the drinker feel relaxed and sleepy.

Variations on Kava: Blends and Additives

There are many different varieties of kava, and each has its own unique taste and effect on the body. Some kava blends may be mixed with other herbs or spices to enhance their flavor or add additional health benefits. Some popular additives include ginger, cinnamon, and honey.

Conclusion: Kava as a Cultural Touchstone

Kava is more than just a drink in Fiji; it is a cultural touchstone that has been passed down through generations. The preparation and serving of kava is a social event that brings people together and fosters a sense of community. Whether enjoyed in a formal ceremony or a casual gathering, kava remains an important part of Fijian culture and tradition.

Introduction to Escargot

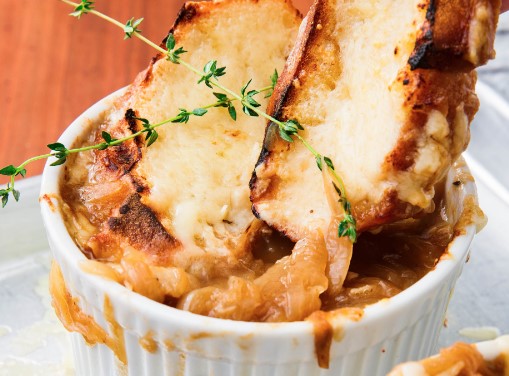
Escargot is a French word for snails and is considered a delicacy in France and other parts of the world. The dish is typically prepared by cooking land snails in a garlic butter sauce and then served in their shell. Escargot has a distinct earthy and musky flavor and a firm, chewy texture that is enjoyed by many food enthusiasts worldwide.

Types of Escargot

There are many different types of snails that can be used in escargot dishes, but the most commonly used snails are the Helix aspersa variety. These snails are small, and their shells are typically between 2 and 3 centimeters long. In addition to the Helix aspersa, the Helix pomatia and the Achatina fulica are also commonly used for preparing escargot.

The Art of Preparing Escargot

Preparing escargot is an artful process that requires patience and attention to detail. The first step in the process is to source and clean the snails thoroughly. Once cleaned, the snails are then cooked in a flavorful sauce, typically made from garlic, butter, and herbs. The cooked snails are then served in their shells, often accompanied by bread to soak up the delicious sauce.

Sourcing and Cleaning Escargot

Sourcing high-quality escargot is essential for achieving the best possible flavor. Fresh snails can be challenging to find outside of France, so many chefs and home cooks turn to canned snails for convenience. Before cooking, canned snails should be thoroughly rinsed and soaked to remove any excess salt or brine.

Classic Escargot Recipes

The classic escargot recipe is simple, yet delicious. To make it, sauté garlic in butter until fragrant, add chopped parsley, and then add the snails. Cook the snails until heated through, and then serve in their shells with a generous drizzle of the garlic butter sauce. For a more adventurous twist, try adding Pernod, a French anise-flavored liqueur, to the garlic butter sauce.

Serving Escargot with Elegance and Flair

The presentation of escargot is just as important as its preparation. Traditionally, escargot is served in a special dish designed to hold the snail shells securely. To serve, the snail shells are arranged in the dish, and a small fork called an escargot fork is used to remove the snail from its shell. Add a touch of elegance to your table by serving the escargot with a crisp white wine and a basket of crusty bread to soak up the delicious sauce.

Introduction: Grilled Bushmeat

Grilled bushmeat is a popular delicacy in many countries with tropical forests, such as central and western Africa, as well as some parts of Asia and South America. Bushmeat refers to meat from wild animals hunted for food, including mammals, reptiles, birds, and sometimes insects. Grilling is one of the most common ways of cooking bushmeat, as it provides a smoky flavor and crispy texture that enhance its taste.

What counts as bushmeat?

Bushmeat can include a wide range of animals, from small rodents and primates to large mammals such as antelopes, elephants, and gorillas. In some cultures, certain species are considered taboo or sacred, while in others, they are valued for their medicinal properties or as a source of protein and income. However, hunting and consuming bushmeat can have negative impacts on local ecosystems, as it can lead to overhunting, depletion of wildlife populations, and spread of zoonotic diseases.

Preparing the meat for grilling

Before grilling bushmeat, it is important to clean and marinate the meat to remove any gamey or unpleasant flavors. Some hunters prefer to skin and gut the animals in the field, while others bring them home whole or in parts. The meat can be soaked in a mixture of water, vinegar, and salt for a few hours or overnight to tenderize and disinfect it. Some people also add spices, herbs, or fruits to the marinade for extra flavor.

Grilling techniques for bushmeat

When it comes to grilling bushmeat, there are several techniques and tools that can be used, depending on the type and size of the meat. Some hunters prefer to use a open fire, while others use a barbecue grill or a smoker. The heat should be moderate to avoid burning the meat and to ensure that it cooks thoroughly. Some people also baste the meat with oil or sauce to keep it moist and to add flavor. The cooking time can vary from a few minutes for small pieces to several hours for large cuts.

Serving and eating grilled bushmeat

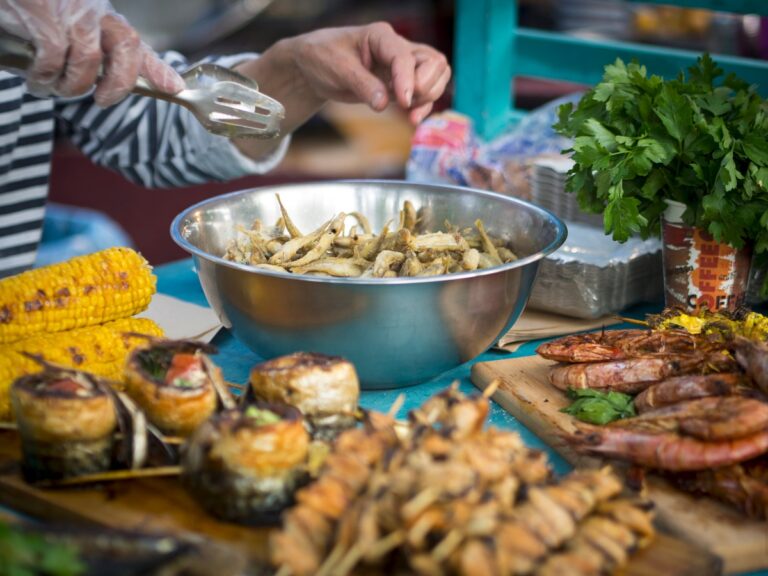
Once the bushmeat is grilled, it can be served with a variety of side dishes, such as rice, vegetables, or plantains. Some people also eat it with sauces or dips, such as peanut butter sauce or hot pepper sauce. Eating bushmeat is often a communal activity, where people sit around the fire and share pieces of meat with their hands or with utensils. In some cultures, certain parts of the animal are considered delicacies, such as the brain, the liver, or the heart.

Health and ethical considerations

While grilled bushmeat can be a tasty and cultural experience, it is important to be aware of the health and ethical considerations of consuming wild animals. Some bushmeat may contain pathogens that can cause diseases, such as Ebola, SARS, or Bovine tuberculosis. Moreover, hunting and killing wildlife can disrupt natural ecosystems and threaten endangered species. Therefore, it is essential to promote sustainable and ethical hunting practices, as well as to support alternative sources of protein and livelihoods for local communities.

Introduction

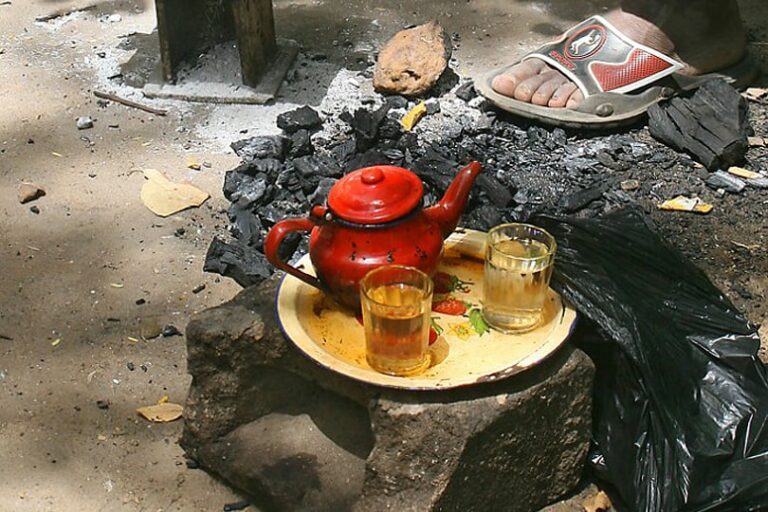
Attaya, also known as Gambian tea, is a popular drink in the West African country of The Gambia. It is a strong, sweet tea usually consumed in social settings and is considered a symbol of hospitality. Preparing and serving attaya is a cultural tradition in The Gambia, and it is often accompanied by conversation and socializing.

Ingredients and tools

To prepare attaya, one needs black tea leaves, mint leaves, sugar, and water. The tea is brewed in a special kettle called a “bouilloire” or “kanthoor,” which has a long spout for pouring and a handle for holding. The brewing process involves boiling the tea leaves and mint leaves in water multiple times until the desired strength and flavor is achieved.

Preparation process

The attaya preparation process is a social activity that involves multiple rounds of brewing and serving. The first round, called the “first boil,” is traditionally poured out and discarded as it is believed to contain impurities. The second round, called the “second boil,” is usually served to guests and is considered the best quality. The remaining rounds, called the “third boil” and “fourth boil,” are also served but are typically weaker in strength. Sugar is added to the tea during the brewing process, and the amount varies according to individual taste preferences.

Serving and etiquette

Attaya is typically served in small glasses and poured from a height to create a frothy layer on top. The person pouring the tea is known as the “attaya maker” and is considered the host of the gathering. It is customary for the attaya maker to pour tea for each guest individually, with the glass being passed around the group. It is also customary to offer the first glass to the oldest person present. Guests are expected to drink the tea slowly and savor the flavor, and it is considered impolite to refuse a cup of attaya.

Variations in attaya recipes

While the basic attaya recipe remains the same, there are variations in the ingredients used to brew the tea. Some people add spices like ginger or cardamom to the tea, while others use different types of mint leaves. The amount of sugar added to the tea can also vary, depending on individual taste preferences.

Health benefits and risks

Attaya contains caffeine, which can provide a short-term energy boost. Mint leaves have been known to aid digestion, and black tea has antioxidants that can help protect against disease. However, excessive consumption of attaya can lead to health problems like dehydration, high blood pressure, and insomnia. It is recommended to consume attaya in moderation and to alternate it with water to maintain hydration levels.