Tag

Preserving

Browsing

Chilies add flavor to any meal and are easy to grow here too. To keep your chili peppers longer, you can easily dry them and use them in a variety of ways.

Drying the chili: This keeps the pods durable

Chili plants are easy to care for and high-yielding and are therefore becoming increasingly popular with hobby gardeners in this country. Depending on the variety, you can harvest the pods in late summer or autumn. However, if you grow the chilies to use in the kitchen, you will hardly use all the pods at once. To preserve them, you can dry chili. So you don’t have to throw away your harvest and you can stock up for the whole year.

Drying chili: the right method for the right pod

You can air dry chili peppers, in the oven, or in a food dehydrator. Which method is most suitable also depends on the type of chili. If you want to air-dry your chillies in an environmentally friendly and energy-saving way, you should take this into account when choosing the variety.

Air: You can thread the fresh pods onto a string and hang them up like a clothesline in a warm, dry place. After about four to six weeks, the chillies should be completely dry. This method is suitable for thin-fleshed, narrow chili peppers, such as Cayenne or Tabasco.
Oven: Halve the pods and remove the stalk. You can also dry the seeds if you like. Arrange the chillies on a baking sheet lined with parchment paper so that they do not overlap. Let them dry in a fan oven at 80 degrees for about 6 to 8 hours.
Dehydrator: Even when drying in the dehydrator, you should halve larger pods. After about eight hours, the pods should be dry – they should no longer bend and should be slightly brittle. The last two methods are ideal for thick-fleshed chili varieties such as jalapenos or habaneros.
Tip: Drying chillies in the oven or dehydrator uses a lot of energy. If you don’t preheat the oven first, it at least saves a little electricity. Never leave the oven door open while you are drying the chillies: this wastes a lot of energy and the pods have to stay in the oven longer.

Attention: In the oven or dehydrator, sharp vapors develop quickly that can irritate the eyes and nose. To avoid this, you can leave your kitchen window open during the drying process.

Drying chili: tips for storage and use

You can store the dried chillies as whole pods, process them into flakes or powder. They retain their aroma best as pods, while flakes or powder are easier to use as spices. If you later want to process the pods into chili powder, it is advisable to remove the seeds before drying.

You can roast whole, dried pods briefly before using them. This is how you enhance the sharp aroma. If you soak the dried pods for half an hour before you process them further, they almost return to their original shape: You can then fill them, for example, or use them to make a hot sauce. Dried chillies can be used in many ways and complement your spice rack.

Identifying fresh fish and preserving fish made it easy. Recognize the fresh fish with tips and tricks and avoid smelly fish. Also, make fish last longer and thaw fresh fish without loss of quality and bring it home after fishing.

How do you recognize fresh fish?

If you want to test whether the fish is fresh when you buy it, look closely at the scales. If the scales are shiny and fit snugly against the skin of the fish, this is an indication of freshness. The gills must not be grey. They should be red or pink in color.

Fresh fish without loss of quality

Freshly caught fish spoils quite quickly. Warm weather wears it out, guts accelerate spoilage, and pH levels quickly drop into the acidic range—if you don’t treat the fish you catch properly, you’ll have little pleasure in eating it. Freshly caught fish should be killed and gutted after being caught. Then wrap it in greaseproof paper and keep it cool. This means it can be taken home and processed there without any loss of quality.

Leave the fish in the water for as long as possible

When a nice fish has bitten and you want it to end up on your plate later, it’s best to put it back in the water – in a large and spacious keepnet, of course, so it doesn’t swim away from us. This allows the fish to stay alive for as long as possible and is therefore fresher.

However, caution is advised: In some federal states it is forbidden to keep fish in keepnets. Here the prudent fisherman should inquire sufficiently before fishing. In the worst case, fines and confiscation of the fishing equipment can threaten.

Chill the dead fish as much as possible

The fish should not be taken out of its net until the angler has gone home. The fish is to be stunned directly and without delay with a blow on the head. He can now be killed with a knife wound between the pectoral fins. The fish should be gutted immediately afterward. If the intestines remain in the fish for too long, they can negatively affect the meat quality.

Once the fish has been gutted (it can be worthwhile to remove the head and the roughest scales as well), pack it up. Please do not use foil for this. This packs the fish as airtight as possible and the dead meat cannot evaporate. Greaseproof paper or the small bags made of this material is definitely better. The fish is to be packed in it.

The best thing for the meat quality is to keep the fish refrigerated. Because as soon as it is dead, the pH value of the meat slowly drops and makes the fish sour and soon inedible. Either you wrap a wet, cool towel around it. Or you can put it together with the wrapped greaseproof paper directly in a cool box. You can use it to go home and eat the fish or freeze it. However, it should be processed after 2-3 days.

Eat frozen fish with no aftertaste

Fish will keep best if you freeze them. So that the frozen fish does not retain its frozen taste, you can defrost it in milk. The aroma of the fish is brought out again.

Fresh vegetables in the dark winter when supplies from the garden are dwindling and colds are on the rise? How do we save the harvest surpluses in this time? In addition to preserving, drying and freezing, we have (re)discovered fermentation and would like to invite you into the world of sparkling, spicy and crispy fresh vegetables from the jar.

The process of “living preservation” through fermentation is uncomplicated, resource-saving and the result is always a tasty, crispy, fresh surprise. The advantage for your health: The fermentation creates healthy lactic acid bacteria, which offer a cure for the intestinal flora and thus strengthen your immune system.

What is fermentation and what foods are fermented?

What sauerkraut is to the Germans, kimchi to the Koreans, soy sauce to the Japanese, kefir to the Russians and surströmming, which smells unpleasant to our noses, to the Swedes – all these products are fermented foods.

Fermentation refers to the microbial conversion of organic substances by probiotic bacteria and fungi. Acid, gases or alcohol are produced during this natural process.

Buy fermented products or make them yourself?

Many industrially fermented foods are pasteurized after the fermentation process, i.e. heated to high temperatures. This pasteurization enables a hygienically and tastefully standardized process.

What is practical and efficient for industrial processing, however, also destroys beneficial bacteria produced during fermentation, including cultures of lactic acid bacteria that can be beneficial for your intestinal flora.

When you make your own fermented vegetables (also called ferments), you can be sure that nutrients, enzymes and lactic acid bacteria will be preserved. You can vary your fermented vegetables with many different spices and herbs and thus have a new taste variation in the glass every time.

The own fermentation of vegetables brings you a spicy variety on your plate and is worth trying out!

The advantages of fermentation at a glance

It promotes a favorable intestinal flora through the proliferation of healthy intestinal bacteria. This improves digestion and absorption of nutrients.
During fermentation, vitamins are created that are only found in a few non-fermented foods. Among them the important vitamin K. This vitamin is essential for your bone and heart health. It also has a reputation for preventing some types of cancer.
A good three quarters of the immune system takes place in the intestines. They strengthen the immune system. If the intestinal flora is weak, the susceptibility to various diseases increases.

The wild fermentation

Fermenting vegetables at home is called wild fermentation. You can compare the fermentation with a cure for your vegetables. The vegetables enjoy a bubbling salt bath for a few days and emerge strengthened. In the wild fermentation of vegetables, you take advantage of naturally occurring bacteria. These are mainly found on the (organic) vegetables themselves or have previously come into contact with the vegetables through the air, soil, water or your hands.

The right accessories for fermentation

You only need a few accessories to ferment your vegetables. In addition to your favorite vegetables, the most important utensils and ingredients are:

Salt
Glasses or other suitable vessels
pounder
weights / smaller glasses
grater

The best vegetables to ferment

The best veggies to ferment are clearly your favorite veggies! Through the fermentation you will rediscover this taste in a completely new way. Organically grown vegetables are particularly suitable for fermentation, because the low level of treatment with pesticides and fungicides results in fewer pollutants but a greater variety of microorganisms.

Classic vegetables for fermenting are cabbage such as red or white cabbage, but also carrots, beetroot and radishes. Vegetables with a high water content such as tomatoes, cucumbers or lettuce can also be fermented, but they quickly become very soft as a result of the fermentation – it is important to explore your own taste there.

The fermentation process depends on the size of the pieces and the water content of the vegetables, as well as the salt content and the ambient temperature.

Salt when fermenting

The vegetables are either whole or chopped up in a jar and covered with salt. The vegetables are now swimming in a salty environment that is as airtight as possible. Many bacteria that are naturally found on the vegetables cannot survive in this and their growth is restricted. Others, such as the lactic acid bacteria, which are beneficial for us humans, begin to live and multiply in this salt water. The breakdown of macronutrients creates acids, which you can perceive as a sour taste and smell.

A salinity of 2% is ideal for wild fermentation. For example, 1 kilogram of cabbage requires around 20 grams of salt to ferment.

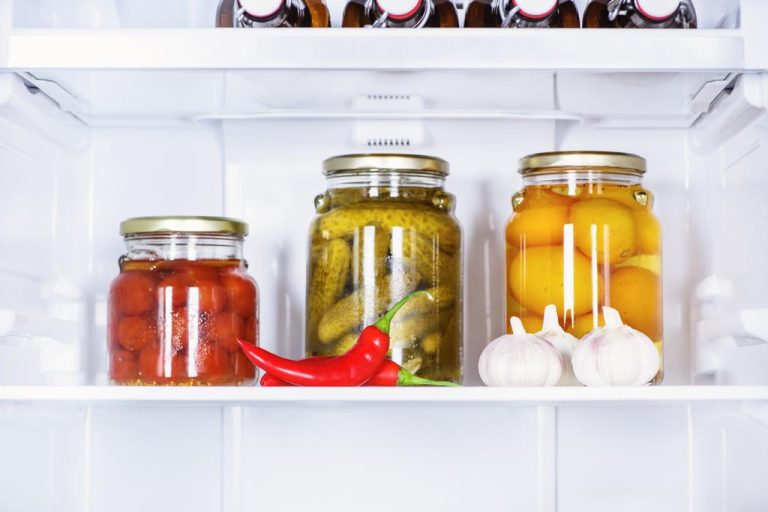
Why preserve? Everyone has a refrigerator, tins last forever and anyway you can buy fresh every day. So it’s no wonder that hardly anyone knows how to preserve food themselves. Preserving, pickling or drying makes sense – and fun.

If you research the internet about preserving food, you will come across many websites dedicated to self-sufficiency and people who think they need to prepare for the coming apocalypse. Of course, in this case, long-lasting foods are essential. But it also makes sense for the average consumer with a fridge and supermarket around the corner to preserve food themselves: That way you know exactly what’s in it – and what’s not.

Everyone decides for themselves what they process – regional and seasonal organic goods, for example. In this way, you can store your supplies without plastic and possibly save energy if they don’t have to be in the fridge. In addition, the trip to the supermarket just before closing time is no longer necessary if you have delicious supplies at home.

Here are three simple ways to make food last longer through canning:

1. Preserving Food: Boiling

This preservation method is particularly suitable for fresh fruit and vegetables as well as ready-cooked dishes and is a simple way of preserving seasonal foods for a long time. Ideally, the food preserved in this way will keep for several years. The principle: When preserving, the food is filled into clean jars, which are then closed and heated. When the glass is heated, an overpressure is created, and when it cools down, a vacuum is formed. This keeps the jar airtight and protects the contents from germs.

If you only briefly heat the food at around 60 to 90 degrees, bacteria are killed while vitamins and nutrients are retained (pasteurized). However, what has been cooked in this way does not last quite as long.

The second option: You heat the glasses to over 100 degrees Celsius for a long time (sterilize). This kills any microorganisms that could spoil the food. Disadvantage: the fruit and vegetables lose some of their nutrients and vitamins, for example vitamin C. On the other hand, the food cooked in this way can be kept for a very long time – if you follow the temperature and time specifications exactly.

In principle, for both methods you only need fresh fruit or vegetables of your choice (if possible free of bruises or stains) and clean mason jars or screw-top jars. You should prepare the food for preservation by pitting or pitting, peeling and/or chopping it, depending on the type.

They are then filled into the clean jars, either raw or pre-cooked. You should leave at least one centimeter of space at the top to the edge. Then the well-closed jars are placed in a large saucepan in such a way that they do not touch each other. Fill the pot with water until the glasses are about three-quarters covered and then boil – depending on the method for about 10 to 45 minutes. Let cool, done.

Tip: Find a suitable recipe for exactly the fruit or vegetables you want to preserve and follow the instructions exactly.

2. Preserving food: Pickling

Canning is the process of preserving food in liquid—usually vinegar, oil, or alcohol. Pickling works well with most fruits, herbs, and vegetables.

In addition to cucumbers, other solid vegetables such as beans, carrots, cauliflower, onions, peppers, pumpkin or beetroot can also be pickled in vinegar. The vegetables should not have bruises or discolouration. The best way to prepare it is to clean it and cut it into pieces; You can leave cucumbers sprinkled with salt for a few hours.

For one kilogram of vegetables you need about half a liter of 5% vinegar and a quarter to half a liter of water with spices (e.g. mustard seeds, coriander seeds, bay leaves, juniper berries, pepper). From this you cook a broth and cook the vegetables in it. You then fill this hot into prepared, clean screw-top jars. Bring the sauce back to the boil and pour over the vegetables. The vegetables should be at least an inch or two covered with liquid.

Seal jars tightly and then allow them to steep for about 4 to 6 weeks before eating the pickles. The vinegared vegetables usually last for at least a few months if you store them in a cool and dark place.

Possible variant: You can add some sugar to the vinegar mixture, this also has a preservative effect.

Soaking in oil is not quite as effective as in vinegar, because oil does not preserve as well, but mainly protects against microorganisms. That’s why pickling works best if you preserve the food in a different way beforehand (e.g. dry it) or at least boil or roast it.

Pickling in oil is well suited for vegetables such as peppers, aubergines, mushrooms or artichokes, but also for feta cheese or cream cheese. For taste, you can add fresh or dried herbs or pepper, for example.

Again, it is important that you use clean screw-top jars. In addition, it is best to use oil for pickling that does not have a very strong taste of its own.

To prevent air bubbles from forming, fill the glass alternately with the food and the oil. The whole thing should be covered with oil by an inch or two. Seal the jar tightly and then store in a cool, dark place. The contents will last for about three to four months.

3. Preserving food: drying

One of the oldest and easiest ways to preserve food is to dry it. This works particularly well with fruit, vegetables, herbs, seeds, nuts, fish and meat. When drying or dehydrating food, most of its moisture is removed. This removes the breeding ground for the microorganisms and enzymes responsible for spoiling the products – the food lasts much longer.

However: In our latitudes, air drying is rather difficult due to the weather – and we don’t think it makes sense to heat the oven for hours or even to use special electric drying and drying devices. Therefore: You should only try drying if you have a warm, airy, dry and ideally even sunny place where the food can be stored for some time until it is dry (e.g. balcony, attic, tiled stove).

It is best to only use flawless products that you have washed beforehand and cut into pieces, slices or strips. Blanching vegetables beforehand shortens the drying time. You can either tie herbs into bundles or pluck their leaves.

Then spread the food out on a grid or grid and cover it with a thin cloth (gauze) to protect it from insects and dust. You can also thread them onto cords and hang them up.

How long it takes to dry depends on the food: fruit and vegetables are dried when they feel leathery, are pliable and no liquid escapes. Herbs should rub easily between your fingers.

The dried fruits, vegetables or herbs can be stored well in storage jars or screw-top jars. If you store them in a dark and dry place, they can last for several years thanks to this preservation.

Make kitchen treasures last longer

From simple jams and marmalades to juices and syrups, pesto and chutney, salted delicacies and pickled vegetables to soups, goulash, and beef roulades in a jar. Bread, cakes, and even pizza can also be baked in the right jars. Here we tell you the 7 best tips for preserving fruit, vegetables, and mushrooms and also our insider tips for the perfect homemade jam.

Now it’s time: get to the glasses, get set, boil down!

7 ultimate tips for preserving

  • Cleanliness of all objects used is the top priority!
  • Make sure that all ingredients used are of impeccable quality! Fruit should not be overripe.
  • Buy new lids! These are cheap to buy (between 5 and 15 cents each), clean, leak-proof, and not rusty.
  • Do not use wooden spoons or boards as these are usually not sterile.
  • Before you start preparing, have everything you need ready.
  • A hot-filled glass only tolerates warm water, never cold water (and vice versa), stress cracks can quickly appear in the glass (risk of injury!).
  • When you open your glass, listen for the “pop”! It is a sign that the contents have been properly pasteurized or sterilized and are edible: when the filled jars are being boiled, water vapor forms which can escape from the jar, but air cannot get into the jar, creating a vacuum.

10 Tips for Homemade Jam

  1. The fruit should be fresh, firm, and ripe, but not overripe, otherwise, it will not set well. Frozen fruit can also be used.
  2. Working hygienically is very important.
  3. Wash the fruit, drain, remove the stalks and seeds if necessary and cut into small pieces or puree as you prefer.
  4. Accurate Weighing – The weight ratio of fruit and sugar is critical to success.
  5. Preserve no more than 2 kg of fruit in one go.
  6. With large fruits, it is good to leave them mixed with sugar in a cool place overnight, as this will allow the sugar to dissolve more evenly throughout the fruit mass.
  7. Stir while heating or cooking to allow the sugar to dissolve and distribute evenly.
  8. The cooking time does not begin until the mass is bubbling. Be sure to adhere to the specified cooking times!
  9. Make a jelly test: put 1 teaspoon of jam or jelly on a cold, dry plate, let it cool down, and check the firmness. The mass must no longer flow. If you push them with your finger, small folds should form in the skin.
  10. Quickly pour the boiling hot jam into jars, close the jars tightly and store the jam in a cool, dark, and dry place.

Botulism is a serious form of food poisoning that can even be life-threatening. We tell you how botulism develops and how you can protect yourself from it.

Botulism is caused by the neurotoxin botulinum toxin. This toxin is caused by the bacterium Clostridium botulinum, which is particularly resistant to heat and cold. Botulism is not to be trifled with: in the worst case, this food poisoning can be fatal. Luckily, botulism is very rare.

Botulism: symptoms and diagnosis

Botulism can manifest itself through the following symptoms:

  • dry mouth
  • nausea
  • Vomit
  • Diarrhea
  • circulatory problems
  • Signs of paralysis in the eye and throat muscles
  • numbness in the hands

In severe cases, the paralysis spreads from the head.

There are antidotes that can be used to combat the symptoms. However, diagnosing botulism is not easy because it is such a rare phenomenon. If you suspect botulism, be sure to tell your doctor if you ate canned or preserved food before the onset of symptoms. Thanks to improved laboratory technology, it is now possible to detect toxins in stool samples within a few hours.

Botulism from cooked foods

The bacterium Clostridium botulinum occurs frequently in nature: It can be found in soil and water. That is why it can also get into our food. The name already suggests this: botulism comes from the Latin word botulus, which means “sausage”. The causative bacterium was first detected in a ham in 1896.

However, not only meat products are affected – the bacterium can also occur in preserved and particularly protein-rich foods. Canned foods and jars provide the perfect environment for the bacteria to multiply and produce botulinum toxin. To do this, it must be shielded from oxygen. Although the bacterium and the resulting toxins can be destroyed by heat, the contents of an infested can are often not heated to the required 80 degrees.

In the past, botulinum neurotoxins were often found in bloated tin cans. In the 19th century, seafarers in particular often contracted botulism during their long voyages because they ate the contents of the bloated cans for lack of alternatives. Since the neurotoxin botulinum toxin is colorless and odorless, the danger is not so easy to recognize.

In the past, however, canned goods were processed much less cleanly than they are today and botulism could easily form in the absence of air. In the meantime, this danger usually only exists if you cook it yourself. You should be particularly careful with beans, mushrooms and asparagus, as they contain a lot of protein. With other preserves like jam, on the other hand, the risk of botulism is almost impossible.

Avoid botulism: this is how you cook properly

Canning is a great way to stock up and preserve food. Nevertheless, the process is not entirely harmless because of the risk of botulism. However, to protect yourself from botulism while preserving, you just need to take a few precautions. It is particularly important that you pay attention to hygiene and boil the canned food long enough to kill the bacterium. You should follow these rules to protect against botulism when cooking:

Thoroughly boil all canning supplies, such as jars, lids, and sealing rings, for at least 10 minutes before using them. This will sterilize the jars. Wash your hands and work surface thoroughly, too.
You should also clean the food you want to preserve well. If you discover moldy areas, it is better not to process the affected specimen further. Also check carefully whether there are other moldy specimens.
Fill the jars and close them tightly. Boil the sealed jars in a large saucepan for 2 hours. When cooking on the stove, you reach a temperature of 100 degrees.
Repeat the cooking process again after 24 hours. This will destroy any germinated spores.
If you have a pressure cooker, use it to cook. If you work with a pressure cooker, the temperatures during cooking are between 116 and 119 degrees. So you can be sure that all bacteria will be killed. The higher temperatures are caused by the pressure that is created in the pressure cooker. This also reduces the cooking time to 25 minutes.
Don’t eat canned foods that have obviously been improperly stored. This is the case, for example, when the lid has opened. The same applies to bloated canned goods.
Never eat cooked food unheated. This is especially true for vegetables that are particularly rich in protein – for example beans. Before you eat preserves, you should heat them up to 80 degrees for at least five minutes. This will destroy any poison that may be present.
If you follow these safety rules, the risk of contracting botulism is extremely low.

Introduction: Lithuanian Culinary Heritage

Lithuanian cuisine is a vital aspect of the country’s cultural heritage. It reflects the country’s rich history and traditions and is deeply rooted in local agriculture, customs, and beliefs. Lithuanian cuisine is known for its hearty and filling dishes, made from simple, locally sourced ingredients. Despite the growing influence of global cuisine, traditional Lithuanian dishes remain popular, and efforts are being made to promote and preserve this culinary heritage.

Traditional Lithuanian Dishes: Popular or Endangered?

Traditional Lithuanian cuisine is diverse and includes a variety of dishes made from meat, dairy products, grains, and vegetables. Some of the most popular dishes include cepelinai (potato dumplings filled with meat or cottage cheese), kugelis (potato pudding with bacon and onions), and šaltibarščiai (cold beetroot soup). However, as with many traditional cuisines, some dishes are becoming less popular and are at risk of disappearing.

Efforts to Preserve Traditional Lithuanian Cuisine

Efforts to preserve traditional Lithuanian cuisine are underway at the national and local levels. In 2016, the Lithuanian Ministry of Agriculture launched a program to promote and preserve traditional Lithuanian cuisine. The program includes measures such as promoting local food festivals and educating young chefs about traditional Lithuanian ingredients and cooking techniques. Local initiatives, such as the Žemaitija Culinary Heritage Center, are also promoting Lithuanian cuisine by hosting workshops and events that showcase traditional dishes.

Challenges in Promoting Lithuanian Culinary Heritage

One of the biggest challenges in promoting Lithuanian culinary heritage is the influence of global cuisine and changing food preferences. Younger generations may not be as familiar with traditional dishes, and the availability of international cuisine may make it more challenging to promote local food. Another challenge is the limited recognition of traditional Lithuanian cuisine on the international culinary stage.

Initiatives to Promote and Popularize Lithuanian Cuisine

Despite the challenges, there are several initiatives underway to promote and popularize Lithuanian cuisine. In 2021, Lithuania was named the European Region of Gastronomy, which aims to showcase the country’s culinary heritage and promote sustainable food practices. The initiative includes a series of events and programs that highlight traditional Lithuanian dishes and ingredients. Social media campaigns, such as the #LithuanianEats campaign, also help to raise awareness and promote Lithuanian cuisine to a wider audience.

Conclusion: The Future of Lithuanian Culinary Heritage

Lithuanian culinary heritage is an essential part of the country’s cultural identity, and efforts are being made to preserve and promote traditional dishes. While there are challenges in promoting Lithuanian cuisine, initiatives such as the European Region of Gastronomy and local initiatives are helping to raise awareness and introduce traditional dishes to new audiences. By continuing to celebrate and support traditional Lithuanian cuisine, the country can ensure that its culinary heritage thrives for future generations.