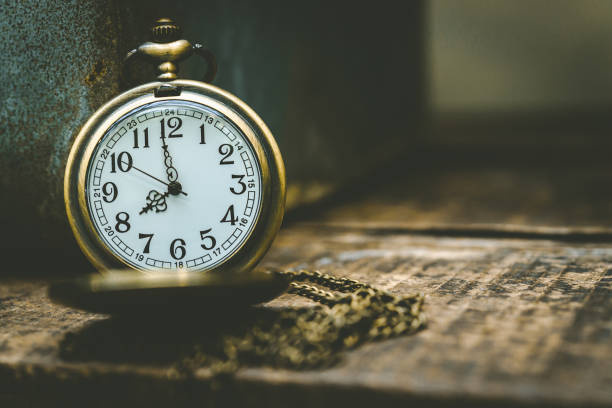
Tag

properly

Browsing
There are many different types of jewelry that we use as beautiful accessories every day. But how do they stay beautiful and shiny? With our tips, you can easily clean and store jewelry. So ivory, enamel, gold bronze, gold frames, garnet jewelry, or silver remain worth seeing for a long time.

With a large number of types of jewelry, one often does not know which cleaning strategy is the right one without damaging the piece of jewelry. But when the silver starts to tarnish or your gold chain loses its shine, it’s time to clean the jewelry. Simple home remedies can help you with this.

Jewelry cleaning made easy

The history of jewelry is a centuries-old story. Because long before our time, people made jewelry from natural materials such as shells, animal teeth, or stones. And even today there are a variety of types of jewelry. There are no limits to the creativity of the designers. So there are many different shapes and colors with which we can beautify our outfits. In addition, many people use these accessories to express their individuality or even to strengthen their self-confidence. But after a while, the beloved silver jewelry or other fashion jewelry can lose its shine and tarnish. Then it’s high time to clean your favorite items.

Cleaning jewelry with home remedies

You can clean different types of jewelry using natural home remedies. During this time you should refrain from using aggressive chemical cleaners. Because these can attack and damage the material. But which home remedies are the right ones? In general, you can use home remedies such as baking powder or baking soda. Various types of jewelry can also be cleaned with vinegar or soap.

1) Clean gold jewelry

Gold has been used to make jewelry for centuries. Because it is a very soft metal, it is often alloyed with other materials such as silver or copper. This mixing of the metals means that the jewelry can tarnish faster. Then you can clean your jewelry as follows. Also, read our other tips on cleaning gold jewelry and gold jewelry as a gift.

2) Clean the gold frame

You can clean gold frames with a mixture of 2 tablespoons of ammonia solution and a quarter of a liter of water. Then use the mixture to wipe down the frame. And to be able to restore the original shine, polish the frame again after treatment with a mixture of salt and egg white.

3) Clean silver jewelry

Nowadays silver jewelry is very popular and available in many forms. But silver can also be affected by discoloration after a while. You don’t need expensive cleaning products to clean your silver jewelry.

4) Clean bronze jewelry

The best way to clean your bronze jewelry is with jewelry cleaning cloths. You can get these at jewelers or drugstores. You can also clean bronze with a mild soapy solution. To do this, mix warm water with mild soap and use the water for cleaning. In addition, soapy water is great for a quick house cleaning.

5) Clean pearl jewelry properly

Although one sees less pearl jewelry these days, many still have one or the other heirloom at home. In order to be able to remove dirt from your pearl jewelry, you should avoid using aggressive and hard cleaning agents. To clean this jewelry, use pH-neutral baby soap. Then put them on a cloth and gently rub the beads clean.

6) Cleaning gemstone jewelry

The type of cleaning depends on the degree of hardness of the gemstones. For soft gemstones, you can use lukewarm water, a mild detergent, and a soft cloth to clean the jewelry. For slightly harder gems, soak the jewelry in a water bath for five minutes. You can clean dirty areas with a soft brush. Finally, rinse the jewelry and dry everything well. The harder gemstones include sapphires, diamonds, or rubies. If you have valuable jewelry at home, read our article on effective burglary protection.

7) Clean enamel effectively

To clean enamel jewelry, use a silver cleaning cloth regularly. This prevents the enamel from getting heavily soiled. You should also avoid ultrasonic devices for cleaning the jewelry. Also, note our tips for cleaning glasses properly.

8) Clean garnet jewelry

Great garnet jewelry will get clean again if left in a soapy water bath. For this use lukewarm water, soap, and some ammoniac. Then leave it on for two hours. Then rinse it off with cold water and rub it dry with a soft cloth.

9) Clean ivory properly

Dirty ivory can be cleaned with lukewarm water, some soap, and a brush. You can also clean your ivory jewelry by placing it in soapy water for about 5 minutes and then rubbing it clean. Or wash it with lukewarm milk and polish it with a soft cloth. Also, note how you can keep your valuables safe.

How often should I clean the bathroom? We have tips and instructions for cleaning the bathroom properly. Because in order to stop germs and bacteria in the bathroom, you should clean the bathroom regularly. Some hygiene measures and cleaning rules can make your work much easier and ensure that a bathroom stays clean for a long time.

Bathroom cleaning tricks

Simple hygiene measures help you to keep your bathroom clean for longer. Even in the bathroom at home, germs and bacteria can quickly collect. Regular cleaning of the bathroom is therefore essential in order to avoid germs in the household. But with a guide and cleaning tips, cleaning becomes an easy routine. In addition, see our article on a bathroom renovation.

1) Clean from top to bottom

This rule is not only helpful in the bathroom but in all rooms. So it is best to start by cleaning the surfaces of hanging shelves and removing dust. You can also clean the mirror without leaving streaks as one of the first steps. In contrast, wiping the floor should be done at the very end.

2) Put away bathroom and hygiene items

Before you start cleaning, you should definitely put hygiene items such as creams, make-up, and other cosmetics out of the way. Because this is how the bathroom can be really cleaned. You can also use this opportunity to put other things aside or put them in the washing machine, such as bath mats, towels, scales, and trash cans.

3) Ventilate regularly and avoid mold

You should also air your bathroom regularly. Increased humidity in the bathroom causes mold to form. Therefore, air the room for several minutes every day, preferably after showering. In windowless bathrooms, you should open the bathroom door and the nearest window. This way you can avoid mold. If mold has already formed, read our home remedies for mold removal.

4) Change towels frequently

Germs particularly like to collect in damp towels. It is therefore advisable to replace them regularly and wash them at a wash cycle of 60 degrees. This ensures that all germs and bacteria are killed during the hot wash. You should also wash the bath mats regularly so that all dirt disappears. Because here, too, germs can form very quickly which is not healthy for humans themselves.

5) Clean the sink

The sink is super easy to clean with vinegar. To do this, mix the vinegar with water in a ratio of 1 to 1. This will also remove stubborn limescale stains. As a result, your bathroom is really clean. You also save on chemical cleaning agents. If you would like to do without these, you can also use washing soda as an environmentally friendly alternative.

6) Clean the shower and bathtub

Probably the worst task when cleaning the bathroom properly is the large shower and bathtub. But here, too, thorough cleaning is required. The use of baking soda or other common home remedies such as effective lemon juice can help you with this. So start by cleaning the tiles and joints, for example with the help of baking soda, which you mix with a little water to a paste. You can then clean the tub properly with lemon juice or diluted vinegar.

7) Tips to avoid lime

If the water in your region is particularly hard, it is advisable to dry the wet surfaces after every wash or shower. Use a microfiber cloth for the sink. And for the shower stalls, it is advisable to use a special squeegee. It is also advisable to use a microfiber cloth when cleaning and to dry everything with it. You should definitely use a small sieve for the shower drain so that hair and fluff don’t get into the drains and clog the pipe. Also, note our tips for cleaning chrome and chrome parts.

8) Remove lime with home remedies

If limescale deposits are difficult to remove, you can remove them with various home remedies. As a result, you can use it to remove limescale from washbasins and shower basins as well as from taps and shower heads. This means that unsightly deposits are a thing of the past.

Coffee is a treat. Without question. But the presentation of the coffee is also important: You can find out how to serve coffee correctly in our article.

With the right serving, you can round off the taste of coffee perfectly and offer your guests a special service.

For a long time, coffee was considered a luxury that only wealthy people could afford. Today, however, it has reached the status of a commodity and is freely available to almost everyone. Most people drink several cups of coffee a day and enjoy the stimulating effect and excellent taste. But how exactly is a coffee served? If you want to proceed with style and etiquette here, you have to follow a few guidelines and specifications. Coffee etiquette is part of everyday life for every waiter, secretary and server. In our article we provide you with coffee knowledge of a special kind.

Whether in a restaurant, at home with guests or in conferences and work meetings – coffee is the must-have drink for many get-togethers. As a true pleasure drink, it must of course also be served and presented in style. The server has a number of options here. He can pour the coffee himself according to etiquette or offer self-service. With both variants, there is a certain procedure to follow and to act as inconspicuously and stylishly as possible. When you serve guests, you must not simply proceed as you please, but must adapt to their wishes and specifications. Proper serving ultimately also contributes to a better and more relaxed dining experience. An excellent coffee is in no way inferior to fine drinks such as wine, sparkling wine and champagne and should therefore be served as such. Tell your guests that they can look forward to an aromatic and beneficial drink.

Coffee in our everyday life

Coffee is everywhere these days. Most of us grab a cup of the drink as soon as we wake up in the morning. The invigorating effect gives us more energy and promises a good start to the day. Even at work, many cannot do without a delicious cup of coffee. Here it not only offers a tasty change, but also helps through sleepy midday slumps. But we also notice the strong presence of coffee in everyday life in our free time. As soon as we step outside, we come across numerous places that offer coffee. Whether in shopping streets, small side streets, restaurants, gas stations or one of the countless cafés on our doorstep – coffee can be found everywhere and is one of the most popular drinks in the world. In 2016 alone, every German citizen drank an average of 162 liters of coffee.

In addition to the general popularity of coffee, the drink has also become a classic for good manners. When guests are visiting, it is always a good idea to serve a coffee. This applies equally to the private and business area. At home, it is above all the well-known “lunch party” that many people remember. Here we sit comfortably together with friends and guests, talk and enjoy a delicious coffee in peace and quiet. In the business area, on the other hand, it is considered good manners to offer a coffee to your counterpart. This task is usually performed by secretaries or receptionists. They should be well versed in how coffee is served properly. The right serving in combination with aromatic coffee creates an inviting atmosphere and relaxes business conversations immensely.

Serving coffee correctly: rules of conduct and practical tips

If you want to serve coffee properly, then you should follow a few rules. There are some differences depending on who you serve and where you are. For example, different regulations apply at home than at work. In the latter case in particular, it is important to maintain form and act in an extremely courteous manner. As a waiter, you must ensure that you are served in style. You can use useful tools such as coffee service sets as table settings. These oval trays are ideal for transporting a cup and saucer, a jug and a matching teaspoon. In addition, the coffee utensils are beautifully presented.

If your guest is to enjoy full service like in a restaurant, you have to follow a certain procedure. First of all, you should know that a new cup of coffee must always be refilled in the kitchen or away from the guest. The old cup of coffee is replaced along with the saucer. To ensure that the coffee arrives pleasantly warm at the table, it is also advisable to warm it up beforehand. The refilling option is a little less formal and more suitable for everyday use. You do not need new cups for this, but carefully pour new coffee from the right side for the guest. In many cases, the guest will also hand you the cup – you should make sure that the saucer is also handed to you so that not a drop of coffee spills. Modern style suggests taking the cup and saucer straight away and only then refilling it. In this way, you relieve your visitor of as much work as possible. Incidentally, pouring takes place behind the guest’s right shoulder. This prevents unwanted mishaps that can lead to the hot coffee pouring over the person in front of you.

As a waitress at business meals, meetings and other gatherings, the order of the people present plays a role in addition to the correct serving of the coffee. You always start with the most senior person in the room. This often sits directly to the right of the host and thus occupies a central position. Then distribute the coffee counter-clockwise. The host is now the last to receive his coffee and is therefore using excellent manners. If the meeting gets a bit larger so that a single pour would take too long, you can also introduce self-service in consultation with your manager. Here, coffee pots are distributed at appropriate intervals over the entire table and every coffee drinker can easily refill himself. However, it is worthwhile to make the guests aware of this offer again after a short time so that everyone knows about the procedure.

If you want to serve the coffee correctly and you choose a coffee service set, you must always arrange it correctly. The rules state that the milk jug must be on the far right. The coffee cup and saucer are then placed on the tray on the left. A little above and in the middle is a dispenser with sugar. However, you should serve honey separately, as it has no place on a coffee service. Since most people are right-handed, the handles of the jug and cup both point to the right. The coffee spoon is placed last on the right side of the cup. Finally, only one cookie is missing, which can be placed on the left side of the saucer. Now the coffee service set is ready and you can serve it to the guest. In the four walls at home, this procedure does not have to be followed quite so strictly. However, if you want to be a good host, you should ensure that the food is served as stylishly as possible.

Storing coffee at home is sometimes a difficult undertaking. We give you a few tips on how to store it appropriately.

5 tips on how to optimally store your coffee in your own four walls

Coffee is one of the most popular beverages in the world and is consumed in large numbers every day. However, if you have discovered your personal favorite coffee over time and want to keep a larger quantity of it at home, you should take a few storage tips to heart. External influences can quickly deprive the coffee of its aromatic ingredients and spoil the taste after a short time. We’ve looked at how to store coffee properly, and here’s some advice.

Tip 1: The coffee aromas usually survive much longer in a whole bean than in already ground coffee powder.

Tip 2: Make sure to always keep your coffee in an airtight and dark place.

Tip 3: Storing your favorite coffee in the refrigerator can have a major impact on the coffee aroma and thus the taste.

Tip 4: The best place to store coffee is in an opaque ceramic jar.

Tip 5: As an “extra protection”, you can also wrap your coffee can in a bag.

Proper storage for ideal coffee taste

As already mentioned, the coffee should be stored as a whole bean. Of course, it always depends on whether you can grind your coffee yourself with a coffee grinder or otherwise. During the grinding process, many of the aromas develop, which can escape more easily during subsequent storage. Coffee powder is therefore simply more vulnerable than whole beans. Therefore, avoid unpleasant surprises when enjoying your coffee and rely on an airtight ceramic coffee canister. So you can look forward to a great taste experience even weeks later.

Whether or not it is necessary to peel persimmons depends on several factors. In this article you will learn how to best consume the sweet exotic fruits and what you should bear in mind when doing so.

Whether you peel persimmons or not depends on your preferences. Basically, the skins of the persimmons are edible and you can eat the orange fruits with their skins.

Unripe persimmons do not taste good due to the high tannin content. Therefore, when shopping, you should consider whether you want to eat the persimmons right away or in a few days. In this article, you will not only learn how to eat persimmons correctly, but also how to recognize and influence the right degree of ripeness.

The persimmon is the sweet fruit of the persimmon tree and originally comes from Asia. Persimmon trees need warmer growing areas because they are not frost-resistant. There is therefore no significant commercial cultivation of the orange fruit in Germany. Most of the growing areas are in China, Korea and Japan.

There are now also European kakis on the market, for example from Spain. In order to avoid long transport routes, you should prefer these fruits to those from Asia. If possible, buy kakis in organic quality: they are free of chemical-synthetic pesticides.

Peeling persimmons: you should know that

You don’t have to peel persimmons to eat them. However, there are a few basic things you should keep in mind if you want to eat persimmons with the skin on.

Use organic persimmons as their skins are untreated. In principle, however, you can also eat the skin of conventionally grown fruits.
You should always wash fruit thoroughly before eating. More about this here: Washing fruit properly: What to do about pesticides on the skin?
Depending on the type of persimmon, the skin varies in thickness. Thick-skinned specimens taste better peeled.
This is how you eat persimmons correctly

Wash the persimmons thoroughly with cold water.
Halve the fruit lengthwise.
Remove the hard carpels and the light-colored base of the stalk.
Cut the fruit lengthwise into four or eight wedges.
Whether you peel the kaki or eat it with the peel is up to you. If you want to peel the persimmons, cut the flesh off the skin, similar to a melon.
Scoop out persimmons

When persimmons are fully ripe and very juicy, they are easier to spoon than to cut:

Wash the persimmons thoroughly with cold water.
Halve the fruit lengthwise.
Using a small spoon, scoop the insides of the persimmon straight out of the shell.

Recognizing the right degree of ripeness of persimmons

In order to withstand the long transport routes, the harvested persimmons are usually still unripe. Unripe persimmons contain a high proportion of the vegetable tanning agent tannin. When you eat them, this gives you a furry sensation in your mouth. However, tannins are not harmful to health. As it ripens, the sugar content in the persimmon increases and the orange fruit tastes juicy and sweet.

In addition to the actual kaki, you will also find the cultivated forms in the trade

honey apple
persimmon and
Sharon.
The cultivated forms contain significantly less tannin and you can therefore eat them in a harder state.

This is how you can tell that the persimmon is ripe

The persimmon is ripe when it is very soft. The persimmon has reached the perfect degree of ripeness when the pulp shimmers through the skin with a glassy sheen. Fully ripe persimmons yield slightly when pressed lightly with your fingers. The shell should not show any brown spots or dents.

Transport and store ripe persimmons

When fully ripe, the persimmon is very sensitive to pressure. Therefore, make sure that you pack ripe persimmons to protect them from pressure when you buy them, so that you can transport them home safely. Store ripe persimmons refrigerated and eat within a day or two.

Allow unripe persimmons to ripen

If the persimmon is not yet ripe, you can store it next to bananas or apples for a few days. These secrete ethylene, which stimulates other fruit to ripen faster.

Storing Christmas cookies correctly is important so that you can enjoy your cookies for a long time. We’ll show you how to keep Christmas cookies fresh and how to use leftovers sensibly.

Storing Christmas cookies: This is how you succeed

Whether cinnamon stars, vanilla crescents or gingerbread – cookies are part of the Advent season. So that you can enjoy your homemade biscuits throughout Advent, you should make sure that they last as long as possible. Therefore, we have put together the best tips for you on how to store Christmas cookies properly:

Store by type: After baking, all types of cookies should be allowed to cool completely before tinning. The glaze or other decorations must first dry completely. Otherwise the biscuits may stick together. Then store the Christmas cookies according to type in different airtight cookie jars. You should also wrap homemade stollen in a kitchen towel.
Shelf life is related to the type of cookie: The use-by date is closely related to the type of cookie. Dry cookies can last up to eight weeks. However, if your cookies have a cream filling, you should use them up within a week if possible.
Freezing Christmas cookies: If you can foresee that you will not use up your cookies in time, you can simply freeze them. You will need an airtight container to put your cookies in after they have cooled. However, be careful not to freeze cookies decorated with chocolate. Chocolate turns gray in the freezer. If you want to thaw the frozen pastry again, take it out of the freezer and let it sit at room temperature for several hours.

Tips for making good use of leftover pastries

Storing Christmas cookies properly can avoid food waste. But what to do if there are leftovers? With our ideas you will be able to use what is left over. So nothing has to end up in the garbage, but can be used elsewhere.

Second chance for leftover cookies: You can crumble many types of Christmas cookies and use them instead of biscuits for various recipes. In this way you can refine (vegan) tiramisu or other layered desserts, for example. You can also use them to make sprinkles for apple crumbles. You can melt leftover chocolate and use it as a glaze for cakes or fresh pastries.
Utilize expired ingredients: Each food item is given a sell-by date before it is sold. However, this date is not to be taken so strictly for all foods. Because ingredients such as baking powder, flour or spices can keep much longer. Therefore, you can use these basic foods for baking for a long time without hesitation. Read more: Forget the best before date – many foods last longer than you think
Cookies as a gift idea for friends and relatives: What Christmas cookies you don’t want to store with you may be missing from others. How about giving your homemade treats to friends, acquaintances and relatives? Not only do you give your loved ones a little treat, you also don’t have to throw away your leftover cookies.

Tips on cleaning glasses properly. Because they are our constant companions. Therefore, they can quickly become dirty or smudged. And for a clear view, you need to clean your glasses more often. You should avoid common mistakes so that your lenses are not damaged. We have summarized the most important things about cleaning glasses for you.

Proper cleaning of the glasses is important

A good and correct cleaning of the glasses is very important. Dirty glasses can be very annoying and distracting. And the glasses wearers among us know the good feeling after cleaning: finally a clear view again! In addition, limited vision can damage your eyes. Or they tire over time. You can also get headaches if you don’t see clearly. Therefore, you should make sure to clean your glasses every day. It makes sense to get used to it at a certain time. In addition, also note our article on the question of contact lenses or glasses, as well as for instructions on cleaning contact lenses conscientiously if you wear contact lenses from time to time.

Causes of dirty glasses

Glasses are already smeared when your eyes are itchy. But splashes of fat when eating can also impair the view. Even the weather can damage your glasses, which can fog up or become stained by raindrops. Then most people just use a handkerchief to clean the glasses. Often the shirt or sweater is simply used to quickly clean the glasses. But this is not beneficial for the glass and is a common mistake when cleaning glasses. Because the glass can get fine scratches, which of course are very unpleasant for the clear view.

Clean glasses properly with home remedies and Co.

It is our faithful companion and should therefore always be cared for. But the lenses of your glasses are very sensitive, so you should be careful not to treat them too roughly. Therefore, only certain home remedies are well suited for regular cleaning of glasses. So we have an overview:

1) Clean lenses with water and washing-up liquid

It is best to clean your glasses at home with lukewarm water and non-greasy detergent (pH value-neutral). And do without skin-friendly and moisturizing detergents, because these can damage the glasses and leave a greasy film. Accordingly, hold your glasses under the running water. This removes large dirt particles. Then put a little non-greasy washing-up liquid on each of the glasses and rub it in with clean fingers. Then rinse it off with water. Then dry it with a microfiber cloth. Also, read our article on monitor and screen care.

2) Use of microfiber cloths to clean glasses

You can also clean your glasses with the help of microfiber cloths. These are great for in-between and on the go. Because you can use them dry. Of course, you can also use a glasses cleaning cloth for cleaning. It is important that you wash the microfiber cloths regularly. You should wash them at least 40 degrees and without fabric softener. Also, note our tips for sunglasses.

3) Goggle sprays and cleaning wipes

Especially when you’re out and about, you don’t have water or the right washing-up liquid. Therefore, some people use special glasses sprays or damp cleaning wipes (without alcohol). These are good for cleaning glasses. However, you should pay attention to good quality here. As some of these items are said to be capable of damaging the lenses. Also, note our home remedies for tired and stressed eyes.

4) Clean glasses with ultrasound

Professional ultrasonic cleaning is best. This will clean your glasses gently and effectively. Your glasses are placed in a water bath, which is then subjected to ultrasonic vibrations. As a result, bubbles form and gradually burst. This removes dirt particles. Most opticians offer a free service. Such a cleaning makes sense every 3 – 6 months. You can also buy these ultrasonic devices on the Internet. Also, note our effective home remedies for burning eyes.

5) Protect your glasses with a glasses case

Good care is therefore essential if you want to preserve the longevity of your glasses. You should also protect your glasses by putting them in a glasses case when you are not using them. This prevents you from accidentally sitting on it. In addition, see our article Identifying and avoiding poor eyesight in children.

Instructions and tips for properly frying a steak. Frying the perfect steak is a mystery to many chefs. With our practical instructions and numerous tips, every steak is just right, just the way the guest wants it.

Fry the steak properly

If you want to sear a steak properly, there are a few things to keep in mind. You should not only pay attention to the right temperature and frying time. The quality of the meat and the pan can also be important for a successful result. Individual wishes and tastes should also be taken into account. Because not everyone likes their steak “well done”. Thus, the preparation of a steak seems like a big challenge to some. But don’t worry, with the following tips you will succeed in frying the steak:

1) Know the most common types of steak


Finding the right meat for a steak is not always easy. With beef steaks, a distinction is made between the different parts of the animal. The most common types of steak are rib-eye steak, fillet steak, rump steak, T-bone steak, porterhouse steak, rump steak, sirloin steak, flank steak, and boiled beef. The difference lies in the fat and bone content and the size of the meat piece. In addition, a fillet steak, for example, is far more tender than a T-bone steak, which has more roast beef than a fillet.

2) Buy the right meat

For a real gourmet steak, it is advisable to choose a flank steak, rump steak, or fillet steak. In any case, the meat should be tender and juicy. Depending on your taste, you should cut the steaks at least 2 cm and at most 4 cm thick. It is advisable to buy the meat fresh from the butcher or at the meat counter in the supermarket. Because ready-packaged steaks are not necessarily cheaper, they are far behind freshly cut meat in terms of quality. Also, note how you can identify and preserve fresh fish.

3) Fry the steak properly in the pan

A cast-iron grill or frying pan, which ideally can be used on a gas stove, works best. Of course, ceramic hobs and induction cookers are also suitable for frying. In the summer season, a charcoal grill is recommended, because it can generate enough heat and is also really fun. Also, read delicious menu ideas for grilling. Meanwhile, cast aluminum pans are more suitable for low frying temperatures, as coatings may otherwise come off. This is not a problem but takes longer.

4) Which fat to use for frying?

Butter, peanut oil, or rapeseed oil are particularly suitable as fat. Because these have a high smoke point, which is not the case with olive oil or butter, for example. At high temperatures, bitter substances can be released here. And you should avoid that when frying your steak properly. In addition, you can freeze and thaw meat well, so that leftovers do not have to be thrown away.

5) Tips on preparing to fry steak

The steak should always be at room temperature before frying. To do this, take the meat out of the fridge early enough. Half an hour before cooking is usually sufficient. If the steak is to be pulled into the oven, the oven must first be switched on at a maximum of 160 degrees circulating air or top and bottom heat. Cooking the steak in the oven at lower temperatures will make it more tender. However, it takes longer accordingly. Read also how you can then remove the oven smell.

There are two ways to prepare meat. Either the fat is added to the pan or it is massaged into the meat beforehand. In the latter process, you should let the meat rest for 10 minutes after massaging it. The pan must be heated to a high temperature before frying. If you put a drop of water in the pan, it must immediately evaporate. Then you know that the right temperature has been reached.

6) What cooking levels are there?

Cooking is an important issue when frying a steak properly. Depending on your taste and preference, you can choose between different cooking levels. And depending on the degree of doneness, a different core temperature is required. It is advisable to place the steak in the preheated oven after searing. Depending on the thickness of the meat and how well done you want it to be, the cooking time in the oven can range from 5 minutes to an hour if you prefer the slow cooking method. It is important to know that a steak becomes more tender the longer it is cooked at low temperatures.

7) The perfect cooking point and the perfect cooking time

You should always ask guests in advance how they want their steak. And then pay attention to the respective core temperatures during preparation. Then you need to sear the steak for a minute on each side. This creates a delicious crust and the meat’s own juices remain in the steak. So it doesn’t get dry.

You can use the finger test to determine the doneness. Because you can estimate the degree of doneness on the heel of your hand. If you hold your hand loosely and press on the heel of your hand, it feels like a steak that has been “rare” cooked. “Medium” corresponds to the firmness of the heel when you hold your thumb and middle finger together. A steak feels “well done” like the heel of a hand when the thumb and ring finger are held together. A little helper in the kitchen is useful for the cooking time in the oven – a roasting thermometer.

If you want to store lemons, you have to consider a few things. With the right storage conditions, lemons stay fresh for several weeks – we’ll show you what’s important.

To store lemons properly, you should know their properties. Lemons are the fruit of the lemon tree and belong to the citrus fruits. They require an evenly warm and humid climate and are sensitive to drought and cold. Due to the cold winters, lemon trees do not thrive in Central Europe.

Lemons from conventional cultivation are usually treated with preservatives and wax so that they can be kept for as long as possible. It is therefore better to use organic lemons. Chemical-synthetic pesticides and artificial fertilizers are prohibited in organic farming. Organic lemons are only superficially cleaned and the natural wax layer of the fruit is preserved. If you buy organic lemons, you can also use the lemon zest. You also support sustainable agriculture.

Unfortunately, lemons are not native to Germany. To avoid long transport routes, you can use European lemons. Organic lemons from northern Italy are in season between November and July. You can buy Spanish organic lemons all year round.

Storing lemons: You should pay attention to this

With these tips you can store lemons properly:

Lemons should be stored in a cool, dark place.
The best temperature to store lemons is between ten and fifteen degrees Celsius.
A cool, windowless pantry or the dark basement is best suited for this.
Avoid storing lemons in the fridge as the fridge temperature is too low.
To avoid mold, you should keep a distance between the individual lemons. Therefore, be sure to remove the shopping bag if you want to store lemons longer. This makes it harder for mold to spread.
Spread an old newspaper under the lemons. The newspaper absorbs excess moisture, which reduces mold growth.
Avoid storing lemons near apples or tomatoes. The escaping ethylene greatly accelerates the ripening process of the lemons.
By the way: Organic lemons go moldy faster because no chemical-synthetic pesticides are used during cultivation. When buying, make sure that the lemons do not have bruises.

There are also a few tips for cut lemons. If you only need half a lemon when cooking or baking, you can store the other half in the fridge for a day or two:

Place the lemons cut-side down on a small plate.
Place the plate with the lemon half on the top shelf or in the refrigerator door. This is where the highest temperatures prevail.
Consume the lemon within a day or two.

Reserve the lemon juice

Store fresh lemon juice in a sealed container in the fridge. Fresh lemon juice will keep for a day or two.

If you want to extend the shelf life of lemon juice, you can freeze it. Even if you only need lemon juice very rarely and in small amounts, freezing is a good solution. Use small jars to freeze lemon juice. Alternatively, you can freeze it in ice cube trays. This way you always have a small amount of lemon juice available.

Lemon ice cubes are a great way to quickly prepare a cool, refreshing drink, especially in summer. Frozen lemon juice has a shelf life of at least six months.

Chinese cabbage can be prepared in many ways – but how? Asian cabbage varieties are popular, but the preparation of Chinese cabbage is unknown to many. A little product information.

Preparing Chinese cabbage is also something for cabbage skeptics

Chinese cabbage is different from its native relatives – it is more subtle and easier to digest. If you are put off by digestive problems, the smell and taste of cabbage from the local varieties, then prepare Chinese cabbage instead.

Because it also has the vital substances typical of cabbage: Above all, it provides a lot of vitamin C, vitamins from the B group, folic acid, mustard oil glycosides and minerals such as potassium and iron. With around twelve calories per 100 grams and a water content of 94 percent, it is the ideal vegetable for losing weight.

Caution: Chinese cabbage has a high nitrate content. Adults can take it without hesitation. Babies and toddlers, on the other hand, should only consume small amounts occasionally – or they should avoid it altogether.

Before preparing: Buy good Chinese cabbage

When shopping, test to see if the cabbage is tightly closed and feels firm. The leaves should be crisp with no dark spots. Chinese cabbage from the supermarket often has small black spots. They are not harmful to health, but occur when storage is too warm. Damage to the outer layer of leaves isn’t a big deal, since you remove this layer anyway when you prepare the Chinese cabbage. The cabbage should not have mushy spots.

Now it’s time to prepare: Cut the Chinese cabbage

In contrast to the local types of headed cabbage, Chinese cabbage does not have a hard stalk and the leaf veins are so tender that you can use them. How to cut Chinese cabbage before cooking:

Remove the outer leaves. Also withered or damaged areas.
Then, at the bottom of the cabbage, cut a slice about an inch thick with a straight cut.
Now the leaves can be easily separated and you can cut them into the desired shape.
Wash the Chinese cabbage pieces in cold salted water.

Cooking Chinese cabbage is quick and easy

If you want to prepare a larger portion of Chinese cabbage, choose a wide pan or pot, because raw Chinese cabbage takes up a lot of space at first. Cooking time depends on how crispy you want it. Basically, the crunchier, the tastier. If you haven’t prepared Chinese cabbage often, try the al dente every now and then. These are the cooking times:

Roast and Cook: Five to seven minutes
Steam and simmer: Five to ten minutes
How to prepare Chinese cabbage:

as a raw food snack or salad
fried in a pan with oil
cooked in salted boiling water
as steamed vegetables in their own juice: first add the thick ribs and later the fine leaves to the pot.
steamed in a saucepan with a steamer insert or a suitable kitchen sieve with the lid closed. The cooking water should not come into contact with the Chinese cabbage.
fermented

Store Chinese cabbage properly

Chinese cabbage is tender, so you should get it as fresh as possible and use it immediately. Stored in the fridge, it keeps its crunchiness for up to four days. If you wrap it, you can still cook Chinese cabbage after a week.

Be sure to wrap the Chinese cabbage loosely, otherwise it will get bruises that can rot. It is better not to use cling film for this: a beeswax cloth is the plastic-free solution. Once added, you can use it over and over again.

The productive head of cabbage can be kept in the freezer for up to four months: Clean the Chinese cabbage, cut into small pieces and blanch briefly in boiling, lightly salted water. The professional would then quench the Chinese cabbage in ice water.

Our tip: If you freeze the Chinese cabbage in portions, it will be easier to prepare the amount intended for your recipe.