Tag

properly

Browsing

Burgers are a fairly simple dish, but there are cooking tricks that can help you get a great taste. To prepare this treat according to the rules, follow the simple tips from the chefs.

  1. The ideal burger meat is the ground beef neck. It contains about 20% fat and 80% meat, so the burgers are the most juicy with it.
  2. Use minced meat as close to room temperature as possible to form cutlets. However, before grilling cutlets, it is still better to keep them in the refrigerator so as not to lose their shape.
  3. Salt and pepper minced meat or cutlets just before cooking.
  4. If you form cutlets with your hands, then make sure that the thickness is at least 1.5-2 cm. Cutlets of a smaller thickness will turn out to be dry.
  5. After the cutlets are formed, be sure to make a depression in the center of each of them with your thumb or a tablespoon – this is necessary so that they remain flat after grilling. The safest option for forming patties is to use a burger press.
  6. When placing the patties on the grill, do not press down on them with a spatula to keep them juicy.
  7. Grill burgers for about 6-8 minutes indirect medium heat turn once.

Meat is the most common food cooked and eaten in all countries. But how to make sure that the meat is not dry, or how not to forget about it and then not be content with “coal”? What is better to serve as a side dish and what sauce to season?

  1. Always cook meat at room temperature – let it rest for an hour after the refrigerator, then the meat will be juicier and the roasting will be more predictable.
  2. The dishes are simple: a frying pan or a grill – it doesn’t matter. This also does not affect the taste. But it is still very important – the dishes must be heavy enough so that the pan can gain maximum energy and heat. If we use a very light frying pan, then it keeps little heat and as a result, when we spread the steak, it loses its power very quickly, and we get low-quality frying: the meat can give juice, and then we get not a fried steak, but its likeness!
  3. Heat the pan: the first smoke from the pan will be the signal for cooking. If you have one, you can proceed.
  4. Well-cooked meat goes well with a sauce based on ripe tomatoes, garlic, and cilantro. As a side dish, we offer boiled basmati rice with butter and a salad of fresh cucumbers and tomatoes with fragrant cilantro, red onion, and olive oil. Also, potatoes fried with onions go well with meat.
  5. But everyone’s favorite side dish for meat is vegetables fried over an open fire: eggplants, zucchini, tomatoes, and bell peppers.

Whether you are cooking marbled meat for the first time, or with regular consistency, read the answers to the questions in this section. You will definitely find something interesting for yourself.

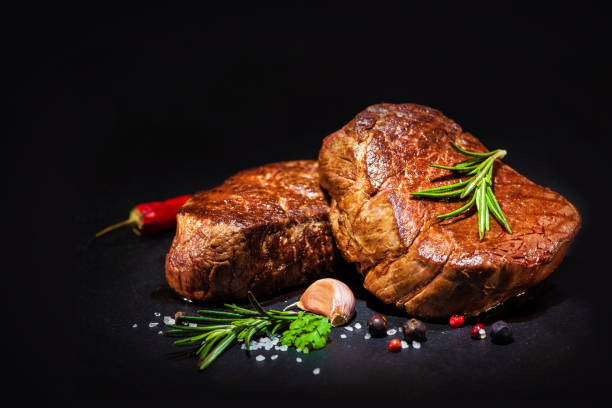
Step 1. Remove the meat from the refrigerator a few hours before cooking and place it on an absorbent surface. The meat should warm up to room temperature so that it is evenly fried throughout the entire volume during cooking.

Step 2. If you are cooking a steak in a cast-iron skillet, put the pan on the fire and heat it well. If you prefer a steak more fried, then preheat the oven to a temperature of 200 ̊С, it is better if there is a grate in the oven. If you are grilling a steak, turn on the grill or light the coals and heat the grate well on which you will cook the steak.

Step 3. Brush the meat with a little oil, pepper and salt with coarse sea salt.

Step 4. Wipe the pan or grill rack with a waffle towel with a little oil, when the pan starts to “smoke” you can put the steak on the wire rack.

Step 5. Fry the steak on each side for 1.5-2 minutes, then place the steak on the edge, as if sealing it on all sides.

Step 6. If you are cooking a steak in a cast-iron skillet, while the steak is on the rib, add a little butter, crushed garlic, and a couple of thyme sprigs into the skillet. Dip the steak in boiling oil on each side.

Step 7. If you prefer less roast, then the steak can be removed from the pan or wire rack, but not immediately onto the plate. Let the meat rest for a few minutes, so that all the meat juice inside the steak is distributed throughout the entire volume.

Step 8. If you prefer the steak more cooked, then hold it on the wire rack for a few more minutes, turning it constantly so that it does not burn. If there is an oven, then place it in the oven for 4-6 minutes, then take it out and also let it rest.

Step 9. Then serve the steak on a plate, add salt and pepper and voila, the steak is ready!

To get a taste of the steak, forget about the sauce, at least for the first couple of slices. Add a little more salt. As a side dish for me, the best option is grilled vegetables. But anything can go with a steak, even pasta!

Fall is here – time to pay a visit to the apple growers and stock up on apples for fall and winter. These tips will keep your apples juicy and crisp for several months.

1. The apple likes it cool

Stored at room temperature, apples ripen faster and become shriveled. Always store the fruit as cool as possible, 2 to 5 °C is ideal. This temperature prevails, for example, in the vegetable compartment of the refrigerator.

If you don’t want to dedicate the entire lower level of your refrigerator to apple storage, cool basement rooms and/or the balcony are also suitable. On the balcony, however, the apples need a place in the shade, because being illuminated by the sun accelerates the ripening process. It is important that you do not expose the apples to frost.

2. Nice and airy, please

Apples feel happiest when they are loosely packed in boxes on newspaper. If space allows, use multiple crates rather than stacking the fruit. Also, make sure the apples aren’t touching; This is how you prevent rotten spots and mold.

3. Protection from evaporation

In order for the apple skin to stay plump, protection against evaporation is also important. Many apple farmers offer their fruit in plastic bags. These are good for storage. Ventilation holes are important to prevent condensation from forming. Alternatively, you can place a plastic bag or foil, also with ventilation holes, over your apple crates.

4. It depends on the right apple

Not all apple varieties store well. For example, the following are well suited:

  • boskoop
  • Braeburn
  • Elstar
  • Gala
  • Golden Delicious
  • Jonagold
  • Idared
  • Welland
  • rubies
  • topaz

It is best to ask the farmer or retailer you trust which varieties he particularly recommends.

After enjoying the ice cream, what remains is the empty packaging. Margarine containers and the like are also still popular to store, freeze or reheat leftovers from food. But why shouldn’t you continue to use such containers?

Ice cream and margarine containers: why can continued use be harmful to health?

But what exactly makes such containers harmful to health if they are reused? Many of these packages are made of thermoplastics. This is especially true for ice cream packaging. These are designed for cold, frozen food and are completely harmless for this single use. However, if you put warm food in it, the container heats up and the plastics come loose. This allows them to transfer directly to the food. In the long run, you absorb various residues from the packaging through the food. Repeated rinsing and prolonged use can also cause chemical transfer as the containers are not designed for such a purpose.

But not only margarine packaging or ice cream containers have been designed for single use. Other retail packaging should not be misused either. These include: cream cheese jars, yoghurt pots and containers for ready-made salads.

Conclusion: If you want to continue using the containers, you should use them to store pens, screws or other small parts. However, if you want to store food, freeze it or heat it up in the microwave, use products that have been specially made for this purpose*. Glass containers and stainless steel jars are the better and healthier choice for storage jars.

Tulips should never be given fresh water during water changes. Why does this damage the cut flowers?

A colorful bouquet of tulips can make your heart happy and bring the fresh scent of spring into your home. Quickly fetch a vase from the cupboard, fill it at the tap and then drape it nicely on the windowsill: You can already feel the spring mood in the apartment.

After a certain time, however, there is less and less water in the vase because the tulips have drawn it. Should I drain the water and fill in new? This would be a mistake that would make the beautiful flowers look ugly sooner.

That way you can keep your tulips for longer

If you have the impulse to give your tulips new water, caution is advised: the water already in the vase should never be poured out, instead you should only refill the vase with fresh water. Because: Fresh water gives the cut flowers new energy, it allows them to grow or bloom much faster. But that also means that they age and wither faster. With the mixture of older and fresh water, the tulips will continue to grow, but more slowly.

However, it is important to refill in good time so that the nutrient content in the water does not become too high. So check regularly how much water your tulips have left. These cut flowers in particular draw water quickly, which is why repeated watering may be necessary.

So no fresh water for tulips! If you heed this tip, you can enjoy colorful flowers for longer.

If you want to get rid of old VHS tapes, it’s important to know how to dispose of them properly. Alternatively, you can donate or sell the video cassettes.

What to do with the old VHS?

“Where to put the old VHS?” is a question that has certainly come to your mind if you have found old cassettes somewhere that you no longer want to keep. If you want to back up the contents of the VHS cassette, you should do this as a first step. You can either digitize the videos yourself using an intermediate device (called a video grabber) or you can find out about companies in your area that offer VHS digitization.

You can try to make some money with your old VHS tapes. For collectors, some of the old cassettes are real treasures. You could approach a sale through collector forums, online auction houses, or a flea market. How much your cassette is still worth has to be decided individually. If it’s a very rare film that isn’t available on DVD or Blu-ray, or one with a special sleeve, you can get more for it than if it’s an unknown film or a multi-rereleased classic . To get a rough idea of ​​the price, you can find out about common prices in advance, for example in collectors’ forums or on VHS markets. Alternatively, you could also donate your cassettes and make someone happy who cannot afford Blu-rays or DVDs, for example. Charity shops often gratefully accept donations of video cassettes. Just call your local fundraiser or nonprofit shop ahead of time and see if they would accept your tapes.

If selling or donating is not an option for you, you can of course dispose of the cassettes. You should definitely delete the video recordings on the cassette beforehand; so you can be sure that nobody can view your (perhaps private) content anymore. If you only have a small number of VHS cassettes, you can dispose of them in the general waste. If you have a larger collection, you should go to a recycling center.

A dirty baking sheet is not a particularly pretty sight. The encrustations and residues can be easily cleaned with the right tips and tricks.

This is how baking sheets get dirty

If you use the baking tray daily or several times a week, it is quite normal for various types of soiling to appear, despite the baking paper or baking mat. The sheet metal can usually no longer be cleaned simply with water.

No matter what you prepare in the oven: there is always a chance that grease stains, dirt, leftover food or other residues will remain on the tray. We would generally advise you to remove any dirt immediately after use. If you continue to put the dirty sheet in the oven, smoke can form and the dirt can burn and become caked, making it difficult to remove.

Home remedies for cleaning your sheets

There are various cleaning agents on the market that have been specially developed for removing grease stains, burnt-in stains and the like. But if you want to do without chemical cleaners, you can easily use household remedies. These are on the one hand cheaper, on the other hand more environmentally friendly and the best thing about it: We usually already have products like salt, baking soda and vinegar at home.

Clean the baking sheet with baking soda and baking soda

When heated, baking soda develops, together with water, into a strong lye that splits proteins and fats into acids. It is therefore perfect for removing fat and stubborn crusts from the baking tray.

Although it is also found in baking powder as sodium bicarbonate, it can work even better in its pure form. Baking soda in combination with mineral water can hold a candle to some chemical cleaners.

That’s how it’s done:
First you put 50 grams of baking soda on the baking tray to be cleaned and then pour enough mineral water over it until the tray is completely covered.
Now heat comes into play: At 100 degrees below heat you can let the water-soda mixture slowly evaporate for about 20 minutes.
After taking out the tray, let it cool down a bit.
The burnt-in residue can now be easily removed with a sponge or dishcloth.
If you don’t have baking soda on hand, you can alternatively use baking powder. To do this, first soak the tray in warm water and then add a packet of baking powder. After a short exposure time, the crusts should be able to be removed with a damp sponge.

Remove incrustations with salt

Probably the simplest and cheapest home remedy for fighting incrustations is salt. To do this, generously sprinkle all baked areas with commercially available salt so that they are completely covered. Then you put it in the oven at 50 degrees and wait 30 to 60 minutes. When the salt turns light brown, you can remove the tray from the oven and drain the salt. The crusts should now be easy to remove and it is sufficient to rinse the tray again with a little warm water.

Get the baking sheet clean with vinegar and citric acid

Baked-in food residues can also be removed with vinegar and citric acid, which, with their acidic pH value, easily loosen stubborn crusts. The procedure should already be known from the previous uses of baking soda and salt – household remedies, in this case vinegar or citric acid, spread over a large area on the tray and then put it in the oven. At 200 degrees you give the mixture about 20 minutes to show its full effect. When the work is done, pour off the liquid. Here, too, the last step is to rinse the baking tray with clean water and wipe it off with a sponge or cloth.

Tip: The strong smell of vinegar is part of this cleaning method, but it can sting your nose and burn your eyes. To reduce the smell a bit, you can simply mix vinegar with lemon juice.

Fruit acids are also known to gently remove residues from sheet metal. To do this, first cut an apple, rub the incrustations with the inside of the peel and let the sheet soak briefly.

Cleaning the baking tray with coke – does that really work?

Sounds crazy, but it still has an effect! We are talking about cola, which contains phosphoric acid, an active ingredient that is also found in much higher concentrations in rust removers. Here you can simply use the stale leftovers that would otherwise end up in the drain. You put this on the baking tray and let the cola sit for a few hours or even overnight. In this case, you don’t have to heat the tray. After that, you can clean it with a sponge and rinse off the sugar thoroughly.

Chemical cleaners vs. home remedies

Even industrial cleaning agents such as oven and baking sheet cleaners cannot be denied their effective effect. They promise a particularly fast and effective removal of dirt, which is due to their chemical composition. However, such cleaners are not completely harmless. The ingredients can cause allergic reactions and also irritate the skin and eyes.
For environmental reasons, it is not advisable to use chemical cleaners. Our tips and tricks on how to get baking trays clean again with household products such as baking soda, citric acid and the like offer a much more environmentally friendly and gentle alternative.

But if you don’t want to do without industrial cleaning agents entirely, you can use dishwasher tabs to clean your trays. To do this, place a tab in the middle of your baking tray and pour hot water over it. Cover the entire area, wait until the tab has dissolved and then give the mixture some time to take effect.

Prevent encrustations – three rules to keep the sheet clean

So that annoying crusts do not form on the baking sheet in the first place, we give you the following tips:

Clean your baking sheet immediately after each use and don’t wait until the leftovers are badly burned on. It is best to soak the tray in warm water and washing-up liquid immediately afterwards. This prevents particularly heavy incrustations and makes cleaning easier later.
A pad is a must! Always use parchment paper or a permanent baking mat when baking.
It is better to avoid cleaning with scratching steel sponges or brushes. The scratches on the baking tray are then even more susceptible to dirt.

Conclusion: Only you can decide which method is the right one for you. But maybe you would like to try one or the other.

To preserve beans, you need to freeze them. However, important steps must be taken beforehand in order to achieve an optimal result. In this article, you will find out what you need to consider when preparing for freezing.

Beans can be stored in the freezer for up to ten months. You can freeze them cooked or freeze them raw. To ensure that nothing goes wrong when freezing the beans, it is advisable to observe the following points:

Freeze green beans

With our step-by-step instructions, nothing can go wrong when freezing. So you can enjoy bean dishes such as meat sausage and bean pot all year round. In addition, you can freeze not only the green beans but also other garden beans, such as wax beans or green beans in this way. You can then use the frozen supplies to prepare delicious bean dishes at any time.

Wash and prepare beans

Follow this step-by-step guide to preparing the beans.

  • You should wash the beans before you freeze them to remove dirt.
  • Now cut off the ends of the beans with kitchen scissors – about half a centimeter.
  • To be able to blanch the beans right away, you need a pot with boiling water and salt.
  • Set a bowl of cold water with ice cubes next to the saucepan to chill the beans.

Blanch and cool the beans

Blanching means that you first cook the beans very briefly in boiling water and then chill them in ice-cold water. Beans, kohlrabi, or carrots are blanched for 3-5 minutes, and cabbage is blanched a little longer. Place the beans in the pot of boiling water so that all of the beans are completely covered with water. Then let the beans cook for only about 3 to 5 minutes and then drain them. Then, by immediately adding the beans to the bowl of ice-cold water, you’ll preserve their vitamins and colors. Also, note our tips for freezing asparagus.

Drying the beans is very important. It is best to dry the beans as much as possible. This is because if there is still too much liquid, they will freeze together, making it more difficult to remove them individually from the freezer bag later. Tea towels are best for drying the beans. Dab the beans and wrap them in the tea towel. If you have a lot of time, it is best to let the beans dry and spread them out on the tea towel.

Freeze raw beans

To freeze the beans, it is best to place them in a reusable zip lock bag or in a plastic container. Now put them in the freezer. The beans can then be stored in the freezer for eight to ten months.

Freeze cooked beans

If you haven’t just blanched your beans, but already cooked them, you can also freeze them. Place the finished bean dish in a freezer container and follow our food freezing tips and guide. Then you can conjure up your bean dish on the table again later if necessary.

More on freezing

Freezing allows you to make food last longer. Freezing leftover fresh bread or rolls is a great way to keep food from going to waste. If you want to preserve foods such as meat, mushrooms, zucchini, and kitchen herbs such as wild garlic, you can simply freeze them raw. However, other vegetables, such as cauliflower, peas, spinach, beans, carrots, and chanterelles, must be blanched beforehand. Check out our tips on freezing mushrooms for more details. You can also find instructions on how to freeze meat in our articles.

Simply store eggs and preserve eggs. Tips and tricks for eggs and information on how long eggs can be kept. This is how you store eggs properly so that they can be kept for a long time.

Many people like to eat eggs. Be it on bread or in a salad or just in between. But mostly eggs are left over and you don’t want them to spoil. After all, spoiled eggs can cause unsightly diseases. In order to enjoy fresh and tasty eggs, one must store the eggs properly and preserve the eggs.

Things to know about eggs

The color of the eggs has nothing to do with the color of the feathers, as is often assumed. However, there is another feature on the hen’s head that can be used to determine what color the eggs will be. On the hen’s head, a flap of skin sticks out between the eye and the beak, which is either brown or light-colored. The egg you laid will be the same color.

Shelf life of eggs

You should never wash raw eggs because it destroys the protective layer of the egg and the eggs don’t last as long. In addition, without a protective layer, salmonella can spread on the egg. Eggs have to mature to really taste good. The egg tastes best from the fourth day after laying. Very young eggs are called “greasy”. Nevertheless, you should note the best-before date. The best before date (BBD) of eggs is stated on the label of the packaging. Here are 5 tips to keep food fresher for longer.

If the eggs are still good shortly after the expiry date, you can still eat them when they are heated to at least 70 degrees. Eggs cannot be sold after 21 days, but they can be kept for about 28 days after laying. If you plan on storing boiled eggs, don’t put them off. Although quenching with cold water stops the cooking process, the eggshell becomes porous and germs can penetrate more easily. Therefore, you should not put off eggs that you want to store longer. Doesn’t it always have to be eggs? There are also foods and recipes as egg substitutes.

Preserve eggs in the fridge

Eggs are protected by a yolk membrane that prevents germs from entering. The protection of the membrane depends on the temperature. The fewest germs develop at a temperature of 4-6 degrees, which is why storing eggs at 4-6 degrees is recommended. From 20 degrees, the membrane lets bacteria through, which means that eggs definitely need to be refrigerated if they have been exposed to such temperatures. They should be cooled to a maximum of 7 degrees. They can then be stored in the refrigerator for four weeks. Eggs don’t belong in the fridge near smelly foods like cheese. Here’s how to get rid of musty odors in the smelly fridge.

In the refrigerator, they do not belong in the refrigerator door. With eggs, it is very important that the temperature remains consistently cool and that the cold chain is not broken. The constant opening and closing of the refrigerator door damage the eggs as it causes temperature fluctuations. Eggs are best stored in their carton inside the refrigerator. Take a look at our instructions for defrosting and cleaning the refrigerator.

Egg dishes and their shelf life

Extreme temperature fluctuations impair the self-protection of the egg. This reduces the quality and the egg ages faster. You should eat egg dishes such as mayonnaise, pudding, or sauces on the same day or store them tightly closed in the refrigerator at a maximum of 7 degrees for a maximum of one day. If the best-before date has passed, then you should no longer eat the eggs raw. You should heat them to at least 70 degrees and then only use them for baking and cooking. Also, note our tips and instructions on how to cook eggs properly.

There are dishes in which raw eggs must be used. For this, you should only use very fresh eggs and consume these dishes on the same day. You may no longer consume egg dishes once the cold chain has been broken. You should also be careful when blowing out Easter eggs. Sensitive people whose immune system is not very good, such as the elderly and small children, should only eat well-cooked eggs and egg dishes. Here you will find tips for blowing out eggs and dyeing Easter eggs.