Tag

recipe

Browsing

With the Frappuccino, the American coffee house Starbucks has succeeded in creating a real cult drink. We’ll show you that you don’t necessarily have to go to one of the branches to enjoy iced coffee, you can easily prepare it yourself.

Frappuccino – what is that?

A frappuccino is an iced coffee variation that consists of the basic ingredients espresso, milk, cream and ice cubes. The taste of the Frappuccino can be changed with different additions such as caramel or chocolate sauce.

The term is a proprietary creation of the American coffee house Starbucks and is made up of the words frappé and cappuccino. Other coffee houses sell the same mixed drink as a frappé. The original frappé is actually a Greek national drink made from instant coffee and ice cubes. Starbucks has been selling the Frappuccino in a variety of flavors since 1995. The smallest variant costs a little more than four euros.

How do you make a frappuccino?

You don’t have to go to any Starbucks to enjoy a Frappuccino. You can get all the ingredients for this in the supermarket. It only takes about five minutes to prepare. Of course also as a vegan version.

Ingredients needed for two glasses (about 0.4 l):
About 20 ice cubes
A double espresso
150ml milk (as a vegan alternative, oat milk is the best option)
A tablespoon of unsweetened cocoa powder
Approx. 100 ml whipped cream for the topping (alternative: “plant-based whipped cream”)
Optional: chocolate, caramel or vanilla syrup

Step 1: Prepare espresso

Whether with a fully automatic or an espresso machine, that’s up to you. To start, you’ll need a double espresso, ideally made from a strong bean. Then let it cool down for about three minutes. If you do not have a portafilter, strong filter coffee, e.g. from the espresso maker, will also work.

Step 2: Whip the cream

You need about 100 ml of cream for two glasses of Frappuccino. Pour the liquid cream into a tall container and whip until stiff with a hand mixer. Alternatively, you can of course also use spray cream and dose as you wish. By the way: There is now also vegan cream for whipping, with which the whole thing works just as well. These versions are mostly based on soy, oats or coconut.

Step 3: Mix espresso and milk

Put the cooled espresso with the milk or milk alternative in a blender and mix both ingredients. If you don’t have a mixer handy, you can use a whisk or spoon.

Step 4: Add ice cubes

Add the ice cubes to the blender and blend again. The ice cubes are processed into crushed ice, i.e. very fine ice cubes, by the scissors of the mixer. You can of course also buy crushed ice directly if you don’t have a mixer. You can usually find crushed ice in the frozen section of the supermarket.

Step 5: Pour into the glass

Prepare two glasses, each holding at least 0.4 l. Now carefully pour in the mixture.

Step 6: Topping

After filling the glass, use a spoon to spoon the whipped cream on top. You can pimp up your Frappuccino with different toppings. For example, with syrup or for even more refinement, fruit, small biscuits or chocolate sprinkles are suitable.

How many calories does a Frappuccino have?

The sweet drink sounds like a real calorie bomb. However, since the frappuccino consists almost half of ice cube water, the number of calories is still within limits. 100 ml contains about 62 kcal. With a drink of 400 ml you consume 248 kcal. For comparison: A black coffee contains zero calories, a cappuccino with around 180 ml and whole milk around 82 kcal.

The latte macchiato has been an absolute favorite drink for years. It has a mild taste and consists largely of milk. The accompanying espresso provides the necessary coffee nuance and a fine aroma. In the following post we show the perfect preparation method.

What is a latte macchiato?

Along with cappuccino, latte macchiato is one of the most popular coffee specialties worldwide. The beverage originally came from Italy. Here it was traditionally made for children and young people because it has a low coffee and caffeine content. The individual layers of the drink consist of warm milk, espresso and milk froth. A typical latte macchiato with whole milk weighs in at almost 130 calories and 25-30 mg of caffeine.

Origin and history of “spotted milk”

Unfortunately, it is not known when and by whom latte macchiato was invented. However, it has its origins in Italy. In contrast to conventional coffees, this variation should have the lowest possible caffeine content of 25-30 mg caffeine. A typical 200 ml cup of filter coffee has 64-96 mg of caffeine in comparison. The aim was to gradually introduce children and young people to the taste of coffee without giving them an unhealthy amount of caffeine for their age. Incidentally, latte macchiato means “spotted milk”, which is an allusion to its composition. This consists of three superimposed layers. Warm milk is in the lower third, espresso in the middle and milk froth in the upper part.

Difference to cappuccino

Latte macchiato and cappuccino have the same ingredients: espresso and milk (alternative). The difference lies in the preparation. While the cappuccino only contains milk froth, the milk separates from the latte macchiato.

How do you prepare a latte macchiato?

The original Italian recipe for a latte macchiato is quite simple and consists of hot milk and espresso. The preparation looks very uncomplicated: the coffee is quickly poured over the milk. The classic three layers, as we know it in this country, are not used with this method.

To enjoy a latte macchiato with layers, the preparation is a little more difficult than the basic Italian recipe. For the perfect enjoyment, it is recommended to follow the following three steps.

Ingredients needed for a latte macchiato:

An espresso
200 ml milk (alternative)

Step 1:

Froth approx. 200 ml of milk to create a creamy and firm milk froth. This should be firmer than a cappuccino, so froth the milk or milk alternative a little longer.

Step 2:

Slowly pour the frothed milk into a tall, narrow glass. Set the glass aside to allow the foam and milk to separate.

Step 3:

Carefully pour 25-30ml of espresso into the glass. The espresso can easily be poured into the milk using a small jug in order to achieve an optimal layer formation.
Good to know: With an espresso maker you do not prepare espresso, but a strong coffee. This can still be used for the preparation.
When pouring the espresso, remember to pour it slowly in the middle or on the side of the glass. As a result, the coffee should separate the milk from the milk foam and be placed exactly in the middle between the two components. This is how the well-known three layers of latte macchiato are created: milk below, espresso in the middle and milk foam on top.

Why do the three layers mix?

If the layers mix with each other, this can have two reasons:
There is a possibility that the milk has not been properly frothed and the froth lacks firmness.
On the other hand, pouring the espresso too quickly or imprecisely can lead to the milk and coffee being mixed together.

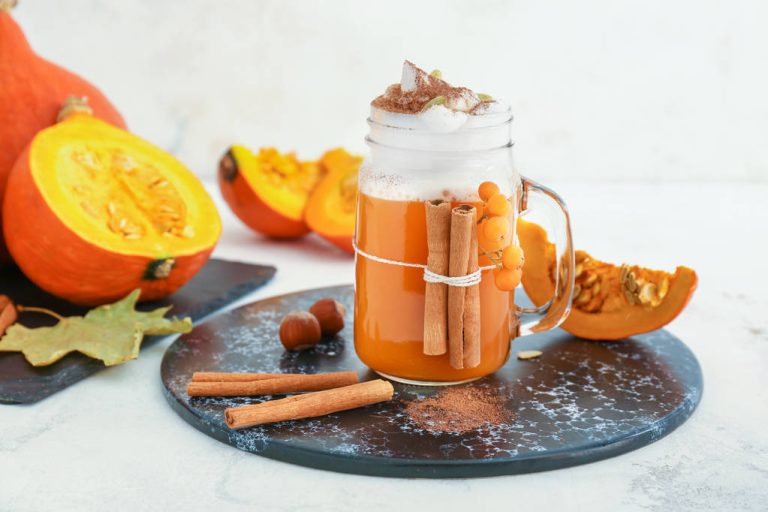
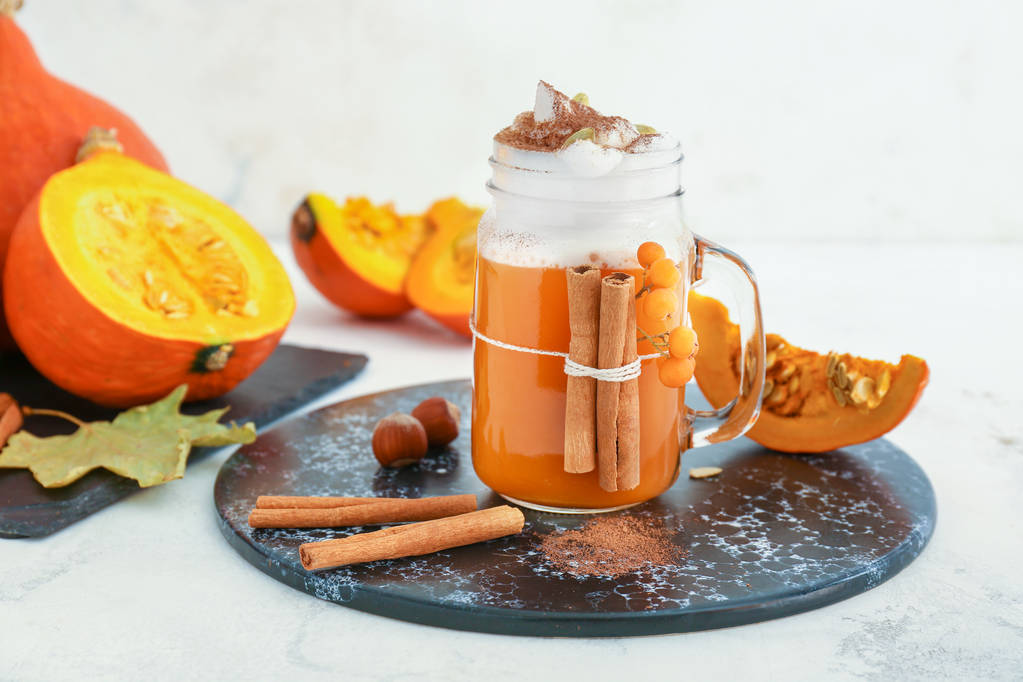
Cozy afternoons can be perfectly enjoyed with a Pumpkin Spice Latte. We explain why pumpkin coffee is so popular, where it comes from and how you can easily make it yourself.

What is a Pumpkin Spice Latte?

A Pumpkin Spice Latte is a coffee variation that is essentially made with espresso or strong coffee, pumpkin puree, spices and milk froth. Depending on the season, mainly autumnal spices such as cinnamon or cloves are used.

The drink was made famous by the American coffee chain Starbucks, which offers the drink in its branches every year around Halloween. The first Pumpkin Spice Latte went over the counter in January 2003. At that time, the company tried to extend the Christmas season with the drink by launching a hot drink with Christmas spices.

Since the drink was very well received by customers, but the pumpkin season generally begins in autumn, the decision was subsequently made to sell the pumpkin coffee in the branches as early as September. Since then, the Pumpkin Spice Latte has developed into a real cult drink that is so popular that Starbucks was already offering the drink in selected branches in mid-August.

This is how the Pumpkin Spice Latte works

If you are looking for a pumpkin and coffee recipe to take home, you’ve come to the right place. The recipe is quite simple, but requires some preparation if you want to make all the ingredients yourself.

List of ingredients for about 0.4 l Pumpkin Spice Latte:

1-2 tbsp fine pumpkin puree
1 tsp Pumpkin Spice spice mix
2 tbsp agave syrup
Milk/milk alternative for milk froth
espresso
Options:
Coffee syrup for refining or sweetening, such as vanilla or caramel

Step 1: Prepare the pumpkin puree

In the USA you can get the ready-made pumpkin puree in almost every supermarket. In Germany you can occasionally find the puree at the weekly market or in some delicatessens. You can also easily prepare pumpkin puree yourself in just three steps:
cut pumpkin
Cut a Hokkaido pumpkin into four equal parts and remove the seeds.
Cook Pumpkin
Put the pieces, including the peel, in boiling water and leave them there for around 15 to 20 minutes.
puree
Using a hand blender, mash the soft pumpkin pieces into a puree.
Storage Tip: You’ll probably need a lot less puree than you get from a whole squash. But that doesn’t matter. If you pack the puree airtight, it will keep in the fridge for about a week for further processing. Of course, you can also plan ahead and store the finished puree in the freezer.

Step 2: Preparation of the spice mixture

The listed ingredients for our pumpkin recipe can be found in almost every supermarket or easily ordered online. You can also make the spice mixture yourself and create your own individual taste. Depending on your preference, you can change the proportion accordingly. To make it, simply mix the following ground ingredients together:
3 tbsp cinnamon
2 tsp ginger
2 tsp nutmeg
1.5 tsp allspice
1 tsp cloves

Step 3: Prepare Pumpkin Spice Latte

Now the ingredients for the pumpkin coffee can finally be mixed together:
Pour pumpkin puree into a glass
Prepare a large glass and fill it with 1-2 tablespoons of fine pumpkin puree. To get it particularly fine, you can scrape it through a sieve into the glass again.
mix ingredients
Take a small bowl and mix 1 teaspoon of the spice mixture with the 2 tablespoons of agave syrup. Then spread the mixture over the pumpkin puree.
Add milk froth
In the next step you need milk foam. You can open it yourself or get it quickly and easily from a fully automatic coffee machine. Then add the milk froth to the glass.
Add espresso
Now it is important to make a particularly strong espresso. This is only possible with the help of a fully automatic machine or portafilter. A strong coffee can be made with an espresso maker, for example. Now pour the espresso into the glass very slowly so that the individual layers do not mix with each other. This creates a great visual effect when serving.
Stir
The Pumpkin Spice Latte is ready and ready to be enjoyed. Just before drinking, you should stir the drink well with a long-handled spoon so that all the ingredients mix together and the typical pumpkin taste can unfold.
Optional: Add syrup and cream
If you would like to refine your pumpkin coffee, you can optionally add cream to the PSL as a topping or add coffee syrup instead of agave syrup.

Vegan Pumpkin Coffee

For the vegan variant of the Pumpkin Spice Latte, you can also easily become a milk alternative. Soy milk or oat milk are best suited for frothing. Rice, coconut, almond or spelled milk are less suitable. After all, the milk froth is an essential part of the pumpkin latte. But in the end it’s a matter of taste.

Pumpkin Spice Latte without coffee – the version for children

For people who don’t want to drink coffee, malt coffee is an alternative preparation option. It’s actually not real coffee, since it’s made from grain, but the taste is similar and the pumpkin malt coffee is also very tasty. So that it doesn’t get too sweet, you can also do without the agave syrup and use honey instead.

How many calories does a Pumpkin Spice Latte have?

You may have guessed it: Starbucks finished PSL is anything but a diet drink. A 12 ounce Tall cup contains approximately 300 calories. The calories of the Pumpkin Spice Latte are divided into about 10 g of fat and 40 g of sugar, which corresponds to about 10 sugar cubes. This increases the daily energy requirement. If you prepare the coffee with pumpkin puree at home, you can of course control the addition of sugar and fat. This delicious and homemade alternative is not quite as impressive. A glass (250 ml) with fine puree and 1.5% milk has approx. 135 Kcal.

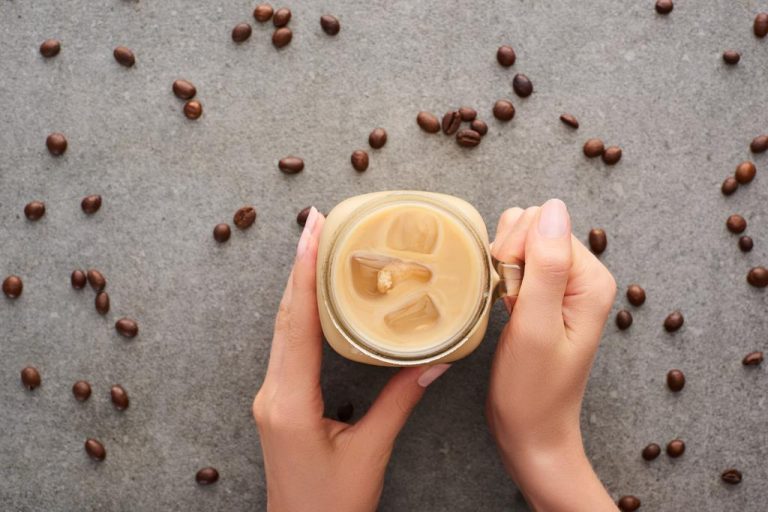
Do you have a great thirst for coffee in summer, but would you rather cool off than a classic coffee? Then try a classic iced coffee. You can find the recipe for it here – so you don’t miss out on the delicious coffee taste even on hot days. Don’t feel like the classic? There are also numerous other iced coffee variations.

What is an iced coffee?

One thing right away: “The” iced coffee doesn’t exist. Classically, it is prepared with vanilla ice cream, cream and coffee. However, there are no limits to creativity when preparing an iced coffee. Whether frappé, milkshake, iced coffee only with ice cubes, with almond milk, caramel, brittle, cream or other extras – everything is possible.

How do you make a classic iced coffee?

Admittedly, the classic iced coffee is not exactly low in calories. But for the taste experience, it is definitely worth sinning. How to prepare the classic:

The ingredients (1 portion):

50 grams cream (possibly 1 packet vanilla sugar)
1-2 scoops of vanilla ice cream
200 ml cooled coffee (preferably stronger)

Step 1: Make coffee

Make yourself some coffee. It doesn’t matter whether you use a hand filter, Mokkamaster or a normal filter machine. Just the way you like it best. Then let it cool down well. It is best to bring the coffee to room temperature before you put it in the freezer for about an hour. If you have more time, put it in the fridge for several hours.

Step 2: Whip the cream

When the coffee has cooled, whip the cream until stiff. If you like it sweet, add a packet of vanilla sugar.

Step 3: Mix ingredients

Put the vanilla ice cream in a glass. Then pour the cold coffee over the balls. Finally, top the drink with the whipped cream. If you want, you can top them with pieces of chocolate or whatever you feel like.

The most famous variants of iced coffee

Frappé: The frappé is prepared with instant coffee and chilled milk (and/or cream) and ice cubes. In Greece in particular, it is considered the “national drink”.
Frappuccino: A frappuccino is similar to a frappé, but consists of a classic brewed espresso, milk, cream and mostly shredded ice cubes. The term is a proprietary creation of the American coffee house Starbucks and is made up of the words frappé and cappuccino.
Iced Coffee: Classically, an Iced Coffee consists only of ice-cold coffee with ice cubes. In some cases milk is added.
Affogato: With an affogato, an espresso and a scoop of vanilla ice cream meet. The creation comes from Italy, where it is often served as a dessert.
Cold brew: In contrast to conventional coffee, when preparing a cold brew, coffee powder is infused with cold water. It is then left to stand for 12 to 24 hours before the brew is filtered. As a result, the coffee has four times the caffeine content of regular coffee. It is served with ice cubes and is usually drunk black or with a dash of milk.

Colorful drinks with wobbly balls: bubble tea is back in fashion. We’ll show you here why it’s better to just make it yourself than to buy it.

Already ten years ago it was the trend drink par excellence in Germany: bubble tea. Freely translated, this means ball or pearl tea. The liquid refreshment comes from Asia, more precisely from Taiwan. Bubble tea has been there for more than 25 years. The special thing about it: in addition to tea, milk and syrup, small balls make the bubble tea what it is.

The classic version of the bubbles consists of tapioca pearls. These are made from maple syrup mixed with tapioca flour and cooked. The bubbles turn black because the syrup caramelizes.

Tapioca flour consists of ground cassava roots, which are often referred to as “tropical potatoes”. The tapioca flour is relatively neutral, the flavor comes from mixing with the syrup. The consistency of the pearls resembles that of jello.

There are now other options on the market: on the one hand, there are the “Popping Bobas”. They are filled with fruit juice and will burst if you bite into them. There are also “jellies” made from coconut flesh and fruit juice.

Why you should make bubble tea yourself

As tasty and trendy as the soft drink may be, there are good reasons not to buy commercial bubble tea. In addition to very obvious points such as the plastic packaging, there are also many hidden ingredients in Bubble Tea that are not necessarily obvious at first glance.

If you still feel like having the drink from time to time, you can make it yourself with just a few ingredients. This is how you decide what goes into the tea and how you serve it.

Plastic cup and straw: the packaging of bubble tea

Bubble tea shops usually offer little space and are designed according to the to-go principle. This means that the drink is filled into plastic cups and customers take it with them. But that’s not all: the lid of the cup is made of a thin plastic film into which a plastic straw is inserted.

Not exactly timely when you consider that an EU-wide ban on single-use plastic, which also affects plastic straws, is to come into force in July 2021. Because if you use plastic, you harm both the environment and your health. Because plastic contains many chemicals that can get into your body, according to the Bund für Umwelt und Naturschutz Deutschland (BUND). The additives are not firmly embedded in the plastic and are therefore particularly easy to remove from the cup and straw.

Packaging waste in particular poses a problem, as it is thrown away after it has been used once. It accounts for around a third of the plastic waste we produce; according to BUND, only a little is recycled.

Sugar content as high as cola

Tea and milk – actually, the main ingredients of bubble tea seem to be quite healthy. In fact, bubble tea contains about the same amount of sugar and calories as cola: a 500-milliliter cup of the trend drink contains between 300 and 500 calories, depending on the variety; the sugar content is up to 60 grams.

For comparison: The World Health Organization (WHO) recommends a maximum of 50 grams of sugar per day for adults. With a cup of bubble tea, this need is already covered, if not exceeded. For children and adolescents, the recommended intake of sugar is even lower.

As a consumer, you quickly underestimate the sugar content of bubble tea: the drinks are enriched with ice cubes, which weaken the sweet taste. If you make the bubble tea yourself, you can better control the sugar content.

Ingredients of Bubble Tea

From colorants and flavorings to acidifiers and preservatives – according to Stiftung Warentest, bubble tea contains numerous artificial ingredients. The survey was released during the first wave of bubble tea trends in 2012. However, the results are still usable, because the ingredients have not changed much.

There are also shops that use tea powder instead of fresh tea to prepare bubble tea. This creates a variety of tastes. The downside of the coin: the powders contain more chemical additives than natural teas. In the homemade bubble tea you can rely on natural ingredients.

Caffeine content in bubble tea

Black and green teas contain theine – a special name for the stimulant caffeine. Since green or black tea forms the basis for many bubble teas, the soft drinks also contain large amounts of caffeine. The stimulating effect is usually similar to that of cola, but is usually not marked when bubble tea is sold.

The problem with this is that children and young people in particular drink bubble tea. And caffeinated drinks are not suitable for them, according to the Association for Independent Health Advice (UGB).

Danger of choking from bubbles

As attractive as the bubbles make the tea, they can be life-threatening. Because the beads with a diameter of eight to eleven millimeters are very slippery and sometimes difficult to chew on.

The danger is increased by the straws: They are extra wide so that the balls can fit through. Due to the suction, the beads can get directly into the trachea and lungs. The situation in children is so alarming that the professional association of paediatricians in Germany advocated a warning on the cups with bubble tea in 2012. Adults can also choke on the bubbles.

If you make bubble tea yourself and want to serve it to children, make sure to use low-caffeine tea and do not offer it to young children.

Make bubble tea yourself

Although the above points make bubble tea questionable: you don’t have to do without the soft drink. With our simple recipe you can make it yourself and thus pay attention to natural ingredients and a low sugar content – you can do without the plastic cup and straw.

For all ingredients, make sure to use products with organic and fair trade seals – especially with tea, which you use as the basis for the drink. We particularly recommend the Naturland, Bioland and Demeter seals, as the certified products have to meet very strict environmental protection criteria. You can use black or green tea, but any other variety of your choice also tastes good as bubble tea.

To make the balls you need Tapioca Starch. Regional alternatives are corn starch or potato starch.

Caution: Homemade bubble tea is also unsuitable for small children, as they can choke on the balls.

Ingredients:

60 g tapioca, corn or potato starch
30 ml maple syrup
700 ml tea
300 ml vegetable milk
ice cubes
Honey, agave syrup or maple syrup for sweetening

Directions:

First you make the tapioca pearls. Put the starch in a bowl with the maple syrup.
Knead the ingredients into a homogeneous, caramel-colored mass.
Form hazelnut-sized balls from the syrup-starch mixture.
Boil water in a saucepan.
Put the balls in the water and let them cook for 20 minutes. Keep stirring every now and then.
If the bubbles have a jelly-like consistency, you can pour them into a colander. Then rinse the balls thoroughly with cold water. Tip: If you don’t use your bubbles straight away, you should store them in syrup so that they don’t stick together.
brew the tea It can be a little stronger, as the ice cubes will dilute it.
Divide the tea, bubbles, ice and milk into glasses. To sweeten, you can add honey, agave nectar, or maple syrup to taste.

Bubble tea sometimes fruity

To serve the bubble tea, you can put tall spoons or straws made of glass or metal into the glasses.

If you want to give your drink a fruity note, you can reduce the amount of tea and add a fresh juice of your choice to the bubble tea instead.
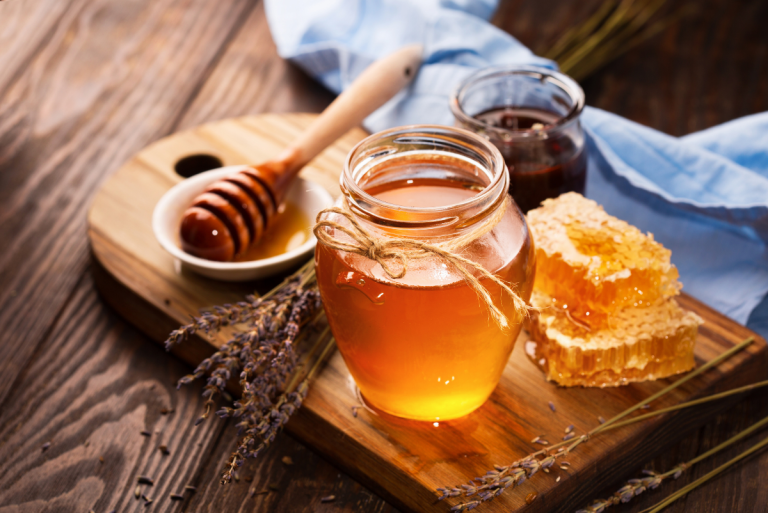
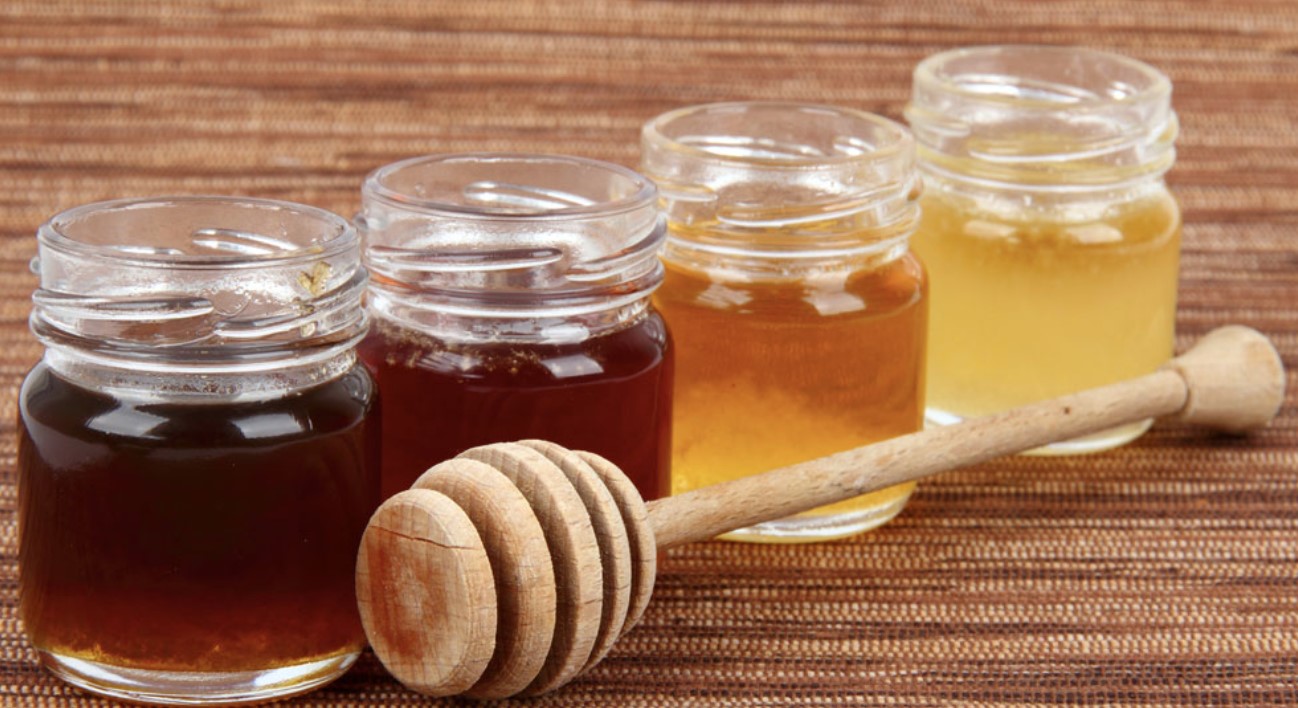
Sage honey is an effective home remedy for cold and flu symptoms. Here you can find out how sage honey works and how you can make it yourself.

A sore throat, cough and hoarseness are among the most common symptoms of a cold or flu. Sage honey can provide quick relief and aid in healing. It is also a natural alternative to conventional cough syrups, which often contain questionable ingredients and should be used with caution, especially in children. You can find out more about this in our article cough syrup for children: risks, home remedies and what you should consider.

As the name suggests, sage honey consists of only two ingredients: sage and honey.

Sage is a well-known medicinal herb that has anti-inflammatory, analgesic and antibacterial properties. That is why it is a popular home remedy for sore throats and coughs.
Honey also has anti-inflammatory and antibacterial properties. It is therefore well suited as a carrier for the sage.
Important: If possible, use regional organic honey from Germany for the sage honey. This way you can be sure that it was not imported via CO2-intensive transport routes. In another Utopia article you will find out what you should consider when buying honey.

Make sage honey yourself: Here’s how

Ingredients:

20leaves of fresh sage
500 ghoney
optional: lemon juice

Directions:

Wash the sage leaves thoroughly and then drain them. Then cut them into small pieces.
Place the honey in a large sterilized jar. The glass should be able to hold at least 700 grams.
Stir in the chopped sage. Tip: If the honey is very thick and stirring is too difficult, you can dilute it with a little lemon juice.
Place the sage honey in a dark place and let it steep for at least four weeks. After this time he is finished.

Sage honey: tips and hints

The earlier you take the sage honey, the better it can work. At the first scratchy throat, start applying the sage honey. Let it slowly melt on your tongue.

Since sage contains the neurotoxin thujone, you should consider the following points when using sage honey:

Overdoses of thujone can cause symptoms of poisoning such as tachycardia, dizziness and cramps. Since the thujone content of sage honey is difficult to determine, to be on the safe side, you should consume a maximum of five teaspoons of sage honey a day.
New studies have shown that sage is suitable for long-term use without hesitation. However, you should seek medical help if your symptoms have not improved within three days.
Children younger than one year should not eat honey. As a natural product, honey can contain bacteria that can cause life-threatening bacterial infections in babies.
Pregnant and breastfeeding women should also avoid taking sage honey.

Who of you has never tried a traditional English breakfast?

Bacon, scrambled eggs, pork sausages, beans, toast, jam and much more are part of the “Full English Breakfast”, the traditional breakfast that the British love to eat in the morning. And “Full” really is. In contrast to the small, often quick bites that we eat in Germany in the morning, the English breakfast always counts as a complete meal.

When it comes to this hearty highlight of English cuisine, non-British people usually have different opinions: either you love it or you find it far too sumptuous and take some getting used to.

Especially on cold winter days, the English breakfast offers a really energetic start to the day.

Why is the English breakfast so rich?

The reasons for such a hearty breakfast have a historical background. In the past, such a high-calorie start was very good preparation for a long day’s work in the factory or in the field. The rich breakfast provided the necessary energy for this. Nowadays, so many reserves of strength are no longer absolutely necessary, since many jobs are less physically demanding. That’s why there are also lighter breakfast options in England for everyone who prefers to stay in shape and start the day carefree.

How do you prepare an English breakfast?

As previously mentioned, the Full English Breakfast consists of both sweet and savory foods. Although there are now various healthier breakfast options, this traditional morning meal remains popular and is a nice ritual for the whole family, especially at the weekend.

Now let’s take a look at how to prepare a traditional Full English Breakfast and what ingredients you need to make it.

Ingredients (2 servings)

– 6 sausages
– 4 slices of smoked bacon
– 2 medium-sized eggs
– ½ can of beans in tomato sauce (baked beans)
– 2 medium tomatoes cut in half
– 12 cleaned mushrooms
– 4 slices of toast
– some butter
– some jam
– 8 oranges
– Coffee or Ceylon tea

preparation

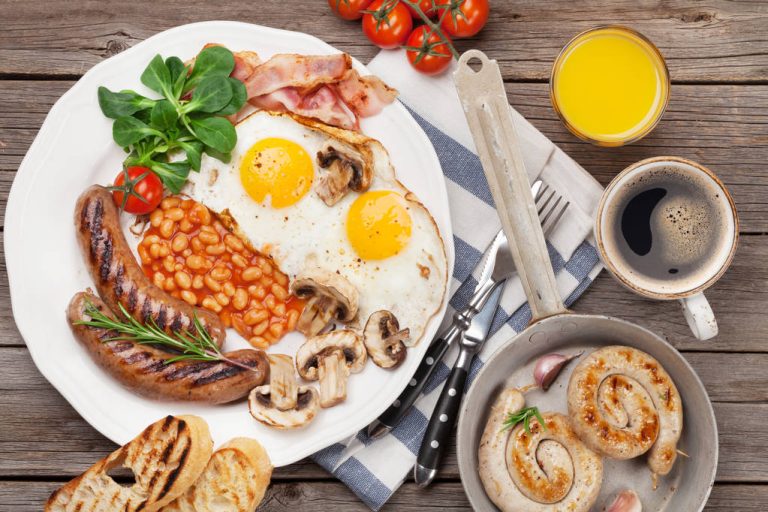
Fry the sausages in the pan on all sides, do the same with the bacon until it is crispy. Keep everything warm in the preheated oven (to 80°C). Warm the beans over medium heat for about 5 minutes. Now fry the tomatoes and mushrooms in the same oil as the sausages and bacon and keep them warm in the oven as well. Toast the bread slices until golden, cut each in half diagonally and brush with butter and jam if desired. Now fry the eggs in another pan: depending on your taste, you can either prepare fried or scrambled eggs.
Arrange the plates as shown in the picture above.

Coffee or tea: what do you drink with an English breakfast?

At a full English breakfast, Brits usually drink a freshly squeezed orange juice and a cup of tea. However, over the years, traditional English tea has been increasingly replaced by breakfast coffee, which is best drunk thin in a large cup.

Bring freshness to your grill: grilled watermelon tastes wonderfully fruity and is refreshing on hot summer days. You can find out how to grill watermelon here.

Watermelon is the quintessential summer fruit and grilling is the quintessential summer activity. So why not combine these two things? Grilled watermelon is refreshing and super easy to make.

Grilling watermelon: You need these ingredients

What you need to be able to grill watermelon:

1 watermelon
3 tbsp oil, for example olive oil
a pinch of salt
We recommend that you use organic ingredients. In this way you can be sure that the food is free of chemical-synthetic pesticides, which supports species protection and soil protection. When shopping, look out for the organic seals from Demeter, Naturland and Bioland – these each follow stricter criteria than the EU organic seal.

Grilling a watermelon: It’s that easy

Slice the watermelon. Note our tricks for slicing melon. If you want, you can cut off the peel right away. You can also leave them on and only remove them when you eat. Don’t throw away the rind: This is how you can use the rind of the watermelon.
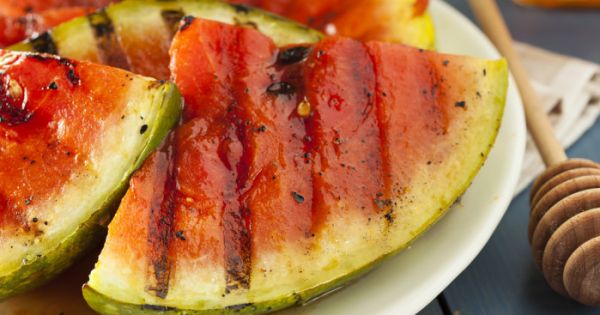
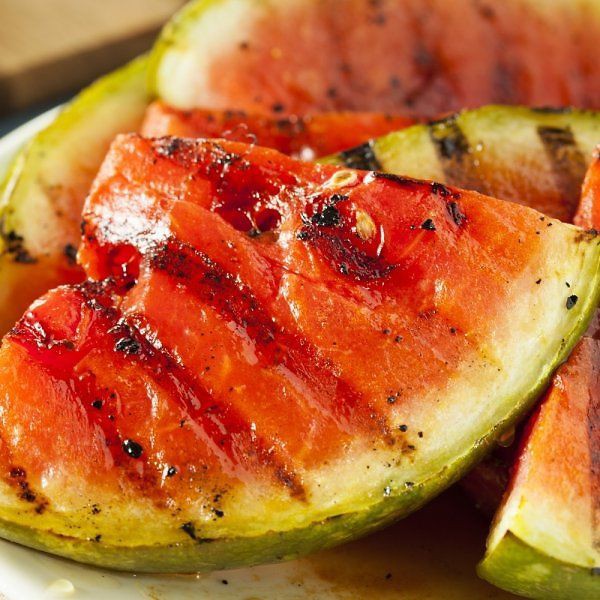
Place the slices on the grill for about 3 to 4 minutes per side. Don’t leave the melon on the grill for too long or it will become mushy. You can place the watermelon directly on the grill or use a grill container. You can find out how to do this sustainably in our article on grilling without aluminum foil.
Remove the watermelon from the grill, drizzle the grilled slices with some oil and sprinkle with a little salt.

Tips for refining your grilled watermelon:

If you like it sweeter, you can rub or sprinkle sugar on both sides of the watermelon before grilling. The sugar caramelizes with the heat.
If you want, you can also crumble feta (there is also vegan feta) or herder’s cheese and sprinkle it over the watermelon after grilling.
Fresh lemon or lime juice is also recommended. Drizzle a few drops over the grilled watermelon.
Chop up herbs like basil or lemon balm and serve with the melon.
Chopped nuts or seeds such as almonds or pistachios, sesame or sunflower seeds give the fruit a bite and a nutty note.
If you cut the grilled watermelon into smaller pieces and add the above ingredients and mix everything together, you will have a delicious watermelon salad.
If you serve the watermelon with ice after grilling, such as homemade vanilla ice cream, you get a summery dessert.
Test a savory version and season the watermelon with salt and pepper after grilling.

Semolina dumplings should not fall apart during cooking and should not form a hard lump on the inside. Perfect semolina dumplings should be nice and fluffy. Semolina dumplings are very easy if you follow a few tips.

Ingredients

Semolina dumplings can be made with fat (butter) or without. There is not much difference in taste. Anyone who pays attention to their slim figure can certainly do without butter. Basically, you take about 60 g of semolina for one egg, a small piece of soft butter, salt, and nutmeg. Also read the sure-fire, fat-free recipe on Cooking & Kitchen Original Semolina Dumpling Soup. Simply stir the ingredients together with a spoon. The dough should not be too thin, but not too firm either. Let the mass swell and infuse for a while.

Preparation

Set up a wide pot with 1 liter of water. Lightly salt the water. When the water boils, the dough has already set and become firmer. For boiling, the water should only boil slightly. Form dumplings with two small spoons. Always push the mass with one spoon onto the other. Slide slowly into the water.

If the dumplings stick to the bottom, nudge them lightly with a spoon to loosen them. As soon as the semolina dumplings float to the top, take a close look at the water. Then free the water from the floating gravel. Add the vegetable stock cube and bring it to a boil.

Put the dumplings back into the soup and let them simmer. At least 20 minutes or until the dumplings are as firm as you want them to be. There are also people who only like dumplings if there is still a core inside. As soon as you have made the semolina dumplings a few times, you no longer have to strain the water or you know exactly how long the dumplings have to steep.

Different types of semolina

Every semolina behaves differently and if the semolina dumplings don’t get soft even after a long steep, you don’t have to throw the soup away. The dumplings can also be left in the cold soup overnight and they are usually perfect the next day. Some types of semolina taste better in soup (soup cooking), while others are good for sweet and savory main courses (semolina recipes).

Conclusion

Anyone who can prepare fluffy semolina dumplings can also cook any other type of dumpling. Cooking & Kitchen wishes you a lot of fun trying out the recipes (make dumplings yourself). The spinach and sage dumplings come without any meat at all and are prepared on the basis of potato dough.

Brussels sprouts casserole provides vitamins and warms in cold temperatures. The hearty, vegetarian dish brings variety to the winter kitchen.

Brussels sprouts casserole: the ingredients

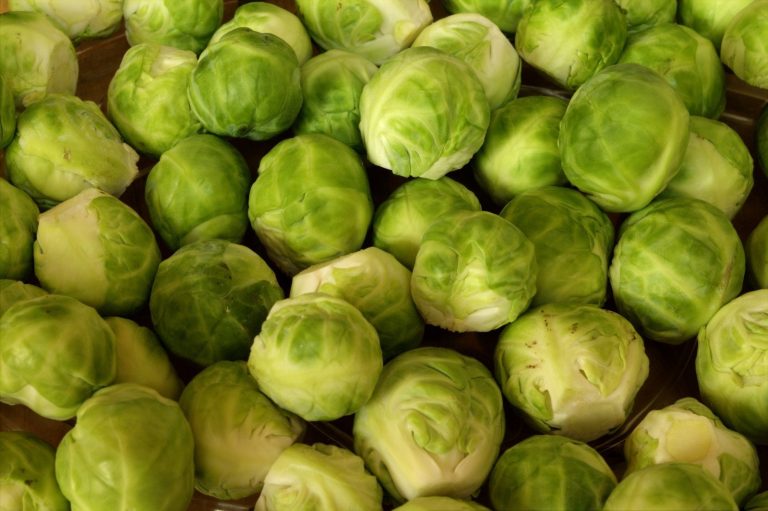
A hearty Brussels sprouts casserole is a particularly flavorful way to prepare the classic winter vegetable. It is best to use fresh Brussels sprouts for this recipe. Frozen cabbage florets taste soggy in the casserole because they lose too much water.

Note: Pay attention to the organic quality of the ingredients, especially animal products. In this way you avoid chemical-synthetic pesticides and support more sustainable agriculture.

For four servings of Brussels sprouts casserole you need the following ingredients:

700 g potatoes (mainly waxy)
400 grams of Brussels sprouts
Salt
Seasoned Salt
pepper
nutmeg
ground cumin
2 eggs or 2 tablespoons soy flour
250 ml cream or oat cream
100 g hard cheese or vegan cheese
Tip: The ground cumin helps you to digest the cabbage better and avoid bloating. If you don’t like cumin, you can easily omit it.

Preparation time: 30 minutes
Cooking time: 15 minutes
Baking time: 30 minutes

Brussels sprouts casserole: the preparation

You should plan about 15 to 20 minutes to prepare the vegetables. The oven does the rest of the cooking.

How to prepare the vegetables for the Brussels sprouts casserole:

Wash and peel the potatoes.
Clean the Brussels sprouts carefully. You can find detailed instructions in our article Cleaning Brussels sprouts.
Cut the potatoes into quarters or eighths, depending on their size.
Boil the potato wedges in salted water for 10 minutes.
Now add the Brussels sprouts and cook the vegetables for another five minutes.
Strain the vegetables and let them evaporate briefly.
How to prepare the Brussels sprouts casserole:

Spread the potato wedges and Brussels sprouts evenly in the casserole dish.
Sprinkle the vegetables with some herb salt, pepper, nutmeg and ground cumin.
Mix the spices with the vegetables.
Whisk the two eggs with the cream or the soy flour with the oat cream and pour the mixture evenly over the Brussels sprouts casserole.
Grate the (vegan) cheese over the casserole.
Bake the Brussels sprouts casserole at 200 degrees Celsius top/bottom heat in the oven for 30 minutes.

Brussels sprouts casserole: tips for preparation

You can prepare the vegetables for the Brussels sprouts casserole very well the day before. If you don’t have much time to cook, cut down on the time by planning ahead.

Fast kitchen by chain cooking:

Serve boiled potatoes and boiled or roasted Brussels sprouts as a side dish with the meal the day before.
Boil a large batch of potatoes and keep the leftovers unpeeled in the fridge for the next day.
Also keep some of the Brussels sprouts covered in the fridge.
The next day, all you have to do for the Brussels sprouts casserole is peel the potatoes, cut them into slices or wedges and mix them with the cooked Brussels sprouts and the spices.
Complete the casserole using the instructions above.
Since the vegetables are fully cooked, the baking time is reduced to 20 to 25 minutes.
In this way, the preparation time for the Brussels sprouts casserole is reduced from 45 minutes to around ten minutes. The Brussels sprouts casserole then cooks alone in the oven and you can use the time gained for other things.

Things to know about Brussels sprouts

Brussels sprouts are a typical winter vegetable from the cabbage family. Harvest time in Germany begins at the end of September. Brussels sprouts are in high season between November and December. Since cabbage can be stored very well, you can buy regional Brussels sprouts until March.

It is best to buy fresh Brussels sprouts in organic quality and from regional suppliers. Organic food tends to contain far less residual pesticides because synthetic pesticides are banned from organic farming. Brussels sprouts from the region also have shorter transport routes – that saves CO2.