Tag

recipe

Browsing

Pizza Marinara is one of the most original pizza recipes. With just a few ingredients, the vegan pizza variant is quick and easy to prepare. We show you how to prepare pizza marinara.

The secret of this pizza lies in its simplicity. Pizza Marinara is the way of preparing one of the simplest pizzas from Naples. This recipe is traditionally prepared in Italian cuisine without cheese and is therefore suitable for vegans.

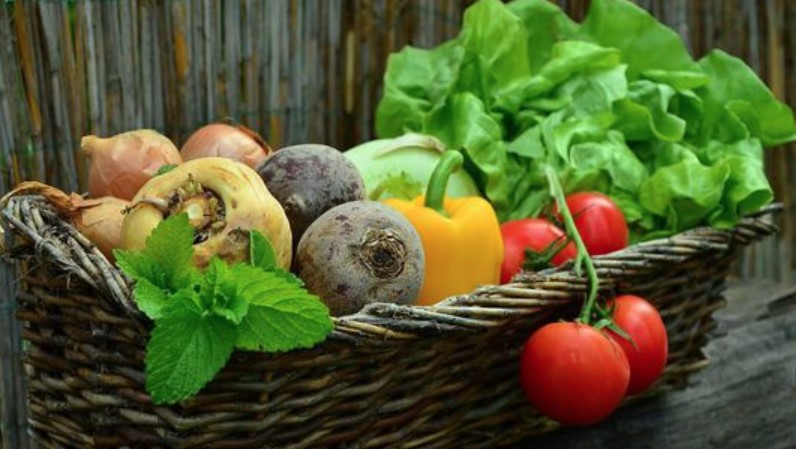
For the preparation, the fresh pizza dough is covered with tomato sauce, olive oil, oregano and garlic. When choosing your ingredients, make sure that they come from organic and regional cultivation.

The pizza tastes even better if you grow your own ingredients. You can easily plant garlic and oregano yourself, and tomatoes are also suitable for the balcony and garden.

Pizza Marinara: How to cook it

For this simple recipe you only need a rolling pin in addition to the ingredients. If you have problems with the dough, then read our article on yeast dough with valuable tips.

Ingredients:

250 g flour
125 ml warm water
0.5 pieces of yeast cubes
1 pinch(s) of salt
1 pinch(s) of sugar
125 ml tomato sauce
3 cloves garlic, chopped
2 pinch(s) fresh oregano, chopped
4 tablespoons olive oil

Directions:

Mix the flour with the warm water, yeast, and some salt and sugar in a large bowl.
Knead the flour mixture until you get an even mass. If necessary, add a little more water or flour if the dough is too wet or too dry.
Cover the dough with a damp kitchen towel and let it rise in a warm place for 60 minutes.
After the dough has risen, dust your work surface with some flour.
Preheat the oven to 200 degrees Celsius top/bottom heat. Preheating the oven is necessary here so that the pizza becomes crispy.
Roll out the dough evenly. Place the dough on your baking sheet without any toppings.
Spread the rolled out yeast dough with the tomato sauce.
Drizzle the pizza with olive oil, then sprinkle the chopped garlic and fresh oregano on top.
Bake the pizza in the oven for 10 minutes.

Tip: Every oven and every yeast dough is slightly different. Therefore the baking time can vary. If necessary, leave your pizza in the oven for another 5 to 10 minutes. It’s done when the edges turn a crispy brown color.

Pizza Marinara: Delicious variants

You can also spice up the pizza marinara with other ingredients. A few ideas for this are

Pizza Mediterranean: with zucchini, aubergine, and basil
Pizza Pesto: with fresh herbs and vegan pesto
Pizza Vegetariana: with corn, peppers, zucchini, and other fresh vegetables
Pizza Funghi: with mushrooms and oregano

Tip: Even with vegan pizza, you don’t have to do without cheese. After baking, sprinkle your pizza with a handful of yeast flakes or some vegan cheese.

With a vegan potato and vegetable stir-fry, there is a delicious dish on the table at any time of the year. Depending on the season, you can add other local vegetables to the potatoes. Here you will find the recipe and inspiration for every season.

This autumnal and wintery potato and vegetable pan is quick to prepare. It does not contain any animal products – instead, legumes provide a portion of vegetable protein. If you don’t have chickpeas on hand, you can also use sweet lupins, kidney beans, kidney beans or lentils.

If possible, make sure to buy the ingredients for the potato and vegetable pan in organic quality. This is particularly important for potatoes, since conventional agriculture relies heavily on toxic chemicals in potato cultivation. By opting for organic ingredients instead, you can support more sustainable agriculture that does not use synthetic chemical pesticides that can harm the environment, animals and people. Seals such as Bioland, Naturland or Demeter offer you orientation when shopping.

Recipe for the potato and vegetable pan

Ingredients:

500 g potatoes
3carrots
250 g Brussels sprouts
3onions
2 clove(s) garlic
2 sprigs of thyme
2 tablespoons frying oil
150g jarred chickpeas
2 tablespoons vegan cream cheese or almond butter
salt and pepper

Directions:

Wash the potatoes and carrots that are as small as possible and rub them thoroughly with a kitchen towel if necessary. Wash the Brussels sprouts as well, removing any dry or brown leaves.
Halve the potatoes, thinly slice the carrots and halve the Brussels sprouts.
Peel the onion and the garlic cloves. Quarter the onions and finely chop the garlic.
Wash the thyme and shake dry. Pluck the leaves from the branch and roughly chop them.
Bring salted water to a boil in a saucepan. Cook the potatoes in it for about ten minutes and then drain them.
Heat the oil in a pan. Sauté the onions and garlic in it until translucent. Then add the remaining vegetables and the pre-cooked potatoes. Fry everything for about five minutes.
Now add the thyme leaves and the drained chickpeas. Sauté everything for another three minutes.
Finally stir in the vegan cream cheese or almond butter and season the potato and vegetable pan with salt and pepper.

This is how you prepare the potato and vegetable pan seasonally and regionally

You can get regional potatoes all year round. Potatoes from local cultivation are available as stock from November to May, and fresh from the field from June to October.

Together with other seasonal vegetables, you can use them to prepare a delicious vegan potato and vegetable pan that is suitable for every season:

Combine the potatoes with asparagus and kohlrabi in spring, for example.
In summer you can use peppers, tomatoes and zucchini for a Mediterranean potato and vegetable pan.
When autumn comes, mushrooms and squash go well with potatoes.
Winter is when root and tuber vegetables like beets, parsnips and parsley root are in season.

Chop suey is also vegan and a delicious classic of Chinese cuisine. We’ll show you how to prepare the dish without any animal products.

The best way to prepare vegan chop suey is in a wok. Alternatively, you can replace this with a large pot. The chop suey sauce gets its spiciness and intense aroma primarily from the thickened soy sauce. Ginger, garlic and the hot paste Sambal Oelek are also used in our recipe.

Since the vegan chop suey consists almost entirely of vegetables, you need the most time for cutting during preparation. So if you don’t have the time, you can prepare the vegetables the day before. The mixing, cooking and seasoning of the ingredients is then relatively quick.

Make sure the vegetables are organic if possible. This is not only better for the environment, but also for you. No harmful chemical-synthetic pesticides are used in organic farming.

For your chop suey you also need vegetable broth. You can prepare these yourself.

Vegan Chop Suey: An easy recipe

Ingredients:

3onions
4 tablespoons sesame oil
2 tbsp tomato paste
2Chicory
2peppers
2carrots
2 clove(s) garlic
200 g green beans
10 ginger
120 mlsoy sauce
400 ml vegetable broth
1 teaspoon Sambal Oelek
3 tablespoons starch
400 gbean sprouts

Directions:

First cut the onions into small pieces. Heat 1 tbsp sesame oil in a wok and fry the onion together with the tomato paste.
Then wash the chicory, cut it into small pieces and fry it in a separate pan with 2 tablespoons of oil.
Now cut the peppers and carrots into small pieces and chop the garlic into fine pieces.
Add the garlic and chicory to the sautéed onions.
Then fry the carrots, peppers and beans in the pan with the remaining sesame oil. Put everything in the wok or large pot.
Mix the cornstarch with some water in a small bowl. Now cut the ginger into small pieces and add it to the chop suey together with the soy sauce, the vegetable stock, the sambal oelek and the cornstarch.
Let the whole thing simmer for a moment and then add the bean sprouts. Chop suey tastes particularly delicious with fried noodles or rice.

This is a particularly good way to make vegan chop suey

If you want to prepare the vegan chop suey with noodles, you can find the typical Asian fried noodles in the supermarket. However, these are often prepared with egg.

You can also vary the ingredients according to the season and regional availability.

For example, you can replace chicory with white cabbage when the cabbage is in season.
Depending on your taste, you can also use other vegetables for your chop suey. For example, broccoli or leeks go very well with it.
In the Utopia seasonal calendar you can check when is the best time for which vegetables: Seasonal calendar for vegetables and fruit: Think Global, Eat Local!
Classic chop suey usually comes with chicken, shrimp, or pork. Just as delicious, much more environmentally friendly and cruelty-free, the chop suey works with tofu, soy strips, kidney beans or mushrooms instead.

A cauliflower curry is prepared in no time at all and warms from the inside during the cold months. Find out here how to prepare the hearty vegan dish.

Curries are hearty dishes of Southeast Asian and South Asian cuisine and consist of vegetables such as cauliflower, potatoes, eggplant and zucchini with a spicy sauce and sometimes extra ingredients such as fish, meat or dairy products.

The spices are of particular importance in a curry. By default, the following are used:

  • cardamom
  • Ginger
  • coriander
  • turmeric
  • mustard seeds
  • cumin

Below we show you the recipe for a vegan cauliflower curry. The recipe is quick and easy.

Important: If possible, buy your ingredients for the curry with an organic seal to avoid chemical-synthetic pesticides. Also read, for example: Buying organic spices: the most important brands and online shops. Depending on the season, you can also buy the vegetables unpackaged at the weekly market.

Vegan Cauliflower Curry: A quick recipe

Ingredients:

1cauliflower
1 onion
2 cloves of garlic
4 tablespoons olive oil
400 ml vegetable broth
400 ml coconut milk
4 tsp paprika powder
2 tbsp curry powder
salt and pepper
200 peas, TK

Directions:

Wash the cauliflower and divide it into small florets.
Peel and finely chop the onion and garlic cloves. Heat some oil in a large pan and sweat both in it.
Add the cauliflower to the pan and sauté for a few minutes.
Deglaze the vegetables with the vegetable broth and coconut milk.
Let the curry simmer for about 20 minutes.
Season with paprika and curry powder and salt and pepper.
Add the peas to the curry and simmer for another ten minutes. When the sauce in the curry gets thicker and creamier, it’s done.

Cauliflower curry: tips for modification

You can vary the cauliflower curry according to your preferences. For example, if you don’t like peas, you can just leave them out. If desired, you can add a few chickpeas instead, for example. You can also combine the cauliflower curry with potatoes or sweet potatoes. You simply cut them into small, bite-sized pieces and let them simmer right from the start. And you also have a free hand with the spices: try out chilli powder, fresh coriander or oregano, for example.

Tip: Due to its richness, you can serve the curry as an independent main course. If you want, you can also eat rice or naan bread with it.

Poha is a hearty breakfast dish from Ayurvedic cuisine. The basis is always rice flakes – all other ingredients can be modified in many ways. We present you a traditional recipe.

Ayurvedic nutrition focuses on the harmony of body and mind. According to Ayurveda, eating right is important for both physical and mental health. The recipes of this cuisine are usually nutritious and filling and should cover all six tastes of the Ayurvedic teachings: sweet, sour, salty, pungent, bitter and astringent.

Poha is an Ayurvedic breakfast recipe that puts this concept into practice. Among other things, the rice flake dish contains honey for sweetness (or sugar for the vegan version), lemon juice for acidity and ginger and chili for spiciness. Various spices provide further strong flavors. We will show you a simple basic recipe for poha that you can expand and vary as you like.

Basic Recipe: Hearty Poha

Ingredients:

200 gPoha (red rice flakes)
1tomato
1 piece of ginger
0.5 tsp turmeric
0.5 tsp chili powder
1 tsp salt
2 tablespoons coconut oil
1 teaspoon mustard seeds
3cardamom pods
0.5 TLAsant
1 tsp lemon or lime juice
1 teaspoon cane sugar

Directions:

Place the rice flakes in a bowl and mix with your hands for 2-3 minutes to absorb moisture. Then drain the water and catch the rice flakes in a sieve. Set them aside for about ten minutes.
Wash the tomato and cut it into cubes. Peel the ginger and chop it finely.
Add the turmeric, chili powder, and salt to the rice flakes and mix in the spices with a fork.
Heat the coconut oil in a saucepan. Add the mustard seeds to the pot and toast them until they burst.
Once the mustard seeds have popped open, add the cardamom, asafoetida, the chopped ginger and the diced tomato. Let everything cook for about three minutes while stirring.
Then add the rice flakes to the pot and let them cook for 3 to 4 minutes while stirring. If they seem too dry, add some water.
Turn off the stove but leave the pot on the stovetop. Stir in the lemon juice and sugar and let the poha cook for another minute or two while stirring.
Divide the poha between two bowls or plates and serve warm.

Poha: Shopping tips and possible variations

While rice flakes are considered an everyday food in India, they are less common in this country. The “real” red rice flakes for poha are therefore usually only found in Indian specialty shops or in Asian shops. White rice flakes, on the other hand, are much easier to find: Drugstores or larger supermarkets usually have them in their range. If you can’t get rice flakes, you can also make poha based on oatmeal. This is actually the more sustainable option because oatmeal (unlike rice flakes) is a regional food.

Most of the spices that you need for the poha are not of regional origin either, but travel long distances. They have a correspondingly poor ecological balance. We therefore recommend that you only use them sparingly.

Buy spices, but also other ingredients, if possible in organic quality. This is how you avoid products that are contaminated with chemical-synthetic pesticides. You can find out more about this in this article, for example: Buying organic spices: the most important brands and online shops.

The basic recipe for Poha can be supplemented and modified according to personal taste. If you fancy additional vegetables, you can, for example, fry a small onion or a pepper. In summer it is particularly refreshing to mix sliced ​​cucumber with the flakes. A chopped chili pepper, cumin, fresh coriander or fresh parsley refine the taste.

Brussels sprouts quiche is a vegetarian recipe that you can prepare without much effort. We’ll show you how the classic French oven succeeds.

The quiche originally comes from France and there are different variations. The shortcrust pastry base and the egg and sour cream filling always remain the same. It is best to prepare the Brussels sprouts quiche between September and March, because Brussels sprouts are in season during this period.

Brussels sprouts quiche: A vegetarian recipe

Ingredients:

250 g flour
125 g butter 1 egg
2 tbsp water
0.5 tsp salt
500 g Brussels sprouts 150 sour cream 3 eggs
100 g cheese (Gouda)
0.5 tsp pepper
5 pinch(s) of salt
2 pinch(s) nutmeg

Directions:

First prepare the quiche dough. To do this, sift the flour into a bowl and crumble in the butter. Knead them in a bit before adding the egg, water, and salt. Then place the dough in the fridge for 10 minutes.
Wash the Brussels sprouts and remove the brown spots. Then cook it for about six minutes. Pre-cooking will prevent the quiche from being ready before the cabbage is soft enough.
Then put the sour cream and eggs in a bowl and whisk them together.
Now add the grated cheese and spices.
Take the quiche dough out of the fridge and roll it out on a lightly floured work surface.
Place the dough in the pan and pull it up along the edges of the pan. You can use a quiche tart or a normal round cake tin with a diameter of 28 centimeters.
Now pour the egg and sour cream mixture onto the dough and spread the Brussels sprouts on top.
Finally, put the quiche in the oven for 30 to 40 minutes at 160 degrees.

Brussels sprouts quiche: expansion for the filling

Many quiches are made with bacon. You can simply replace it with smoked tofu. To do this, cut the smoked tofu (200 grams per quiche) into small cubes and fry it in a pan with oil for ten minutes. Add the fried cubes to the quiche filling later.

Animal products and sustainability

For the Brussels sprouts quiche you need some animal ingredients such as eggs and sour cream. However, the production of animal products generates CO2 emissions. One kilogram of cheese, for example, causes 7.3 kilograms of CO2 equivalents. With 1.3 kilograms of CO2 equivalent, one liter of milk causes fewer emissions. According to the Federal Information Center for Agriculture, the CO2 equivalents are particularly high in dairy products with a high fat content. It is therefore better for the environment to consume animal products consciously and in moderation.

You should also pay attention to how the animals are kept when buying dairy products and eggs. Basically, it makes sense to buy animal products in organic quality. But not all organic eggs are kept in the same way: The European Union’s organic seal only meets the minimum requirements for organic animal husbandry. Under the EU organic seal, 230 laying hens per hectare may be kept. In contrast, the farming associations Bioland, Naturland and Demeter have 140 laying hens per hectare. You can find more examples of the various requirements in organic farming in the article: Organic seal: what do the animals get out of it? Also, try to use eggs without shredding the chicks.

You can make delicious wild garlic oil yourself from fresh wild garlic – you can find it in many shady places from March. In the following text you will find a recipe for wild garlic oil and ideas for its use.

From mid-March to early May you can find wild garlic in numerous parks and forests. The typical smell makes you want spring and invites you to extensive wild garlic harvest. You can conjure up many delicious dishes from the ingredient, such as wild garlic pesto or wild garlic soup. Wild garlic oil is another way of processing wild vegetables and preserving them at the same time.

Make wild garlic oil yourself: recipe

You need these ingredients:

100 g wild garlic (about a handful)
500 ml vegetable oil (olive oil, for example, works particularly well)
You also need a screw-top jar with a capacity of 500 milliliters or alternatively a sealable glass bottle with a wide opening. To filter the wild garlic oil you need a sieve and a large bowl.

The preparation takes about 20 minutes. The oil then has to steep for two to three weeks.

How to make wild garlic oil yourself:

Wash the wild garlic and gently pat dry. Make sure the wild garlic is dry before using it further. Otherwise it can easily rot and spoil the oil.
Roughly chop the wild garlic with a sharp knife and fill it into the glass jar.
Now fill the glass with the oil. The wild garlic should be completely covered with oil and not float on the surface. If necessary, you can swirl the jar a little to cover leaves on the surface. Do this carefully and do not shake the oil.
Seal the jar or bottle and store the wild garlic oil in a cool, dark place for two to three weeks.

After two to three weeks, the wild garlic oil has infused well and has taken on the taste of wild garlic. Get a bowl and a colander ready.

Pour the oil and wild garlic leaves into a sieve and catch the oil in the bowl.
Squeeze the wild garlic leaves well so that as little of the wild garlic oil as possible is lost.
Now you can fill the finished wild garlic oil back into a sealable glass bottle.
Wild garlic oil will keep for about a year in a dark, cool place.

How to use wild garlic oil

Wild garlic oil is particularly diverse:

Wild garlic oil is a good alternative to homemade garlic oil because it tastes similar but smells less intense.
The homemade oil is a tasty ingredient for (vegan) dips or salad dressing recipes.
You can also use wild garlic oil when grilling. For example, you can marinate tofu or vegetables or drizzle it over grilled bread.
Spaghetti, wild garlic oil, salt and pepper result in a delicious and quickly prepared meal. If you like spicy food, refine it with some dried chili.
Otherwise, you can use the wild garlic oil to season hearty stir-fries, vegetables or sauces.
Gift tip: fill the wild garlic oil in a pretty bottle, design a suitable label – you already have a souvenir for barbecue evenings or a small gift for your loved ones.

Important: Harvest only a few leaves per plant to allow it to regenerate. (More tips: wild garlic season: when wild garlic grows – tips for harvesting) You should also recognize wild garlic and not confuse it with the poisonous lily of the valley!

Making mustard yourself is not as complicated as you think. We’ll show you how to make a basic recipe, which you can then expand on as you wish.

Mustard is a delicious and versatile condiment. It should not be missing from any barbecue party and rounds off the taste of sauces and salad dressings. You can make the popular spice paste yourself with just a few ingredients and refine it according to your taste. In addition to the basic recipe, we will tell you four other variants for the homemade mustard: extra hot, fruity, sweet and with a herbal note.

Choose mustard seeds for the homemade mustard

There are white, brown and black mustard seeds – here the rule is: the darker the colour, the sharper the seeds. If you want to make medium-hot mustard, mix white and brown mustard seeds in a 50:50 ratio. You can get high-quality mustard seeds in health food stores or at the weekly market.

The mustard oils contained in the grains are not only responsible for the spiciness – they are also very healthy, have an antibacterial and appetizing effect and promote digestion. According to a study by the University of Freiburg, spicy mustard can even have a preventive effect against cancer.

Make mustard yourself: The basic recipe

For about three glasses of mustard you will need:

200 g mustard seeds
275 ml white balsamic vinegar
100ml of water
80 grams of sugar
3 tsp salt
some turmeric for the color
How to prepare the homemade mustard:

Grind the mustard seeds as finely as possible. The best way to do this is with a coffee grinder, alternatively with a mortar. The finer you grind the grains, the finer the mustard will be. Tip: If you don’t want to grind the grains yourself, you can use 200 grams of mustard flour.
Heat the water with the balsamic vinegar in a saucepan.
Remove the pot from the heat and let the liquid cool to a lukewarm temperature. This step is especially important to keep the mustard from turning bitter.
Mix all dry ingredients together.
Pour the liquid over the mustard flour and mix with a mixer for at least 5 minutes.
Pour the mustard into sterilized, sealable jars.
Leave the mustard for three days and it will lose its initial spiciness.
The mustard can be stored in a cool place for up to three months. So don’t do too much at once.

Make mustard variations yourself

Extra hot mustard: If you like your mustard to be extra hot, add some wasabi paste or crushed chillies to the basic recipe.
Fruity mustard: To give the basic recipe a fruity note, you can add the zest of an organic orange, some fig puree or other pureed dried fruit to the recipe before bottling.
Apple mustard: Replace the white balsamic vinegar in the basic recipe with apple cider vinegar. Instead of sugar, use ten organic dates that you soak in water beforehand and a grated apple. Use just a small pinch of salt. Mix all the ingredients together with a blender. This mustard can be stored in the refrigerator for up to four weeks.
Herb mustard: Supplement the basic recipe with fresh herbs. The following are particularly suitable: wild garlic, rosemary, thyme and dill.

A large salad is a good quick main course, especially in summer. Here you will find a vegan recipe for a filling salad.

You’re hungry, but you need it fast? You can make a delicious, filling salad in just fifteen minutes, and with the right ingredients in the recipe, it also doubles as a main course.

For a main dish, add both protein and carbohydrates to the salad recipe. Our recipe includes tempeh for a protein source and soba noodles—Japanese gluten-free noodles made from buckwheat—for healthy carbs. You can buy soba noodles at most health food stores or Asian grocery stores.

When buying the ingredients for the main course salad recipe, make sure that they are organic if possible. You are supporting ecologically more sustainable agriculture that treats the earth’s natural resources with care and, for example, does not use chemical-synthetic pesticides. The organic seals from Demeter, Bioland and Naturland are particularly recommended, as they require stricter criteria than the EU organic seal. Also prefer regional and seasonal foods.

Main Course Salad: A simple recipe

Ingredients:

200 g romaine lettuce
2carrots
100 gcucumber
100 g soba noodles
100 g tempeh
1 tablespoon coconut oil
2 tablespoons soy sauce
2 tbsp olive oil
1 teaspoon horn syrup
2 tbsp apple cider vinegar
1 tsp mustard
Salt

Directions:

First wash the lettuce, cucumber and carrots thoroughly. Then cut the lettuce and cucumber into bite-sized pieces. Finely grate the carrots. Put everything in a medium-sized bowl. Then cut the tempeh into small cubes.
Put enough water in a medium-sized saucepan and bring to a boil. Turn the heat down to medium, add the soba noodles and cook for no more than 5 minutes, stirring occasionally. Rinse them under cold water and drain them in a colander.
Meanwhile, heat the coconut oil in a pan. Add the tempeh and mix with the soy sauce. Fry it on high for 5 minutes, stirring occasionally.
Place the olive oil, maple syrup, apple cider vinegar, and mustard in a small, clean jar. Shake until the ingredients combine to form a smooth dressing.
Salt the soba noodles. Then toss them with the salad, fried tempeh, and dressing. Your filling salad main course is ready!

Main course salad recipe: possible variations

You can easily adapt this salad recipe as a main course. For example, use tofu or pre-cooked mung beans instead of tempeh, or substitute pre-cooked rice or healthy buckwheat for soba noodles.

You can also vary the vegetables depending on the season. Radicchio, lamb’s lettuce, baby spinach, kale, tomatoes or peppers also go well with our main course salad. You can find out more about seasonal vegetables and fruit in our seasonal calendar.

Special tip: For even more healthy nutrients in the recipe, you can grow sprouts and add them to the salad main course.

Making wild garlic salt is a great way to preserve fresh wild garlic leaves. So you can enjoy the taste all year round. We explain what you should consider.

The wild garlic season starts in mid-March and you can harvest wild garlic leaves for homemade wild garlic salt. Wild garlic not only offers a wonderful, regional variety in the kitchen, but is also very healthy. The leaves contain valuable essential oils, as well as vitamin C and minerals such as iron, manganese and magnesium.

In addition to the classic wild garlic pesto, there are countless other recipes with wild garlic. We’ll show you a simple recipe for wild garlic salt so that you don’t have to do without the fine, spicy taste of the wild garlic leaves for the rest of the year.

Wild garlic salt: Two simple ingredients

You only need two ingredients for the basic recipe:

250 g table salt or other salt
100 g fresh wild garlic
Since dried wild garlic leaves quickly lose their taste, it is best to process them immediately after collecting them. Optionally, you can refine the wild garlic salt with a little spiciness. White pepper or chilli are particularly suitable for this.

You also need:

a mortar or a blender
Screw-top jars for filling

Recipe for wild garlic salt

The preparation of wild garlic salt is very simple:

Wash the wild garlic thoroughly.
Dry the leaves well or place them in a salad spinner.
Then remove the stems and cut the leaves into strips.
Grind the strips in your mortar or use a chopping knife to cut them into a homogeneous mass.
Mix the salt with the wild garlic paste.
Spread the mixture on a baking sheet.
It is best to dry the moist salt in the sun. This is the best way to preserve the taste of the wild garlic. This takes about eight hours. (In bad weather, you can alternatively dry the wild garlic salt in the oven at around 50 degrees. Check regularly whether it is already dry and stir it with a spoon so that it dries evenly. It should be ready in about four hours.)
You can fill your wild garlic salt directly into a spice mill or grind it finely again before filling it into screw-top jars.


You can simply sprinkle wild garlic salt on buttered bread or use it for cooking. From scrambled eggs, to salads or pan-fried vegetables – wild garlic is always a good choice, even if garlic would also be a good choice.

Storage: Wild garlic salt should be stored in a dark and dry place. The wild garlic is well preserved by the salt and lasts for at least a year.