Tag

recipe

Browsing

Yeast dough is versatile and not difficult to make. We will show you a classic and a vegan recipe for sweet yeast dough and tell you what is important when it comes to the dough – and also how it is made into a braid.

Recipe for vegan yeast dough without egg, butter, and milk

You can easily make a vegan, sweet yeast dough yourself.

You need for this:

500 g flour (light organic wheat or spelled flour)
80 grams of sugar
1 cube of yeast
250 ml plant milk (e.g. oat or soy milk)
70g vegan margarine
1 tsp apple cider vinegar
1 pinch of salt
Optional: some light-colored jam for spreading, quince or apricot jam without pieces is best.
You also need:

a bowl,
a whisk,
a kitchen scale,
a pastry brush,
a clean tea towel.

This is how the vegan yeast dough succeeds

Whether for Easter or for a nice Sunday breakfast – you can easily make a vegan yeast plait yourself with a little preparation time. There is no need to use eggs, milk or butter, because this vegan yeast dough is delicious and buttery soft.

How to make the dough:

Place all liquid ingredients and in a bowl. The plant-based milk and margarine should be lukewarm.
Add the yeast cube and stir until it has dissolved.
Then add the salt and sugar to the liquid.
Add the flour while stirring constantly until the dough has reached the typical consistency.
Knead the dough well on a floured work surface for several minutes.
Cover the bowl with a tea towel and let the dough rise in a warm place for at least an hour. The cloth is important to protect the dough from drafts.
The dough is ready when it has doubled in size.
Important: The decisive factor for a successful yeast dough is the temperature. With fresh yeast, the liquid should be warm but not hot. If it’s too hot, the yeast culture will die and your dough won’t rise. Cold, on the other hand, does not harm the yeast. It just takes longer for your dough to rise. If you’re not in a hurry, you can leave the dough in the fridge overnight and bake it the next day.

This is how you succeed in making the perfect yeast braid

Take the dough out of the bowl and knead it well again on a floured work surface.
Divide the dough into three equal parts and form long strands out of the dough balls.
Braid the strands of dough loosely and pinch the ends together.
Use a pastry brush to brush the braid with some light-colored jam or plant-based milk.
Place the braid on a baking sheet and let it rise for another 20 minutes.
Halfway through the resting time, preheat the oven. If you want to bake with top and bottom heat, set the stove to 200 degrees Celsius and 175 degrees Celsius for circulating air.
Bake the braid on the bottom shelf of the oven for about 25 minutes.
Take the braid out of the oven and let it cool down a bit.

Recipe for classic yeast dough

For a classic yeast dough you need:

500g flour
80 grams of sugar
1 cube of yeast
250 ml lukewarm milk
70 grams of butter
1 pinch of salt
1 organic egg
You also need:

a bowl,
a whisk,
a kitchen scale,
a pastry brush,
a tea towel.
The preparation and processing of the classic yeast dough hardly differs from that of a vegan one. The following variant is for a yeast dough with pre-dough:

Sift the flour into a bowl and mix it with a pinch of salt.
In another bowl, mix lukewarm milk with sugar and crumble in the yeast. Stir the liquid a little until the yeast has dissolved.
Make a well in the flour and pour in the liquid. Thicken the yeast milk with a little flour using a spoon and then leave the bowl covered for 15 minutes.
Then add the other ingredients and knead the dough for several minutes.
Cover the bowl with a tea towel and let the dough rise in a warm place for at least an hour.
The dough is ready when it has doubled in size.
You can use this dough as a base for cakes or a yeast plait. If you want to make a yeast plait, you can brush it with milk before baking to brown it nicely.

Tip: If you made too much dough, you can freeze the leftover yeast dough. It will last up to six months this way.

Chickpea Brownies are a delicious alternative to traditional brownies. In this article we will show you a recipe that is gluten-free, vegan and high in protein and does not require flour.

These chickpea brownies are particularly juicy and full-bodied. At the same time, you stay full longer because they are rich in protein and fiber thanks to the chickpeas. They are very easy to make and taste good with afternoon coffee or as a snack in between. In addition to an oven and a baking pan, you will also need a blender.

We recommend that you buy the ingredients in organic quality. This is how you avoid chemical-synthetic pesticides. We can particularly recommend the organic seals from Demeter, Bioland and Naturland, as they follow stricter criteria than the EU organic seal. In addition, it makes sense, especially with cocoa powder, to pay attention to the Fairtrade seal. This is how you support better working conditions and fairer trade.

A recipe for chickpea brownies – without flour

Ingredients:

450 g canned or jarred chickpeas
5 tbsp rolled oats
3 tablespoons cocoa powder
1 teaspoon Baking powder
2 tbsp almond butter
1 tablespoon coconut oil
3 ELA horn syrup or raw cane sugar
150 ml plant drink
1 pinch(s) of salt
1 pinch(s) of cinnamon

Directions:

Wash the chickpeas in a colander under running water and drain well. You can also use your own cooked chickpeas.
Place the chickpeas in a blender with all other ingredients. Make sure that the coconut oil has a liquid to creamy-soft consistency and is not too hard. Reheat briefly on the stovetop, in the microwave, or in the oven if necessary. Mix everything until a homogeneous mass is formed.
Pour the batter into a medium-sized, shallow baking dish. You can also use a casserole dish.
Heat the oven to 180 degrees Celsius and let the chickpea brownies bake for 35 to 40 minutes.
Remove the chickpea brownies from the oven and let them cool before slicing.

Wild garlic dumplings are a hearty, vegan dish that you can easily prepare yourself in spring. You can find out here what you need apart from fresh wild garlic.

Wild garlic dumplings or dumplings in general are a dish from southern German and Austrian cuisine. The round treat traditionally consists mainly of old rolls, eggs, milk and wild garlic. But it’s also easy vegan. You can serve them with a side salad or eat them with a sauce.

You can pick wild garlic yourself in many forests in Germany in March and April. It is important that you are able to recognize wild garlic and do not confuse it with the poisonous lily of the valley – these look very similar to wild garlic.

Important: Buy the ingredients for the dumplings with an organic seal. This is how you avoid chemical-synthetic pesticides.

Wild garlic dumplings: recipe with step-by-step instructions

Ingredients:

400 gilte rolls, cut into cubes
2 small onions
6 tbsp vegan butter
225 ml plant drink
4 tsp locust bean gum
200 g fresh wild garlic
salt, pepper and nutmeg
possibly some flour or breadcrumbs

Directions:

Place the bun cubes in a bowl.
Peel and chop the onions.
Heat two tablespoons of the vegan butter in a pan or saucepan and sauté the onion pieces in it until translucent.
Add the sautéed onion to the bun cubes.
Then add the plant-based milk and the locust bean gum and mix everything together roughly with your hands or a wooden spoon. Let it swell for half an hour.
In the meantime, wash the wild garlic, chop it up and mix it into the bread roll mixture.
Season the dumpling dough with salt, pepper and nutmeg. If it is too soft or runny, you can add some flour or breadcrumbs and knead it in.
Bring salted water to a boil in a large saucepan.
Use your hands to form round dumplings from the dough and add them one by one to the boiling salted water. Turn the heat down and let it steep for about 15 minutes.
Lift the dumplings out of the water and let them drain.

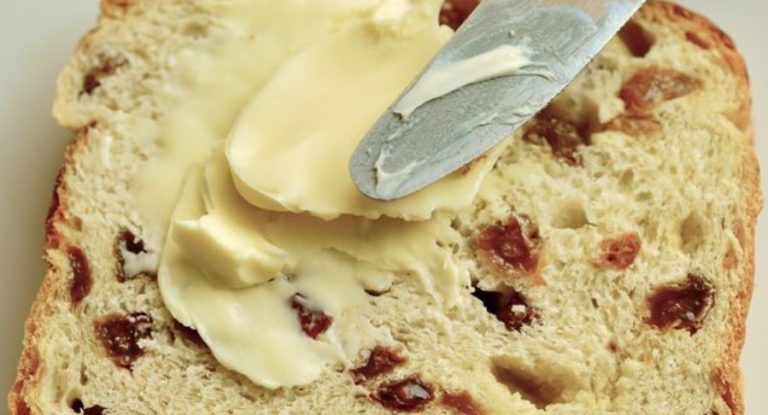
A raisin mare is a delicious Easter pastry made from yeast dough. We present a recipe that you can use to easily bake a raisin mare yourself.

Raisin mares are also known by other names depending on the region. In any case, it is a large, bread-like pastry made from a medium-heavy yeast dough. It contains a relatively large amount of fat and sugar. If you like it less sweet, you can also reduce the amount of sugar.

Make sure the ingredients are organic. This is particularly important with ingredients of animal origin, because you can support more species-appropriate animal husbandry.

In general, by buying organic products, you support agriculture that does not use chemical-synthetic pesticides and thus protects the environment and health.

A recipe for raisin mares

Ingredients:

500 g flour (+ something for dusting the mold)
0.5 tsp salt
50 gsugar
50 g butter (+ something to grease the mold)
250 ml milk (+ something for brushing)
1 pack(s) fresh yeast (42g)
1 egg
150 g raisins

Directions:

In a bowl, mix the flour with the salt and sugar. Make a well in the middle.
In a small saucepan, melt the butter. Add the milk and warm it to lukewarm. Add the yeast in small pieces and stir the mixture until the yeast has dissolved.
Pour the yeast milk into the flour well. Gently stir in a little flour with a fork. Let the mixture sit for five minutes.
Add the egg. Using your hands or the dough hooks of a hand mixer or food processor, knead everything together for about 5 minutes until you have a smooth dough. Add some flour or milk if needed. The dough should pull away from the bowl easily and be neither very firm nor very sticky.
Cover the bowl with a clean kitchen towel, put it in a warm place and let the dough rise for about 40 minutes. It should roughly double.
Grease a loaf tin (about 30 centimeters long) with some butter and dust it with flour.
Add the raisins to the dough and knead it again for five minutes.
Shape the dough to fit your baking pan and place it in the pan. Cover and let rise in a warm place for another 45 minutes.
Brush the dough with a little milk for a nice browning and shine. Bake the raisin mares at 170 degrees Celsius for about 40 minutes.

This is how you can vary the raisin mares

If you don’t like raisins, you can replace them with other dried fruits. Dried cranberries or dried cherries are suitable, for example. Fresh fruit is not suitable because it loses too much liquid and the dough then becomes mushy.

You can use plant milk of your choice instead of milk. You can easily replace the butter with margarine.

With 500 grams of flour, the recipe results in a fairly large mare of raisins. It stays fresh in a bread bin for two to three days. You can use leftovers to make French toasts.

Alternatively, you can slice the raisin mares and freeze them. Then you can defrost individual slices. They are particularly tasty if you toast them briefly.

How healthy your salad actually is depends on various factors. In this article, we will show you how to make salad healthy and provide you with suitable recipe suggestions.

Salads consist largely of water and are therefore low in calories. According to the Federal Center for Nutrition, they also contain various health-promoting nutrients. These include vitamin A, B vitamins, vitamin C, beta-carotene, folate and fiber as well as potassium, magnesium and phosphorus.

There are a variety of salad dishes and even more ways to arrange salads individually. Not all salads are created equal. You can influence how healthy your salad will ultimately be.

These factors affect how healthy your salad is

It’s best to add variety to your salad choices because different types of lettuce contain different amounts of nutrients. For example, according to the BzfE, iceberg lettuce is rather low in nutrients, while lamb’s lettuce and endive have a better nutrient composition. Wild herbs are particularly rich in nutrients.

When putting together, you can use seasonal and regional salad varieties as a guide. You can also save on CO2 emissions because long transport routes are no longer necessary. Our seasonal calendar can give you an overview. In addition, we recommend that you buy your salad and all other ingredients in organic quality. In this way, you avoid chemical-synthetic pesticides and artificial fertilizers.

It is healthiest and tastiest if you prepare your salad and dressing yourself. Ready-made salads lose nutrients when cut and stored. In addition, packaged salads are more susceptible to bacteria. This is due to the cut surfaces of the pre-cut lettuce, on which microorganisms can colonize more easily. Ready-made dressings often contain a lot of sugar, salt or oil and can quickly become a calorie bomb. For example, try a classic vinaigrette instead. If you have the opportunity, we recommend that you grow your own lettuce. So you get the freshest salad ever and save plastic at the same time.

If you prepare your salad yourself, you can combine it according to your taste and supplement it with filling ingredients. It is particularly healthy to add protein-rich components to the salad. This can be, for example, legumes, eggs, organic cheese, nuts and seeds or the organic (soy) yoghurt in the dressing. Complex carbohydrates also promote satiety. Add healthy carbohydrates in the form of millet, whole wheat pasta, or sweet potatoes to the salad. You can also integrate fruits, mushrooms or other vegetables. There are no limits to the design of your salad.

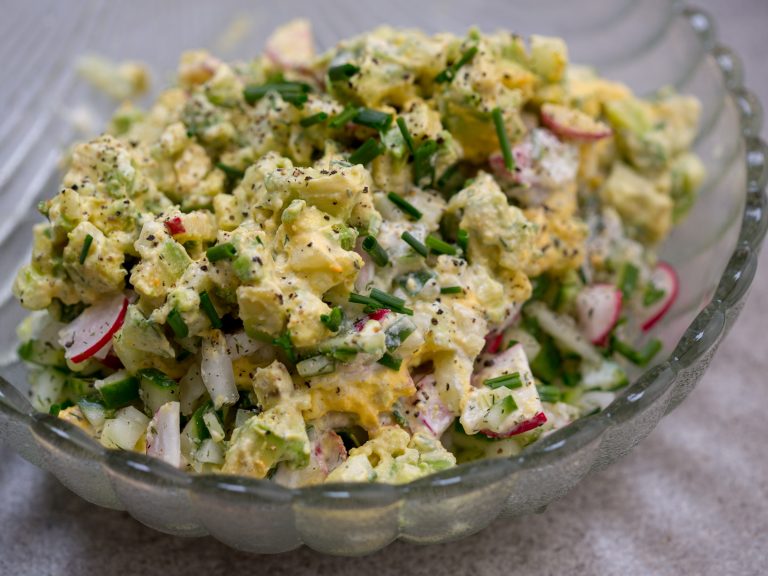
Vegan egg salad that resembles a “real” egg salad in terms of taste, appearance and consistency – that’s possible. With our recipe you can make your own egg salad without eggs and dairy products.

A vegan egg salad made from chickpeas and noodles: What sounds unusual at first tastes convincing. And all without animal suffering and animal protein. We’ll show you a simple recipe for vegan egg salad that is in no way inferior to the animal-based original.

Vegan Egg Salad: Ingredients for the recipe

This recipe for vegan egg salad makes two full servings or four servings as a side to the main course.

You need the following ingredients:

200 g chickpeas (cooked, drained)
125 g small pasta (uncooked)
1 tsp turmeric
1 small onion
1 tsp Kala Namak (Black Salt)
black pepper
1 small bunch of fresh chives (or other herbs)
100g vegan mayonnaise

Ingredient tips and variations:

You have to soak dried chickpeas overnight beforehand and boil them until soft for about two hours. In a separate guide, we explain exactly how to cook and soak chickpeas. If you want to be quick, you can also use pre-cooked chickpeas from a jar.
Very small noodles are best for the vegan egg salad. You can also use normal (whole grain) pasta and cut it up later. Make sure the noodles don’t contain any eggs.
Kala Namak is a special sulphurous salt that gives the egg salad its typical egg taste. In our special article on black salt “Kala Namak” you can find out everything about its origin, use, and buying tips.
Fresh chives are part of a classic egg salad. Alternatively, you can also use other fresh herbs from the garden – we have included a few rocket leaves in our recipe.
You can either buy vegan mayonnaise ready-made in health food stores or you can make it yourself. We show you a recipe for mayonnaise without eggs.
Extra tip: We made a low-fat mayonnaise alternative for the recipe. We seasoned vegan oat cream (porridge-based) with some linseed oil, mustard, salt, pepper, lemon juice and yeast flakes.

Make vegan egg salad yourself: Instructions in 10 steps

Plan about twenty minutes to prepare the vegan egg salad:

Put the noodles in boiling water and cook them until they are really soft (not al dente).
In the meantime, you can already mash the cooked chickpeas with a fork.
Optional: If you prepare the vegan mayonnaise yourself, you can also do this in the meantime.
Drain the cooked noodles and mash them with a fork as well.
Mix the mashed chickpeas with the noodles and add the turmeric powder for the color.
Cut the onion into fine pieces and add them to the egg salad mixture.
Now add the Kala Namak and black pepper to taste.
Wash and chop the chives and add them to the mixture as well.
Stir well.
Finally, fold in the vegan mayonnaise – et voilá, your vegan egg salad is ready!

Congee is a warming rice porridge from Asian cuisine that can be easily adapted to your taste. You can find out how to prepare the nourishing dish here.

Congee is a simple rice porridge. In many Asian countries, especially China, it is one of the most popular staple foods. It is particularly common as a warming breakfast dish.

For congee, rice is boiled in plenty of water (rule of thumb: ten cups of water per cup of rice) until it has almost completely dissolved. It then takes on a porridge-like consistency. Prepared in this way, congee has a very faint taste of its own. This makes the rice porridge an ideal basis for various toppings and fillings.

The basic recipe requires only rice and is therefore very inexpensive. Which kind you take is up to your personal taste. However, we recommend using organic rice. Rice is a food that is often contaminated with pollutants such as cadmium, mineral oil, and arsenic, as Oko-Test found out. Although some organic rice varieties are also affected, no chemical-synthetic pesticides are used in organic farming. This is not only better for you, but also for the environment.

Congee: The basic recipe

Since congee takes a little more time to prepare, it’s worth preparing a large portion in advance. Covered, Congee keeps in the fridge for four days and can be warmed up in portions.

Ingredients:

100 grice
1000 ml water

Directions:

Wash the rice in a colander under running water.
Boil the rice in a large pot with a liter of water.
Then reduce the heat to the lowest setting and let the rice simmer for 3 to 4 hours.
You can now refine the congee or enjoy it pure.

Pure congee is like a blank slate. Only with the right toppings or ingredients does it become a dish full of flavors.

For example, you can emulate people in some areas of China who cook rice in broth instead of water. Or you can add chopped ginger, garlic or mushrooms during the cooking process.

If you want to prepare congee as a sweet meal, you can add the following toppings to the finished porridge:

  • plum compote
  • raspberry jam
  • Roasted almonds or other nuts
  • soy yoghurt
  • chia pudding
  • fresh fruit

The following are suitable as toppings for a savory version:

  • sprouts
  • regular tofu or chickpea tofu
  • Sushi Ginger
  • Sesame and other seeds and kernels
  • roasted chickpeas
  • roasted onions
  • Vegetables like spring onions, carrots, cucumbers, or broccoli

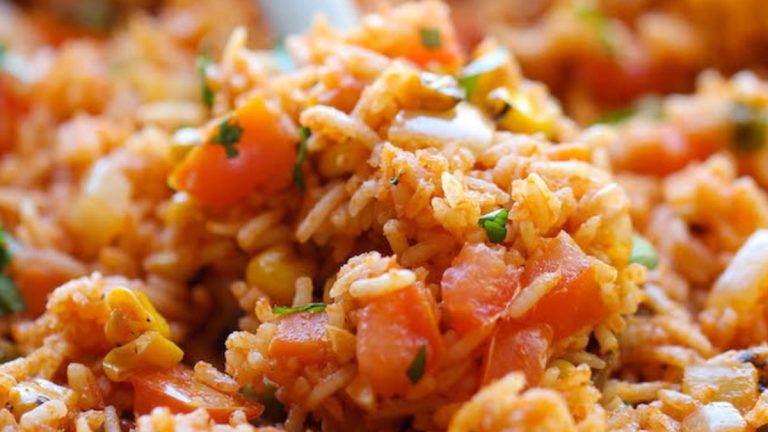
Jollof Rice is a spicy rice dish from Senegal. Traditionally it is prepared with meat. This vegan Jollof Rice recipe shows you that it works just as well without animal ingredients.

The national dish of Senegal is Jollof Rice, a traditional rice dish that usually includes meat along with tomatoes, peppers and onions. However, since less meat consumption can have a positive effect on health and the climate, we are showing you a vegan Jollof Rice variant here.

Jollof Rice is very flavorful thanks to many spices such as curry powder, paprika powder and thyme. When buying spices, make sure they are of good quality. We recommend organically grown spices, which you can recognize by the Demeter, Bioland or Naturland logo, for example, because conventional spices are often contaminated with pesticides. If possible, you should also use organic products for the other ingredients. In this way you support agriculture that does not use chemical-synthetic pesticides, which is not only good for you, but also for the environment.

Jollof Rice: Aromatic rice dish from Senegal in vegan

Ingredients:

400 g canned tomatoes
2peppers
1red onion
2 clove(s) garlic
1chili pepper
2 tablespoons oil
1 tbsp curry powder
1 tsp smoked paprika powder
1 tsp grated ginger
1 tsp dried thyme
260 g parboiled rice
4bay leaves
480 g canned black-eyed peas
90 g okra pods
salt and pepper

Directions:

Chop the tomatoes, one of the peppers, the onion, the garlic and the deseeded chilli in a food processor. Alternatively, you can finely chop the ingredients with a knife. Then puree everything to a smooth mass.
Heat the oil in a pan and stir in the tomato paste. Add curry powder, (smoked) paprika powder, dried thyme and grated ginger root.
Stir everything well and let it simmer for five minutes over medium heat.
Wash the parboiled rice in a colander until the water runs clear. Add the rice to the sauce along with the bay leaves. Add enough water to completely cover the rice.
Cover and simmer the Jollof Rice over medium heat for 15 minutes. Stir occasionally. If the water boils off too quickly and the rice sticks to the bottom of the pot, add more water.
Drain the black bean eyes, give them a quick wash and add them to the rice. Cut the remaining peppers and okra into small pieces and add them to the pan as well.
Let the Jollof Rice simmer for another ten minutes until the vegetables and rice are tender and the sauce has reduced. Finally, season with salt and pepper and optionally garnish the Jollof Rice with some fresh thyme before serving.

Here’s how you can modify Jollof Rice

You can easily adapt Jollof Rice to your taste. You can also substitute individual ingredients if you don’t have them at home:

  • Instead of black-eyed peas, you could use chickpeas.
  • An alternative to the okra would be green beans.

For example, you can serve the following with Jollof Rice:

  • Grilled tofu
  • Fried plantains
  • Fresh salad
  • Vegan meatballs

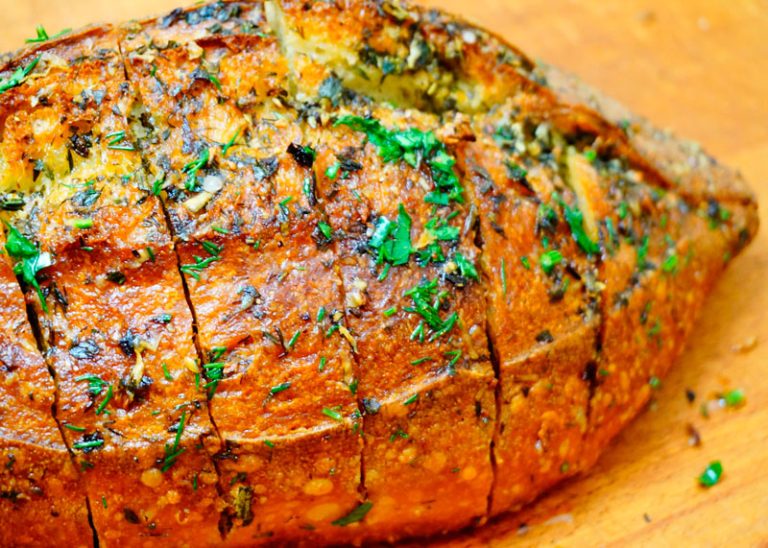
Baking wild garlic bread yourself is easy with this vegan recipe, even as a baking beginner:in. You can pick the spicy herb yourself in many parks and forests during the wild garlic season.

The vegan wild garlic bread with spelled flour not only tastes good for dinner, but is also an excellent accompaniment to a cream soup. The recipe is not very complex, but needs a bit more preparation time due to the rising time.

Wild garlic bread: recipe and preparation

Ingredients:

0.5 cubes of fresh yeast
150 ml lukewarm water
500 g spelled flour (type 630)
10 g salt
5 gsugar
150 ml oat drink
2 tbsp olive oil
50 g fresh wild garlic leaves

Directions:

Dissolve the yeast in the lukewarm water.
Put the spelled flour in a mixing bowl and add the salt and sugar.
Pour in the yeast water, the oat drink and the olive oil and mix all the ingredients together well.
Knead the dough with the dough hook of a food processor or a hand mixer until it gets a smooth and silky surface. This can take ten to 15 minutes. The longer you knead, the nicer the structure of your wild garlic bread will be later. Tip: If you don’t have a food processor, you can also knead the yeast dough by hand. You should take at least 15 minutes to do this.
Cover and let the ball of dough rest in a warm place for about 60 minutes. During this time, its volume should double.
Towards the end of the resting time, wash the wild garlic leaves and chop them roughly.
Knead the bread dough thoroughly with the chopped wild garlic and divide the dough into four parts.

Shape each of the pieces into a roll 10 to 12 inches long. Twist two rolls of dough together and place them on a baking sheet greased with olive oil.

Bake the two wild garlic breads in the oven at 220 degrees Celsius top and bottom heat for 20 to 30 minutes until light brown.
Allow the wild garlic bread to cool before serving.

Wild garlic bread: tips for preparation

With just a few changes, you can easily vary the recipe for wild garlic bread:

If you use dry yeast, you need a whole packet for the wild garlic bread.
As an alternative to the simple twisted braid, you can also bake the wild garlic bread in a greased and floured loaf tin.
Finally, knead a handful of sunflower seeds into the dough, then the wild garlic bread has a bit more bite.
Sprinkle the wild garlic bread with sesame seeds before baking. Not only does it look pretty, it also tastes delicious.
For a Mediterranean flavor, chop a handful of sun-dried tomatoes and mix them into the batter.
Depending on the season, you can use other herbs instead of wild garlic, e.g. rocket, basil or herb mixtures.
Use up your bread as quickly as possible – it tastes best fresh!

Tip: Your freshly baked wild garlic bread tastes best if you spread it with homemade wild garlic butter.

Ingredients for your wild garlic bread

Depending on the region, the wild garlic season in Germany begins in early to mid-March. Wild garlic is one of the most popular wild herbs in local cuisine. The leaves contain valuable essential oils, as well as vitamin C and minerals such as iron, manganese and magnesium.

It is best to harvest wild garlic yourself and process it fresh. Wild garlic wilts quickly and tends to mold, which is why you rarely find it in the supermarket. Alternatively, you can buy it at the farmer’s market or from regional direct suppliers.

Use organic spelled flour for the wild garlic bread: It is free of pesticides and you support ecologically sustainable agriculture. Also pay attention to regional cultivation: products from the region have shorter transport routes and are therefore better for the climate.

Tip: Wild garlic bread can also be frozen well. It’s best to freeze it in slices, then you can thaw them individually in the toaster or on the grill and roast them until crispy.

You can harvest sorrel on your next walk. We’ll show you what to look out for and how to prepare a delicious sorrel salad with strawberries.

How to harvest sorrel for your salad

You will find sorrel, a wild herb belonging to the knotweed family, in many meadows. Just take a closer look the next time you go out into nature. The main harvest time is from spring to July.

You can recognize sorrel by its elongated, lanceolate leaves. These grow out of the ground in a rosette shape. In the flowering period, between May and June, you can easily recognize the sorrel. During this time, long panicles with inconspicuous, reddish flowers push up to a meter high from the ground.

If the meadows are public, you can harvest some leaves for your salad. Only pick as much as you need. This allows the plants to grow back in peace. Of course, you shouldn’t harvest the main ingredient for your delicious summer salad from private property.

If the leaves of the sorrel are still very small, it is better to let them grow a little longer. You can harvest the leaves from a diameter of about ten centimeters. Sorrel has a bitter taste. You can balance this out in your vegan salad with the sweetness of the strawberries and the dressing.

By the way: The earlier in the year, the lower the risk that the leaves of the sorrel will taste too bitter or sour.

Recipe for vegan sorrel salad with strawberries

Strawberries are in peak season in early summer. Combine the sorrel harvest with a trip to the strawberry field. If possible, also pay attention to organic quality with the strawberries. In this way you support agriculture that does not use chemical-synthetic pesticides and thus protects the environment and health.

This is how you prepare a delicious summer salad from your self-harvested ingredients.

Ingredients:

200 g sorrel
50 g lettuce
400 g strawberries
1spring onion
0.5 red onions
1 tbsp sunflower seeds
1 teaspoon nectar
1 tsp mustard
1 tsp apple cider vinegar
1 tbsp sunflower oil
0.5 clove(s) garlic
1 pinch(s) of salt
1 pinch(s) of pepper
Some chives

Directions:

Prepare your sorrel and lettuce leaves. Wash them and then dry them.
Wash and dry the strawberries as well. Then cut them in half lengthways and put them in a bowl with the salad.
Cut the onions into small pieces and add them to the rest of the salad together with the sunflower seeds.
Now you prepare the dressing. To do this, first mix agave syrup, mustard, apple cider vinegar and sunflower oil.
Using a garlic press, press the garlic into the dressing. Alternatively, you can chop it finely.
Season the dressing with salt and pepper. When you’re satisfied, spread it over your sorrel salad.
Finally, garnish your salad with chopped chives.

Sorrel is so healthy

This refreshing and light salad is ideal for warmer days. The strawberries add a great pop of color.

The recipe is not only regional and seasonal, but also healthy. With its high vitamin C content, sorrel has health-promoting effects in store for you. It is said to help with gastrointestinal complaints, reduce fever and have a diuretic effect. Sorrel gives a sluggish digestion a boost. The bitter substances in sorrel are also very healthy.

If you still have sorrel left over from your harvest, you can use the rest to prepare a delicious sorrel soup.