Tag

remove

Browsing

Tips and tricks for removing rust stains from clothes. When using household ingredients rust stains are removed from surfaces and clothing. Before you simply remove rust stains, you should treat the rust stains thoroughly.

Remove rust stains from clothing

Stubborn rust can sometimes stain clothing. Especially if you want to remove rust from the grill grate in summer or do other work with rusty objects. Then quick action is required. But before you treat the rust stain, you should test the fabric for colorfastness in a hidden spot. If the clothing is colorfast, you can use simple home remedies to remove the rust stain. But here, too, there are a few rules to be observed so that the cleaning of the clothes is completely successful.

1) Vinegar to remove rust stains

In order for you to be able to successfully tackle rust stains, it is important to pretreat the stain with home remedies. Consequently, make a solution of 1 part vinegar essence and 8 parts water. Then treat the stain on the clothing with this solution. Then simply rinse the fabric thoroughly with clear water.

2) Remove lemon juice with salt to rust from clothes

You can also mix 1 part cleansing lemon essence with 8 parts water and use it to treat the rust stain as described above. Or mix lemon juice with salt and rub it into the dampened stain. Then let it take effect (overnight for severe stains). Finally, simply brush off the salt and wash the garment in the washing machine. Also, note how you can clean work clothes with salt.

3) Use baking soda to clean the stains

The tried and tested household remedy baking soda is also suitable for removing rust stains. To do this, put the powder on the affected area and pour some water over it. The bubbling reaction then ensures that the dirt particles are loosened. If necessary, repeat the process several times. In addition, read useful tips for removing the rust from cutlery and crockery.

Be careful when dosing and using home remedies. Home remedies such as baking powder or citric acid should be carefully tested on the garment beforehand. Because these can fade the clothing or attack sensitive fabrics.

4) Sour milk or buttermilk for rust

You can also soak the rust-stained garment in sour milk or buttermilk (preferably overnight). This applies in particular to colored laundry. After sufficient exposure time, rinse the garment well. Then put it in the washing machine, as usual, to be able to finally remove rust stains. You will also learn how to remove tar stains from work clothing.

5) Spot remover from the internet

Some home remedies may not produce the desired result. But don’t panic. If it has to be quick, you can use the stain remover from Dr. Use Beckmann to pretreat the stains.

Now remove tar stains with simple home remedies. We will show you how you can quickly and easily remove tar stains from textiles and your skin without any special or chemical cleaners.

Home remedies for tar stains

It’s rare for tar stains to get stuck in clothing, skin, or cars. But it can happen that you find tar on the body or the skin. Some professions in particular have the problem of tar stains on their work clothes. Then you wonder how to effectively clean the work clothes and get rid of the tar pollution? Here are the best tips at a glance:

1) Remove tar stains from clothes

There is a simple trick to cleaning work clothes and removing tar. To do this, spread some butter on the tar stain. Then leave it on until the tar dissolves. Then wash as normal with a mild detergent. You can also clean clothes soiled with tar with the household remedy gall soap. Accordingly, moisten the area with water and rub it with the gall soap. Then leave it on for a few minutes before rinsing it off with clear water.

Aftercare and caution with delicate laundry!
If the stain is still very clear, you should treat it further with alcohol and wash it out thoroughly again. However, note that the home remedies are not suitable for fine textiles such as cashmere or silk.

2) Remove tar from the car

Since tar stains on cars are rare, hardly anyone has any advice. But you can help yourself in such a case with butter, margarine, or oils. So put one of these fats on the affected area and let it soak for 10 minutes. To then remove the tar stains, take a soft cloth moistened with water and detergent. You can use this to wipe everything clean. It works similarly when cleaning shoes.

3) Remove tar stains from the skin

You can also get rid of tar stains on the skin. The best way to do this is to use butter. Then apply some butter to the affected areas and let it work for a short time. You can then simply wipe off the tar residue without damaging your skin.

Pesticides are hazardous to health and should not be absorbed into our bodies if possible. That’s why you should always clean fruit and vegetables properly – even if you don’t eat the peel.

Pesticides on fruits and vegetables: where are they used?

These are various chemical-synthetic substances that are toxic to very specific organisms. Herbicides are used against weeds, fungicides are used against fungi and so-called insecticides are used against insects. In Europe alone, around 290 different substances are permitted. Of course, in conventional agriculture there are strict regulations regarding the amount and type of use of pesticides.

These are EU maximum values ​​that must not be exceeded. Therefore, most fruits and vegetables contain only small amounts of residues, but in which combination and with what effects on the body remains questionable.

In order to avoid the intake of harmful substances as much as possible, you should always remove pesticides from your fruit and vegetables.

How do you properly remove pesticides?

If you want to thoroughly rid your fruits and vegetables of pesticides, there are two simple methods:
Wash fruits and vegetables carefully under running water and rub them well with a cloth. This removes even more residue. Also wash varieties with skin that we don’t eat (citrus fruits, melons, pumpkins, bananas), because when you cut them up, residues and dirt can get straight from the skin to the inside of the pulp and be eaten.
However, the most effective method is provided by an American study from 2017: Scientists from the University of Massachusetts found that you can use water mixed with baking soda or baking soda for cleaning. It is much more thorough and removes almost all pesticides. However, you will need to leave your fruit and veg in the solution for about 15 minutes. Here are the exact instructions: Add 1 teaspoon of baking soda to 200 ml of tap water. Mix both together briefly and add the fruit.

The safest way to avoid using pesticides is to buy organic fruits and vegetables. Organically grown vegetables and fruits can be eaten with their skins without hesitation, as chemical-synthetic pesticides are generally not permitted in organic farming.

Removing a hickey is what many people who have just fallen in love want to do. Whether you’re new or old, these tricks can help.

This creates a hickey

A hickey is a small bruise, also called a hematoma. By sucking on the skin, small blood vessels burst, and the blood spreads to the surrounding tissue. That’s why a bruise appears. And as is usual with bruises, they can also take on a wide variety of colors over time: red, green, yellow.

But beware: A hickey is not only an exciting token of love, it can also cause unpleasant excitement. There are a particularly large number of small blood vessels in the neck. If they burst, they can, in the worst case, lead to a blood clot that can trigger a stroke. So be careful in this area.

In general, hickeys are harmless. They will go away on their own after about one to three weeks. Don’t you want to wait that long? You can help with a few tricks.

Remove hickey – is that possible?

You really can’t really remove a hickey, but you can speed up the healing process. Of course, it depends on how intense the bruise is. Three strategies can help to keep the love secret to yourself:

Don’t let a fresh stain get bigger: As with many injuries, ice is the first choice of remedy. You can put it on the affected area. The cold ice can prevent more blood from spreading. If you don’t have ice to hand, you can use other cool items, such as a cold towel or frozen food. Here you can get creative. Cooling several times a day works best.
If the stain is two to three days old, only heat can help. You can warm the spot with a hot-water bottle or grain pillow to stimulate blood circulation and thus also to decongest the blood under the hematoma. But a hot bath or a visit to the sauna are also ways to shorten the healing process. Common ointments available in pharmacies for wound healing can also be tried.
If all else fails, there is only one solution: hide the stain. Especially in winter, a thick scarf around the neck is not conspicuous. You can also do a lot with make-up.

It doesn’t have to be chemicals: how to remove mildew stains yourself with inexpensive home remedies.

The difference between mildew and mildew

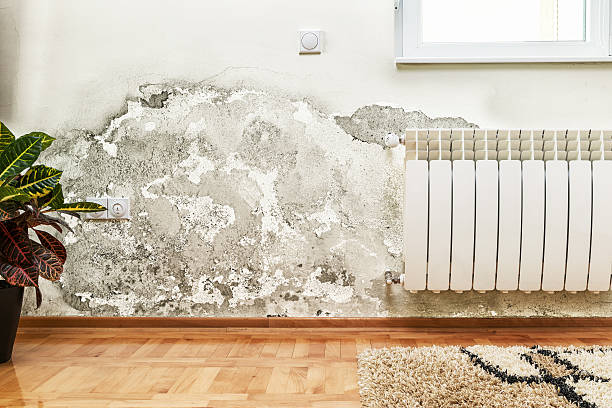
Is the dark spot behind the cupboard mold or mold stains? Mold stains and mildew look very similar at first glance, as both are visible as brownish to yellowish or greyish discolorations on the wall, they also have a musty and musty smell. On closer inspection, however, a difference becomes clear, since most mushrooms consist of what is known as mycelium. This, in turn, is made up of filamentous cells, as evidenced by thin, coherent, and puffy filaments that continue to spread out. In contrast, mold stains do not form any visible threads, although mold is also active here. Due to a higher pressure, these show a different growth, but mold stains can form from the mildew stains over time.

Mold stains are just as harmful as mold, and not just for allergy sufferers. Irritation of the mucous membranes, sleep disturbances and lack of concentration can often be the result of mold stains. Mildew stain fungal spores can fly in the air, but will not stick to a surface. As soon as so-called mycotoxins (= metabolites) from mold stains get into the respiratory tract, this can even lead to allergies, gastrointestinal complaints and a weakening of the immune system. In return, mold stains do not cause any structural damage or optical discolouration. If such dark spots appear, it can usually

Mold and mildew mostly develop when there is insufficient ventilation and too much humidity. All factors, such as drying clothes, hot baths, cooking, but also inadequately sealed walls, leaks or holes in pipes contribute to an increase in humidity. Condensation forms, which settles on surfaces and walls, since the air can no longer fully absorb the moisture. Damp, cold and uninsulated walls in particular are the ideal breeding ground for mold stains and dangerous mould. Forced airing ensures sufficient ventilation, a hygrometer helps to determine the humidity level in the air. As soon as mold stains become visible, the cause must be sought, because in many cases mold is a side effect of the discoloration. At best, these should be removed by a specialist, because mold spores can cause significant health problems, ranging from respiratory problems to lung and heart diseases or even burnout. Furthermore, an already widespread mold infestation results in considerable additional costs, which can often lead to lengthy differences in tenancies.

Home remedies for stains

The yellowish to brownish discoloration is not only found on walls and wallpaper, mold stains can also form on wood, paper, textiles or plastic. In the case of mold, professional removal is usually essential, but mold stains can often be removed yourself with the help of household remedies or special cleaners.

However, some protective measures should also be taken here when removing mildew stains. Rubber gloves, a respirator mask and suitable safety goggles are important. Furthermore, the infested stains should not be vacuumed off or swept away, as the fungal spores can easily detach in this way. The inhalation of mold spores should also be avoided by adequate ventilation. Direct skin contact with the home remedies should be avoided due to the sometimes caustic effect. After the stains have been removed, all sponges and cloths used, as well as masks and gloves, should be thrown in the garbage immediately, ideally in the garbage can outside the apartment. Clothing should also be changed, and a shower is advisable to avoid spreading more fungal spores in the area. Other items can be cleaned and disinfected.

Mold stains can be removed from numerous objects, but can only be concealed from some, such as books. Here they appear relatively frequently, often not only on the cover, but also on the pages of the book. When pressed together leaves in a book have soaked up moisture from the environment, they provide a perfect habitat for mold stains. The exclusion of air often causes moisture damage, which can only be concealed by dusting the affected areas with starch. The flour should remain in place for some time so that it sticks to the damp stains and lightens the damaged side at least a little.

Infestation of walls, textiles and wood

Already in earlier times there were stains and mold growth. To this day, some very useful home remedies that have been used since grandmother’s time to effectively remove mildew and mold have proven their worth.

wall and wallpaper
Mold stains can be removed quite easily from walls. If woodchip wallpaper is infested and is not to be changed, glass cleaner can be sprayed onto the stain. After an exposure time of five minutes, you can spray again and then rub the wall clean with a microfiber cloth. However, if the mold stains are deeper in the wallpaper, it usually cannot be saved. Woodchip wallpaper, which you can paint yourself, can still be used to a limited extent after the stains have been removed, but printed wallpaper should be replaced.

If stains are to be removed from the wall itself, you need vinegar or spirit. To do this, one of the two agents is simply placed in a small bowl, mixed with water and a clean cotton cloth immersed in it. The mold stains are then dabbed off with the cloth until they can no longer be seen. Another home remedy is a mixture of 50 grams of baking soda, 50 grams of citric acid and 150 millimeters of water. The solution is applied with a clean cleaning cloth and after half an hour it is wiped off with a lye mixture of water and washing powder. Finally, everything should be wiped off with .

On clean plaster, commercially available chlorine cleaners are suitable for removing stubborn mold stains. Mold stains on the wall are usually caused by moisture. If there is furniture in front of the infested area, move it a little further away from the wall to allow for better air circulation.

textiles and clothing
Mold stains not only appear on walls, but can also be found on textiles. These unwelcome yellow to brownish stains occur, among other things, when laundry has not been completely dried and placed in the closet. The unsightly mold stains on textiles can also be harmful to health. However, mildew stains can also be removed from clothing with simple household remedies. First of all, textiles that tolerate high temperatures can be washed at 60 degrees. In the best case, light stains have disappeared afterwards. Another inexpensive home remedy for fabric stains is buttermilk. For this purpose, the affected pieces of fabric should be placed in buttermilk for one to two days and can then be washed as usual. Vinegar not only helps with mold stains on the wall, but also on clothing and fabrics. The discolored pieces should be soaked in vinegar for one to two hours and then washed normally. Another way to counteract stains on textiles is alcohol. For this purpose, the areas with the mold stains should be soaked in it and then washed. Smaller stains can be treated with baking soda, for this purpose the areas must be moistened and rubbed with the baking soda. After the powder has dried, it can be removed with a brush. Alternatively, baking soda or baking soda can be used to combat mold stains. Another method is a mixture of water and denture cleaner, in which the laundry can be soaked. This inexpensive and at the same time effective cleaning agent has also proven itself in the area of ​​discolored porcelain and is suitable as an alternative to baking powder. The same applies to other textiles such as seat cushion covers or blankets. In the worst case, chlorine cleaners or bleach may also be necessary for white and robust fabrics. In order to avoid mildew stains from the outset, laundry should not be left wet for too long and should not be sorted when it is damp.

wood
In the event of discoloration of wood, action must be taken quickly. Mold stains caused by water damage appear on wood in the form of gray to black or brownish discolouration, which can also be yellowish depending on the type of wood. To remove stains from varnished wood, the wood must first be cleaned with water. It should be well dry before washing the wood with a 1:1 solution of detergent and water using a brush. The wood surface will then dry and the stains should be gone. However, if these cannot be removed, vinegar can also be applied to the affected areas and allowed to act for around an hour. Finally, the area should be cleaned with water and a sponge.

If it is too late and mold has already developed from the mold stains, you must act immediately. Black mold massively damages the wood substance, it can even completely decompose it within a very short time. In addition to the health consequences, there may be other risks if the wooden components are stable or load-bearing. If the staining is light, superficial, the wood can be treated with a mixture of chlorine cleaner, vinegar essence and pure alcohol. In the case of deeper and larger infestations, a suitable fungicide from a specialist store should be used to prevent complete destruction of the wood. If stains are still visible after treatment with the cleaning agent, the mold has already penetrated deeper into the wood. The stains must be removed mechanically, which requires sanding the wood. In the case of deeper infestations, a planer can even be used in addition to the grinder. The stains must be thoroughly removed and the clean surface rubbed again with vinegar essence. After the treatment, the wood must be dried thoroughly.

Since black mold is harmful to health, care must be taken to protect yourself when removing mildew and mildew. In addition to suitable respiratory protection, work should be done outdoors if possible.

In order to avoid mildew stains on wood, wooden surfaces should be aired regularly and dried completely. Dirt must also be removed promptly. Wooden parts that are exposed to permanent weathering are more susceptible to mildew and mold growth, which is why storing garden furniture is recommended, especially in winter. Regular care of the wood and preventive mold protection are definitely recommended. Even before buying, you should pay attention to a suitable type of wood, for example hardwoods and pine species are considered to be more resistant to discoloration.

Infestation of joints, mattresses and prams

silicone joints
Even if the elastic and hard-wearing silicone is often used in homes, it is exposed to daily stress there and becomes porous over time. Even if it is considered relatively resistant to fungal attack, harmful mold can form again and again, which should be eliminated soon, especially here. Since moisture is always a perfect breeding ground for mildew and mold growth, rooms with high humidity, such as bathrooms and sanitary areas, are particularly affected by mold and need more frequent checks. Long-lasting moisture in combination with heat and condensation can not only cause mold to form on the windows, but also dirt often occurs on the seals and the water gets caught in the joints when it drains, which in turn promotes mold growth.

Basically, you should try to keep these areas as dry as possible. However, mold cannot always be completely removed from silicone joints. First, all gaps should be cleaned of dirt. A grout brush or toothbrush can be used to reach hard-to-reach areas. Then a mushy mixture of water and baking powder can be applied to the joints and worked in. The joint should not be damaged and the baking powder mixture should not dry out. Leave it on for an hour and then rinse off with clear water.

mattress
Unsightly and unhealthy mold stains can also form on mattresses. Reasons for mildew stains on mattresses can be a missing slatted frame, if the mattress is lying directly on the floor, moisture and moisture can accumulate. Air circulation through a slatted frame would be better. When buying a mattress, you should also pay attention to a certain level of breathability in order to rule out unfavorable ventilation and damage to health. Above all, allergy sufferers should prefer a high-quality mattress, as they can be particularly sensitive to pollen. Cold foam mattresses or gel mattresses are particularly suitable for preventing the formation of mold, a breathable cover for pillows and duvets, and regular ventilation and changing of the bed linen is also recommended. Mattress covers or bed underlays that rest on wider slats should also be adequately aired, since excessive pressure can contribute to the formation of mildew stains.

As soon as mold stains become visible on a mattress, you should act quickly, as mold can form as a result of the moisture. There are several home remedies for this: on the one hand, a solution of buttermilk can be applied to the affected areas, and direct sunlight is also often recommended as a home remedy for mold stains. However, if the mold has spread to the entire cover, the mattress must be disposed of. If the affected area is relatively small, a 1:1 mixture of vinegar and water can be applied to the mildew stain. This should act on the cover for 15 minutes and then be washed in the washing machine without rinsing. White laundry and a white cover can also be washed with a bleach containing chlorine.

stroller
Clothing and textiles are not the only things that can start to mold and develop mildew due to moisture. Everyday objects in particular, which are often used in all weathers, have an increased risk of infestation. If the yellow-greenish or brownish-grey spots form on the stroller, caution is advised. There is already a health risk here. However, you don’t have to throw the car away just yet. If you don’t want to resort to a chemical solution based on chlorine bleach right away, you can use simple household remedies to counteract the unpleasant discolouration.

To do this, vinegar essence and water must be mixed in a 1:1 ratio. Instead of the vinegar-water mixture, you can also use undiluted, high-proof alcohol, such as denatured alcohol or isopropanol. Then the respective solution is applied and then the corresponding area is covered with a cloth for at least 60 minutes. To prevent the vinegar essence or alcohol from evaporating, the area can also be covered with foil. Then wash off with clear water and repeat the process until the mold stains have been completely removed. Air out the pram well and let it dry completely. Another home remedy for getting rid of mildew stains on more sensitive areas of less robust fabrics is a paste made from baking soda or baking soda and water. This is applied to the affected area with a sponge or brush and then brushed off with clear water. Here, too, the cleaning process should be repeated until the stains have been removed and the stroller allowed to dry out completely. Washable items should also be cleaned in the washing machine. Stubborn stains can also be removed with an organic mildew remover.

In order to prevent mold from forming in the first place, the stroller should be completely dry, especially after rain. For this purpose, individual parts can be removed and dried separately. Storage in a damp condition should also be avoided. For a longer storage period, attention should be paid to a cool and dry storage location with low humidity.

Splinters under the skin are easier to remove with simple home remedies. This is how it works and you should pay attention to this.

Tweezers, baking soda and warm water will help

The splinter can usually be removed with tweezers. It is important here that it is sterile so that no germs get under the skin. You should also disinfect your hands beforehand. Some dexterity is required to grip with the tweezers. If you’re too rough, the splinter can break up into smaller pieces that are even more difficult to remove. Important: Do not push the splinter out, as this will push it even deeper under the skin. However, some splinters are so small that other means are required.

The first home remedy of choice is baking soda. To remove the splinter with baking soda, you will need 1 tablespoon of baking soda, 1 band aid or gauze bandage, and some water. The water needs to be mixed with the baking soda to form a paste-like liquid and then applied over the splinter. Cover the treated area with a plaster or gauze bandage for a few hours. Either the splinter has dissipated or you can now pull it out more easily with tweezers.

You can also detect splinters better with warm water. Place the injured area in a bowl of warm water several times a day. The splinter is easier to see when it is swollen, so that you can then remove it with the tweezers.

Other home remedies: tape and olive oil

The adhesive tape solution is also worth trying. For this you need strong adhesive tape, which you stick to the affected skin area. Then pull the tape off in the direction in which the splinter comes out of the skin. Ideally, it then sticks to it and is no longer in your finger. If you’d rather skip this more painful method, you might want to try olive oil. If you let this soak into the skin for a few minutes, you can better grab the splinter with the tweezers.

The bottle method is ideal for fingertip splinters. To do this, fill a bottle with hot water up to about one centimeter below the bottleneck. Then press your fingertip on the opening of the bottle. The warm water pushes the splinter out of the skin and can then be pulled out with tweezers.

If you have successfully removed the splinter, you should clean the wound again with disinfectant or alcohol. If no home remedy has served its purpose and your skin has been reddening for a long time around the splinter, you should have the whole thing looked at by a doctor. Incidentally, it sometimes helps to simply get a second person to help you pull out the splinter.

Great tips for removing old dowels and loosening stuck dowels. So it should be child’s play with the dowels. With instructions for filling holes.

Legal to remove the old dowel

There are more and more clauses in rental agreements about cosmetic repairs. A reasonable number of dowel holes are tolerated in the bathroom. But only those that need to be attached to towel rails or mirrors. However, if the rental contract also obliges you to carry out cosmetic repairs, you must at least close the holes.

Remove old dowels with a corkscrew

Removing old dowels is made very easy: If you have an old dowel in the wall, you can easily remove the dowel with a corkscrew. Simply turn the corkscrew in the old dowel in the wall. And then pull out together with the dowel.

Use an old screw if the dowels are stuck

If the anchor is too tight in the wall, it’s better to screw an old screw into the anchor. So you can easily take a pair of pliers and lever the dowel together with the screw out of the wall like a nail. But be careful not to damage the wall too much. And removing stuck screws should also be done.

Fill dowel holes with putty

After removing the dowel, you can close any holes in the wall or moving cracks in the screed. Putty from the hardware store is suitable for this. The filler can be bought ready-to-use in tubes for approx. 3 EUR in hardware stores. You can then use a spatula to easily fill in the dowel holes.

Mix the filler or apply it directly to or into the holes with the spatula. Then use the spatula to distribute the mass evenly around the dowel hole. After the putty has dried, you can smooth everything out with sandpaper.

Remove weeds effectively without chemical weed killers. Because with simple tricks, such as a weed fleece or home remedies, you can destroy and prevent weeds. We have collected the best tips for you and your garden.

The unwelcome weeds grow quickly and disturb the view of the lovingly planted garden. If you want to free your oasis of well-being and finally destroy the weeds, you can use everything from home remedies to chemicals. But what really helps as a weed killer?

What is weed

In the great outdoors one does not speak of weeds. In contrast, in cultivated nature, one speaks of so-called weeds. These are plants that were not deliberately planted by humans. But they grow seeds carried by the wind. Or by seeds that were already in the soil. Then they usually grow in the beautifully prepared flower bed or in the vegetable garden. Consequently, we find them here as a nuisance and the weeds must be removed.

From natural techniques to chemistry

There are many different ways to get rid of weeds in your own garden. Some of these are very short-term. And others have a long-term purpose. The type of means chosen also differs. While weed killers are more likely to be successful with chemicals, there are numerous variants that can be used to remove weeds without using chemicals. Also, note our tips for fighting ants.

1) Environment-friendly method: pulling weeds

The most natural and environmentally friendly way is weeding. It is still one of the most effective. You can often do this by hand and without tools. But for stronger weed plants, use light gardening tools, such as a garden claw. For very small areas, such as the joints on the terrace, joint scrapers or knives are suitable. With the help of these tools, weeds can be removed quickly and easily from the gaps in between. Read our tips on safety when gardening.

2) The weed killer: Hot water

If you want to do without useful garden tools and chemical products, you can use a simple household remedy as an alternative. Boiling water is a very effective way to get rid of weeds. The procedure is very simple. For this, you have to pour the boiling water over the plants. Then let it dry and then remove the weeds from the soil. The water destroys the cells and the plant dies.

3) Destroy weeds by flaming

If you only have a stone floor on your terrace, flaming off unwanted plants is also an option. In this case, they are effectively and quickly removed with the help of fire. Here, too, the heat causes the unwanted plants to die off. In addition, read our tips for beautiful terrace design and ensure a true oasis of well-being.

4) Get rid of weeds with vinegar

Other additives are also suitable as weed killers. Accordingly, many hobby gardeners rely on the household remedy vinegar to get rid of unwanted plants. To do this, dilute 1 part vinegar with 15 parts water. You can then spray the weeds with it.

5) Combat unwanted plants with salt

Using salt also helps. Because the salt should remove the liquid from the unwanted plants. As a result, they die. For this application, mix a tablespoon of salt with a small cup of hot water. Then pour the mixture over the weeds.

6) Baking soda and baking soda as weed killers

The popular household remedy baking powder and the all-rounder baking soda can also be used to remove weeds. For this, you can mix about five liters of water for pouring with about 2 packets of baking powder. Then you have to water the unwanted plants several times with it.

7) Use of chemical aids

If you don’t have the time to control weeds naturally, there are numerous chemical alternatives to choose from. However, these should usually be used with caution. Since they often damage other plants or deprive the soil of the nutrients they need. For this reason, before buying such products, you should always read the application description to find out about possible “side effects”. Also, note our tips for lawn care and lawn fertilizer.

Lots of useful tips, tricks, and home remedies for removing annoying pet hair in the home. Cleverly remove animal hair now and better avoid it in the future.

You are just as dear to us as family and friends, maybe even more so. Cats, dogs, and Co. are popular and have probably been since the beginning of mankind. Nobody really wants to be without their animal roommates and as different as they are, all pet owners share the same fate: the fight against animal hair.

Clever removal of animal hair in the household

Basically, in a certain sense, you simply have to accept that your own home will never be completely free of animal hair. But nobody has to succumb to the constant supply of hair without a fight. With a few tips, tricks, and home remedies, it is possible to curb the hairy invasion at least noticeably.

Maintain regularly with a hairbrush

Apart from a few exceptions, all animals with fur tend to lose hair more or less evenly. Hair is constantly being lost to be replaced by new ones. In cats and dogs, there are also phases during the change of season in which there is an increased loss of fur from the summer coat to the winter coat and vice versa. There are different types and options for fur care in pet shops. Here it is worth getting advice and investing in a suitable hairbrush or special gloves with which loose hair can be brushed off directly. Most pets enjoy daily brushing, plus so much of that loose hair ends up in the trash before it even makes it onto the couch.

Blankets for all skins as the lesser evil

Most hair can be found in places where pets like to hang out. You should therefore prepare frequently used places accordingly in advance. A comprehensive collection of blankets and towels makes life easier for pet owners. These can be placed on sofas, armchairs, carpets, and the like. It is far more practical and easier to clean hairy ceilings than furniture and carpeting. In addition, blankets are used to protect furniture and floors from claws and other dirt. Other felt and coarse cotton have proven to be particularly robust and easy-to-clean fabrics that can withstand a large number of wash cycles.

Quick help with animal hair on clothing

A huge help in the battle between clothes and pet hair is to use a clothes dryer. This not only avoids cumbersome ironing but also dust, lint, and animal hair end up in the dryer sieve. If you don’t have a dryer, you should dry your clothes outside of your home if possible, or at least in a room that is not accessible to the animals. It would also be good if clothes that are currently being worn disappeared into closets and drawers. Also, wipe dust regularly and clean hair and other dirt regularly.

Lint rollers with removable adhesive strips

For clothing that is to be worn, lint rollers with removable adhesive strips have proven their worth. They are very thorough, easy to use, and can also be offered to guests when they say goodbye. However, if you want to avoid waste and constant shopping for adhesive strips, you can use a home remedy. To do this, collect old nylon stockings. If you put it on like a glove and rub it over hairy clothing, you can remove hair and dust very easily. With coarse and very fine fabrics, it helps to soak the tights in water beforehand and wring them out.

Adhesive tape and microfiber cloths for emergencies

In an emergency, classic clothes brushes, strips of wide adhesive tape, and clean, dry microfiber cloths also help, albeit not as well. In this way, even long hair can be removed from the carpet without much effort.

Vacuum cleaner against animal hair

Anyone who does not want to hide their own furniture from animal hair infestation with cloths and plastic covers should at some point deal with the perfect removal method. Sooner or later it is advisable to invest in a high-quality, powerful vacuum cleaner for pet hair anyway. Special attachment nozzles are available for most models, with which furniture can be thoroughly cleaned of hair and dust. This purchase is definitely worth it.

Upholstery brushes help remove pet hair

However, you cannot clean all surfaces with a vacuum cleaner. Special upholstery brushes help to remove pet hair quickly and effectively when cleaning upholstery. These aids are available in pet shops and specialist shops, and many pet owners swear by different products. However, the offers for the supposedly perfect cleaning result are quite extensive. Also, some removal options may work better than others on certain fabrics. Exchange with other “affected persons” and advice in retail can prevent expensive bad purchases and frustration.

Damage control as a daily challenge

No matter what advertising and product manufacturers promise, anyone who keeps pets has to accept that their own home will be covered with a “basic amount” of animal hair. Daily vacuuming, regular changing of blankets, and cleaning of pet beds and pillows will greatly improve the hairy catastrophe. But if you don’t go through an excessive cleaning regiment, you just have to get used to encountering different amounts of animal hair more or less everywhere. However, with a good vacuum cleaner, an adequate selection of blankets, towels, pillows, and bedding, and a habit of dusting where you stand and go, the hairy problem can be contained to manageable levels.

Useful tips to remove the cat urine smell. Anyone who has ever had cat urine anywhere in the apartment knows how stubborn it can be. Now remove cat urine from sofas, carpets, or wood.

If the smell of cat urine spreads in the apartment, quick help is required. Or if your darling has a mishap on the sofa, that’s no longer a problem. Because we have collected home remedies for cat urine and the bad smell for you.

Effective home remedies for cat urine

After you have found and eliminated possible causes, you can eliminate the cat urine problem. There are a number of methods to choose from to remove cat urine odor. Consequently, you can use various means to remove cat urine and neutralize odor. In addition, note our tips for neutralizing odors in a smelly apartment.

1) Neutralize odor with baking soda or baking soda

If the mishap has just happened, you can optimally bind cat urine with the household remedy baking soda and neutralize the smell. To do this, apply the powder to the urine stain and leave it on until it is dry. You can then remove everything, for example with a vacuum cleaner. It works just as well with the use of baking soda.

2) Remove cat urine with myrtle oil

Pure myrtle oil has long been popular with cat owners because it effectively counteracts cat urine odor. But the oil contains substances that are toxic to cats. Therefore, the oil should be diluted before use. So put a few drops in water. You can then wipe over the affected area and effectively remove the cat urine smell. Also, note useful tips for removing cat droppings from the carpet.

3) Lemon fragrance or cleanser with citrus freshness

If you want to prevent cat urine smell, you can put some lemon scent on the spot where your cat prefers to pee. Because cats don’t like the smell and avoid these places. It can also be helpful to place orange peels in preferred locations. Lemon juice is also a good home remedy for fleas in cats.

4) Remove soap and coffee powder from urine

You can also remove the stain using gall soap. Then you can spread some coffee powder on the spot to get rid of the smell of cat urine as well. After the powder has dried, you can gently brush or vacuum it off.

5) Vinegar cleaner against cat pee odor

A homemade vinegar cleaner is a good home remedy for cat pee odor. For the production you need the following resources:

  • 1 part distilled vinegar
  • 2 parts warm water

Then apply this mixture to the urine stain with a sponge and let it dry for about 10 minutes. You can also put the agent in a spray bottle and spray the stain. Once the vinegar has dried, rinse off with lukewarm water. Consequently, the smell of urine is neutralized. Vinegar is just as effective in removing the smell of nicotine.

6) A mix of hydrogen peroxide

An alternative to the vinegar solution is a hydrogen peroxide mix. It’s best to make this mixture in a disposable cup or container that you can throw away afterward. Since the remedy quickly loses its effect, you should use it within 2 hours at the latest. In addition, you should test the bleach on an area that is not visible beforehand. For the mixture you need the following ingredients:

  • 450 ml hydrogen peroxide solution 3%
  • 2 tablespoons baking soda or baking powder
  • 2 drops of dishwashing liquid or liquid soap

Instructions for using hydrogen peroxide

You should also use the hydrogen peroxide as in the following instructions. The following application tips will ensure that everything works perfectly. Equally interesting is the treatment of skin fungus with hydrogen peroxide.

  • put on protective gloves
  • Pour hydrogen peroxide into the container
  • Add baking powder or baking soda
  • Add dishwasher or liquid soap
  • Put the remedy on the urine stain and rub it in
  • let dry
  • wipe with a damp cloth

7) Special cat urine odor eliminator

‘If the above remedies don’t work for you, then you can resort to special cat urine odor eliminators. Because these usually contain effective pro-bacteria and enzymes. And you can get these enzyme cleaners at pet stores, drugstores, or online. You can find out how to use them in the instructions for use. Also, note our tips for neutralizing the odor of the litter box.