Tag

remove

Browsing

Many tips for removing chocolate stains at a glance. Small children and babies especially love chocolate. Unfortunately, the little ones pay little attention to the fact that the delicious treat disappears completely in their mouth. The little hands are quickly smeared with soft chocolate mass, which is then unerringly distributed on the sofa, trousers, or car seat.

But chocolate stains usually look worse than they are. First of all, keep calm and act prudently. Many people tend to immediately rinse the chocolate stain under warm water. However, this is counterproductive and can allow the stain to penetrate even deeper into the fabric. With the right tips, you can almost always completely remove the annoying stains without having to resort to expensive stain removers or special cleaners.

General chocolate stain tips
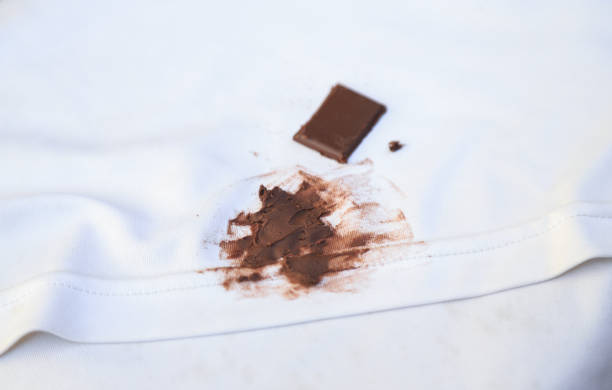
Depending on the type and amount of material the chocolate stain is on, you should use different stain removal procedures. However, there is one thing in common: In the beginning, you always remove the chocolate with the unsharpened back of a breakfast knife, regardless of the surface. Using gentle pressure, scrape off the excess chocolate mass with the knife without making the stain worse.

A large part of the contamination has already disappeared. What remains is a small residue and a grease stain. And this is the real problem with a stain treatment. You need the following things to completely remove chocolate stains:

  • dinner knife
  • gall soap
  • cloth or sponge
  • detergent
  • possibly flour and salt
  • possibly milk
  • possibly potato flour
  • possibly sparkling mineral water
  • spirit of wine

Remove chocolate stains from clothing

Blouses, jeans, jackets, dresses, skirts, and T-shirts, in particular, are popular targets for chocolate stains. Be sure to remove the garment for cleaning. This makes it a lot easier to clean. First, carefully remove the excess chocolate mass with the blunt side of the knife. Then dab and rub the remaining chocolate off the garment with a soft cloth, some warm water, and a few drops of washing-up liquid.

A light greasy film will probably remain in the fabric. To remove this as well, rub the greasy spot with some effective gall soap and leave it on for a good 10 to 20 minutes. Then wash the garment at the highest possible temperature (observe the washing label) in the machine. After the wash, the chocolate stain should be a thing of the past. You should also try the following household tips for removing chocolate stains:

  • Lukewarm milk is a home remedy for removing chocolate stains. Pour slightly tempered milk into a large bowl or bowl. Then soak the dirty clothes in it for a good 30 minutes. Then rinse the chocolate stain out with cold water and wash the clothing in the washing machine at the highest possible temperature.
  • You can also tackle this annoying stain with potato flour. Sprinkle this on the remaining grease stain and let it soak in well. The finely ground flour literally attracts and binds the fat molecules. After about 20 to 30 minutes you can brush the potato flour out of the stain again. Last but not least, with this household tip you have to wash the wardrobe at a high temperature in the washing machine.
  • Another possibility for this staining problem is bottled water. But it must contain carbonic acid. Pour the carbonated water generously over the dirt and let it soak in. In the meantime, you should regularly rub your finger gently over the stain. You can also use it to remove fruit stains.
  • Flour and salt also give good results and you probably have these two ingredients at home. First, sprinkle the salt on the chocolate stain and let it sit for a while. Then shake it off and sprinkle flour over it, which you also leave to work. After shaking off the flour, you can machine wash the fabric. Salt and lemon have a similar effect against red wine stains.

Remove chocolate stains from upholstered furniture
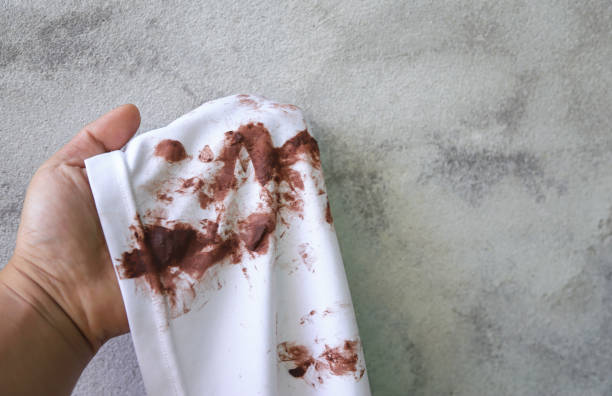
When nibbling or snacking, a chocolate crumb falls on the seating area or sofa. You quickly sit this wide and only notice the mishap later. In order to be able to clean the upholstery properly, proceed as follows: First scrape off the chocolate mass with a paring knife. Then rub the stain with a cloth, lukewarm water, and a little washing-up liquid without enlarging it or smearing it. The detergent dissolves the fat and is absorbed by the cleaning cloth. Then treat the dirt with gall soap to remove the last shadows. Finally, rub the damp area dry with absorbent towels.

Eliminate chocolate stains from velvet and silk

Silk and velvet are very sensitive fabrics, which is why the chocolate grease stain often gets stuck in the fabric. We ingest from the pharmacy is your salvation here. Rub the area with it and then wipe with lukewarm water.

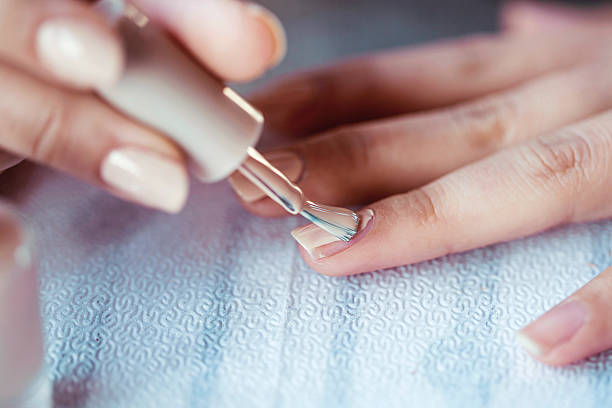
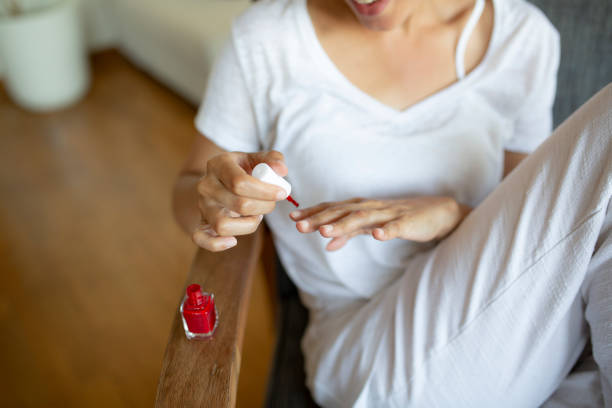
Women, in particular, are familiar with the problem: a small slip and the nail polish are already on the clothes. And as if that wasn’t bad enough, you’re wearing the new and, above all, expensive top. It is well known that nail polish is very aggressive and therefore cannot be removed easily. But with the right products, which can mostly be found in your own household, nail polish stains can be easily removed from clothing. Above all, it is important to act quickly if you want to save yourself the trip to the expensive cleaning service.

Dab quickly – do not rub

Beautiful nails are often painted with nail polish. If you paint your fingernails with nail polish, you should always have a cotton ball or a cloth ready. These are used when something goes wrong and the nail polish ends up where it doesn’t belong – on the clothes. In addition, note other tips for painting nails.

It is important to act quickly. The stain should be dabbed off with a cotton swab or a towel as soon as possible – never rub! Rubbing would destroy the textures of the clothing, causing the nail polish to get even deeper into the clothing. As a result, it will be even harder to completely remove the stain later.

Remove the stain with nail polish remover

After most of the stain has been blotted, nail polish remover can be used.
However, before treating the stain with it, the application should be tested on an inconspicuous area of ​​the garment. The clothing may react poorly to the nail polish remover, which would increase the damage. If this is not the case, a piece of paper or a towel should first be placed under the affected area. This catches any nail polish remover that may drip out in the next step.

A towel or cotton ball is now lightly dipped in the nail polish remover. The nail polish stain is now dabbed with this until the stain has completely disappeared. Any residue of the nail polish remover can be removed with a warm, damp cloth.

Remove nail polish with white spirit

A good alternative to nail polish remover is petroleum ether, even if it may not be found in every household. The use of this is particularly recommended if a piece of clothing shows bad reactions to nail polish remover.

The same applies here: Dip a cotton swab or a towel in some white spirit and dab the stain until it has been completely removed. If there are residues here too: simply remove them with a warm, damp cloth.

Remove nail polish with acetone as a stain remover

Anyone who has neither nail polish remover nor benzine to hand can consider whether there is acetone somewhere in the household. This is also great for removing nail polish stains from clothing. The same application applies here as for nail polish remover and benzine.

Then in the washing machine

Nail polish remover, acetone, and mineral spirits may be good stain removers, but their smell is certainly not pleasant. It is therefore advisable to put the respective garment in the washing machine after treating the textile. The usual washing program should be used here – the odors have now disappeared and the garment can be worn again.

Remove nail polish from clothing

  • If possible, dab the nail polish off immediately with a cotton ball or towel
  • Never rub!
  • Put nail polish remover, mineral spirits, or acetone on a cotton ball/towel
  • Blot the stain until it is gone
  • Then wash the garment in the washing machine

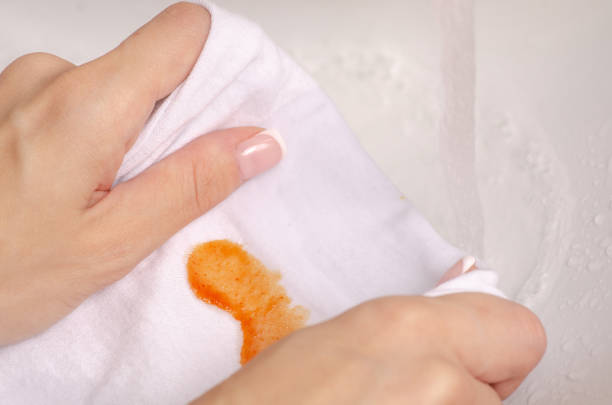
Lots of useful tips for removing tomato stains. Now it’s child’s play to remove tomato stains at home. Nowadays, many dishes are unthinkable without the use of tomatoes. While there are some recipes for good tomato dishes, none for removing tomato stains from clothes. Cooking with tomatoes should be fun, be it for spaghetti bolognese or any other dish, without fear of possible stains on clothes.

Removing tomato stains from clothing and textiles

Many are of the opinion that removing tomato stains from clothes is difficult. However, this is easier than you think. If you slip up, stay calm and act quickly, because a fresh tomato stain is much easier to remove than a tomato stain that has already dried. First of all, it should be determined what the stain on clothes consists of.

This is of enormous importance, as the finished products made from tomatoes can consist of a wide variety of ingredients such as vinegar, sugar, or oil. This should be taken into account when removing the stain. If you are still inexperienced in treating such stains, you should first test them with a wide variety of cleaning agents and cleaning processes in small and inconspicuous areas. Best in the inner area. By doing this, it can be recognized whether there will be damage to the clothes or not. You can also read tips on removing carrot stains.

Removing tomato stains from homemade tomato sauce

The cleaning process for a homemade sauce made from delicious tomato plants is quite simple:

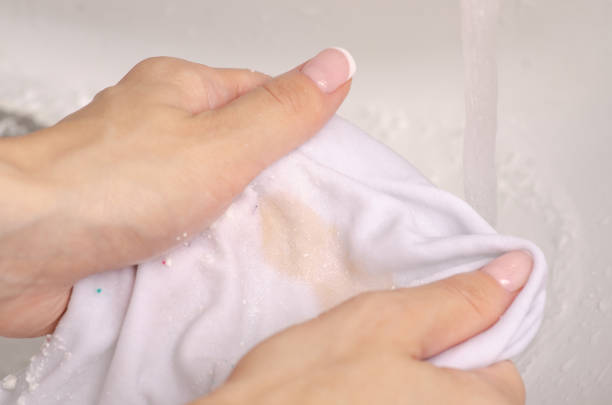
  1. First, a knife should be used to scrape off as much of the tomato stain as possible. Then let cold water run over the affected area from the wrong side of the fabric. This wash removes the tomato stain in the same way as it was on the clothing. Turning the fabric over or rubbing the affected stain should be avoided at all costs, as this would only aggravate the situation and the stain would set in.
  2. Once the first step is done, it is advisable to take a wet and clean cloth with a little detergent and wipe the stain with a small circular. washing out movements. You should pay attention to the instructions for use of the detergent so that the fabric is not damaged.
  3. If all steps have been followed properly, most of the tomato stain should be removed from the clothing. The piece of textile must then be washed with a high-quality detergent. A gentle washing program in the washing machine would be helpful here.

Remove tomato sauce with oil

If a tomato sauce contains oils or fats, you have to proceed differently here. Because removing oil stains is a little more difficult.

  • First, the stain on the clothing should be blotted with an enzyme-based liquid detergent. This attacks the oil and fats directly.
  • Then, when most of it is removed, finish the rest with Kreis. Remove movements and the use of cold water and then put in the washing machine.

Remove tomato sauce with vinegar and sugar

For tomato stains with sugar or vinegar, the use of warm or hot water should be avoided. If you use hot water to remove it, you only strengthen the stain on the clothing. The affected fabric should therefore be cleaned with cold water and dried in the open air. You can also learn how to effectively clean your workwear.

Ind and weather leave rust on the grill grate and stains on the whole grill. Not very appetizing and above all unhygienic.

In an hour the guests will be at the door and you have just discovered that your grill has suffered over the winter. Rusty spots and stains everywhere. Unhygienic and unaesthetic! Of course, you don’t want to expect that from any guest. There are a few simple tricks to avoid embarrassment and raised eyebrows without having to rush to get a new grill.

Also, note the tips on charcoal and types of charcoal and the clever tips for grilling vegetables.

Remove rust stains on grillage with aluminum foil

To remove the rusty spots, there is a quick and easy housewife tip. Wrap the grill grate tightly in household aluminum foil. Make sure that the foil is firmly pressed together at the edges. It is also important that aluminum foil encloses the grill grate airtight. Hang the packed grill grate over the glowing charcoal for about ten minutes as if you wanted to grill normally. Then simply set it aside to cool. After the grate has cooled, you can remove the aluminum foil. The rust spots are gone. Now just wipe again and the guests can stand in front of the door.

Clean the grill grate with newspaper

The easiest way to get any grill clean again without any effort: Cover the grill grate with wet newspaper immediately after it has cooled down. The encrustations can be easily removed after soaking with a sponge and washing-up liquid. You can also put the grill grate on the meadow or in the grass overnight. This allows the wet grass to soak overnight and the morning dew to soak. Moisture softens the hard incrustations. The next morning you can simply remove it with a newspaper

Cleaning the grill grate with ashes

When grilling with charcoal, the ash can be used to clean up. Simply rub the grill grate with a damp old cloth and the ashes from the grill. A mash of ash will write off the grill crusts. Then rinse the grill grate with water. As a side effect, you can use the ash mixture in the garden as fertilizer. Ash is a natural fertilizer.

Prevent rust stains on the grill

To protect the cleaned grill grate from stains, it is best to grease it with cooking oil before each use. This protects the rust but is also suitable for consumption at the same time. Be careful not to use too much oil so that none of it drips into the fire later. You should also make sure that the grate is always dried well after cleaning with water.

Let the grill shine with coffee grounds

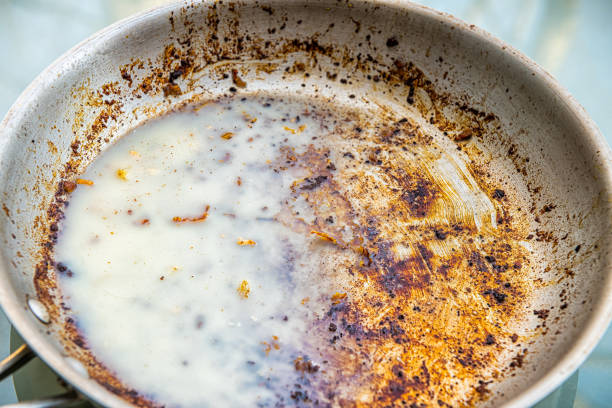
To clean the body of the grill, remove the grate. Sprinkle your old coffee grounds (e.g. from breakfast) on the grill. This tip works best when the grill is still slightly warm, but a cold grill also comes out clean. However, you should not use this tip immediately after the fire has been extinguished. Wipe vigorously. The grill is cleaned quickly, gently, and above all without toxic chemicals. Stains and burnt-on grill residue are sanded off by the coffee powder. The result is amazing!

Tips and home remedies to clean deposits in the toilet and to remove urine scales in the toilet. If deposits have formed in the bowl of your toilet that cannot be removed with conventional cleaning agents, you can clean the inside bowl of the toilet with cola.

Remove deposits with cola

Just pour the cola into the toilet bowl and clean it with the toilet brush. Then let it soak in for a moment, brush again, and then simply rinse off. In the case of heavy soiling, you can leave the cola to act overnight. The toilet is clean and shiny again.

Remove urine scale and deposits with vinegar

Vinegar is a miracle cure for limescale and urine scale. Here are simple but very effective instructions for removing the urine scale with vinegar:

  1. You need a lot of vinegar to clean the limescale and urine scale.
  2. Spread vinegar on a rag or pour it directly into the toilet bowl.
  3. Leave the vinegar on for a long time. A few hours is ideal. You can also pour vinegar down the toilet in the evening and leave it on overnight.
  4. Clean the toilet with a sponge or scrubber. Keep using new vinegar.
  5. You can use the toilet brush to help.
  6. The last resort for stubborn crusts is steel wool. In combination with steel wool and vinegar, you get every toilet clean.

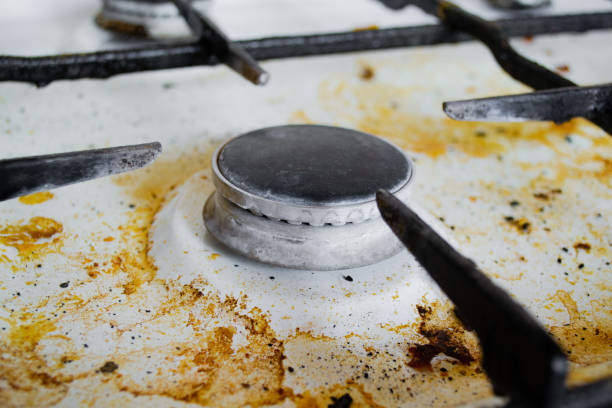
Home remedies and tips for removing fat in the kitchen. Quickly and easily remove grease deposits from kitchen cupboards or kitchen furniture. Because even in the best kitchens, from time to time a film of grease can build up on the cupboards.

How to remove fat in the kitchen? The disgusting grease in the kitchen can be removed easily and in an environmentally friendly way with various home remedies. We show you the most effective home remedies for removing a greasy film in the kitchen. Because if you don’t get rid of the grease regularly, it will be difficult to remove later.

Home remedies for fat deposits in the kitchen

Various home remedies are suitable for cleaning and removing grease. These are especially good because they contain no chemicals. This allows you to gently clean your kitchen and remove the dirt layer of dust and grease with ease. You can also find most home remedies in your own kitchen. One more reason to use the following tools to remove kitchen grease.

1) Remove fat with baking soda

Everyone knows the problem with the greasy film in the kitchen. The use of effective baking powder is suitable for removing stubborn fat from the surfaces. Simply take some baking powder, about 2-3 teaspoons. Then sprinkle it onto a slightly damp sponge or rag. You can then use it to wipe down the cabinets and cabinet surfaces. Consequently, the dirt film is thus bound in the form of crumbs. And then you can easily remove the fat. Then wipe again with water.

2) Vinegar to remove fat

The miracle cure vinegar is often used. Vinegar is a useful home remedy. So it’s no wonder that it can also help you to get rid of the unwelcome layer of fat in the kitchen. Simply mix a little vinegar with the same amount of detergent. Then apply this mixture to the affected area and let it work for a moment. Then you can simply wipe the areas with water. You should be able to remove the fat with ease. Also, read how to remove stains from the mattress with vinegar.

3) Vegetable oil against fat deposits

You can also use vegetable oil to remove fat deposits in the kitchen. For example, use sunflower oil or use effective olive oil. Put a few drops on a sponge or rag. Then rub the greasy surfaces with it. This is how you dissolve the fat film. To remove the grease completely, you should then wipe it off with a little washing-up liquid and water. This method is great for removing greasy fingerprints.

4) Remove grease stains with gall soap

If you haven’t cleaned your kitchen of grease deposits for a long time, then you should start doing it quickly. Because the longer you wait, the more difficult it is to clean greasy surfaces. Gall soap is a cheap and environmentally friendly miracle product for removing grease in the kitchen. Accordingly, moisten the grease stain with water. Then rub the area properly with gall soap and let it take effect for a few minutes. Finally, you need to rinse the affected area with water. Also, note our tips for removing grease stains on wooden furniture and wood.

5) Remove the grease from the dishwasher tab

You can also use a dishwasher tab to help fight grease. This is also a clever way of removing kitchen grease. To do this, you have to put the tab in a spray bottle filled with water. Then you wait until it has completely dissolved. When the tab has dissolved, you can spray the greasy surfaces and cabinets with it. Leave it on for about 15 minutes. You can then wipe everything off with clear water and the greasy film should be removed. Also, read how you can cleverly remove grease stains and oil stains.

Prevent fat deposits

Grease deposits in the kitchen are a tiresome topic. And in the kitchen, greasy surfaces and cupboards are quickly covered with a film of grease. To avoid stubborn grease, you should clean your kitchen regularly. You should also clean and clean the ceramic hob immediately after cooking. Fat deposits don’t even stand a chance and you save time. Because once the fat has dried it is difficult to remove. You should also always line baking sheets with parchment paper. You can also equip your cupboards with newspapers. You should make sure that the paper lies tightly on the surface. Otherwise, it collects underneath.

Fat-dissolving products from the Internet

You can also use online degreasing household products to remove stubborn grease deposits in the kitchen. We have selected products for you, including environmentally friendly orange oil cleaners.

Now remove the acrid smell of vomit easily and cleverly. Because vomit not only looks unpleasant but also smells extremely bad. After removing the puke, the odor often lingers for a long time.

You don’t always make it to the toilet in time or hit the bucket in front of the bed. And then you have the salad. Because the smell often persists despite immediate cleaning. Getting the smell of vomit out of textiles, however, requires fewer resources and a little time.

Remove vomit step by step

The surge-like emptying of the gastric contents is extremely unpleasant. There is also an acrid odor. And the smell of vomit tends to linger on textiles for a long time, making them difficult to remove despite immediate cleaning. There are several simple methods to remove the smell of vomit. The majority of these include means or objects that are available in every household. It is important that the vomit is cleaned up quickly and completely. If there is still vomit on the affected area, the area must be soaked with water to make the vomit easier to remove. But especially on carpets, not too much water should be used, as the water spreads quickly and the stain could become even bigger.

1) Cat litter and sawdust against vomit

First of all, you need to remove the vomit as soon as possible. You can sprinkle cat litter or sawdust on the vomit first to get rid of the vomit faster. Because these two tools bind the liquid. This makes it easier to remove. They also help to neutralize odors. That’s why you should use one of the two methods as a first step. Cat litter can also be used to clean mattresses and remove stains.

2) Detergent against smelly odor

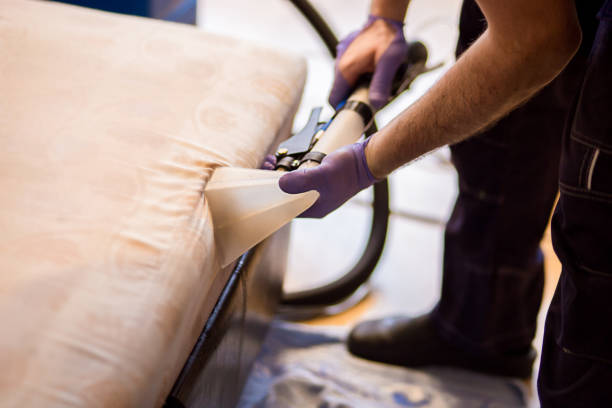
For the first method, you only need commercial detergent. After removing the vomit, you still have to rub the detergent onto the wet textile with a hard-bristled brush. If the fabric is delicate, you can dilute the detergent with a little water. For white fabrics, you can replace the detergent with bleach. Then vacuum with a normal vacuum cleaner or a wet vacuum cleaner.

If you use a vacuum cleaner, it must be suitable for both dry and liquid vacuuming. If you don’t have a wet vacuum cleaner or a vacuum cleaner, you can also use a dry kitchen towel. You should then wet the textile again to remove the remaining detergent residue. Then repeat this step until all of the product has been removed. Because soap residue from the detergent leads to discoloration on the textile. After drying, the smell of the vomit is usually gone. Also, note our tips for neutralizing odors in the home.

3) Water-baking soda paste for textiles

As an alternative to detergent, you can use a paste made from baking soda and water. First, mix the baking soda with water until it forms a paste. If you want, you can also add a drop of dish soap or bleach. But you can only use bleach on light-colored fabrics. Otherwise, stains may occur. The bigger the stain, the more paste you’ll need. Also, make sure the paste isn’t too thick or clumpy. Since you need to apply it evenly and thinly to the affected area. Once dry, you can remove them with a stiff brush or an old toothbrush. The drying process should take at least 24 hours. So that the paste has an effective effect. If there are still paste residues after brushing off, you can remove them with a vacuum cleaner or by hand.

4) Vinegar and window cleaner for puke

Instead of a baking soda paste, using vinegar, acetic acid, or window cleaner also helps. For this, you have to mix the vinegar or the window cleaning agent with water. So mix one part vinegar with two parts water. You can also add a drop of bleach or dishwashing liquid for even better odor control. You can then apply the vinegar-water mixture to the affected area with a brush or sponge. The mixture now acts on the textile for one to two hours. Finally, you have to vacuum up the mixture again with a wet vacuum cleaner or towel. If you’re using a towel, you’ll need to apply constant pressure as you remove it.

Effective products from the Internet

If nothing helps because the smell of the puke is so strong or you don’t have any home remedies handy. Then you can use tools from the Internet. Because they too can successfully eliminate the smell of vomit. So it quickly smells fresh again at home. We have selected the best for you. The product “Dufti Spezial”, which was recommended by one of our readers, is also included.

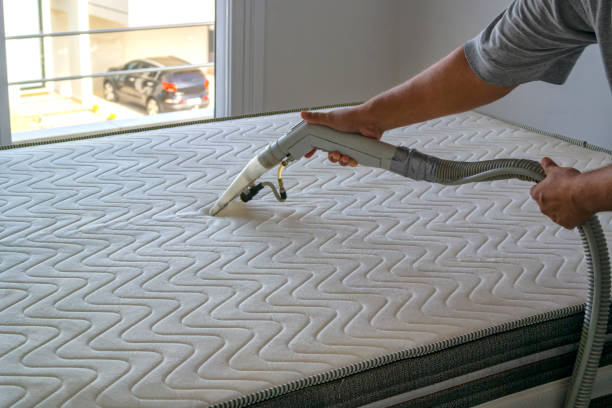
Instructions for thorough mattress cleaning and successful stain removal. Our housewife tips help to keep the mattress fresh and attractive over a longer period of time without great expense.

Most people spend more than a third of the day in bed on their mattresses. Over time, more and more sweat, skin flakes and other dirt accumulated in this area. On the one hand, this leads to an unsightly appearance and, on the other hand, it promotes the spread of mites.

Good reasons to clean your mattress

A mattress is a place where we spend a lot of time. So you should clean them regularly. Because up to 10 million house dust mites live in the bed. The small arachnids are basically harmless. However, their excretions can trigger house dust mite allergies in sensitive people. Possible signs of a mite allergy are sneezing attacks or a stuffy nose. In addition, sweat and skin flakes accumulate over months and years. And stains can also appear on the mattress.

Mattress cleaning methods

There are several methods you can use to clean your mattress. Likewise, you should perform some methods regularly. While intensive cleaning is only necessary once a year. But the rule is: the more often, the better. You should definitely air, turn and brush your mattress regularly. Proper care of the bedding is also important. In the following, we will show you which methods you can use to get your mattress clean again.

1) Wash mattress cover

If you have a removable cover, you can most likely machine wash it. This is the easiest way to clean your mattress. But before doing so, be sure to read the information on the care label. Because using the right temperature (often max. 60 degrees) and a recommended detergent are important. Then let it air dry. Or if possible in a good tumble dryer.

2) Dry cleaning with baking soda

This quick mattress cleaning is good for in between. To do this, first remove any hair, dander, and dirt from your mattress with a brush. Then spread baking soda evenly and leave it on for a few hours. It is a good help for odor neutralization. It also kills germs, fungi, and bacteria. You can then vacuum up the powder with the vacuum cleaner. Repeat this cleaning every 3-4 months on both sides of the mattress.

3) Damp cleaning of the mattress

You should also damp clean your mattress once a year. You will also need baking soda for this. Spread the powder on your mattress. Then rub it in with a damp, warm sponge. The combination of hot water and baking soda creates an alkaline solution. As a result, proteins and fats are broken down. After the paste has dried on the mattress, you can simply vacuum it up.

More tips for a clean mattress

In addition to cleaning your mattress regularly, there are a few things you should keep in mind. We give you tips on fighting dust mites, choosing the right mattress, and removing stains.

4) Control of mites

Regular cleaning of your mattress with baking soda helps against dust mites. In addition, the powder not only has a disinfecting effect but also removes mold. It also eliminates unpleasant odors. In addition, you can carry out the treatment with baking soda both dry and wet, as described above. Other tips against house dust mites or an anti-mite vacuum cleaner can also help you.

5) Fight mold

Stains caused by moisture, such as mold or stick, should be removed quickly. Therefore, it is best to place the mattress outdoors so that it can air out well. Then vacuum your mattress thoroughly with the vacuum cleaner. So that the mold spores do not spread elsewhere, dispose of the vacuum cleaner bag in the garbage can. You can also remove stubborn stains with rubbing alcohol, which you can get at the pharmacy. So put the alcohol on a sponge and rub away the mold and mildew stains with the solution. Mold is a serious issue. And don’t underestimate the dangers of mold. Therefore, also note our other tips for removing mold. If the mold infestation is too severe, it is better to replace your mattress, as the spores are harmful to your health.

6) Choose the right mattress

Some mattresses are more prone to certain stains than others. This means that sweat stains can develop more quickly on cold or thermal foam mattresses due to their material properties. These include, for example, the innerspring mattresses. Waterbeds and latex mattresses are more insensitive to liquids, as they do not absorb liquids due to their material properties.

But of course, this only applies to the mattresses themselves – there can still be a lot of stains on the covers. Unless they are provided with a liquid-repellent pad. Therefore, when buying a new mattress, pay attention not only to the inner values but also to the cover. Because if this is easily removable and washable at least 60°, you can confidently drink your coffee in bed. Also, note other tips for buying a mattress.

7) Avoid mattress protectors

A real mattress no-go: mattress protectors. Their use is already clear from the name – they should protect the mattresses. Unfortunately, this is only partially true. While such a protector does protect the mattress from moisture, it can also create more serious problems inside the mattress. Air circulation is impeded by mattress protectors so that mold can form inside. It is not advisable to use these supposed helpers. If you still want one, you will find a wide variety of mattress toppers, and when choosing one you should make sure that it is of good quality.

Remove stains, but how?

Who doesn’t know it: Sunday breakfast is often spent in bed. But at least once a year it happens that the coffee cup suddenly becomes independent. Result – a soiled mattress. or do you have children Then you can surely sing a little song about stains? No matter how careful you are, something always goes wrong. That’s why we’re giving you tips on how to get rid of the top 4 mattress stains. You will also receive further tips with regard to the correct cleaning and selection of your mattress.

Remove glue, superglue, and glue residue – we have the best tips. This is how you get rid of adhesive residues on a wide variety of materials such as wood, fabric, and your fingers.

Super glue is a great thing, it sticks to just about anything and is very fast too. Unfortunately, it happens again and again that the glue doesn’t just drip where you need it. With these housewife tips, you can remove glue stains and any super glue.

Remove glue and glue residue

We start with a general tip on how to remove annoying adhesive residue. This can be used on different materials and situations: Hot air removes glue stains and residues. You can work very well with a hairdryer or a heat gun. As soon as the adhesive is heated to approx. 80 degrees, you can remove adhesives. Be careful not to overheat the area being treated. In the following, we explain how you can get glue and glue residues off your skin, clothes, wood, and your car window with additional tips.

Get (super)glue off your skin

If you have superglue on your skin, don’t peel it off. This takes hours and could become painful. At this point, we will tell you three effective tips on how to free your skin from the annoying glue as quickly and painlessly as possible.

Tip 1: Dishwasher

Take some dish soap and lukewarm water. You should let the area of ​​the skin with the glue soak well. Then the glue dissolves almost by itself. You can then either wash it off or gently detach it from the skin at the point of contact and then clean it with soap and water.

Tip 2: Oil

You can also use fat or oil to remove super glue and adhesives from the skin. Just soak your finger in a bowl of sunflower oil. After a reaction time of a few minutes, the adhesive should be able to be removed. At the same time, the skin is cared for by the oil.

Tip 3: Vaseline

Glue on the skin is also easily removed with petroleum jelly. Simply apply Vaseline to the affected area and let it work for a short time. Body heat also gets the petroleum jelly under the glue and it can be easily peeled off without damaging the skin.

Get rid of adhesives on clothing and fabric

Glue on clothing also causes some resentment at first, but it happens again and again when doing handicrafts with the children or the current DIY project. But here, too, we have effective methods for saving your clothes.

Tip 1: nail polish remover

Nail polish remover containing acetone can not only remove nail polish from fabrics but also glue residue on clothing – by filling up a cotton ball with it and pressing on the unwanted super glue for a while. The adhesive mass then dissolves and it can be washed out of the clothing. It is advisable to wash out the coarse adhesive residues and cotton fibers by hand before the next machine wash.

Tip 2: Oil

Oil can also help you remove glue from fabrics. You can use regular cooking oil. Rub this into the glue stain and leave it on for a few minutes. You should then be able to peel the glue stain off the fabric with ease. However, it is important that you wash the garment immediately afterward so that the oil is removed from the fiber.

Tip 3: liquid heavy-duty detergent

It sounds trite, but it often works: If you wash the item in question immediately, a liquid heavy-duty detergent is often enough to remove the glue from the clothing. To do this, you should soak the area briefly before washing, preferably with a special agent against adhesive residues, and then wash it in the normal.

Remove (secondary) glue on wood

Did a mishap happen while tinkering on the expensive new solid wood dining table? There are several ways to remove superglue and glue from wood. We explain the three most effective and popular in the following tips.

Tip 1: Fingernail or spatula

Try digging under the glue with a fingernail. Then you can simply peel off the glue stain. You can also carefully use a spatula or knife to help. This trick works particularly well if you heat the glue with a little bit of hot air from a hairdryer. Then the adhesive strength on the wood surface can be reduced and you can loosen the glue more easily.

Tip 2: Acetone or nail polish remover

If the wood is treated, it is better to use acetone or nail polish remover. Simply apply to a cloth and then rub into the stain. But be careful with the amount, otherwise, the varnish on the wood will also dissolve. Treat the wood later (e.g. with a wood polish).

Clever tips and natural home remedies to combat and permanently remove a stinking musty odor in the basement. We have collected the best tricks against moisture, bad smell, and mold for you.

Who doesn’t know this typical musty scent that a vaulted cellar likes to leave behind? Moisture, construction defects, lack of ventilation, mold – the smell can have many causes. You should get to the bottom of them and then use our tips to eliminate the problems.

Combating the causes to remove mold odor

Basements are the storage rooms in everyday life, but ultimately every second basement owner struggles with a musty smell. With these old house recipes and housewife tips, you can quickly get the problem under control. Depending on the extent and cause, different remedies help particularly well.

1) Vinegar against mildew odor

One of the main causes of damp basement walls and the rather musty smell is excessive humidity. A proven and successful household remedy helps against the smell: commercially available vinegar. You certainly have this at home. Handling is also easy.

Just put a glass or two of vinegar in a room. You will soon notice a change: the commercially available vinegar has the advantage that the musty smell is absorbed and removed after just a few days. Then you should ventilate the room properly so that the vinegar smell disappears again.

2) Salt against moisture

It is optimal if you use vinegar together with another household remedy: salt. It absorbs moisture and thus fights the cause of the musty odor. Three to four bowls filled with salt already help. Once the salt has become soaked with moisture, it must be replaced.

3) Cat litter against moisture

Cat litter also serves this purpose. Three to four larger containers are ideal for larger rooms. They easily replace electronic devices. The success is visible within a few days and ultimately even saves money. Once the litter has become soaked with moisture, you should replace it. As a rule, however, this is not necessary for normal room size.

4) Coffee against the musty smell

The acknowledged favorite drink of the Germans and probably the best-known pick-me-up has one outstanding property: coffee is an odor killer that quickly achieves the desired effect. So you can take it down to the basement after your morning treat and counteract the bad smell.

Place four to five teaspoons of coffee powder on a plate, place it directly in the room and the brown powder will do the rest. The air is cleaned after one or two days. Expensive chemicals and air fresheners, which usually only cover up the smell, are not necessary. The musty smell is gone.

5) Dehumidifier

If the actual problem has not yet been resolved, rough tools will help. For example, dehumidifiers literally suck up the moisture in a room. They also agree on larger vaults. There are many offers here. Depending on requirements, machines can also be borrowed from the local hardware store for larger issues.

Mold: A health threat

The musty smell can also be an indication of mold. Mold spores find a perfect breeding ground in damp rooms. The mold should definitely be removed. Affected furniture that is stored in the basement should be disposed of as soon as possible or dried thoroughly, for example in the sun.

An effective mold eliminator is an alcohol. The alcohol removes the water from the mold spores, as well as from the human body, and thus destroys the mold quickly and reliably. It is an ideal household remedy against mold caused by moisture.

You can also use vinegar as a home remedy instead if you have mold. You can read about the best way to do this and what other home remedies are effective against mold in the linked article. Sometimes, however, only professional mold remediation can help as a last resort. With the mold, you also remove the musty smell in the basement at the same time.

Avoid musty smell

If you ventilate regularly and ensure even air circulation, you won’t have any problems with mold and odors of the worst kind in the end. The following rules should be observed, especially for basement rooms: In summer, always air at night or in the early hours of the morning. If there is no window, it is essential to ensure regular air circulation by means of open doors.