Tag

remove

Browsing

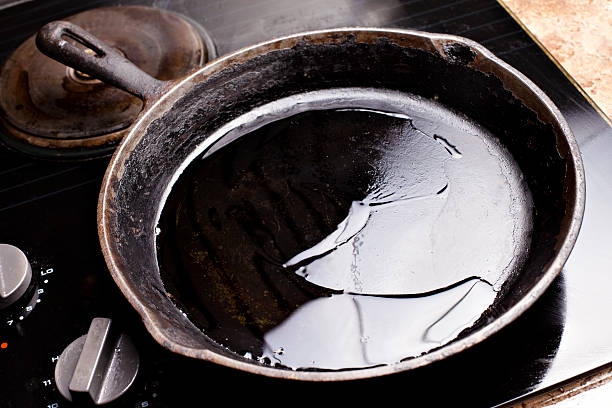
Many natural home remedies help against mold in the apartment and in the basement. This is how you fight and drive away mold effectively and prevent new mold from forming.

Once the mold has “moved in”, you first have to find the cause in order to combat the mold in the long term. We will explain how you can get to the bottom of the causes, remove the mold and prevent new growth. Once the mold has been removed, the moldy smell that comes with it, which is particularly common in the basement, usually disappears.

Causes of mold in the apartment and basement

Where there is mold, there is also moisture! Mold is not just a “beauty problem”. It’s about health and much more: Mold threatens due to its cause – moisture! – also the substance and the value of your property!

Everyone actively and passively produces humidity: Whether showering, cooking or simply breathing: we constantly produce “humidity”. And that’s not exactly little. When we shower or cook, tend houseplants, or do laundry, the air humidity regularly increases. And when we sweat, more is added.

1) Vinegar against mold

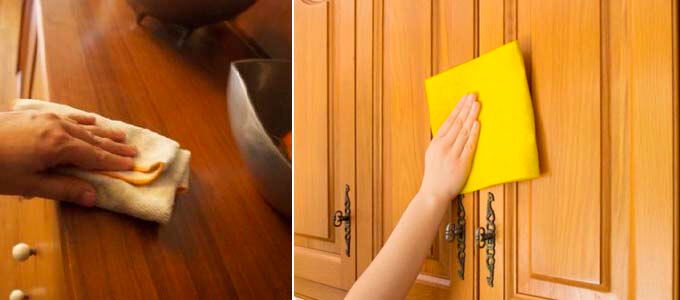
Vinegar has a low pH. Most types of mold do not tolerate such an environment. Therefore, fighting mold with this old household remedy works quite well in smaller infested areas. In addition, vinegar has no toxic substances. Application: Drizzle plenty of vinegar onto a cloth and rub it vigorously into the affected area. Then wipe the entire surface with a damp cloth. Destroy all rags immediately after use!

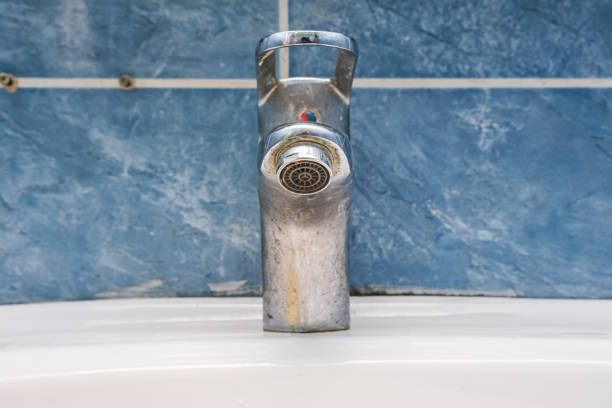
Vinegar should not be used under any circumstances if limescale is involved: Stiftung Warentest has tested a number of home remedies against mold infestation in detail. Vinegar performed very well here, but with one caveat: Vinegar is completely unsuitable as a remedy against mold growth on limestone walls.

Why? The acetic acid forms a compound with lime, which is particularly popular with mold as a breeding ground. Treating a moldy limestone wall with vinegar therefore only shows short-term success. Within a few days, however, the mold blooms again and reaches an even more intensive infestation than before. Vinegar could only do well in the detailed test by the Stiftung Warentest if the mold was on a firm and level surface. Please also note useful tips for cleaning awnings and removing mold.

2) Hydrogen peroxide against mold

Known as a hair bleaching agent, hydrogen peroxide kills mold. When using it, the substrate must be absolutely dry. You can test the contaminated area for dryness using blotting paper BEFORE use. If there are damp stains on the blotting paper and if it was previously pressed firmly onto the mold area, you should first dry the surface thoroughly with a hairdryer or radiant heater before use.

Once everything is dry, you should close the doors and windows in the affected room. Then you spread the affected area and the surrounding area generously with hydrogen peroxide. After about an hour, the area can be wiped off with a damp cloth.

3) Alcohol and methylated spirits as mold killers

On the one hand, alcohol has a disinfecting effect and, on the other hand, it removes the vital water from the mold. This is how the molds dry out. The alcohol must have a concentration of at least 70%. You can also use medicinal alcohol. Isopropanol – IPA for short – is a good choice, for example.

When choosing this means of destroying mold, care should be taken to ensure that the alcohol penetrates deep into the subsoil, because that is where the branched roots of the mold spores are located. The disadvantage is that alcohol evaporates very quickly.

Therefore, treatments with alcohol must be repeated several times in order to achieve satisfactory results. In a test by Stiftung Warentest, alcohol achieved very good results as a mold killer based on repeated applications. The use of methylated spirits as a home remedy against mold corresponds roughly to the use of alcohol.

Here, too, it should be noted that the spores are invisible, and only visibly affected areas should be treated yourself. It is also important to find the cause and eliminate it permanently. If in doubt, it is best to consult a specialist!

Be careful when fighting mold

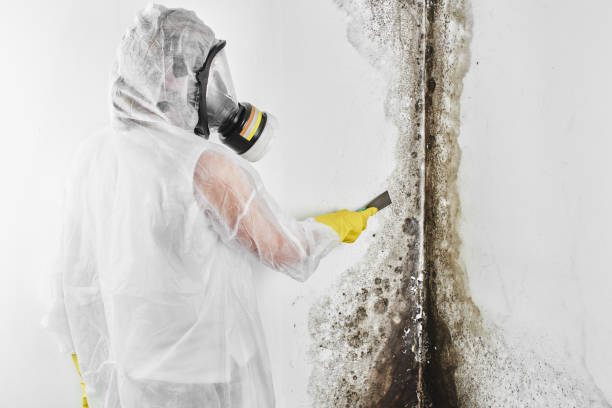
Smaller areas affected by mold can sometimes be removed first with home remedies. Nevertheless, there are a few things to consider when using the “do-it-yourself method” of mold removal in order to avoid health consequences!

Mold has spores that are invisible and spread through the air. This is how they get into human respiratory organs, which can cause allergies and other diseases. In addition, inhaling mold spores weakens the immune system.

How can you avoid mold?

Mold is often caused by damp walls or excessive humidity. Today’s structural engineering options for insulating and sealing buildings ensure that a lot of energy can be saved when heating. Unfortunately, there is the negative side effect that the houses tend to be less well ventilated, which means that even small weak points in the thermal insulation can promote mold growth. The kitchen, bathroom, and bedroom are areas that are particularly at risk here since their use results in higher room humidity with less heating at the same time.

Let the water vapor out again quickly

Moisture in living spaces is mainly generated by people. With four people in a household, for example, around twelve liters of moisture in the form of water vapor can occur every day. Plenty of water vapor is produced when showering, washing, and cooking. He should leave the room as soon as possible. It is also helpful if bathrooms are permanently heated.

Lots of useful tips and tricks for cleaning, cleaning, and cleaning carpets. Because even carpet stains can be easy to remove. In addition, many carpets are heavily used and get dirty. As a result, they lose their color over time.

Grandma’s home remedies and tips are also suitable for cleaning carpets. So you don’t have to go straight to work with the chemical club. We will show you how to clean your carpet with salt, cucumber juice, sauerkraut, and more.

This is how carpet cleaning works

With home remedies and tips for removing carpet stains, carpet cleaning is child’s play. Everyone knows it, no matter how careful you want to be, it still happens. You sit comfortably while watching TV with chips and a glass of juice. You may have prepared a dip and dipped a chip into it. And then it happens. The glass tips over and falls to the ground. So everything tilts onto the good carpet. Even if you immediately wipe up the sap with paper, the new stain will show up on the light-colored carpet. Also, note our tips for cleaning and caring for parquet floors.

Remove colorfastness and carpet stains

You’ve probably used many different methods to get rid of carpet stains. But so far nothing has really helped. But there are some magic bullets for removing stains from carpets. We will introduce you to the following natural home remedies that will help you get a clean carpet.

1) Ammonia and cucumber juice against dirt

In many cases, you can remove carpet stains with ammonia. For this, you need a half-full bucket of lukewarm water. Then add a dash of ammonia. But not too much. Then puree a cucumber. Or juice them and pour the juice of the cucumber into the bucket. After you’ve mixed everything well, dampen a rag with it. Then use this to go to the stains and rub them for a while. You should see success quickly. It’s amazing how well it removes the stains. If it doesn’t come out all the way the first time, repeat the process after a few days. Also, read how you can wipe your floor clean quickly and easily.

2) Ice cream versus gum and chocolate

If your carpet is soiled by chocolate or gum, use ice cubes or an ice pack. Simply place a bag of ice cubes on the dirty spot and cool. After proper hypothermia, you can carefully scrape off the chocolate and chewing gum with a knife. You then have to wash out the dissolved residues with a normal cleaning agent. The easiest way to loosen chocolate is with a little washing-up liquid. You can also work with ice spray. Because this is a simple means of removing chewing gum.

3) Remove candle wax from the carpet

You can also effectively remove candle wax and wax stains on the carpet. Accordingly, after drying, place a sheet of paper on the wax stains. Blotting paper is particularly suitable for this. Then you have to heat the area above the wax with iron or hairdryer. When the wax softens, it soaks into the paper. The remains of the wax can then be washed out with benzine or spirit. So you can successfully remove candle wax and have a clean carpet.

4) Clean dirty carpet with salt

To remove light traces of dirt, e.g. from damp street shoes on the carpet, use conventional salt as a household remedy. You’ll also need a vacuum cleaner away. Then sprinkle the affected areas with salt. Then you have to wait a while for the salt to absorb the moisture. After the exposure time, simply vacuum up the salt with a vacuum cleaner. And the carpet is clean again. In particular, the removal of red wine stains can be successful in this way.

5) Remove stains with window cleaner

If you drop your jam roll and land on the carpet, don’t panic. You can effectively remove this stain with a window cleaner. To do this, spray the stain with the cleaner and brush everything out well. The stain is already yesterday. For other interesting stain removal methods, check out the experiments by Sat.

6) Remove felt pen stains with shaving cream

If you have children, chances are you will find felt tip marks on all kinds of surfaces. Simple home remedies help to remove felt-tip pen stains. Accordingly, you can also remove stains from felt-tip pens from the carpet. There is a simple trick for this with funds from the household. A felt pen stain can be easily removed with shaving cream. Put some shaving foam on the stain. Then let it work. You can then rub out the stain with a cloth. So the matter is quickly settled.

7) Clean the carpet with sauerkraut

The old household remedy sauerkraut is suitable for cleaning carpets. To do this, you must first vacuum the carpet thoroughly. In the meantime, depending on the size of the carpet, the raw sauerkraut is drained in a sieve and properly squeezed out. You should plan enough sauerkraut. Then spread it loosely on the carpet and rub it off thoroughly. Although this part of the cleaning is associated with physical exertion, the result is excellent. Finally, you can sweep away the worst with the broom. The small remains can be vacuumed off. If the rug is smaller, you can hang it on the balcony or in the garden to air it out. It is a good and environmentally friendly carpet cleaning with which the carpet colors can be refreshed.

8) The classic baking powder and baking soda

If you spill your coffee on the carpet, the popular home remedy baking soda or using the effective baking soda can help you get rid of the coffee stain. To do this, spread one of the two powders on the carpet stain and rub it in lightly. Then add hot water. Best with a spray bottle. Then let it sit for a moment before sucking it away.

9) Clean the carpet with the steam cleaner

If all else fails, a steam cleaner can ensure a clean carpet. The handling is often simple and effective. It is also suitable for the entire household. Therefore, a purchase can be worthwhile. You can find many different models on the internet.

Tips for removing rust from the baking sheet or from the rusty pan. With natural home remedies, you can remove the rust without any chemicals and save cleverly. There are also tricks to avoid rust.

After a while, it can happen that rust spreads in the baking tray or in your favorite pan. But throwing it away is not an option. Instead, you can easily remove the rust with simple home remedies and help your baking tray and pan to shine again.

How is rust formed?

Rust is formed by the reaction of iron and oxygen in combination with water. Thus, rust is corrosion caused by the chemical process of oxidation. Steel or iron objects, in particular, can be affected by this slow destruction. Therefore, the question often arises as to how these objects can be rust-free. In the following, we will show you how to remove the rust from your baking sheet and pans.

1) Remove the grate from the baking sheet

The baking tray is often affected by rust and dirt. Cleaning the baking sheet is usually an unpleasant task. But simple home remedies for cleaning the baking sheet will help you to eliminate the problem. In the following, we will show you how you can remove the rust from your baking sheet quickly and effectively.

Tomato juice against rust

A little-known home remedy for rust is tomato juice. Similar to the vinegar, you need to spread the tomato juice on the baking sheet. Or put some of the juice on an old sponge and use it to rub away the rust stains. Here, too, it may be necessary to let the tomato juice take effect. So you can easily remove the stubborn rust.

Clean the baking sheet with salt and oil

Using salt as a home remedy is popular. And not just when cooking! You can also use it to remove the rust from your baking sheet. To do this, rub the tin with salt. Then rub in an oil-soaked cloth or old bacon and leave to take effect. Then clean and polish again with a new, damp cloth. If you have a lot of rust spots or patches of rust, you should repeat the process several times.

Remove vinegar and oil to rust

To remove rust, the use of all-rounder vinegar has also proven itself. This makes removing the grate from the baking tray child’s play. To do this, mix vinegar and oil in a ratio of 1 to 1. Then rub the baking sheet with it and let it work in briefly if necessary. Finally, grate the mixture, removing the rust as you go.

Cola as a home remedy for rust

Just as often one reads on the internet about removing baking tray rust with cola as a home remedy. And indeed it works because the cola contains phosphoric acid. Consequently, you can dampen a sponge with coke and then rub the affected areas with it. Or put the cola on your baking sheet and let it soak in. Finally, you can easily remove the rust. Also, read how to clean clogged pipes with coke.

2) Remove rust from the pan

You can remove rust with simple means. Whether from the cast iron pans, frying pans, or other kitchen accessories. It’s a tedious task, but there’s no way around it. And with the right tricks for cleaning the pans, it’s a lot easier.

Use baking powder and baking soda

For thorough rust removal in frying pans, use the home remedy baking soda or the miracle cure baking powder. To do this, mix 2-3 packets of baking powder or baking soda with two tablespoons of vinegar to a paste. Then spread this on the pan surface and let it work for a few minutes or overnight. Finally, rinse the grate with hot water. Or use a brush to scrub. The brush should not be a steel or metal brush. In the case of very stubborn rust, you can also use dishwashing detergent. Can also be used on the baking tray.

Soak in vinegar

Not only can you use vinegar to clean coated pans, but you can also remove rust. If you have a rusty steel pan, you can soak it in vinegar and then gently brush it with a steel sponge. You can see how well this method works in the video below. You should then sear the pan. Also, note our tips for removing rust from cutlery and crockery.

Potato and salt method

If you want to remove the rust from your pan, put a good amount of salt in the pan. Then cut a large potato in half. Now you can rub the salt in the pan with the cut potato side. You can rub vigorously in circular movements. As a result, you should be able to remove the rust from the pan. Several repetitions may be necessary. Also, note our other tips for using potatoes.

Remove citric acid to rust

You can also treat your rusty pan with effective lemon juice and lukewarm water. In the case of heavy rust, you should let the pan soak in this mixture. After the exposure time, you can rinse the pan with hot water and, if necessary, rub it down properly with a sponge. If your pan has only a few rust spots, it is sufficient to apply the mixture with a sponge and rub off the rust spots. Citric acid is also suitable for removing rust stains from clothing.

Now remove the stinking smell of nicotine and neutralize the smell of cigarettes in the apartment. There are many ways to help you reduce or even eliminate the smell of cigarettes. The following tips are to remove the smell of nicotine from your home, car, and clothes.

If you smoke in the apartment, you have probably already noticed it yourself: the cigarette smoke settles on the carpet, on the furniture, the ceiling, the wallpaper, the curtains, and last but not least on your clothes. If you are now expecting visitors from non-smokers, this smell can be very unpleasant for them and for you.

How to remove the smell of nicotine with home remedies

Luckily, there are some household tips on how to largely neutralize the annoying cigarette smoke in your home. And there are also tricks for removing the smell of nicotine from your car, furniture, and clothing. Proven home remedies include vinegar, incense, scented candles, plants, or fresh air.

1) Neutralize cigarette smoke by ventilation

Of course, it would be best not to smoke in the apartment in the first place. This means that the smell of nicotine cannot even develop in the apartment and the furniture. But that is not always possible. As not everyone has a balcony or terrace. However, if you smoke in the apartment, you should either do so at the open window or, at the latest, air it out immediately afterward. Proper ventilation and heating is also good home remedy for mold. You might be interested in our tips for quitting smoking.

2) Remove nicotine smell with coffee

A popular home remedy is to use fresh coffee beans or ground coffee. For this, you have to distribute a few bowls with coffee beans in your apartment. This should bind the smell, while at the same time a good aroma is given off by the coffee beans. However, you should renew the coffee beans regularly. There should always be some plants in the smoking rooms. Because they can clean the air. So you can largely remove the nicotine smell. Also applicable to the car.

3) Neutralize cigarette smoke with vinegar

Vinegar is widely used in the home. For good reason! Because he helps with a lot of things around the house. Accordingly, also to neutralize cigarette smoke. You should boil the vinegar in a pot of water. Then put it in the smoking-room. The vinegar helps bind the smoke molecules. But you shouldn’t leave the vinegar in the room for too long. Otherwise, the sour smell of the vinegar can spread.

4) Incense to remove the nicotine smell

You can also neutralize the smell of cigarettes by using incense. Because with these, the strong smell of cigarette smoke can at least be drowned out a little. You should also regularly remove and wash all removable fabrics. There are also vacuum cleaner deodorants that give off a pleasant scent every time you vacuum. This masks the smell of cigarettes. Also, note our home remedies for neutralizing odors in a smelly apartment.

5) Room freshener against nicotine smell

In addition, you can use different room sprays that have been specially developed to counteract the smell of nicotine. With these, you can not only spray the air in the room but also your curtains. Also carpets and the sofa. There are also special scented candles whose aromas can be used to counteract the smell of cigarettes. Or try homemade scented candles. You should empty the ashtrays after each smoking session. This means that they do not give off any additional odor. And now you can find great room fresheners on the internet, such as our darling.

6) Apple and aluminum foil against the smoke smell

One of our readers also recommends cutting an apple into slices and placing them on aluminum foil. You can then distribute them in your apartment. Or put it in your car. Consequently, the sour smell of the apple provides a fresh scent. In addition, it can neutralize cigarette smoke. Of course, they shouldn’t stay there for too long.

7) Paint the walls with insulating paint

If you smoke in your apartment or you have moved into a smoker’s apartment, you can use insulating paint to remove the smell of nicotine. Accordingly, odor neutralization should already take place.

8) Reduce nicotine odors on yourself

Cigarette smoke settles not only in the apartment but also on every smoker himself. There are a few methods to minimize these odors. We have put together some tricks for you:

  • Chewing gum helps you get rid of the nicotine smell and taste in your mouth and freshens your breath.
  • Washing your hands immediately after smoking can also reduce the strong odor of the cigarette.
  • Facial cleansing is also an effective way to eliminate cigarette smell.
  • Tying your hair back and then airing it out also helps against the smell of nicotine.
  • Extra clothing for smoking is also effective in eliminating the smell of nicotine in everyday clothing.

If you have any other tips on removing the smell of nicotine and neutralizing cigarette smoke, please let us know in the comments. We look forward to your experiences.

Removing grease stains on wooden furniture and wood made it easy. For each stain, these tips show different ways of successfully removing the annoying grease stains. So that the furniture looks attractive and fresh again in the sunlight.

Home remedies to remove grease stains from wood

In general, solid wood furniture is sturdy. But sometimes everyday life leaves its mark. So the problem can arise that unsightly grease stains mar furniture, beautiful wooden frames, or even wooden decorative pieces. We show you how to remove grease stains from wood.

Especially with the first rays of sunshine you see all these unsightly grease stains and wonder how to get rid of them. Furniture has different levels of sensitivity. That depends on the type of wood and the treatment of the surface. It is therefore advisable to first follow the manufacturer’s care instructions. Various home remedies can also be used. In the following, we will show you which home remedies you can use effectively for grease stains on wooden furniture. Also, read how to remove ballpoint pen stains from wooden furniture.

1) Wipe away grease stains with the microfiber cloth

Pretty much everyone has microfiber towels in their household. Because they are perfect for cleaning. You can remove water-soluble as well as greasy dirt. You don’t need any other cleaning agents. Therefore, a good microfiber cloth is usually sufficient for wooden furniture that is coated with a colored glaze or varnish. Since the stains only stick to the surface, you can wipe them off with a microfiber cloth. But be careful, you should not use microfiber cloths with oiled solid wood.

2) Lemon juice for greasy stains on wooden furniture

You can also use the household remedy lemon juice for varnished wood. You can use this to remove grease stains on wood. You should be careful not to leave the sap on the wood for too long. Otherwise, the spot may fade. So put some lemon juice on a cloth and rub it on the affected area. Then wipe thoroughly with clear water.

3) Remove grease stains from wood with orange oil

If you discover grease stains on your painted or varnished wooden furniture, you can use orange oil in addition to lemon juice for cleaning. To do this, simply apply the orange oil lightly to the area with a soft cloth. Then leave it on for a short time. And then wipe with water. You will also achieve an additional shine effect. You can also use the orange oil cleaner for tiles, floors, sinks, and much more.

4) Remove grease stains on wooden furniture with gall soap

If you want to remove grease stains on natural wood, the effective gall soap is a suitable home remedy. You can work with warm water and gall soap, especially with less sensitive wood. Because this is a well-known household remedy. For this, you have to moisten the affected area. Then rub them with gall soap. And then wash off. You can use this method to remove common household stains. Alternatively, you can use a neutral soap to remove grease stains on wooden furniture.

5) Clean the wooden surface with pipe clay

On items made of natural wood, the grease stains can penetrate the wood. Then you should get the so-called pipeclay to remove the grease stains. Pipeclay, also known as white clay, has a cleansing effect. Accordingly, you can mix a paste from water and pipeclay. Then let it rest for 24 hours before use. Then you can apply the mixture for cleaning in round movements. Wipe off again with water after a short exposure time. You can get pipeclay in the pharmacy or drugstore. Also, note our tips for removing the greasy film.

6) Remove grease stains on wooden furniture with baking soda

As so often, the effective baking powder can be used as a home remedy. This is a good way to remove grease stains on wood. Simply put hot water on the spot. Then add baking soda and mix it with the water to form a paste. Then leave it on for about a minute. Then remove the mush with soap and water. You should also dry the area properly and treat it with a care product.

7) turpentine for cleaning wood

To remove grease stains on stained hardwood floors, use turpentine. But please test it first on a small, invisible spot. Then you can apply the turpentine to the affected area. After a short exposure time, you can wash it off with clear water. It may well be that you have to rework the affected area later with the stain. Also, read how to remove paint easily and effectively.

8) Remove grease stains on wood by sanding

If all else fails and you can’t remove the grease stain from the wood, you’ll need to sand it down. Also, note our article on repairing dents and scratches on wooden furniture and wooden floors. What else you have to consider when sanding, we have summarized briefly below:

  • With a belt sander or an orbital sander, you can easily scrape off a smooth surface. The oil-contaminated area must be ground out. If the fat has penetrated deeply into the wood, the spot there must be bleached.
  • The entire surface must then be re-coated with wax or a glaze.
  • Decorative objects or ornate wooden frames are removed by hand with coarse emery paper and – as described above – treated further.
  • With soda lye, the housewife can also remove wooden furniture and objects made of wood and later treat them again with wax, glaze, or varnish.

Remove grease stains from antique furniture

Be careful with antique furniture in particular. Therefore, you should use all home remedies very carefully. Also, you should always test it on a small spot at the back of the closet first. If in doubt, do not lend a hand and ask an experienced carpenter or restorer for advice. Also, note our article on how to cleverly remove grease stains and oil stains.

If you know any other tips for removing grease stains from wood, please share them with us in the comments. We look forward to your personal experiences!

Tips, tricks, and home remedies to remove brown limescale in the toilet. Now get the toilet really clean again and remove the brown deposits easily and naturally.

Effectively remove brown lime

A toilet is often cleaned and appears hygienically clean, but where the water is permanently standing, limescale deposits and overtime turns brown and simply ugly to look at. There are simple and helpful solutions for this, which we have summarized for you in this article.

1) Get rid of the brown discoloration with vinegar

You can remove brown lime or urine scale with a tried-and-tested household remedy: Vinegar is a cheap remedy that effectively removes deposits in the toilet. Thanks to the acetic acid, vinegar is a miracle cure for limescale.

The brown urine scale and brown limescale are removed by pouring a little vinegar into the toilet bowl and then using the toilet brush to scrub off the discoloration. If this doesn’t work right away, you can leave the vinegar on for a longer period of time, for example overnight.

If you want to clean areas that are above the water surface, you can simply soak a piece of toilet paper in vinegar and apply it to the affected area. After a few hours of exposure, you can flush the toilet as normal and then use the toilet brush to remove the brown limescale in the toilet.

2) Counter unsightly discoloration with citric acid

You can use citric acid to combat brown lime in a similar way to vinegar. To do this, dissolve the citric acid powder, put it in the toilet, and let it work for several hours. Then use the toilet brush to scrub off the discoloration directly.

Alternatively, you can also apply the powder undiluted to the affected areas, including under the edge. Then leave it on for a few hours and scrub it off with the toilet brush. Then rinse thoroughly. The advantage of this method is that, unlike vinegar, it does not lead to an unpleasant smell and is just as effective.

3) Remove brown encrustation with steel wool

If the brown crust is really stuck in the drain area, you can also try steel wool as a last resort. This will damage the ceramic somewhat, but the brown lime can be easily brushed off. However, proceed as carefully as possible so that, in case of doubt, small scratches remain.

4) Remove brown limescale in the toilet with special tabs

If the brown encrustation still cannot be removed, the following will help: Self-active against urine scale and brown calcification are special tabs for the toilet, which work deep into the drain even in the water. Only to be recommended! The application is very simple: Put “Corega Tabs” in the toilet overnight and the next morning everything is snow white again.

We show you home remedies and tips for removing felt-tip pens. Whether a scribble needs to be removed from a child’s face or a line from other materials. Felt pen stains can be gently removed with household tricks. You can certainly be spared the expensive trip to the next cleaning.

It’s annoying when felt-tip pens adorn the sofa. You can get marker stain remover at the drugstore. However, household items such as milk, hairspray, vinegar, and nail polish remover are also inexpensive ways to remove markers. In the following list, we show which home remedies are suitable for which stain.

Check the material before removing the stain

A felt-tip pen stain is not only quickly but also inexpensively removed with the right agent. However, always bear in mind that it is possible that the stain will disappear, but that a light stain can appear due to the material fading with the appropriate home remedy. So always check a hidden spot before use to see if the material is sensitive to the home remedy in question. However, there is one exception. Your child’s skin will not fade, don’t worry! After removing the felt-tip pen, simply care for it with one of our home remedies for smooth skin.

1) Remove felt pen from skin

Every mother knows the problem: If it’s been very quiet in the house for a while and you’re happy to see how nicely the children are playing, then there is usually a very big and often very creative surprise for the parents. For example this one: The offspring comes out of the children’s room and has painted on itself with a felt pen. Keep Calm! It all goes away over time as the skin rapidly renews itself. But if you or the children do not want to have the original tattoos on the children’s skin until the skin is renewed, there are ways to clean it. There are some very simple tricks: water and soap, milk, or even lemon juice. Take a damp cloth and gently rub the child’s face clean. Also, note our tips on removing adhesive and adhesive residue.

2) Removal of a felt pen from fabric

Use more or less mild home remedies to easily remove felt-tip pen stains from textiles. But be careful: Always check a harmless part of the fabric! (Draw a line with the felt-tip pen in a place that is not visible and check the effectiveness of the remedy there first.) It would be a shame if the remedy ruined the fabric. In addition, always dab carefully from the outside so as not to worsen the stain by wiping. Of course, you can also buy a stain remover in the drugstore, but there are six ways to inexpensively remove a felt-tip pen stain from fabric with home remedies:

  • Milk: Soak the fabric in milk and leave it soaked for a day. After that, wash your clothes immediately.
  • Baking soda: Take a little baking soda, make a paste with water and leave it on for just a few minutes. Wash the fabric immediately afterward.
  • Lemon Juice: Put some juice on the stain and wait 30 minutes before washing the clothes in the machine.
  • Caution: lemon juice can bleach your fabric.
  • Vinegar: Mix 1 part vinegar with 2 parts water and leave the mixture on for 30 minutes. Warning: the vinegar can bleach your fabric.
  • Hairspray: Spray the stain with hairspray and let it dry. Then put it in the regular wash. No risk of bleaching!
  • Acetone: Glass cleaner or nail polish remover contains acetone and can loosen felt tip stains. This home remedy is not suitable for sensitive fabrics as it is a very strong agent.

3) Remove felt tip pen from plastic

As far as it is a water-soluble marker, removing it is easy. With a bit of hot water and soap, this is quickly done. But what can you do if it’s a permanent marker? Either get a specialty stain remover from the drugstore, or put on cleaning gloves, grab a microfiber or cotton cloth, get a bucket of warm water, and use the following home remedies. The same applies again: first try out how the material reacts in an inconspicuous area and then go to work with the following home remedies:

  • Soap and Water: This simple option removes only water-soluble markers from plastic. But it’s definitely worth a try.
  • Special eraser: This can be used to break up and remove color pigments.
  • Deodorant: Spray the deodorant on the felt-tip pen stain and let it soak in for a moment. Then wipe with the rag. If necessary, repeat the application until the pen is gone.

4) Remove marker

Edding is a special kind of felt pen. It is insoluble in water and very broad and strong. In addition, it is often used in the colors red and black and has a strong color effect. It is very annoying when this strong pen of all things accidentally lands on an object in the household. But, especially when there are children in the house, this kind of thing happens.

Cleaning stainless steel and brushing stains off stainless steel. Stainless steel can now be found in every kitchen and every household. Sometimes, however, every touch leaves annoying marks and stains. With a few home remedies for cleaning stainless steel surfaces, this problem can be solved within minutes.

In the following, we will show you how you can use simple means to make stainless steel in your household shine without having to spend hours scrubbing. Pots, pans, cutlery, sinks, and fittings will shine again in no time and the jewelry will be hygienically clean.

1) Fingerprints don’t have to be

The easiest way to remove fingerprints on stainless steel is with a damp microfiber cloth. If there are greasy traces, you can use some washing-up liquid. After cleaning the stainless steel, you should use an absorbent cloth to dry the surface. This prevents water stains after cleaning.

2) Eliminate limescale

If traces of limescale have formed on your stainless steel sink or faucet, use vinegar, a universal household remedy. It works wonders and makes the limescale disappear quickly. It is enough if you put a few splashes of vinegar on a cloth and then use it to clean the sink or the stainless steel faucet.

3) Clean stainless steel pots

Heavy soiling on pots can be removed with baking powder or baking soda. To do this, put baking powder or baking soda in a saucepan, pour in some water, and use a sponge to remove the dirt. You should be careful not to use sponges that are too coarse, as they can leave scratches and damage the surface of the stainless steel. In this case, the baking soda acts as a polishing paste.

You can also read on our website which material in pots has exactly the properties you need and how you can remove burnt food from pots. Here you will find the right solution for every household problem with tips and tricks for correct handling.

4) The power of the lemon

You can rub a lemon on a stained sink, pots, or faucets made of stainless steel to remove the annoying stains. If you don’t have a lemon handy, lemon juice concentrate from the bottle will do. After treatment with the top home remedy lemon, you should rinse the pots with clear water and dry them, otherwise, limescale will quickly form again.

5) Clean stainless steel jewelry

Stainless steel jewelry, which is not only trendy but also ideal for allergy sufferers, should be cleaned from time to time. Through skin contact, dead skin and sebum can accumulate in and on the jewelry, which promotes bacterial growth.

Simple jewelry can be cleaned well with a soft cloth and a little soapy water or washing-up liquid from the kitchen. If the cloth is not enough, you can take some polishing cotton and use it to remove small scratches from the jewelry. However, the polishing cotton should not be used on jewelry with brushed surfaces, as you could lose the brushed effect.

Oops, there’s some dirty silver jewelry in the box too? If, in addition to cleaning stainless steel jewelry, you also find jewelry made of other materials in your casket that you would like to clean, you will also find the right home remedies, tips, and tricks for this with us.

6) Clean stainless steel with cleaning milk

If you don’t want to rely on home remedies, you can also buy special cleaning products for stainless steel, which can also magically remove stubborn dirt. They reliably dissolve all dirt and clean stains from stainless steel surfaces. Here, too, it is necessary to dry the surfaces with a cloth afterward.

7) Special care for non-stainless steel

Although non-stainless steel is rare, it is always found in cutlery and knives. This can be cleaned with the agents described above but requires special care. After cleaning, you should rub the steel surfaces with some oil, for example, sunflower oil, to protect them from rust.

8) Stain removal on matte stainless steel

It can hardly be avoided that some surfaces of kitchen fronts, for example, the extractor hood, are touched when operating or closing. It can be problematic if there are surfaces made of brushed stainless steel in your kitchen. Simply wiping with common fat-dissolving agents is not enough, fingerprints or other stains remain. You should avoid aggressive cleaning agents – the character of the brushed stainless steel suffers as a result, as does the environment.

Peeling ginger is only necessary if it is a bit older or not from organic farming. On this page we will show you why this is the case and how best to remove the shell.

Peel ginger: when is it necessary and when not?

Ginger is considered antibacterial and anti-inflammatory. But most of the active ingredients are located directly under the shell. For this reason, it makes sense not to peel the ginger but to process it directly. For example, cut it into small pieces and make your own ginger tea from it.

You don’t have to peel fresh organic ginger. The organic seal guarantees that the ginger has not been treated with synthetic chemical pesticides. Nevertheless, you should wash it thoroughly and clean it with a vegetable brush.
If the ginger is a bit older, you should remove the peel. It often tastes woody, and that flavor can carry over into the food, tea, or soda.
If the tuber comes from conventional agriculture, you should also peel the ginger. It was probably treated with pesticides.
You can also plant ginger yourself. It’s worth it, for example, if the ginger sprout or you can’t use everything.

Remove the ginger peel – instructions

Removing the peel from the ginger is often not that easy. Because the shape of the ginger, the leaf scars and the many outgrowths make it difficult to peel. How to do it anyway:

The easiest way to peel ginger is with a vegetable peeler. First you save excesses and then peel them off with a normal kitchen knife.
If you prefer to grab the kitchen knife right away, just use it to scrape off the skin. With fresh ginger, the skin is very thin and the flesh of the ginger is hard. Therefore, scraping goes without problems.
Even suitable for children: You can also easily remove the soft, thin shell with a teaspoon. Hold the spoon firmly and simply scrape the edge over the surface. The skin peels off like this, you can get into all the difficult spots and on top of that you only have very little section. So there is no risk of injury here.

Now remove the oven smell with home remedies. Who does not know it? The oven is used frequently but rarely cleaned. But after a while, bad smells develop. Then you should effectively neutralize the oven smell.

So that the oven smells good again, you can neutralize the smelly oven smell. Here you can do without chemical cleaning agents and drive unpleasant smells out of the oven by using household remedies such as baking soda, lemon, and Co.

Why does my oven stink?

There are many reasons for unpleasant smells in the oven. A first look into the oven usually helps. Because then you can often see that food leftovers have collected and are responsible for the stench. Even if you recently cooked a fish in the oven, this can cause a bad smell. Likewise, sponge residue or other cleaning material could have gotten stuck on the heating rods during the last cleaning. Then they burn and it stinks. Therefore, you should always clarify the cause. A flashlight will help you with this. Also, note our tips for cleaning the oven.

New oven stinks

Even a new oven can stink if it has not been sufficiently seasoned. Because in the production and manufacture of such devices, substances are used that cause unpleasant odors. Therefore, you should burn it in the oven before use. You will usually find instructions for this in the oven packaging after buying a new oven.

Home remedies to remove oven smell

While you can neutralize bad odors in a new oven by properly baking it in, you can use household remedies to remove the smell from an old oven. We have collected the most important home remedies for you. Also, note our tips for neutralizing odors in the apartment.

1) Neutralize oven odor with lemon

Strong-smelling food odors can linger in the oven for a long time. But with the home remedy lemon juice, you can quickly clean your old oven and provide a fresh scent. To do this, put some lemon juice in a glass of water. Then put this in the oven for a few minutes and heat it to 120 degrees. The steam dissolves grease stains and neutralizes unpleasant odors.

2) Use of baking soda against oven stink

It works just as well with the use of baking soda. Because baking soda also neutralizes odors. You can also use a paste made from 2 tablespoons of baking soda, 1 tablespoon of salt, and 2 tablespoons of water to remove burnt-on residue and clean your oven. So you kill two birds with one stone.

3) Baking soda removes a bad smell from the oven

To get rid of unpleasant smells from the oven, use baking powder, the most popular household remedy that is readily available. Because that can also eliminate stench and is a great cleaning agent. To do this, mix baking soda with water to form a paste. Then use it to clean your oven. Then wipe everything well with a damp cloth.

4) Vinegar for odor neutralization

You can also use vinegar as an oven smell home remedy. To do this, wipe out your stinky oven with the household remedy vinegar. However, many people find the smell of vinegar unpleasant. Therefore, you can also mix it with lemon juice. Afterward, it smells fresh in the oven.

5) Eliminate orange peels to stink

In addition to the usual home remedies for removing odors from the oven, you can banish the stench with orange peels. To do this, place the orange peels on a baking sheet and put them in the oven. Then warm them up briefly. They then spread a pleasant scent in the oven. In addition, note our tips for getting rid of musty smells in the closet and removing the smell of vomit.