Tag

replace

Browsing

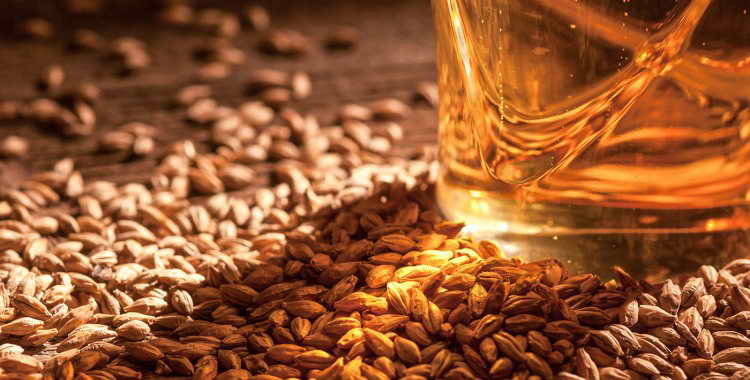
Baking malt is a leavening agent that improves the texture and flavor of homemade bread. If you have a little time, you can easily make baking malt yourself – we’ll explain how it works.

Baked malt is made from sprouted grains that you dry in the oven, roast, and then finely grind. Baking malt fulfills two main tasks when baking bread: On the one hand, it refines the taste of the bread and also gives it a stronger colour. On the other hand, it can ensure that the dough rises better. This works especially well with wheat dough.

This is because the enzymes in the sprouted grains remain active when you dry them at low temperatures. Together with the yeast, they ensure that the bread rises particularly well. However, baking malt is not the only leavening agent – it only supports the function of the yeast. Recipes with baking malt therefore usually also contain yeast. You don’t have to change the amount of yeast if you also use baking malt.

Baking malt can be bought ready-made, but you can also easily make it yourself. All you need is grains, water and a few days of patience – because depending on the type of grain, it takes a while for the grains to germinate.

Important: Always use untreated organic grain if you make baking malt yourself. On the one hand, you support sustainable agriculture that works without synthetic pesticides. On the other hand, conventionally processed cereal grains are often not germinable because they are usually dried at high temperatures. Your enzymes can then no longer be activated.

Make baking malt yourself: This is how it works

Ingredients:

200 gorganic cereal grains (e.g. wheat or spelt)
water

Directions:

Place the grains in a sieve. Place the sieve in a bowl and fill it with enough water to cover the grains by about an inch or two. Leave them like that for twelve hours.
Remove the strainer from the bowl and drain the water. Dry the bowl. Rinse the grains in the sieve well under fresh cold water and then put the sieve back into the dry bowl. Important: The bowl should get light during this step, but if possible not stand directly in a sunny place.
Let the grains sit, this time for about two to three days. Rinse again under cold water every 12 hours.
After some time, the grains will begin to germinate. You can tell by the fact that thin white shoots sprout at the ends, which gradually intertwine. Wait for them to grow long enough to branch and form a braid. Then you can move on to drying the kernels. How long the grains need to germinate varies depending on the type of grain. With spelled, for example, it usually takes longer than with wheat. Important: If the shoots turn green, the grains are no longer edible. It is therefore important to wait for the right moment.
Line a baking tray with baking paper (or an ecological baking paper substitute). Spread the grains out on the baking tray and let them dry in the oven at 70 degrees top/bottom heat for about an hour. It is best to clamp a wooden spoon in the oven door so that it remains open a crack and the moisture can escape better.
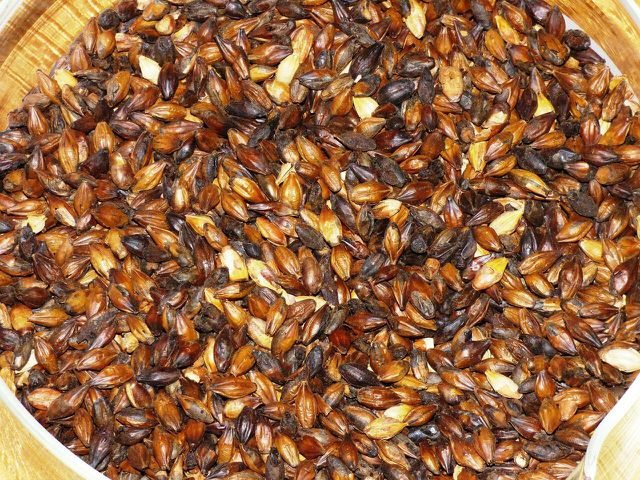
After the drying process, you can roast the grains. Increase the temperature to 170 degrees top/bottom heat and leave the grains in the oven for another 40 minutes. You can then do a taste test: if the grain already tastes slightly malty, it’s ready. Otherwise, roast the grains again for 10 minutes.
When the kernels are done, remove the tray from the oven and let them cool completely. Then check if the grains are really completely dried. They must no longer contain any moisture.
Once they have cooled, you can grind the grains. It is best to use a grain mill or coffee grinder for this. Alternatively, you can also put them in the blender.
Fill the ground baking malt into a clean screw-top jar and close it tightly.

Baking malt: tips for use

The baking malt will keep for several months in a screw-top jar. It is important that the glass is sterile. You can find tips for this here: Sterilizing glasses: The best methods with step-by-step instructions.

When baking bread, it is sufficient to use about 30 grams of baking malt per kilogram of flour, unless the recipe specifies otherwise. Simply mix the baking malt into the remaining ingredients before kneading them into a dough and follow the further instructions.

Tip: If you don’t have baking malt at hand, you can replace it with malt coffee if necessary. It is then sufficient to use about a fifth of the recommended amount of baking malt – for example six grams instead of 30 grams.

Whether dry yeast or fresh yeast – you can bake airy pizza dough and bread with both types of yeast. In this guide you will find out what the differences are and how you can use fresh yeast and dry yeast.

Yeast is a unicellular microorganism that belongs to the fungi family. This living organism feeds on the sugars and starches in the dough and converts them into carbon dioxide gas, among other things. This is reflected in the bubbles in the dough, which allow it to rise and make it more airy. We use this property of yeast for many recipes – whether pizza dough, home-baked bread or cinnamon rolls.

You can find yeast in two main forms on the market: as dry yeast and fresh yeast, which is also called block yeast. We will explain how the two differ, what you need to look out for when storing and using them, and how you can convert one type of yeast and replace it with the other.

Dry yeast and fresh yeast: differences in yeast types

Dry yeast and fresh yeast have much more in common than differences:

Both dry yeast and fresh yeast are the same strains of yeast (Saccharomyces cerevisiae), also known as baker’s yeast or brewer’s yeast.
Dry yeast and fresh yeast serve the same purpose in the bakery: they convert sugar and starch into gaseous carbon dioxide, allowing the dough to rise.
The yeast cultures were also grown and propagated in the same way: on a carbohydrate-rich culture medium. The exact cultivation form depends on whether it is conventional yeast or organic yeast – but not whether it is dry yeast or fresh yeast. You can find out below how organic yeast differs from conventional yeast.

But there are also big differences between dry yeast and fresh yeast:

While fresh yeast consists of around 70 percent water, dry yeast only contains around five percent residual moisture. Therein lies the biggest difference: For dry yeast, fresh yeast is dried.
As a result, dry yeast has a significantly longer shelf life than fresh yeast. While you can store fresh yeast in the fridge for a maximum of two weeks, dry yeast can be stored at room temperature for between several months and a year.
The fungal cultures contained in the dry yeast are inactivated and are only activated by adding liquid. Nevertheless, they are living microorganisms – only in a “resting state”.

Dry yeast or fresh yeast – which is better?

Both dry yeast and fresh yeast do an excellent job as leavening agents. In the finished recipe, the difference is hardly or not at all noticeable.

The benefits of fresh yeast are rather subjective:

Some (hobby) bakers swear by fresh yeast because it gives the baked goods a rounder, slightly sweeter taste.
Some also report that yeast dough rises slightly better with fresh yeast than with dry yeast.
If baked goods require a particularly long fermentation time or several resting phases to rise, fresh yeast is usually recommended. Because it is said to have a longer-lasting driving force than dry yeast.
On the other hand, dry yeast has prevailed today mainly because of its practical advantages over fresh yeast:

Dry yeast can be stored at room temperature for several months in a closed packet. Once opened, you can store the packet tightly sealed in the fridge for another two weeks. Fresh yeast, on the other hand, must be stored in the refrigerator and used within two weeks of purchase.
You don’t have to stir the dry yeast into liquid beforehand, you can mix it directly with the dry baking ingredients. This makes it a little easier to mix the dry yeast with the dough than fresh yeast.
In addition, thanks to its shape, dry yeast is a little easier to dose than fresh yeast in block form.

Conclusion of the comparison:

Fresh yeast should give the baked goods a slightly better taste and also have a higher raising power than dry yeast. For a few recipes like yeast loaf or Berlin pancakes, this is possibly the better yeast.
On the other hand, dry yeast is the much more practical form of yeast, especially for hobby bakers: it lasts much longer and is easier and faster to process.

Using dry yeast and fresh yeast: tips for the kitchen

If you want to make yeast dough yourself, you should consider the following points when preparing it:

First stir fresh yeast with some of the lukewarm liquid from the recipe and some sugar and let this mixture stand for about ten minutes. You can tell by the formation of bubbles that the yeast have started their activity. After the ten minutes, you can mix the liquid with the remaining baking ingredients.
You don’t need to mix dry yeast with liquid first. Mix directly into the dry ingredients in the recipe. Make sure that the remaining ingredients are not too cold: you should therefore take them out of the fridge some time beforehand.
Whether fresh yeast or dry yeast: yeast has the best raising power at temperatures between 25 and 30 degrees. At more than 45 degrees, the yeast fungi die off, while at less than ten degrees, the metabolic processes run considerably more slowly. That means: The cooler, the more walking time you have to plan.
When baking, you can easily convert and replace fresh yeast with dry yeast:

You can replace one cube of fresh yeast (42 grams) with two packets of dry yeast (fourteen grams).
As a result, one packet of dry yeast is equivalent to about half a cube of fresh yeast (21 grams).
As a rule of thumb, half a cube of fresh yeast or a packet of dry yeast is sufficient for 500 grams of flour. However, this amount varies greatly depending on the recipe.
In principle, you can also mix fresh yeast and dry yeast in a recipe, should this ever be necessary.

Buy yeast: organic quality and list of ingredients

It doesn’t matter whether it’s dry yeast or fresh yeast: we recommend that you pay attention to organic quality when buying. Because there are some differences between organic yeast and conventional yeast:

Growth medium: Conventional yeasts are often cultivated on molasses (a by-product of sugar production), phosphorus or inorganic nitrogen. Organic yeasts, on the other hand, are cultivated on natural raw materials from controlled organic cultivation, often on grain or sugar beet syrup.
Defoaming agent: To prevent growth-inhibiting foam from forming, sunflower oil is added to organic yeast as a defoaming agent. With conventional yeasts, synthetic substances are used for this purpose, which later have to be rinsed out with plenty of water. Therefore, according to the Bavarian Consumer Center, more water is used in the production of conventional yeast than in the case of organic yeast.
Genetic engineering: In addition, no genetically modified organisms (GMOs) are used in the production of organic yeast. Since there are still no reliable long-term studies on the health effects of GMOs, we recommend non-GMO foods.
If you want to buy dry yeast, you should also take a closer look at the ingredients:

Some of the dry yeast contains emulsifiers so that the yeast does not dry out. The most commonly used emulsifier is sorbitan monostearate with the E number 491. There are even some emulsifiers in fresh yeast.
Organic manufacturers in particular usually deliberately avoid using emulsifiers. With their yeast, there is nothing else in the packet but yeast.