Tag

right

Browsing

For a radiant face with healthy skin into old age, individual care is required. However, one of the biggest mistakes in facial care is using the wrong products. A skin type analysis creates clarity and allows the selection of the optimal care products. We summarize how you can determine your skin type and find the right facial care.

Face care with the measure

What your skin needs depends on several factors. Age, your genetic skin type, and individual habits in the care routine play a role. For example, if you are constantly changing your face cream and are one of those people who like to regularly test new care products, this can stress your skin in the long run. This stress can lead to blemishes being specifically promoted and over-stimulation occurring. Skin that has been overstressed for a long time becomes more sensitive – redness, feelings of tightness, and itching are typical consequences.

Choose the right cream for your facial care

The choice of face cream must be made particularly care if the skin is irritated. The cosmetics company asambeauty with the M. Asam brand, which has existed since 1963, develops successful recipes in cooperation with renowned dermatologists and recommends mild and fragrance-free formulations with selected and gentle ingredients for sensitive skin. As a suitable face cream from the M. Asam brand, the manufacturer recommends the perfume-free Hyaluron Repair 24h Cream, which strengthens the natural skin protection barrier and gives the facial skin new resistance. The texture of the cream is described as velvety and it should be applied in the morning and evening after cleansing the face.

Face cream types for different skin types

Yes, there are different types of face cream for different skin types. In general, a distinction is made between oily, dry, and normal skin as well as so-called combination skin for the right facial care:

Normal skin

This skin type does not suffer from particularly dry or oily skin. Pimples are also rather rare. Care is easy here with daily facial cleansing and a moisturizer.

Oily skin

Excessive sebum production leads to oily facial skin. The cause for this can be genes and hormone fluctuations as well as inferior cosmetic products and stress. Typical signs of oily skin are shine all over the face and enlarged pores. Wrinkles are less noticeable. Blemishes are possible, but not a must for this skin type. With oily skin, the mistake is often made when drying care products are used. But that is exactly what can contribute to an additional boost to sebum production and worsen the complexion. Substances such as menthol and eucalyptus are unfavorable.

Proper care should be based on a thorough cleaning and the additional use of a facial tonic. A serum or gel is recommended for light care. Vogue has interviewed dermatologist Dr. Elena Martínez and asked about proper skincare for oily skin. The expert advises using a sebum-regulating serum in the morning in combination with a water-based moisturizing cream. For the night, however, care products with glycolic acid, salicylic acid, or retinol are advantageous.

Dry/dehydrated skin

If the facial skin feels mainly dry, and tense and is often characterized by irritation, there is a lack of natural fats, and sebum production is restricted. Flaky areas of skin are also conceivable. Care products that also dry out and irritate the skin should be avoided. Ingredients such as perfume, alcohol, and mineral oils should be taboo. Substances such as almond oil, ceramides, and shea butter are advisable instead. After mild facial cleansing, a moisturizing face cream is applied.

Combination skin

This is where greasy and dry spots mix. While the area around the nose and forehead (the T-zone) often tends to be greasy, the cheeks appear dry. Care is a bit more complex here because the products have to meet the different requirements. A pH-neutral facial cleansing gel and tonic make a good combination. A face cream especially for combination skin completes the care. Products with hyaluronic acid and gel-like texture are optimal.

If in doubt, consult an expert

However, the classification of the skin is often not quite as simple as this classic categorization would make it out to be. The problem: Just because your skin looks oily doesn’t mean that facial care for oily skin is right for you. It is not uncommon for different characteristics of skin types to mix with signs of a skin disease that has not yet been diagnosed.

In addition, skin that suffers from a lack of moisture can also be oily, at least temporarily. Drinking too little also damages the organ and promotes dry skin. If you interpret the signals incorrectly and therefore use unfavorable care, this can lead to the overstimulation mentioned above in the long run. If in doubt, a visit to a dermatologist is helpful to have an individual analysis carried out and to determine the appropriate care without a doubt.

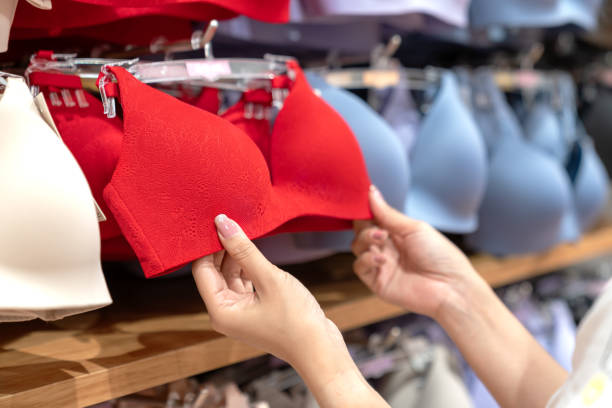
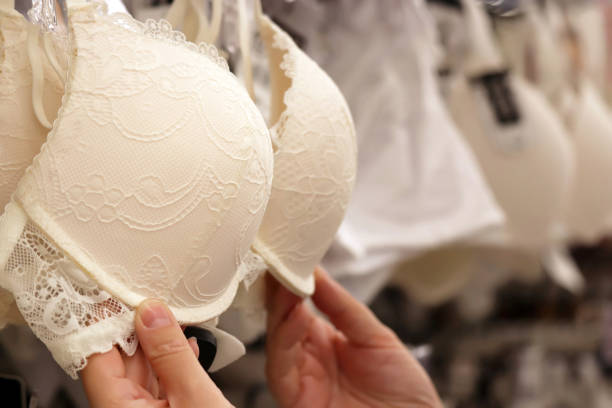
Helpful tips for the right bra size and fit. Many women find it difficult to find the perfect fitting bra. Because the biggest problem is that many do not know what to look for when buying. In addition, not all customers want to be advised in retail.

After all, there is a wide range of bras online, which are often cheaper. Since there is no possibility to try on the underwear beforehand, the optimal size should be known. With a few tips and tricks, you will find the right fit and thus your new favorite bra.

That’s why the right bra fit is important

Wearing a bra that doesn’t fit properly can quickly lead to discomfort. Because a bra that doesn’t fit properly can chafe and hurt. In addition, the bra should fit well so that it gives and supports your connective tissue and breasts. And this is especially true for women with larger breasts. Consequently, a bra can prevent or alleviate back and neck pain. Choosing the right bra can have a positive impact on your health.

Buying a bra

Bras are often bought in the wrong size. Because many women don’t know how a bra should actually fit. Then there is often an uncomfortable feeling when wearing it. But that usually only becomes apparent after a few days. Therefore, you should consider the following things when buying:

1) The correct size of the bra

The size of your bra is very important. When you look at yourself from the side in the mirror, the strap that fastens at the back must run horizontally in one line around the entire body. If the waistband rides up at the back, the bra is too big. Then the weight of the chest pulls forward and down. Only when the waistband runs exactly in one line have you found the optimal size of the bra. Also, note our tips for washing and caring for lingerie.

2) Recognize the optimal fit of the bra

In addition, the waistband of a closed bra should not be too tight. Then the scope would be too small. So make sure that two finder widths fit between your back and the clasp. Consequently, the scope is perfect. Most bra clasps have width adjustment. Ideally, this sits in the middle eyelet area. The only underwear that can be very tight is the popular shapewear.

3) Determine the right bra size

The cups often don’t fit well either. Your breasts should be level with the top of the cups. The breast should not be pushed out, nor should there be a cavity between the breast and the cup. In both cases, an uncomfortable feeling arises. You can tell if the cup was chosen too generously by any creases in the fabric. If the material does not lie flat on the chest, the cup size is too large. Equally important is the side area of ​​the cups. Especially with underwire straps, you have to prevent the end of the underwire from causing pressure points. In this case, the size would be too small. Also interesting are the benefits and dangers of breast augmentation.

4) Adjust the carrier correctly

The bra straps make a significant contribution to ensuring that the breasts are well supported and kept in ideal shape. They are often set incorrectly. Because too loosely regulated, the weight pulls down. And pulled too tight, the straps cut into the shoulder area. Both are very annoying. If two fingers can still fit between the fabric and the skin, the straps are adjusted as best as possible.

Grapes for a beautiful décolleté

The perfect bra also includes a beautiful décolleté. And you don’t even have to leave the house for firming care of your décolleté. Simply take 200g of grapes from the fruit bowl, crush them, and spread them over the décolleté. Then leave this treatment on for 10 minutes before you can admire how the grapes can smooth your décolleté because of their fruit acids and active ingredients. So you will be able to wear an elegant evening dress perfect for the next special occasion.

Macronutrients from food provide us with energy. We will explain to you which substances are involved, how best to take them and how they work.

What are macronutrients?

The nutrients that humans can consume through food are divided into micro and macro nutrients. The body needs these nutrients to grow and stay healthy.

The macronutrients are the substances that the body absolutely needs for its energy supply. You should therefore make sure that you always consume enough macronutrients. The macronutrients include:
carbohydrates and fiber,
Fats (lipids) and
Proteins (proteins).
Sometimes alcohol is also counted among the macronutrients because the body can also use it to generate energy. However, this does not mean the alcohol that you consume through alcoholic beverages, but the alcohol that is part of some important fatty acids.

Carbohydrates – the body’s most important source of energy

Carbohydrates provide your body with the most energy. They also serve as scaffolding substances for the carbon skeletons needed for amino acids. According to the DGE (German Society for Nutrition e.V.), about half of the nutrient intake should consist of carbohydrates. With an average energy requirement of 2000 calories, this corresponds to around 250-360 grams of carbohydrates.

Carbohydrates are divided into three major groups:
Simple sugars such as glucose
Disaccharides such as lactose
Polysaccharides, such as starch and fiber
Simple sugars are absorbed directly by the body and the blood sugar level rises quickly. Multi-chain carbohydrates (multiple sugars), on the other hand, first have to be broken down again because the body can only use simple sugars directly. This is why polysaccharides in particular serve to provide the body with long-term energy.

The right dosage of carbohydrates

You should primarily consume polychain carbohydrates, i.e. multiple sugars, with your food. The World Health Organization recommends that no more than 10% of carbohydrate intake should be made up of simple sugars.

When too much simple sugar is ingested in the diet, the body cannot process it all at once and stores it in the liver and muscles. If the supply of glucose is too high, it is metabolized into fat.

However, if you eat too few carbohydrates through your diet, it can happen that your body converts protein to carbohydrates instead and then not enough protein is available for the body. You should therefore always ensure a balanced diet.

The best carbohydrate suppliers

Depending on the type of carbohydrates, you can use different foods:
Simple sugars: You can consume simple sugars in the form of fructose and glucose, for example through fruit. A simple sugar in milk sugar, galactose, is found primarily in milk and milk products. From an ecological point of view, you should make sure to shop locally and seasonally. You can also pay attention to organic quality, especially with fruit and milk.
Double sugar: You can find double sugar in common household sugar and all products containing it, as well as e.g. beet sugar in the form of sucrose. It also includes lactose from dairy products and maltose from beer.
Polysaccharides: One of the most important carbohydrates is polychain starch. Examples of starchy foods are cereals, potatoes, vegetables and legumes. These foods also contain a lot of important fiber. Dietary fiber is particularly important for digestion. Meat with a high muscle content also contains polysaccharides in the form of glycogen. When shopping, please make sure that you use sustainable and organic products whenever possible.
The following foods are recommended for the right carbohydrate supply:
fruit and vegetables
Grain
potatoes
legumes
Dairy products

Fats – the all-rounders

Fats serve as a source of energy for your body because they contain the most energy per gram (approx. 9 calories per gram). In addition, fats have a protective function for organs, support the absorption of fat-soluble substances such as vitamins and are a flavor carrier. In addition, fats store energy in the form of fat deposits and serve as a building material for the body’s cells.

According to the DGE, around 25-30% of the energy intake should come from fats. This corresponds to an intake of approx. 65 grams of fat per day with an energy intake of 2000 calories per day.

There are different types of fat that can also be absorbed and processed differently by the body.

Fats include:
animal and vegetable fats
Fats with saturated and unsaturated fatty acids

The different fatty acids

Saturated fats are mainly found in animal foods such as butter and cheese. Your body can produce saturated fatty acids itself, so they don’t have to be ingested in large amounts through food.
Monounsaturated fatty acids are mainly contained in vegetable oils. They can also be produced by your body itself and ensure that the blood lipid level is kept constant.
Polysaturated fatty acids or essential fatty acids cannot be produced by your body itself and must therefore be supplied through food. The omega-3 fatty acids and the omega-6 fatty acids play a particularly important role. The essential fats are largely responsible for the function of your organism. They are found in oils, nuts and leafy vegetables, as well as in meat, butter or egg yolks.
Trans fats are a by-product of fat hardening and are found in margarine, shortenings and products containing them, such as chips, convenience foods or cookies. According to the German Society for Fat Science e.V., an excessive intake of such trans fatty acids increases the risk of cardiovascular diseases.

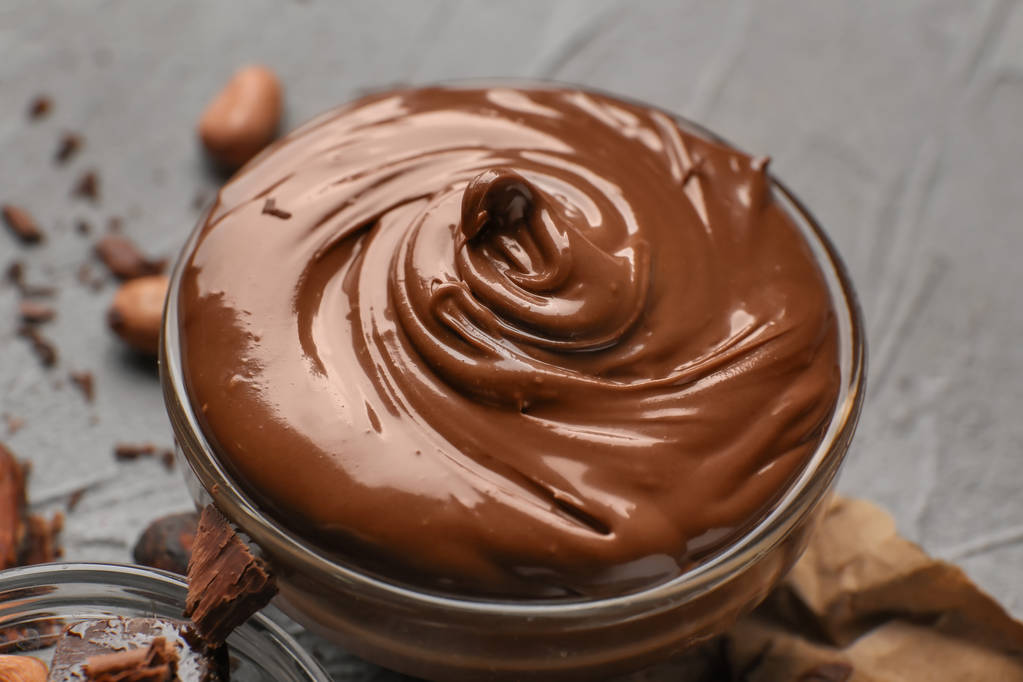
In order for the chocolate coating to have a nice shine, you have to heat the chocolate properly. Here you can find out what you have to pay attention to and which methods are available.

Tempering Chocolate: Why is it Important?

Chocolate is very sensitive to temperature. Just one degree more or less can change its consistency. This is due to the cocoa butter it contains, which can harden into six different crystal forms depending on the temperature. Only in the fifth crystal form (from about 28°C) does the chocolate harden stably. The tempering of chocolate is therefore also referred to as “pre-crystallization”. This gives your chocolate the following properties when it has solidified:
smooth and shiny surface
crisp break
quick drying
If you don’t temper the chocolate, it may not harden, may not break cleanly, or may form a gray-white haze as it dries – called a fat glaze.

Tempering chocolate: The temperature is crucial

The optimum temperature for pouring depends on the chocolate. You can use the following information as a guide:
Dark chocolate: 31-32°C
Milk chocolate: 30-31°C
White chocolate: 29-30°C
Ideally, you should use a thermometer to accurately measure the temperature. With a little sensitivity, however, you can also temper chocolate without a thermometer.

Tempering Chocolate: Three Methods

There are various methods of bringing the chocolate to the desired temperature. But the basic principle is the same for all.

1. Vaccination method:
Melt chocolate: Chop or grate the chocolate into small pieces. Place 2/3 of the chocolate in a bowl and melt over a water bath while stirring. Make sure the water isn’t boiling and the bowl isn’t touching the water. It is also important that no water gets into the chocolate, as this could cause lumps.
Lower the temperature: Remove the chocolate from the water bath and add the remaining third. It is important that you stir constantly so that the chocolate melts evenly. The mass thereby cools down to about the desired processing temperature. If the chocolate has melted evenly and become thicker, you can now use it. It is best to check the temperature with a thermometer.
Measure the temperature: If the chocolate has a temperature of around 29 to 32 degrees Celsius (depending on the type of chocolate), you can use it. If the temperature is lower, heat the liquid chocolate again over the water bath to the desired temperature.
2. Tabling method:
Melt the chocolate: Melt the chocolate as described above (to about 45-50 degrees Celsius) and pour 2/3 of the melted chocolate onto a smooth and cool work surface (a marble slab works best here).
Lower the temperature: Use a kitchen spatula to spread the chocolate over the plate and push it back towards the center. Keep the mixture moving until it has cooled and become more viscous. The chocolate should now be around 27 degrees Celsius.
Measure the temperature: add the slightly cooled chocolate back to the remaining third of the melted chocolate and mix thoroughly. The chocolate should now be at the optimum temperature for pouring. To be on the safe side, you can use a thermometer as a precaution and, depending on the cocoa content, bring the chocolate to the exact temperature with the help of a warm or cold water bath.
3. In the microwave:
Microwave the chocolate on high for about 20 to 30 seconds, then stir vigorously.
Repeat this process until most of the chocolate has melted. If there are only a few pieces left, you no longer need to put the chocolate in the microwave. Then stir until all the lumps are melted.
The chocolate should now be slightly viscous and have reached the optimum processing temperature. You can check this with a thermometer.

Tempering chocolate: more tips

And here are a few tips…
To test if the chocolate is setting the way you want, you can dip a spoon in it and let it dry. After a minute or two, the chocolate should set and have a slight sheen – that’s how you know everything worked out!
In general, the more you stir, the better. Because that promotes crystal formation and you get a better end result.
If you want to make it a little easier for yourself, you can use cake icing or fat icing instead of chocolate. These are specially made for coating sweet delicacies and have a higher fat content. This means you don’t have to pay so much attention to the temperature when melting and the glaze still gets a nice shine.

To soften white beans, you don’t necessarily have to soak them beforehand, unlike other legumes. We explain how to properly prepare white beans.

White beans belong to the legumes and are rich in protein and fiber. They ensure a long-lasting feeling of satiety and are among the best vegetable protein sources. Nevertheless, beans rarely end up on the plate in this country. You can prepare white beans easily and quite quickly.

Boil white beans: Soaking is worth it

Contrary to popular belief, you don’t necessarily have to soak beans before cooking. However, by soaking them overnight first, you can reduce the oligosaccharide content, making the beans easier to digest. However, this has not been definitively proven: while some people get severe flatulence even from soaked beans, others never have problems with the delicious legumes.

But what definitely speaks in favor of the soaking method is a shorter cooking time:
dry beans: cook for 1.5 to 2 hours
Beans soaked for more than 12 hours: cook for 45 to 60 minutes
So, soaking white beans overnight not only saves you time in the kitchen, but also energy when cooking.

The ideal preparation of the white beans:
The day before: Rinse the beans with water, then pour plenty of fresh water over them and let them soak overnight.
After at least 12 hours: Drain the soaking water, rinse the beans again with fresh water, and place them in a saucepan.
Pour water into the pot until the beans are about an inch or two covered with water.
Optional: add spices or fresh herbs of your choice to the cooking water, for example some marjoram or bay leaves.
Let the beans simmer over low heat until nicely tender, about 45 to 60 minutes.
If you don’t want to continue using the beans hot right away, you should let them cool down in the warm broth. Otherwise the fine skin of the beans would burst open. This is particularly important with giant white beans.

Cook white beans without soaking

If you forgot to soak the kidney beans first, you can still cook them. You only have to plan about twice as long cooking time so that the white beans become soft. Otherwise the preparation remains the same:
Rinse the beans with water, then place them in a saucepan.
Add enough water to cover the beans by about an inch or two.
Optionally, you can add fresh herbs or spices of your choice.
Let the beans simmer over low heat for about 1.5 to 2 hours until tender.
Here, too, you should let the beans cool down in the warm broth if you don’t want to use them hot.

Tip: Quick soak method for beans

If you didn’t think about soaking the night before, but are thinking about the bean dish at least a few hours before cooking, you can also use the following method:
Rinse the beans with water and place them in a saucepan with an inch or two of water.
Bring the water to a boil, let the beans simmer for about 2 minutes, and then remove them from the heat.
Allow the beans to sit for about 1 to 1.5 hours to cook.
The quick soak method also delays the cooking time a bit, which can save you energy. However, with this preparation, the white beans are most likely to disintegrate and sometimes lose the skin. Therefore, this method is more suitable if you want to puree the beans anyway – for example to make a delicious spread.

As is so often the case, the idea came from the USA, but it is also very popular in this country: More and more pregnant women want to celebrate a baby shower! The upcoming arrival of the baby is celebrated with the female friends of the pregnant woman. We have collected the best baby shower ideas and baby shower planning tips.

When is the baby shower?

Such a party usually takes place before birth. Since many people struggle with morning sickness in the first few months of pregnancy, a later date is usually chosen. You should also not set the date too soon before the birth. Because if the baby comes earlier than expected or the pregnant woman has to go to the hospital earlier because of complications, the party will, unfortunately, be canceled. So the mother-to-be should be surprised in the last trimester of her pregnancy. As a rule, a baby shower 6 – 8 weeks before the birth makes sense.

How to plan a baby shower correctly?

A baby shower is all about celebrating the upcoming arrival of the baby. Then there is delicious food, such as cakes, finger food or salads. And together, games that often have to do with the baby can be celebrated. In addition, the pregnant woman enjoys gifts for the baby and everything is nicely decorated. So a nice evening among friends. To ensure that the organization of the baby shower is successful, we have collected creative ideas for you.

Where is the celebration?

Since the friends want to be among themselves, most celebrate at home. Either with the pregnant woman or with one of the guests. If you don’t have enough space, you can also rent a room or, if possible, celebrate in the garden.

Planning food for the baby shower

First, you should invite the guests and set a suitable date with them. Then it’s time to plan the baby shower. Providing food is important as it is a big part of the party. There is usually a great cake, maybe even with the name of the child. Donuts, muffins, or other sweets can also be provided. You can also provide various salads, such as pasta salad, potato salad, and dips with finger food. It is best if everyone brings something with them, it makes the work easier. However, also note a healthy diet for pregnant women. But back to the cake. You can order great cakes online, but they’re not always cheap. Therefore, many make a cake themselves.

Baby shower party games

So that there is no boredom in between, there are great games for the baby shower. Of course, you can use existing games and play Tabu or UNO, which were used at other planned parties. But here are also wonderful games related to the baby. You can also find great sets and templates on the internet here. Then you can buy them or print them out. For example, here is a city, country, baby. It works almost like a city, country, or river, but here are the categories: baby clothes, baby food, baby toys, etc. There are also playing cards where the players guess the baby’s name or assign the baby’s characteristics to the respective parent. In addition, you can play the following games for the planned baby shower:

  • Guess waist size
  • Assign baby photos
  • advise baby porridge
  • paint onesie
  • Fill out the friend book
  • predict due date

Ideas for a beautiful decoration

Furthermore, decoration is a must for many. Here you can let your creativity run free and decorate the apartment as you wish. But now there are already ready-made sets for baby shower decoration on the Internet. This usually includes garlands, balloons, and streamers. You can also order matching plates and mugs. This makes planning a baby shower super easy. And the good thing is that this decoration is available in many different colors and designs.

What gifts for a baby shower?

As a rule, the guests of the pregnant women bring gifts that they can use for the newborn baby after the birth. They can be very different gifts. Some give diapers, burp cloths, baby clothes, or pacifiers as gifts. Others give baby toys, blankets, or vouchers. The best thing to do is to find out inconspicuously beforehand what the parents-to-be still need for their baby’s initial equipment.

What speaks for a baby shower after the birth?

Of course, there are also some reasons that speak for a baby shower after the birth. Parents often opt for this variant in order to offer guests the opportunity to get to know their newcomers right away. In addition, it is often easier for guests to choose a gift for the baby if their size, gender, and name are known. Also, note useful tips on pregnancy and how you can give the gift of joy with beautiful birth cards.

Tailor’s dummies are the be-all and end-all for people who like to tailor and sew themselves and form the basis for creative sewing work. Both professionals and amateurs work with appropriate tailor’s dummies in order to be able to mark out their sewing work in the best possible way.

Especially if a direct fitting is not possible. But finding the right tailor’s dummy for you and your sewing skills is not always easy and requires a number of criteria to be taken into account.

Only a tailor’s dummy makes it fit perfectly

If you want to make sure that the tailoring result is as accurate as possible when sewing yourself, you will probably not be able to avoid buying a tailor’s dummy. Because in most cases, a flesh-and-blood person is not always available for fitting.

A tailor’s dummy is indispensable for sewing work because tailors can use it not only to check and plan their patterns but also to drape the fabrics and pin them out for sewing. You don’t need a dressmaker’s dummy for smaller jobs like patching small holes in T-shirts or repairing loose stitches and pulling threads.

When choosing a suitable tailor’s dummy, consumers should pay attention to a number of criteria, such as the dimensions of the dummy or whether the dummy has various adjustment and movement options. The cost of a tailor’s dummy can also differ significantly from one another and depend, among other things, on the material properties.

Adjustable dress form

Anyone who counts sewing as a permanent hobby or who tailors professionally usually needs an adjustable tailor’s dummy since the sewing work is largely intended for different people. However, if you primarily want to tailor for yourself, you will also be happy with a fixed tailor’s dummy to create your own individual garments. Long-term use of tailor’s dummies works best with an adjustable variant since the dimensions of many people do not remain constant over time.

Before purchasing, it is highly advisable to take the measurements of the person in question so that the choice of the appropriate bust size is not based on pure estimates. The selection of models of tailor’s dummies is very large with most suppliers, there are female and male busts, but also children’s torsos for children’s clothing. Some tailor’s mannequin manufacturers even offer models for maternity wear and elaborate designer mannequins.

Pay attention to the material properties

Earlier tailor’s dummies were mainly made of wood and were very robust. Most commercial dolls today are made of polyurethane foam or Styrofoam. Ideally, the cover of the doll should be removable and therefore washable so that new patterns or fabrics do not get dirty.

When it comes to choosing colors, light colors are ideal, as the marked patterns stand out better with light tones. Otherwise, the look of the tailor’s dummy is a matter of taste, many dummies are also used as decorative elements if the dimensions no longer match.

For jogging in winter, you need the right sportswear. This is the only way to be adequately protected from unwelcome weather conditions. Then running in winter is fun and good for your health.

Sport in winter is healthy

Sport in the cold season is healthy. Because the cold ensures that the immune bodies are stimulated more. As a result, more immune cells are formed that can protect your body from colds. With sporting activity in the wintertime, you can not only overcome your sluggishness, and counteract winter depressions, but also promote your health. As long as there are no health problems, such as chest pain or asthma, you can continue your training without pausing. So jogging in winter or other sporting activities are no problem.

Jogging in winter

In addition to sports that you can do relaxed at home, such as yoga exercises, there are a variety of other sporting activities in winter. So you can go on a skiing holiday or go ice skating. In addition, jogging in winter is healthy. Because, as already mentioned, you can use it to strengthen your immune system and stay fit in everyday life. In general, running is an endurance sport and this is a good way to prevent diseases. It also improves your performance and strengthens your cardiovascular system, as well as your lungs and brain. It also boosts metabolism. But you need the right sportswear in winter. Otherwise, it is less fun and can

Which sportswear in winter?

One of the most important tips for winter sports and sports in winter is having the right equipment. Exercise in the fresh air is healthy, even when it’s cold. But especially if you want to train outdoors, you need the right sportswear in winter. This is the only way you can protect your body appropriately. You should definitely protect your head and ears when jogging in winter. In addition, pay attention to the following properties of your sportswear in winter:

  • Sportswear should be breathable.
  • Water repellent clothing is essential at this time of year.
  • The sportswear should protect you sufficiently from the wind.

Use functional clothing when jogging in winter

To keep your muscles warm, it is best to wear long pants that are roughened on the inside. But do not wear cotton clothing, as it tends to soak up sweat. As a result, your body can cool down and you could catch a cold. Accordingly, you are better advised with the so-called functional sportswear. Because it wicks sweat away to the outside. You can buy these at sporting goods stores and departments. In general, you should not dress too thickly but wear light clothing. This way you avoid overheating during your workout. So the first few hundred meters are still shivering from the cold. Also, note that you should warm up sufficiently before every workout and especially when jogging in winter.

Making the bed properly and preparing the bed made easy. With instructions and tips for making the right bed. Making the bed is a problem for many people, above all, it seems extremely tedious. But with a few simple tricks, the “tattered” bed can be turned into an exhibit like in stores. Many a bed looks chaotic even when made, but that doesn’t have to be the case. Making your bed properly is easy – if you keep a few tricks in mind.

Make and prepare the bed properly

The battle with the bedding usually begins with making the sheets, despite fitted sheets and covers with a zip. When you change your bed, clear away the bedding and put it aside. The easiest way to reference is to start at the top corner of the side that is most difficult to reach. In the first step, lift the corner of the mattress a little and pull a corner of the fitted sheet over it, fold the corners of the sheet over each other and place them under the mattress.

Next, lift the mattress a bit on the downward long side and pull the fitted sheet or wrapper underneath until you reach the opposite corner on the long side. Then proceed as in step one. Now start on the side of the bed that is easier to reach with the sheet parts still lying loosely on the bed as described above, corner – long side – corner. Finally, fold in the sheets on the narrow side of the head and foot ends – done.

Make a duvet and pillow

The next step is to cover the duvet and pillow. First, pull the duvet covers inside out, then grasp the cover and grab the corners of the corners on the right and left of the pillow. Let the coverslip over the pillow, button or pull it up and take the corners of the pillow in your hand from the outside, fluff the pillow. The duvet is treated in the same way as the pillow. If you are small, you should stand on a chair, it looks a bit silly, but it is extremely helpful, the long cover then slides easily over the bedding.

Making beds every day

Making the bed right every day is also very easy and quick to do. Pillows should either be laid flat on the bed after being fluffed daily or folded in the middle for large pillows. If you like the look of the hotel, you can also set the cushions up and make a depression in the middle with the edge of your hand. Comforters can be folded in a number of ways.

The easiest method is to simply fold it in half after fluffing it up and place it on the mattress. In hotels, the duvets are divided into three, the process can also be carried out without any problems. The first third of the bed is placed on the mattress, the rear end folded in a third and placed with the middle part on the first third. In southern European countries it is customary to tuck the duvet under the mattress on the right and left in the upper part after folding in a piece approx.

30 centimeters in size. However, it is not advisable to do this with feather beds, as this can lead to the feathers breaking. It is undoubtedly very important to shake up the bed every day and change the covers regularly, as this is the only way to ensure a certain level of hygiene and long service life of the material. – it doesn’t matter which method is chosen to give the bed a neat look.

Instructions and tips for choosing the right baking pan for cakes. The cake is still one of the most popular delicacies: There are plenty of delicious recipes for the most diverse types of cake. What many people forget, however, is that it’s not just the recipe that counts, but also the right baking pan.

Choose the baking dish according to the recipe

When baking, it’s not just about the right recipe, but also the right cake pan. This is determined by the baking mold and there are many different ones: silicone baking molds and sheet metal molds made of various metals, with and without a special coating.

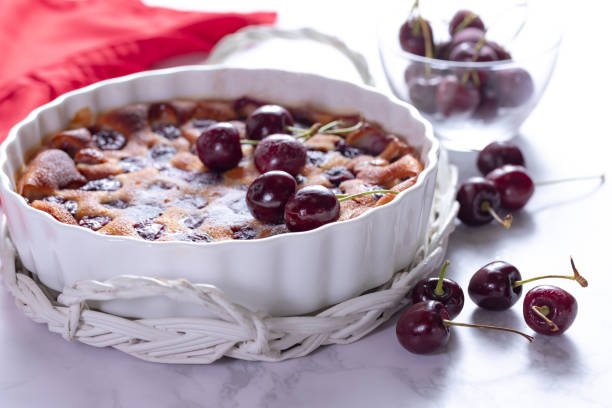
There are also ordinary standard forms, as well as very complex motif baking forms. And in a wide variety of sizes. Not only the material is fundamentally different, but actually also the later cake form. Therefore, think about which cake recipe is used to find the right shape. For an affordable canned fruit cake, you can use a baking sheet or round springform pan. These molds are also ideal for grandma’s simple plum apple cake. While other cakes cry out for more unusual shapes.

Know-how of the right baking pan

But which form of buck is the right one for the individual? Every baker and every hobby baker has its own preferences and requirements. This applies to the taste of the cake, but clearly also to the texture of the baking pan.

For example, I prefer silicone baking pans, but my sister-in-law has always sworn by metal baking pans with a high-quality enamel coating. So far we have tried both variants – always with good and less good results. In order to be able to make an individual choice, you should take a closer look at the properties, advantages, and disadvantages of each type of baking pan.

Silicone or metal? With or without coating?

As mentioned, my favorite is the silicone baking pan. Molds made of silicone are very flexible and heat-resistant and there is no need for annoying greasing beforehand and then attaching cardboard afterward. After baking, the finished cake can almost always be removed from the mold easily and without much effort – and above all without unsightly crumbling. In addition, silicone can be used not only in the oven but also in the refrigerator. Today, however, this also applies to many sheet metal shapes.

Metal baking molds, on the other hand, are a lot more robust than silicone baking molds. They wear out slower and last a lot longer than a silicone cake pan. Here, however, the quality of the individual mold is very important – the lifespan of the baking mold can therefore vary greatly. But that doesn’t have to mean that a cheap baking pan has to be a bad one. When buying, simply check the workmanship, the impression of the material, and possible seams or transitions. With the right care, you can conjure up delicious cakes and tarts even with a cheap baking pan and you will enjoy them for a long time.

By the way, if the dough sticks to the mold despite everything, it often helps to simply put the still lukewarm mold in the fridge or on the cool balcony for a few minutes. In my experience, a wet towel wrapped around the mold only helps to a limited extent and only with a metal mold.

Which baking pan and which cake go together?

Finally, the question arises as to which baking pan is the right one for which cake. Here, too, there are numerous variants, motifs, and types of sheet metal. My children love playful shapes for their birthday cakes, but these are really only suitable for very simple and dry types of cake: for example marble, chocolate, or sand cakes. Unfortunately, sensitive and rather sticky types of dough quickly stick to the “details” of a motif mold – even if it is very well greased or made of high-quality silicone.

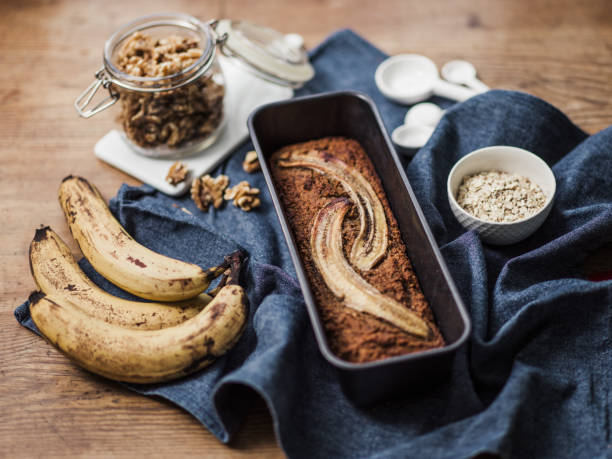
The commercially available standard forms are somewhat less complicated: springform tins, baking trays, and loaf tins. Incidentally, cool and fresh fruit tarts are best baked in springform pans, warm fruit cakes on a baking tray or also in a springform pan, and sand or bundt cakes in a Gugelhupf or loaf pan.