Tag

Salt

Browsing

To get your dirty work clothes really clean again, useful tips for cleaning work clothes. Because with the right pre-treatment and home remedies, effective cleaning is possible.

Clean dirty work clothes

After strenuous work in the garden or after a hard day’s work on the construction site, it can happen that dirt does not disappear with a simple wash. So that the dirt still disappears, you should add a simple household remedy to the laundry when cleaning work clothes:

Pre-treatment of work clothing

Since workwear is often heavily soiled clothing, you should pretreat it in the washing machine before washing it. So let them soak overnight. To do this, fill a bucket or the bathtub with water and add the household remedy baking soda. You can also moisten the dirty areas and rub in the miracle cure gall soap. Then let it soak for a while before you put it in the washing machine.

Clean work clothes with salt

In order to be able to effectively clean heavily soiled work clothing, you can add three tablespoons of salt to the washing water in addition to the detergent. This means that you can remove even stubborn stains without much effort and make your workwear look new. Also, note tips on how to effectively remove the following stubborn stains from your clothes:

  • Tips for removing grass stains
  • Easy ways to get rid of red wine stains
  • Remove stubborn grease and oil stains

More tips on cleaning workwear

Either you have your work clothes dry cleaned, where professional people with the right equipment and resources will take care of your clothes. Or you try to get your work clothes clean yourself. You should also heed the following tips. Also, read how to remove tar stains from skin and work clothes.

  • Always wash work clothes alone. This way, the rest of your laundry won’t get dirty.
  • Wash soiled clothing at high temperatures. As a result, stubborn dirt is loosened.
  • Instead of liquid detergent, use powder detergent to clean your workwear.
  • Use special scented cleaners or detergent alternatives to neutralize odors.

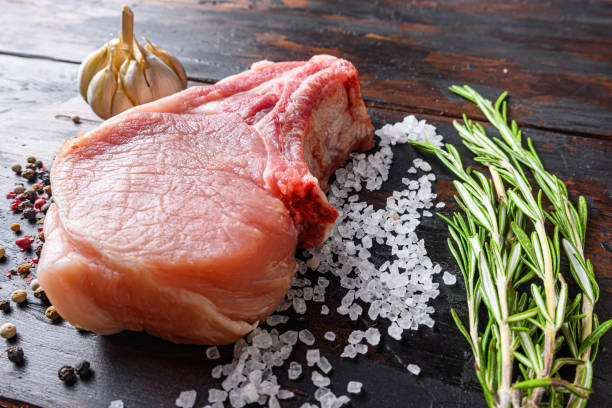
As soon as it gets warmer outside, we head to the grill. So that there is a little variety on your grill, we will present “barbecuing on the salt plank” in the following article. The salt plank enables indirect, gentle cooking on the grill and excellently supports the natural taste of meat, fish & co.

Doesn’t that make my food oversalted?

When you see the salt stone, fear quickly spreads: Isn’t my grilled food completely oversalted with it? But here we can give the all-clear. The salt plank imparts a subtle, evenly distributed taste of salt to fish, meat, and vegetables, providing a pleasant seasoning.

What can I cook on the Salt Plank?

The salt plank is very versatile, from thinly sliced ​​meat to fish and vegetables. It is particularly suitable for sea fish and seafood, for example. However, thick-cut steaks are not recommended.

How does it work?

The salt plank needs to be preheated for about 10-15 minutes over medium-high heat. It is advisable to use the heat and, for example, grill the side dishes while it is preheating. Once the plate is preheated, there are two ways to grill on the salt plank:

  • Either you grill meat, fish, or vegetables and then let them finish cooking on the salt plank
    or you let it cook gently on the plank and give the grilled food a crispy crust at the end.
  • Incidentally, the salt plank is reusable and can be cleaned quite easily with a damp cloth. Remove any roasting residue with a scraper beforehand.

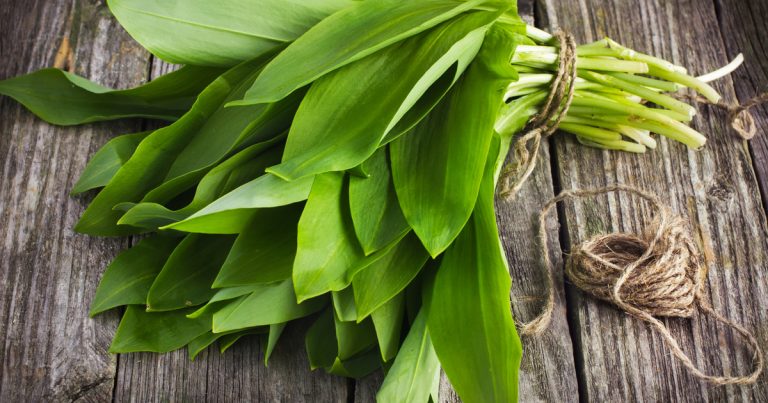
Making wild garlic salt is a great way to preserve fresh wild garlic leaves. So you can enjoy the taste all year round. We explain what you should consider.

The wild garlic season starts in mid-March and you can harvest wild garlic leaves for homemade wild garlic salt. Wild garlic not only offers a wonderful, regional variety in the kitchen, but is also very healthy. The leaves contain valuable essential oils, as well as vitamin C and minerals such as iron, manganese and magnesium.

In addition to the classic wild garlic pesto, there are countless other recipes with wild garlic. We’ll show you a simple recipe for wild garlic salt so that you don’t have to do without the fine, spicy taste of the wild garlic leaves for the rest of the year.

Wild garlic salt: Two simple ingredients

You only need two ingredients for the basic recipe:

250 g table salt or other salt
100 g fresh wild garlic
Since dried wild garlic leaves quickly lose their taste, it is best to process them immediately after collecting them. Optionally, you can refine the wild garlic salt with a little spiciness. White pepper or chilli are particularly suitable for this.

You also need:

a mortar or a blender
Screw-top jars for filling

Recipe for wild garlic salt

The preparation of wild garlic salt is very simple:

Wash the wild garlic thoroughly.
Dry the leaves well or place them in a salad spinner.
Then remove the stems and cut the leaves into strips.
Grind the strips in your mortar or use a chopping knife to cut them into a homogeneous mass.
Mix the salt with the wild garlic paste.
Spread the mixture on a baking sheet.
It is best to dry the moist salt in the sun. This is the best way to preserve the taste of the wild garlic. This takes about eight hours. (In bad weather, you can alternatively dry the wild garlic salt in the oven at around 50 degrees. Check regularly whether it is already dry and stir it with a spoon so that it dries evenly. It should be ready in about four hours.)
You can fill your wild garlic salt directly into a spice mill or grind it finely again before filling it into screw-top jars.


You can simply sprinkle wild garlic salt on buttered bread or use it for cooking. From scrambled eggs, to salads or pan-fried vegetables – wild garlic is always a good choice, even if garlic would also be a good choice.

Storage: Wild garlic salt should be stored in a dark and dry place. The wild garlic is well preserved by the salt and lasts for at least a year.

Lemon salt gives your dishes a particularly aromatic note. We’ll show you how easy it is to make your own.

Homemade lemon salt brings a refreshing and fruity change to your dishes. It goes particularly well with vegetable pans, salads or salad dressings and dips. We recommend choosing organic ingredients. This is how you avoid chemical-synthetic pesticides.

Lemon salt: A recipe to make yourself

This recipe gives you a supply of lemon salt that is sufficient for many dishes. For example, you can put the lemon salt in a large salt shaker or put it in a small mason jar.

Ingredients:

200g salt

1 organic lemon

Directions:

Wash the lemon with hot water and then dry it with a kitchen towel.
Grate the lemon zest with a grater.
Juice the lemon with a lemon squeezer. Pour the juice through a fine mesh strainer to remove the pulp. You only need the juice.
Mix the salt with the zest and the lemon juice.
Spread the lemon salt on a baking tray and put it in the oven at 100 degrees for 20 minutes. This step is important so that your lemon salt loses water and has a long shelf life.
Allow the lemon salt to cool completely and then pour it into a glass container.

Tips for your homemade lemon salt

These tips will make your lemon salt even more aromatic:

You can mix your lemon salt with herbs of your choice. Add the fresh and chopped herbs in the fourth step. You can add already dried herbs after the salt has come out of the oven and cooled down. For example, rosemary can complement lemon salt wonderfully.
When grating the lemon zest, make sure that you do not rub off any or only a little of the white skin. This is just below the yellow peel and would add a bitter note to your lemon salt.
Of course, the salt can also be made with other citrus fruits. You can also use an orange or lime in place of the lemon.
Choose a salt of your choice. For example, you can use fine-grain sea salt or coarse-grain rock salt. The coarse-grained lemon salt is suitable for filling a salt mill with it. You may also want to leave the coarse-grained salt in the oven a few minutes longer so that your lemon salt is really dry.
Incidentally, homemade lemon salt with its refreshing yellowish color is a wonderful gift idea. You can still decorate the glass and you already have a homemade souvenir.

Mushroom salt is versatile. It goes well with warm dishes, refines salads, or seasons your bread. We’ll tell you how to make it yourself with just three ingredients.

Mushroom salt is an interesting alternative to conventional table salt. The mushrooms give the salt an earthy, nutty note. It goes particularly well with vegetable dishes or salads, and the salt also tastes good on bread and butter.

Herb salt or chili salt are already known in many kitchens. With this mushroom salt you bring variety to your dishes. It is also a great gift for family and friends.

If you buy the ingredients, then pay attention to organic quality. Organic seals such as Demeter, Naturland, or Bioland are good indicators of ecologically sustainable cultivation. Choose the products from regional trade. This saves long transport routes and thus reduces the ecological footprint of your food.

Make mushroom salt yourself

WHO recommends eating salt in moderation. Therefore, use the mushroom salt carefully and use a salt substitute if necessary. Gomasio, Japanese sesame salt, is also suitable for this.

Ingredients:

  • 60 coarse salt
  • 60 g dried mushrooms of your choice
  • 1 teaspoon of colored peppercorns

Directions:

  • Place the mushrooms, salt, and peppercorns in a mortar or high-powered blender.
  • Grind the ingredients very finely.
  • Pour the finished mushroom salt into clean screw-top jars.

Tip: Store the mushroom salt airtight and protected from moisture. Then it can be kept practically indefinitely.

The mushroom salt consists of two main ingredients: mushrooms and salt. There are many different types of salt. In this recipe, we recommend using a fairly coarse one. Simply choose your favorite varieties for the mushrooms in this recipe. Dried porcini, oyster mushrooms or chanterelles taste particularly good.

You must dry the mushrooms before preparing the mushroom salt. You can find dried mushrooms in an organic supermarket or gourmet specialty store.

You can also collect or grow your own mushrooms. You should note a few things:

Wild mushrooms are in season in autumn. Then they grow in the forest and garden.
Choose local edible mushrooms for your recipe. In this way, you avoid high CO2 emissions due to long transport routes.
If you are collecting edible mushrooms, use mushroom identification tools.
Grow mushrooms yourself to be absolutely sure it’s the right kind.
Air or oven-dry the mushrooms. Then they have a long shelf life and you can use them for the mushroom salt.