Tag

simple,

Browsing

Introduction: The Australian Bush Bread, Damper

Damper is a traditional Australian bread that has been a staple of the country’s cuisine for centuries. This bread was originally created by the early settlers who lived in the outback, where access to fresh bread was limited. The damper is made from a simple combination of flour, salt, and water, and is cooked over a campfire. This bread is easy to make and is perfect for camping trips, outdoor gatherings, or as a side dish for a hearty meal.

Ingredients: Self-Rising Flour, Salt, and Water

The ingredients for making damper are simple and easy to find. Self-rising flour is the key ingredient for this bread, as it contains baking powder, which helps the bread to rise. You will also need salt to enhance the flavor of the bread. Finally, you will need water to mix the dough. The amount of each ingredient you need will depend on how much bread you want to make.

For a basic recipe, you will need two cups of self-rising flour, one teaspoon of salt, and one cup of water. Mix the ingredients together until they form a dough. Knead the dough for a few minutes until it becomes smooth. You can add additional ingredients like cheese, bacon, or herbs to the dough to add extra flavor to the bread.

Method: Cooking Damper Over a Campfire

To cook the damper, you will need to have a campfire or a fire pit. The traditional method of cooking damper is to wrap the dough in foil and place it in the coals of the fire. Alternatively, you can place the dough on a stick or a metal skewer and cook it over the fire.

Cook the damper for about 30 minutes or until it is cooked through. The bread should sound hollow when tapped on the bottom. Once the damper is cooked, remove it from the fire and let it cool for a few minutes before slicing and serving. This bread is best served warm with butter or jam.

In conclusion, making damper is a fun and easy way to experience traditional Australian cuisine. With just a few simple ingredients and a campfire, you can create a delicious and hearty bread that is perfect for any outdoor gathering. Give this recipe a try and enjoy the taste of the Australian outback.

Introduction: The Charm of Afghan Street Food

Afghanistan, with its rich history and diverse culture, has a cuisine that is unique and authentic. The country’s street food is no exception. Afghan street food is simple, delicious, and made with fresh ingredients, reflecting the country’s rural and agricultural background. The food is often prepared on the spot, giving off a tantalizing aroma that attracts people from all walks of life to try it out.

Traditional Afghan Street Food: A Culinary Journey

Afghanistan’s traditional street food has its roots in the country’s rich culinary history. The cuisine has been influenced by the flavors and spices of neighboring countries, such as Iran, India, and Pakistan, but it has developed its unique taste over thousands of years. The food is often served on small carts or makeshift stalls on the streets. These vendors have long been an integral part of the culture of Afghanistan, as they offer affordable, tasty food that is accessible to everyone.

Exploring the Flavors of Afghan Cuisine

Afghan cuisine is known for its bold and aromatic flavors. Some of the most popular spices used in Afghan cooking are cumin, coriander, turmeric, ginger, and garlic. These spices are often used to flavor meat dishes such as kebabs, qormas, and stews. Vegetables such as eggplant, okra, and spinach are also commonly used in Afghan cuisine. Afghan street food offers a wide variety of flavors, from savory to sweet, and every bite is sure to tantalize the taste buds.

The Simplicity of Afghan Street Food

Despite its bold flavors, Afghan street food is often simple and straightforward. The food is made with fresh ingredients, and the recipes are often passed down from generation to generation. The vendors take pride in their work, and they strive to offer the best quality food to their customers. Afghan street food is not only delicious but also healthy, as it is made with ingredients that are natural and locally sourced.

Authenticity at Its Best: Afghan Street Food

Afghan street food is authentic, representing the country’s culture and traditions. The food is prepared using traditional methods and techniques that have been passed down for generations. The vendors often use homegrown ingredients that are unique to the region, adding to the authenticity of the food. Eating Afghan street food is a way to experience the culture of the country and connect with the people.

Popular Afghan Street Foods You Must Try

Some of the most popular Afghan street foods include kebabs, a skewered meat dish often served with bread and yogurt; qormas, a meat or vegetable stew served with rice; bolani, a type of stuffed flatbread; and samosas, a fried or baked pastry filled with meat or vegetables. Other popular dishes include mantu, a type of dumpling filled with meat and spices, and ashak, a type of pasta filled with leeks and served with meat sauce.

Homegrown Ingredients in Afghan Street Food

Afghan street food is often made with ingredients that are locally sourced and grown in the region. These ingredients are unique to Afghanistan, adding to the authenticity of the food. Some of the ingredients commonly used in Afghan street food include lamb, chicken, chickpeas, lentils, and fresh herbs such as cilantro and mint. Vegetables such as tomatoes, onions, and peppers are also commonly used.

Conclusion: Discovering Afghan Street Food

Afghan street food is a perfect representation of the country’s culture and traditions. The food is simple, authentic, and delicious, offering a culinary journey to anyone who tries it. The street vendors take pride in their work, and the food they offer is a testament to the richness and diversity of Afghan cuisine. If you ever get a chance to visit Afghanistan, do not miss out on the opportunity to try some of the country’s amazing street food.

It’s bright orange and extremely juicy and delicious: we’re talking about pumpkin bread. But the autumn baked goods are rarely found in stores. So now it’s time to bake pumpkin bread!

You only need a few ingredients and a little patience to bake pumpkin bread, because the pastry is made from yeast dough. When it comes to choosing the type of pumpkin, the only limit is your imagination – we chose the Hokkaido pumpkin because it doesn’t even have to be peeled.

Bake pumpkin bread – healthy ingredients

Pumpkin bread not only scores points in terms of taste with its fluffy and juicy consistency and the slightly sweet and nutty aroma, the ingredients are also impressive thanks to good ingredients.

The wholemeal flour in the dough provides a good deal of fiber and B vitamins, while the pumpkin contains few calories (25 kilocalories per 100 grams) and plenty of beta-carotene, the plant-based precursor of vitamin A. Pumpkin seeds also score points with polyunsaturated fatty acids and iron.

Bake Pumpkin Bread

The ingredients for 1 pumpkin bread:

  • 450 g pumpkin of your choice (makes approx. 300 g pulp)
  • 500 g wholemeal spelled flour
  • 1 cube of yeast (42 g)
  • 1/2 tsp honey
  • 350 ml of lukewarm milk of your choice (e.g. goat milk, buttermilk)
  • 110 grams of butter
  • 1 tsp salt
  • 60 g pumpkin seeds

The preparation:

  1. Wash or peel the pumpkin, clean and cut into small cubes. Place the diced pumpkin in a saucepan, cover with water and cook covered for about ten minutes. Then drain, finely puree, and leave to cool.
  2. Meanwhile, put the flour in a bowl, make a well in it and crumble the yeast into the well. Mix the honey, milk, and some flour from the edges to form a pre-dough, cover, and leave to rise for 15 minutes in a warm, draft-free place. Melt 100 grams of butter.
  3. Add butter, salt, pumpkin puree, and 50 grams of pumpkin seeds to the pre-dough and knead everything into a smooth dough.
  4. Grease a loaf pan with the remaining butter and fill in the batter. Cover and let rise for another 15 minutes. Sprinkle the bread with the remaining pumpkin seeds and bake the pumpkin bread in a preheated oven at 200 °C (180 °C fan oven; gas: level 3) for approx. 60 minutes.

Good food is well known for making us happier inside and out. A study shows how a simple trick can increase this effect.

Basics of the study

Every person has a different way to feel more comfortable. While for some it is relaxation methods such as yoga or meditation, others rely on sports, painting or talking to friends. But it is not uncommon for people to feel completely at ease after a delicious meal.

Based on the assumption that good food makes you happy, Edith Cowan University (ECU) initiated a study to prove that there is a connection between good food and our mental health.

A total of 657 people took part in the study, each of whom underwent a seven-week cooking course focused on preparing healthy food. After completing the cooking course, it was examined to what extent participation in the program affected general, but also mental health and subjective vitality. The term “subjective vitality” includes, among other things, perceived energy, willingness to perform and zest for life.

Cooking yourself: Good food should make you even happier

The results were impressive: The participants not only had a higher self-confidence when it came to cooking in general, but even adopted new and healthy eating habits in everyday life. In all three areas that were examined after the study, positive effects were found in the test persons: in general, but also in mental health and subjective vitality.

Basically, the study shows that there is a connection between health and healthy eating. Significant for an improvement in nutrition is not only healthy cooking, but also cooking at home – which increases the good feeling even more. According to the researchers, such nutritional improvement is also a way to combat mental health problems, obesity and other metabolic health disorders.

How much time is invested in cooking and the quality of the ingredients used is less relevant. It’s more about consciously turning to healthy cooking and doing something good for yourself; for example, just eating more fruit and vegetables can have a big effect.

Conclusion

In summary, it can be said that a healthier diet can be implemented at home and can have a positive effect on your physical and mental health. The question of how food can make you happier can be answered easily: Cooking at home is fresh, healthy and fun.

Potato pancakes or potato pancakes are a traditional, well-known dish of good German and Austrian cuisine. Every grandmother, mother, or housewife can easily and cheaply make potato pancakes themselves. Grated potatoes are mixed with other ingredients and baked in hot fat in the form of patties.

This meatless housewife-style dish is eaten with different ingredients, often sweet, depending on the region, especially at Christmas markets, and is also suitable for parties.

Ingredients for 6 servings

  • 850 g floury or semi-hard potatoes
  • 4 eggs
  • 1-pint salt
  • 200 grams of flour
  • 1 pinch of baking powder
  • 1 pinch nutmeg
  • 1 pinch pepper
  • 400ml milk
  • 4 tablespoons fat for baking
  • 1 onion

Preparation of the potato pancakes

First, the potatoes are peeled and grated. The resulting potato water is removed; if necessary, you can also put the rubbing compound through a hair sieve. Then add eggs, salt, nutmeg, flour, baking powder, and milk and mix well. In the meantime, heat 3 tablespoons of fat (beef fat, lard, or oil) in a cast-iron pan over medium heat and fry small pancakes in it.

1 to 2 tablespoons of potato mixture are sufficient per potato pancake so that three to four potato pancakes fit in a pan with a diameter of 25 cm. When the edges begin to turn golden brown, the fritters must be turned with a spatula to cook on the other side.

Useful additional knowledge about potato pancakes

  1. The rubbing mass must be processed immediately so that it does not discolor. Scoop off the resulting potato water with a soup ladle.
  2. In grandmother’s cookbook, the potato pancakes are fried in a cast-iron pan with only lard to make them even tastier.
  3. In the past, the pan was rubbed with bacon rind.
  4. Adding onion to the frying fat gives the potato pancakes an inimitable flavor.
  5. A paper towel on the plate soaks up excess fat.
  6. Depending on the region, fritters are eaten with apple sauce, black bread, sauerkraut, soup, beans, or even salmon and horseradish.
  7. At parties, potato pancakes are an unbeatable hit.
  8. You can then bake the potato pancakes in the waffle iron so that it goes faster.
  9. Experiment with the following ingredients: rolled oats, diced bacon, buttermilk or quark, garlic, marjoram, paprika, or fresh garden herbs.
  10. The potato pancakes should definitely be served hot. Of course, they taste best right out of the pan.

Pasta casserole with a difference, with vegetables and ham. Heartily seasoned with cheese, salt, and nutmeg. A wholesome meal where vegetables are popular even with children. Pasta casserole is delicious and popular with the whole family. Even children can’t get past the vegetables.

Ingredients for 4 persons

  •  250 g tagliatelle
  • 1 ½ teaspoons salt
  • ½ packet of frozen spinach (225g)
  • ½ packet of frozen peas (150g)
  • 4 tbsp. Cooked cheese
  • 150 g raw ham
  • 4 eggs
  • 1 pinch ger. nutmeg
  • 1 cup of yogurt
  • ½ tbsp. oil
  • 1 tbsp. frying fat
  • 1 tomato

Preparation

Cook the ribbon noodles in plenty of water with ½ teaspoon of salt according to the instructions on the package. Defrost the spinach with a little water over low heat. Cook the deep-frozen peas in a little water with ¼ teaspoon of salt for 4 minutes over low heat. the eng. Mix the cheese and ½ teaspoon salt into the spinach. Cut the ham into fine strips. Whisk the eggs, add ½ teaspoon salt and nutmeg and mix in the ham strips. Add the yogurt, which can remain a bit chunky. Pour the noodles through a sieve and rinse with cold water. Grease the fireproof dish with a little oil and preheat the oven to 180 degrees.

Preparation

Melt the drippings in the pan and fry the noodles in it. Cover the bottom of the casserole dish with spinach. Then fill in the noodles, on top of the noodles the peas, and finally the egg and ham mixture. Bake the casserole in the preheated oven for 30 minutes.

Tip: Serve the pasta bake in the dish and garnish with tomato slices.

Simple tips and tricks for saving in the household are particularly suitable for housewives. If you save cleverly, you have more money for beautiful things or for old-age provisions. Save in the household and improve the household budget.

Clever housewives always compare the prices and automatically look at the costs in the household and the family budget. They live frugally because they always find clever ways to save euros. We show all the good ways to save money cleverly in everyday life and at home so that a little more money is available for the family at the end of the month.

The necessity of saving in the household

The fear of financial bottlenecks in German households can be felt more and more frequently. Negative news and the euro crisis mean that many consumers in Germany and other countries are concerned about their previously carefree future. Many German households are now saving for bad times.

1) Vacation in Germany instead of abroad

And that brings us to the topic. If you want to save, you don’t have to give up your vacation. Recreation is important, and if you work hard all year round, you also need to relax once in a while. However, when planning your holiday, you can also think about your wallet at the same time.

  • A holiday trip to Germany is usually cheaper. In this way, you will also get to know a new city or a new district at the same time.
  • Going on holiday outside of the high season saves. Because then the accommodation is available at a fraction of the price.
  • Shorten your vacation by a week. In the second week, just do a lot of interesting excursions from home. Properly planned, you will have the feeling that you have been on vacation longer.
  • The organization of holiday activities also offers potential savings. Just go hiking more often or go on bike tours instead of spending a lot of money on city trips for visits to restaurants or museums.

2) Observe prospectuses and advertising papers

Brochures and weekly offers, promotional goods from Penny, Aldi, Lidl, and Co.

  • rewe.de – All market offers from REWE.
  • penny.de – Current offers in the Penny branches.

3) Compare prices

Be it browsing through the advertising insert in the daily newspaper, leafing through the advertising mailings, or shopping in the city. Especially with the direct mailings of the food discounters, you can see that the same products are almost always on offer or that the same product appears the following week at a competitive price from the competition.

Especially with more expensive items in the computer sector, it is always worth taking a look on the Internet. Even when you enter the exact product name in a search engine, price comparison sites usually appear among the first hits – and often expose supposed “sensational offers” as average normal prices, even if you add postage.

All price comparison providers for housewives at a glance.

4) Compare cell phone and DSL contracts

But you can also save money within your own four walls without turning the heating on to the back burner or saving on food. We often take the fixed costs such as rent, electricity, and internet for granted and turn every cent three times over for all other expenses. But it is definitely worthwhile to look through the contracts more often and look for cheaper offers. With the right contract alone, you can save a lot of money on electricity, for example.

Internet contracts also have enormous savings potential. A comparison and, if necessary, a change of provider can be worthwhile. However, it is often not even necessary to change providers, sometimes it is enough if you switch to a cheaper tariff with the same provider that did not exist when you signed your contract. Incidentally, the same applies to mobile phone and insurance contracts. Also, think about which contracts you really need and which ones you can cancel – do you prefer cycling in the fresh air to going to the gym anyway? Then cancel your contract. The money saved can certainly be used for more meaningful and beautiful things.

  • Compare fixed cost contracts regularly
  • Mobile phone, DSL, insurance
  • Also, consider changing tariffs with the same provider
  • Terminate unnecessary contracts and save money

Photography is a great hobby and you can capture great moments. So that it’s not just snapshots, but great pictures of people or travel, we’ve collected tips for learning to take photos. Accordingly, photography is also a success for beginners.

A few simple tricks will help you to avoid having to have blurry, underexposed, or shaky photos developed. Then your pictures will become breathtaking snapshots. Whether as a hobby or as a professional activity, everyone starts small.

Learn to take photos successfully

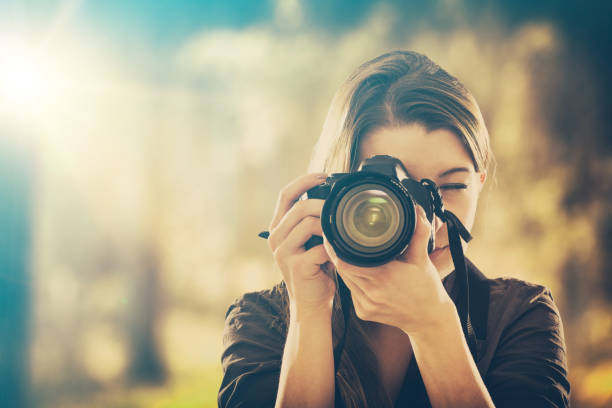
If you want to learn photography successfully, you don’t need much at first. Because the passion for photography is completely sufficient to start with the hobby of photography. Many think it’s an expensive hobby. And indeed, professional equipment is not cheap. But cell phones already offer you good cameras to try out. It is highly recommended to try it out first and find out whether photography will become a permanent hobby.

When taking photos, you learn to consciously perceive your surroundings and get an eye for the beautiful details in your surroundings. And your environment offers you diverse and beautiful motifs so that you never get bored while learning to photograph. You can also use the photos to create great photo gifts as a souvenir.

Simple photography tips for beginners

Once you’ve decided to learn how to take photos, simple tricks will help you get impressive shots. This makes photography a success even for beginners and provides a lot of fun. In addition, note our tips for learning to sew yourself.

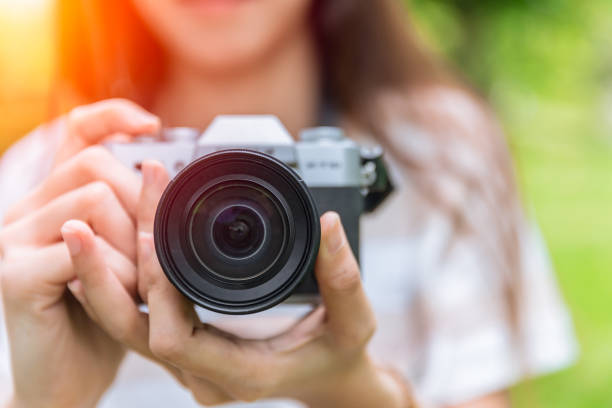
1) What equipment do I need to take photos?

You don’t need much to learn to photograph. And above all, it is not necessary to buy the best professional equipment right at the beginning. It makes much more sense if you, as a beginner, buy simple or used equipment. You can use your cell phone or get a camera for beginners. For this purpose, think about which motifs you mainly want to shoot and which cameras are available on the market. Also, note tips for bargain hunting on the Internet.

2) Get to know attitudes

You don’t have to be tech-savvy, but you should know the most important camera settings and know how to use them. The categories aperture, ISO, and exposure time should be mentioned here. In the following, look at their meaning and then try out the settings. Because practice makes perfect. You will quickly see how well you can learn to take photos.

3) When taking photos, learn to pay attention to the lighting conditions

The light plays an important role. Studio lighting is not always available, especially when you are out and about. Therefore, you should know how to use natural daylight properly. In strong sunlight, a soft light should be generated. This works if you go to a shady place or if you don’t take the picture against the sun. If you own a professional camera, you can create the right light using the aperture and exposure time settings. This is not only practical when the brightness is low, but can also lead to great effects! Also, note tips for effective learning with self-organization.

4) When to use flash?

You can also use the flash to take photos outdoors. This is especially important when the sun is shining. Because it can create dark shadows on the subject’s face. Therefore, depending on the strength of the sunlight, choose between fill flash and full flash. If the subject is about 5 feet from the camera, use fills flash; full flash at a further distance. There may also be suitable professional training for you to learn photography.

5) Focus on the subject

The subject should be staged. This means that you as the person taking the photo determine what happens. Accordingly, take over the management and direction. When taking pictures of people, you can get up close and zoom in. This can reveal quite nice and interesting details. Make sure that the images are not blurred, depending on the type of camera and lens, the limits are different. You can use great motifs to create great homemade gifts.

6) Camera at eye level for portraits

The most important thing first: the subject should be the center of the picture. Therefore, it is important to properly arrange people. Especially with group photos, you should keep an overview. The following applies to the small ones to the front, and the big ones to the back. And note that no one will be cut off. It can also be useful for portraits to hold the camera at eye level. This is how beautiful and impressive photos are created. The person does not necessarily have to look into the camera. Photos are taken in this way to create a particularly welcoming atmosphere. You can also create great photo calendars with your own pictures and give them away.

7) Social Media

If you don’t want to stick your finished photos in a now old-fashioned photo album, you can also easily share them on social media channels. So you can not only capture and enjoy the great moments yourself but also share them with friends. Learning to photograph is also a great idea for leisure time.

You should peel the celery before eating it – regardless of whether you dip it or prepare it as an oven vegetable. The interior of the perennials and the hard threads are particularly important. We’ll show you how to remove them.

Clean and peel the celery

1. Trim celery:
First you separate the stems from each other and remove the leaves inside the celery.
Then cut off the bottom ends of the perennials. It is best to remove everything white to avoid bitter substances.
You should also cut off the top ends once they have dried.
2. Wash Celery:
Now you can wash the celery to get rid of dirt: make sure to also remove the dirt from the grooves and clean the celery thoroughly.
Hot water and a vegetable brush are best for this.

3. Peel the celery

After cleaning, you can remove the hard fibers. You can use either a knife or a peeler to do this:
Use the knife to cut about 1mm into the celery and then pull off the thread between the knife and your thumb.
If you use a vegetable peeler, you’ll remove the threads just as effectively. However, you will also remove much of the edible celery.
Tip: Basically, when peeling and cleaning celery, you can proceed in a similar way to rhubarb. If you are used to peeling rhubarb, it is also very easy to peel celery.

Once you have washed and peeled the celery, you can eat it as finger food with a delicious dip, or fry, steam or cook a celery soup.

Peeling tomatoes is not that easy. Unless you try this method—then the tomato skin will almost come off by itself!

Simply peel tomatoes in 4 steps

Tomatoes are among the most popular vegetables. They are delicious raw, but also cooked in a delicious tomato sauce or soup. To make them particularly velvety, many recipes recommend peeling the tomatoes. It works like this:

1. Score the tomato

Take a sharp kitchen knife and score the bottom of the tomato with a cross. This will make it easier to peel later. Meanwhile, bring water to a boil in a saucepan. There should be enough water to completely submerge the tomato.
Tip: You can then use the water for the pasta.

2. Blanch the tomato

Add the tomato to the pot of boiling water and let it blanch for about 30 seconds. Then lift them out of the pot with a slotted spoon.

3. Deter the tomato

Immediately place the tomato in a bowl of cold water. You will notice that the skin of the tomato is already starting to peel off.

4. Peel the tomato

Now you can peel the tomato. To do this, take them out of the water, let them drain a little, and use a small knife to peel off the skin from where you cut them.

For example, you can use the peeled tomatoes to prepare a delicious tomato sauce. To do this, sauté a piece of onion and garlic in olive oil, add the tomatoes and herbs of your choice and let the sauce simmer. Season with salt and pepper and possibly a little sugar. If you fill the hot sauce into clean jars or bottles and seal them tightly, the tomato sauce will keep for several months.