Tag

simple,

Browsing

Tips on how to remove and avoid cobwebs. Dust and dead insects collect in the unsightly cobwebs. These are particularly evident in the corners of the apartment and behind cupboards. We’ll show you the best way to remove them.

Everyone knows cobwebs and has them in their home from time to time. Cobwebs are hard to avoid, but you can easily remove them using a variety of devices and methods. Cobwebs can be removed with a broom, vacuum cleaner, or damp cloth without leaving stains on the wall.

How are cobwebs formed?

Spiders produce the cobwebs in their abdomens and use them to build their webs. They can produce one meter of threads per second. Since everyone has beneficial spiders in the house, cobwebs also happen. These are mostly ugly to look at. This is where dead insects and dust collect. Often the spiders can no longer be found. Therefore, you can calmly remove the dusty residue.

Removing cobwebs made easy

The remaining spider webs in the corners of the apartment or behind the closet quickly make the apartment appear dirty. If you want to remove the spider webs, they often leave dark stains on the wall. Therefore, you should only remove them carefully. We will show you which means will help you and how to avoid cobwebs. For a clean apartment.

1) Remove spider webs with the broom

The easiest method is to remove the spider’s webs with a broom. A hand brush is enough to free the corners of the floor from the weaves. For corners on the ceiling that are difficult to reach, you can use a long broom to help. It is best to sweep from top to bottom to avoid stains. If it does, read our tips on removing dust stains from walls.

2) Vacuum to remove

If spiders are still sitting near the cobwebs, then many use the vacuum cleaner. To do this, you can remove the floor nozzle and vacuum everything on the wall without leaving any stains. But that means an agonizing death for the dear little animals. Therefore, it is better to catch them beforehand and set them free. On the topic of vacuum cleaners, also read our other articles: Preventing a smelly odor from the vacuum cleaner and the best vacuum cleaners in comparison.

3) Duster against cobwebs

The feather duster is also a tried and tested remedy for dust and old cobwebs. Therefore, you should definitely have one in the household. Many feather dusters have a telescopic rod. So you can also remove spider webs that are difficult to reach. If you don’t already own a feather duster, you can find some inexpensive models online. Also, read our tips for dusting electronic devices.

4) Get rid of cobwebs with sticky cardboard

Getting rid of cobwebs can be particularly difficult behind radiators or heavy cupboards. But there is a solution. To do this, you have to stick double-sided adhesive tape on a piece of cardboard or cardboard. You can then use it to remove the weaves behind the heater. Because they stick to the tape. Also, note our tips for driving away flies.

5) Avoid cobwebs

Of course, it would be best if the cobwebs could be avoided. Since there are spiders in every apartment, there are also cobwebs. Accordingly, you would have to drive away from the spiders permanently. That’s very difficult. There are some tips circulating on the Internet that the little animals can be driven away with ultrasonic devices. It would be worth at least trying.

Grass stains are stubborn and difficult to remove from clothing. Anyone with children knows this only too well. But with simple home remedies for removing grass stains, this will no longer be a problem in the future.

When children play in nature, they usually come back with dirty clothes. Then especially removing the patches of grass is a challenge for the parents.

1) Using a raw potato

Similar to removing spinach stains, a raw potato will also help you with grass stains. To do this, cut it in half and rub the green spot with the cut surface. This applies to dark clothes and not too light ones. Finally, leave it on for a bit and wash the clothes as usual.

2) Remove grass stains with lemon juice

If you discover a grass stain on a pair of jeans, use the home remedy lemon juice to remove it. Accordingly, put the juice on the green spot and let it work for about an hour. Then wash it off and put it in the washing machine. However, you should always test it in an inconspicuous area to see if the acid will damage the jeans and their color.

3) Classic gall soap against grass stains

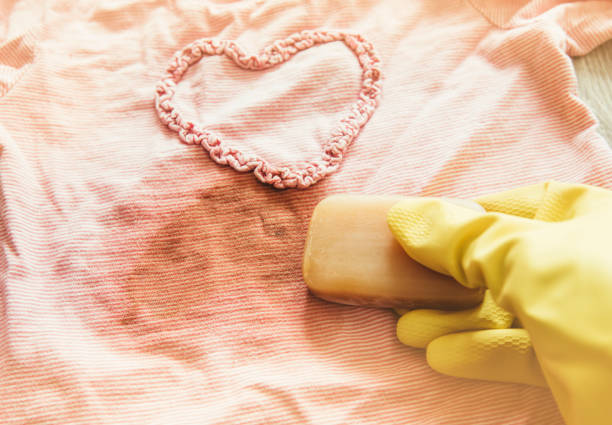
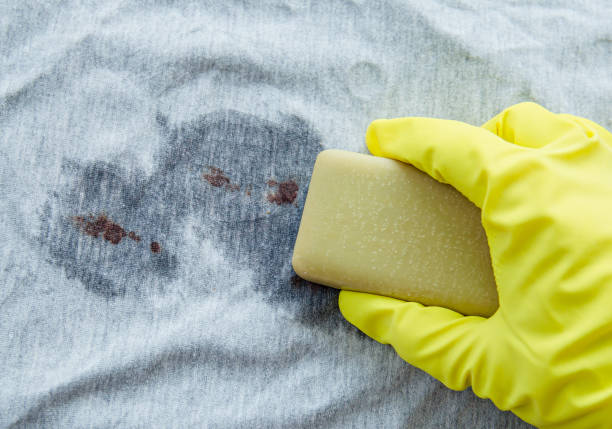
You can also use classic gall soap to effectively remove grass stains. To do this, work the soap into the affected clothing and then leave it on for about an hour. Finally, wash out the soap and put the laundry in the washing machine.

4) Toothpaste to remove grass stains

The Sat 1 winner against grass stains is the toothpaste. Because toothpaste contains the active ingredients menthol and other whitening agents. Therefore, you can put toothpaste to good use to get rid of weed stains. So put the toothpaste on the stain and let it soak for an hour. Also, read how to remove carrot stains.

5) Eliminate alcohol to stain

The best way to treat grass stains with alcohol is to first dab the stain with a cotton ball soaked in alcohol. Then treat it with a lukewarm detergent solution. Finally, rinse everything thoroughly. Also, note how to remove other common stains.

So that your glasses don’t get dusty if they remain unused for a long time, you should pay attention to a few things about storing the glasses. Consequently, you can avoid dusty glasses and save yourself cleaning after you have taken them out of the cupboard.

Glasses that are not used often gather dust quickly, even in closed cupboards, and have to be cleaned again before they are used again. You can use a simple trick to ensure that the glasses stay clean.

Tips to avoid dusty glasses

Have you planned a big family meal and are you getting the holiday glasses out of the cupboard? Then to find that all the glasses are covered in dust and they need to be cleaned? This is annoying and takes up an unnecessary amount of time. Therefore, we have collected some tricks that will avoid dusty glasses in the future. Also, note our clever tips for cleaning the kitchen.

1) Glasses do not get dusty upside down

To avoid dusty drinking glasses, simply place the glasses upside down in the cupboard. As a result, no dust can get into the glass and you always have clean glasses at hand. In addition, note useful tips for polishing glasses.EMPTY

2) Regularly wipe dust against dusty glasses

If you struggle with dust in the apartment and keep your glasses on open shelves, your glasses can quickly gather dust. Then regular dusting helps. And if you don’t have time to dust the whole apartment, at least try to dust off the glasses.

3) Avoid dusty glasses with plants

Since plants provide moisture, they ensure that the dust is bound. Then it usually settles on the leaves of the plant. So you can put plants next to the shelves where you keep your glasses. Consequently, the glasses are better protected from dust. Also, note helpful tricks for separating wedged glasses.

To make marzipan yourself, you only need two ingredients: almonds and sugar. With this recipe you can easily make your own marzipan.

What is marzipan made of?

Traditionally, marzipan consists of ground almonds, sugar and rose water. The proportions of the ingredients are decisive for the quality. According to the legal requirements, a maximum of 17% liquid, 35% sugar and 48% almonds may be used for the marzipan paste. However, manufacturers usually add more sugar for commercial marzipan. Only with very high-quality products, such as certain fine marzipan brands, is no additional sugar mixed in.

Make marzipan yourself: The basic recipe

For the homemade marzipan you need these ingredients:

200 g almond kernels with skin (alternatively walnuts)
150g powdered sugar
1 to 2 tablespoons of liquid (classic here is homemade rose water or from the pharmacy or health food store)
Preparation:

Boil the almonds in about a liter of water for a minute or two.
Pour the almonds into a colander.
Let them cool down a bit.
Peel them by squeezing them out of the skin with your fingers.
Crush the almonds in a good blender. Depending on the moisture content of the almonds, you will get a mealy to mushy mass.
Place the ground almonds in a bowl.
Sift in the powdered sugar.
Add a tablespoon of rose water.
Now knead all the ingredients by hand into a smooth dough. You may need to add some more liquid. (This also depends on whether you dried your almonds after cooking).
When the marzipan is ready, store it airtight in the fridge – e.g. in a screw-top jar.
Then the homemade marzipan is ready for further processing!

Depending on your taste, you can use other liquids instead of rose water. Orange liqueur or amaretto, for example, are suitable, but also a few drops of bitter almond oil. This makes the mass a bit bitter and more intense in taste.

Which almonds are best for marzipan?

Almonds belong to the rose family and probably originally come from Southeast Asia. Today the kernels are also cultivated in Pakistan, Iran or in the Mediterranean region. However, more than 80 percent of the almonds grown worldwide come from the USA, more precisely from California.

However, there has been a drought for several years. Almond cultivation plays its part: to harvest one kilo of almonds in California, about 10,000 liters of water are used. The high water requirements of the almond orchards are also critical in European growing areas.

So when you buy almonds, make sure they’re not from California. The long transport route halfway around the world also worsens the ecological balance. At best, buy almonds from Europe and from controlled organic cultivation.

Instead of almonds, you can also use regionally grown, organic walnuts for the marzipan. The process is the same and the taste is very similar to almond marzipan.

Dirty tile grout is difficult to clean, so the longer you wait to do it. Therefore, make sure the tile joints are clean regularly and use natural home remedies to clean the joints. In addition, heed useful tips for avoiding mold.

With dirty or gray joints, you can achieve a lot with grandma’s cleaning tips. Whether in your kitchen, toilet, or bathroom, tiles are found in numerous places in the home. Therefore, use simple home remedies to clean your joints and save money.

Good reasons for grout cleaning

Especially in wet rooms like the bathroom, you mostly have to deal with completely tiled walls and floors. First and foremost, this is very practical, because the tiles can simply get wet when showering or bathing, for example, without being affected in any way. Unfortunately, the whole thing looks a little different with the joints. Because dirt and dust can settle in these very easily and it happens very quickly that they appear gray or even mold forms.

If that’s the case, you can clean the tiles yourself as often as you like, and the wall will always look dirty and unkempt. This is why regular cleaning is so important. It saves you from the dangerous form of mold and ensures a clean appearance. In addition, bacteria can accumulate in joints. In order to avoid such sources of germs in the household and to ensure sufficient hygiene, constant cleaning is essential.

Clean tile joints with home remedies

Not only do the tiles have to be cleaned, but cleaning the joints is also a must. This is clearly the more difficult task. Because it is often not just dirt that settles here. Mold can also settle in the tile joints. The correct cleaning of the dirty tile joints is often a feat of strength and it is often postponed. Consequently, we show the home remedies for effectively cleaning tile joints. With regular use, dirt and mold no longer stand a chance.

1) Clean joints thanks to baking soda

For clean joints, use the method with the popular home remedy baking soda. So you can easily clean the joints. And successfully remove the dirt that forms in particularly damp places. To do this, mix some baking soda with water. Then use an old toothbrush to apply the mixture to the tile grout. You may have to scrub a little to get the grout dirt off. Finally, rinse off the dirt with lukewarm water. You can also use chalk instead of baking soda.

2) Clean grout with baking soda

Tile joints also get really clean by using the all-rounder baking powder. All you have to do is mix a packet of baking soda with some lukewarm water. Then work the resulting mush into the dirty joints with an old toothbrush. Then let it soak in for a moment before you wipe everything clean.

3) Nail polish remover for heavy soiling

You can also clean heavily soiled joints with nail polish remover. Simply put some of the liquid on a cotton pad and rub the joints with it. You can also use cotton swabs to thoroughly clean very narrow joints. You then have clean tile joints. In addition, also note the usage instructions for cleaning the bathroom properly.

4) Clean joints with steam in an environmentally friendly way

The most environmentally friendly and thorough method for clean tile joints is to use a steam jet. If you don’t have a steam jet, that’s no problem. Because you can now rent one from more and more hardware stores. And then heavy pollution will be a thing of the past. To do this, treat the joints to clean them with hot steam. Then you have to wipe everything dry. A purchase can also be worthwhile, as you can use it to clean entire tiles or remove moss.

Neutralizing the taste of vinegar is helpful if you slipped the vinegar bottle while cooking. We’ll show you what you can do to save an overly acidic dish.

Vinegar spices up many a meal. From salad dressings to sauces and chutneys to vegetable dishes – it is an important ingredient in many recipes. But it’s easy to overdose on vinegar. Luckily, this error can be corrected: There are various options available to you to neutralize the acetic acid. It doesn’t matter what type of vinegar you used—apple cider vinegar, balsamic vinegar, herbal vinegar, or even rice vinegar.

Tip 1 against too much vinegar: neutralize with other ingredients

You can neutralize the taste of vinegar by adding any of the following ingredients to your dish:

Baking soda or baking soda: These are alkaline, so they neutralize the acidity of the vinegar. When added, the food will froth briefly as it reacts with the vinegar. This variant is suitable for all dishes, whether hot or cold.
Salt: Salt helps with small amounts of vinegar. But approach it slowly, otherwise your food will be too salty. Soy sauce or instant vegetable broth also contain salt and are therefore suitable for neutralizing vinegar.
Sugar: For small amounts, you can work with sugar as well as with salt. As an alternative to granulated sugar, you can use honey. As with salt, the following applies here: feel your way around, otherwise you will change the taste of the dish.

Tip 2 against too much vinegar: Remove from the dish

There are several ways to get rid of excess vinegar from your dish:

Potatoes: For dishes that are heated, you can add raw potatoes and let them cook. These absorb vinegar and thus soften the taste. Cut them into pieces or put them in whole. You can then either leave the potatoes in the dish or take them out and use them at a later time. While the potato extracts the vinegar taste, it also absorbs other flavors so that it is still edible afterwards. You can use a hot, freshly cooked potato in dishes that don’t need to be heated.
Simmer: If your dish lends itself to this, allow it to simmer for a long time to neutralize the vinegar. Since acetic acid is volatile, you can get rid of at least some of it this way. You may need to add other liquid (e.g., water, cream, broth, tomato sauce) to maintain the desired amount and consistency.

Tip 3 against too much vinegar: Stretch the dish

Depending on the type of dish, you can neutralize too much vinegar by stretching the food. You have various options for this:

Increase amount: Add the other ingredients proportionately. Note that this will usually only mitigate the vinegar taste.
Liquids: Enhance your dish with matching liquids. This can be salty like vegetable broth, but also neutral like cream, sour cream, cream cheese or crème fraîche. Vegan alternatives are also suitable.
Tomatoes: Tomatoes contain a lot of water and thus stretch the dish. They also absorb some acid, helping to neutralize the vinegar. It doesn’t matter whether you cook them or add them raw to a salad, for example.
If necessary, combine several of the above options. For example, you can increase the total amount and at the same time add salt and cook a potato. Or you mix baking soda into your food and at the same time stretch it with tomatoes. Choose the appropriate options based on the level of vinegar flavor.

Tips on cleaning glasses properly. Because they are our constant companions. Therefore, they can quickly become dirty or smudged. And for a clear view, you need to clean your glasses more often. You should avoid common mistakes so that your lenses are not damaged. We have summarized the most important things about cleaning glasses for you.

Proper cleaning of the glasses is important

A good and correct cleaning of the glasses is very important. Dirty glasses can be very annoying and distracting. And the glasses wearers among us know the good feeling after cleaning: finally a clear view again! In addition, limited vision can damage your eyes. Or they tire over time. You can also get headaches if you don’t see clearly. Therefore, you should make sure to clean your glasses every day. It makes sense to get used to it at a certain time. In addition, also note our article on the question of contact lenses or glasses, as well as for instructions on cleaning contact lenses conscientiously if you wear contact lenses from time to time.

Causes of dirty glasses

Glasses are already smeared when your eyes are itchy. But splashes of fat when eating can also impair the view. Even the weather can damage your glasses, which can fog up or become stained by raindrops. Then most people just use a handkerchief to clean the glasses. Often the shirt or sweater is simply used to quickly clean the glasses. But this is not beneficial for the glass and is a common mistake when cleaning glasses. Because the glass can get fine scratches, which of course are very unpleasant for the clear view.

Clean glasses properly with home remedies and Co.

It is our faithful companion and should therefore always be cared for. But the lenses of your glasses are very sensitive, so you should be careful not to treat them too roughly. Therefore, only certain home remedies are well suited for regular cleaning of glasses. So we have an overview:

1) Clean lenses with water and washing-up liquid

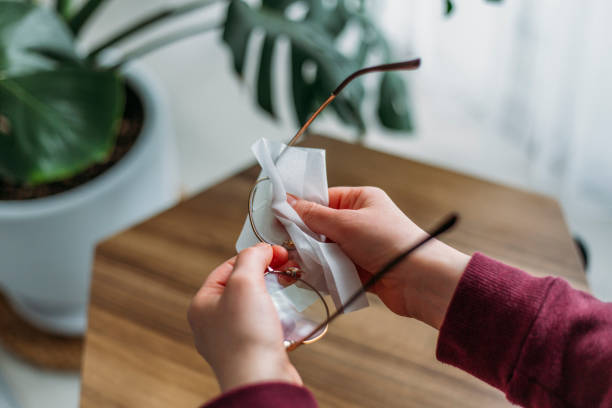
It is best to clean your glasses at home with lukewarm water and non-greasy detergent (pH value-neutral). And do without skin-friendly and moisturizing detergents, because these can damage the glasses and leave a greasy film. Accordingly, hold your glasses under the running water. This removes large dirt particles. Then put a little non-greasy washing-up liquid on each of the glasses and rub it in with clean fingers. Then rinse it off with water. Then dry it with a microfiber cloth. Also, read our article on monitor and screen care.

2) Use of microfiber cloths to clean glasses

You can also clean your glasses with the help of microfiber cloths. These are great for in-between and on the go. Because you can use them dry. Of course, you can also use a glasses cleaning cloth for cleaning. It is important that you wash the microfiber cloths regularly. You should wash them at least 40 degrees and without fabric softener. Also, note our tips for sunglasses.

3) Goggle sprays and cleaning wipes

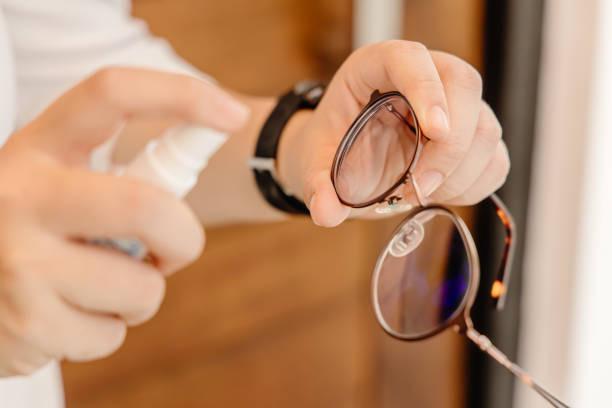
Especially when you’re out and about, you don’t have water or the right washing-up liquid. Therefore, some people use special glasses sprays or damp cleaning wipes (without alcohol). These are good for cleaning glasses. However, you should pay attention to good quality here. As some of these items are said to be capable of damaging the lenses. Also, note our home remedies for tired and stressed eyes.

4) Clean glasses with ultrasound

Professional ultrasonic cleaning is best. This will clean your glasses gently and effectively. Your glasses are placed in a water bath, which is then subjected to ultrasonic vibrations. As a result, bubbles form and gradually burst. This removes dirt particles. Most opticians offer a free service. Such a cleaning makes sense every 3 – 6 months. You can also buy these ultrasonic devices on the Internet. Also, note our effective home remedies for burning eyes.

5) Protect your glasses with a glasses case

Good care is therefore essential if you want to preserve the longevity of your glasses. You should also protect your glasses by putting them in a glasses case when you are not using them. This prevents you from accidentally sitting on it. In addition, see our article Identifying and avoiding poor eyesight in children.

The coating of a pan is very delicate and should not be damaged. Therefore, gentle and gentle cleaning methods should be used to clean coated pans. We have an overview of the best means.

Use a coated pan or not?

At first, the question arises as to why you need a coated pan at all? Now the use of coated pans is for searing at low and medium temperatures. Also, little or no fat is used here. This is usually the case with sensitive dishes such as eggs or the like. Meanwhile, you can use uncoated pans if you want to sear your ingredients. You can use high temperatures for this. You should also note that there are different coatings. This is particularly important for passionate cooks.

Advantages and disadvantages of a coating

The advantage of the coating of the pans is that it enables gentle preparation. Since the pans require little or no fat, you can cook low in calories. Another benefit is that the pans will last a very long time if handled properly. In addition, they burn less quickly because a lot of fat is not used when frying. This makes them easier to clean. But here is a disadvantage. Because the pans should not be heated to high temperatures and should be cleaned properly. Otherwise, the coating could be damaged. Then it can lose its beneficial effect. In addition, the coatings are suspected of releasing toxic benzene if damaged.

Tricks for cleaning the coated pan

To ensure that your coated pan lasts a long time and is not harmful to your health, you should know how to clean it. Simple home remedies are usually sufficient. As a result, you can protect the environment in the household and do without chemical cleaners.

1) Rinse clean with hot water

The easiest way to clean your coated pan is to rinse it with hot water immediately after use. Then leftover food can be removed quickly and the dirt is gone. In this way, you can also easily clean pans with a ceramic coating.

2) Use baking soda for cleaning

Stains from the art coating of a pan are harder to remove. But then put an eighth of a liter of water with 3 tablespoons of the household remedy baking powder in the pan. Then bring it to a boil and rinse well. If you don’t have baking powder, you can use baking soda, and cleaning nonstick pans will be child’s play.

3) Clean coated pan with vinegar

The household remedy vinegar also helps you effectively with cleaning. To do this, add water and vinegar to the pan in a ratio of 3 to 1. Then let it boil and simmer on low for a few minutes until the dirt dissolves. Then rinse with clear water. If necessary, you can clean it with a soft cloth.

4) Clean the pan with salt

Salt as a household remedy can also clean the coated pan. To do this, you have to distribute the salt evenly in the pan and heat it carefully until it turns brown. This process ensures that the dirt in the pan can be easily removed. Also, read how to clean your work clothes with salt.

5) Use detergent and sponge for cleaning

You can also use the classic soft sponge and mild washing-up liquid to clean coated pans. After pre-rinsing with hot water, you can add some washing-up liquid to the pan. If the food residue is already dried, you can let it soak for a few minutes. Otherwise, you can wipe everything away directly with a soft sponge. In addition, note tips for removing rust from the pan.

6) Avoid the following cleaning methods

While the methods mentioned clean your pan gently and undamaged, there are cleaning methods that can damage the coating. You should therefore urgently avoid the following methods and means:

Avoid using a steel sponge when cleaning. Because this is too hard and scratches the coating.
Cleaning in the dishwasher is forbidden if you want to keep your coated pan for a long time.
Avoid strong chemical cleaning agents. Because these can damage the coating or stick to the pan.

Useful home remedies and tricks for widening tight shoes. Surely you know the problem, you buy new shoes and after wearing them for the first time, various pressure points and blisters appear on your feet. Then you should use the following tips to stretch your footwear.

Simple home remedies and tricks for widening shoes

When you have bought new shoes, you are usually very happy. Then you want to put them on and perform them right away. But often one has to realize that after a short time pain arises due to pressure points. Shoes that are too tight can cause blisters on your feet. As a result, you don’t want to wear them anymore. However, there are some clever tricks to widen the shoes and thus ensure a comfortable fit.

1) Use spirits and alcohol to stretch

Once you have located the spot(s) where it pinches, you can rub alcohol (or high-proof alcohol or hot water) into the boot. Then wear the footwear directly for a longer period of time (several hours). It may feel a little tight at first, but this pressure will subside after a short while. Because the alcohol in combination with exercise will expand the material of your shoes. As a result, you will no longer notice any pressure, so the new footwear can be worn without any problems. Also, note tips for getting rid of smelly shoes.

2) Vinegar on hard leather shoes

You can also do something about older models that pinch in certain places. If leather shoes have become hard over time and are therefore painful in certain areas, another home remedy can help: using vinegar. It is also rubbed inside the leather shoes and causes the pressure to ease. For this, you have to put them on and move. In addition, note how you can freshen up old leather so that your leather shoes last a long time.

3) Shoes expand with heat

Another very effective method against shoes that are too tight in heat. Accordingly, take a hot spoon and hold it from the inside to the respective oppressive areas. Alternatively, a warm shoe tree is also suitable for this purpose. You can also try stretching your footwear with a hairdryer. For this, you put on thick socks and slip into the sneakers. Then heat them up with the hairdryer and try to widen the shoes by stretching and moving your feet. Also, read how to gently clean white shoes.

4) Push the seams of leather shoes outwards

If you have leather shoes that are painful on the outside seams, you can push them outwards very gently. In order for the shoes to expand, repeat the process several times until they are comfortable to wear. Also, note the proper care of patent leather shoes.

5) Potatoes and newspaper to stretch shoes

Potatoes are also suitable as a home remedy for use on tight leather shoes. To do this, you have to cut open a potato and place the open side against the leather. So that it doesn’t slip, you can simply put some newspaper inside to fix it. Then leave the potato and paper there overnight. In this way, the footwear is supplied with moisture and it expands. A nice side effect is that the shoes become soft due to the starch in the potato.

6) gel pads in leatherette shoes

If you have faux leather shoes, it’s not that easy to widen those shoes because faux leather doesn’t really yield. Nevertheless, you can do something with these models to prevent any pressure. Accordingly, put a gel cushion in the imitation leather shoe so that the material gives way when you wear it and you no longer feel any pressure. You can avoid blisters on your feet in the future.

Avoid tight and tight shoes

As you can see, there are numerous simple tips on how to widen tight shoes or provide relief in other ways. So you can continue to wear your favorite shoes and don’t have to buy new ones. If the tips listed above don’t help, you should visit a cobbler to help you mend the shoes. However, it is even better when trying on and buying shoes to decide on slightly larger models.

Now remove tar stains with simple home remedies. We will show you how you can quickly and easily remove tar stains from textiles and your skin without any special or chemical cleaners.

Home remedies for tar stains

It’s rare for tar stains to get stuck in clothing, skin, or cars. But it can happen that you find tar on the body or the skin. Some professions in particular have the problem of tar stains on their work clothes. Then you wonder how to effectively clean the work clothes and get rid of the tar pollution? Here are the best tips at a glance:

1) Remove tar stains from clothes

There is a simple trick to cleaning work clothes and removing tar. To do this, spread some butter on the tar stain. Then leave it on until the tar dissolves. Then wash as normal with a mild detergent. You can also clean clothes soiled with tar with the household remedy gall soap. Accordingly, moisten the area with water and rub it with the gall soap. Then leave it on for a few minutes before rinsing it off with clear water.

Aftercare and caution with delicate laundry!
If the stain is still very clear, you should treat it further with alcohol and wash it out thoroughly again. However, note that the home remedies are not suitable for fine textiles such as cashmere or silk.

2) Remove tar from the car

Since tar stains on cars are rare, hardly anyone has any advice. But you can help yourself in such a case with butter, margarine, or oils. So put one of these fats on the affected area and let it soak for 10 minutes. To then remove the tar stains, take a soft cloth moistened with water and detergent. You can use this to wipe everything clean. It works similarly when cleaning shoes.

3) Remove tar stains from the skin

You can also get rid of tar stains on the skin. The best way to do this is to use butter. Then apply some butter to the affected areas and let it work for a short time. You can then simply wipe off the tar residue without damaging your skin.