Tag

Sourdough

Browsing

You can simply dry sourdough and store it for a long time. We will introduce you to three methods of preserving sourdough: by crumbling, drying and freezing.

You only have to prepare sourdough once and can then “feed” it again and again with flour and water and thus multiply it. This makes it last forever. The sourdough contains microorganisms (such as lactic acid bacteria and yeast) that form during the fermentation process and make the dough slightly acidic. However, if you don’t bake regularly or want to send the sourdough to friends or relatives, you can preserve the sourdough by drying it. The shelf life of the sourdough varies depending on the method, ranging from three months to several years.

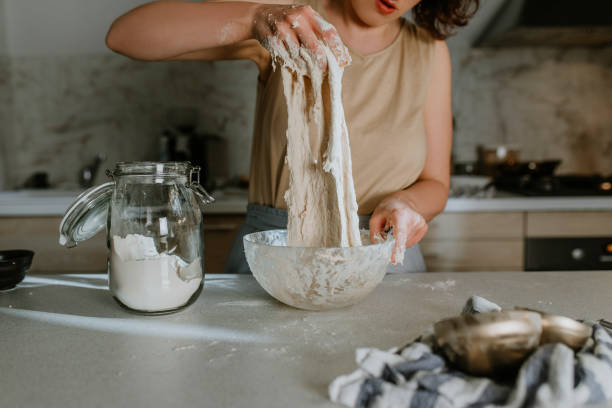
For each of the three methods, you must first prepare a sourdough. You can find instructions here: Prepare the sourdough. We strongly recommend that you buy the ingredients in organic quality. Among other things, you avoid residues of chemical-synthetic pesticides and support ecological agriculture.

Method: Crumble sourdough

The first method is the “crumbling” and subsequent drying of leaven:

Pour your prepared sourdough into a bowl.
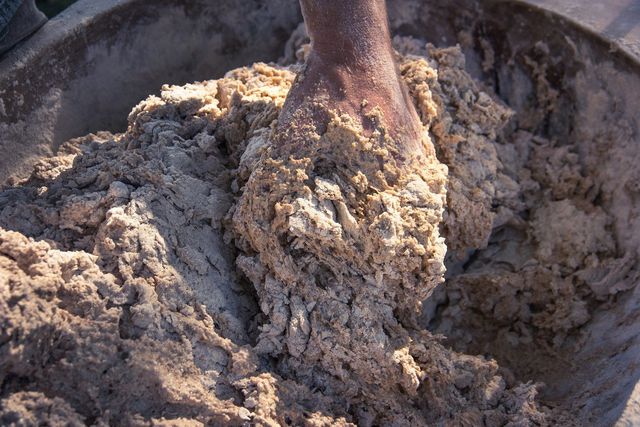
Gradually add the flour and mix everything together with a wooden spoon. Use enough flour so that the dough is only slightly moist and crumbs can form.
Gradually rub the dough between your palms. This creates crumbs. Do the same with the entire dough.
It is best to spread the crumbs on a baking sheet and let them dry for several hours. This way you prevent mold.
Fill the so-called Krümelsauer into a lockable screw-top jar. You should only close the jar loosely or drill a hole in it if the dough continues to ferment a little. Alternatively, use a cloth bag. The dried sourdough can be stored in the refrigerator for about three months.

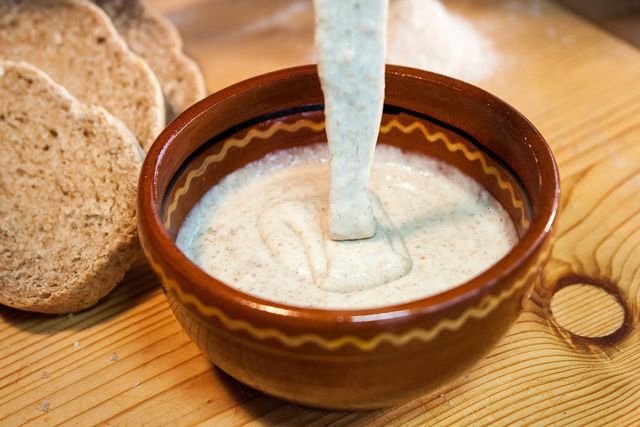
To use the dough again, add enough water to the crumbs until it becomes a paste. Store the dough at room temperature for about 2 to 8 hours. It is then activated again and can be processed further.

Method: Dry sourdough as flakes or powder

The second method involves making flakes or powder from the sourdough:

Spread the sourdough thinly on half of a sheet of baking paper and fold it over. If you have more dough, use a second sheet of baking paper.
Allow the sourdough to dry at room temperature. This takes about a day or two. The dough needs to be really dry, otherwise mold can form.
Dried, sourdough is lighter in color, cracks, and breaks easily when touched.
Note: You can usually reuse the parchment paper. To do this, carefully peel off the dry sourdough so that the baking paper does not tear. Or you can use a sustainable baking paper alternative.

Break off small pieces of the dried sourdough. Now you have two options:

For tiles: Place the small pieces in a sealable container, cloth bag, or paper bag.
For powder: grind the small dividers into powder with a mortar or grinder.
Dried sourdough lasts for several years. You can store it in the fridge or at room temperature in a dark place (for example, in the pantry).

To reactivate the leaven, you need to add water and flour. First add the same amount of water to the dried dough (ratio 1:1). If he starts blistering at room temperature, you can “feed” him with more water and flour. This can take several hours.

Note: Since most microorganisms die off during drying, the sourdough may not always start to ferment. This is always the case when there are no or no longer sufficient microorganisms in the dough.

Method: Sourdough Freezing

Pour your sourdough into a sealable container that is freezer-safe. Alternatively, you can fill the batter into an ice cube tray. Place the dough in your freezer or freezer compartment.

Freezing disrupts the fermenting properties of sourdough, as some of the microorganisms die off. So give the dough 1-3 days after defrosting to recover slowly. You can add some flour and water and activate it at room temperature. You can then feed him more flour and water.

Make healthy and delicious sourdough yourself with simple instructions. Because sourdough bread has the necessary acidity and is light and fluffy, it tastes particularly good. So learn now how to prepare and feed sourdough. This is how the sourdough starter succeeds the first time.

Is sourdough healthy?

A sourdough made from rye provides you with lots of healthy fiber, vitamins, and minerals. These include vitamins B and E, iron, sodium, zinc, and folic acid, which is important for pregnant women. In addition, no artificial additives are necessary for the production of sourdough bread. Yeast is also avoided here. In addition, sourdough has a low glycemic index. This indicates the blood sugar-raising effect of foods containing carbohydrates. The low level of sourdough illustrates that blood sugar rises slowly after consumption. Since the important vitamins and minerals can also be better absorbed by the body, homemade sourdough is very healthy.

Instructions for making your own sourdough

Since sourdough is very healthy and well-tolerated, it is enjoying increasing obesity. So use our clever recipe for the right dough. You can feed this sourdough up to ten times. All you need is water and rye flour. Then mix these two components and in about three days you have the perfect sourdough with which you can bake delicious whole-food bread. But how exactly does it work? In the following video, you will find pictorial instructions for the sourdough starter. And below you will find detailed instructions.

1) Prepare the sourdough

To prepare the sourdough you have to mix the following ingredients into the dough and leave it to stand covered and warm overnight. The rest period should be at least 24 hours. After this time, the dough should form small bubbles. Important: the temperature must be around 25 degrees. But please make sure that no drafts or direct sunlight spoil the dough. In order for the fermentation of the dough to take place hygienically, you should leave the dough covered. This prevents bacteria from penetrating from the outside. Because the dough only needs heat, time, and rest. You can then move on to the next step.

  • 100 g rye – grind it fresh yourself and use it
  • Mix in 150g of water.
  • or take 100 g rye flour and 100 g lukewarm water as described in the video instructions.

2) Lengthen sourdough

On the second day, you can extend the sourdough. Then add another 100 g rye, finely ground, and 150 g water. Then mix these ingredients into the already prepared base dough. The part still shows little change, since slight blistering or pink coloring usually only occurs after the 3rd day of fermentation. After the addition, the dough must have rest, warmth, and at least 24 hours to allow the fermentation process to progress.

Tip: Right from the start, you should mix the rye and water in a large enough bowl so that the sourdough can double in volume without spilling out of the bowl. Similar to yeast dough, each fermentation process needs space in the dough. The last step can follow after another 24 hours.

3) Feed sourdough

In the last step, you have to feed the sourdough again. Add another 150 g of finely ground rye and about 3 tablespoons of warm water. Since the dough piece is already slightly liquid, adding 3 tablespoons of water is sufficient. Then mix the entire dough again and then let it rest, covered, for 24 hours in a warm place.

After three days, when all three steps are complete, the sourdough should smell slightly sour and show up as slight pink discoloration. At the same time, the frothy bubble formation reflects the optimal fermentation process. Then the sourdough is ready and can be used as a basis for baking bread.

“Lock up” sourdough base

If this sourdough is now ready, you can lock a small part in a “glass”. It is best to close the jar tightly with a screw cap. After that, you can store it in the fridge. The sourdough lasts there for a few weeks and can later be used very well as a base for the next sourdough.

Sourdough buns are a healthier alternative to regular bun dough. Here you can find out how you can easily do them overnight.

You can prepare the dough for these delicious sourdough buns in the evening, so all you have to do the next day is shape and bake them.

For the rolls you need starter goods. This is, for example, sourdough from the last baked bread that you can store in mason jars. However, this should only be stored for a week so that it does not go bad. You can find out whether you can still use the sourdough as a starter by smelling it – because if it is bad, the dough actually smells sour. The smell of alcohol, on the other hand, is normal. It is also possible to get a small portion of sourdough from some bakeries.

You can find out here how to make the starter yourself from flour and lukewarm water: Prepare sourdough – healthy bread from your own production. You should prepare it three to five days in advance so that it can ferment long enough.

Sourdough Buns: Easy recipe

Ingredients:

175 gwholemeal flour
125 gwheat flour
75 gspelt (wholemeal) flour
300 g water
40 g starter (e.g. from rye or spelled flour)
Salt

Directions:

Thoroughly stir together all the flour, water, and starter. Then let the dough stand untouched for 50 minutes.
Knead the salt into the fluffy dough, then let it rest for 30 minutes and then fold it. You fold the dough by stretching it a little in the bowl and then folding it over to the other side. To do this, take a bowl of water and wet your fingers before each crease.
Wait another 30 minutes, then fold the leaven again. Then cover it and let it rise at room temperature overnight. Tip: If you prefer less sour rolls, you can put the dough in the fridge overnight. At low temperatures, the dough ferments more slowly.
To bake the sourdough rolls, preheat the oven to 250 degrees top/bottom heat and divide the dough into six portions. Preheating is important here, because this way the rolls can be crisp on the outside and remain fluffy on the inside.
Dust the baking tray with a little flour and press the sourdough buns into shape. You can also cut them in a cross shape to create a pattern. Then bake them on the middle shelf for about 15 minutes until golden brown.

Sourdough: alternatives and tips

You only need a few ingredients for the sourdough buns. Buy these anyway in organic quality – so you know that no chemical-synthetic pesticides are used. We recommend that you prefer the Bioland, Naturland or Demeter seals, as they follow stricter criteria than the EU organic seal.

If you want a sweet breakfast, you can serve homemade jam, jam or jelly, honey or a Nutella alternative with the sourdough rolls. If you prefer it savory, prepare a beetroot spread or a tomato spread, for example.

There are also other recipes with sourdough on Utopia, such as the Siegfried and Hermann dough, the latter being a sweet variant.

Introduction to Injera

Injera is a sourdough flatbread that is a staple in Eritrean cuisine. It is made with teff flour, water, and a sourdough starter, which gives it a tangy flavor and spongy texture. Injera is usually eaten with stews or vegetables, and is used as a utensil to scoop up the food.

History of Injera in Eritrean Cuisine

Injera has been a part of Eritrean cuisine for centuries. It is believed to have originated in Ethiopia, which has a similar version of the bread. Injera was introduced to Eritrea by Ethiopian immigrants, and has since become an integral part of the country’s food culture. It is a symbol of hospitality and is often served to guests.

Ingredients and Preparation of Injera

The main ingredient in injera is teff flour, which is a gluten-free grain that is native to Ethiopia and Eritrea. The teff flour is mixed with water and a sourdough starter, which is made from fermented teff flour and water. The mixture is left to ferment for a few days, which gives the bread its characteristic tangy flavor and spongy texture. The batter is then poured onto a hot griddle or clay pan, where it cooks for a few minutes until it is bubbly and cooked through.

Importance of Injera in Eritrean Dining

Injera is an important part of Eritrean dining. It is often served as the base of a meal, with stews or vegetables piled on top. Injera is also used as a utensil to scoop up the food. This communal way of eating is an important part of Eritrean culture, and injera is a symbol of sharing and togetherness.

Injera as a Staple in Traditional Eritrean Dishes

Injera is used in many traditional Eritrean dishes, such as tsebhi (stew), zigni (spicy beef stew), and shiro (ground chickpeas or lentils). These dishes are often served with injera and eaten with the hands. Injera is also used as a wrap for meat, vegetables, and lentils, creating a portable meal that can be eaten on the go.

Health Benefits of Injera

Teff flour, the main ingredient in injera, is rich in nutrients such as iron, calcium, and protein. It is also gluten-free, which makes it an ideal choice for people with gluten sensitivities or celiac disease. The fermentation process used to make injera also increases the bioavailability of nutrients in the teff flour, making it more easily absorbed by the body.

Variations of Injera in Eritrean Cuisine

There are many variations of injera in Eritrean cuisine. Some are made with a mixture of teff and wheat flour, which gives them a milder flavor. Others are made with different grains, such as barley or sorghum. Some injera are thicker and spongier, while others are thinner and more crepe-like. These variations add to the diversity of Eritrean cuisine and allow for different flavor and texture combinations.

Conclusion: Injera’s Role in Eritrean Culture and Cuisine

Injera is more than just a bread in Eritrean culture. It is a symbol of hospitality, sharing, and togetherness. It is an integral part of traditional Eritrean dishes, and is used in a communal way of eating that brings people together. Injera’s unique flavor, texture, and nutrition make it a beloved staple in Eritrean cuisine, and a cultural icon that has stood the test of time.

What makes a good sourdough bread? A crispy crust and a medium-firm crumb! We will explain how you can bake your own wholemeal bread with sourdough and what you need to pay particular attention to. So nothing stands in the way of your next breakfast or dinner with your “own” bread.

After we presented you with a real lightning-fast bread recipe last week, we now come to the slow-food variant: baking a wholemeal bread with homemade sourdough that takes several days to prepare. Rest assured: this effort is worth it! Enjoying the first slice of home-baked sourdough bread just makes you proud – apart from the fact that the home-baked bread tastes really good too! Incidentally, you do not have to go through the effort of preparing a sourdough for every bread. Because once it has been prepared, you can use the sourdough starter later to bake other bread.

Bake wholemeal bread yourself: the preparation

Ingredients for the sourdough:

  • 250 ml warm water
  • 1 tsp honey
  • 150 g wholemeal rye flour

Preparation:

  1. In a large bowl, stir the water with the honey until the honey has dissolved. Add the flour and mix with a wooden spoon to form a smooth batter.
  2. Cover the bowl with a suitable lid and leave it in a warm place (at least 20 °C) for 3 days, stirring vigorously once a day – in the morning and in the evening.
  3. The dough starts to form bubbles as a result of fermentation and increases in volume in the bowl. The vigorous stirring makes it collapse again and again. The finished dough is viscous, smells fresh and sour, and has bubbles.

Bake wholemeal bread yourself: prepare the wholemeal bread dough

Ingredients:

  • 250 ml warm water
  • 500 grams of sourdough
  • 500 g wholemeal rye flour
  • 1 tbsp sea salt
  • 1 tsp bread spice (a mixture of aniseed, fennel, coriander, and cumin) to taste
  • For sprinkling kernels or seeds to taste

Preparation:

  1. Place all ingredients in a large bowl and knead.
  2. Pour the batter into a loaf pan lined with baking paper and cover with a kitchen towel. Leave for another 12 hours.
  3. The next morning the dough should have risen a bit. Preheat the oven to 270°C (top and bottom heat) and place a small saucepan filled with water on the oven floor.
  4. Wet the surface of the bread with a little water and sprinkle with sunflower seeds or pumpkin seeds if you like. Then put the bread in the loaf pan in the oven. After 5 minutes reduce the temperature to 200 °C and let the bread bake for another 40 minutes.
  5. After 40 minutes the bread is ready. If you prefer a slightly darker crust, turn out of the loaf tin and bake for a further 5 minutes at 200°C.