Tag

stays

Browsing

Freezing cakes is very easy and practical if one or two pieces are left over. With our tips, cake tastes even better after freezing.

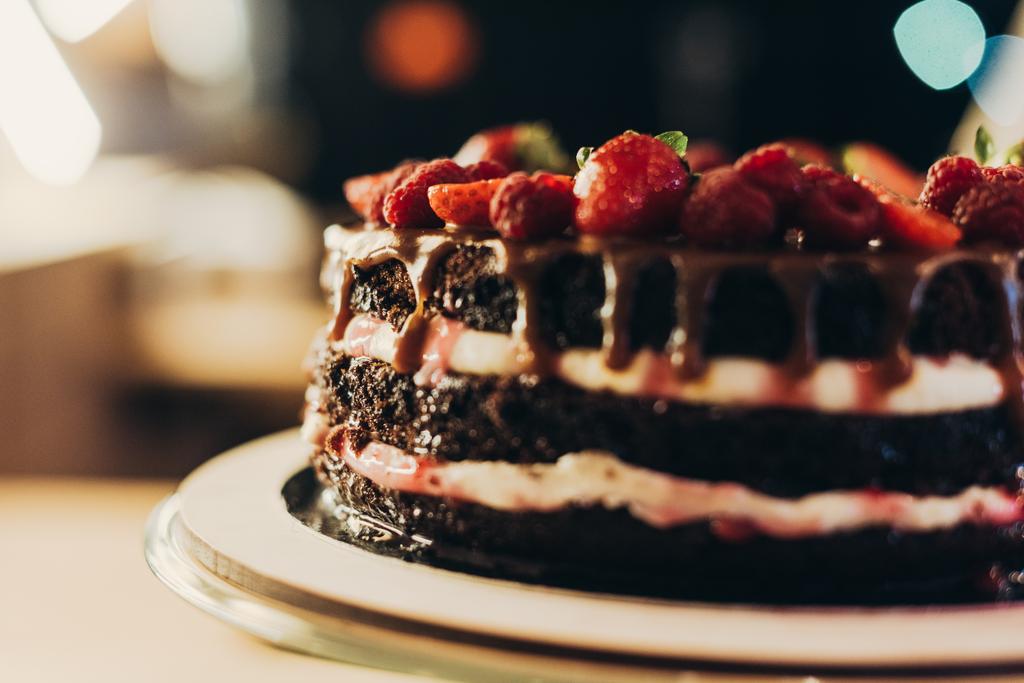
Freezing cakes: You should consider this beforehand

Baked too much or in advance: Freezing cakes is the best solution for this and is also suitable for preventing food waste. Before you put the cake in the freezer, you should consider the following:

Wait for the cake to cool. At the same time, you shouldn’t leave it there for too long. The fresher you freeze it, the more flavor it will retain.
Cut the cake into pieces so you can thaw them individually later and don’t have to take everything out of the freezer.
Cakes and tarts that are decorated with cream should be frozen first before you wrap them. This will prevent the deco from being crushed. To freeze, you can place the cake on a plate in the freezer for a few hours.
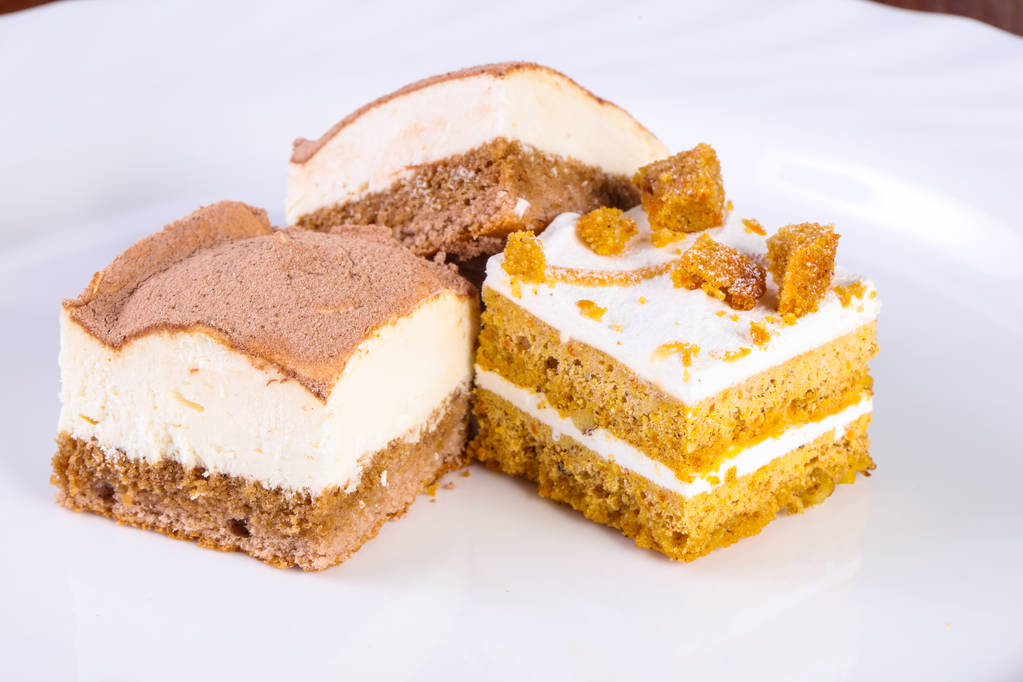
Not all cakes are suitable for freezing:
In the case of cakes with icing or gelatine, this begins to crumble after defrosting.
The vegan alternative agar agar is also not suitable for freezing for the same reason.
Also, don’t freeze custard, jam, or buttercream pie fillings, as they will lose their flavor or become too soggy and watery.
However, it is not a problem to freeze choux pastry without filling.
For yeast dough, freeze before you let it rise.

Freezing cakes: this is how it works

No matter what you use to freeze the cakes, it is important that you pack them as airtight as possible. This will prevent freezer burn and preserve the flavor for longer.

Place individual pieces in a freezer bag. By the way, you can use the freezer bags several times if you rinse them well. A plastic-free alternative is a cotton bag in which you can freeze dry sponge cakes, for example. Wrap the cake well in the bag.
You can also freeze cakes wrapped in wax paper. However, the cake only stays fresh for a few weeks.
Plastic food storage boxes are the right size if you want to freeze multiple kitchen items together. The same applies to lunch boxes made of stainless steel.
You can even freeze leftover cake in glass casserole dishes and casseroles. So that the glass does not crack in the freezer, you should only fill the container 3/4 full with cake and only close the lid when the cake is frozen. To keep the individual pieces from sticking together, you can separate them with paper from bakery bags or wax paper.
While they’re often recommended, it’s best not to use cling film or aluminum foil to freeze cakes. Because these disposable products end up in the garbage after a single use.

Freezing cakes: defrosting

If you want to eat the frozen cake, you take it out of the packaging or the container in which you frozen it. Let it thaw at room temperature for about three to five hours. Frozen cake will keep in the freezer for about four months. After that, it loses its flavor and firmness.

You only need a small piece of fresh ginger for most dishes.

Tip 1 for correct storage: Don’t buy too much ginger

If you want to enjoy fresh ginger for as long as possible, you must not buy old tubers. Old ginger is very difficult to store. You can recognize fresh produce by the fact that the tuber feels firm and heavy. Ginger that is no longer as dewy is softer and has a wrinkled skin.

Also, don’t buy too much ginger at once. For most recipes you only need a few slices, the rest is often forgotten and eventually ends up in the bin. So you should consider beforehand how much ginger you need and how you want to use it.

Tip 2: Store ginger outside of the refrigerator

If your fresh ginger root is still unpeeled and uncut, you can store it in a dark and cool place outside the refrigerator. The pantry is best for this. You can store fresh ginger there for several weeks. Wrap it up completely in a paper towel beforehand and then put it in a sealable container or paper bag.

Sliced ​​ginger can also be stored outside the refrigerator for some time. Store it in a dark and cool place. While the interface may become a bit woody and hard over time, the ginger flesh stays fresh and you can keep using it.

Tip 3: Store cut ginger in the fridge

If you want to store cut ginger in the fridge, you should make sure that it is kept as airtight as possible. There is high humidity in the refrigerator, which promotes the formation of mold in food.
Option 1: To prevent the ginger cut from drying out too much, you can cover it with reusable beeswax towels instead of plastic or aluminum foil. Place the fully wrapped ginger in a sealable can or paper bag.
Option 2: Alternatively, you can slightly dampen a cloth kitchen towel and wrap the ginger in it before storing it in the crisper of the fridge.

You can use these methods to keep sliced ​​ginger fresh in the refrigerator for up to three weeks.

Tip 4: Freeze fresh ginger

If you always want to have a supply of ginger on hand, you can also freeze it. Proceed as follows:
Method 1: ginger pile
Peel the ginger and then grate it finely.
Use a spoon to form small mounds of the grated ginger.
Put these piles on a plate, which you then put in the freezer.
Once the ginger mounds are frozen, you can remove them from the plate and place them in a freezer bowl.
Method 2: ginger slices
Peel the ginger.
Cut it into strips or slices.
Place in a freezer-safe container and freeze.
You can pour hot water over the heaps or slices of ginger to make ginger tea or add them to dishes. Processed like this, the ginger will keep in the freezer for about 3 to 6 months.

Tip 5: Pot ginger and plant it yourself

Ginger is one of those foods that grows back on its own. This means that you can easily keep fresh ginger bulbs alive by planting them one at a time. In this way, you can also recycle ginger bulbs that have already sprouted. The ginger pieces sprout and form reed-like plants. After some time you can harvest fresh ginger bulbs for kitchen use.

Here you can find out how to plant ginger yourself.

Tip 6: Preserve ginger by pickling it

To prevent ginger from spoiling or becoming too woody and dry, you can preserve it by pickling it. Peeled, cut, grated and preserved in a vinegar broth, the ginger prepared in this way can be kept for up to six months. Pickled ginger is particularly popular with sushi.

Here are the instructions on how to pickle ginger.

Kohlrabi is a healthy and delicious summer vegetable. You can freeze it so that you still have some of it in winter.

Depending on the variety, the kohlrabi harvest season begins in May and ends in autumn. If your harvest is very good, you can freeze kohlrabi and enjoy the vegetables even in winter. But even if you have leftover kohlrabi from a meal, you can freeze it to avoid wasting food.

Blanch and freeze the kohlrabi

If you want to preserve your kohlrabi harvest, then proceed as follows:
Peel and wash the fresh kohlrabi.
Cut it into strips or cubes. Be sure to remove woody spots.
Bring salted water to a boil in a saucepan.
Have ice water ready to chill.
Add the kohlrabi and blanch in boiling salted water for two minutes.
Then shock the kohlrabi in ice water.
Let it cool completely and drain well through a sieve.
Then freeze it in suitable glass or bioplastic freezer containers.
Defrosting: You can add the kohlrabi pieces to soups, stews and vegetable pans while they are still frozen. It is important not to cook it for too long, otherwise it will become too soft.

Alternative: Freeze raw kohlrabi

Some home gardeners and chefs skip a step and freeze their kohlrabi without blanching it first. To do this, peel the raw kohlrabi and cut it into sticks or cubes and place it in freezer-safe containers. After thawing, however, this method can change the appearance and consistency of the kohlrabi.

You want to freeze spinach because you had a good harvest? Or do you have leftover fresh spinach and want to preserve it? Find out here how it works and what you should consider when freezing.

Freeze spinach: Here’s how

Spinach is a healthy, regional vegetable. So it’s no wonder he’s so popular. Fresh spinach is especially delicious. If you have bought too much of it or your harvest has been very rich, you can freeze it without any problems.

How to freeze spinach correctly:

Wash the spinach and remove the stalks. These taste mainly bitter and are also not very pleasant when you bite them.
Briefly blanch the spinach. Blanched it is easier to freeze, and because you only heat it briefly, most of the nutrients are preserved.
To do this, add the spinach in portions to boiling water and let it cook for a few seconds.
Immediately afterward, place in a bowl of ice water to pause the cooking process.
Spin it dry in a salad spinner. It is important that the spinach is completely dry, otherwise too much liquid will collect due to the ice crystals when defrosting. You can also press the spinach dry between tea towels. Make sure, however, that it is not exposed to room temperature for too long. Because then nitrite can form in the spinach.
If the spinach is dry, you can freeze it in glass or stainless steel containers.
Tip: Depending on how you want to use the spinach, you can also cut it up or finely chop it before freezing.

You can also freeze spinach raw. However, the spinach should be as fresh as possible and you should clean it well so that no dirt or bacteria are thawed again later.

If you freeze leftover cooked rice, you don’t have to throw anything away. So that it still tastes delicious after surfacing, we explain how to freeze rice properly.

With rice, it can quickly happen that you misjudge the amount and there is a lot left over. You can keep cooked rice in the fridge for a few days for the next meal. Or you can freeze it and thaw it later when needed.

Rice freezes easily. We’ll show you what you should pay attention to so that the grains still taste good after surfacing and don’t become soft and mushy.

Freezing rice: These varieties are suitable

Perfectly cooked rice grains still have a slight bite. When you thaw frozen rice, the texture changes and the grains become a little too soft. Some types of rice are better for freezing than others because they retain their texture better. These varieties include:

jasmine rice
basmati rice
Patnareis
If you want to cook rice ahead of time, you can intentionally undercook it a little. When reheated, it reaches its perfect consistency.

How to properly freeze and thaw rice

Freeze rice properly

Do not cook the rice too soft, but so that it is still al dente.
Let the rice cool down.
When portioning the rice you have two options:
You freeze everything together. If your rice was still grainy enough after cooking, it will create a frozen clump that you can always break off pieces and thaw.
You’re already freezing it in portions equal to one meal. This is useful if your rice is not quite as grainy and would not be as easy to portion when frozen.
Freezer containers made of glass or stainless steel are suitable for freezing.

Properly defrost rice

It is best to let the rice thaw at room temperature.
Then heat it up with steam. If you boiled it again, possibly with additional water, it would quickly become too soft and gooey.
Instead, place it in a fine-mesh strainer that you hang over a saucepan of boiling water. The rice is heated by the rising steam. Stir the rice once during this time so that it warms up evenly.
You can also just add it directly to the sauce you made for your dish to thaw and let it simmer over low heat.

You can pickle red cabbage to significantly extend its shelf life. In this article we will show you exactly how to pickle red cabbage.

Red cabbage is a nutrient-rich winter vegetable and particularly contains vitamin C, vitamin E, dietary fiber, iron and phytochemicals. The colorful vegetables can be prepared in many ways – for example as red cabbage according to a classic recipe, as red cabbage salad or as red cabbage soup.

In this article, we would like to show you how to pickle your red cabbage and how to ferment it for at least six months. You only need two ingredients for the basic recipe.

We recommend that you buy organic red cabbage. In this way you avoid that it was grown with chemical-synthetic pesticides or artificial fertilizers. Because it can be stored well, you can get red cabbage from regional cultivation all year round.

Pickling red cabbage: A basic recipe

Ingredients:

1 kg red cabbage
20 g salt

Directions:

Remove the stalk of the red cabbage. Cut the remaining cabbage into the desired shape and size, for example into fine strips.
Place the red cabbage strips in a bowl along with the salt. Use about 20 to 25 grams of salt per pound of cabbage. Knead and mix the red cabbage strips well with the salt until the juice begins to escape. This creates a brine.
Leave the red cabbage in the bowl for one to two hours and then mix it up again.
Now fill the herb and liquid in portions into a swing-top glass with a rubber ring that holds 1.5 liters. When decanting, always press the cabbage down well so that as much air as possible escapes. The glass should be no more than three quarters full at the end.
Make sure the pickled red cabbage is completely covered with the brine. Weigh the red cabbage down with a fermenting weight, a small glass container, or a clean rock. Seal the jar and leave it at room temperature, out of direct sunlight, for five to seven days.
If necessary, fill the red cabbage into smaller jars and keep them tightly closed in a cool place.

Tips for pickling red cabbage

In the following we would like to give you a few tips that can be helpful when pickling red cabbage.

It is best not to use screw-top jars. If you pickle red cabbage, gases are formed as a result of the fermentation. The resulting pressure could cause the glasses to burst. Some pressure can escape from glasses with swing tops and rubber rings. In addition, you can occasionally open the lid briefly during fermentation to release the pressure.
Make sure you use clean glasses and have a clean work environment overall. This will prevent harmful microorganisms from multiplying. You can sterilize the jars with boiling water, for example, before use. More about this here: Sterilizing glasses: The best methods with step-by-step instructions.
It is important that the red cabbage is completely covered with liquid. If the juice is not enough, you can make additional brine. Add 20 to 25 grams of salt to 1 liter of water or, if you need less, 10 to 12 grams to 500 milliliters. This can be especially necessary if you prefer to cut your red cabbage into larger pieces.
If you pickle red cabbage, you can play with other spices and ingredients according to your taste. In the second step, you can add chopped onions, diced apples or cumin, for example.