Tag

succeeds

Browsing

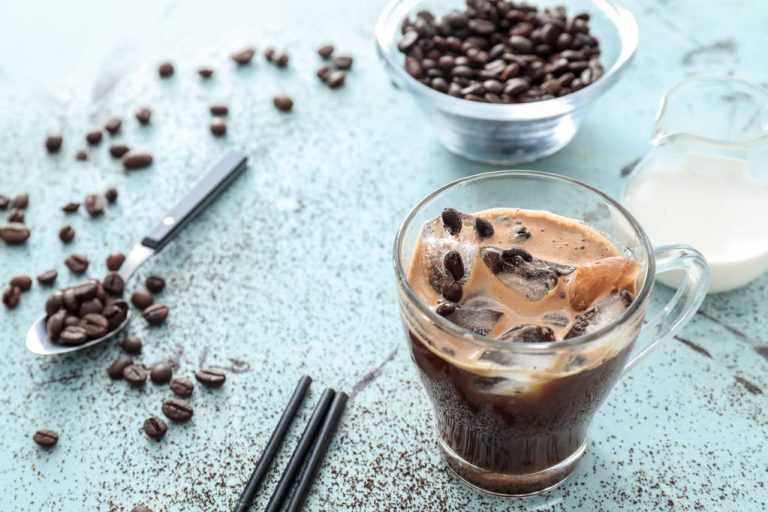
How about a frappé as a refreshing iced coffee variation? We will show you how you can easily prepare the frothy coffee specialty yourself. Thanks to numerous possible variations, there are hardly any limits to your taste.

What does Frappe mean?

The word derives from the French verb “frapper” which means “to shake” in German. Based on the French word “lait frappé” (milkshake), the “Café frappé”, i.e. “shaken coffee”, was created.

Step 1: Mix instant coffee and water

For the classic version, put a teaspoon of instant coffee and about a teaspoon of sugar in a tall glass or bowl. Now add enough cold water to just cover the mixture.

Step 2: Beat until fluffy

Now stir the mass until foamy until about half of the glass is full. Ideally, you should use a small milk frother. Alternatively, you can shake the mixture for about a minute or froth it up with a small whisk.

Step 3: Add ice cubes

Finally, add some cold water, a dash of milk/milk alternative and a few ice cubes until the glass is completely full – done.
Important: When buying instant coffee, make sure that it contains as little oil as possible. A good guideline is no more than 1.5% fat. As a rule, the manufacturers offer instant products specially developed for frappé. If the instant coffee contains little fat and therefore little oil, small bubbles are formed when stirring, which create a stable layer of foam.

What is the difference between frappé and iced coffee?

While iced coffee is usually cooled with vanilla ice cream, a classic frappé only contains ice cubes and a dash of water. The number of calories is therefore significantly lower. In the meantime, however, there are also numerous preparation variants in which the frappé is refined with milk ice cream.

Why is a frappé preferable to an iced coffee? You not only make the healthier choice, but also the more refreshing one: By adding water instead of milk or cream ice cream, the body gets more liquid. In the Mediterranean region, the frappé is often preferred to a cappuccino.

Creamy coffee just like in Bella Italia: With the right recipe and professional know-how, you can make your own cappuccino at home, the taste of which will immediately take you back to your last holiday in Italy.

Warming rays of sunshine, the hustle and bustle on the piazza and a cappuccino with perfect milk foam topping – the ingredients for a relaxing holiday! At least the luxurious drink can easily be taken home. Because the recipe for classic Italian cappuccino is very simple: it consists of equal parts espresso, milk and milk froth.

Already knew?

Italians only drink cappuccino in the morning. Due to its high milk content, it is considered to be stomach-filling. In Germany, on the other hand, we enjoy it all day long: with a long breakfast or in the afternoon with pastries.

It all comes down to the beans

First things first: The espresso beans should be of the best quality so that the cappuccino really tastes as good as it does on holiday. You are guaranteed to be on the right track with the high-quality coffees from Mamis Caffè. Which variety you choose is up to your personal preferences.

Gran Crema impresses with the fine crema of the Arabica beans from Brazil, which settles perfectly on the milk.
The full-bodied espresso crema has a soft, intense crema, which unfolds its aroma in the interplay of Arabica beans with a strong Robusta note.
The sweet Amabile with its generous, soft body brings together seductive Dolce Vita with aromatic notes from India and South America.
Dolce Vita already carries the pleasure in the name. Sweet and with a certain spice, Arabica and Robusta beans bring the Italian attitude to life into your cup.
The smooth Deca Coffee is suitable for a delicious decaffeinated cappuccino variant.

What else makes a good cappuccino? That’s right: a creamy, dense foam. For this to succeed, you need milk with a high fat content. Whole milk with a fat content of 3.5 percent is ideal. Without fat, the foam will be watery and won’t stay solid.

All good things come in threes: the cappuccino recipe

Everything together? Now it depends on the mixing ratio. A cup of cappuccino consists of:

⅓ espresso
⅓ warm milk
⅓ milk froth.
For this you need:

Espresso (approx. 25 – 30 milliliters)
milk (approx. 100 – 150 milliliters)

Cappuccino preparation: start with the espresso

Professionals brew their espresso in a portafilter machine. Such a high-end coffee machine has its price and requires a relatively large amount of effort to prepare. However, if you regularly enjoy cappuccino at barista level, the investment can be worth it. You like it less complicated? A small espresso pot for the stove, a so-called Bialetti, also does a good job. The espresso is quick and easy with a fully automatic coffee machine, a pad or capsule machine.

Of course, you know best which method best suits your everyday life. At Mamis Caffè you will find your favorite variety for every type of preparation: as a whole bean, ground coffee, pad or capsule.

It’s all in the milk: this is how the perfect milk froth succeeds

In order to produce a stable milk froth, it is important that the milk is not too hot. As the owner of a portafilter machine with a steam nozzle, you are on the safe side. Here you use hot steam to heat milk in a jug and froth it at the same time. It’s even easier with a fully automatic machine. Most models conjure up a decent amount of milk foam at the touch of a button.

Alternatively, simply heat the milk on the stove. A temperature below 65 degrees is ideal, it should never boil.

You can then either froth the warm milk with a special milk frother or use a hand blender or a whisk. What actually works: a sufficiently large, empty mason jar. Pour in the warm milk and shake vigorously: a fine froth forms.

For your cappuccino you need milk froth, milk and espresso in equal parts. Froth until the volume of the milk has roughly doubled.

Expert tip: Professional baristas briefly knock the pot onto the table after heating the milk. In this way, unwanted bubbles escape from the milk and the froth becomes more even.

The final touch: Serve the cappuccino

Once you have prepared your espresso, first pour it into a preheated cup. Now it’s time for the milk, which you pour into the cup with a flourish. First hold back the foam with a spoon. You use it in the last step to crown your drink with it.

Et voilà: the homemade cappuccino is ready and tastes at least as good as in your favorite café in Milan or Rome.

Art in coffee: create latte art like a barista

Professionals refine the cappuccino with artistic motifs in the milk froth, the so-called latte art. The patterns in the crema are created when you pour the milk onto the espresso with a lot of energy and small, targeted movements. This requires finesse and practice. Would you like to surprise your guests with artistic masterpieces on milk froth? Most major cities have barista classes that will teach you the basics in just a few hours.

Cappuccino – the popular coffee and milk drink from Italy

A classic cappuccino consists of an espresso and milk and milk froth in equal parts. While cappuccino is drunk throughout the day in Germany, things are different in Italy. In the homeland of cappuccino, it is only consumed in the morning because it is considered to fill the stomach due to its milk content. From midday, the Italians rely on espresso, which awakens the spirits, makes you lively and is easier to digest.

In addition to cappuccino, latte macchiato is a popular drink in both Italy and Germany. Both coffee specialties are prepared with milk, but they look different and taste different.

The difference between cappuccino, latte macchiato and milk coffee

The mixing proportions between coffee and milk in a cappuccino are 1/3 espresso, which is poured into the cup, and 2/3 lightly frothed warm milk and milk froth are poured over it. The typical crema of the espresso settles on the milk froth of the cappuccino. The look of the cappuccino is white on the surface with a golden-brown crema, which is also often drawn into the milk froth with patterns using a spoon. There are now even competitions in which the most beautiful patterns that can be conjured up with the crema in the milk foam are evaluated. This can be leaves, hearts or even faces. A cappuccino is usually served in a bulbous cup.

With a latte macchiato, three layers can be seen in the tall glass. First, milk is poured into the glass, then the milk froth is poured over it. Finally, the espresso is slowly poured in through the milk froth. The layers are created by the air contained in the milk froth, which remains on the surface. The espresso stays on top of the milk, which is at the bottom of the glass, because it has a higher temperature and density.

Unlike cappuccino and latte macchiato, a classic latte does not use espresso to prepare it, but normal coffee mixed in equal parts with warm milk.

How to properly prepare cappuccino

Classic Italian cappuccino is now also at home in Germany and the times when coffee was whipped cream and then called cappuccino are long gone.

To prepare a good cappuccino, a metal jug is filled with cold milk. This is heated with the hot water nozzle. Care should be taken to ensure that the nozzle remains below the surface while the milk is being heated. If this is neglected, the milk may splatter.

The milk is frothed until it has doubled its volume in the jug. It is often observed with professional baristas that the jug is briefly knocked onto the table after the milk has been heated. This is done to get unwanted bubbles out of the milk.

The higher the fat content of the milk, the creamier and denser the foam. Whole milk or semi-skimmed milk is ideal for cappuccino. Almost fat-free milk is not suitable because the foam does not become firm and remains watery.

Of course, you can also prepare cappuccino at home in fully automatic coffee machines that already have an integrated milk container. Here the milk is frothed at the push of a button and automatically applied directly to the coffee. With fully automatic coffee machines, always make sure to clean the milk nozzle or the milk hose so that they do not stick.

You can also prepare cappuccino with pads and capsules. You either froth the milk separately or you have a device in which the appropriate milk capsules can be used to prepare coffee and milk drinks.

Spaghetti Cacio e Pepe is a simple and classic Italian recipe that doesn’t require many ingredients or time. We will show you a basic recipe and a vegan version.

Spaghetti Cacio e Pepe means spaghetti with pecorino and pepper. Cacio is a special Roman pecorino made from sheep’s milk. You can get it in Italian specialty shops or, for example, at a cheese counter. Pay attention to organic quality in order to guarantee species-appropriate animal husbandry.

Spaghetti Cacio e Pepe: basic recipe

For Cacio e Pepe for three people you need about:

400 grams of spaghetti
200 g Pecorino
Salt
black pepper (freshly ground)
Note: Note that pecorino is usually made with animal rennet. These are enzymes that are taken from the stomach of calves. Accordingly, Pecorino is not vegetarian.

How to prepare Cacio e Pepe

Place the spaghetti in boiling salted water. Don’t use too much salt in the pasta water, as the pecorino is already very salty.
Grate the pecorino.
Put the grated cheese in a cold pan. Now add a few tablespoons of the hot pasta water and stir the cheese into a creamy paste. Caution: In a coated pan, you should use a wooden spoon to stir, otherwise the coating could break.
Generously grind the black pepper, add it to the pan and stir the mixture well again.
About 2-3 minutes before the spaghetti is al dente, drain and reserve the pasta water.
Add the pasta to the pan with the pecorino mixture. Now add enough pasta water by the spoonful so that the spaghetti Cacio e Pepe can simmer gently for the remaining minutes.
At the end, the noodles should have soaked up the water and there should be almost no liquid left in the pan.
To serve, you can grate some fresh Pecorino over the portions of your fresh Cacio e Pepe.

Vegan variation of the spaghetti Cacio e Pepe

If you want to make spaghetti cacio e pepe entirely without animal products, you can make a vegan nut-based cheese sauce.

For 300 to 400 grams of spaghetti you need:

25 grams of almonds
25 g cashew nuts
1/2 tbsp sesame seeds
4-5 tbsp yeast flakes
1/4 tsp salt
60 g sauerkraut brine
120 g unsweetened plant drink
1 tbsp olive oil
freshly ground pepper

This is how the vegan version of Cacio e Pepe works:

Roast the almonds, cashews and sesame seeds in a pan without fat until lightly brown and fragrant.
Put the nuts, yeast flakes, salt, sauerkraut brine and plant-based drink with about 250 milliliters of pasta water in a blender and puree the ingredients into a creamy sauce. If the sauce is still too thick, you can add more pasta water in between.
Heat the oil in a pan and grind in some pepper.
Let the pepper roast briefly and then add the cheese sauce.
As described above, add the almost-cooked spaghetti and pasta water and let the pasta simmer in the pan until done.

Tip: Although almonds, cashews and sesame provide the creamy cheese note of the vegan Cacio e Pepe, they are problematic from an ecological perspective: They have to travel long distances to Germany and therefore have a bad ecological balance. Alternatively, you can replace them with the same amount of walnuts and sunflower seeds from German cultivation. When buying the products, also pay attention to organic goods if possible in order to avoid chemical-synthetic pesticides.


Puccia is an Apulian bread and you can make it vegan or vegetarian. We show you how to bake the flatbread with olives.

Puccia comes from southern Italy, specifically Apulia, and is a type of flatbread. The dough often resembles a pizza dough and is supplemented with ingredients such as olives.

You can also buy ready-made puccia at some supermarkets. However, homemade pucce have no extra additives or preservatives and are therefore healthier, and you avoid packaging waste.

In order to use good quality food, pay attention to organic quality. Conventional olive oils in particular can contain harmful substances. Read the following article: Olive oil test: Convince discounter and organic oils. We can particularly recommend the organic seals from Demeter, Bioland and Naturland, as they follow stricter criteria than the EU organic seal.

Puccia: This is how the Apulian bread with olives succeeds

Ingredients:

130 g durum wheat semolina
500 ml water
50 g green olives
50g black olives
1 clove(s) garlic
400 g flour
40 g of yeast
50 g olive oil
5 g salt

Directions:

Pour boiling water into a bowl and stir in the durum wheat semolina. Let everything swell for 15 minutes.

Meanwhile, cut the olives into small rings and the garlic into small pieces.
Now put all the other ingredients in a new bowl. You should also add the garlic, you should wait with the olives so that they don’t fall apart when kneading.
You can break up the yeast into small pieces with your fingers and add them.

When the swollen durum wheat semolina has cooled down enough that you can easily put your finger in the bowl, add it to the other ingredients.

Now knead everything into a smooth dough. Finally add the olives and let the Puccia dough rise covered in a warm place for an hour.
Knead the risen dough again. If it’s too sticky, dust it with some flour if necessary.

Divide the dough into even pieces and form small flatbreads. They should be about ten centimeters in diameter.
Place the Puccia flatbreads on a baking sheet and place them on the middle of the oven. Place another bowl of water in the bottom of the oven to give the dough a nice crust. Bake the flatbreads at 160 degrees Celsius for 40 minutes. Note: Do not preheat the oven as this allows the dough to rise again before you bake it. It also saves energy and is better for the environment. Also read: Preheating the oven: useful or not?
To check if the flatbreads are done baking, you can take one out and tap the bottom. If you hear a dull, hollow sound, the Puccia are done.

Puccia prove: This is how the flat cake tastes particularly good

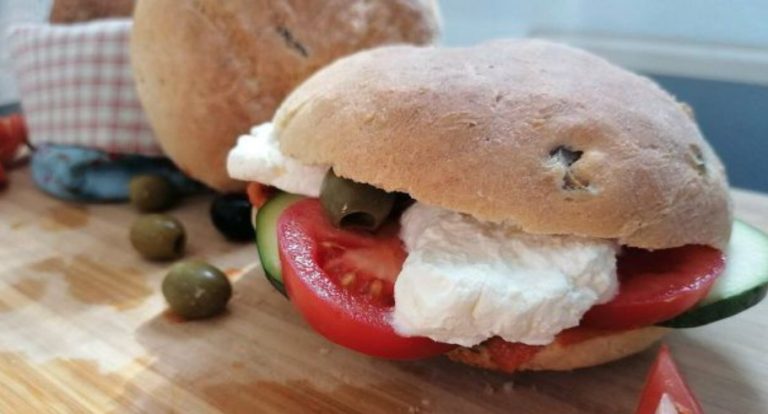
You can fill the Apulian flatbread as you like. There are no set ingredients or recipes. Italians often refer to Puccia as:

Mozzarella (you can also use vegan mozzarella)
tomatoes
basil
arugula
fried vegetables
So that the Puccia is not dry and tastes spicier, you can spread the halves with spreads or sauces:

homemade tomato sauce
pesto Rosso
Basil pesto
cream cheese
Make sure that you use organic food whenever possible. We also recommend that you shop seasonally and regionally. This is how you act particularly sustainably.

Vegan egg salad that resembles a “real” egg salad in terms of taste, appearance and consistency – that’s possible. With our recipe you can make your own egg salad without eggs and dairy products.

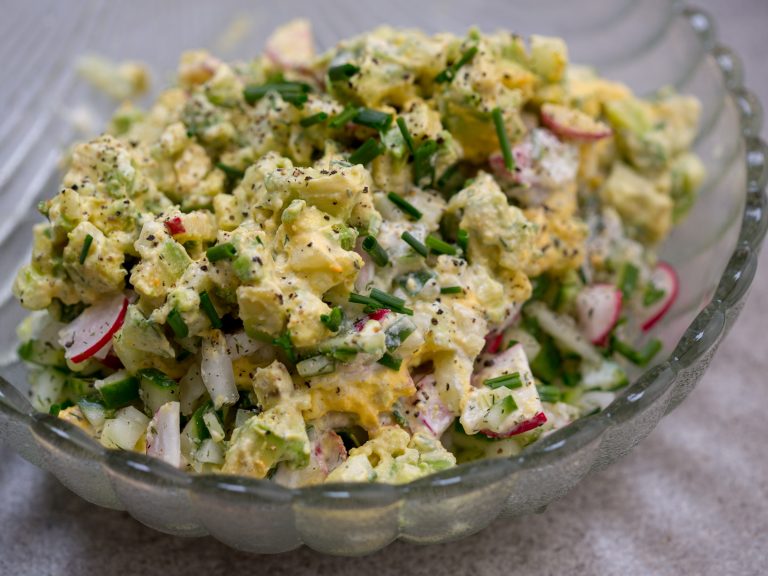
A vegan egg salad made from chickpeas and noodles: What sounds unusual at first tastes convincing. And all without animal suffering and animal protein. We’ll show you a simple recipe for vegan egg salad that is in no way inferior to the animal-based original.

Vegan Egg Salad: Ingredients for the recipe

This recipe for vegan egg salad makes two full servings or four servings as a side to the main course.

You need the following ingredients:

200 g chickpeas (cooked, drained)
125 g small pasta (uncooked)
1 tsp turmeric
1 small onion
1 tsp Kala Namak (Black Salt)
black pepper
1 small bunch of fresh chives (or other herbs)
100g vegan mayonnaise

Ingredient tips and variations:

You have to soak dried chickpeas overnight beforehand and boil them until soft for about two hours. In a separate guide, we explain exactly how to cook and soak chickpeas. If you want to be quick, you can also use pre-cooked chickpeas from a jar.
Very small noodles are best for the vegan egg salad. You can also use normal (whole grain) pasta and cut it up later. Make sure the noodles don’t contain any eggs.
Kala Namak is a special sulphurous salt that gives the egg salad its typical egg taste. In our special article on black salt “Kala Namak” you can find out everything about its origin, use, and buying tips.
Fresh chives are part of a classic egg salad. Alternatively, you can also use other fresh herbs from the garden – we have included a few rocket leaves in our recipe.
You can either buy vegan mayonnaise ready-made in health food stores or you can make it yourself. We show you a recipe for mayonnaise without eggs.
Extra tip: We made a low-fat mayonnaise alternative for the recipe. We seasoned vegan oat cream (porridge-based) with some linseed oil, mustard, salt, pepper, lemon juice and yeast flakes.

Make vegan egg salad yourself: Instructions in 10 steps

Plan about twenty minutes to prepare the vegan egg salad:

Put the noodles in boiling water and cook them until they are really soft (not al dente).
In the meantime, you can already mash the cooked chickpeas with a fork.
Optional: If you prepare the vegan mayonnaise yourself, you can also do this in the meantime.
Drain the cooked noodles and mash them with a fork as well.
Mix the mashed chickpeas with the noodles and add the turmeric powder for the color.
Cut the onion into fine pieces and add them to the egg salad mixture.
Now add the Kala Namak and black pepper to taste.
Wash and chop the chives and add them to the mixture as well.
Stir well.
Finally, fold in the vegan mayonnaise – et voilá, your vegan egg salad is ready!

The Pinsa Romana is similar to an ordinary pizza, but is said to be more digestible. We will explain to you what is behind the trend from Italy and how you can prepare Pinsa yourself.

For several years, a trend dish has been spreading from Italy that not only resembles pizza in name: the pinsa. They are also called Pinsa Romana, because the Romans are said to have enjoyed eating the pastry. But the recipe was forgotten until it was rediscovered in the last decade.

What makes the pinsa romana so popular? Above all, it is their dough that is said to be more digestible than pizza dough. It consists of a mixture of wheat, rice and soy or chickpea flour and Italian sourdough (“lievito madre”). The rice flour is supposed to loosen up the dough, the soy flour ensures good binding and proteins and the sourdough is supposed to make the pinsa romana easier to digest.

The long rising time also contributes to this: the dough of the pinsa should rest for up to 72 hours or more. The ongoing fermentation processes not only make the dough very airy, but are also supposed to relieve the digestive tract of some of its work. However, there are still no systematic scientific comparative studies between the digestibility of pinsa and pizza. More about this here: This is why many people can no longer tolerate bread.

In the next sections you will find out how you can bake and topping Pinsa Romana yourself without Lievito Madre.

Pinsa Romana: The recipe for the special dough

For four pins you need:

350 g flour type 405 or 550
50 g wholemeal spelled flour
75 g rice flour
25 g chickpea flour or soy flour
0.5g of fresh yeast or 0.2g of fresh yeast and 50g of Lievito Madre
approx. 300 ml cold water
1 tsp salt
1 tsp olive oil

Directions:

Mix the flours together in a large bowl.
Dissolve the yeast and salt each in a portion of the water.
Add yeast water, salt water, olive oil and, if necessary, Lievito Madre to the flour mixture. Knead the ingredients for about ten minutes until you have a smooth dough. Add some more water if needed.
Cover and let the dough rest for 30 minutes, kneading it briefly every ten minutes.
Place the dough in a large sealable container and refrigerate for 48 to 72 hours.
On baking day, take the dough out of the fridge 2-3 hours before you use it to let it come to room temperature.
Knead the dough briefly and divide it into four pieces of dough. Cover them with a tea towel and let them rise again for an hour.
Preheat the oven to 240 degrees circulating air. Note: For most dishes you can do without preheating the oven and thus save energy. Preheating the pinsa romana (just like pizza or tarte flambée) makes sense, however, because it only needs to be baked for a short time, but it should be nice and crispy. The ovens of professional pizzerias reach much higher temperatures.
Pull the dough pieces apart in an oval or round shape. Be careful to break as few air bubbles as possible. The dough does not have to be as thin as pizza dough.
Place the pins on an oiled baking sheet and top them with ingredients of your choice.
Bake the pins for about 10 to 15 minutes.

Tasty toppings for pinsa romana

You can eat the Pinsa pure or top it like a pizza, for example with:

  • tomato sauce
  • fresh seasonal vegetables
  • cheese or vegan yeast melt
  • fresh herbs
  • aromatic olive oil

The only thing to keep in mind is that the Pinsa Romana is only briefly in the oven, just like a pizza. This means that you should pre-cook vegetables or cut them very thinly. It’s also a good idea not to cover the pinsa too thickly, as that could make them mushy (and harder to eat).