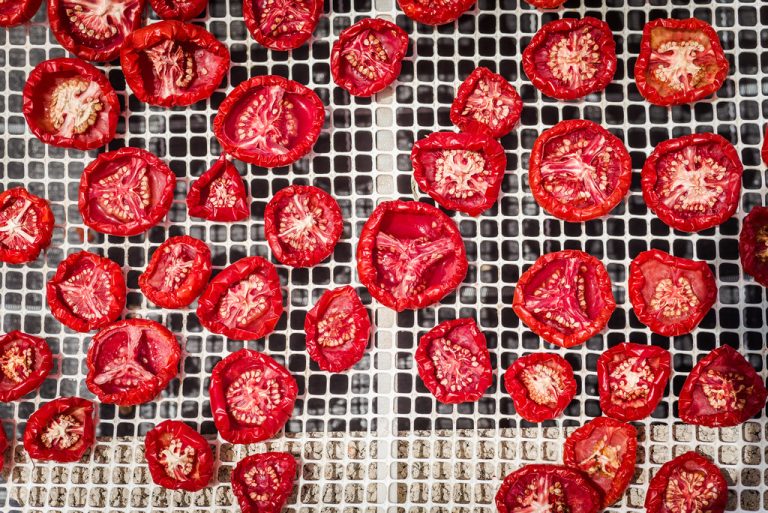
Sun-dried tomatoes are a great reminder of summer. We’ll show you three methods you can use to dry tomatoes yourself and make them durable.
If you want to dry tomatoes, you first need the right tomatoes: they should be fully ripe, as that is when they have the most flavor. It is best if you use tomatoes from your own garden. But local organic tomatoes, which are available on the market in summer, are also well suited. Regardless of which method you choose to use to dry the tomatoes, here’s how to prepare them:
Wash the tomatoes and cut out rotten spots and spots.
Skinning the tomatoes is sometimes recommended for drying with a dehydrator.
Chop the tomatoes depending on their size: With small cocktail tomatoes, halving them is enough. Larger tomatoes, on the other hand, should be cut into slices that are about half an inch thick.
Remove the juice and seeds from inside the tomato. This allows them to dry faster and you therefore need less energy and time. You can do without it with firm tomatoes that contain little juice.
You can now use the oven, a dehydrator or – under favorable conditions – the sun to dry. All methods have their advantages and disadvantages.

1. Dry tomatoes in the sun
Drying the tomatoes in the sun is the original method, which is still practiced in Italy, for example. Unfortunately, there are rarely enough hours of sunshine in this country. But if there are several consistently sunny days in a row in summer, you can try it. That is how it goes:
Place the prepared tomatoes, cut-side down, on a wire rack (such as a grill grate) or suitable trellis. Season with a little salt and other spices if you like.
Cover them with a close-meshed net to protect them from birds and pests. For example, you can use cheesecloth.
Place the grate well off the ground in a sunny and airy spot.
The drying process takes about three days. Meanwhile, you should turn the tomatoes several times. When it rains and also overnight, it is best to put the tomatoes inside.
You can recognize the finished tomatoes by the fact that they look shriveled and leathery. The drier the tomatoes end up, the longer they will keep.
Advantages:
You don’t need any energy to dry the tomatoes in the sun, so this is the best option from an ecological point of view.
Due to the slow drying at a comparatively low temperature, a particularly large number of healthy nutrients are retained.
Disadvantages:
In this country, the weather is usually not suitable for drying tomatoes in the sun.
Drying in the sun takes the longest.
Tomatoes, despite protection, can be attacked by pests.
2. Dry the tomatoes in the dehydrator
If you generally like drying fruits and vegetables, it might be worth getting a dehydrator. How to dry tomatoes with a dehydrator:
Brush the sieves with some oil to prevent the tomatoes from sticking to the dehydrator.
Place the tomatoes about an inch apart on the sieves and season with a little salt.
Dry the tomatoes. This can take different amounts of time from device to device. Some dehydrators have a temperature controller and a timer for this. It is most nutritious if you dry the tomatoes at less than 50 degrees.
After about ten hours the tomatoes are ready. You can tell by the fact that they take on a rubbery consistency.
Advantages:
You don’t need to turn the tomatoes as they dry.
Many dehydrators can dry the tomatoes at low temperatures and thus protect the nutrients.
Disadvantages:
Dehydrators cost money. Depending on the quality, you pay 30 to 400 euros.
Although most dehydrators use less electricity than the oven when drying, the electricity consumption is not low here either. There are, of course, economical and less economical devices.
3. Dry tomatoes in the oven
If the weather is not suitable for drying in the sun, you can also dry the tomatoes in the oven. How it works:
Preheat the oven to 90 degrees.
Place the chopped tomatoes about an inch apart on a greased baking sheet. Season with a little salt and any other spices you like.
Dry the tomatoes in the oven for about 6 hours, turning them several times. To allow the moisture to escape from the oven, you should stick a cooking spoon in the oven door.
Advantages:
Drying in the oven is independent of the weather.
You don’t need any special tools.
Disadvantages:
At 90 degrees, many nutrients are already destroyed. You can also dry the tomatoes at lower temperatures, but then the drying time will be correspondingly longer. Many ovens also become very inaccurate at low temperatures.
Since the oven has to heat up for several hours and heat constantly escapes through the open door, energy consumption is highest here.

Our conclusion
It’s best for the environment if you air dry the tomatoes. This variant is also nutrient-friendly, but the weather is rarely suitable for it and this method is certainly the most complex otherwise.
If you don’t want to rely on the weather, a low-power dehydrator is probably your best alternative. To make the purchase worthwhile, however, you should consider whether you will use it from time to time. A dehydrator is a device that can also be easily loaned out to the family or neighborhood. it could be worth buying and using together.
On the other hand, if you only want to dry your annual tomato harvest once, you can also use the oven. In order to at least limit the energy consumption here, you should juice the tomatoes well before drying. Finally, in all cases, we recommend that you take tomatoes that have been harvested in the region during the summer and that do not come from a heated greenhouse.


