Tag

Syrup

Browsing

Black radish tastes sharper and more aromatic than other varieties. You can grow it yourself – find out here what you need to look out for and how you can use the winter radish.

Also called winter radish, black radish is a particularly undemanding type of radish. It has a thick, mostly dark brown or almost black skin – hence its name. Inside, however, the root vegetable is white.

You can use black radish both as a food and as a home remedy for coughs. Since it is quite easy to care for, you can also plant it as a beginner when growing vegetables. To ensure that it thrives in your garden, you should follow a few tips.

How to grow black radish

Plant black radish: Depending on the species, sow the black radish from mid-June to August. You can find out the exact time from the seed packet. Preferably buy organic seeds. Proceed as follows when sowing:

First, make furrows in the soil into which you will later scatter the seeds. Keep a distance of at least 20 centimeters between the individual rows.
Now scatter the seeds in the rows of plants.
Cover round seeds very lightly with soil. If you bought a species with elongated seeds, you need to sow the seeds about two centimeters deep.
Finally, water the seeds generously.
The right location: Similar to white radish, black radish prefers full sun to half shade.

The right soil: It is best to plant black radishes where the soil is nice and loose, deep and rich in humus. Mix some compost into the soil about a month before sowing.

The right care for the black radish

Black radish is quite easy to care for. With a few tricks you will soon be able to harvest the first tubers:

Watering: Water regularly, because the black radish needs a lot of water, especially during the growth phase. Rainwater is best; you can, for example, collect rainwater.
Weeding: Black radish grows relatively slowly. To ensure that it always gets enough sunlight and water, you should regularly loosen the soil and remove weeds.
Fertilizing: If you have fertilized the soil with compost before sowing, you do not need any further fertilizer. After a month you can mix some horn shavings or other organic fertilizer into the soil if needed.
Harvest: Depending on the variety, you can harvest the first radishes after eight to thirteen weeks. It is only important that you do not leave the black radish in the ground for too long, otherwise it will become woody. First loosen the tubers with a digging fork before you pull it out of the ground.

How to use black radish

You can use black radish in different ways:

In the kitchen: Similar to the white radish, black radish is particularly popular as a raw vegetable. Peeled and finely grated, you can eat it as a radish salad or on a piece of bread. If you sprinkle it with salt, you reduce its sharpness a bit. You can also pickle black radish or cook it in vegetable soups. For example, you can replace the horseradish with black radish in this recipe: Horseradish Soup: Easy Recipe and Tasty Variations.
As a medicinal plant: Black radish contains a lot of vitamin C, mustard oils, magnesium and potassium. These and some other ingredients make it very interesting for medicinal and folk medicine. It is used there, for example, to alleviate the symptoms of rheumatism, gout and respiratory diseases.
As a cough syrup: black radish gets its typical spiciness from the mustard oils it contains. These have an antibacterial effect and can help with dry coughs, for example. Therefore, you can make an effective cough syrup from the tuber.

Black radish cough syrup recipe

For the black radish cough syrup you need:

a black radish
honey, sugar or rock candy
This is how you can use the cough syrup in the quick version:

Halve the black radish with a sharp knife.
Place both halves in front of you with the white insides facing up. If the halves wobble a bit, cut off a small piece at the bottom so they stay put.
Take a teaspoon. In the center of each half, dig a hole about two inches wide and one inch deep. You can eat the inside of the radish right away or use it in a dish.
Place each halves in a small bowl. Now put your sweetener in the hole.
Leave the bowls for a few hours until the sugar has drawn liquid out of the black radish. Then you can spoon out the cough syrup and enjoy!
Then enlarge the hole to continue using the halves.
If your black radish sits small and shriveled in the bowl, the sugar has drained all of the liquid and it’s time to discard it.

This is how you prepare the cough syrup a little more complex:

First, use a sharp knife to cut the top of the black radish straight off. The upper end must later act as a “lid”.
Now scoop out the radish with a teaspoon or knife in a cone shape. Finely chop the radish insides and set aside.
Now poke a few holes in the bottom of the radish. It is best to use a skewer or a knitting needle for this. The cough syrup later runs through these holes.
Now fill the hollowed-out radish halfway with honey and add the remaining radish pieces.
Give everything a quick stir and put the radish “lid” back on.
Place the stuffed radish on a plate or in a jar and let it sit for a few hours.
Pour the reserved syrup into a clean jar and store in the refrigerator.

With syrup, great cold and hot drinks can be mixed in no time at all.

Syrup – something for every taste

With an aromatic syrup, delicious delicacies can be mixed in no time at all. Whether fruit cocktails, spritzers or alcoholic refreshments – there are no limits to your imagination. Syrup can also be a suitable ingredient to turn a coffee into a special coffee specialty. In addition to finished products, you can also use homemade variants. So you not only know exactly which ingredients are hidden in it, but also have full control over the variety of flavors. Not only classic variations such as caramel and strawberry are possible.

Make delicious syrup yourself

With just a few ingredients, you can easily conjure up a tasty syrup. The basic ingredients are sugar and water. The desired syrup flavor can then be added to taste. Very different syrups are created with fruits, herbs, spices, but also nuts or chocolate. A clear advantage is that flavor enhancers, preservatives and other chemicals are completely dispensed with in the production process. Even the sweetness of the syrup can easily be adjusted to individual preference.
There are two manufacturing processes for a syrup:
Boil down the water and sugar and finally add the aroma
Use already flavored water for boiling
In the first method, a thick sugar syrup is made from water and sugar. Both normal sugar and special canning sugar are suitable for this. For the canning sugar, the manufacturer usually gives a clear proportion of water and sugar, which simplifies the production. The sugar syrup is then refined with the desired natural flavors. Here the possibilities are of course unlimited. The flavors strawberry, apple and cherry are popular, as are ginger and lemon.
The second method uses already flavored water to make the syrup. The desired flavor carriers are boiled into a brew. The brew is then sieved and used as the basis for making the sugar syrup. Foaming occurs when boiling. This foam must be skimmed off constantly to obtain a clear syrup. This method is particularly suitable for fruit or fruit, as the flavorings are released into the liquid in large quantities.
Herbs or zest as flavoring should best be used after the first method.

Elderflower syrup – a real classic

For lemonade, tea drinks or cocktails – elderflower syrup is very popular. The fine taste can be combined with many flavors and the syrup is a real all-rounder. The recipe for the elderberry syrup consists of a few ingredients:
1 liter of water
Juice of three lemons
500 grams of sugar
25 elderflower clusters
Boil the sugar and water. Then add the flowers. Let the whole thing simmer for about an hour under constant observation. Cook the syrup over medium heat, otherwise it may burn. Then strain the warm liquid through a cloth or a coffee filter and fill into bottles. The fresh syrup can be stored in the refrigerator for up to three weeks.

There is also syrup for coffee

The coffee syrup is a special feature. This has a similar effect to fruit syrup and was specially developed for use in coffee. Coffee specialties such as latte macchiato, café au lait or cappuccino can be refined with delicious syrup. There are numerous flavors from coconut to caramel to vanilla and hazelnut. For a special treat, coffee lovers can also use syrups with mint, chocolate or rum. However, since syrups are very sweet, care should always be taken to add only small amounts. The result is a very individual coffee specialty with that certain something.

Boil down the syrup and store it properly

To make the syrup storable for up to a year, you can preserve the filled bottles. To do this, place the bottles in a water bath and put it in the oven at 120 °C for around 20 minutes. Allow the bottles to cool sufficiently before storing in the cupboard. Don’t forget to write the date of manufacture on the bottle.

The finished bottles in a cool place without direct
Conserve light exposure. Best in the basement or in a kitchen cupboard. The color may change slightly over time, which does not affect the taste. Once opened, the syrup should be used within two to three weeks.

Syrup isn’t just for drinking

Whether you buy the delicious syrup or make it yourself – it is ideal for conjuring up delicious drinks in no time at all. It is also suitable for refining desserts or preparing a salad. A high-quality syrup is highly concentrated. Even a few drops can provide an intense taste.

The fruits of early summer are ideal for making delicious syrups, such as rhubarb syrup or elderflower syrup. But herbs such as mint or lemon balm can also be used to make a delicious syrup. Syrup recipes often refer to syrup sugar. But what is that anyway?

What is the difference between syrup sugar and regular sugar?

Syrup sugar is sugar that has already been enriched with the citric acid needed to make the syrup in the right proportion. You can buy this ready-made in the supermarket or simply mix it yourself:

Mixing ratio for syrup sugar:

  • 1 kg of sugar
  • 30 grams of citric acid

Rice syrup is considered a healthier sugar alternative alongside honey, agave syrup and other sweeteners. You can find out here whether the chewy, sweet juice is actually better for your health and what special features it has.

It is well known that sugar is not very good for our health. Therefore, if you want to try to do without it partially or completely, there are various alternative options. Some swear by stevia or birch sugar, others by honey or maple syrup. And then finally there is rice syrup.

Rice syrup: use, production, and origin

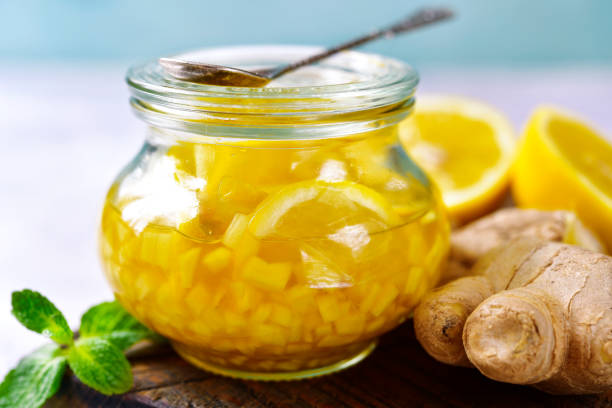
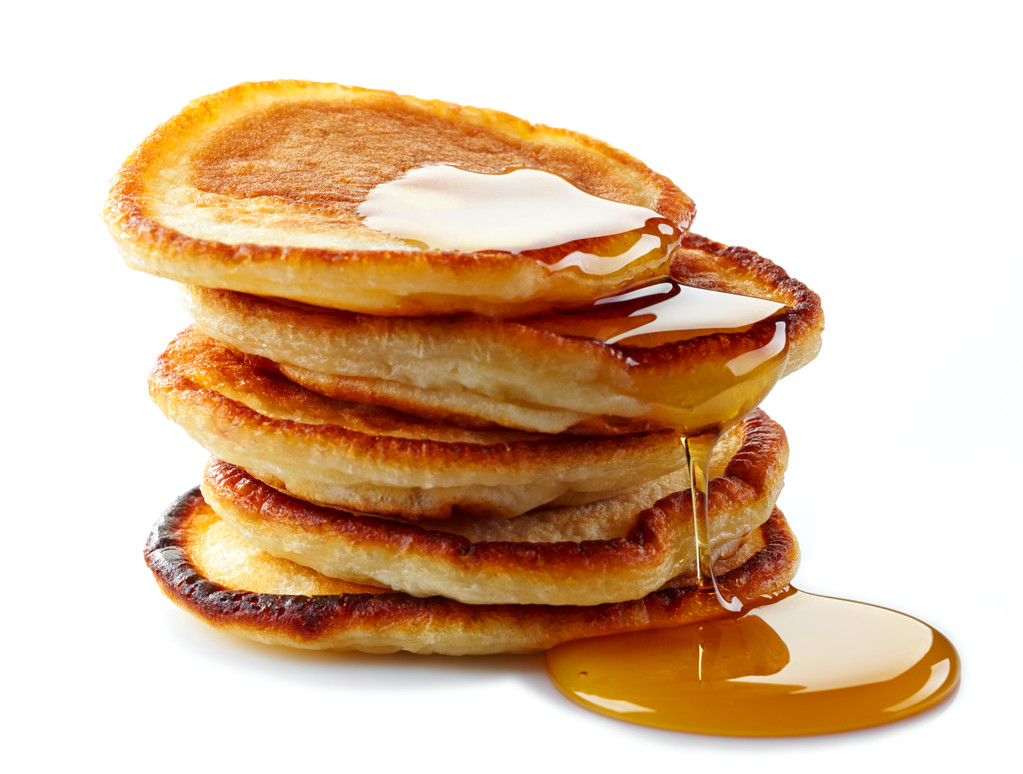
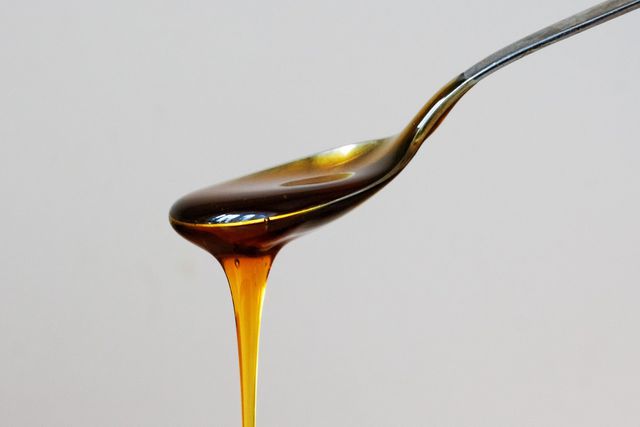
Rice syrup is a light golden syrup that tastes mild and sweet. Since it doesn’t have a particularly strong taste or aftertaste, you can use it in a variety of ways. For example, it is suitable for sweetening yoghurt or porridge, as a sweetener in the dough of cakes, muffins or biscuits or for caramelizing.

To make rice syrup, machines heat the ground rice and then break it down into sugars. This is how the sweet juice is extracted from the rice grain. The syrup then runs through filters and is finally thickened. Since rice syrup is therefore completely vegetable, it is a vegan honey alternative. In Japan, the sweet juice has long been an integral part of traditional cuisine.

Since rice is grown in Asian countries such as China, Thailand or India in particular, rice syrup often has a poor eco-balance. After all, there are long transport routes during production, which release large amounts of greenhouse gases. To a small extent, some farmers also grow rice in southern Europe, for example in Italy or Spain.

We recommend that you pay attention to information about the origin of the rice grains when buying and that you prefer rice syrup from European cultivation. For example, according to the company, Reishunger’s organic rice syrup comes from Italy. You should also buy organic rice syrup if possible. In this way you avoid chemical-synthetic pesticides that are harmful to your health and, in particular, drive insect mortality.

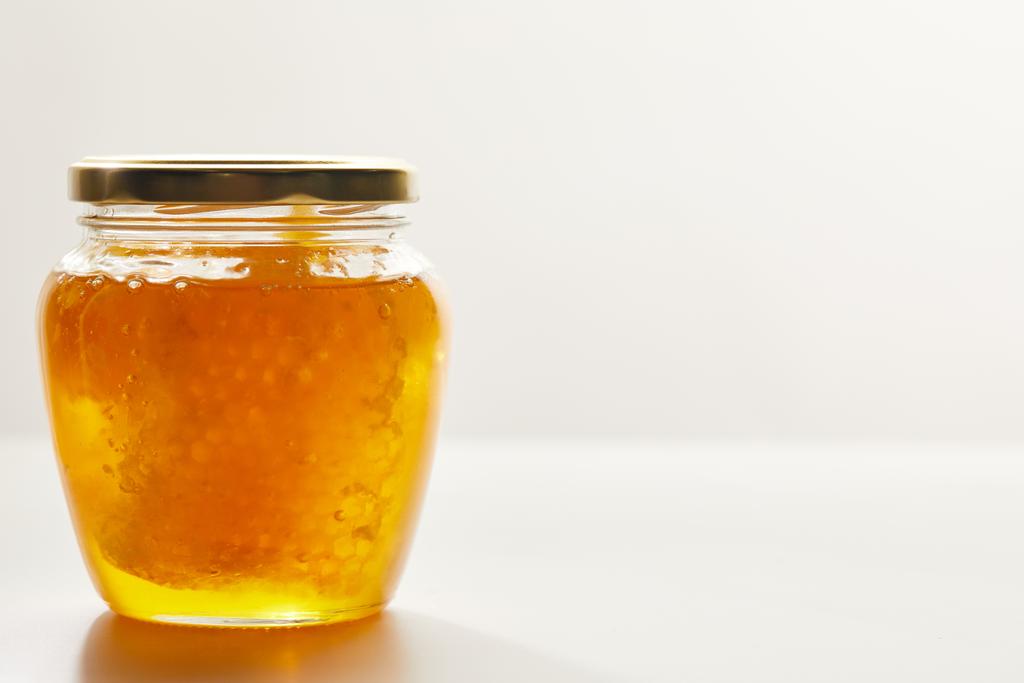
By the way, to extend the shelf life, it is best to store rice syrup in the refrigerator after opening. It stays there for weeks or months.

Is Rice Syrup Healthier Than Sugar?

When looking at the nutritional values, rice syrup performs only slightly better than conventional table sugar. According to Reishunger, the syrup has around 319 kilocalories per 100 grams. Alnatura’s organic beet sugar, on the other hand, has 400 kilocalories. Both sweeteners contain only small traces of fat and protein.

Sugar is almost 100 percent carbohydrates, while in rice syrup they are only 80 percent. Of that 80 percent, sugar molecules make up 62 percent. This is also the reason that rice syrup does not taste as sweet as sugar. So you need more syrup to achieve the same sweetness. This also makes up for the calorie difference.

According to a Northwestern University nutritionist, our bodies treat rice syrup the same way it treats sugar. Our organism therefore does not recognize any difference between the sugar molecules. In addition, rice syrup has a higher glycemic index than sugar. This means that your body breaks down the syrup into glucose extra quickly. This process causes your blood sugar levels to rise and fall rapidly. As a result, you will only feel full for a short time and will soon feel hungry again.

There is also no evidence that rice syrup would contain a particularly large number of micronutrients (such as vitamins or minerals). Even if these are available in moderation, they hardly make an important contribution to covering our daily needs.

Conclusion: Rice syrup is not a miracle cure either

There is not enough substantiated evidence to support the thesis that rice syrup is healthier than sugar. But with both sweeteners, the dose makes the poison. As part of a balanced diet, it is not a problem to eat sweets from time to time.

From an ecological perspective, rice syrup from Europe is definitely more climate-friendly than maple or agave syrup. These often come from even more distant growing areas. Even better sweeteners would be, for example, apple or pear syrup, sugar beet syrup or beet sugar from German cultivation.

The special thing about dandelion honey is that it is actually not real honey. Instead, it’s a mixture of sugar and dandelion flavor in syrup form. We reveal how you make the vegan “honey” yourself.

General information about dandelion honey

In contrast to bee honey, dandelion honey does not contain any animal components and is therefore vegan. However, it tastes similar to real honey and has a similar consistency – hence the name.

Collecting dandelion flowers requires some effort. But it’s worth it. When collecting, make sure that:

  • you collect the dandelions in places with little or preferably no traffic.
  • you take the young, juicy blossoms.
  • you don’t remove the whole plant. Unless you want to remove the dandelions from your vegetable beds.

The flowering period of the dandelion is in April and May.

Dandelion honey recipe

First, you need enough dandelion flowers – depending on how much “honey” you want to make. For starters, 200 grams should be a good guideline.

You also need:

  • 1 liter of water
  • 1 kg of sugar
  • 1 half organic lemon

Proceed as follows:

Put the flowers in a pot and pour the water over them.
Cover the pot with a lid and let the mixture steep for about two hours.
Bring the mixture to a boil and then let it cool down again.
Let the water and dandelion blossoms sit overnight and drain the blossoms with a colander.
Add the sugar and some grated zest of the lemon.
Bring the mixture to a simmer.
To test whether the mixture has the right consistency, you can put a small amount on a plate and let it cool. If the consistency is similar to that of “normal” honey, then the dandelion honey has simmered long enough.
If it is not firm enough, let the mixture simmer a little more and test the consistency at regular intervals.

Store dandelion honey properly

There are a few things to note:

  • Use sterilized jars to bottle the “honey.”
  • Be careful not to pour the dandelion honey into jars that are wet or too cold. Otherwise, the spread will crystallize. Therefore, use well-dried glasses.
  • Protect the “honey” from too much light and heat as well as cold. Store it in the closet or pantry. It can be kept there for about a year.

Introduction: Maple Syrup in Canadian Cuisine

Maple syrup is a staple ingredient in Canadian cuisine, known for its sweet and distinct flavor. It is made from the sap of maple trees, which is collected in the spring and then boiled down to create the thick syrup. Maple syrup is not only used as a topping for pancakes and waffles but is also a versatile ingredient in a variety of sweet and savory dishes.

The History of Maple Syrup in Canada

The Indigenous people of Canada were the first to discover the sweet sap of maple trees and used it for medicinal purposes and as a sweetener. The process of making maple syrup was later adopted by European settlers who arrived in Canada in the 17th century. Since then, maple syrup has become an important part of Canadian culture and cuisine, with Canada being the largest producer of maple syrup in the world.

Production and Grading of Maple Syrup

Maple syrup production varies depending on the region and the type of maple tree being used. Generally, the sap is collected by tapping a hole into the tree and then boiling it down to create the syrup. Maple syrup is graded based on its color and flavor, with lighter colored syrups having a milder taste and darker syrups having a stronger, more robust flavor.

Common Uses of Maple Syrup in Canadian Dishes

Maple syrup is a versatile ingredient in Canadian cuisine and is used in a variety of dishes, both sweet and savory. It is commonly used as a topping for pancakes and waffles, as well as in desserts such as pies, tarts, and ice cream. In savory dishes, maple syrup is often used as a glaze for meats such as ham and salmon, or as a flavoring in sauces and marinades.

Traditional Canadian Dishes with Maple Syrup

Traditional Canadian dishes such as maple baked beans, tourtière, and sugar pie all feature maple syrup as a key ingredient. Maple baked beans are a staple in Quebec cuisine, made with navy beans, bacon, and maple syrup. Tourtière is a meat pie that originated in Quebec and is traditionally made with pork and spices, with a touch of maple syrup added for sweetness. Sugar pie, a dessert that originated in Quebec, is made with a rich filling of brown sugar, butter, and maple syrup.

Modern Canadian Cuisine with Maple Syrup

In recent years, Canadian chefs have been using maple syrup in innovative ways, incorporating it into new and exciting dishes. Maple glazed pork belly, maple roasted brussels sprouts, and maple glazed carrots are just a few examples of how maple syrup is being used in modern Canadian cuisine.

Health Benefits of Maple Syrup

Maple syrup contains antioxidants and minerals such as zinc and manganese, making it a healthier alternative to refined sugar. It also has a lower glycemic index, meaning it doesn’t cause a rapid spike in blood sugar levels.

Conclusion: Maple Syrup, a Canadian Icon

Maple syrup is not just a sweet topping for pancakes, it is an integral part of Canadian culture and cuisine. From traditional dishes to modern creations, maple syrup adds a unique flavor to a variety of dishes and is enjoyed by both Canadians and visitors to the country. Its history and production process make it a truly Canadian icon.

Introduction: What is Basbousa?

Basbousa is a traditional Egyptian dessert that is loved by many in the Middle East and around the world. This dessert is made from semolina, a coarse wheat flour, and sweetened with sugar syrup. Basbousa has a deliciously crumbly texture and is often served with Arabic coffee or tea. The dessert is a staple at festive occasions such as Ramadan, Eid, and weddings.

Ingredients used in making Basbousa

The ingredients used in making Basbousa are simple and can be found in most grocery stores. The main ingredient is semolina, which gives the dessert its signature texture. Other ingredients include sugar, butter, baking powder, yogurt, and milk. Some variations of Basbousa may also include coconut flakes or ground nuts for added texture and flavor.

Preparing the semolina mixture

To prepare the semolina mixture, the dry ingredients (semolina, sugar, and baking powder) are combined and mixed well. Softened butter is then added to the mixture and worked in until it resembles coarse sand. Next, yogurt and milk are added to the mixture and stirred until a thick batter is formed.

Making the sugar syrup

Sugar syrup is a crucial component of Basbousa and is made by dissolving sugar in water and boiling until a thick syrup is formed. The syrup is then flavored with lemon juice or rose water, depending on preference.

Baking the Basbousa

Once the semolina mixture and sugar syrup are prepared, the batter is poured into a baking dish and spread evenly. The dish is then baked in a preheated oven until the Basbousa is golden brown and cooked through.

Soaking the Basbousa in syrup

Once the Basbousa is baked, it is removed from the oven and immediately soaked in the prepared sugar syrup. The syrup is absorbed by the cake, giving it a sweet and moist texture.

Serving and storing Basbousa

Basbousa is traditionally served at room temperature or slightly warmed, with a drizzle of extra sugar syrup on top. Leftovers can be stored in an airtight container at room temperature for up to two days or refrigerated for up to a week.

Conclusion: Tips for making perfect Basbousa

To make the perfect Basbousa, it is important to use fresh and high-quality ingredients. The semolina mixture should be well-mixed and evenly spread in the baking dish. The sugar syrup should be boiled until it reaches a thick consistency and should be poured over the Basbousa immediately after baking. Over-soaking the cake can result in a mushy texture, so it’s essential to monitor the soaking time carefully. With the right ingredients and techniques, making delicious Basbousa at home is easy and enjoyable.

What are Anzac Biscuits?

Anzac biscuits are a traditional Australian biscuit that has its roots in the First World War. The biscuits were originally baked by the wives and mothers of the Australian and New Zealand soldiers who were fighting in Gallipoli. The biscuits are made from a combination of oats, flour, coconut, and golden syrup, and are known for their hard texture and long shelf life.

Ingredients and Recipe for Anzac Biscuits

To make Anzac biscuits, you will need the following ingredients:

  • 1 cup of rolled oats
  • 1 cup of plain flour
  • 1 cup of desiccated coconut
  • ¾ cup of brown sugar
  • 125g of butter
  • 2 tablespoons of golden syrup
  • 1 teaspoon of bicarbonate of soda
  • 2 tablespoons of boiling water

To make the biscuits, preheat your oven to 160°C and line a baking tray with baking paper. In a bowl, combine the rolled oats, flour, coconut, and brown sugar. In a saucepan, melt the butter and golden syrup together over a low heat. In a small bowl, mix the bicarbonate of soda with the boiling water, and then add it to the melted butter and golden syrup mixture. Pour the wet ingredients into the dry ingredients and mix well. Roll the mixture into balls and place them on the baking tray, flattening them slightly. Bake for 12-15 minutes or until golden brown.

History and Significance of Anzac Biscuits

Anzac biscuits are named after the Australian and New Zealand Army Corps (ANZAC) who fought in the Gallipoli campaign of the First World War. The biscuits were originally known as “Soldier’s Biscuits” as they were made by the women back home and sent to the soldiers as a form of care package. The biscuits were designed to have a long shelf life and survive the journey to Gallipoli. Today, Anzac biscuits are a symbol of remembrance for those who have served in the armed forces and are commonly eaten on Anzac Day, which is a national day of remembrance in Australia and New Zealand.

If you want to make your own cough syrup, you should read our tips. In this way, a very good and helpful juice can be made. We have collected 4 ways to make your own cough syrup.

Cough syrup from the pharmacy usually also has some side effects. Therefore, more and more home remedies are in demand. You can make a good cough syrup yourself with our tips and know exactly what it contains.

Cough syrup is sometimes a must

Cough syrup is sometimes just necessary. Because often a persistent cough torments. The mucus doesn’t want to come off and you can’t relax. Of course, you could also simply get a cough syrup from the pharmacy, but this is usually associated with side effects. This is not the case with natural remedies and home remedies unless you are allergic to a substance. Even our grandmothers made their own cough syrup so that the problem quickly resolved itself.

For a time conventional medicine was heavily relied upon, but now we are in a state of transition. People understand more and more that you can try home remedies first or that normal medicine must be taken in any case for certain diseases. But if you have a cough, you can first try to fight it with homemade cough syrup. If the homemade juice doesn’t help, you can always go to the doctor and rely on conventional medicine. Especially with a cough that is just beginning, homemade cough syrup is often a great help.

1) Make your own cough syrup with onion juice

A good home remedy for dry cough is onion juice. Onion juice is very popular, even with children. With this, you cut onions into pieces or slices and put them in a container that can be closed. A good portion of sugar is added to this and the whole thing is stirred again and again. As soon as a liquid settles on the floor, take a teaspoon of it every half hour. The cough syrup should be closed so that the refrigerator does not start to take on the smell. Onions are anti-inflammatory, loosen mucus quite well and calm the urge to cough. Anyone who tries it will quickly be amazed.

2) Thyme, Peppermint, and Sage

A lot can also be achieved with thyme, peppermint, and sage. This is boiled with a liter of water, a handful of the herbs at a time, then the tea is strained and the brew is additionally sweetened with honey. Honey has a calming effect on the cough. You drink the tea over the tea with small sips and you will see that the special cough syrup works very well.

3) Own cough syrup with anise

If you like anise, you have another option for a good cough syrup. The anise is crushed and three teaspoons of it are mixed with 2-3 teaspoons of thyme. Half a liter of water is poured over the whole thing. After 5 minutes of steeping time, lemon and honey are added to the brew. Take this now and then throughout the day, preferably a teaspoon every hour, and the cough should stop.

4) Homemade cough syrup with black radish

Black radish can also be used for homemade cough syrup. This is halved and hollowed out. Then the two hollowed-out parts are filled with honey. This must now steep for 12 hours, ideally in the refrigerator in summer. After the 12 hours, you then take a tablespoon of the cough syrup daily. This is stored in the refrigerator and should bring an improvement after 2 days. Few people take this cough syrup due to the fact that it has to stand for so long before it can be used. But it is an effective home remedy for coughs.

Are sugar substitutes such as agave syrup, maple syrup, honey or stevia really healthier and more ecological? What about zero calorie sugar substitutes? The answers will surprise some…

Sugar appears to be the new enemy in food. Many people are increasingly opting for foods with as little “sugar” as possible – regardless of where the total sugar content of the food actually comes from. People prefer to choose products that contain supposedly healthier alternatives instead of sugar.

When looking for a sugar substitute, ask yourself why you want to substitute sugar. When it comes to calories, low-calorie or no-calorie sweeteners are the best choices. But it is usually healthier to simply change your diet to fewer sweets if you have this wish. When it comes to taste, honey and syrups are the best alternatives to sugar.

Agave syrup and agave syrup
honey as a sugar substitute
maple syrup
coconut blossom sugar
rice syrup
Stevia aka sweet cabbage
xylitol and birch sugar
erythritol