Tag

tender

Browsing

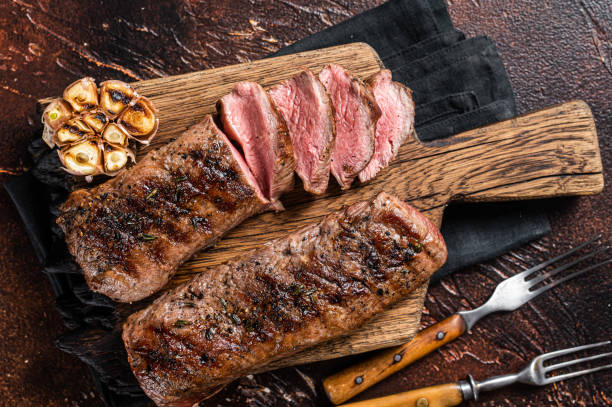
For many, steak is chicken, pork, lamb, fried in a pan or charcoal. However, we need just beef – juicy, with a rich taste. Everything else is an attempt to replace marbled meat.

By the way, how do you get it? To do this, the bulls are fed their fill for 4-6 months. How long the animal will have a feast for the whole world depends on the category that is later assigned to the carcasses. For example, prime is a real benchmark from which great steaks are made. The most popular product is chosen, followed by select. Most restaurateurs use choice – this is the best option: it is moderately greasy, moderately tender.

  1. For cooking, you need to take only fresh meat. It should be chilled. Leave it to lie down just before grilling to warm it up to room temperature.
  2. We remind you: the dish in question can only be made from beef. Other options (lamb, pork, chicken, fish) can also be grilled, but this does not make them a steak.
  3. The ideal thickness for portions is 2.5 to 4 cm.
  4. If you have uncut marbled meat, it doesn’t matter. It must be cut strictly across the fibers.
  5. Tender pieces are prepared from the back muscles – the least loaded.

Introduction: Discover the Perfect Recipe for Salt and Pepper Squid

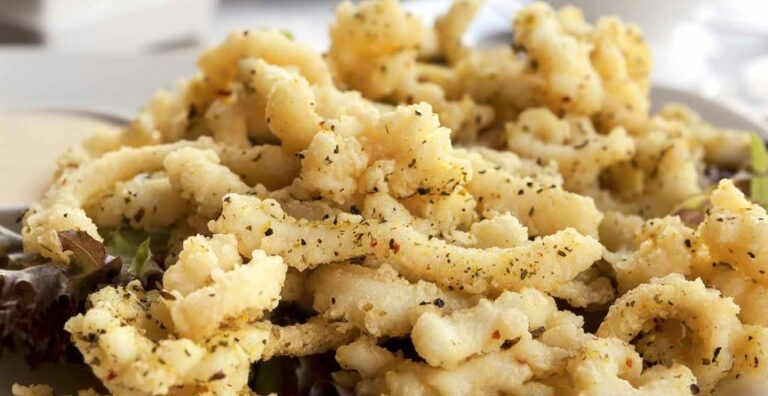
Succulent and tender, salt and pepper squid is a popular Chinese seafood dish that has made its way to restaurants all around the world. The dish is characterized by crispy, golden-brown squid rings seasoned with salt and pepper. This delectable treat is perfect as an appetizer or as a main dish with steamed rice.

Making salt and pepper squid is not as difficult as it may seem. With the right ingredients and a little bit of patience, you too can recreate this restaurant-style dish at home. In this article, we will take you through the steps to cook up a batch of crispy and flavorful salt and pepper squid.

Ingredients and Preparation: Coat Squid Rings in a Seasoned Flour Mixture for Best Results

The first step in making salt and pepper squid is to gather all the necessary ingredients. You will need 500 grams of cleaned squid rings, 1 cup of all-purpose flour, 1 tablespoon of salt, 1 tablespoon of black pepper, and 1 teaspoon of five-spice powder. You will also need vegetable oil for deep-frying.

To prepare the squid rings, first, rinse them under cold water and pat them dry with a paper towel. In a separate bowl, mix the flour, salt, black pepper, and five-spice powder. Coat the squid rings in the flour mixture, making sure each ring is evenly coated.

Cooking Instructions: Achieve Crispy and Golden Squid Rings with Deep-Frying Method

To cook the squid rings, heat up a pot of vegetable oil to 180°C (350°F). Carefully drop the squid rings into the hot oil, making sure not to overcrowd the pot. Fry the squid rings for 2-3 minutes until they are crispy and golden brown.

Using a slotted spoon, remove the squid rings from the pot and place them on a paper towel to drain excess oil. Season the squid rings with a little bit of extra salt and black pepper, and serve them hot with a side of sweet chili sauce.

In conclusion, salt and pepper squid is a delicious and easy-to-make recipe that is perfect for seafood lovers. By following these simple steps, you can achieve crispy and golden-brown squid rings every time. So, fire up that stove and get ready to impress your family and friends with your very own salt and pepper squid!

Want to grill spare ribs but don’t have time to turn them over and over for 3-4 hours over low heat? Why not try this recipe, in which the spare ribs are first cooked in a spicy broth. You have never eaten more tender spare ribs – I promise!

Spare ribs are something delicious: you can nibble on the crispy ribs to your heart’s content until your fingers and face are really smeared with barbecue marinade. Because eating spare ribs with a knife and fork is a no-no!

Along with pulled pork and beef brisket (breast of beef), the spicy ribs are part of the “Holy Trinity” of classic American barbecues. Traditionally, spare ribs are cooked over low heat for several hours, turning them over and over again. This allows the fat to spread out slowly, making the meat tender and crispy. Unfortunately, not everyone has the patience of the American BBQ forefathers and grilling spare ribs often turns into a fat-soaked, chewy, and burnt affair.

Our recipe suits all friends of quick barbecue enjoyment because the ribs are first pre-cooked in a seasoning broth for half an hour. The pre-cooking can also be done a day before the BBQ. After that, 15 to 20 minutes on the grill is enough! A positive side effect: pre-cooking the ribs makes them less greasy.

Grilling spare ribs: the ingredients

  • 2 kg pork rib ready to cook
  • 2 onions
  • 2 cloves of garlic
  • 1 tbsp sea salt
  • 2 tablespoons oil
  • 150 ml dark beer
  • 2 tbsp ketchup
  • 2 tbsp tomato paste
  • 1 teaspoon of liquid honey
  • 1 tbsp Dijon mustard
  • 1 tbsp Worcestershire sauce
  • 1 tbsp paprika powder
  • Salt
  • Tabasco
  • pepper from the grinder

Grilling spare ribs: That’s how it’s done

  1. Wash the spareribs, pat dry, place in a saucepan, pour over enough water to cover, and bring to a boil. Peel and onion and a clove of garlic, cut in half and add to the water along with a level tablespoon of sea salt.
  2. Let simmer for about 30 minutes.
  3. Put the oil in a pan, peel, and dice the remaining onion, and sweat in the oil until translucent. Peel and press the garlic. Pour on the beer, let it reduce a little, and mix in a bowl with the ketchup, tomato paste, honey, mustard, and Worcestershire sauce. Add the paprika powder and season with salt, Tabasco, and pepper.
  4. Remove the spareribs from the broth and place them on a hot grill. Brush with the beer sauce and grill for 15 to 20 minutes, turning occasionally. Keep brushing and turning with the marinade.
  5. Divide the spare ribs into individual ribs and serve them arranged on plates. This goes well with coleslaw.

Cooking meat and then keeping it warm until it is served has long been considered the best option for a tasty and juicy fillet in gastronomy. However, a new study refutes this assumption: According to the latest findings, the meat is actually rather dry and tough after this method of preparation. The magic word for preparing tender and juicy pork is sous-vide cooking – i.e. under a vacuum.

The study

Researchers at the Max Planck Institute for Polymer Research in Mainz are now investigating the changes in the protein structure of meat when it is vacuum cooked – also known as sous vide. The study tested the effects of cooking time and different cooking temperatures on the water content and protein structure of the meat. These are the first research results with a time span of ten minutes to 48 hours and a temperature variance of 45 °C to 74 °C.

The result

The loss of meat juice increases with increasing temperature and cooking time. The evaluation of the study shows that the meat loses a large part of its water content above 60 °C. This makes it dry, tough, and hard – not the best result for meat lovers. Only precise control of the cooking temperature makes it possible to circumvent these properties.

The best way to do this is with sous-vide cooking: the food to be processed is placed in a plastic bag and packed airtight. The food is then cooked in a water bath at the exact temperature specified.

It’s going to be tender and juicy

Cooking meat sous vide changes its protein structure in a controlled manner. This keeps the meat tender and juicy. For the best pork tenderloin on a medium-sized cut, cook it sous vide for 20 minutes at 55ºC.