Tag

this

Browsing

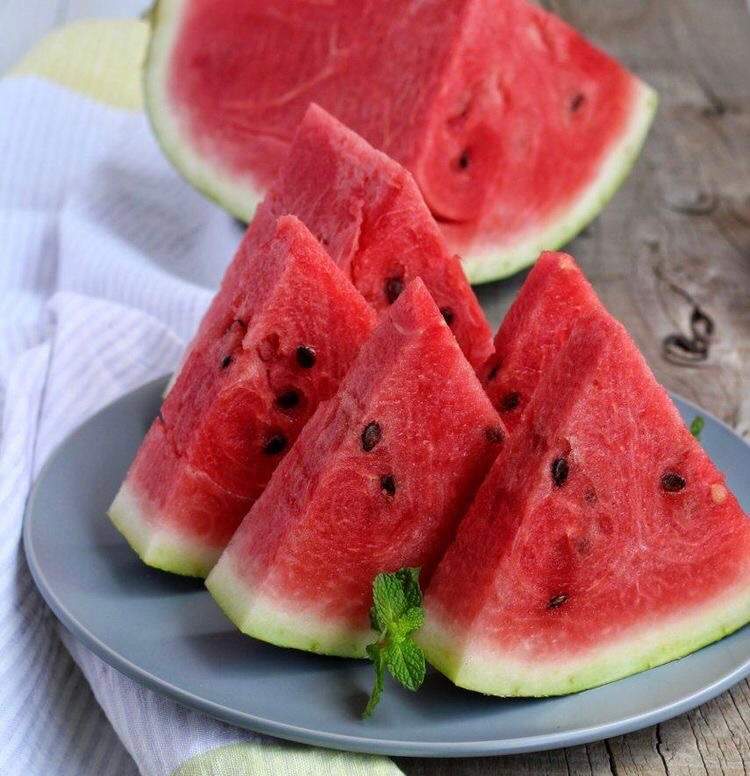
Zavtrák is the name of the traditional Russian breakfast. If you like it hearty, this is the right place for you in this country, because things get really rich here early in the morning.

Milk porridge (kascha), sausages, fried potatoes, scrambled eggs, pancakes (blini), quark pancakes (syrniki), bread, butter, jam, kefir and much more are what Russians love to eat with their morning meal. In this way, despite the harsh climate, they are already equipped with enough energy for the day in the morning.

These Russian specialties are very popular at breakfast: a national dish called kasha, a porridge made with milk, mostly made from buckwheat, but also made from oats, barley or rye, and blini – also affectionately called blinchiki – the traditional Russian pancakes.

For all lovers of hearty, hearty cuisine, this delicious breakfast offers a really tasty and energetic start to the day.

Food culture in Russia

In general, Russian cuisine is very diverse: this is because in this large country different ethnic groups live together and mix their traditions. In addition, the food culture in the city differs greatly from that in rural areas: Most people in the country eat richer and heartier food, while people in the city are also influenced by international eating habits and eat a little more “globalized”.

How do you prepare a Russian breakfast?

get hungry and want to prepare a breakfast like in Russia? Then let’s see together how to do it and what ingredients you need for it.

The first thing you should do is open your fridge and see what’s left over from yesterday, because Russians often have leftovers from the day before for breakfast, such as rice, noodles or fried potatoes.

Now set up a hearty sausage and cheese platter, warm up a few sausages and prepare the eggs – either scrambled or fried, just as you like. Don’t forget the bread: white bread is fine, although the Russians themselves prefer black bread. Just like in Russia, your morning meal should not be without various dairy products such as cottage cheese, kefir and sour cream.

That was the easiest part, now comes the preparation of the Russian kasha (milk porridge) and the blini (Russian pancakes). For this we give you the following breakfast recipes:

1. Recipe kasha – Russian milk porridge:

Ingredients (2 people)
75 grams of buckwheat
250 ml milk (1.5% fat)
1 pinch of salt
2 tbsp poppy seeds
As you like: some sugar, butter, jam, fruit or meat preparation

preparation

Briefly toast the buckwheat in a saucepan and add the cold milk, salt and poppy seeds. Let the porridge cook on low heat for about 10 minutes. Stir the kasha from time to time.
Russians usually serve their kasha with sugar and melted butter, more often with fruit, or sometimes with meat dishes for a savory version.

2. Recipe Blini- Russian pancakes:

Ingredients (2 people)
150 grams of wheat flour
12 grams of yeast
250ml milk
12 grams of butter
1 egg
50 ml cream
1 tsp sugar
½ tsp salt
some oil
At will: jam, sour cream

preparation

Dissolve the yeast in the milk and add half the flour and the melted butter. Leave the mixture to rest for about 30 minutes. Now separate the egg and mix the yolk with the sugar in a bowl. Now whip the cream and then the egg white until stiff. Then fold it into the whipped cream. Stir the dough and add the remaining flour, salt, egg yolks with sugar while continuing to mix. Finally, add the cream and egg white mixture and let the dough rest for a few hours. Now heat some oil in the pan, add some batter and fry your Russian blinis on both sides.
In Russia, blinis are either filled with jam or served folded, then dipped in sour cream.

Have you ever made coffee with the Chemex? No? No problem, we’ll explain how you can use the glass filter carafe to make a particularly clear and aromatic coffee.

What is a Chemex?

The Chemex is a traditional way of preparing filter coffee. The German chemist Peter Schlumbohm invented the filter carafe in the mid-20th century by building a glass funnel onto a simple Erlenmeyer flask. You may remember the latter from your school lessons, because the Erlenmeyer flask is normally used for chemical experiments. Schlumbohm traveled to the United States to sell patents for other inventions there. In 1941 Schlumbohm registered the patent for the invented filter carafe. To this day, the Chemex and its special filters are manufactured by the Chemex Corporation in Chicopee (Massachusetts, USA) and distributed worldwide.

At the time, Schlumbohm was probably not aware that he had invented a real cult device. The shape of the machine is reminiscent of an hourglass. The heat-resistant wooden belt that connects the two pieces of glass and also serves as a handle is striking.

What is special about a Chemex?

In 1958, thanks to its design, the Chemex even made it into the New York Metropolitan Museum of Modern Art, one of the most important art museums in the world, and it is still there today. However, the long-standing popularity of the machine can be explained above all with the consistently high-quality coffee result. Its secret lies in the extra thick coffee filter, in which oils, suspended matter or sediments are retained. This gives you a very pure and tasty coffee without a lot of bitter substances. In addition, the filter is shaped like a cone, which means that the coffee is extracted very evenly with this pour-over method. You usually have to buy the coffee filters separately.

How to make coffee with a Chemex

Preparation with a Chemex is quick and easy. Nevertheless, it is important that you follow the individual steps in order to be able to enjoy the full coffee aroma at the end. This is the pour-over method with a filter, which we will now present in more detail.

Ingredients needed for one liter:

60 grams of ground coffee with a medium to coarse grind
1 L of water with a temperature of 96 degrees

Step 1: Heat the water

The ideal water temperature is about 96 degrees. If you don’t have a thermometer, heat water in a kettle and then wait two minutes. The water is then almost at the perfect temperature.

Step 2: Unfold and insert the filter

When you unfold the filter, you get a page with three layers of paper. It is very important that this side is on the Chemex spout. This makes the filter paper more stable on this side and prevents it from getting stuck in the spout during extraction and preventing air from escaping from the carafe.

Step 3: Rinse the filter

Pour hot water into the filter without coffee in it. In this way, you already warm up the filter and can use the water that has passed through to remove any residue from previous preparations. At the same time, the inherent odor of the filter disappears. Then throw away the water that has run through. Then reinsert the filter.

Step 4: grind coffee

Grind the coffee on a medium to coarse setting. After grinding, the coffee should resemble the structure of sea salt.

In general, the more coffee you use, the coarser the grind should be.

Maybe try a little bit here. You have found the best result when the extraction of the coffee, i.e. the process in which the coffee runs through the filter, takes between four and five minutes.

Step 5: Start blooming process

Put the appropriate amount of coffee  in the filter and add some water. The amount of water depends on the amount of coffee. For blooming, you should always take twice as much water as coffee. It is advisable to add the water slowly and in circles from the inside out. The ground coffee should be completely covered with water. Now wait about 40-45 seconds. During this time, the remaining CO2 escapes and the coffee soaks up the water. By allowing the CO2 to escape, blooming ensures a more even extraction and a more stable coffee bed.

Step 6: Add water

Slowly pour in the rest of the water in a circular motion. There should be at least an inch of space between the water and the top of the funnel. Avoid pouring water directly onto the filter. In this case, the water would pull through the paper and not come into contact with the coffee. You may have to refill several times.
If the coffee has seeped into the lower part of the Chemex, remove the filter. The Chemex coffee is ready!

To keep peppers fresh and crisp for a long time, you can freeze the delicious vegetables. Here we explain what you should pay attention to and how to do it without plastic.

Freezing peppers: how it works

Whether as a side dish in a pasta sauce or as a healthy snack in between: paprika can be used in many ways. However, you should use up the crunchy vegetables within a few days. If you want to store peppers longer, you can freeze them.

Prep: Unlike other vegetables, you don’t need to blanch peppers beforehand. You don’t have to skin the peppers either.

This is how easy it is to freeze peppers:

Wash the peppers thoroughly.
Cut them into smaller pieces. For example, you can cut the peppers lengthwise into thin strips and then dice them further.
Put the chunks of pepper in a small tin and store them in the freezer.

Alternatives to plastic

Freezing peppers or other vegetables in plastic bags is often recommended. However, we recommend avoiding plastic as far as possible. There are some greener alternatives to plastic freezer bags:

You can use lunch boxes made of wood or glass several times.
Stainless steel cans are also suitable for freezing vegetables.
You can also freeze peppers in glasses (e.g. washed jam jars).
You can even freeze peppers in cotton or jute bags. You should first pat them as dry as possible with a kitchen towel.
By the way: A great alternative to freezing is to soak peppers in oil or vinegar. This way the vegetables will last longer.


Creamy coffee just like in Bella Italia: With the right recipe and professional know-how, you can make your own cappuccino at home, the taste of which will immediately take you back to your last holiday in Italy.

Warming rays of sunshine, the hustle and bustle on the piazza and a cappuccino with perfect milk foam topping – the ingredients for a relaxing holiday! At least the luxurious drink can easily be taken home. Because the recipe for classic Italian cappuccino is very simple: it consists of equal parts espresso, milk and milk froth.

Already knew?

Italians only drink cappuccino in the morning. Due to its high milk content, it is considered to be stomach-filling. In Germany, on the other hand, we enjoy it all day long: with a long breakfast or in the afternoon with pastries.

It all comes down to the beans

First things first: The espresso beans should be of the best quality so that the cappuccino really tastes as good as it does on holiday. You are guaranteed to be on the right track with the high-quality coffees from Mamis Caffè. Which variety you choose is up to your personal preferences.

Gran Crema impresses with the fine crema of the Arabica beans from Brazil, which settles perfectly on the milk.
The full-bodied espresso crema has a soft, intense crema, which unfolds its aroma in the interplay of Arabica beans with a strong Robusta note.
The sweet Amabile with its generous, soft body brings together seductive Dolce Vita with aromatic notes from India and South America.
Dolce Vita already carries the pleasure in the name. Sweet and with a certain spice, Arabica and Robusta beans bring the Italian attitude to life into your cup.
The smooth Deca Coffee is suitable for a delicious decaffeinated cappuccino variant.

What else makes a good cappuccino? That’s right: a creamy, dense foam. For this to succeed, you need milk with a high fat content. Whole milk with a fat content of 3.5 percent is ideal. Without fat, the foam will be watery and won’t stay solid.

All good things come in threes: the cappuccino recipe

Everything together? Now it depends on the mixing ratio. A cup of cappuccino consists of:

⅓ espresso
⅓ warm milk
⅓ milk froth.
For this you need:

Espresso (approx. 25 – 30 milliliters)
milk (approx. 100 – 150 milliliters)

Cappuccino preparation: start with the espresso

Professionals brew their espresso in a portafilter machine. Such a high-end coffee machine has its price and requires a relatively large amount of effort to prepare. However, if you regularly enjoy cappuccino at barista level, the investment can be worth it. You like it less complicated? A small espresso pot for the stove, a so-called Bialetti, also does a good job. The espresso is quick and easy with a fully automatic coffee machine, a pad or capsule machine.

Of course, you know best which method best suits your everyday life. At Mamis Caffè you will find your favorite variety for every type of preparation: as a whole bean, ground coffee, pad or capsule.

It’s all in the milk: this is how the perfect milk froth succeeds

In order to produce a stable milk froth, it is important that the milk is not too hot. As the owner of a portafilter machine with a steam nozzle, you are on the safe side. Here you use hot steam to heat milk in a jug and froth it at the same time. It’s even easier with a fully automatic machine. Most models conjure up a decent amount of milk foam at the touch of a button.

Alternatively, simply heat the milk on the stove. A temperature below 65 degrees is ideal, it should never boil.

You can then either froth the warm milk with a special milk frother or use a hand blender or a whisk. What actually works: a sufficiently large, empty mason jar. Pour in the warm milk and shake vigorously: a fine froth forms.

For your cappuccino you need milk froth, milk and espresso in equal parts. Froth until the volume of the milk has roughly doubled.

Expert tip: Professional baristas briefly knock the pot onto the table after heating the milk. In this way, unwanted bubbles escape from the milk and the froth becomes more even.

The final touch: Serve the cappuccino

Once you have prepared your espresso, first pour it into a preheated cup. Now it’s time for the milk, which you pour into the cup with a flourish. First hold back the foam with a spoon. You use it in the last step to crown your drink with it.

Et voilà: the homemade cappuccino is ready and tastes at least as good as in your favorite café in Milan or Rome.

Art in coffee: create latte art like a barista

Professionals refine the cappuccino with artistic motifs in the milk froth, the so-called latte art. The patterns in the crema are created when you pour the milk onto the espresso with a lot of energy and small, targeted movements. This requires finesse and practice. Would you like to surprise your guests with artistic masterpieces on milk froth? Most major cities have barista classes that will teach you the basics in just a few hours.

Cappuccino – the popular coffee and milk drink from Italy

A classic cappuccino consists of an espresso and milk and milk froth in equal parts. While cappuccino is drunk throughout the day in Germany, things are different in Italy. In the homeland of cappuccino, it is only consumed in the morning because it is considered to fill the stomach due to its milk content. From midday, the Italians rely on espresso, which awakens the spirits, makes you lively and is easier to digest.

In addition to cappuccino, latte macchiato is a popular drink in both Italy and Germany. Both coffee specialties are prepared with milk, but they look different and taste different.

The difference between cappuccino, latte macchiato and milk coffee

The mixing proportions between coffee and milk in a cappuccino are 1/3 espresso, which is poured into the cup, and 2/3 lightly frothed warm milk and milk froth are poured over it. The typical crema of the espresso settles on the milk froth of the cappuccino. The look of the cappuccino is white on the surface with a golden-brown crema, which is also often drawn into the milk froth with patterns using a spoon. There are now even competitions in which the most beautiful patterns that can be conjured up with the crema in the milk foam are evaluated. This can be leaves, hearts or even faces. A cappuccino is usually served in a bulbous cup.

With a latte macchiato, three layers can be seen in the tall glass. First, milk is poured into the glass, then the milk froth is poured over it. Finally, the espresso is slowly poured in through the milk froth. The layers are created by the air contained in the milk froth, which remains on the surface. The espresso stays on top of the milk, which is at the bottom of the glass, because it has a higher temperature and density.

Unlike cappuccino and latte macchiato, a classic latte does not use espresso to prepare it, but normal coffee mixed in equal parts with warm milk.

How to properly prepare cappuccino

Classic Italian cappuccino is now also at home in Germany and the times when coffee was whipped cream and then called cappuccino are long gone.

To prepare a good cappuccino, a metal jug is filled with cold milk. This is heated with the hot water nozzle. Care should be taken to ensure that the nozzle remains below the surface while the milk is being heated. If this is neglected, the milk may splatter.

The milk is frothed until it has doubled its volume in the jug. It is often observed with professional baristas that the jug is briefly knocked onto the table after the milk has been heated. This is done to get unwanted bubbles out of the milk.

The higher the fat content of the milk, the creamier and denser the foam. Whole milk or semi-skimmed milk is ideal for cappuccino. Almost fat-free milk is not suitable because the foam does not become firm and remains watery.

Of course, you can also prepare cappuccino at home in fully automatic coffee machines that already have an integrated milk container. Here the milk is frothed at the push of a button and automatically applied directly to the coffee. With fully automatic coffee machines, always make sure to clean the milk nozzle or the milk hose so that they do not stick.

You can also prepare cappuccino with pads and capsules. You either froth the milk separately or you have a device in which the appropriate milk capsules can be used to prepare coffee and milk drinks.

In summer, watermelons are a refreshing dessert. You don’t have to throw away the shell, you can use it. We’ll show you what else you can use watermelon peel for.

Of course, many people think of the fruity-sweet and refreshing watermelon flesh first when they think of watermelons. In fact, all parts of the watermelon are edible, including the seeds and the skin. There are many easy ways you can use watermelon rind in delicious recipes. We introduce them to you below.

Use watermelon peel quickly

Do you have some leftover peel and you are cooking anyway? Then try one of these ideas:

1. Grated watermelon peel

The simplest method: grate the zest and mix into salads. For example, you can spice up a coleslaw with watermelon peel or add it to a cucumber and dill salad. Or you mix the finely grated zest with cold soups.

Tip: Roasted watermelon seeds are a good topping for soups and salads.

2. Smoothie with watermelon peel

The next time you make a watermelon smoothie (or any other fruity blended drink), just throw the watermelon rind into the blender. So you don’t have to throw away the leftovers, but give the smoothie additional fiber.

Tip: How about a breakfast smoothie bowl or summer smoothies with regional ingredients? Both recipes are good for using watermelon peel in an uncomplicated way.

Recipe for pickled watermelon rind

The watermelon peel is also welcome to take the leading role in some recipes. In other countries this is nothing unusual. For example, in the United States, pickled or candied watermelon peels are common. For example, you can pickle the peel of the watermelon in a sweet and sour way.

For about two to three glasses, each with 400 milliliters of pickled watermelon peel, you need the following ingredients:

1 large watermelon
3 tbsp salt
1 organic lemon or 1 organic lime
1/2 l balsamic vinegar
750g brown sugar
1-2 cm fresh ginger
2-3 cinnamon sticks
8 cloves
8 allspice corns
Now follow these steps:

Eighth the watermelon. Remove the red pulp. There should now be about an inch of peel left.
Remove the dark green, bitter outer skin with a sharp knife or vegetable peeler.
Cut the peel into bite-sized pieces.
Mix the zest with the salt and the juice of half a lemon and leave to stand under a kitchen towel overnight.
After the brewing time, wash the bowl off briefly.
Put the bowl in a saucepan. Fill it with water until the bowl is just covered.
Bring everything to the boil and simmer gently for 15 minutes. Strain the peel and catch the water.
Finely slice the ginger and the other half of the lemon. Coarsely grind the cinnamon, cloves, and allspice.
Mix a quarter of the cooking liquid with the balsamic vinegar and sugar, add the spices and bring to the boil.
Add the melon cubes and let the brew simmer over low heat for about 50 minutes. The skins should now be translucent.
Pour the hot mixture into sterilized jars and seal immediately. Let them rest for at least two to three weeks. Serve the pickled watermelon peels as a sweet and sour side dish, for example.

Watermelon rind jam recipe

You can also use the watermelon peel to make jam.

For about six to seven jam jars with a capacity of 250 milliliters you need the following ingredients:

1 kg watermelon peel
2.5 liters of water
200 ml apple cider vinegar
1 lemon
1 kg preserving sugar
1 packet of vanilla sugar
How to make jam from watermelon rind:

Eighth the watermelon. Remove the red pulp. There should now be about an inch of peel left.
Remove the dark green, bitter outer skin with a sharp knife or vegetable peeler.
Cut the peel into bite-sized pieces.
Add two liters of water and 200 milliliters of apple cider vinegar and let everything boil for two hours over medium heat.
After cooking, drain the shells and rinse them in cold water.
Put the peels back in the saucepan, add half a liter of water, the juice of the lemon, a kilo of preserving sugar and a sachet of vanilla sugar. Cook everything until the mass has thickened. You can now puree them completely or partially.
Pour the hot jam into jars. Close the jam jars and turn them upside down for five minutes. Wrap the jars in a kitchen towel and let them sit for half a day.

2 good reasons to use watermelon peel

1. Watermelon rind contains many nutrients

There are many valuable ingredients in the watermelon peel: it contains a lot of fiber that quickly fills you up. It also contains amino acids, which support the body in muscle building, among other things, as well as lots of vitamin A.

There is still a white layer between the green outer skin and the red flesh of the fruit, which is considered to be one of the best sources of the amino acid citrulline. The body converts citrulline into the amino acid arginine, which is said to dilate blood vessels and thereby improve blood flow.

According to US researchers, arginine can increase male potency. Whether you can produce this effect by eating watermelon, however, is considered controversial. According to critics, the concentration of amino acids is too low.

2. Watermelon rind is not food waste

Food waste is a big problem of our time. According to the consumer center, 12 million tons of food end up in the garbage every year in Germany alone. Much of what we throw in the bin is actually still edible.

If we waste food, this also has disadvantages for the environment: Because to produce food you need energy, water and other raw materials. If we consume too much of it, our ecological footprint increases – we use up the resources that should be available to future generations.

The climate is also negatively influenced by food waste. For example, according to the consumer association, the annual food waste in the EU causes the same amount of CO2 as the entire Netherlands.

34 percent of the food waste in households consists of fruit and vegetables. If you start recycling peels and other “waste” items, you too can eliminate waste and reduce litter.

Buy organic watermelons

If you want to use the peel, you should make sure that the melon comes from controlled organic cultivation. Conventional watermelons are usually sprayed with pesticides. In China, for example, forchlorfenuron is used as a growth regulator. (More information: Watermelon: The summer fruit really is that healthy)

Pesticides not only harm pests but also other animals and insects – in this respect they threaten biodiversity. In addition, many of the agents are suspected of being harmful to health – glyphosate is just one of many examples. Even after washing, there could still be residues of pesticides on the bowl. Organic watermelons, on the other hand, are not treated with chemical pesticides.

It has been the trend in hip cafés and bars for some time: the flat white – translated as “flat white”. This coffee specialty is something like the little Australian cousin of the Italian cappuccino. But what exactly is a flat white – and how is it prepared? Find out here.

The little difference between flat white and cappuccino

Although the delicious coffee specialty only recently came to Europe, the Flat White is actually a child of the 1980s. It was at this time that the recipe first spread to Australia and New Zealand. Basically, it’s a version of the world-famous Italian cappuccino, but with its own character.

The main difference between flat white and cappuccino is already evident in the name: the “flat white” contains a lower proportion of milk foam. It is also more liquid and homogeneous overall than the half-solid, half-liquid froth of the cappuccino. This is because, unlike cappuccino, the milk is frothed with just a little air.

This so-called micro-foam should be a maximum of 5 mm high for Flat White. Accordingly, the almost liquid foam of the “flat white” ends with the rim of the cup. With a cappuccino, on the other hand, it typically curves up a bit.

What the flat white lacks in foam, it makes up for in espresso: instead of a simple one, like a cappuccino, it has an espresso doppio intus and accordingly contains twice the amount of caffeine. The right drink for everyone who likes milk froth but likes to have a little more punch in the cup.

Make Flat White yourself: The recipe

You need:

Coffee machine with steam nozzle for milk froth (preferably a portafilter machine or fully automatic machine)
milk can
cappuccino cup
50ml espresso
130 ml whole milk
That’s how it works:

Warm up the cappuccino cup.
Prepare double espresso in the cup.
Make milk froth: Pour milk into the jug and use the steam nozzle to prepare the froth. Tip: The typical “hissing” should only be heard briefly when foaming, so that not too much air gets into the foam and it remains nice and fine-pored and creamy. Swirl the jug under the nozzle for an even consistency.
Pour the milk froth onto the espresso: the froth should have a consistency that blends well with the espresso and is flush with the rim of the cup.
Tip: Want to impress your guests? Try your hand at latte art and conjure up a work of art out of milk foam and crema on the top layer of the flat white.

You can prepare horseradish in the form of dips, sauces and soups, for example. If you bought too much or had a particularly rich harvest, horseradish can also be easily preserved.

Horseradish is a particularly hot type of radish that is in season in Germany between October and January. The horseradish root is considered healthy because it is rich in vitamin C and is said to have an antibacterial effect due to its mustard oils. At the same time, the mustard oils ensure the characteristic spiciness of horseradish, which gives various dishes their special flavor.

In this article, we will show you how you can prepare horseradish and how best to store it.

Cook horseradish: This is how you use the root

Due to its sharpness, horseradish is hardly edible on its own. In the kitchen, it is therefore used in small amounts to flavor sauces and similar dishes – often in combination with cream or other ingredients that reduce the heat somewhat.

The classic horseradish sauce is traditionally often served with meat or fish, but it also goes well with potatoes, dumplings, vegetables or vegetarian patties. You can also prepare salad dressings, dips or soups with horseradish.

If you are particularly fond of horseradish, you can plant it in your own garden and harvest the roots yourself. You can find detailed instructions on how to do this in our guides on harvesting and planting horseradish. If you buy the horseradish at the weekly market or in the shop, you should do so in season if possible and pay attention to organic quality. In this way you avoid unnecessarily long transport routes and residues of harmful pesticides.

When cooking, you often only need small amounts of horseradish root. Because of this, it’s easy to end up buying or harvesting more horseradish than you can cook. So that you don’t have to throw away the excess horseradish, you can make it last longer. We’ll show you a simple method to do this.

Preserve horseradish: Simple method with salt and vinegar

Ingredients:

200 g fresh horseradish
1 tsp salt
1 squirt vinegar (plus more for topping if needed)

Directions:

Wash the horseradish, peel it and grate it finely.
Mix the grated horseradish with a teaspoon of salt and a dash of vinegar. Important: Make sure that the vinegar is evenly distributed so that the entire horseradish mixture can be preserved. Otherwise it will quickly turn gray later.
Pour the mixture into a sterilized jar, covering the surface with a little extra vinegar if necessary. Then close the jar tightly.
It is best to keep the pickled horseradish in the fridge. Unopened, it will keep for at least four weeks. Just like with fresh horseradish, you can use it to prepare various horseradish dishes. Once opened, you should use the jar within a few days if possible.

By the way: As an alternative to this method, you can also preserve horseradish by freezing it. This is possible with both the unpeeled whole root and with grated horseradish, which you should mix with a little vinegar or lemon juice before freezing. The horseradish will keep in the freezer for about half a year. However, it may lose some of its flavor when frozen.

A cup of macchiato promises coffee enjoyment like in Bella Italia. But what is the difference between an espresso macchiato and a latte macchiato – and how can the specialties be perfectly prepared?

The fine difference between espresso macchiato and latte macchiato

Espresso macchiato and latte macchiato sound similar in name, but they are two different drinks. The espresso macchiato (also known as macchiato for short) is a genuine Italian specialty. With this type of coffee, the espresso is “stained” with milk (macchiato). It is characteristic of the drink that the barista only adds a little milk froth to the espresso.

The latte macchiato, on the other hand, consists of espresso and significantly more milk. Conversely, with this variant, the milk is “stained” by the espresso.

How do you make latte macchiato?

The perfect latte macchiato is served in a glass, because this is how the color nuances of the espresso and the milk can be seen. The hot drink consists of a total of three layers: the milk is at the bottom of the glass, then the espresso follows in the middle and the relatively firm and creamy milk foam is enthroned at the top.

How can the layers be separated? Quite simply: When pouring espresso and milk froth, caution and the right order is required.

First pour the milk into the glass.
Now add the milk froth.
Finally, carefully pour the espresso through the milk froth.

Prepare espresso macchiato: Here’s how

The preparation of an espresso macchiato does not require quite as much skill as the latte. To serve the perfect espresso macchiato, first froth the milk. Tip: The froth is particularly firm and retains its consistency longer if you use milk with a high fat content.

Prepare the espresso separately. First pour the espresso into the cup and garnish it with the milk froth.
The delicious hot drink is available in different versions:

● Italians like to drink a doppio macchiato, which consists of twice the amount of espresso. This variation is also often served in a glass. Incidentally, an espresso macchiato tastes particularly good when the cup is warm.
● Cold macchiato is a pleasure, especially on warm summer days. This is prepared without foam. Instead, the espresso is simply mixed with some cold milk and called espresso macchiato freddo.


You can easily freeze strawberries without losing much of their flavor. Not only whole fruits are suitable for freezing, you can also preserve strawberry puree in this way. You can find out more about the various options here.

You can freeze strawberries after the strawberry season and thus preserve them. Depending on the weather, the strawberry season varies slightly from year to year. However, the bright red fruits can usually be harvested between May and July. Then they also have high season in supermarkets and organic shops. In order to have delicious strawberries for the rest of the summer and even in winter, we show you different ways to freeze them.

Freeze strawberries: instructions for whole fruits

You can easily freeze fresh strawberries – whether from the organic market or harvested yourself – as whole fruits:

It is important that you wash the strawberries thoroughly before freezing. It is best to clean them in cold, standing water, for example in a large bowl or in the sink, so that you do not damage the fruit.
Now remove all stems and remaining foliage.
Then pat the berries dry with some kitchen paper or a towel. They must not be wet when freezing, so that a layer of ice does not form.
To prevent the fruit from sticking together later when defrosting, freeze them first: place berry by berry next to each other on a flat plate or tray. The berries should not touch each other. Then place everything in the freezer for an hour or two.
To make room again, you can then fill the strawberries into their final freezer container. Place the pre-frozen berries in a stainless steel freezer box and store in the freezer. Frozen fresh strawberries will keep for about eight months.

Tip: Only use freshly harvested soil without dents or holes for freezing. Damaged fruit spoils faster even in the freezer – better eat it now.

Freeze strawberries as a puree

You can also puree the strawberries before freezing them. After defrosting, you have fresh strawberry puree at hand that is perfect for pancakes, with homemade Bircher muesli or to be enjoyed on its own. You can also cook strawberry jam or combine it with rhubarb to make strawberry rhubarb jam.

Wash the undamaged, fresh fruit in standing, cold water (as described above).
Remove the stems and foliage, then gently pat the strawberries dry with a towel.
Place the strawberries in a tall container and puree them into a smooth cream.
If you want the puree to be even creamier and finer, spoon it through a fine sieve before freezing. So you can easily catch the small seeds.
Pour the strawberry puree into a freezer bowl or glass.
Tip: You can also pour your pureed strawberry puree into ice cube molds. Frozen strawberry ice cubes taste wonderful in sparkling wine, mineral water or homemade cocktails.