Tag

this

Browsing

Can the coronavirus be transmitted through fruit and vegetables? We have put together the most important tips that you should currently consider when buying and preparing fresh food.

That’s how long the coronavirus survives on fruit and vegetables

The corona virus causes uncertainty: Many people are afraid of contracting the virus via a smear infection when buying food. First the good news: According to the Federal Institute for Risk Assessment, transmission of the coronavirus through fruit and vegetables is very unlikely.

Nevertheless, the virus can usually survive on surfaces for between three hours and three days, according to American researchers from the “New England Journal”. According to a study by the University of Greifswald, the virus can persist on surfaces for up to nine days.

However, the survival time depends on various factors, such as temperature, humidity and the material of the surface. According to the University of Greifswald, cold and high humidity should promote the lifespan of the virus.

The germs of the coronavirus have a very low environmental stability, so transmission through food, even imported from risk areas, is unlikely.

Coronavirus: Prepare fruits and vegetables safely

Even if the transmission of the coronavirus via fruit and vegetables is rather unlikely, sufficient hygiene and caution when dealing with pathogens can never hurt. We have therefore put together the most important tips for handling fruit and vegetables for you:

Wash your hands: The most important tip when dealing with fruit and vegetables is still washing your hands. You should urgently wash your hands after buying the food and before and after preparing it.
Wash fruit and vegetables: Of course, you must not forget to wash the fruit or vegetables thoroughly with hot water. More about this here: Washing fruit properly: What to do about pesticides on the skin?
Peel fruit and vegetables: Not every type of fruit and vegetable can be peeled. However, where it is feasible, it is definitely recommended.
Boil fruit and vegetables: Especially for high-risk patients, it is advisable to completely avoid raw food during the corona crisis and only eat fruit and vegetables that have been cooked. The high temperatures render the viruses harmless.

Tramezzini consist of slices of white bread topped with various ingredients. We’ll show you how to make Italian sandwiches at home.

The term “Tramezzini” comes from tramezzo, which means something like “in between” in Italian. The special thing about the Italian sandwiches is the tremezzini bread. It is very similar to toast bread, but with a softer texture and no crust. In addition, it is more fine-pored. If you don’t have tramezzini bread, you can also simply use normal slices of toast for the preparation.

It is best to buy the covering for your tramezzini at the weekly market. There you can usually get regional and seasonal groceries and thus save unnecessarily long transport routes. Also use organic products to support organic farming. She refrains from using synthetic chemical pesticides that are bad for the soil quality. If you eat eggs, take extra care to buy eggs without chick shredding; This means that the male chicks are also raised. Unfortunately, this is not necessarily the case with organic quality either.

Tramezzini: The recipe

Ingredients:

3 pieces of red peppers
3 tbsp olive oil
1 bunch of parsley
400 gmushrooms
2 tbsp lemon juice
4 pieces eggs (optional)
4 slices of tramezzini bread or 8 large slices of toast
40g hummus

Directions:

Halve, deseed and wash the peppers. Rub them with a tablespoon of oil.
Place the peppers, skin side up, on a baking sheet lined with parchment paper and roast them under the grill for about ten minutes until the skin of the peppers is dark brown.
Cover the peppers with a damp cloth, let them cool slightly, and then peel off the skin.
Remove the parsley stems and finely chop the leaves. Clean the mushrooms and chop them as well.
Heat a tablespoon of olive oil in a pan. Add the chopped mushrooms and fry until golden brown.
Add the parsley to the mushrooms and season with salt and pepper.
Fry the eggs one at a time in the remaining oil. (Skip this step for the vegan version.)
Spread the tramezzini or toast with hummus. Top one half of the bread with mushrooms and fried eggs, the other half with peppers. Fold the halves together.

Topping ideas for tramezzini

In addition to hummus, you can also combine your tramezzini with various spreads. You can find various spread ideas here, for example: Seasonal spreads: 3 recipes with regional winter vegetables.

The topping of the tramezzini can also be varied in many ways. Well suited are:

Various vegetables, for example cucumbers, radishes, radishes or Chinese cabbage
fried vegetables, for example eggplant, zucchini or peppers
various (vegan) cheeses

Sourdough buns are a healthier alternative to regular bun dough. Here you can find out how you can easily do them overnight.

You can prepare the dough for these delicious sourdough buns in the evening, so all you have to do the next day is shape and bake them.

For the rolls you need starter goods. This is, for example, sourdough from the last baked bread that you can store in mason jars. However, this should only be stored for a week so that it does not go bad. You can find out whether you can still use the sourdough as a starter by smelling it – because if it is bad, the dough actually smells sour. The smell of alcohol, on the other hand, is normal. It is also possible to get a small portion of sourdough from some bakeries.

You can find out here how to make the starter yourself from flour and lukewarm water: Prepare sourdough – healthy bread from your own production. You should prepare it three to five days in advance so that it can ferment long enough.

Sourdough Buns: Easy recipe

Ingredients:

175 gwholemeal flour
125 gwheat flour
75 gspelt (wholemeal) flour
300 g water
40 g starter (e.g. from rye or spelled flour)
Salt

Directions:

Thoroughly stir together all the flour, water, and starter. Then let the dough stand untouched for 50 minutes.
Knead the salt into the fluffy dough, then let it rest for 30 minutes and then fold it. You fold the dough by stretching it a little in the bowl and then folding it over to the other side. To do this, take a bowl of water and wet your fingers before each crease.
Wait another 30 minutes, then fold the leaven again. Then cover it and let it rise at room temperature overnight. Tip: If you prefer less sour rolls, you can put the dough in the fridge overnight. At low temperatures, the dough ferments more slowly.
To bake the sourdough rolls, preheat the oven to 250 degrees top/bottom heat and divide the dough into six portions. Preheating is important here, because this way the rolls can be crisp on the outside and remain fluffy on the inside.
Dust the baking tray with a little flour and press the sourdough buns into shape. You can also cut them in a cross shape to create a pattern. Then bake them on the middle shelf for about 15 minutes until golden brown.

Sourdough: alternatives and tips

You only need a few ingredients for the sourdough buns. Buy these anyway in organic quality – so you know that no chemical-synthetic pesticides are used. We recommend that you prefer the Bioland, Naturland or Demeter seals, as they follow stricter criteria than the EU organic seal.

If you want a sweet breakfast, you can serve homemade jam, jam or jelly, honey or a Nutella alternative with the sourdough rolls. If you prefer it savory, prepare a beetroot spread or a tomato spread, for example.

There are also other recipes with sourdough on Utopia, such as the Siegfried and Hermann dough, the latter being a sweet variant.

Have you ever heard of Lievito Madre? Here you can find out what makes this sourdough variant special, how you can make it yourself and what delicious things you can bake with it.

Lievito Madre means mother yeast in German. It is the Italian variant of the sourdough known in Germany. You can make it yourself relatively easily and use it to bake various foods such as bread, rolls or pizza. Similar to yeast or baking powder, Lievito Madre ensures that the pastries are nice and fluffy. It has a much milder taste than German sourdough, so you can even use Lievito Madre for sweet pastries.

The next section shows you an example recipe to grow your own Lievito Madre. Don’t be discouraged if you don’t get it right on the first try. It takes time and experience to learn how the dough reacts and how best to handle it.

The sample recipe is designed so that you don’t have to throw anything away. Many recipes use relatively large amounts of ingredients and require regular disposal of appropriately sized leftovers, but this is food waste that you can easily avoid. You don’t need 100 grams or more flour for the first batch, you can also do it with less. However, dough residues always occur in the process. It is best to collect these in a separate container in the fridge and use them later when baking.

There are many different ways to schedule a Lievito Madre. Using dried Lievito Madre as a base, you can make a baking batch in just one day. Without it, the whole process takes up to 25 days at room temperature. But you can easily speed this up by placing the dough in a place that is around 28 to 30 degrees Celsius. In winter, for example, this can be with the heating, or you take a cooler and put the dough in it with a bottle of hot water, which you change regularly. In just five days at best, follow the steps below to create your own Lievito Madre.

How to make the Lievito Madre approach

Ingredients:

225 organic wheat flour
115ml water
0.5 tsp organic olive oil
0.5 tsp organic honey

Directions:

Day 1 Of the ingredients you need today: 30 g flour
15 ml lukewarm water
0.5 tsp honey
0.5 tsp olive oil Put the flour in a bowl and add the remaining ingredients. First mix the ingredients roughly with a spoon and then knead them thoroughly by hand until a smooth dough is formed. It is really important here that everything is mixed and there are no lumps. Form the dough into a ball and cut a cross in the top with a knife. Then place it in an easy-to-clean jar with a lid. Just put the lid on loosely. Place the dough in a warm place and let it rest for 24 hours.
Day 2Today you need: yesterday’s dough
25 ml lukewarm water
45 g flour Mix your dough with the water until it dissolves. Then add the flour and knead again very carefully. Place the dough in a loosely sealed jar and keep warm until tomorrow. Today, and every day that follows, it’s important to make sure the dough doesn’t spoil. If mold does form, you’ll have to get rid of it entirely and unfortunately start over. Good dough smells pleasantly of flour, yeast and slightly sour. Even a slightly alcoholic smell is not bad.
Day 3 to 5 On each of these days you will need: 50g of dough from the previous day (collect the rest in a separate container in the fridge)
25 ml lukewarm water
50 g flour Mix your dough with the water until it dissolves. Then add the flour and knead again very carefully. Place the dough in a loosely sealed jar and keep it warm on the third and fourth day until the next day. On the fifth day, the batch is placed in the refrigerator with the lid closed for further storage. The Lievito Madre should now, on the fifth day, have doubled in size compared to the previous day and be nicely bubbled. If this is not the case yet, then continue the procedure of the last few days a little longer, sometimes it just takes more time.
You can simply use the dough leftovers from the past few days for a pastry. They are very mild, so they fit in bread or roll dough as well as in sweet yeast dough.

How to properly care for your Lievito Madre

You did it and bred your first own Lievito Madre. So that you can enjoy it for a long time, it is important never to use it up completely when baking and to feed it regularly. The more dough you have, the less often you need to feed him, generally every eight to ten days is recommended. You can also use the intensity of the smell of alcohol as a guide: the more intense it is, the more urgently the dough needs more flour and water.

14 days without feeding are normally not a problem for the Lievito Madre. If you’re going to be away for a longer period of time, you’d better dry it off beforehand. To do this, only add a very small amount of water when refreshing, so that the dough is very tough.

Feeding is very easy. Take the dough out of the fridge well in advance so that it comes to room temperature. Over time, a harder layer has formed on the surface. You can remove these and simply mix them in when baking. Mix the soft part thoroughly with 50 g flour and 25 ml lukewarm water.

If you are already planning to bake a specific recipe, you can adjust the amount of flour and water to get the amount of Lievito Madre you need plus a small reserve for storage. The important thing is that you always use twice as much flour as water.

Then put the batter in a fresh jar. Wait for the dough to double in size, then place it back in the fridge with the lid on.

Lievito Madre and Sourdough – What’s the Difference?

The difference between Lievito Madre and sourdough lies in the ratio of flour to water. With classic sourdough it is 1:1, i.e. just as much flour as water. For Lievito Madre, on the other hand, you use twice as much flour as water, i.e. the ratio is 2:1 flour to water.

Another difference is that you add olive oil and honey to the base for Lievito Madre, sourdough is always just flour and water. The types of flour are also different. Rye flour is usually used for sourdough, while wheat flour is used for Lievito Madre.

As a result, Lievito Madre is less acidic and contains more natural yeasts than a classic sourdough, making it more versatile. If you already have a sourdough starter in the fridge, you can easily make a Lievito Madre out of it. The necessary steps are:

Weigh the sourdough starter and add the same amount of flour and half the amount of lukewarm water. With 20 grams of sourdough, for example, 20 grams of flour and 10 milliliters of water.
Knead everything thoroughly and place the dough in a clean, loosely sealed container.
Place the dough in a warm place for 12 hours.
Repeat steps 1 through 3, adjusting the amount of flour and water, two or three more times. The dough should double in volume within 6 hours.
In the further procedure, i.e. use, storage and feeding, you don’t have to pay attention to anything other than with the directly applied Lievito Madre.

If you’re really in the mood for baking now, you’ll find a recipe to try in the next section.

How to make focaccia with Lievito Madre

Ingredients:

70 gLievito Madre (fed the day before)
350 gorganic wheat flour
280 ml lukewarm water
1 tsp salt
1.5 tbsp organic olive oil
Herbs, olives, tomatoes or other favorite ingredients

Directions:

Knead the flour thoroughly with 230 milliliters of the water to form a dough and leave covered for 30 minutes.
Add the Lievito Madre and the salt and gradually add the remaining water while kneading for at least five minutes. You can do this by hand or with a food processor fitted with a dough hook.
Grease a flat baking pan with some olive oil.
Spread the dough out in the pan and let it rise, covered, in a warm place for at least two hours. If you have more time, you can also put it in the fridge overnight. This way the result gets even better.
Press small indentations into the dough from above with your fingers.
Brush the dough with the olive oil and spread the olives, tomatoes, or whatever you have chosen on the dough.
Bake the focaccia in the oven at 180 degrees Celsius for 20 to 30 minutes. It should be lightly browned. Actual baking time will vary by oven.

Intermittent fasting should not only make you fit, but also slim, healthier and more powerful. Proponents argue that the energy that would otherwise be “lost” in digestion would be available to the body for other activities. What’s up with the trend?

In contrast to therapeutic fasting, intermittent fasting does not generally refrain from eating for a longer period of time, but only for certain periods of time. Several intervals are possible with the form of nutrition, also known as “intermittent fasting”. The variants “2:5” and “16:8” are popular. One involves fasting moderately for two days and eating normally for five days. In the second, there is no food intake for 16 hours, and eating is allowed for the following eight hours.

The variants and permitted calorie intake seem endless here, because everyone should be able to adapt their form of intermittent fasting individually. The idea behind this is the notion that centuries ago the human body didn’t have regular access to food either. That is why intermittent fasting is the original form of nutrition.

With intermittent fasting against insulin fattening

Nowadays we have constant access to food. Most of these are far from healthy because they contain too many unhealthy fats or sugars or are made from white flour. The oversupply of food means that the proportion of overweight people is increasing and it is becoming increasingly expensive for us.

Constant supply of calories through snacks, between meals and high-calorie drinks lead to so-called “insulin fattening”. Due to the almost non-stop consumption, insulin is released from the pancreas almost continuously in order to metabolize the food. However, if insulin is constantly available to the body, it builds up fat mass. Many small meals or high-calorie drinks throughout the day therefore lead to excessive body fat being formed.

In addition, a constant release of insulin leads to fatigue of the pancreas. In addition, the body cells are becoming less and less sensitive to insulin, so that over time diabetes type II can also develop from insulin fattening. A constant calorie intake of any kind is really fundamentally harmful.

Intermittent fasting as a way out of the insulin trap?

Proponents of intermittent fasting cite, among other things, insulin fattening as evidence that intermittent fasting is the most original and healthiest form of nutrition. Animal experiments with mice should also show that intermittent fasting could prevent the onset of type II diabetes. However, the extent to which this result can be transferred to humans has not yet been scientifically researched. This also applies to claims that high blood pressure, Parkinson’s disease or dementia can also be prevented with intermittent fasting.

Only: Even nutritional recommendations such as “in the morning like a king, at noon like a king or in the evening like a pauper” have the same positive effect on the pancreas and insulin levels as intermittent fasting. And if you don’t eat from 5 p.m. to 9 a.m. with the 16:8 variant of intermittent fasting, for example, you are doing nothing other than the once popular “dinner cancelling”. So the idea of ​​intermittent fasting as a way out of the insulin trap isn’t all that new.

Criticism of intermittent fasting

Intermittent fasting therefore has positive effects on the metabolism, but there are also risks behind intermittent fasting. It is suggested that during the permitted “meal times” all foods are generally permitted. Despite the fasting period, the calorie intake can still be higher than is actually healthy. Nor is there any recommendation as to what a healthy meal should look like. Anyone who fasts intermittently does not learn anything about healthy eating apart from not eating.

On the contrary: You run the risk of taking in too many unhealthy calories in the allowed period of time in order to get through the fasting period better. Especially with the 2:5 variant, unhealthy eating habits that can lead to insulin fattening are neither changed nor sensible diets learned.

The German Society for Nutrition (DGE) is therefore very clear about intermittent fasting: “The DGE does not consider this method to be useful for regulating weight in the long term. This does not result in a switch to a health-promoting diet.”

For whom is intermittent fasting nevertheless suitable?

First and foremost, intermittent fasting should not be about losing weight, but about normalizing and optimizing your metabolism. Weight loss is usually a pleasant side effect, but should not be the focus – also to prevent malnutrition or malnutrition.

If you want to do something to prevent insulin fattening and the secondary diseases, you can achieve the first results with the 16:8 variant and “Dinner Cancelling”. However, it is important that the remaining two meals (i.e. breakfast and lunch) are balanced so as not to provoke malnutrition.

At best, however, a healthy diet should consist of three balanced, healthy, wholesome meals with no caloric intake in between: no in-between meals, no snacks, no fruit in between, and no high-calorie beverages. A kind of “mini-intermittent fasting” in the daily rhythm with three wholesome meals.

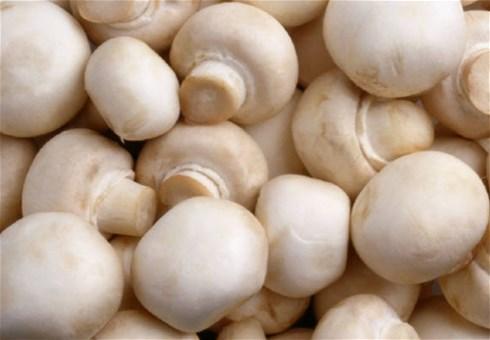
Mushrooms are healthy and tasty all-rounders that can be prepared in a variety of ways. We will show you which method has which advantages.

Mushrooms are a very popular type of mushroom used in many cultures in different dishes and prepared in different ways. As they are easy to grow in the dark, mushrooms are available from us all year round. In nature, however, they are only in season in late summer.

Mushrooms are healthy: They consist of about 91 percent water and are therefore extremely low in calories. They’re high in the healthy electrolyte potassium — about the same as bananas, which are famous for it. Among other things, potassium is responsible for keeping your nerve cells and their conductivity healthy.

Mushrooms also contain minerals such as:

iron
magnesium
zinc
Vitamins such as B1, B2 and folic acid

There are white and brown mushrooms that hardly differ from each other in terms of their ingredients. The white ones just taste a little nuttier and the brown ones a little stronger.

Cook mushrooms

If you want to prepare mushrooms, you should consider a few points beforehand. This includes buying quality produce and cleaning the mushrooms.

What you should consider when buying:

Make sure the mushrooms are fresh. Canned or jarred mushrooms don’t have nearly as many nutrients as fresh mushrooms, and they taste completely different.
Mushrooms can be bought all year round, but these “cultured” mushrooms are often treated with pesticides. So make sure to buy them organic.
The wild mushrooms are in season here in late summer. However, you should only collect them yourself if you are an experienced mushroom picker, as they can easily be confused with the dangerous death cap mushroom.
To clean mushrooms, you can use a brush or clean kitchen towel to gently rub them. Bought mushrooms usually have little soiling. More about this here:

Cook mushrooms raw

Like other vegetables, mushrooms can also be eaten raw. Not only does this have the benefit of making them quick to prepare, they also retain all of their nutrients.

If you have never eaten raw mushrooms, you should not overdo it: some people do not tolerate raw mushrooms very well, which can lead to flatulence. They are best eaten raw in a salad.

What you need to prepare a vegan mushroom salad:

250 g mushrooms of your choice
5 tbsp olive oil
4 tablespoons lemon juice (from a fresh lemon)
1 tbsp grated lemon zest
2 garlic cloves (chopped or pressed)
Salt and pepper to taste
1 half bunch parsley (chopped)
(optional, not vegan: 3 tablespoons grated parmesan)
Recipe:

Clean the mushrooms and cut them vertically into very thin slices.
For the dressing, combine the olive oil, lemon juice, lemon zest, and garlic in a bowl.
Season to taste with salt and pepper.
Now add the dressing and the roughly chopped parsley to the mushrooms.
Gently fold them in to avoid breaking the mushrooms.
A simple salad for a summer barbecue is ready!

Fry mushrooms

If you fry mushrooms, they lose some of their nutrients due to the high heat. On the other hand, they unfold their full, strong and nutty aroma.

To fry the mushrooms, you need a large pan so that they are well heated on all sides.

What you need for fried mushrooms:

250 g mushrooms of your choice
2 tbsp butter
3 garlic cloves (chopped or pressed)
2 shallots (chopped small)
Salt and pepper to taste
a handful of freshly chopped parsley
Recipe:

Clean the mushrooms and quarter them.
Heat the butter in a pan until it starts to sizzle.
Now add the mushrooms and spread them out in the pan so that they don’t pile up.
After about four minutes, add the onions and garlic.
Fry the whole thing for about three more minutes.
Season the fried mushrooms with salt and pepper to taste and fold in the parsley.

Steam mushrooms

Mushrooms are often prepared and served steamed: due to the relatively low heat, they retain more nutrients than when fried. Here they also develop their aromatic taste strongly and absorb spices and herbal aromas well. If you leave out the oil and fat, the mushrooms are also far lower in calories. Steamed mushrooms can be served both with meat and vegetarian, for example, with pasta.

Ingredients for stewed mushrooms:

250 g mushrooms of your choice
1/2 cup your choice of chicken, beef, or vegetable broth
3 garlic cloves (chopped or pressed)
2 spring onions
fresh or dried oregano
Salt and pepper to taste
Recipe:

Clean the mushrooms and roughly cut them into thin slices (Different slices will steam different degrees and make your dish taste more rustic.)
Cut the spring onions into small rings and set the green part aside for the time being.
Peel the garlic and briefly fry it and the white end of the spring onions over medium heat.
Add the broth to the pan and heat until it begins to simmer.
Now add the mushrooms and turn the heat to low.
Season with salt, pepper and oregano.
Toss the mushrooms well in the pan until they have completely absorbed the liquid.
Finally, mix in the green of the spring onion. Now you can serve them with your favorite dish!

Grill mushrooms

Whether with meat or completely vegetarian, the grilled mushrooms with herb butter are the star on the grill. They are particularly easy to make and spice up every barbecue party. Another advantage of this preparation is that you can always put a new portion on the grill. So you can always serve hot and fresh mushrooms to guests.

What you need to prepare the grilled mushrooms:

particularly large mushrooms
homemade herb butter
garlic (pressed)
How to prepare grilled mushrooms:

Clean the mushrooms and remove the stems.
Use a spoon to spoon the herb butter and crushed garlic into the well.
Put the mushrooms in e.g. a grill board, grill paper or a grill grid so that they don’t fall over and the butter runs out. Avoid aluminum foil or an aluminum tray. Aluminum is not only harmful to the environment, it also ends up in your food when heated. We will show you various grill alternatives to aluminum foil:

After about ten minutes, the mushrooms should be ready.

Lye burgers are a tasty change from classic burgers. We’ll show you how to make the vegan burger buns and vegan patties at home.

Pretzel rolls are ideal as burger buns. You only need a few ingredients for the soft rolls and you can easily prepare them vegan. It is up to you which patty you use for the pretzel burger. Below you will find recipe suggestions for matching burger patties.

Tip: If you are in a hurry, you can also use ready-made burger patties made from seitan or tofu for the pretzel burger. It is best to pay attention to an organic seal, because this way you support ecological agriculture and protect yourself and the environment from chemical-synthetic pesticides. You can find out more about this here: Beyond Meat, EnerBio and The Vegetarian Butcher: Veggie Burgers in Test.

Lye Burger: Recipe for vegan lye rolls

The following recipe makes eight small burger buns.

Ingredients:

0.5 cubes of yeast
1 tsp sugar
220 ml water (lukewarm)
400 g flour (e.g. spelled flour type 630)
1 tsp salt
30 vegan butter / vegan margarine
3 tablespoons baking soda
sesame for sprinkling

Directions:

Dissolve the yeast along with the sugar in a few tablespoons of the lukewarm water. Add the yeast mixture to the flour and add the remaining water, salt and the softened vegan butter or vegan margarine.

Knead for a few minutes until you have a smooth and no longer sticky dough – the longer you knead, the better. This can be done with the dough hook of a food processor or a hand mixer, but you can also do it with your hands.

Form the dough into a ball and let it rise, covered, in a warm place for about 45 minutes until it has doubled in size. Then portion the dough into eight equal parts (for small pretzel burgers) and form them into balls. Let the dough pieces rise again for about 20 minutes.
In the meantime, preheat the oven to 190°C top/bottom heat and bring one to two liters of water to the boil in a large saucepan. Stir in 3 tablespoons of baking soda and drop each ball of dough into the boiling water for 30 seconds.

Allow the dough pieces to drain briefly and place them on a baking sheet lined with baking paper or a well-greased baking sheet. Cut into the pretzel buns with a sharp knife and immediately sprinkle with sesame seeds or coarse sea salt. If the buns are already too dry, you can brush the dough pieces with some plant-based milk as a milk substitute.
Bake the buns for the pretzel burger for about 20 minutes or until golden brown and then let them cool on a wire rack. Tip: You can easily freeze leftover pretzel buns.

Vegan burger patties recipe

In the pretzel burger in the photos, we used our patty recipe for vegan burgers with kidney beans. The recipe makes about eight small patties.

This is how you put the lye burger together

The pretzel burger tastes particularly delicious with pickles, a slice of vegan cheese and fresh or homemade caramelized onions. Depending on the season, you can garnish the burger with fresh lettuce and tomato slices. A vegan dip as a sauce or simply ketchup and/or vegan mayo should not be missing.

Tip: A homemade tartar sauce, which you can easily prepare vegan, also goes very well with it. If you prepare the patties from tofu or seitan, sweet mustard also tastes very good.

Roasting Brussels sprouts is easy with these instructions. Roasted Brussels sprouts are a popular side dish in wintry temperatures. Three variants bring variety to the plate.

You can prepare Brussels sprouts in different ways – for example in a pan. We’ll show you three varied ways of roasting Brussels sprouts.

Brussels sprouts are a typical winter vegetable from the cabbage family. Harvest time in Germany begins at the end of September. Brussels sprouts are in high season between November and December. Since cabbage can be stored very well, you can buy regional Brussels sprouts until March.

The best way to buy fresh Brussels sprouts is organic and from regional suppliers. Because organic food usually contains far less pesticide residues – synthetic pesticides are forbidden in organic cultivation. In addition, Brussels sprouts from the region do not have to be transported so far, which saves CO2. An alternative to the shop or market around the corner is the delivery of an eco box** with regional fruit and vegetables directly to your home.

Roast Brussels sprouts: the ingredients

You need the following ingredients for four to six side dishes of roasted Brussels sprouts:

500 grams of Brussels sprouts
3-4 tbsp vegetable oil (e.g. olive oil)
Salt
pepper
1/2 tsp ground cumin
Be sure to use fresh Brussels sprouts for this recipe. Frozen cabbage florets cannot be fried until brown because they lose too much water.

Tip: The ground cumin will help you digest the cabbage better.

Roast Brussels sprouts properly

If you want to roast Brussels sprouts, you should be careful not to burn them. How to properly roast Brussels sprouts:

Clean the Brussels sprouts carefully.
Cut the cabbage florets in half.
Heat the olive oil in a pan on high.
Add the Brussels sprouts once the oil is hot.
Then reduce the heat and fry the halves of Brussels sprouts for about five minutes on medium-high. Stir constantly so the vegetables don’t burn.
Add the salt, pepper and ground cumin and mix the spices with the Brussels sprouts. Reduce the temperature to the lowest level and cover the pan with a lid.
Roast the Brussels sprouts for an additional 15 to 20 minutes, depending on how al dente you want them to be. Stir every 3 to 5 minutes to avoid burning the Brussels sprouts. Add 1-2 tablespoons of water if the veggies are too dry and sticking. Alternatively, you can also increase the amount of oil in this case.

Roast Brussels sprouts: three delicious variants

Roasted Brussels sprouts don’t have to taste boring: With a few simple steps and little effort, you can change the winter vegetables and add variety to your plate.

Brussels sprouts go very well with nuts. For example, add some roasted peanuts or cashew nuts to the finished dish.
With leftover rice from the day before, you can turn the fried Brussels sprouts into a delicious rice pan. Mix the cold rice with the fried florets and heat the rice pan for five more minutes. As a spice, curry goes very well here.
If you’re roasting Brussels sprouts, you can use breadcrumbs to give them a crispy crust. Simply add some oil or butter along with 2-3 tablespoons of breadcrumbs to the already cooked Brussels sprouts and sear them again.
Roast Brussels sprouts in the oven: Put the Brussels sprouts halves in a casserole dish and mix the vegetables with the spices. Pour some oil over it and put the mold in the oven. Then roast the Brussels sprouts for 45 to 50 minutes at 200 degrees Celsius top and bottom heat.
Brussels sprouts can also be combined with other types of vegetables to create a vegetable pan. But pay attention to the different cooking times of the vegetables.

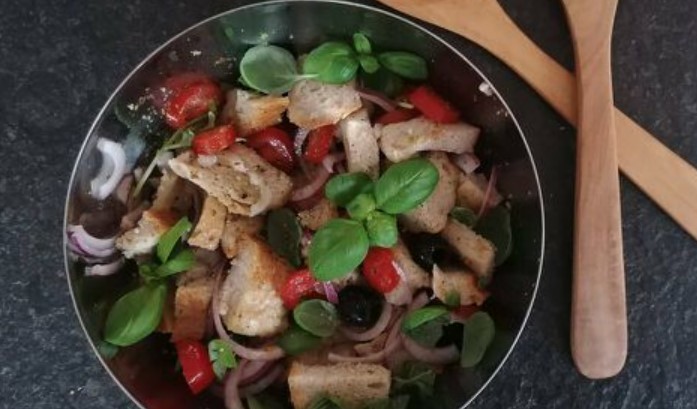
Cialledda comes from southern Italy. The salad consists of leftover bread, olive oil and fresh tomatoes. We show you how to prepare the salad.

Bread dries out quickly and becomes hard. You can prevent this, for example, by storing the bread properly. However, any braid or bun will dry out after some time, that’s all. Under no circumstances should you throw it in the trash. You can avoid such food waste and use food more sustainably.

Cialledda comes from southern Italy. The bread salad has its origins in the city of Matera in the region of Basilicata and in the adjacent region of Puglia. The dish comes from rural cuisine and is quickly prepared with inexpensive ingredients. The main component is stale bread, plus vegetables, spices and oil.

Cialledda: This is a great way to use leftover bread in a salad

Ingredients:

150 g bread
150 ml water
70 g olives
150 g cocktail tomatoes
4 tablespoons olive oil
2 tspOrengano
1 bunch basil
0.5 tsp pepper
0.5 clove(s) garlic
0.5 red onion

Directions:

Cut the bread into cubes about 1 inch by 1 inch and place in a bowl.
Now pour the water over the bread and roll it in it until it becomes soft. Then you can pour off the excess water and gently wring out the bread with your hand.
Now cut the tomatoes, the onion and the garlic into small pieces.

Add all the ingredients to the bread and pour over the oil and spices as well.

Mix everything together thoroughly so that the spices are distributed. The Cialledda salad is ready.

Cialledda in different variants

Cialledda comes from the rural kitchen and is used for leftovers. You can therefore prepare the bread salad with a wide variety of vegetables and use different types of bread. More ideas for the bread salad:

Other vegetables: You can also use zucchini or mushrooms. You can add them raw or toss them in a pan with a little oil and fry them lightly.
Mozzarella: In order to have another component in the salad in addition to the broth and the vegetables, you can also add a sliced mozzarella ball.
Toasted bread: You can also toast the pieces of bread after soaking for a slightly crispy texture and toasted aromas. To do this, fry the pieces of bread in a pan for about five minutes until golden brown.

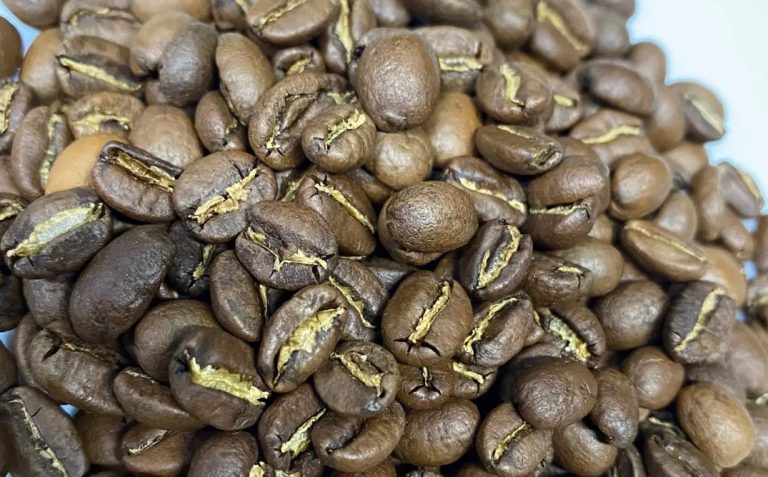
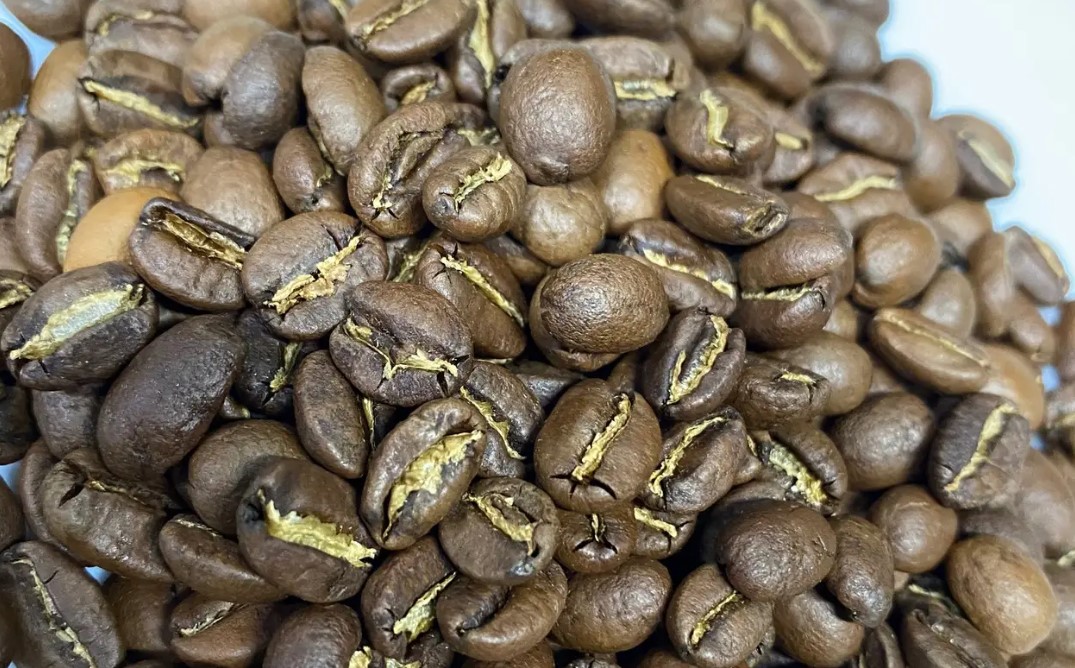
You can make mocha beans yourself from just six ingredients. We will show you how to make marzipan pralines vegan and gluten-free.

Mocha beans are chocolate pralines with a coffee note. You can use the beans to decorate cakes or for snacking. If you buy the beans in the supermarket, they are usually packed in plastic and cardboard. You can avoid the packaging by making the mocha beans yourself. You can also use high-quality chocolate and coffee to produce a particularly tasty and non-toxic product.

Since cocoa beans and coffee beans are grown in areas near the equator, you should look for the Fairtrade seal when buying. Among other things, the seal improves the working and trading conditions of smallholders. For example, they receive a cost-covering price guarantee. There is also a ban on the use of certain pesticides on the plantations.

Finding sustainable coconut oil, on the other hand, is not always easy. You can also pay attention to fair trade here, as well as the organic seal to avoid chemical-synthetic pesticides. In addition, there are now coconut oils that have received awards from the Rainforest Alliance.

Make mocha beans yourself: This is how the chocolates are also vegan

Ingredients:

200g marzipan
150 grams of chocolate
80 coconut fat
3 tsp ground coffee
2 teaspoons coffee liqueur
2 tbsp powdered sugar

Directions:

First cut the raw marzipan mixture into small pieces so that you can knead all the ingredients more easily.
Now put all the ingredients except the chocolate and coconut oil in a bowl and knead everything together. You can also make the coffee liqueur yourself.
Now form small oval beans from the marzipan-coffee dough and place them on baking paper.

After shaping, you can use a skewer to press small, long grooves into the beans.
After that, cool the beans and start melting the chocolate and coconut oil together.

Now cover the beans with chocolate. It makes sense to only glaze the underside of the beans, let them dry and then glaze the entire bean. Place the beans, bottom side up, on the baking sheet. Now brush the undersides with the chocolate icing. The chocolate may take 15 minutes to set.

Once the chocolate has set, you can glaze the top of the beans. Place the beans on a fine grid. This way, the excess chocolate can run off later and the finished pralines look nicer. Note: The small chocolates will slip through the normal oven grates. To avoid this, you can simply place two grids on top of each other. You should place a piece of baking paper substitute under the grid or place a flat plate. This way you can catch and recycle the chocolate that runs down.
If the beans are completely covered with chocolate, you should quickly put them on a plate or on a piece of baking paper. If the chocolate sets while the beans are still on the grid, they could stick to it.

Now all you have to do is set the chocolate. Let the beans set in a cool place for about an hour.

Use up the leftover chocolate

If you make the mocha beans yourself, there will be chocolate left over at the end because it runs down when glazing, for example. You should not throw away these leftover chocolates, but reuse them. How to use up leftover chocolate:

in a chocolate fondue
as a chocolate glaze on a vegan chocolate cake
as broken chocolate
in a drinking chocolate
as a chocolate sauce for desserts or ice cream
in a vegan chocolate salami.