Tag

this

Browsing

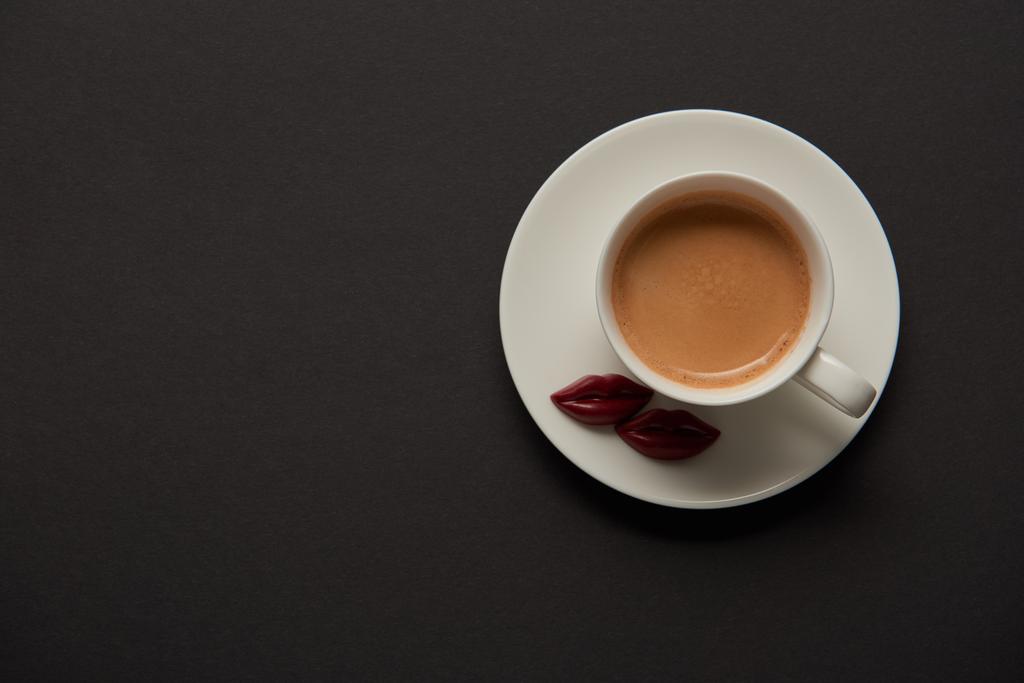
The classic brown coffee bean that we are familiar with has come a long way before it finally ends up in our coffee.

How is the typical brown coffee bean made? In our article we tell you everything about the individual roasting stages and how the process works.

One of the most important steps on their journey is the so-called roasting. But how exactly can we roast coffee and what happens in the process? The roasting – also called “refining” – ensures that the coffee bean receives a flavor profile. A consistency is thus created that can unfold during later grinding. In the following we will go into the roasting process in more detail and describe how to roast coffee optimally.

The roasting process and its subtleties

The roasting of coffee beans creates a multitude of aromas and gives the coffee its unique taste. A single bean alone contains between 300,000 and 400,000 thousand cells. If heat is now applied to this, a chemical reaction occurs. The amino acids and sugar acids contained in the coffee bean are completely reassembled during roasting. Up to 1,000 aromas can be created from one cell. The roasting process makes coffee one of the most aromatic drinks of all. And this is how the roasting works in detail:

A classic and also extremely gentle roasting process is carried out with the so-called drum roaster. Up to 30 kilograms of coffee can be roasted at once. For this purpose, the coffee beans are placed in a drum that has been mounted on a corresponding roasting machine. The roasting drum then rotates for up to 20 minutes. The internal temperature is raised to around 200 degrees Celsius. The green raw beans are roasted piece by piece and get their classic brown color. After the roasting process, they must be quickly cooled down again so that there is no further change in consistency. Since the beans lose some of the oil and water in the roasting machine, they weigh up to 20 percent less in the roasted additive than before. However, roasting coffee is not nearly as easy as it sounds. The taste, variety of aromas and appearance of the roasted bean can vary greatly. This is where the subtleties of drum roasting come into play.

After just a few minutes, the slightly yellow color of the beans changes to light brown. This creates a smell as if you were preparing fresh popcorn. Since the beans still have a lot of water and fat in this state, they appear slightly wrinkled.

Probably the most important event in the roasting process is the “first crack”. The coffee beans increase in volume during the roasting process due to the gases produced and the water evaporating, which cannot escape. Until, after about nine minutes, the pressure is so great that the cell walls of the bean burst and the water vapor can escape. The color of the bean has evolved from its previously pale green color to a yellow/brownish color by this point. Once the “first crack” has taken place, the roaster must be extremely vigilant from now on. Now the coffee beans begin to unfold their aromas and form their typical, tasty character. Chlorogenic acids are broken down piecemeal, the cell structure decomposes, and sugars caramelize inside. The longer the coffee is roasted, the more acids are broken down. At the same time, more and more roasted aromas unfold. A coffee that has been roasted for a long time has a much stronger and more bitter taste. Those who prefer it more individual can rely on short roasting times and thus enhance the coffee’s own taste.

The individual roasting stages

As already mentioned, the roasting time plays a decisive role in the final coffee taste. The degree of roasting varies depending on the heat input and the duration of the roasting. In the following we will show you the individual roasting stages for the coffee beans:

Cinnamon Roast: Probably the lightest of all roasts. A light tan ensures strong acidity and a minimal aroma profile. This state arises directly after the “First Crack”.
City Roast Plus: The medium-brown bean has reached its perfect roast point about two minutes after the “first crack”. There are light roasted substances to taste, but very acidic.
Full City: The bean is a bit dark brown. For this, almost four minutes must elapse after the “first crack” has started. The coffee bean smells spicy and hot and tastes of bitter and roasted substances. The acid takes a back seat.
Continental (French roasting): Shortly before the second crack, the bean is already dark brown. An oily consistency emerges and the taste is dominated by strong roasted aromas.
Dark French (Heavy): After the first half of the second crack, the caramelized sugar is broken down. The bean keeps getting lighter. The taste focuses entirely on roasted and bitter aromas.
Spanish Roast: At the end of the second crack and beyond, the bean is blackish-brown. It shines and has hardly any ingredients left. The taste is slightly burnt and can only be perceived through some bitter substances and roasted aromas.
Roasting coffee can be a real craft. Master roasters train on new variations every day and thus learn more and more about the variety of aromas in coffee and how this can be best brought to light.

Bitter almond flavoring is a popular flavoring for baking and cooking. The aroma contains no animal ingredients and is therefore also suitable for vegetarian and vegan recipes. But is bitter almond flavoring also recommended?

Bitter almond flavor is one of the typical baking ingredients. It smells and tastes like marzipan, almonds and sugar. The aroma is highly concentrated, so just a few drops are enough. For this reason, bitter almond flavoring is almost always available in small bottles that allow you to accurately measure the flavor on the drops. Bitter almond flavoring is popular as an ingredient in sweet recipes:

Marble cake and other sponge cakes
coconut macaroons
amarettini
nut snails
Recipes with marzipan
jams
But what is the bitter almond flavor made of and how does it differ from bitter almond oil? We explain this in detail in the following sections.

Bitter almond flavor: These ingredients are in the bottle

Bitter almond flavoring is not typically a natural flavoring, but is almost always created in a lab. It consists of two substances:

Benzaldehyde (about 20 percent)
Vegetable oil (about 80 percent)
Benzaldehyde is a clear liquid that is transparent to light yellow. Their smell and taste are reminiscent of bitter almonds and give their name to the bitter almond aroma. Real almonds or rum, on the other hand, are not in the baking aroma. The bottle with the bitter almond flavor does not contain sugar either, so you have to sweeten your recipes yourself.

Benzaldehyde is officially approved as a food additive. In addition, it is often found in perfumes and essential oils and naturally in the pits of peaches and apricots, explains the Federal Environment Agency. According to Stiftung Warentest, it is also found in food as a cherry flavoring substance. It can be produced naturally (“natural aroma”), but is usually produced chemically in the laboratory (“aroma”). In large amounts, benzaldehyde can be toxic, causing damage to the nervous system and respiratory problems. According to Stiftung Warentest, the European Food Safety Authority has classified benzaldehyde in small quantities as non-critical.

Tip: In many cases, you can simply omit bitter almond flavoring. If you still want to use it, pay attention to the addition “natural aroma” and use it sparingly.

Bitter almond flavor or bitter almond oil?

Bitter almond flavoring and bitter almond oil are not identical. The important difference is in the composition:

Bitter almond oil can also be made naturally or artificially. However, it contains highly toxic hydrocyanic acid, while bitter almond flavor does not.
If the hydrocyanic acid is removed from bitter almond oil, the chemical can be used as a fragrance in perfumes and as a flavoring for liqueurs. The bitter almond oil then contains 99 percent benzaldehyde.
Bitter almond oil is also not identical to almond oil. So it cannot be used as a care product for external use.
Note: Untreated bitter almond oil is not commercially available. Bitter almond oil without prussic acid is much less common than bitter almond flavoring and should be used with caution because of the high benzaldehyde content. Bitter almond flavor is easier to use.

Whether or not it is necessary to peel persimmons depends on several factors. In this article you will learn how to best consume the sweet exotic fruits and what you should bear in mind when doing so.

Whether you peel persimmons or not depends on your preferences. Basically, the skins of the persimmons are edible and you can eat the orange fruits with their skins.

Unripe persimmons do not taste good due to the high tannin content. Therefore, when shopping, you should consider whether you want to eat the persimmons right away or in a few days. In this article, you will not only learn how to eat persimmons correctly, but also how to recognize and influence the right degree of ripeness.

The persimmon is the sweet fruit of the persimmon tree and originally comes from Asia. Persimmon trees need warmer growing areas because they are not frost-resistant. There is therefore no significant commercial cultivation of the orange fruit in Germany. Most of the growing areas are in China, Korea and Japan.

There are now also European kakis on the market, for example from Spain. In order to avoid long transport routes, you should prefer these fruits to those from Asia. If possible, buy kakis in organic quality: they are free of chemical-synthetic pesticides.

Peeling persimmons: you should know that

You don’t have to peel persimmons to eat them. However, there are a few basic things you should keep in mind if you want to eat persimmons with the skin on.

Use organic persimmons as their skins are untreated. In principle, however, you can also eat the skin of conventionally grown fruits.
You should always wash fruit thoroughly before eating. More about this here: Washing fruit properly: What to do about pesticides on the skin?
Depending on the type of persimmon, the skin varies in thickness. Thick-skinned specimens taste better peeled.
This is how you eat persimmons correctly

Wash the persimmons thoroughly with cold water.
Halve the fruit lengthwise.
Remove the hard carpels and the light-colored base of the stalk.
Cut the fruit lengthwise into four or eight wedges.
Whether you peel the kaki or eat it with the peel is up to you. If you want to peel the persimmons, cut the flesh off the skin, similar to a melon.
Scoop out persimmons

When persimmons are fully ripe and very juicy, they are easier to spoon than to cut:

Wash the persimmons thoroughly with cold water.
Halve the fruit lengthwise.
Using a small spoon, scoop the insides of the persimmon straight out of the shell.

Recognizing the right degree of ripeness of persimmons

In order to withstand the long transport routes, the harvested persimmons are usually still unripe. Unripe persimmons contain a high proportion of the vegetable tanning agent tannin. When you eat them, this gives you a furry sensation in your mouth. However, tannins are not harmful to health. As it ripens, the sugar content in the persimmon increases and the orange fruit tastes juicy and sweet.

In addition to the actual kaki, you will also find the cultivated forms in the trade

honey apple
persimmon and
Sharon.
The cultivated forms contain significantly less tannin and you can therefore eat them in a harder state.

This is how you can tell that the persimmon is ripe

The persimmon is ripe when it is very soft. The persimmon has reached the perfect degree of ripeness when the pulp shimmers through the skin with a glassy sheen. Fully ripe persimmons yield slightly when pressed lightly with your fingers. The shell should not show any brown spots or dents.

Transport and store ripe persimmons

When fully ripe, the persimmon is very sensitive to pressure. Therefore, make sure that you pack ripe persimmons to protect them from pressure when you buy them, so that you can transport them home safely. Store ripe persimmons refrigerated and eat within a day or two.

Allow unripe persimmons to ripen

If the persimmon is not yet ripe, you can store it next to bananas or apples for a few days. These secrete ethylene, which stimulates other fruit to ripen faster.

Olive oil is a healthy and tasty Mediterranean cooking oil. It just can’t get too hot. Here we tell you what you should pay attention to when heating olive oil.

Heat olive oil: tips for cooking, braising, baking and frying

Whether you want to fry onions until translucent, season a pasta sauce to taste, or brush a pumpkin in the oven with the popular oil in autumn: you can use most olive oils – including good “extra virgin” quality olive oils.

As long as the olive oil is cooking, stewing or baking in the pot with vegetables or other water-containing foods, it hardly gets hotter than 100°C.
You can even fry in olive oil as long as you use a temperature controlled fryer and don’t set it above 180°C.

Be careful when frying: do not let the olive oil get too hot

In fact, there are few situations where olive oil can actually burn and lose both its great taste and health-giving properties. For example, if you want to sear something to create roasted aromas.

The so-called smoke point of olive oil is around 180°C. Beyond this temperature, the oil burns and not only loses its healthy components – dangerous and sometimes carcinogenic by-products such as the toxic acrolein are also produced.

If it must be olive oil, only hot-pressed, refined olive oil would be suitable for searing. This is heat-resistant at temperatures of up to 220°C. During hot pressing, however, a large part of the aroma and the health-promoting properties of the oil are lost.

In summary – what should be considered when heating olive oil?

Here are a few things to keep in mind when heating olive oil:

Combined with vegetables or other water-containing foods, olive oil does not burn.
With a temperature control, you can even use olive oil for frying at a maximum of 180°C.
For temperatures higher than 180°C, you should use hot-pressed olive oil or other cooking oils.
If you want to get the most out of your olive oil, both in terms of taste and health, you can add it at the end of the recipe to refine it. Organically grown olive oils from cooperatives are best for the environment and producers. However, since it is such a coveted raw material, consumers are often misled.

Spinach is a vitamin bomb and a source of protein at the same time. We will show you how to cook spinach properly and what you should pay attention to.

Spinach contains many important vitamins and minerals, including folic acid and vitamin A. You can use it in salads, smoothies or vegetarian dishes, for example. Many use ready-made spinach from the freezer, but you can also easily cook fresh spinach yourself.

The basic rule for fresh spinach is that it should only be stored at room temperature for as short a time as possible. This is because spinach contains nitrate, which turns into nitrite at room temperature – nitrite is toxic in high concentrations. So if you bought spinach, put it in the fridge. You should also keep leftovers in a cool place. Then you can warm up spinach without hesitation.

Blanch, boil or puree spinach

How to cook fresh spinach:

First, you should remove stems that are too large or woody. You can then wash the spinach in a bowl of cold water. You should be thorough here: there is usually a lot of sand from the field in the spinach. Once you have washed the spinach, you can drain it.
Caution: Do not leave the spinach in water for too long when washing, otherwise it will lose too many vitamins.
Then you can briefly boil the spinach in a large pot with salted water. The easiest way is to add the spinach to the pot in batches and cook for a minute at a time.
Keep an eye on the spinach to make sure it doesn’t get too soft. The leaves should still be a little firm to the bite.
To blanch, put the spinach in ice water for a few minutes. This step is optional.
So you can already eat your spinach. You can also add spices like pepper and salt to make it taste better. More about this here: Seasoning spinach: This is how it tastes best.

If you want to puree the spinach, you should let it cook a little longer so that it can be processed more easily. After about five minutes you can shake it off, let it drain and, depending on your taste, refine it with a little (vegetable) cream before crushing it with the hand blender.

You can simply dry sourdough and store it for a long time. We will introduce you to three methods of preserving sourdough: by crumbling, drying and freezing.

You only have to prepare sourdough once and can then “feed” it again and again with flour and water and thus multiply it. This makes it last forever. The sourdough contains microorganisms (such as lactic acid bacteria and yeast) that form during the fermentation process and make the dough slightly acidic. However, if you don’t bake regularly or want to send the sourdough to friends or relatives, you can preserve the sourdough by drying it. The shelf life of the sourdough varies depending on the method, ranging from three months to several years.

For each of the three methods, you must first prepare a sourdough. You can find instructions here: Prepare the sourdough. We strongly recommend that you buy the ingredients in organic quality. Among other things, you avoid residues of chemical-synthetic pesticides and support ecological agriculture.

Method: Crumble sourdough

The first method is the “crumbling” and subsequent drying of leaven:

Pour your prepared sourdough into a bowl.
Gradually add the flour and mix everything together with a wooden spoon. Use enough flour so that the dough is only slightly moist and crumbs can form.
Gradually rub the dough between your palms. This creates crumbs. Do the same with the entire dough.
It is best to spread the crumbs on a baking sheet and let them dry for several hours. This way you prevent mold.
Fill the so-called Krümelsauer into a lockable screw-top jar. You should only close the jar loosely or drill a hole in it if the dough continues to ferment a little. Alternatively, use a cloth bag. The dried sourdough can be stored in the refrigerator for about three months.

To use the dough again, add enough water to the crumbs until it becomes a paste. Store the dough at room temperature for about 2 to 8 hours. It is then activated again and can be processed further.

Method: Dry sourdough as flakes or powder

The second method involves making flakes or powder from the sourdough:

Spread the sourdough thinly on half of a sheet of baking paper and fold it over. If you have more dough, use a second sheet of baking paper.
Allow the sourdough to dry at room temperature. This takes about a day or two. The dough needs to be really dry, otherwise mold can form.
Dried, sourdough is lighter in color, cracks, and breaks easily when touched.
Note: You can usually reuse the parchment paper. To do this, carefully peel off the dry sourdough so that the baking paper does not tear. Or you can use a sustainable baking paper alternative.

Break off small pieces of the dried sourdough. Now you have two options:

For tiles: Place the small pieces in a sealable container, cloth bag, or paper bag.
For powder: grind the small dividers into powder with a mortar or grinder.
Dried sourdough lasts for several years. You can store it in the fridge or at room temperature in a dark place (for example, in the pantry).

To reactivate the leaven, you need to add water and flour. First add the same amount of water to the dried dough (ratio 1:1). If he starts blistering at room temperature, you can “feed” him with more water and flour. This can take several hours.

Note: Since most microorganisms die off during drying, the sourdough may not always start to ferment. This is always the case when there are no or no longer sufficient microorganisms in the dough.

Method: Sourdough Freezing

Pour your sourdough into a sealable container that is freezer-safe. Alternatively, you can fill the batter into an ice cube tray. Place the dough in your freezer or freezer compartment.

Freezing disrupts the fermenting properties of sourdough, as some of the microorganisms die off. So give the dough 1-3 days after defrosting to recover slowly. You can add some flour and water and activate it at room temperature. You can then feed him more flour and water.

When dosing coffee, you always have to look very closely. Measuring spoons can easily distort the taste. We will show you what you have to be aware of.

The dosage affects the taste

The taste and wholesomeness of a freshly prepared coffee depends on many factors – including the dosage. How much brewing time do I give the coffee and of course what is the quality of the beans used? However, what many coffee lovers like to overlook: The dosage of the coffee powder also has a significant influence on the coffee quality: If there is too little powder, the coffee quickly tastes bland and not aromatic, but too much powder can make it taste bitter and sour. We have therefore put together some tips on how to dose your coffee correctly.

Measuring spoons are too imprecise

If you buy fresh beans for your coffee in a roastery, if you are lucky you will also get a measuring spoon with it. That’s well intentioned, but it doesn’t necessarily have to be an advantage – at least for the taste of our coffee beans. Because here the mistake is in the details: Depending on the type of coffee, the size, structure and density of the beans vary. This means that a scoop of one type of coffee can contain many more grams of coffee powder than the same scoop of another type. So if you want to be on the safe side, you should weigh the coffee powder instead of measuring it with a spoon. Because: When it comes to coffee powder, the volume is unfortunately no help. It can therefore be weighed neither by spoon nor by cup.

Dose coffee correctly: Always pay attention to the weight

So we see that good coffee quality depends, among other things, on weight. The best and most accurate way to determine the coffee powder is with a conventional kitchen scale.

Now, of course, it depends on which type of coffee you have chosen and which method of preparation you prefer – whether filter coffee, stamp jug, coffee from the fully automatic machine or from the coffee machine. Mild coffee also likes to tolerate a stronger dosage in order to develop the full taste with all aromas. Stronger varieties should be dosed rather cautiously at the beginning. However, the rule here is: the proof of the pudding is in the eating. You can find your preferred starch and bean relatively quickly. So nothing stands in the way of perfect coffee enjoyment.

Freeze tofu? That’s fine! This not only keeps it longer, but also makes it particularly crispy or tasty. You can find out what you should consider here.

Freezing tofu has several advantages: Not only can you extend the shelf life, but you can also change the consistency. Tofu can be frozen for up to six months.

When does it make sense to freeze tofu?

Freezing tofu makes sense to prevent food waste – for example in these cases:

You don’t consume your tofu within its shelf life. Note: Most foods are still edible beyond the best-before date without any problems.
You opened the package and you have tofu left over. Tofu usually only lasts a few days in the refrigerator once opened.
Because it contains a lot of water, the tofu changes its consistency when it freezes. You can use this:

The pores get bigger. As a result, thawed tofu can absorb the marinade and spices better and tastes more intense. For particularly flavorful marinated tofu, it makes sense to freeze the tofu beforehand. However, be careful not to over-season – this can easily happen due to the larger pores.
Depending on the type, freezing the tofu makes it either firmer, softer or more crumbly. Natural tofu becomes firmer and easier to express. You can take advantage of this in dishes with crispy tofu, such as breaded tofu sticks. All other types of tofu, such as silken tofu, become softer and more crumbly and are then great for soy Bolognese or desserts such as vegan chocolate mousse or vegan cheesecake.
It is possible that some varieties will turn yellowish when frozen. However, the yellow tinge often disappears again when it is thawed.

Freezing tofu: what do you have to consider?

Pack the tofu airtight, for example in a tightly sealable box. Alternatively, you can leave it in the vacuum pack that you bought the tofu in. This is important to keep the tofu from drying out and freezer burn.
If you like, you can chop or portion the tofu before freezing.
The tofu should be in the freezer compartment or cupboard for at least half a day so that it is properly frozen. Then you can use the changes in consistency (see above).
Don’t marinate and season the tofu until it’s thawed.
The best way to thaw frozen tofu is to place it in the fridge the night before.

Which tofu is recommended

We recommend buying organic tofu. In particular, organic seals such as Bioland, Demeter or Naturland have strict guidelines and ban chemical-synthetic pesticides, among other things. In addition, organic tofu mostly consists of European soy.

Ask your supermarket or health food store about regional products and pay attention to the indications of origin. With shorter transport routes, you can save on CO2 emissions and thus reduce your ecological footprint. Here you can find out more about how you can eat regionally despite a vegan diet: Vegan regional: Soya and seitan are also available from Germany.

Tip: You can also make tofu yourself.

Quinoline yellow is questionable as a food coloring – experts are still researching how much. Here’s how the substance is likely to affect your health and how best to avoid it.

Quinoline Yellow is an artificial coloring. The yellow powder gives industrially produced foods in particular a more intense tint. Quinoline yellow can hide not only in yellow, but also in green-colored foods: when mixed with a blue dye, it creates a green tint.

However, the use of artificial dyes such as quinoline yellow is quite controversial. Research results have been known for some time that indicate connections between dyes and health risks. Most studies refer to a special group of artificial colors, the so-called azo dyes. Although quinoline yellow does not belong directly to this group by chemical definition, it can be identified using the same analytical methods. Studies on the effects of the additives on humans often examine quinoline yellow and azo dyes together.

Can quinoline yellow be harmful to health?

Due to the worrying information, the European Food Safety Authority (EFSA) is currently re-examining all previously approved coloring agents in a large-scale study. Quinoline yellow is specifically suspected of promoting the following diseases, among others:

Hyperactivity in children (ADHD syndrome):

An English study from 2007 triggered renewed scientific discussion about artificial colourants. As a result, the study establishes a connection between certain dyes, the preservative sodium benzoate (E 211) and hyperactivity in children. The EFSA names the affected dyes: In addition to quinoline yellow (E104), five azo dyes have also been noticed. They are Tartrazine (E102), Sunset Yellow (E110), Ponceau 4R (E124), Allura Red (E129) and Carmoisin (E122).
Surveys by the EFSA showed that the additives mentioned are widespread in soft drinks such as lemonades or in sweets. In this way, children could ingest dangerously high amounts of the substances. However, the EFSA has not yet been able to confirm the conclusions of the English study. A final risk assessment by EFSA for all substances is not yet available. However, there are already interim reports for some of the dyes – including quinoline yellow.

In its 2009 risk assessment for quinoline yellow, the EFSA drastically reduced the previous maximum value as a precaution. The so-called ADI value indicates the daily intake that is considered harmless (“acceptable daily intake”). For quinoline yellow it is now a maximum of 0.5 milligrams per kilogram of body weight. Before that, the range was zero to ten milligrams per kilogram of body weight.
The Bavarian State Office for Food Safety also refers to the statutory EU regulation, which prescribes a warning for the additives mentioned. Foods containing quinoline yellow or any of the other coloring agents must indicate the possible health consequences for children on the packaging.
According to Foodwatch, for example, Haribo has dispensed with the artificial colors in question since the reclassification in order to avoid the warning. Foodwatch also asks why the EU requires a warning but has not issued a ban. For example, foodstuffs containing quinoline yellow may not be imported into the USA.
Hives (Urticaria):

Like many of the azo dyes, quinoline yellow can presumably worsen the course of certain skin diseases. A study shows that the dye quinoline yellow can trigger a renewed flare-up of the disease. It is typical of this skin disease that it occurs in flares due to environmental triggers such as food.

Is quinoline yellow carcinogenic?

When it comes to the question of whether quinoline yellow may promote cancer or damage the genetic material, experts are not in agreement. However, various studies suggest that it is.

Is quinoline yellow carcinogenic? A study on laboratory animals suggests an increased risk of cancer from the food coloring. However, the study dates back to 1997 and is therefore more than twenty years old.
Is quinoline yellow mutagenic? This is the result of another study from 2004. Using laboratory tests on cell cultures, it identified potentially genotoxic – i.e. mutagenic – effects.
EFSA cannot confirm such conclusions in its 2009 report on quinoline yellow. According to the organization, their research found no scientific evidence that quinoline yellow could cause cancer in humans or cause genetic damage.

However, it remains questionable whether the question has been finally resolved. Recent research points in the direction that quinoline yellow could trigger undesirable reactions in the body. A study from 2018 shows that the dye can react with certain proteins in the blood plasma. However, it is not clear from the study whether such reactions may lead to health problems.

Where quinoline yellow can be found – and how to avoid it

You can recognize quinoline yellow by the E number E 104 on the list of ingredients. You can also download an app that shows you questionable content and explains the E number, for example from Codecheck. With these products, it is particularly worth looking at the additives – they could contain quinoline yellow:

The knowledge magazine Spektrum reports that the food industry often uses quinoline yellow to color drinks, jams, sweets or desserts.
According to the code check, companies help with some energy drinks, lemonades, fruit gums or vanilla sauce with the coloring agent.
Quinoline Yellow can also be found in cosmetics or pharmaceuticals. These include, for example, vitamin preparations or the coating of various capsules and tablets. By the way: The green color of the cold syrup Wick Medinait is also due to a mixture of quinoline yellow and blue dye.

The best way to avoid possible health risks from quinoline yellow is to use fresh food. Many of the products that are available ready-made can also be made by yourself with simple means. The big advantage: You then know exactly what is in your meals or snacks. Here are some tips:

You can mix soft drinks such as lemonade or iced tea quickly and with just a few ingredients according to your own preferences.
Jam: With this basic recipe you will succeed in making fruity jam.
You can also easily make fruit gums or sugar caramel yourself.
Coffee: Instead of an energy drink, brew a cup of coffee. When you buy organic coffee, you can be sure that it doesn’t contain any harmful pesticides. It is best to also look out for a Fairtrade seal.
Cold: Herbal home remedies relieve the symptoms of a cold in a natural way – and are free of artificial colors.
If possible, use organic products from the organic market or a regional farm shop as ingredients. You can orientate yourself to organic seals that do not use any artificial additives, such as Bioland, Demeter or Naturland.

Cime di rapa are leafy greens that taste like broccoli. Here you can find out where and when the stem cabbage grows and how you can get it in Germany. We also present a typical Apulian recipe.

Cime di rapa are also known as Italian broccoli, wild broccoli or collards. Literally translated, the term means something like “turnip sprouts” or “turnip tops”. The vegetable has long-stemmed leaves and small inflorescences that look like broccoli florets. The inflorescences are edible if they have not yet blossomed, as are the leaves and stems. While cime di rapa is widespread in Italy and the Mediterranean region in general, they are less common in Germany.

The name “wild broccoli” is not only due to its appearance: it is also similar to conventional broccoli in taste. However, the stalk cabbage has a bitter note and a slight spiciness. If you want to tone down these flavors, you can blanch the vegetables.

Cime di rapa are a popular ingredient, especially in Apulian cuisine. Apulia is a region located in south-eastern Italy. There, for example, stalk cabbage is part of the traditional pasta dish “Orecchiette alle cime di rapa”. We present a recipe for this further down in the article.

Wild broccoli in the kitchen: how to prepare it

There are many ways to prepare cime di rapa.

A simple method is to cook the buds, stalks, and leaves of the kale in the pan. You can stew, steam, stew or roast the vegetables.
Wild broccoli from the pan is a good vegetable side dish for various dishes.
You can also use the kale as a soup ingredient, for example in a minestrone recipe, or add it to pasta dishes and casseroles.
Even if you want to make pesto yourself, Cime di rapa is a good base.

Orecchiette alle cime di rapa: tips & hints

A classic stalk cabbage recipe from Apulia is “Orecchiette alle cime di rapa”. Orecchiette is a special type of pasta named for its ear-like shape. Traditionally, “Orecchiette alle cime di rapa” contain anchovies in addition to vegetables. Here we present a vegan recipe without anchovies. If you want, you can alternatively replace the small fish with salted capers.

Important: When cooking, use ingredients of organic quality whenever possible – you can recognize them by the corresponding certificate. For example, the Demeter seal and the Bioland seal are recommended. They identify ecologically sustainable products that are free of chemical-synthetic pesticides.

In order to avoid long transport routes with high CO2 emissions, it is also worth buying regionally and seasonally. Unfortunately, this is usually not possible with Cime di rapa. Most of the other ingredients you get in the summer months but from German cultivation.

Apulian recipe: Orecchiette alle cime di rapa

Ingredients:

500 g Cime di rapa
Salt
180 g orecchiette
1 small onion
1 clove(s) garlic
10 dried tomatoes (in oil)
1peperoncino pod (fresh)
2 tbsp olive oil
salt and pepper

Directions:

Wash the cime di rapa and drain well. Cut off and discard any stems that are hollow, woody, or overly thick.
Cut or pluck the leaves, buds, and thinner stems into small pieces.
Fill a large saucepan with plenty of water and bring to a boil. Salt the water and add the pasta.
Follow the time on the package and add the kale to the noodles six minutes before the end of the cooking time.
While the pasta and kale are cooking, you can prepare the rest of the vegetables: Peel and finely chop the onion and garlic. Wash the tomatoes and the peperoncino and cut them into small pieces.
Heat the olive oil in a pan. Fry the onion and garlic briefly and then add the tomatoes and the pepperoncini. Add a little pasta water to the pan and let the vegetables simmer for another 2-3 minutes.
Drain the pasta and kale and let them drain well. Then mix them with the vegetables and stock and season with salt and pepper.

When and where does the kale grow?

In Italy, cime di rapa is grown in consecutive batches two to three months apart. They can be harvested almost all year round. Only in midsummer can it be difficult to find the kale on Italian markets at times. In Germany you can buy Cime di rapa between October and April. The goods are mostly imported from Italy.

Because cime di rapa is not very common in German cuisine, it can be difficult to find the “wild broccoli” in this country. The best thing to do is to try your luck at the larger weekly markets or in the Italian delicatessen. Sometimes Turkish specialty shops also offer cime di rapa under the name “Rappa” or “Rapa”.

Plant cime di rapa yourself

If you’re unsuccessful in finding collards, it’s worth considering planting them yourself. So you are not dependent on imported goods and avoid long transport routes.

When: You can sow the seeds outdoors between June and October. In winter, Cime di rapa can also be grown in a greenhouse.
Location: The plants need a sunny to semi-shady location. They do not make any great demands on the soil.
Sowing: Sow the seeds in rows 40 centimeters apart. You should use the seeds themselves at intervals of 20 to 30 centimeters and press them one to two centimeters deep into the soil. After they have germinated, it is best to separate the plantlets four to six centimeters apart.
Care: Cime di rapa are easy to care for – it is enough to water them regularly, especially during dry periods. Also, you can occasionally hoe the soil to loosen it.
Harvest: The kale is ready for harvest five to seven weeks after sowing.
However, it is not easy to get hold of (organic) seeds for Cime di rapa in Germany. The best thing to do is to try it in a well-stocked garden shop or online.