Tag

this

Browsing

You can simply dry sourdough and store it for a long time. We will introduce you to three methods of preserving sourdough: by crumbling, drying and freezing.

You only have to prepare sourdough once and can then “feed” it again and again with flour and water and thus multiply it. This makes it last forever. The sourdough contains microorganisms (such as lactic acid bacteria and yeast) that form during the fermentation process and make the dough slightly acidic. However, if you don’t bake regularly or want to send the sourdough to friends or relatives, you can preserve the sourdough by drying it. The shelf life of the sourdough varies depending on the method, ranging from three months to several years.

For each of the three methods, you must first prepare a sourdough. You can find instructions here: Prepare the sourdough. We strongly recommend that you buy the ingredients in organic quality. Among other things, you avoid residues of chemical-synthetic pesticides and support ecological agriculture.

Method: Crumble sourdough
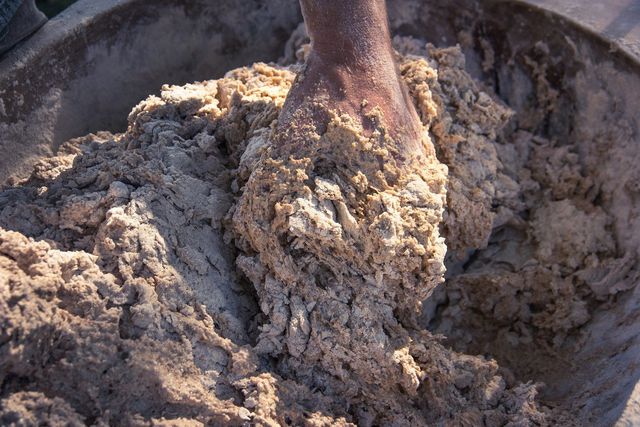
The first method is the “crumbling” and subsequent drying of leaven:

Pour your prepared sourdough into a bowl.
Gradually add the flour and mix everything together with a wooden spoon. Use enough flour so that the dough is only slightly moist and crumbs can form.
Gradually rub the dough between your palms. This creates crumbs. Do the same with the entire dough.
It is best to spread the crumbs on a baking sheet and let them dry for several hours. This way you prevent mold.
Fill the so-called Krümelsauer into a lockable screw-top jar. You should only close the jar loosely or drill a hole in it if the dough continues to ferment a little. Alternatively, use a cloth bag. The dried sourdough can be stored in the refrigerator for about three months.

To use the dough again, add enough water to the crumbs until it becomes a paste. Store the dough at room temperature for about 2 to 8 hours. It is then activated again and can be processed further.

Method: Dry sourdough as flakes or powder

The second method involves making flakes or powder from the sourdough:

Spread the sourdough thinly on half of a sheet of baking paper and fold it over. If you have more dough, use a second sheet of baking paper.
Allow the sourdough to dry at room temperature. This takes about a day or two. The dough needs to be really dry, otherwise mold can form.
Dried, sourdough is lighter in color, cracks, and breaks easily when touched.
Note: You can usually reuse the parchment paper. To do this, carefully peel off the dry sourdough so that the baking paper does not tear. Or you can use a sustainable baking paper alternative.

Break off small pieces of the dried sourdough. Now you have two options:

For tiles: Place the small pieces in a sealable container, cloth bag, or paper bag.
For powder: grind the small dividers into powder with a mortar or grinder.
Dried sourdough lasts for several years. You can store it in the fridge or at room temperature in a dark place (for example, in the pantry).

To reactivate the leaven, you need to add water and flour. First add the same amount of water to the dried dough (ratio 1:1). If he starts blistering at room temperature, you can “feed” him with more water and flour. This can take several hours.

Note: Since most microorganisms die off during drying, the sourdough may not always start to ferment. This is always the case when there are no or no longer sufficient microorganisms in the dough.

Method: Sourdough Freezing
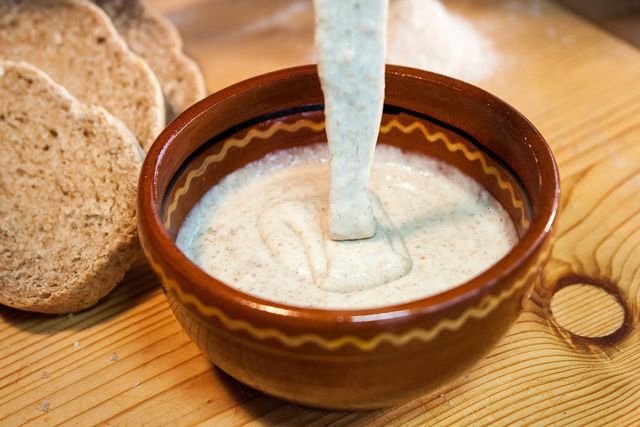
Pour your sourdough into a sealable container that is freezer-safe. Alternatively, you can fill the batter into an ice cube tray. Place the dough in your freezer or freezer compartment.

Freezing disrupts the fermenting properties of sourdough, as some of the microorganisms die off. So give the dough 1-3 days after defrosting to recover slowly. You can add some flour and water and activate it at room temperature. You can then feed him more flour and water.

When dosing coffee, you always have to look very closely. Measuring spoons can easily distort the taste. We will show you what you have to be aware of.

The dosage affects the taste

The taste and wholesomeness of a freshly prepared coffee depends on many factors – including the dosage. How much brewing time do I give the coffee and of course what is the quality of the beans used? However, what many coffee lovers like to overlook: The dosage of the coffee powder also has a significant influence on the coffee quality: If there is too little powder, the coffee quickly tastes bland and not aromatic, but too much powder can make it taste bitter and sour. We have therefore put together some tips on how to dose your coffee correctly.

Measuring spoons are too imprecise

If you buy fresh beans for your coffee in a roastery, if you are lucky you will also get a measuring spoon with it. That’s well intentioned, but it doesn’t necessarily have to be an advantage – at least for the taste of our coffee beans. Because here the mistake is in the details: Depending on the type of coffee, the size, structure and density of the beans vary. This means that a scoop of one type of coffee can contain many more grams of coffee powder than the same scoop of another type. So if you want to be on the safe side, you should weigh the coffee powder instead of measuring it with a spoon. Because: When it comes to coffee powder, the volume is unfortunately no help. It can therefore be weighed neither by spoon nor by cup.

Dose coffee correctly: Always pay attention to the weight

So we see that good coffee quality depends, among other things, on weight. The best and most accurate way to determine the coffee powder is with a conventional kitchen scale.

Now, of course, it depends on which type of coffee you have chosen and which method of preparation you prefer – whether filter coffee, stamp jug, coffee from the fully automatic machine or from the coffee machine. Mild coffee also likes to tolerate a stronger dosage in order to develop the full taste with all aromas. Stronger varieties should be dosed rather cautiously at the beginning. However, the rule here is: the proof of the pudding is in the eating. You can find your preferred starch and bean relatively quickly. So nothing stands in the way of perfect coffee enjoyment.

Freeze tofu? That’s fine! This not only keeps it longer, but also makes it particularly crispy or tasty. You can find out what you should consider here.

Freezing tofu has several advantages: Not only can you extend the shelf life, but you can also change the consistency. Tofu can be frozen for up to six months.

When does it make sense to freeze tofu?

Freezing tofu makes sense to prevent food waste – for example in these cases:

You don’t consume your tofu within its shelf life. Note: Most foods are still edible beyond the best-before date without any problems.
You opened the package and you have tofu left over. Tofu usually only lasts a few days in the refrigerator once opened.
Because it contains a lot of water, the tofu changes its consistency when it freezes. You can use this:

The pores get bigger. As a result, thawed tofu can absorb the marinade and spices better and tastes more intense. For particularly flavorful marinated tofu, it makes sense to freeze the tofu beforehand. However, be careful not to over-season – this can easily happen due to the larger pores.
Depending on the type, freezing the tofu makes it either firmer, softer or more crumbly. Natural tofu becomes firmer and easier to express. You can take advantage of this in dishes with crispy tofu, such as breaded tofu sticks. All other types of tofu, such as silken tofu, become softer and more crumbly and are then great for soy Bolognese or desserts such as vegan chocolate mousse or vegan cheesecake.
It is possible that some varieties will turn yellowish when frozen. However, the yellow tinge often disappears again when it is thawed.

Freezing tofu: what do you have to consider?

Pack the tofu airtight, for example in a tightly sealable box. Alternatively, you can leave it in the vacuum pack that you bought the tofu in. This is important to keep the tofu from drying out and freezer burn.
If you like, you can chop or portion the tofu before freezing.
The tofu should be in the freezer compartment or cupboard for at least half a day so that it is properly frozen. Then you can use the changes in consistency (see above).
Don’t marinate and season the tofu until it’s thawed.
The best way to thaw frozen tofu is to place it in the fridge the night before.

Which tofu is recommended

We recommend buying organic tofu. In particular, organic seals such as Bioland, Demeter or Naturland have strict guidelines and ban chemical-synthetic pesticides, among other things. In addition, organic tofu mostly consists of European soy.

Ask your supermarket or health food store about regional products and pay attention to the indications of origin. With shorter transport routes, you can save on CO2 emissions and thus reduce your ecological footprint. Here you can find out more about how you can eat regionally despite a vegan diet: Vegan regional: Soya and seitan are also available from Germany.

Tip: You can also make tofu yourself.

Quinoline yellow is questionable as a food coloring – experts are still researching how much. Here’s how the substance is likely to affect your health and how best to avoid it.

Quinoline Yellow is an artificial coloring. The yellow powder gives industrially produced foods in particular a more intense tint. Quinoline yellow can hide not only in yellow, but also in green-colored foods: when mixed with a blue dye, it creates a green tint.

However, the use of artificial dyes such as quinoline yellow is quite controversial. Research results have been known for some time that indicate connections between dyes and health risks. Most studies refer to a special group of artificial colors, the so-called azo dyes. Although quinoline yellow does not belong directly to this group by chemical definition, it can be identified using the same analytical methods. Studies on the effects of the additives on humans often examine quinoline yellow and azo dyes together.

Can quinoline yellow be harmful to health?

Due to the worrying information, the European Food Safety Authority (EFSA) is currently re-examining all previously approved coloring agents in a large-scale study. Quinoline yellow is specifically suspected of promoting the following diseases, among others:

Hyperactivity in children (ADHD syndrome):

An English study from 2007 triggered renewed scientific discussion about artificial colourants. As a result, the study establishes a connection between certain dyes, the preservative sodium benzoate (E 211) and hyperactivity in children. The EFSA names the affected dyes: In addition to quinoline yellow (E104), five azo dyes have also been noticed. They are Tartrazine (E102), Sunset Yellow (E110), Ponceau 4R (E124), Allura Red (E129) and Carmoisin (E122).
Surveys by the EFSA showed that the additives mentioned are widespread in soft drinks such as lemonades or in sweets. In this way, children could ingest dangerously high amounts of the substances. However, the EFSA has not yet been able to confirm the conclusions of the English study. A final risk assessment by EFSA for all substances is not yet available. However, there are already interim reports for some of the dyes – including quinoline yellow.

In its 2009 risk assessment for quinoline yellow, the EFSA drastically reduced the previous maximum value as a precaution. The so-called ADI value indicates the daily intake that is considered harmless (“acceptable daily intake”). For quinoline yellow it is now a maximum of 0.5 milligrams per kilogram of body weight. Before that, the range was zero to ten milligrams per kilogram of body weight.
The Bavarian State Office for Food Safety also refers to the statutory EU regulation, which prescribes a warning for the additives mentioned. Foods containing quinoline yellow or any of the other coloring agents must indicate the possible health consequences for children on the packaging.
According to Foodwatch, for example, Haribo has dispensed with the artificial colors in question since the reclassification in order to avoid the warning. Foodwatch also asks why the EU requires a warning but has not issued a ban. For example, foodstuffs containing quinoline yellow may not be imported into the USA.
Hives (Urticaria):

Like many of the azo dyes, quinoline yellow can presumably worsen the course of certain skin diseases. A study shows that the dye quinoline yellow can trigger a renewed flare-up of the disease. It is typical of this skin disease that it occurs in flares due to environmental triggers such as food.

Is quinoline yellow carcinogenic?

When it comes to the question of whether quinoline yellow may promote cancer or damage the genetic material, experts are not in agreement. However, various studies suggest that it is.

Is quinoline yellow carcinogenic? A study on laboratory animals suggests an increased risk of cancer from the food coloring. However, the study dates back to 1997 and is therefore more than twenty years old.
Is quinoline yellow mutagenic? This is the result of another study from 2004. Using laboratory tests on cell cultures, it identified potentially genotoxic – i.e. mutagenic – effects.
EFSA cannot confirm such conclusions in its 2009 report on quinoline yellow. According to the organization, their research found no scientific evidence that quinoline yellow could cause cancer in humans or cause genetic damage.

However, it remains questionable whether the question has been finally resolved. Recent research points in the direction that quinoline yellow could trigger undesirable reactions in the body. A study from 2018 shows that the dye can react with certain proteins in the blood plasma. However, it is not clear from the study whether such reactions may lead to health problems.

Where quinoline yellow can be found – and how to avoid it

You can recognize quinoline yellow by the E number E 104 on the list of ingredients. You can also download an app that shows you questionable content and explains the E number, for example from Codecheck. With these products, it is particularly worth looking at the additives – they could contain quinoline yellow:

The knowledge magazine Spektrum reports that the food industry often uses quinoline yellow to color drinks, jams, sweets or desserts.
According to the code check, companies help with some energy drinks, lemonades, fruit gums or vanilla sauce with the coloring agent.
Quinoline Yellow can also be found in cosmetics or pharmaceuticals. These include, for example, vitamin preparations or the coating of various capsules and tablets. By the way: The green color of the cold syrup Wick Medinait is also due to a mixture of quinoline yellow and blue dye.

The best way to avoid possible health risks from quinoline yellow is to use fresh food. Many of the products that are available ready-made can also be made by yourself with simple means. The big advantage: You then know exactly what is in your meals or snacks. Here are some tips:

You can mix soft drinks such as lemonade or iced tea quickly and with just a few ingredients according to your own preferences.
Jam: With this basic recipe you will succeed in making fruity jam.
You can also easily make fruit gums or sugar caramel yourself.
Coffee: Instead of an energy drink, brew a cup of coffee. When you buy organic coffee, you can be sure that it doesn’t contain any harmful pesticides. It is best to also look out for a Fairtrade seal.
Cold: Herbal home remedies relieve the symptoms of a cold in a natural way – and are free of artificial colors.
If possible, use organic products from the organic market or a regional farm shop as ingredients. You can orientate yourself to organic seals that do not use any artificial additives, such as Bioland, Demeter or Naturland.

Cime di rapa are leafy greens that taste like broccoli. Here you can find out where and when the stem cabbage grows and how you can get it in Germany. We also present a typical Apulian recipe.

Cime di rapa are also known as Italian broccoli, wild broccoli or collards. Literally translated, the term means something like “turnip sprouts” or “turnip tops”. The vegetable has long-stemmed leaves and small inflorescences that look like broccoli florets. The inflorescences are edible if they have not yet blossomed, as are the leaves and stems. While cime di rapa is widespread in Italy and the Mediterranean region in general, they are less common in Germany.

The name “wild broccoli” is not only due to its appearance: it is also similar to conventional broccoli in taste. However, the stalk cabbage has a bitter note and a slight spiciness. If you want to tone down these flavors, you can blanch the vegetables.

Cime di rapa are a popular ingredient, especially in Apulian cuisine. Apulia is a region located in south-eastern Italy. There, for example, stalk cabbage is part of the traditional pasta dish “Orecchiette alle cime di rapa”. We present a recipe for this further down in the article.

Wild broccoli in the kitchen: how to prepare it

There are many ways to prepare cime di rapa.

A simple method is to cook the buds, stalks, and leaves of the kale in the pan. You can stew, steam, stew or roast the vegetables.
Wild broccoli from the pan is a good vegetable side dish for various dishes.
You can also use the kale as a soup ingredient, for example in a minestrone recipe, or add it to pasta dishes and casseroles.
Even if you want to make pesto yourself, Cime di rapa is a good base.

Orecchiette alle cime di rapa: tips & hints

A classic stalk cabbage recipe from Apulia is “Orecchiette alle cime di rapa”. Orecchiette is a special type of pasta named for its ear-like shape. Traditionally, “Orecchiette alle cime di rapa” contain anchovies in addition to vegetables. Here we present a vegan recipe without anchovies. If you want, you can alternatively replace the small fish with salted capers.

Important: When cooking, use ingredients of organic quality whenever possible – you can recognize them by the corresponding certificate. For example, the Demeter seal and the Bioland seal are recommended. They identify ecologically sustainable products that are free of chemical-synthetic pesticides.

In order to avoid long transport routes with high CO2 emissions, it is also worth buying regionally and seasonally. Unfortunately, this is usually not possible with Cime di rapa. Most of the other ingredients you get in the summer months but from German cultivation.

Apulian recipe: Orecchiette alle cime di rapa

Ingredients:

500 g Cime di rapa
Salt
180 g orecchiette
1 small onion
1 clove(s) garlic
10 dried tomatoes (in oil)
1peperoncino pod (fresh)
2 tbsp olive oil
salt and pepper

Directions:

Wash the cime di rapa and drain well. Cut off and discard any stems that are hollow, woody, or overly thick.
Cut or pluck the leaves, buds, and thinner stems into small pieces.
Fill a large saucepan with plenty of water and bring to a boil. Salt the water and add the pasta.
Follow the time on the package and add the kale to the noodles six minutes before the end of the cooking time.
While the pasta and kale are cooking, you can prepare the rest of the vegetables: Peel and finely chop the onion and garlic. Wash the tomatoes and the peperoncino and cut them into small pieces.
Heat the olive oil in a pan. Fry the onion and garlic briefly and then add the tomatoes and the pepperoncini. Add a little pasta water to the pan and let the vegetables simmer for another 2-3 minutes.
Drain the pasta and kale and let them drain well. Then mix them with the vegetables and stock and season with salt and pepper.

When and where does the kale grow?

In Italy, cime di rapa is grown in consecutive batches two to three months apart. They can be harvested almost all year round. Only in midsummer can it be difficult to find the kale on Italian markets at times. In Germany you can buy Cime di rapa between October and April. The goods are mostly imported from Italy.

Because cime di rapa is not very common in German cuisine, it can be difficult to find the “wild broccoli” in this country. The best thing to do is to try your luck at the larger weekly markets or in the Italian delicatessen. Sometimes Turkish specialty shops also offer cime di rapa under the name “Rappa” or “Rapa”.

Plant cime di rapa yourself

If you’re unsuccessful in finding collards, it’s worth considering planting them yourself. So you are not dependent on imported goods and avoid long transport routes.

When: You can sow the seeds outdoors between June and October. In winter, Cime di rapa can also be grown in a greenhouse.
Location: The plants need a sunny to semi-shady location. They do not make any great demands on the soil.
Sowing: Sow the seeds in rows 40 centimeters apart. You should use the seeds themselves at intervals of 20 to 30 centimeters and press them one to two centimeters deep into the soil. After they have germinated, it is best to separate the plantlets four to six centimeters apart.
Care: Cime di rapa are easy to care for – it is enough to water them regularly, especially during dry periods. Also, you can occasionally hoe the soil to loosen it.
Harvest: The kale is ready for harvest five to seven weeks after sowing.
However, it is not easy to get hold of (organic) seeds for Cime di rapa in Germany. The best thing to do is to try it in a well-stocked garden shop or online.

Modified starch is an additive that is subject to authorization and is based on ordinary food starch. In this article you will find out exactly what modified starch is, how the additive is used and whether you should avoid it.

Additives E1404 to E1450

Modified starch is not a single additive: A total of eleven different variants of modified starch can be found in the list of food additives (E number list). However, the substances with the E numbers from E1404 to E1450 all have one thing in common: They are based on chemically modified cornstarch.

Ordinary starch mostly comes from potatoes, corn or wheat. In this form you will find the substance as a “starch” on the list of ingredients. Even if starch is modified physically (by heat or pressure) or enzymatically, it is still considered an ingredient according to the Bavarian Consumer Advice Center – and is therefore listed as “starch”. However, as soon as the substance has been chemically modified, it is, according to the definition, an additive with an E number that is subject to authorization. In the list of ingredients you will then find the additive as “modified starch”. Background: The chemical modification profoundly changes the structure of the substance.

Depending on the process, the starch is chemically modified once or several times. In addition to physical or enzymatic modification, according to the BVL, the starch is treated with acid or alkali solution, oxidized or bleached, among other things.

Use: Modified starch in food

Normal cornstarch and modified starches are used in the food industry primarily as binding agents: the substances can be used to make sauces, puddings and soups creamier, but also to hold finished products such as French fries together. Modified starches can also be found in dressings, mayonnaise, instant products, frozen products and dairy products.

Compared to conventional starch, modified starch is less sensitive to cold, heat and acid and/or swells better.

These properties are used primarily for finished products that are deep-frozen or heated in the microwave. Thanks to the modified starch, the consistency of the products does not change even when cooking or freezing.

Modified Strength: Buying Tips and Advice

In general, we recommend using natural, unprocessed foods as often as possible instead of industrially processed products. This is not only more environmentally friendly, but also healthier. By cooking with natural foods as often as possible instead of eating ready-made products, you have full control over all the ingredients. For this reason, we generally advise against products that contain additives such as modified starch. Tip: Follow the ten rules for a balanced diet.

In addition, you should always use organic food whenever possible. Controlled organic farming is not only more environmentally friendly, but also dispenses with chemical-synthetic pesticides. In addition, fewer additives are permitted for processed organic foods. If you pay attention to an organic seal when buying, you automatically avoid modified starch, because according to the Bavarian consumer advice center, this is not allowed in organic food.

That being said, food manufacturers must always list modified starches as an additive on the ingredients list. How to read the food ingredient list correctly is explained in another article.

From a health point of view, modified starch is no different from ordinary cornstarch because the body processes it in the same way. The additive itself is therefore less of a concern than the product in which it is used: Such products are mostly highly processed foods with many questionable ingredients such as a lot of salt or sugar, flavorings and other additives. In addition, modified starch is based in part on genetically modified corn.

Something went wrong in the kitchen? Most of the time you can still save your food. We give you tips on typical problems.

You weren’t paying attention for a moment, the salt slipped or the recipe didn’t work. This can happen, but don’t worry: you can usually save your food. Before throwing it away, avoid wasting food and try one of our tips.

Save oversalted food

Almost everyone has probably oversalted a meal at some point. This can often be prevented by adding small amounts of salt step by step and tasting in between. However, this is not easy with some dishes such as casseroles and it can also happen that you add too much salt all at once.

How to save oversalted food:

If you’ve just slipped the salt, you may still be able to skim it off the surface of the food.
Cut a raw potato into large pieces and cook them for a few minutes. It absorbs some of the salt. Then remove them from the pot. The same works with carrots, bread or prunes. Cook the latter for about 15 minutes.
Sweeten your dish slightly, for example with honey or maple syrup. If it tastes too sweet afterwards, you can counteract it with a little acid (e.g. lemon).
Serve unsalted side dishes with the dish, such as lettuce leaves or yogurt.
The following tips also work for foods that are too sweet, spicy or sour:

Mix soup, sauce or your stew with water, wine, milk, cream or a vegan cream or plant-based milk. You can then thicken the liquid – there are tips for this below.
Prepare the dish again unsalted (or without spiciness, sugar or acid, as required) and mix both variants together.

Too spicy food? you can do that

Sharpness is not always easy to dose. Some chili peppers are very hot, others hardly at all. In addition, everyone perceives sharpness differently.

How to save overly spicy food:

Capsaicin, which makes the chili hot, is fat-soluble. You can often save overly spicy food by skimming off the fat on the surface.
Again, add a tablespoon or two of honey or maple syrup to the food. You can then compensate for too much sweetness with acid.
Serve the dish with bread and/or yoghurt or quark or provide milk. These foods help mitigate spiciness.
You can also save food that is too spicy by cooking raw potato pieces in it for a few minutes.

Save too sweet food

Sweetness is also a matter of taste – in both savory and sweet dishes. For both variants, you have different options for saving food that is too sweet:

A pinch of salt can help tone down the sweetness of savory foods.
You can season both savory and sweet foods with acid to balance out the sweetness. Lemon juice or vinegar, for example, help with savory dishes (note: some vinegars contain sugar). You can also round off some sweet dishes with lemon juice. For others, it is a good idea to add sour fruit to compensate – for example a berry sauce or rhubarb compote.
As with other taste flaws, you can sometimes salvage food that’s too sweet by stretching it. This works especially well with rather liquid foods. Stretch them with water or a dry wine, for example, and taste them again.

What to do when your food burns

Charred or burnt food is annoying for two reasons: The black spots don’t taste good and contain harmful substances like acrylamide. So you better always keep an eye on your food. Still, you can salvage burnt or charred food.

If something burns in the pot, you may still be able to salvage your food. Be sure not to stir so the burnt doesn’t mix with the rest. Instead, carefully skim off the unharmed portion of the food and place it in a new pot. You can continue cooking the food in it. It may still taste slightly roasted – either that goes well or you can try to cover the roasted flavor with spices.
A few spots have become too dark when roasting or baking? It is best to cut them off generously. Unfortunately, it doesn’t look so nice, especially with a cake. However, you can cover up the broken spots by covering the cake with icing, vegan frosting or whipped cream, for example.

Save food that is too liquid

Soups and sauces don’t always have the desired consistency – they often just don’t want to be creamy. However, food that is too liquid can be saved easily:

If you still have time, you can let the soup or sauce simmer uncovered. This is useful if you are not that far from the desired result. If so, this method is very time-consuming and energy-consuming.
Mix about a tablespoon of flour or starch with a little water, wine, or milk. Stir the mixture into the food and cook again until thick.
(Vegan) cream or crème fraîche (substitute) can also make dishes that are too liquid creamier.
Grate a raw potato and stir it into the food. Cook them until the shavings dissolve and combine with the rest of the sauce.
Stir cold (vegan) butter into the food in chunks.

Overcooked food? You can save even that

Some people don’t mind if the vegetables are soft and the noodles have a wobbly texture. For others, overcooked food is inedible. Unfortunately, the cooking process cannot be reversed – you can still save the food:

Prevent worse by immediately removing the food from the stove. You can also rinse noodles or vegetables under cold water to interrupt the cooking process.
Garnish the food with a crunchy topping. You have many options for this – for example (roasted) nuts or seeds, homemade croutons or crispy fried tofu.
You can prepare a delicious mash, puree or vegetable soup from overcooked vegetables and potatoes.
Sear overcooked foods or gratinate them in the oven until they get a crispy surface. This works particularly well with starchy foods such as pasta or potatoes.

Cake base is broken

Cakes are often served on festive occasions, which makes it all the more important that they turn out well. A broken cake base is therefore very annoying. It can break for a variety of reasons:

You took the dough out of the mold too soon. It should always cool down first.
The pan wasn’t greased well and the dough stuck in one spot. You can prevent this by very carefully removing the dough from the mold and, if necessary, using a knife or something similar.
You tried to cut through the cake base.
Even if it is broken, you can of course still eat the cake base. How to save him:

The easiest thing to save is a cake with multiple bases, only one of which is broken. Simply use this as a middle or top pie crust by piecing it back together. In the latter case, you can cover the mishap with a layer of whipped cream or fruit, for example.
If you only have the one cake base, you can also puzzle it back together. When cutting, some pieces may be a bit crumbly later. However, a creamy filling or a layer of fruit with icing will hold the cake together.
For example, if the cake base is very crumbled, you can layer the crumbs in muffin cups, alternating with the filling. With some fruit, for example, they become delicious apple muffins. Or you turn the broken cake base into a mole cake.

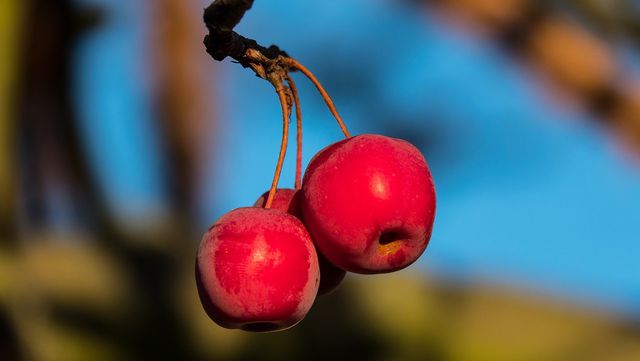
Wild apple is a small tree that attracts attention in summer with its lush flowers and provides you with numerous fruits in autumn. Here you can find out what you should consider when planting, caring for and eating.

The winter apple (also known as the crab apple) is a native plant: it has been cultivated regionally and its fruits eaten for centuries. Today, however, the winter apple is rarely found in Germany. It is also a popular refuge for birds and mammals and an important food source for various insects.

Characteristic is the thin trunk, which only reaches a diameter of two to four centimeters, and the slightly woody consistency. Some branches have thorns. Some varieties also have slightly wrinkled skin. However, this does not affect the health of the tree or the taste of the apples.

The flowering period of the tree extends from April to May and lets it shine in a white to light pink splendour. The apples ripen in early autumn and are yellowish to reddish in color, depending on the variety. Be sure to choose local varieties for planting.

Plant wild apple: The basic conditions

Before you plant wild apples, you should think about the time and place of planting. Please note the following:

Timing: Autumn is the best time to plant. In principle, however, it is possible all year round.
Location: Choose a sunny to partially shaded spot. The tree likes sun and warmth and should not be overshadowed by other plants. Otherwise it is quite robust, so that wind and rain cannot harm it. Note that the apple tree can grow between 3 and 6 meters tall. However, this varies depending on the variety. At the same time, the roots grow quite extensively and close below the surface of the earth. There are also varieties that are suitable for hedge planting.
Soil: Since the wild apple tree is a wild tree, it can get along with almost any soil. He just doesn’t particularly like extremely wet soil like moor. Nevertheless, you can enrich the particularly nutrient-poor soil with nutrients and sand.

This is how you plant the wild apple

Planting a wild apple is not difficult. To do this, follow the steps below:

Place the young tree in a bucket of water so the roots can soak.
Dig a planting hole. This should be at least twice as large as the plant ball of the wild apple tree.
Enrich the soil with some compost or other organic fertilizer.
Place the small tree in the hole and refill the soil. Squeeze them tight.
Water the freshly planted wild apple tree properly.
Depending on the location, it may make sense to initially secure the young tree with a stake.
If you sprinkle bark mulch around the tree, you prevent weeds and at the same time protect the tree from unwanted competing plants.

Caring for a tree: tips and hints

The wild apple tree is robust and quite undemanding. For care, it is sufficient if you observe the following tips:

The most important thing is that you protect the wild apple from drought. Especially when young, you should water the tree regularly during long periods of drought. We recommend collecting rainwater and using it to feed your plants.
If you want to do something good for your wild apple, you can fertilize it in the first half of the year (spring to June), preferably with compost.
Basically, it is not necessary to trim the wild apple tree. However, if it is not developing in the way that is best for your garden and other plants, or if you want to shape it, you should cut it from time to time. You can read here how to best make the cut: Cutting an apple tree: The right tree cut in spring and autumn
Wild apple is hardy. So you don’t have to take any special precautions for the cold season.
If you want to propagate the apple, the best way to do this is by sowing: Scatter the seeds of the fruit in a pot outside in autumn and keep it moist. Cutting a cutting and cultivating it is often not successful.
Diseases and pests do not worry the wild apple tree for the most part. However, typical apple tree diseases such as apple scab or fire blight can sometimes occur.

Here’s how you can use the wild apple

Wild apples are edible. However, young apples of the tree are rather sour and tart because they contain a lot of tannin. You can cook them to tone down the flavor. In addition, the kernels of wild apples, like other apples, contain the substance amygdalin, which is converted to toxic hydrocyanic acid in the body. Even if you bite into the seeds, they are harmless in small amounts.

Wild apples contain a comparatively large amount of pectin. You may know the substance as a vegan gelling agent. They also have a firmer consistency than cultivated apples. You can take advantage of these two properties by using the fruit for homemade applesauce or apple jelly. You can also make tea, juice or syrup from wild apples.

The fruits are also often used as a decorative element in arrangements or wreaths.

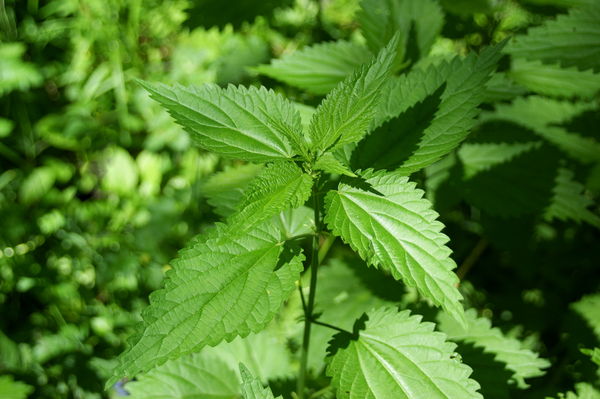
The stinging nettle is very popular again today because of its healthy nutrients. With these five recipes you can conjure up delicious dishes from the “weed”.

Nettle recipes – you should know that in advance

There are many reasons to cook more recipes with stinging nettles: The garden herb contains an active ingredient that inhibits the growth of bacteria. Stinging nettles also provide a lot of nutrients: In addition to minerals such as iron, magnesium and potassium, they even contain more vitamin C than citrus fruits!

In order to be able to enjoy the stinging nettle in your mouth without irritation, you must first break off the stinging hairs. For that there are different possibilities:

Briefly boil the nettle. This destroys the plant structure so much that the stinging hairs no longer work.
Roll the collected nettle parts with a rolling pin. This is how you break off the stinging hairs.
Puree or mix your nettle harvest: Here, too, the hair is broken off mechanically.
After you have pre-processed your nettle harvest in this way, you can overcook it without hesitation. Try the following recipes:

Recipe: Nettle as a spinach substitute

Cooked nettle leaves are an excellent substitute for spinach and can be used in the same way.

Ingredients for 4 persons:

500g nettle leaves
1 onion
olive oil
Salt pepper
Preparation:

Remove the stalks (with gloves) from the nettle leaves.
In a covered pot, boil the nettle leaves in a little water for about 10 minutes. It is enough if the water fills the pot by about 1 – 2 cm. Any overlying leaves are cooked by the steam.
Drain the cooking water, but don’t throw it away. It is rich in nutrients and can be used in a soup, for example, or drunk as is.
Finely dice the onion and sweat it in a pan with the oil.
Mix nettle, onion and spices and puree everything.
Tip: The cooked nettle leaves also taste good as “spinach” on pizza or with pasta.

Recipe: nettle pesto

Nettle leaves are also ideal for a tasty, healthy pesto. You can use our basic recipe for homemade pesto as a guide, or try the following recipe idea:

Ingredients for a jar of pesto:

100 ml olive oil
approx. a muesli bowl of nettle leaves
1 large clove of garlic
30 grams of walnuts
20 grams of pine or sunflower seeds
1 dash of balsamic vinegar
juice of half a lemon
1 tsp salt
Black pepper to taste
Preparation:

Briefly roast the nuts and seeds in the pan without fat.
Place the nuts and any other ingredients in a suitable container.
Blend everything with a hand blender until you get the consistency of pesto you want. Alternatively, you can use a mortar and pestle to complete this step. However, this is significantly more time-consuming.

Recipe: Refine the salad with stinging nettles

You can also add nettle leaves raw to any salad. Make sure to break off the stinging hairs first, as explained above. If possible, you should only use young plants or the top leaves of older nettles, especially for the salad. These are particularly tasty.

You can add just a few leaves to your salad or use the nettle leaves as the main ingredient. You can’t go wrong with one of our delicious salad dressing ideas.

Recipe: Nettle Soup

Nettle leaves are also a great side dish for soups. There are practically no limits to your creativity: You can, for example, cook one of our vegan soups and simply add one or two handfuls of nettle leaves.

Nettle soup is often prepared with potatoes and carrots. You can orientate yourself on an ordinary potato soup by adding the nettle leaves about ten minutes before the end.

Recipe: Nettle in a smoothie

Smoothies are popular, versatile and can be really healthy with the right ingredients. So it makes sense to also use the healthy nettle leaves for a delicious green smoothie.

For example, you can use our recipes for green smoothies as a guide – or just get creative yourself. Bananas, strawberries or raspberries, for example, go well with nettles, but also other wild herbs such as dandelion. In any case, a handful of nettle leaves will give you a delicious health boost.

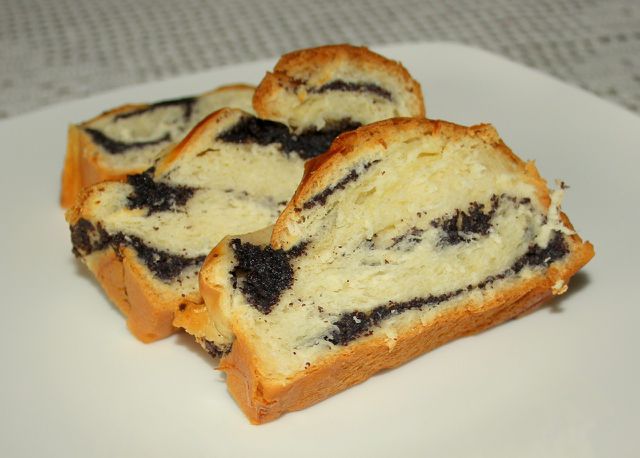
Mohnstriezel is a sweet pastry from Silesia. It is traditionally eaten at Christmas or Easter. We show you a delicious recipe with a vegan version.

Originally Mohnstriezel comes from the former Silesia. The area is now mostly in Poland. The Silesian Mohnstriezel are still served in these regions as a traditional pastry at Easter or Christmas. They consist of a sweet yeast dough filled with poppy seeds or almonds. There are also delicious sprinkles and a sweet glaze. You too can make the Silesian Mohnstriezel yourself. We will show you a recipe for the sweet pastry with a vegan version.

Pay attention to the organic quality of the ingredients. In this way you can support species-appropriate animal husbandry and avoid chemical-synthetic pesticides. Above all, we can recommend the organic seals from Demeter, Bioland and Naturland, as they comply with stricter criteria than the EU organic guidelines. Also, make sure to buy eggs without chick shredding.

Buy ingredients that are locally and seasonally sourced. This avoids long transport routes and reduces global CO2 emissions. You can also support local providers in your region.

Mohnstriezel: The recipe

Ingredients:

600 gwheat flour
42 g yeast
630 mlmilk
230 g butter
260 gsugar
1vanilla bean
0.5 untreated lemon
100 g marzipan raw mass
2 tablespoons starch
1 egg
180 g blue poppy seeds
100 gicing sugar

Directions:

Put 500 grams of flour in a large mixing bowl and make a small well in the middle.
Crumble the yeast and pour it into the well.
Heat 130 milliliters of milk until lukewarm. Pour the warm milk over the yeast and let it soak briefly.
Cut 150 grams of butter into flakes and add them to the mixing bowl.
Now add 100 grams of sugar and process the ingredients with the hand mixer to form an even dough. Cover and let the dough rise for about an hour.
In the meantime, you can make the sprinkles. Put the remaining flour and 80 grams of sugar in a bowl.
Halve the vanilla bean and carefully scrape out the pulp with a knife. Put this in the bowl as well.
Wash the lemon thoroughly and grate half of the lemon zest into the bowl.
Now add the remaining butter in flakes and mix the ingredients into a crumbly dough. You can put the finished crumbles in the fridge.
Then it’s time for the filling. To do this, cut the raw marzipan into small pieces. Pour the marzipan into a pot.
Pour half of the remaining milk into a measuring cup. Whisk together the cornstarch or cornstarch substitute and egg until smooth.
Heat the marzipan with the remaining milk and sugar. Stir constantly so it doesn’t burn. Let the ingredients boil up briefly.
Then take the marzipan off the stove and stir in the blue poppy seeds and the milk with starch. Reheat the filling and keep stirring until you get a smooth mass. Then let them cool down.
On a floured work surface, roll out the dough into an oval shape.
Spread the poppy seed filling evenly over the pastry base. Roll up the Striezel from the two longer sides towards the middle.
Place the finished Mohnstriezel on a baking sheet lined with baking paper. Spread the crumbles evenly over the pastry and press lightly.
Bake the Mohnstriezel at 180 degrees top and bottom heat for about 45 to 50 minutes. Then let it cool down completely.
Halve the lemon. Use the half that you already scraped off the skin. Squeeze out the juice from this lemon half and stir in the icing sugar (tip: make your own icing sugar). Brush the cooled Mohnstriezel with the glaze as you like.

Mohnstriezel: Tips for the preparation

The Silesian Mohnstriezel need a certain resting and baking time. However, the effort is worth it for the tasty treat. With a little practice and patience, even baking beginners can prepare the sweet Striezel. The following tips will help you with a sustainable, varied or even vegan preparation:

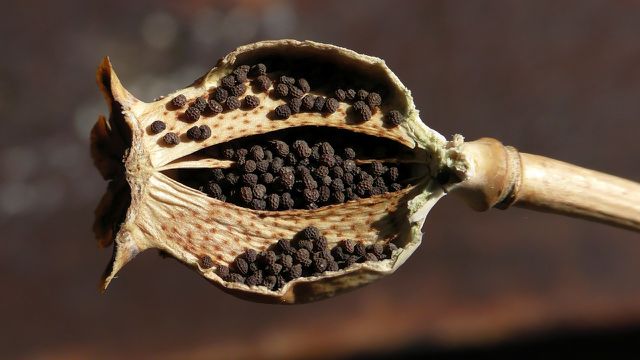
Blue poppy consists of the seeds of the opium poppy. It contains alkaloids that are used in the production of intoxicants and narcotics. The well-known morphine is also obtained from the opium poppy. The poppy seeds usually do not contain morphine, but they can become contaminated with it during harvest. The Federal Institute for Risk Assessment therefore recommends a maximum intake of 6.3 micrograms of morphine per day and kilogram. This corresponds to around 94.5 grams of poppy seeds per day for a person weighing 60 kilograms.
Vanilla originally comes from Mexico. Madagascar is now the largest cultivation area for vanilla beans. Unfortunately, pods from Germany or Europe are not available. Since the vanilla has to travel long distances, you should use it sparingly. Consume them consciously and preferably buy them with the Fairtrade seal.
You can refine the Mohnstriezel with various ingredients. For example, healthy raisins, almonds or other chopped nuts taste great in the filling. Jam or pieces of apple also give the filling a whole new taste. If you replace the wheat flour with wholemeal spelled flour, your pastries will be more nutritious and rich in fibre. However, the dough may need more liquid.
If you want your Striezel to be less sweet, you can reduce the sugar as you like.
You can also prepare your Mohnstriezel vegan. Replace the milk with plant-based milk and the butter with vegan margarine. You can use an egg substitute instead of eggs.