Tag

time?

Browsing

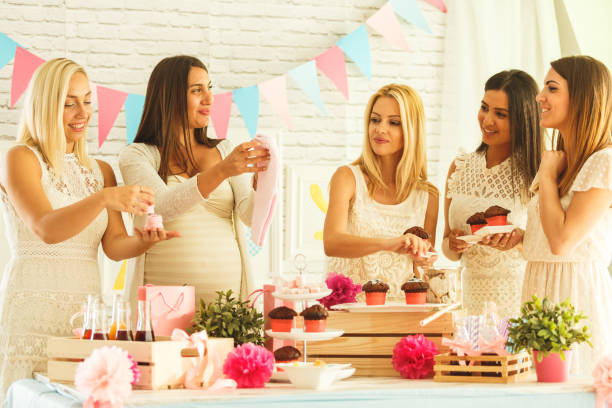
As is so often the case, the idea came from the USA, but it is also very popular in this country: More and more pregnant women want to celebrate a baby shower! The upcoming arrival of the baby is celebrated with the female friends of the pregnant woman. We have collected the best baby shower ideas and baby shower planning tips.

When is the baby shower?

Such a party usually takes place before birth. Since many people struggle with morning sickness in the first few months of pregnancy, a later date is usually chosen. You should also not set the date too soon before the birth. Because if the baby comes earlier than expected or the pregnant woman has to go to the hospital earlier because of complications, the party will, unfortunately, be canceled. So the mother-to-be should be surprised in the last trimester of her pregnancy. As a rule, a baby shower 6 – 8 weeks before the birth makes sense.

How to plan a baby shower correctly?

A baby shower is all about celebrating the upcoming arrival of the baby. Then there is delicious food, such as cakes, finger food or salads. And together, games that often have to do with the baby can be celebrated. In addition, the pregnant woman enjoys gifts for the baby and everything is nicely decorated. So a nice evening among friends. To ensure that the organization of the baby shower is successful, we have collected creative ideas for you.

Where is the celebration?

Since the friends want to be among themselves, most celebrate at home. Either with the pregnant woman or with one of the guests. If you don’t have enough space, you can also rent a room or, if possible, celebrate in the garden.

Planning food for the baby shower

First, you should invite the guests and set a suitable date with them. Then it’s time to plan the baby shower. Providing food is important as it is a big part of the party. There is usually a great cake, maybe even with the name of the child. Donuts, muffins, or other sweets can also be provided. You can also provide various salads, such as pasta salad, potato salad, and dips with finger food. It is best if everyone brings something with them, it makes the work easier. However, also note a healthy diet for pregnant women. But back to the cake. You can order great cakes online, but they’re not always cheap. Therefore, many make a cake themselves.

Baby shower party games

So that there is no boredom in between, there are great games for the baby shower. Of course, you can use existing games and play Tabu or UNO, which were used at other planned parties. But here are also wonderful games related to the baby. You can also find great sets and templates on the internet here. Then you can buy them or print them out. For example, here is a city, country, baby. It works almost like a city, country, or river, but here are the categories: baby clothes, baby food, baby toys, etc. There are also playing cards where the players guess the baby’s name or assign the baby’s characteristics to the respective parent. In addition, you can play the following games for the planned baby shower:

  • Guess waist size
  • Assign baby photos
  • advise baby porridge
  • paint onesie
  • Fill out the friend book
  • predict due date

Ideas for a beautiful decoration

Furthermore, decoration is a must for many. Here you can let your creativity run free and decorate the apartment as you wish. But now there are already ready-made sets for baby shower decoration on the Internet. This usually includes garlands, balloons, and streamers. You can also order matching plates and mugs. This makes planning a baby shower super easy. And the good thing is that this decoration is available in many different colors and designs.

What gifts for a baby shower?

As a rule, the guests of the pregnant women bring gifts that they can use for the newborn baby after the birth. They can be very different gifts. Some give diapers, burp cloths, baby clothes, or pacifiers as gifts. Others give baby toys, blankets, or vouchers. The best thing to do is to find out inconspicuously beforehand what the parents-to-be still need for their baby’s initial equipment.

What speaks for a baby shower after the birth?

Of course, there are also some reasons that speak for a baby shower after the birth. Parents often opt for this variant in order to offer guests the opportunity to get to know their newcomers right away. In addition, it is often easier for guests to choose a gift for the baby if their size, gender, and name are known. Also, note useful tips on pregnancy and how you can give the gift of joy with beautiful birth cards.

You only need a small piece of fresh ginger for most dishes.

Tip 1 for correct storage: Don’t buy too much ginger

If you want to enjoy fresh ginger for as long as possible, you must not buy old tubers. Old ginger is very difficult to store. You can recognize fresh produce by the fact that the tuber feels firm and heavy. Ginger that is no longer as dewy is softer and has a wrinkled skin.

Also, don’t buy too much ginger at once. For most recipes you only need a few slices, the rest is often forgotten and eventually ends up in the bin. So you should consider beforehand how much ginger you need and how you want to use it.

Tip 2: Store ginger outside of the refrigerator

If your fresh ginger root is still unpeeled and uncut, you can store it in a dark and cool place outside the refrigerator. The pantry is best for this. You can store fresh ginger there for several weeks. Wrap it up completely in a paper towel beforehand and then put it in a sealable container or paper bag.

Sliced ​​ginger can also be stored outside the refrigerator for some time. Store it in a dark and cool place. While the interface may become a bit woody and hard over time, the ginger flesh stays fresh and you can keep using it.

Tip 3: Store cut ginger in the fridge

If you want to store cut ginger in the fridge, you should make sure that it is kept as airtight as possible. There is high humidity in the refrigerator, which promotes the formation of mold in food.
Option 1: To prevent the ginger cut from drying out too much, you can cover it with reusable beeswax towels instead of plastic or aluminum foil. Place the fully wrapped ginger in a sealable can or paper bag.
Option 2: Alternatively, you can slightly dampen a cloth kitchen towel and wrap the ginger in it before storing it in the crisper of the fridge.

You can use these methods to keep sliced ​​ginger fresh in the refrigerator for up to three weeks.

Tip 4: Freeze fresh ginger

If you always want to have a supply of ginger on hand, you can also freeze it. Proceed as follows:
Method 1: ginger pile
Peel the ginger and then grate it finely.
Use a spoon to form small mounds of the grated ginger.
Put these piles on a plate, which you then put in the freezer.
Once the ginger mounds are frozen, you can remove them from the plate and place them in a freezer bowl.
Method 2: ginger slices
Peel the ginger.
Cut it into strips or slices.
Place in a freezer-safe container and freeze.
You can pour hot water over the heaps or slices of ginger to make ginger tea or add them to dishes. Processed like this, the ginger will keep in the freezer for about 3 to 6 months.

Tip 5: Pot ginger and plant it yourself

Ginger is one of those foods that grows back on its own. This means that you can easily keep fresh ginger bulbs alive by planting them one at a time. In this way, you can also recycle ginger bulbs that have already sprouted. The ginger pieces sprout and form reed-like plants. After some time you can harvest fresh ginger bulbs for kitchen use.

Here you can find out how to plant ginger yourself.

Tip 6: Preserve ginger by pickling it

To prevent ginger from spoiling or becoming too woody and dry, you can preserve it by pickling it. Peeled, cut, grated and preserved in a vinegar broth, the ginger prepared in this way can be kept for up to six months. Pickled ginger is particularly popular with sushi.

Here are the instructions on how to pickle ginger.

Lentils are very healthy and come in many different varieties. For some, it makes sense to soak them before cooking. You can find out what you need to consider here.

Lentils contain a lot of protein, fiber and minerals and therefore play an important role in vegetarian and vegan cuisine. There are different types that need different cooking times. Especially with lentils with long cooking times, it makes sense to soak them beforehand. Soaking shortens the cooking time, saving you time and energy.

You should soak these types of lentils

Plate lenses are comparatively large and have a brownish color. We recommend soaking these: This shortens their cooking time from 60 to around 30 minutes.
There are many different types of small lentils: brown mountain lentils, green lentils, beluga, puy and pardinal lentils. You can soak them, but you don’t have to. They only take 20 to 30 minutes to cook, even without soaking.
Yellow and red lentils differ from the other varieties because they are lentils that have already been peeled. You shouldn’t soak them as they will break down. In any case, their cooking time is comparatively short at ten to 15 minutes.

Lentils: More digestible by soaking

Soaking lentils not only saves cooking time, but also makes them more digestible. Because in the raw state, lentils not only contain many healthy nutrients, but also substances that are difficult to digest, which can cause digestive problems, among other things. In particular, if you are sensitive to legumes, you should discard the soaking water and use fresh water for cooking. On the other hand, nutrients dissolved in the soaking water are lost.

In addition, lentils (like other legumes and cereals) contain so-called antinutrients that inhibit the absorption of minerals. An example of this: phytic acid. By soaking and cooking the lentils, you destroy a large portion of this antinutrient.

How to properly soak lentils

Combine 1 part lentils with 3 parts water in a porcelain, glass, or ceramic bowl. You should not use plastic or metal bowls, as they can dissolve substances in the soaking water.
Soak the lentils at room temperature for 12 to 24 hours, for example overnight. The warmer it is, the shorter the soaking time.
For subsequent cooking, you can either use the soaking water or fresh water. Both have pros and cons, as the soaking water contains both dissolved nutrients and toxins. The lentils are more digestible if you use new water, but the nutrient content is then lower. Try what is better for you.
If you use the soaking water for cooking, the starch dissolved in the water may cause a lot of foam to form. You can skim it off while cooking.

Summer time is strawberry time. That’s what the seasonal calendar says. Imported strawberries can be bought in stores all year round. Here we explain why it makes sense to buy strawberries regionally and seasonally.

When is strawberry time?

The strawberry season is heavily dependent on the weather, so it can shift slightly from year to year. Depending on the region and the weather, strawberries bloom from April to May.

Accordingly, in mild regions, the first strawberries can be harvested from May. The strawberry season ends at the beginning of August at the latest. Strawberry season is from May to July.

Regional strawberries: home advantage over imported fruit

Who doesn’t like it, strawberry season? Delicious strawberry slices and cakes, strawberry jam or just fresh strawberries with cream. No wonder the strawberry is one of the most popular types of fruit. The trade is good for us and offers strawberries all year round. Who hasn’t bitten into a large red strawberry full of expectation in winter and been disappointed by the taste? Fruit that is allowed to ripen in peace and that is harvested seasonally can develop its typical taste more intensely. The proportion of vitamins and nutrients is significantly higher with “species-appropriate” cultivation of fruit and vegetables.

Strawberry imports artificially extend the strawberry season – not without consequences for the environment

Moist, humus-rich loamy soil is the ideal location for strawberries. The main export countries Spain, Italy and North Africa, along with Egypt and Morocco, have to spend a lot to create the natural growth conditions. Artificial fertilizers, chemicals and plastic tunnels are used to grow the fruit for export.

Unlike organic cultivation, the plants are planted very closely together. This makes powdery mildew easier to spread. A study by the Bavarian State Office for Health and Food Safety (LGL) examined the pollution of strawberries from abroad. A wide variety of chemical cocktails are sprayed against mildew infestation. Agents that are not approved for strawberries were also found in the samples.

Strawberries need a lot of water. Therefore, deeper and deeper wells are being drilled, which lower the groundwater level. The result is that the soils dry out and become deserted. In 2012, the WWF published an alarming report on the drying up of the Coto de Doñana nature reserve in Spain.

After harvesting, strawberries can only be kept refrigerated for a few weeks. Unlike bananas, strawberries cannot be picked and ripened when they are green. The imported strawberries have to be transported refrigerated all the way from the growing countries. Cooling and transporting it to our grocery stores consumes a lot of energy. The strawberries that we do not buy from regional cultivation have come a long way and left a considerable carbon footprint. The strawberries, which we buy from local fruit growers in June, are different.

Extend strawberry season with wild strawberries

You can also plant strawberries yourself on the balcony or in a flower pot. Together with flowers they are very decorative. If you want to harvest strawberries yourself well into autumn, you should definitely try wild strawberries. They are smaller and more intense in taste and bear fruit for a long time. This is a natural and sustainable way to extend the strawberry season.

Cooking broad beans isn’t difficult, but it does take time and patience. With the right preparation, you too can use the delicious beans as the basis for many vegetarian and vegan dishes.

Broad beans, also known as broad beans, horse beans or fava beans, are a particularly healthy and tasty source of protein – not only for vegans. You can use them for various dishes, for example for salads or stir-fried vegetables, but you can also process them into puree. Although they require some prep time, cooking fava beans isn’t difficult.

There are two different ways to cook broad beans: you can use either dried broad beans or fresh broad beans. In both cases, you need a little patience when preparing. In contrast to the dried version, you can prepare fresh beans on the same day: they do not have to be soaked overnight.

Before you buy fresh broad beans, you should pay special attention to the quality of the beans. Look for those that don’t have empty shells. The smaller ones are sweeter and contain less starch. Avoid dried out beans that are yellowed or even mushy. Buying during the season is also crucial for the quality: broad beans are in season from June to August.

Cooking fresh fava beans: this is how it works

Cooking fresh fava beans is quick and easy. Just the preparation takes some time. Before preparing, prepare and set aside the following:
1 tsp salt
an extra plate for the beans and the shells
a bowl of cold water and ice cubes
How to cook fresh fava beans:
Break open the pods with your hands.
Use your fingers to peel the broad beans out of their shells.
Take your saucepan and fill it with water (about enough to cover the beans). Add a teaspoon of salt.
Boil the water.
Blanch the broad beans for a minute or two.
Take them out of the pot with a sieve and let them drain briefly.
Afterward, shock them with cold water in your ice tray to stop the cooking process. Drain them again.
Now you can remove the leathery skin by slightly slitting it with your nails and pressing it away with your fingers.
Boil the broad beans in salted water until done. This takes about ten to 20 minutes.
Now they are ready for further processing for bean salads, stir-fries or puree.

Cooking dried fava beans: you need to know that

Cooking dried broad beans is a bit more tedious: you can’t cook them right away, you have to soak them overnight before cooking. The amount of water depends on how many broad beans you want to cook:
1 liter of (cold) water per 200 grams of beans
1. How to prepare the dried broad beans for cooking:
Rinse the dried beans under cold water using a sieve.
Get a large bowl or saucepan and place the dried beans in it.
Pour in the measured amount of cold water.
Let the beans soak overnight.
2. Cooking dried fava beans:
Even when cooking, pour about 1 liter of water for every 200 grams of beans in a large saucepan and bring to the boil.
Add a teaspoon of salt.
Now put the beans in the pot and cook them for about ten minutes on high heat.
Now set the stove to low heat and let the broad beans cook. Their cooking time is about 45 minutes.
At the end of the cooking time, use a fork to check if the beans are cooked through. If they tear apart easily, they’re nice and soft. Caution: It’s important that you cook beans properly, as they contain toxic lectins. These can only be rendered harmless by fully cooking them.
Be careful when draining: drain the broad beans gently to avoid crushing them and turning them mushy.
You can now process the cooked beans for a broad bean recipe of your choice.

Tomatoes should not be missing in any kitchen, especially in summer. To keep them fresh and tasty for as long as possible, it is important to store tomatoes correctly. We tell you what you should pay attention to.

Tomatoes are sensitive fruits when it comes to storage: they don’t like refrigerators, but they don’t like too much heat either, and they prefer to spend their time away from other fruits and vegetables. Storing tomatoes correctly not only affects their shelf life, but also their taste, because tomatoes that are harvested unripe continue to ripen in storage. Preparation for storage also plays an important role.

Depending on the variety, tomatoes can be kept for up to 14 days under optimal conditions.

How to prepare tomatoes for storage

Even before the actual storage, you can pay attention to certain things that will ensure that your tomatoes stay fresh for a long time.

If you harvest your own tomatoes, you should first harvest them with the stalks and blossom ends and do not remove them even if they have dried up. The green provides the tomatoes with nutrients even after they have been picked.

The following applies to both self-harvested and purchased tomatoes: it is better not to wash them before storing them. When washed tomatoes go into storage, any moisture left behind can quickly lead to mold growth. Overripe tomatoes, on the other hand, burst easily when pressure is applied to them during washing. Therefore: It is better to wash them just before you eat the tomatoes.

Store tomatoes correctly: It depends on the temperature and location

If you want your tomatoes to last as long as possible, the right temperature plays an important role. So the most important thing first: Tomatoes don’t belong in the fridge. This place is the worst imaginable for storing tomatoes. They react sensitively to cold, which means they lose their taste and acquire a floury consistency. In addition, their vitamin content is reduced by the cold temperatures.

But even an environment that is too warm is not good for the harvested tomatoes when they are already ripe. It causes tomatoes to continue to ripen and can therefore rot quickly.

Tomatoes feel best when they

at room temperature
in an airy but dark or shady place
be stored. A simple shelf or the kitchen table is therefore a suitable place to store tomatoes.

Tip for unripe tomatoes: If you want to let unripe tomatoes ripen, you can put them in a slightly warmer place, for example on a sunlit windowsill. Because the higher temperatures accelerate the post-ripening process.

Store tomatoes correctly: Better without neighbors

Another important point is that it is best to store the fruit separately from other fruits and vegetables. Ripe tomatoes emit ethylene, a gaseous plant hormone that stimulates nearby fruit and vegetables to ripen faster—and possibly rot as a result.

Other fruit and vegetables also emit the ripening gas, which means that tomatoes in turn ripen faster – and possibly go bad.

Fruits and vegetables you should keep separate from include tomatoes

Apples, bananas, pears, apricots
Cucumbers, peppers, hot peppers.
Tip for unripe tomatoes: You can of course take advantage of the effects of ethylene if you want to ripen unripe tomatoes faster. Then just store them with these other fruits and vegetables. After a few days, the tomatoes will have ripened and should then be stored separately.

Store tomatoes correctly: the right container

Many tomatoes from the supermarket come sealed in plastic. However, the fruit does not get enough oxygen in it and therefore rots faster. It is therefore better to buy tomatoes without plastic packaging from the start, so you are also doing something good for the environment.

Tomatoes prefer it airy. Therefore, place them in an open container, such as a bowl, basket, storage box without a lid, or on a plate. Baskets work particularly well if they are made of woven straw or metal struts, as this allows for good ventilation.

To prevent the tomatoes from bruising, you can line the container with a clean kitchen towel beforehand.

It’s starting again: Pumpkin season starts as early as August, the fruit is available almost everywhere from September and pumpkin season reaches its peak in October. However, the different varieties have different seasons – and they do not all store equally well…

Like so many other things, the pumpkin is not a German or European fruit: Seafarers brought the seeds of the pumpkin to Europe and it is now native to many gardens here – you can find tips on how to plant a pumpkin in the article. In addition to the increasing popularity of Halloween, the vegetarian-vegan cooking trend in particular is likely to have contributed to the pumpkin boom.

Ornamental pumpkins are used by many as decoration in autumn. Because of the sweet and at the same time nutty taste, it is also valued for rich, filling and yet not high-calorie pumpkin soups and for curry dishes. It is rich in vitamins, potassium, zinc and other nutrients, and the yellow varieties are also rich in carotene. But when is pumpkin actually in season?

When is pumpkin season?

The pumpkin likes it hot and sunny. The pumpkins are planted from the end of April to mid-May; from June it will be too late again. Pumpkins that are then planted will no longer come to fruition.

The pumpkin season starts at the end of July at the earliest, typically at the end of late summer in August.
Pumpkin season peaks in the fall months of September and October and lasts until frost.

Brussels sprouts are a very healthy winter vegetable. Here you can find out what you should consider when preparing Brussels sprouts and find suitable recipe ideas.

Brussels sprouts are a classic winter vegetable: they are in season from October to February and provide us with valuable nutrients during the cold season. Brussels sprouts are rich in vitamin A, vitamin C, iron, potassium, calcium and magnesium.

To ensure that the vitamins and minerals are retained during preparation and that the Brussels sprouts remain crisp, you should observe the following instructions.

Cook Brussels sprouts: This is the ideal cooking time

How long Brussels sprouts should cook depends on its size. If the florets are rather large, the cooking time is about fifteen minutes. If they are small, you shouldn’t cook the sprouts for more than 10 minutes.

To keep the Brussels sprouts from overcooking and becoming crunchy, you should follow these steps:

Before cooking, remove any eaten leaves and wash the Brussels sprouts florets thoroughly in cold water. In another article you will find tips for cleaning Brussels sprouts.
Then bring plenty of salted water to the boil in a saucepan and then add the Brussels sprouts. Turn the heat down to medium-low and let the florets simmer in the salted water for 10-15 minutes. Periodically check with a fork to see if the cabbage is done. As soon as the tines sink relatively easily into the rosette without falling apart, it’s done.
Then pour the Brussels sprouts into a sieve and briefly rinse them under cold water. So its green color is preserved.

Steam Brussels sprouts

Another preparation method that is gentle on the Brussels sprouts is steaming. How to do it:

Before cooking, remove any eaten leaves and wash the Brussels sprouts florets thoroughly in cold water.
Put water in as wide a pot as possible. The water should only be deep enough for you to put a steamer basket in without it leaking through the holes. Alternatively, you can also hang a large sieve in the pot.
Place the Brussels sprouts in the steamer basket or colander and let the water boil. Then immediately turn the heat down to medium-low and let the Brussels sprouts steam for 10 minutes.
Finally, quench it with cold water to give it its light green color.

Storing potatoes properly is not difficult at all. The most important thing is that you protect them from light. Otherwise they will quickly start to germinate or turn green. Here you can find out what else you should pay attention to.

Store potatoes correctly: protect from heat and light

Potatoes begin to germinate quickly in warmth and light. The toxic germs cannot be eaten and they deprive the potato of important nutrients. As a result, it shrinks and loses flavor and firmness. Sprouted potatoes can have high concentrations of toxic glycoalkaloids. This substance is also contained in green potatoes and makes them intolerable. You can prevent or at least delay the potatoes from germinating and turning green by storing them correctly.

In addition, potatoes can easily go moldy – even one affected tuber can spread the rot to many other potatoes and possibly make the entire harvest unusable.

With a little experience, you can even store potatoes for many months until the next season. This is practical because you can buy local potatoes in advance without long transport routes. The late potatoes are ripe in September and October, the early potatoes as early as June.

7 tips for storing potatoes properly

Choose a dark place for storage: for example your pantry, the basement or a shed in the garden. If you don’t have all of this available, you can also store the potatoes in a linen bag in the kitchen to protect them from light.
Pay attention to low temperatures, because the potatoes start to sprout from around 10°C. At the same time, it must not get colder than 4° C, otherwise the starch in the tubers will turn into sugar, which will affect the taste. Ideal for storing potatoes is 4°C to 8°C.
Protect the potatoes from frost (e.g. when storing them in the garden or in cold cellars) and never put them in the freezer.
Store them in a dry and airy place so the potatoes don’t get moldy or rot. A linen sack or a wooden box in which the potatoes are loosely stacked is suitable for storage. Plastic bags are unsuitable for storing potatoes. If you have enough space in the garden, you can also build a potato tower.
Check your potatoes from time to time: If small sprouts have formed, the affected tubers must be eaten as soon as possible. Rotten potatoes must be removed immediately and disposed of with organic waste. Regular rearranging also ensures adequate ventilation.
Store potatoes separately from fruit, especially apples. The ripening gas ethylene that many fruits give off will otherwise quickly spoil the potatoes.
Only undamaged potatoes with an intact skin and without bruises or sprouting are suitable for long-term storage over several months. Slightly damaged potatoes should be eaten quickly. If the potatoes are stored well distributed on slatted frames, they will keep for months.

Coffee is currently still goods that are produced in mass production. But a lot can change due to climate change.

The popular Arabica bean has dominated the world market. But the plant is threatened with extinction. We explain the background.

Since the discovery of the coffee plant and its fruits many centuries ago, the circle of coffee lovers has grown steadily. Now he extends to an appropriate number of coffee drinkers. Over this time, the coffee market has proven itself and the coffee drink is now one of the largest trading goods worldwide. Accordingly, a wide variety of varieties can also be found on the shelves – 70 % of which are due to the coffee type Coffea Arabica.

Arabica, Robusta, Luwak, Liberica – there are many other coffee plants in addition to them. The number is up to 124 different known species. But mainly the Coffea Arabica and the Coffea Robusta have proven themselves as a kind in the world of coffee and pushed the other species into the background. Therefore, in this section we embark on an exciting journey through a small selection of coffee plants that get stuck in the head, especially in the head. This includes the two species mentioned, as well as the Coffea Liberica or the Luwak, which – even if very weak – are represented on the market and rather represent a marginal group. At the same time, there are many prejudices regarding the Art Robusta compared to the Coffea Arabica and represent them poorly: the Arabica should be better than the robusta. But this statement is not true and definitely has to be questioned.

Robusta, Arabica and other coffee plants

Coffea Robusta and Arabica are the most represented in the world of coffee. However, they differentiate themselves very much. Accordingly, a first distinction between the two coffee plants is very helpful and could already question the stubborn prejudices, since they differ significantly from one another in some characteristics and are accordingly geared towards other tastes.

The Coffea Arabica grows on height landscapes from 1000 meters and requires a stable climate between 15 and 24 degrees. The cherries of this coffee plant have a long time to develop their taste and taste rather sweet and light. The beans can be recognized on the basis of the curved scar on its flat side. The robusta, on the other hand, grows on the lower levels and needs a warmer climate. It is smaller than the Arabica and with a straight scar. The scientific name for this coffee plant is Coffea Canhora. Due to the rather low altitude, their taste is described more earthy and full. Other essential differences between the two coffee plants relate to their ingredients and any intolerances. The caffeine content of the robusta can be up to two or three times higher than that of the Arabica. This value depends on the location of the coffee bushes and therefore fluctuates a little. Furthermore, the coffee beans of the Coffea Robusta contain about 30 % more chlorogenic acid, which can lead to heartburn as well as stomach pain and a higher content of alkaloids.

One of the edge groups with a small proportion in the coffee industry includes the coffee plants Coffea Liberica and the Luwak. The fruits of the Liberica are harder and contain only a little juice and sugar. It looks very different with the high caffeine content. Luwak, on the other hand, is the most expensive type of coffee in the world. It is not a type of coffee, but, as it finds the special, chocolate and earthy aroma, it has a very special way of manufacturing: they are given sneaking cats as food and thus run through their intestinal tract, where the cherries of the coffee plant Coffea Luwak develop. However, the sneaking cats are often locked up in large quantities in small cages, suffer mental illnesses there and have a lack of nutrients.

The lack of taste in the Luwak and the bad conditions of the sneaking cats, which only serve to produce a special taste, could be reasons for neither the Liberica nor the Kopi Luwak with the two leaders. On the other hand, the species Robusta and Arabica cover two different flavors, whereby the Coffea Arabica is apparently preferred by the flavor. This would at least explain the large market share of this type of coffee.

Threat of coffee plants

If the Coffea Arabica is currently still clearly at the top of the coffee market, this can change drastically over the years. Scientists from the botanical gardens in Kew, a district of London, researched this. The whole thing was published in the specialist journal “Plos One”. They created a simulation of the climate over the next few years and came to the conclusion that a temperature increase of 6.4 degrees Celsius would lead to the decimation of certain types of coffee. This will affect the African coffee plant Coffea Arabica, because 99.7% of all cultivation areas of these coffee plants would be eliminated by 2080. With a second simulation with moderate global warming – this is at a temperature increase of 3.8 degrees – it is still 65% loss that the Arabica should enter into. The deforestation of the forests was not considered – another factor that can greatly decimate the growing regions of coffee plants and thus the coffee harvest. If these two factors are added together, the extinction of the Coffea Arabica is much more likely to be extended. Furthermore, the research team came to the conclusion that at least here in 2020 there will be no wild Arabica coffee.

The coffee plant Coffea Arabica finds its origin in the plateaus of Ethiopia. In order to be able to grow and thrive properly, it needs a stable, humidly warm climate. It also requires optimal air and light conditions – such as enough shadows with the help of so -called shadow trees. After about 3-4 years, the first yield can be expected. Due to climate change, i.e. warmth and drought, the natural environment of the Arabica coffee plant is gradually changed and it can no longer survive. Important parameters would have to be met for this. This ultimately leads to the extinction of the coffee plant. If the wild Coffea Arabica dies, it can no longer be taken to help to maintain and breed new varieties. This is important in this respect, since these types of coffee are attacked faster by diseases and pests. The extinction of the coffee plant will also carry further, serious consequences.

Consequences and consequences

It is one thing if there is no longer any Arabica coffee to drink in the near or distant future. However, this will not be the only episode. If something changes in a living space, this can trigger one or even a number of chain reactions. For example, if the cats no longer have mice that they can catch and eat, or dies out the natural habitat for an animal, they have to adapt quickly and search for something new, suitable so as not to die out. The extinction of the coffee plant Coffea Arabica can mean extinction for some other living things.

Another consequence can relate to the cost of the coffee. The fewer Arabica coffee is available in retail with the same demand, the higher the price will increase. If the relationship between demand and the supply can no longer be covered, the price will shoot up and eventually become a difficult and precious luxury goods. If you consider that coffee with around 730,000 tons of production volume in 2013 is currently still in second place in the largest commercial goods, this is guaranteed to be a shock for all coffee lovers of the Arabica bean how quickly the production figures could reduce in the future.

Coffee as in short supply

Coffee seems to be indispensable for many. In the meantime, the daily cup of coffee in the morning, at work or with friends is part of everyday life. However, climate change and the strong demand for coffee art Coffea Arabica triggers a problem that can make this coffee plant appear in short supply in the near future. Around 70 % of all types of coffee on the market are currently dominated by this coffee plant. However, this may change quickly. In contrast, the coffee type Robusta will be preserved for a while because it feels more comfortable in warmer areas. Perhaps this could be a good reason to reach for a variety of the robusta and get involved with the slightly different taste.