Tag

with

Browsing

Preparing biryani vegan is not difficult: You simply add some vegetables to the Asian rice stir-fry. We will introduce you to a biryani recipe and explain what you should pay attention to.

Biryani is a rice dish that comes from Asia. The dish is particularly popular in India, Bangladesh and Pakistan. The word “biryani” comes from Persian and means something like “fried”. The rice stir-fry is often prepared with meat, but you can make biryani vegan by adding your choice of vegetables, nuts or tofu to the rice.

We recommend looking for organic quality when buying the ingredients. This is how you avoid chemical-synthetic pesticides. Rice often comes from Southeast Asia and uses a lot of water to grow. Then there are the long transport routes to Europe. Rice that was grown in Europe (e.g. in Italy) is therefore ecologically more advisable. If you do use rice from countries further away, we recommend looking out for the fair trade seal. In this way you guarantee that manufacturers have observed human and labor rights during the production process and the long delivery routes.

Vegan Biryani: Recipe for the rice dish

Ingredients:

300 ml water
200 g basmati rice
1 tsp salt
1.5 tsp curry spice
1 tsp pepper
1 tsp paprika spice (sweet)
1carrot
1Zucchini
1 piece ginger (thumb size)
1 clove(s) garlic
1red onion
2 tablespoons oil
50 g cashew nuts

Directions:

Start cooking the rice. Put it in a pot with the water. Add salt and the spices. Let it gently simmer for five to ten minutes. It shouldn’t be raw anymore, but it shouldn’t be fully cooked either.
While the rice is cooking, you can grate the carrot and cut the zucchini into pieces.

Place the vegetables in a bowl and pour boiling water over them. Let it steep for five minutes. This will lightly pre-cook the carrot and zucchini so that the vegetables are not fried raw. Then drain the water again.

Now cut the ginger and garlic into small pieces as well. Then place the pieces in a mortar and grind them into a paste. This unfolds even more flavors. Tip: If you don’t have a mortar at home, you can also chop the ginger and garlic very small with a knife and press into a paste with the bottom of a spoon.

Gradually add the vegetables and finally the half-cooked rice.

Biryani with peanut sauce

As a dip for biryani, you can stir together a quick peanut sauce. The nutty taste goes very well with the dish. You need the following for this:

2 teaspoons fresh ginger, finely grated
1 garlic clove, finely chopped
65 g peanut butter without additives
2 tbsp sesame oil
2 tbsp soy sauce
1 tbsp rice vinegar
1 tsp maple syrup (alternatively rice syrup or date syrup)
Juice of half a lime
1 pinch cayenne pepper or chilli powder
2 teaspoons water, as needed
First chop the ginger and garlic. Then mix all the ingredients together and stir them into a smooth sauce. You can garnish the sauce with peanuts or fresh herbs.

Soy sauce also goes well with the rice dish. You can simply pour it over the rice on the plate.

Possible variations for the Biryani

You can not only prepare the rice pan with zucchini and carrots, but also with other types of vegetables. Well suited are, for example, broccoli, peppers or mushrooms. It is best to buy seasonal vegetables that do not come from overseas but grow regionally or within Germany. This protects the climate and reduces CO2 emissions. Our seasonal calendar can help you with that.

In Asia, biryani is often prepared with meat. As a vegan alternative, you can use smoked tofu, for example. Cut the tofu into cubes and fry it in a pan or bake it in the oven at 200 degrees Celsius with top and bottom heat until crispy. Later you can sprinkle it on top of your biryani as a topping.

You can also replace the cashew nuts with other nuts. Peanuts, almonds or walnuts go just as well in biryani. Many nut varieties cannot be grown in Europe and are therefore imported from Africa, among other places. There they are sometimes grown under poor, inhumane working conditions. In order not to support this, you should look for a Fairtrade seal when buying the nuts.

Meal Prep is the solution for everyone who, despite the hustle and bustle of everyday life, values healthy food and wants to save money. We’ll tell you what’s behind this trend.

Meal Prep is made up of the English words “meal” (meal) and “preparation” (preparation). It’s all about pre-cooking food to save time and money. In Japan, food has been prepared in boxes, in so-called “bentos”, for on the go since the 5th century. And our grandparents were also excellent “meal preppers” by preserving fruit, beans and even roulades. Meal prep has been a trend in the US for years.

How does meal prep work?

Meal prep is about organization. Before you go shopping, think carefully about what you want to eat in the next few days. Instead of storing food until you need it, Meal Prep processes it right away.

It’s best to do this on a day when you have plenty of time. Because you may have to stand in the kitchen for a few hours to pre-cook. This saves you time for the rest of the week and you can eat the dishes right away or just heat them up when you get home from work.

You should note that dishes with uncooked food only keep for about two days. Cooked and fried food, on the other hand, is still fresh after three to four days in the refrigerator. Soups are easy to freeze and thaw as needed.

Since meal prep involves cooking for several days, you need space to store your supplies. It is best to store the components of your food separately in screw-top jars or cans. Don’t put them together until you’re finally preparing the food. That way everything keeps its consistency and doesn’t get mushy.

If you’re cooking for an entire week, you’re going to need a lot of containers. Start collecting large screw-top jars in good time.

Those are the benefits of meal prep

With meal prep, you do everything yourself. By pre-cooking, you know what is in your dishes. In this way you avoid processed foods and preservatives and can value healthy, regional and seasonal ingredients.

On top of that, you have control over the portion sizes. Since many dishes are suitable for the lunch break and there is no need to go to the snack bar, you also save money. If you buy groceries seasonally and regionally and do this in a planned manner, you can also save money. Spontaneous purchases during the evening supermarket quick shop are no longer necessary. You also have more time for you and your family if you don’t have to shop and cook freshly every day.

These foods are suitable for “Meal Prep”

When it comes to meal prep, vegetables should dominate. For a balanced diet, however, proteins should not be neglected. You can spice up your dishes with sauces and vegan dips. The following foods are particularly suitable for meal prep:

  • carrots
  • zucchini
  • broccoli
  • potatoes
  • rice
  • millet
  • tofu
  • Legumes (chickpeas, lentils, beans)
  • Pesto
  • hummus

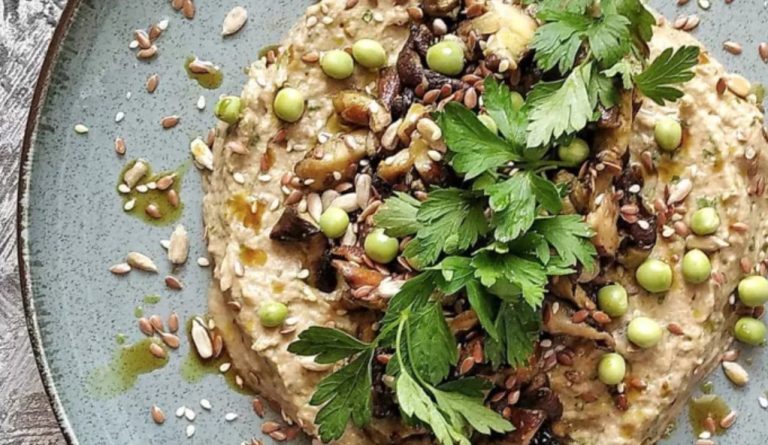
White bean puree tastes delicious and is also a valuable source of protein. In this article we will show you a recipe that you can easily prepare yourself.

White bean puree looks confusingly similar to the well-known hummus made from chickpeas. However, it tastes different and brings variety to your diet. You can prepare the bean puree very easily and quickly. All you need for additional kitchen utensils is a blender or hand blender. The white bean puree is particularly suitable as a dip for vegetable sticks or as a creamy component in salads or wraps.

We recommend that you choose all organic ingredients. In this way you avoid chemical-synthetic pesticides and thus support species and soil protection.

White bean puree: A recipe to make yourself

Ingredients:

400 grams of white beans
2 cloves)garlic juice of half a lemon
2 tbsp olive oil
2 tbsp almond butter or tahini salt pepper

Directions:

Remove the beans from the can or jar and wash them thoroughly.
Peel the garlic and cut it into slices. Halve the lemon and squeeze the juice from one half.
Put all the ingredients in a blender. Mix everything until you get a creamy and homogeneous mass.
Season the white bean puree with pepper and salt to taste. Now you can serve it and/or store it in an airtight container in the fridge for a few days.

Tips for your homemade bean puree

Finally, we would like to give you a few tips that can help you with the production of your homemade bean puree:

Of course you can prepare the recipe with beans of your choice. So you can use kidney beans in the same way or combine different types of beans.
If you don’t want to use canned or jarred beans, you can cook dried beans yourself. You can find out how to do this here: Cooking white beans: This is how they get the right consistency. But keep in mind that the preparation time given above will be significantly longer.
Add kitchen herbs and spices as you wish. You can supplement the white bean puree with dried tomatoes or cumin, for example, and add fresh herbs as a topping.
If you like roasted flavors, you can roast the garlic in a pan or in the oven beforehand. Use several cloves of garlic for this because they lose their intensity when cooked.

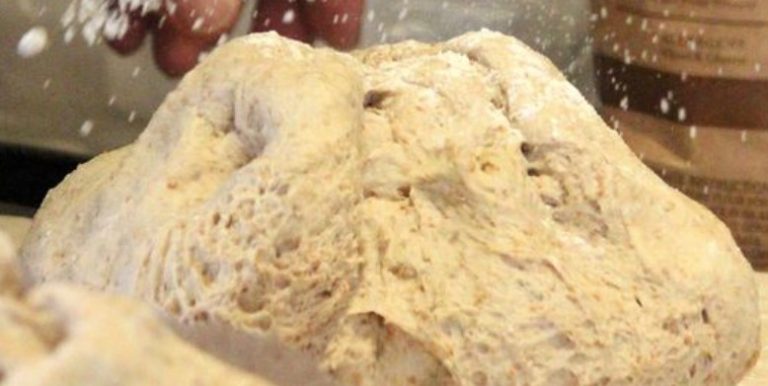
Yeast dough is versatile and not difficult to make. We will show you a classic and a vegan recipe for sweet yeast dough and tell you what is important when it comes to the dough – and also how it is made into a braid.

Recipe for vegan yeast dough without egg, butter, and milk

You can easily make a vegan, sweet yeast dough yourself.

You need for this:

500 g flour (light organic wheat or spelled flour)
80 grams of sugar
1 cube of yeast
250 ml plant milk (e.g. oat or soy milk)
70g vegan margarine
1 tsp apple cider vinegar
1 pinch of salt
Optional: some light-colored jam for spreading, quince or apricot jam without pieces is best.
You also need:

a bowl,
a whisk,
a kitchen scale,
a pastry brush,
a clean tea towel.

This is how the vegan yeast dough succeeds

Whether for Easter or for a nice Sunday breakfast – you can easily make a vegan yeast plait yourself with a little preparation time. There is no need to use eggs, milk or butter, because this vegan yeast dough is delicious and buttery soft.

How to make the dough:

Place all liquid ingredients and in a bowl. The plant-based milk and margarine should be lukewarm.
Add the yeast cube and stir until it has dissolved.
Then add the salt and sugar to the liquid.
Add the flour while stirring constantly until the dough has reached the typical consistency.
Knead the dough well on a floured work surface for several minutes.
Cover the bowl with a tea towel and let the dough rise in a warm place for at least an hour. The cloth is important to protect the dough from drafts.
The dough is ready when it has doubled in size.
Important: The decisive factor for a successful yeast dough is the temperature. With fresh yeast, the liquid should be warm but not hot. If it’s too hot, the yeast culture will die and your dough won’t rise. Cold, on the other hand, does not harm the yeast. It just takes longer for your dough to rise. If you’re not in a hurry, you can leave the dough in the fridge overnight and bake it the next day.

This is how you succeed in making the perfect yeast braid

Take the dough out of the bowl and knead it well again on a floured work surface.
Divide the dough into three equal parts and form long strands out of the dough balls.
Braid the strands of dough loosely and pinch the ends together.
Use a pastry brush to brush the braid with some light-colored jam or plant-based milk.
Place the braid on a baking sheet and let it rise for another 20 minutes.
Halfway through the resting time, preheat the oven. If you want to bake with top and bottom heat, set the stove to 200 degrees Celsius and 175 degrees Celsius for circulating air.
Bake the braid on the bottom shelf of the oven for about 25 minutes.
Take the braid out of the oven and let it cool down a bit.

Recipe for classic yeast dough

For a classic yeast dough you need:

500g flour
80 grams of sugar
1 cube of yeast
250 ml lukewarm milk
70 grams of butter
1 pinch of salt
1 organic egg
You also need:

a bowl,
a whisk,
a kitchen scale,
a pastry brush,
a tea towel.
The preparation and processing of the classic yeast dough hardly differs from that of a vegan one. The following variant is for a yeast dough with pre-dough:

Sift the flour into a bowl and mix it with a pinch of salt.
In another bowl, mix lukewarm milk with sugar and crumble in the yeast. Stir the liquid a little until the yeast has dissolved.
Make a well in the flour and pour in the liquid. Thicken the yeast milk with a little flour using a spoon and then leave the bowl covered for 15 minutes.
Then add the other ingredients and knead the dough for several minutes.
Cover the bowl with a tea towel and let the dough rise in a warm place for at least an hour.
The dough is ready when it has doubled in size.
You can use this dough as a base for cakes or a yeast plait. If you want to make a yeast plait, you can brush it with milk before baking to brown it nicely.

Tip: If you made too much dough, you can freeze the leftover yeast dough. It will last up to six months this way.

How healthy your salad actually is depends on various factors. In this article, we will show you how to make salad healthy and provide you with suitable recipe suggestions.

Salads consist largely of water and are therefore low in calories. According to the Federal Center for Nutrition, they also contain various health-promoting nutrients. These include vitamin A, B vitamins, vitamin C, beta-carotene, folate and fiber as well as potassium, magnesium and phosphorus.

There are a variety of salad dishes and even more ways to arrange salads individually. Not all salads are created equal. You can influence how healthy your salad will ultimately be.

These factors affect how healthy your salad is

It’s best to add variety to your salad choices because different types of lettuce contain different amounts of nutrients. For example, according to the BzfE, iceberg lettuce is rather low in nutrients, while lamb’s lettuce and endive have a better nutrient composition. Wild herbs are particularly rich in nutrients.

When putting together, you can use seasonal and regional salad varieties as a guide. You can also save on CO2 emissions because long transport routes are no longer necessary. Our seasonal calendar can give you an overview. In addition, we recommend that you buy your salad and all other ingredients in organic quality. In this way, you avoid chemical-synthetic pesticides and artificial fertilizers.

It is healthiest and tastiest if you prepare your salad and dressing yourself. Ready-made salads lose nutrients when cut and stored. In addition, packaged salads are more susceptible to bacteria. This is due to the cut surfaces of the pre-cut lettuce, on which microorganisms can colonize more easily. Ready-made dressings often contain a lot of sugar, salt or oil and can quickly become a calorie bomb. For example, try a classic vinaigrette instead. If you have the opportunity, we recommend that you grow your own lettuce. So you get the freshest salad ever and save plastic at the same time.

If you prepare your salad yourself, you can combine it according to your taste and supplement it with filling ingredients. It is particularly healthy to add protein-rich components to the salad. This can be, for example, legumes, eggs, organic cheese, nuts and seeds or the organic (soy) yoghurt in the dressing. Complex carbohydrates also promote satiety. Add healthy carbohydrates in the form of millet, whole wheat pasta, or sweet potatoes to the salad. You can also integrate fruits, mushrooms or other vegetables. There are no limits to the design of your salad.

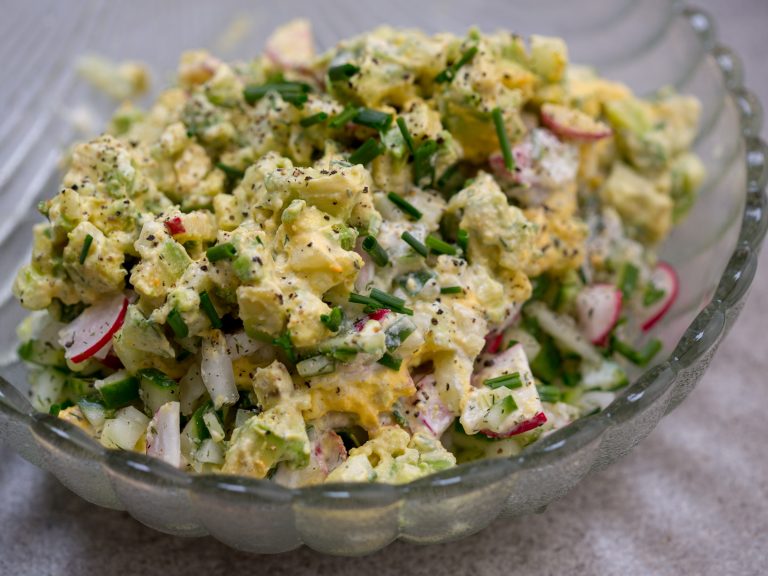
Vegan egg salad that resembles a “real” egg salad in terms of taste, appearance and consistency – that’s possible. With our recipe you can make your own egg salad without eggs and dairy products.

A vegan egg salad made from chickpeas and noodles: What sounds unusual at first tastes convincing. And all without animal suffering and animal protein. We’ll show you a simple recipe for vegan egg salad that is in no way inferior to the animal-based original.

Vegan Egg Salad: Ingredients for the recipe

This recipe for vegan egg salad makes two full servings or four servings as a side to the main course.

You need the following ingredients:

200 g chickpeas (cooked, drained)
125 g small pasta (uncooked)
1 tsp turmeric
1 small onion
1 tsp Kala Namak (Black Salt)
black pepper
1 small bunch of fresh chives (or other herbs)
100g vegan mayonnaise

Ingredient tips and variations:

You have to soak dried chickpeas overnight beforehand and boil them until soft for about two hours. In a separate guide, we explain exactly how to cook and soak chickpeas. If you want to be quick, you can also use pre-cooked chickpeas from a jar.
Very small noodles are best for the vegan egg salad. You can also use normal (whole grain) pasta and cut it up later. Make sure the noodles don’t contain any eggs.
Kala Namak is a special sulphurous salt that gives the egg salad its typical egg taste. In our special article on black salt “Kala Namak” you can find out everything about its origin, use, and buying tips.
Fresh chives are part of a classic egg salad. Alternatively, you can also use other fresh herbs from the garden – we have included a few rocket leaves in our recipe.
You can either buy vegan mayonnaise ready-made in health food stores or you can make it yourself. We show you a recipe for mayonnaise without eggs.
Extra tip: We made a low-fat mayonnaise alternative for the recipe. We seasoned vegan oat cream (porridge-based) with some linseed oil, mustard, salt, pepper, lemon juice and yeast flakes.

Make vegan egg salad yourself: Instructions in 10 steps

Plan about twenty minutes to prepare the vegan egg salad:

Put the noodles in boiling water and cook them until they are really soft (not al dente).
In the meantime, you can already mash the cooked chickpeas with a fork.
Optional: If you prepare the vegan mayonnaise yourself, you can also do this in the meantime.
Drain the cooked noodles and mash them with a fork as well.
Mix the mashed chickpeas with the noodles and add the turmeric powder for the color.
Cut the onion into fine pieces and add them to the egg salad mixture.
Now add the Kala Namak and black pepper to taste.
Wash and chop the chives and add them to the mixture as well.
Stir well.
Finally, fold in the vegan mayonnaise – et voilá, your vegan egg salad is ready!

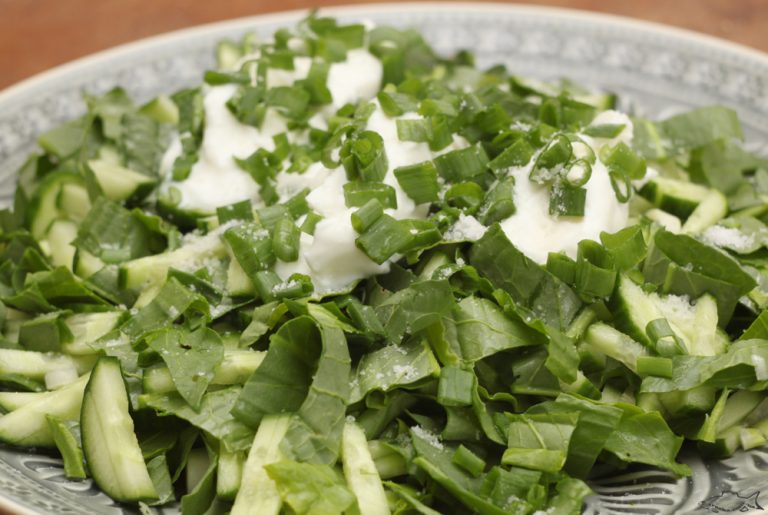
You can harvest sorrel on your next walk. We’ll show you what to look out for and how to prepare a delicious sorrel salad with strawberries.

How to harvest sorrel for your salad

You will find sorrel, a wild herb belonging to the knotweed family, in many meadows. Just take a closer look the next time you go out into nature. The main harvest time is from spring to July.

You can recognize sorrel by its elongated, lanceolate leaves. These grow out of the ground in a rosette shape. In the flowering period, between May and June, you can easily recognize the sorrel. During this time, long panicles with inconspicuous, reddish flowers push up to a meter high from the ground.

If the meadows are public, you can harvest some leaves for your salad. Only pick as much as you need. This allows the plants to grow back in peace. Of course, you shouldn’t harvest the main ingredient for your delicious summer salad from private property.

If the leaves of the sorrel are still very small, it is better to let them grow a little longer. You can harvest the leaves from a diameter of about ten centimeters. Sorrel has a bitter taste. You can balance this out in your vegan salad with the sweetness of the strawberries and the dressing.

By the way: The earlier in the year, the lower the risk that the leaves of the sorrel will taste too bitter or sour.

Recipe for vegan sorrel salad with strawberries

Strawberries are in peak season in early summer. Combine the sorrel harvest with a trip to the strawberry field. If possible, also pay attention to organic quality with the strawberries. In this way you support agriculture that does not use chemical-synthetic pesticides and thus protects the environment and health.

This is how you prepare a delicious summer salad from your self-harvested ingredients.

Ingredients:

200 g sorrel
50 g lettuce
400 g strawberries
1spring onion
0.5 red onions
1 tbsp sunflower seeds
1 teaspoon nectar
1 tsp mustard
1 tsp apple cider vinegar
1 tbsp sunflower oil
0.5 clove(s) garlic
1 pinch(s) of salt
1 pinch(s) of pepper
Some chives

Directions:

Prepare your sorrel and lettuce leaves. Wash them and then dry them.
Wash and dry the strawberries as well. Then cut them in half lengthways and put them in a bowl with the salad.
Cut the onions into small pieces and add them to the rest of the salad together with the sunflower seeds.
Now you prepare the dressing. To do this, first mix agave syrup, mustard, apple cider vinegar and sunflower oil.
Using a garlic press, press the garlic into the dressing. Alternatively, you can chop it finely.
Season the dressing with salt and pepper. When you’re satisfied, spread it over your sorrel salad.
Finally, garnish your salad with chopped chives.

Sorrel is so healthy

This refreshing and light salad is ideal for warmer days. The strawberries add a great pop of color.

The recipe is not only regional and seasonal, but also healthy. With its high vitamin C content, sorrel has health-promoting effects in store for you. It is said to help with gastrointestinal complaints, reduce fever and have a diuretic effect. Sorrel gives a sluggish digestion a boost. The bitter substances in sorrel are also very healthy.

If you still have sorrel left over from your harvest, you can use the rest to prepare a delicious sorrel soup.

If you peel cucumbers before eating, don’t throw away the cucumber peel. We introduce you to a delicious drink with cucumber peel and other uses.

It’s not strictly necessary that you peel cucumbers, especially if you’re using organic cucumbers. If you still prefer peeled cucumbers, you can use the peel separately. After all, the cucumber peel contains a particularly large number of vitamins, as well as dietary fibers that can support your digestion. So it would be a shame if you just threw away the cucumber peel.

We will show you how you can reuse the cucumber peel. It is important that you use the peel of organic cucumbers. Because according to organic guidelines, chemical-synthetic pesticides that can occur as residues in conventional cucumbers are prohibited. Also wash the cucumbers carefully.

You can make a refreshing drink from cucumber peels

You can easily prepare a refreshing drink from cucumber peel, mint and lemon. This leaves lemon zest. But don’t worry, you can also use the peel of the lemons.

Ingredients:

1 organic cucumber (peel)

4 sprigs of mint lemon
400 ml water ice cubes

Directions:

Cut the cucumber peel into rough pieces.
Wash the mint and lemon.
Halve the lemon and squeeze out the juice.
Place the cucumber peel, mint, and lemon juice in a blender, puree, and divide into two glasses.
Fill the glasses with water and add ice cubes if you like.

More ideas with cucumber peel

Instead of throwing away the cucumber peel, you can use it in other recipes.

  • You can cut the cucumber skin into pieces and add it to a salad.
  • You can give a herb quark more freshness with some finely chopped cucumber peel.
  • You can also prepare a smoothie with cucumber peel and other vegetables or fruit. Then less water may be needed because the cucumber skin contains a lot of moisture. For example, you can also use other leftover vegetables in a smoothie. For example, try it with a few radish leaves or the core of a salad or broccoli.
  • Mix (vegan) cream cheese with finely chopped cucumber peel and some salt and pepper. This makes a delicious spread.

If you don’t want to eat the cucumber peel, you can use it very well as a refreshment and relaxation for tired eyes. Simply place pieces of bowl under your eyes or on your closed lids and relax for ten minutes.

Lentil pancakes not only taste delicious, they also contain a lot of protein. Here you will find a simple and quick recipe for the vegan pancakes.

Lentil pancakes are not only nice and crunchy, they are also a good source of plant-based protein. The preparation of the vegan and gluten-free pancakes is very easy and only requires a little preparation time for soaking the lentils.

Both red and yellow lentils are best for the lentil pancakes. When buying legumes, pay attention to organic quality and regionality as much as possible. Not only are you supporting ecologically more sustainable agriculture, but with lentils from Germany you are also making sure that the legumes have not had any long and therefore CO2-intensive import routes behind them.

Lentil Pancakes: A simple basic recipe

Ingredients:

150 large lentils
300 ml water
0.5 tsp salt
2 tablespoons vegan margarine

Directions:

Place the lentils in a saucepan with plenty of cold water. Let them soak for at least three hours.
Drain them through a colander and puree them in a blender along with the water and salt. Alternatively, you can puree them in a tall container with a hand blender.
Heat the vegan margarine in a pan over medium-high heat. Add a large spoonful of the lentil mixture to the pan for each pancake, then fry the lentil pancakes on both sides for about 4 minutes or until golden brown. Complete!

Lentil pancakes: ideas for the filling

You can enjoy the lentil pancakes both sweet and savory.

For example, the following classic pancake toppings are suitable as a sweet filling:

  • Syrup to taste
  • homemade jam
  • (vegan) yoghurt
  • roasted nuts
  • nut butter
  • hot berries or red fruit jelly

For example, for a savory filling, use:

  • (vegan) yoghurt dip
  • fried tofu
  • a simple tomato salad
  • homemade hummus
  • steamed spinach
  • fried mushrooms (e.g. fried porcini mushrooms)

Bread on a stick is a hit with children – and not just during the barbecue season. Read recipes and inspiration for quick and easy stick bread dough with or without yeast here.

Bread on a stick is part of the campfire. This childhood memory can still make us happy as adults. And the best thing is: stick bread is so easy to make! Whether yeast dough or not, you can spice up stick bread with your favorite ingredients. Gluten-free and vegan variants are also possible. So there is something for everyone at the barbecue and around the campfire.

Bread dough: recipe without yeast

If it has to be quick and you don’t have time to “wait” for the yeast dough, you can also prepare stick bread dough without yeast. Here it is important to knead the dough really well so that it becomes airy.

For 10 to 15 stick breads you need:

400 grams of flour
1 tsp salt
2 teaspoons of baking soda
50 g fat (oil or vegan margarine)
220 ml plant drink or milk
If you’re using margarine, let it melt.
Meanwhile mix the dry ingredients together.
Add the plant drink and fat and knead well (about 10 minutes).
Done: Divide the dough and wrap it around the stick.
Hold the stick bread over the embers until it is golden brown on the outside, similar to the crust of regular bread.
Tip: You can incorporate herbs, olives or even vegetables of your choice into the stick bread dough. So you have a little variety around the campfire. You can also prepare sweet stick bread with cinnamon and sugar, for example. Simply add a pinch of salt to the batter and add sugar and cinnamon. Chocolate drops or garlic cloves are also good in stick bread dough.

Classic stick bread recipe

Classically, stick bread dough is a yeast dough. You should plan a little time for this so that it can go.

For the yeast dough you need:

400 grams of flour
1/2 cube of fresh yeast or 1 packet of dry yeast
1 pinch of sugar
2 tsp salt
250 ml lukewarm milk or plant drink
To stimulate the yeast, you must first mix the yeast, sugar, and lukewarm milk in a bowl.
Add 200 grams of flour and let it rise for half an hour.
Now mix the remaining flour with the salt and fold it into the yeast-milk mixture.
Knead everything well and let the stick bread dough rise in a warm place for about one to two hours.
Divide the dough into small portions and wrap it around sticks: your stick bread is ready.