Tag

with

Browsing

Whoever thinks of Argentina, besides Lionel Messi, perhaps has the huge Pampas in mind, which is very intensively cultivated, e.g. B. is used for the world famous cattle breeding. But who thinks about coffee?

Argentina is known for many things. But also for coffee culture?
Argentine coffee culture

It is mainly thanks to the many Italian immigrants that there is a rich coffee culture in Argentina. Due to the geographical and climatic situation, coffee cultivation is only possible to a limited extent in the north of the country. That is why, when it comes to coffee cultivation in Argentina, the focus is very successfully not on sheer volume like in its neighbor Brazil, but on quality.

In most bars, restaurants and cafés in the country you can almost certainly order at least one of these four coffee specialties from the mozo, the waiter:
According to the German understanding, the “Americano” is a normal cup of coffee.
The “Solo” is a strong small coffee that is very similar to espresso.
The “Cortado” is a coffee with a little milk, usually served by the glass.
With the “Lagrima” the ratio of milk and coffee is reversed compared to the “Cortado”, i.e. a lot of hot milk and little coffee.
A piece of chocolate that can be melted in the milk is often served with the coffee and milk specialties.

There are numerous myths and legends surrounding coffee grounds. Who would have thought that you could easily grow mushrooms at home using coffee grounds.

Coffee grounds for mushroom cultivation

Many coffee drinkers pay no attention to it, while others do not see it as a waste product, but as a versatile household remedy: coffee grounds. Coffee grounds are the rest of the coffee powder that remains in the filter after brewing. In fact, the by-product of enjoying a coffee is far too valuable to just throw away in the trash. Whether as an effective cleaning agent in the household, a gentle peeling for body care or a natural fertilizer in the garden, coffee grounds can be used in many different ways. He finds particular attention in mushroom cultivation. But how exactly do you use the coffee grounds to grow mushrooms and why are they suitable for this in the first place?

Why is coffee grounds suitable for mushroom cultivation?

Discarded coffee grounds are an excellent breeding ground for edible mushrooms. Filter coffee that has been brewed for a long time is particularly suitable, because there are hardly any substances left that inhibit fungal growth. These bitter substances are flushed out during long brewing. In contrast, the coffee grounds from the espresso machine are not suitable for mushroom cultivation. It still contains too many antifungal components and tends to prevent growth. The coffee grounds from filter coffee, on the other hand, are rich in nitrogen and therefore an excellent fertilizer, not only for mushrooms.

This is how mushroom cultivation works

For mushroom cultivation of edible mushrooms you do not need much. Only some mushroom spawn, a flower pot and coffee grounds as a substrate are required to grow mushrooms at home. Incidentally, the coffee grounds should not be older than 2-3 days, otherwise unwanted mold can form. First, the coffee waste is mixed with mushroom mycelium, which now serves as a substrate for the production of the mushrooms. This is placed in the flower pot and slightly moved. Finally, another layer of coffee grounds is added. If there is not enough coffee grounds, the pot can be filled up in layers over several days. Incidentally, it is even easier with a transparent plastic bag, which is then lightly knotted so that the air circulation is given. Thanks to the transparent plastic, the development of the mushroom culture is clearly visible.

Incidentally, the coffee grounds should not be older than 2-3 days, otherwise unwanted mold can form.

Best conditions for mushroom cultivation

Mushrooms like it dark and damp and need adequate air circulation. The environment should be clean, otherwise undesirable types of fungi will quickly settle. After about 14-28 days, the substrate is intergrown with the mushroom mycelium. The coffee grounds in the bag have turned white. Now the plastic bag can be opened to water the mushrooms. After a few days, the first fruiting bodies will sprout. As soon as these are large enough, the mushrooms can be harvested. Incidentally, as long as nutrients are available, more fungi will grow when watered.

With syrup, great cold and hot drinks can be mixed in no time at all.

Syrup – something for every taste

With an aromatic syrup, delicious delicacies can be mixed in no time at all. Whether fruit cocktails, spritzers or alcoholic refreshments – there are no limits to your imagination. Syrup can also be a suitable ingredient to turn a coffee into a special coffee specialty. In addition to finished products, you can also use homemade variants. So you not only know exactly which ingredients are hidden in it, but also have full control over the variety of flavors. Not only classic variations such as caramel and strawberry are possible.

Make delicious syrup yourself

With just a few ingredients, you can easily conjure up a tasty syrup. The basic ingredients are sugar and water. The desired syrup flavor can then be added to taste. Very different syrups are created with fruits, herbs, spices, but also nuts or chocolate. A clear advantage is that flavor enhancers, preservatives and other chemicals are completely dispensed with in the production process. Even the sweetness of the syrup can easily be adjusted to individual preference.
There are two manufacturing processes for a syrup:
Boil down the water and sugar and finally add the aroma
Use already flavored water for boiling
In the first method, a thick sugar syrup is made from water and sugar. Both normal sugar and special canning sugar are suitable for this. For the canning sugar, the manufacturer usually gives a clear proportion of water and sugar, which simplifies the production. The sugar syrup is then refined with the desired natural flavors. Here the possibilities are of course unlimited. The flavors strawberry, apple and cherry are popular, as are ginger and lemon.
The second method uses already flavored water to make the syrup. The desired flavor carriers are boiled into a brew. The brew is then sieved and used as the basis for making the sugar syrup. Foaming occurs when boiling. This foam must be skimmed off constantly to obtain a clear syrup. This method is particularly suitable for fruit or fruit, as the flavorings are released into the liquid in large quantities.
Herbs or zest as flavoring should best be used after the first method.

Elderflower syrup – a real classic

For lemonade, tea drinks or cocktails – elderflower syrup is very popular. The fine taste can be combined with many flavors and the syrup is a real all-rounder. The recipe for the elderberry syrup consists of a few ingredients:
1 liter of water
Juice of three lemons
500 grams of sugar
25 elderflower clusters
Boil the sugar and water. Then add the flowers. Let the whole thing simmer for about an hour under constant observation. Cook the syrup over medium heat, otherwise it may burn. Then strain the warm liquid through a cloth or a coffee filter and fill into bottles. The fresh syrup can be stored in the refrigerator for up to three weeks.

There is also syrup for coffee

The coffee syrup is a special feature. This has a similar effect to fruit syrup and was specially developed for use in coffee. Coffee specialties such as latte macchiato, café au lait or cappuccino can be refined with delicious syrup. There are numerous flavors from coconut to caramel to vanilla and hazelnut. For a special treat, coffee lovers can also use syrups with mint, chocolate or rum. However, since syrups are very sweet, care should always be taken to add only small amounts. The result is a very individual coffee specialty with that certain something.

Boil down the syrup and store it properly

To make the syrup storable for up to a year, you can preserve the filled bottles. To do this, place the bottles in a water bath and put it in the oven at 120 °C for around 20 minutes. Allow the bottles to cool sufficiently before storing in the cupboard. Don’t forget to write the date of manufacture on the bottle.

The finished bottles in a cool place without direct
Conserve light exposure. Best in the basement or in a kitchen cupboard. The color may change slightly over time, which does not affect the taste. Once opened, the syrup should be used within two to three weeks.

Syrup isn’t just for drinking

Whether you buy the delicious syrup or make it yourself – it is ideal for conjuring up delicious drinks in no time at all. It is also suitable for refining desserts or preparing a salad. A high-quality syrup is highly concentrated. Even a few drops can provide an intense taste.

Natural cleaning agents are usually sufficient for cleaning and removing dirt. It does not need any chemical cleaning agents. Instead, we show you natural and antibacterial cleaning products for your home. This protects the environment and your wallet.

Natural and antibacterial household cleaning products

If you want to ensure more hygiene in your household, you don’t need chemical cleaning agents with an additional antibacterial function. Because these antibacterial cleaners are superfluous and sometimes even harmful. In most cases, the usual cleaning of the kitchen and bathroom is sufficient. If you avoid germs and clean thoroughly, bad bacteria don’t stand a chance. You can also use natural home remedies as cleaning supplies. We will show you which home remedies have an antibacterial and disinfecting effect and are therefore suitable for house cleaning.

1) Use vinegar to clean

The classic household remedy vinegar is often used for various cleaning jobs. And not without reason. Because its disinfecting and antibacterial properties make it the ideal cleaning agent. You can use it for various purposes in the household. Clean windows, clean bathrooms or clean the kitchen. Everything is possible with it. And the key advantage is that using vinegar protects the environment. Accordingly, use vinegar more often as a natural and antibacterial cleaning agent.

2) Citric acid as an antibacterial cleaning agent

Citric acid is also a good antibacterial cleaning agent. Similar to vinegar, you can use this for cleaning many different areas. The disinfecting and antibacterial effect of citric acid helps to ensure adequate cleanliness. And the good thing is these natural home remedies are inexpensive. Therefore, avoid aggressive cleaning agents in the household in the future.

3) More tips for more hygiene in the household

Since the use of natural home remedies such as vinegar and citric acid is usually sufficient, there is no need for chemical and aggressive cleaning agents. In addition, you can observe a few basic rules that ensure sufficient hygiene in the household. Then you and your family are adequately protected from germs and bacteria. Therefore, note the following tips:

  • Wash hands regularly and thoroughly. Especially after going to the toilet and before preparing food. So bad germs don’t stand a chance.
  • Avoid germs. These are a suitable breeding ground for germs and are usually found in the kitchen, such as in sponges or damp cloths and corners. Therefore, replace them regularly or wash them hot.
  • Thoroughly clean work utensils and surfaces. After use, cleaning with an all-purpose cleaner is usually sufficient to eliminate germs. Then let it dry well.
  • Use wooden cutting boards. Because these are more hygienic because they dry faster and remove the breeding ground for bacteria.
  • Store food in sealed containers in the refrigerator. Throw away moldy food immediately and clean the fridge regularly with vinegar water.

You don’t have to spend a fortune to bake delicious fruit cakes, even in winter. Because canned fruit is also ideal for baking if you pay attention to a few things.

Bake a fruit cake

The fruit cake is a classic in many kitchens. Because this cake is conjured up quickly and it tastes excellent. And the whole family. Plus, even the clumsiest of beginners can’t go wrong here. For a delicious fruit cake, they often use their own fresh fruit from the garden. And that’s what makes him so popular. But that is not always necessary. Because even canned fruit tastes very good in the cake. So you can use ingredients that you usually have at home for such a fruit cake. Also, note tips for baking cookies with children.

What ingredients do you need to bake a fruit cake?

For the cake, you need the usual ingredients for the dough: flour, butter, salt, and sugar. Possibly also eggs, milk, or the household remedy baking powder. You can choose this according to your favorite recipe for the dough. You can also opt for a dough filling or quark filling. Depending on what you and your loved ones like best. And how much time do you have. Since the ingredients are ready at home anyway, you don’t need to go shopping beforehand and can start right away with the affordable fruit cake.

Add the canned fruit to the cake

After you have prepared the dough, it’s time to get down to business. Accordingly, you should first get the fruit out of the can and rinse it off briefly with clear water. Then let them drain thoroughly. So that the canned fruit is easy to use in the dough or other filling, roll it in flour. Finally, add them to the prepared dough. And for fillings of cakes or biscuit bases, you can also use relatively cheap frozen goods. So you can quickly and easily conjure up an affordable fruit cake. Also, read ideas for healthy baking

Clever tips for easy ironing for smooth laundry at a glance. This way you can finish the laundry quickly and effectively and put an end to wrinkles. Learn how to iron properly now and get to know the best iron test, winners.

Ironing tips for beginners

It takes a few tricks and you can easily get smooth laundry. Therefore, our ironing tips will help you to use the iron and ironing board correctly. Do we also clarify the most important questions: iron at high or low temperatures? What can be ironed? Is there an ironing technique for shirts or jeans? And what am I even allowed to iron? Or which iron is the best? In this article, all questions will be answered.

Ironing tips for special materials

Fortunately, we have a variety of fabrics to choose from for our clothes. But that also means that we have to pay attention to the different fabrics and their care instructions and properties. The best way to find out if a garment can be ironed is to always look at the label sewn into the garment. We have also summarized the most important cases:

  1. Cotton and linen fabrics can usually be ironed at high temperatures.
  2. synthetic fibers such as B. nylon, viscose, and wool, usually show a crossed-out ironing symbol and should not be ironed.
  3. Women’s blouses and men’s shirts must be ironed while damp, with a steam iron, or by spraying them with water first. This method protects the material.
  4. Ironing delicate items such as wool or silk is more difficult. They should not be sprinkled with water or ironed with a steam iron. It is better to place silk or wool items between two damp household towels and then iron them, as this is the sensitive fibers.
  5. Be sure to iron difficult garments with embroidery and embellishments inside out. Place a kitchen towel between the clothes and the iron to protect them.
  6. When ironing dresses with hems, be careful to only iron the folded edge of the skirt hem, not the actual hem. This way you avoid the unsightly outline of the hem.
  7. Even professionals need 5 to 10 minutes per ironing shirt. It, therefore, makes sense to always iron shirts together with other shirts so that you can concentrate fully on the shirt.

The correct order of ironing

Selection by temperature: To avoid having to turn the iron up and down and wait for the right temperature, sort your laundry before ironing according to the necessary ironing temperature. Start with the delicate fabrics on low heat and then gradually increase the temperature for the more robust items.

Choosing by size: So that one part of the garment does not crumple again while you are ironing the other part, it makes sense to stick to the following sequence: All small, difficult parts such as the button placket, buttonhole placket, collar, cuffs, the tricky shoulder area, and the sleeves. Only then do you start ironing the larger parts of the garment, i.e. the chest and back areas.

General household tips for ironing

In addition to the information worth knowing about the right temperature and ironing tips for the respective fabrics, you should also heed other general ironing tips. Therefore, we have summarized other important tricks for smooth laundry for you:

1) save your back

Always protect your back when ironing. If you bend over while ironing, it is not good for your back and can lead to tension and severe back pain. If you iron standing up, you should adjust the height of the ironing board to hip height. This ensures a healthy posture.

2) Iron while damp

Always iron textiles while damp because once the laundry has completely dried it is much more difficult to iron. It is best if the laundry is still on the clothesline and is only slightly damp or clammy. The heavier and thicker the fabric, the more important it is to work with moisture. You can also spray the ironing pieces individually with water before ironing.

3) Use a steam iron

Using a steam iron saves on wetting the laundry. The necessary moisture, which is supposed to help us when ironing, comes out of the iron as steam. However, steam irons can give off too much moisture, then clothes need to be ironed much longer to get them dry again.

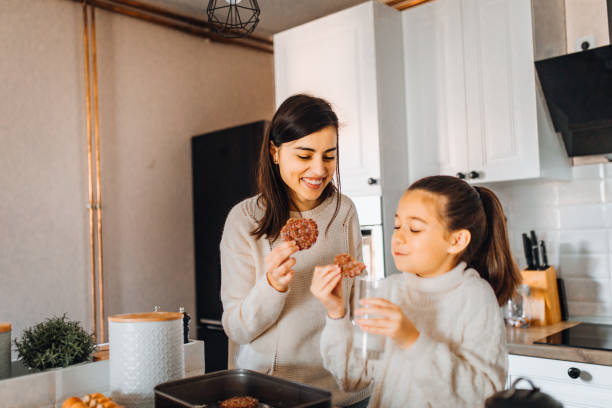
Baking cookies with children is always a good activity. And especially in the run-up to Christmas, this is a popular activity before the festival. So that baking cookie is stress-free, we have simple recipe ideas and tips that you should consider when baking together.

Baking together at Christmas time

Trying out different recipes, creating creative decorations and surprising friends and relatives with the delicacies is the epitome of a contemplative and loving time. Children also like to help their parents with baking and designing. From simple butter biscuits with sugar icing to Linzer eyes and hussar donuts with jam to marzipan potatoes and vanilla crescents, there is a recipe to suit every taste.

What cookies to bake with children?

However, some cookies are too big a challenge for children’s hands. A good example is Linzer Augen, where the individual layers of pastry have to be rolled out so thinly that cutting them out and handling them after baking requires great care. If the cookies keep breaking, frustration is inevitable. So think carefully about which cookies you can bake together. As a result, you prevent mishaps like cracking cookies or cake batter collapsing. The following recipes are also suitable for baking cookies with children and ensure fun in the kitchen:

  • shortbread,
  • wintry cookies,
  • butter cookies, and also vanilla crescents.

What tasks do children take on when baking cookies?

In some families, the mother and father take care of baking the cookies and only ask their children to help decorate them. What can definitely save time, however, takes away the opportunity for children to try things out for themselves and make new experiences. It is therefore best to plan enough time for baking when planning the weekend and to involve your children in the baking process from start to finish.

Depending on their age, children can then take on tasks as if they were under the supervision of their parents. Incidentally, children learn here that they can achieve great things themselves, which in turn strengthens their self-confidence. Because if your children not only decorate the cookies but also knead, shape, and bake them, they will be “proud as Bolle” at kindergarten age. Consequently, let them take over these tasks when baking cookies:

  • weighing ingredients,
  • kneading dough,
  • forming balls, croissants, or cookies
  • as well as cutting out and decorating the biscuits.

Observe hygiene when baking cookies

Good hygiene in the household should be a matter of course when preparing food. It is therefore important to teach children to maintain a certain level of cleanliness when baking cookies. You should make sure that you wash your hands properly before you start. This will get rid of bacteria and dirt. In addition, you should plan short hand washing cycles in between. Children in particular touch other things at work or put their fingers in their mouths.

that dough should only be touched with clean fingers. For this reason, washing your hands before baking is an absolute must. Here, any bacteria and dirt are rinsed off the fingers and do not come into contact with the cookies and dough. In addition, the following hygiene rules should be observed when baking cookies with children:

  • Children with a cold should not help or you will postpone baking the cookies. Then the risk of pathogens coming into contact with dough and cookies when you sneeze or cough is lower.
  • Raw eggs are a source of danger. Salmonella or other pathogens can adhere to the shell, which is why children should not eat raw dough. Or you can use a dough without eggs and a vegan egg substitute.

Bake delicious Christmas cookies

When the cold season begins, the anticipation of the Christmas season is great. Then gifts are bought, apartments and streets are decorated for Christmas and the Christmas tree is decorated. And special dishes are also prepared for the traditional festival. At Christmas, delicious and sweet foods such as gingerbread, chocolate cake, delicious biscuits, and cookies are very popular. These are not only served with a delicious Christmas meal but can also be enjoyed in the pre-Christmas period. Baking cookies together is a great winter activity for kids. The following recipe is good for baking cookies with children.

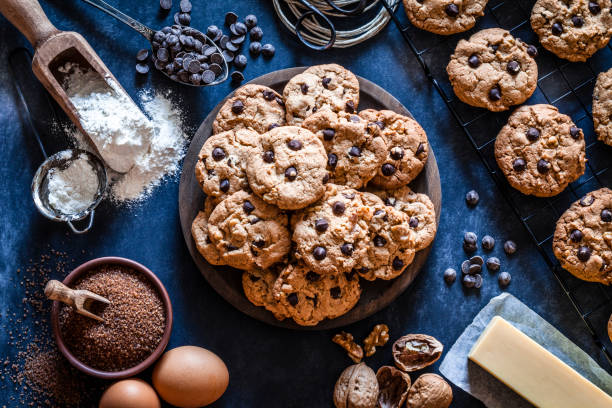
Make cookie dough instructions

To bake cookies you need the ingredients listed below. Then you can start making the cookie dough. To do this, first mix the dry ingredients such as flour, sugar, salt, and vanilla sugar in a large bowl. Then add eggs and margarine and cut into small pieces. Then quickly knead a coherent dough from the ingredients. After kneading you will get a golden-yellow dough, which you should divide into two equal halves. Form one half into a roll that should have a diameter of about 6 cm. The bright yellow rolling pin is now chilled in the fridge for about an hour or two.

Mix the other half of the dough with the cocoa powder and knead everything again. Then this role of dough also goes into the fridge. After the dough has been in the fridge for some time, the light and dark rolls of dough are cut in half lengthways so that you get two light halves and two dark halves of the dough. Then light and dark half of the dough is always put together, which gives you two-colored biscuit rolls that have a light and a dark side. Then cut the rolls into slices, which should be about one centimeter thick. Also, note our tips on how to bake grandma’s cookies easily and vegan.

  • 500g flour,
  • 2 eggs,
  • 250g margarine,
  • 130 grams of sugar,
  • Salt,
  • 1 packet of vanilla sugar,
  • 50 grams of cocoa.

Clever tips for removing sunscreen stains. Natural home remedies against sunscreen in clothing, in t-shirts, on clothes, or on white laundry. So summer can come without fear of yellow sunscreen stains.

Pollution from sunscreen stains

Good sunscreen is extremely important these days and should always be applied. Good sunscreen is essential, especially for children. It should be equipped with a sun protection factor appropriate for sensitive skin. As a result, it can quickly happen in summer or on vacation when sunscreen lands on clothing. Then ugly stains appear. But is it even possible to remove fresh sunscreen from clothing? And how do you get rid of the yellow-brown sunscreen stains? We show various means to remove sunscreen stains and wash them out completely.

Remove sunscreen stains from clothing

You should always have sunscreen suitable for your type with you on excursions in summer in order to avoid sunburn and protect sensitive skin. Long clothing is also advantageous. However, this combination causes unwanted sunscreen stains on clothing. Putting clothes on after sun exposure can stain t-shirts and other clothing. Unfortunately, it also happens from time to time that the sunscreen leaks and leaves ugly stains on the backpack or other things.

These stains contain a lot of fat and are stubborn. Consequently, sunscreen stains are difficult to remove. If you want to remove sunscreen stains from your clothes, you should act quickly. The cause of the stains on the sunscreen is the UV filter of the sun protection factor. This is oil-soluble and the self-coloring is transferred to the textile fibers with the cream.

Immediate measures to remove sunscreen stains

If you want to effectively remove sunscreen stains, you need to act fast. Because the older the sunscreen stain and the higher the sun protection factor, the more difficult it is to remove the stain. Accordingly, you should first remove the sunscreen with a cloth without rubbing it into the fabric. There are then a number of ways to combat the stain. So use the following natural home remedies for sunscreen stains. In addition, note tips for removing carrot stains and home remedies for pen stains on clothing.

1) Use dishwashing detergent for cleaning

Dishwashing detergent is particularly suitable for quick use. Because the washing-up liquid helps very well as a classic degreaser. Since sunscreen, as described above, contains a lot of fat, treat the stain with fat-dissolving dishwashing liquid. To do this, rub it in thoroughly. Then wash the garment as hot as possible.

2) Gall soap to remove sunscreen stains

The good old gall soap helps very well against grease stains. Hand soap is also sufficient in many cases. It is often sufficient to rub the area with the sunscreen on the garment and wash the item thoroughly by hand. If that is not enough, treat the stain very well with the gall soap. Then put the clothes in the washing machine to wash as normal.

3) Vinegar water for suntan lotion stains

Vinegar water also helps against sunscreen stains. Soaking the clothes in vinegar water can help, especially for light stains. Simply mix normal tap water with vinegar essence (at a ratio of 10 parts water to 1 part vinegar essence). Then let the laundry soak for about 1 hour and then wash as normal. But with sensitive textiles, such as wool or silk, you should avoid acetic acid.

4) Use baking soda as a stain remover

The home remedy baking soda is often recommended on the internet for removing sunscreen stains. Because the sodium bicarbonate it contains dissolves the stains of the sunscreen. To do this, put the baking soda on the sunscreen stains and add some water. Then leave it on for 30 minutes. Finally, wash the garment in the washing machine. Also, note how you can get yellowed laundry white again.

5) Baking soda for sunscreen stains

As already revealed in the previous point, the miracle cure of baking soda serves as a stain remover. As a result, you’ll need to wet the yellowed areas with water and then sprinkle baking soda over them. Then leave it on for about 30 minutes before you can machine wash it clean. Find out which other detergent alternatives are available.

Be careful with the stain remover

If you’re using a drugstore stain remover, be sure to test the fabric’s colorfastness on a hidden area before applying the stain remover. Then dab your chosen remedy onto the sunscreen stain in a circle from the outside in. You can then wash the garment in the washing machine according to the care instructions on the garment.

Cleaning windows is a thing of the past, modern window vacuums are the best helpers in the household. Use the window vacuum to make cleaning the window quick and easy. We have an overview of the best devices.

Clean windows with a window vacuum

As soon as the first rays of spring peek out from behind thick clouds, your heart starts to smile. and you immediately feel better. But that changes when you look through the window. Because then you can see all the dirt on the window panes. So it’s time for a thorough house cleaning. Not really be a problem if it weren’t for the tedious cleaning of each individual window front in a conventional way. To ensure that the spring cleaning goes smoothly, you can use useful cleaning gadgets to help you. This also includes the window vacuum.

Advantages of the window vacuum

When used, the window vacuum is not specifically dependent on the size of the respective window. Consequently, he works precisely and carefully on small windows and large window fronts. This makes it a universal all-rounder when it comes to window cleaning. This helper also has other advantages over simply cleaning windows:

  • Enables streak-free cleaning.
  • Speeds up the window cleaning.
  • Available in different sizes and widths.
  • Versatile in use thanks to different attachments.
  • No pre- and post-cleaning of the windows is necessary.

Easy to use to clean windows

The mechanics and function of a window vacuum are very simple. Because window vacuums are usually operated with batteries. This gives you a high degree of mobility and flexibility when cleaning windows. When you switch on the device, the motor creates a suction that pulls the dirty water directly from the window into the collection container. Then this is collected with the help of the attached rubber lip. Once the container is full, simply rinse it out in the sink and it’s ready to use again! After use, you should clean the device and charge the battery from time to time.

To clean the window, first, moisten the window front. Then simply place the vacuum cleaner on the still damp window pane. The vacuum cleaner then attaches itself slightly and you can let it suck systematically from top to bottom, across and step by step simply along with the window. The cleaning water is completely removed from the window and the result is crystal clear. Depending on the size of the window and especially the number of panes, you can save a lot of time on cleaning.

Buy the best window vacuum

In retail and online you will find many different suppliers for vacuum cleaners. But which one is really good? While you don’t have to clean the windows every day, you should give your windows a good cleaning once a month or three times a year. But then you shouldn’t spend too much time on it. You can use the time you save with a good window vacuum as a relaxation time for yourself. The following window vacuums are recommended:

1) The test winner: AEG WX7-60CE1 window vacuum

In the test report, the window vacuum from AEG did very well with a battery life of 60 minutes. Thanks to its rubber lips made of natural rubber, it delivers perfect and streak-free results when cleaning windows.

2) A bestseller: Kärcher cordless window vacuum cleaner WV 2 Premium

The Kärcher brand offers good and effective devices in many areas of cleaning. In addition to effective steam cleaning, there are also devices for cleaning windows.

3) The reliable one: Bosch Home and Garden Battery GlassVAC

The window vacuum from Bosch is also one of the best everyday helpers in the household and guarantees you a streak-free cleaning of your windows.

4) The inexpensive variant from Leifheit

The inexpensive window vacuum from Leifheit has already been tested on various blogs on the Internet and was able to convince. Because it has a special click system with which you can use different handles quickly and easily.

5) The brave: Sophinique window cleaning robot

Admittedly it takes some getting used to, but it’s a great idea. Because this robot should clean the windows automatically. As a result, cleaning the window actually works all by itself. You can easily control this robot with your smartphone.

Useful home remedies and tricks for widening tight shoes. Surely you know the problem, you buy new shoes and after wearing them for the first time, various pressure points and blisters appear on your feet. Then you should use the following tips to stretch your footwear.

Simple home remedies and tricks for widening shoes

When you have bought new shoes, you are usually very happy. Then you want to put them on and perform them right away. But often one has to realize that after a short time pain arises due to pressure points. Shoes that are too tight can cause blisters on your feet. As a result, you don’t want to wear them anymore. However, there are some clever tricks to widen the shoes and thus ensure a comfortable fit.

1) Use spirits and alcohol to stretch

Once you have located the spot(s) where it pinches, you can rub alcohol (or high-proof alcohol or hot water) into the boot. Then wear the footwear directly for a longer period of time (several hours). It may feel a little tight at first, but this pressure will subside after a short while. Because the alcohol in combination with exercise will expand the material of your shoes. As a result, you will no longer notice any pressure, so the new footwear can be worn without any problems. Also, note tips for getting rid of smelly shoes.

2) Vinegar on hard leather shoes

You can also do something about older models that pinch in certain places. If leather shoes have become hard over time and are therefore painful in certain areas, another home remedy can help: using vinegar. It is also rubbed inside the leather shoes and causes the pressure to ease. For this, you have to put them on and move. In addition, note how you can freshen up old leather so that your leather shoes last a long time.

3) Shoes expand with heat

Another very effective method against shoes that are too tight in heat. Accordingly, take a hot spoon and hold it from the inside to the respective oppressive areas. Alternatively, a warm shoe tree is also suitable for this purpose. You can also try stretching your footwear with a hairdryer. For this, you put on thick socks and slip into the sneakers. Then heat them up with the hairdryer and try to widen the shoes by stretching and moving your feet. Also, read how to gently clean white shoes.

4) Push the seams of leather shoes outwards

If you have leather shoes that are painful on the outside seams, you can push them outwards very gently. In order for the shoes to expand, repeat the process several times until they are comfortable to wear. Also, note the proper care of patent leather shoes.

5) Potatoes and newspaper to stretch shoes

Potatoes are also suitable as a home remedy for use on tight leather shoes. To do this, you have to cut open a potato and place the open side against the leather. So that it doesn’t slip, you can simply put some newspaper inside to fix it. Then leave the potato and paper there overnight. In this way, the footwear is supplied with moisture and it expands. A nice side effect is that the shoes become soft due to the starch in the potato.

6) gel pads in leatherette shoes

If you have faux leather shoes, it’s not that easy to widen those shoes because faux leather doesn’t really yield. Nevertheless, you can do something with these models to prevent any pressure. Accordingly, put a gel cushion in the imitation leather shoe so that the material gives way when you wear it and you no longer feel any pressure. You can avoid blisters on your feet in the future.

Avoid tight and tight shoes

As you can see, there are numerous simple tips on how to widen tight shoes or provide relief in other ways. So you can continue to wear your favorite shoes and don’t have to buy new ones. If the tips listed above don’t help, you should visit a cobbler to help you mend the shoes. However, it is even better when trying on and buying shoes to decide on slightly larger models.