Tag

without

Browsing

There are many alternatives that you can use as a substitute for salt in cooking. Why too much salt is unhealthy and how to replace it without sacrificing spice and taste.

The World Health Organization (WHO) recommends a maximum of five grams of salt per day for adults, but the reality is different: According to the organization, the majority of Europeans consume up to eleven grams of salt a day through food. Consuming too much salt over a long period of time can be detrimental to your health. High blood pressure in particular is a dangerous risk associated with too much salt.

Actively reducing salt consumption is not always easy: We get most of it from finished products, snacks such as crisps and pretzel sticks, but also bread and cheese. In addition to fat and sugar, fast food also contains a lot of salt.

So, if you want to control your salt intake, your primary goal should be to cut down on processed foods and cook more at home. This has a positive side effect: you save a lot of packaging waste and you know exactly what you are eating.

However, there are also some flavorful alternatives to salt that you can use in cooking. So you save on salt, but you don’t have to sacrifice taste and spice.

Spices as a salt substitute

“Seasoning” does not necessarily mean “salting”. Instead, use more different spices when cooking and thus develop the whole spectrum of taste. Spice powders are easy to use and widely available. Tip: If you don’t mind the effort, you can grind many spices yourself at home.

Keep the following in your pantry at all times:
For vegetables:
chilli powder
anise
garlic
nutmeg
fennel seeds
cardamom
For fish and meat (for ecological reasons, it is advisable to eat little or no fish and meat):
White pepper
Black pepper
curry powder
paprika powder
Caraway seeds
pimento

Replace salt with vinegar

You can also replace salt with high-quality vinegar. Although vinegar tastes tart, adding small amounts gives you a great flavor.

Herbs as an alternative to salt

Fresh and dried herbs ensure an intense aroma and varied taste. There is an abundance of herbs:
Parsely
chives
dill
wild garlic
basil
watercress
rosemary
thyme
lovage
oregano
coriander
marjoram
tarragon
mint
sage
lemon balm
As you can see, there are a lot of different herbs, many native, others Mediterranean. If you want to harvest your own herbs, you can create your own personal herb bed with your favorites.

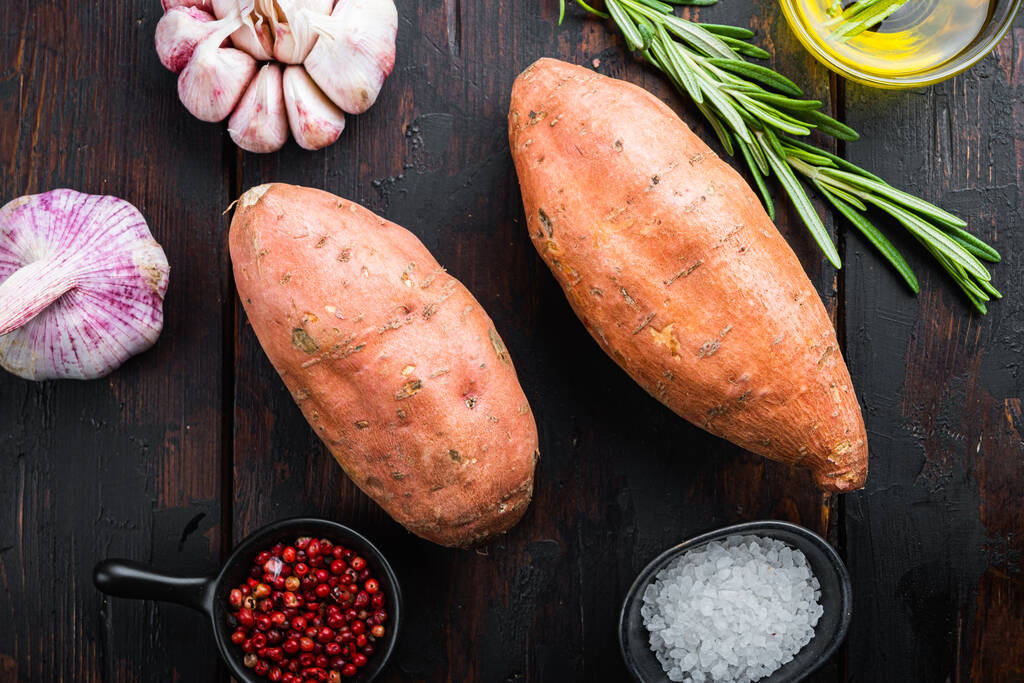
Garlic and onions as a salt substitute

Onions and garlic have a strong flavor of their own and add flavor to your food without the need for additional salt.

Replace salt with yeast

Many dishes, especially soups and broths, can also be seasoned with yeast products. Yeast gives your food an aromatic, spicy taste. Yeast flakes, yeast extract and yeast seasoning pastes are suitable. When buying, make sure that the product in question does not contain any additional table salt.

Sodium reduced salt as a salt substitute?

As its name suggests, reduced-sodium salt contains less sodium chloride than regular salt. As a substitute, potassium chloride is in such products.

Sodium-reduced salt is suitable with regard to a low-salt diet in that you can save a lot of sodium chloride. However, it is said to have a slightly bitter aftertaste and taste less salty than regular salt.

The best thing to do is to try it out to see whether it is suitable and worthwhile as a salt substitute for you. Seasoning with natural ingredients such as spices, herbs or yeast is more recommended.

Salt substitute: More tips

If you want to reduce your salt intake, weaning it off slowly will help. On the one hand, you should (after) add less salt overall. Your taste buds will get used to it over time, so you won’t miss all that salt anymore.

Many seasoning products, such as vegetable broth and soy sauce, are also available in reduced-salt versions. Keep your eyes open when shopping and look around for such products. You can save a lot of salt this way.

Low-carb pasta is now available in many different forms. Noodles without carbohydrates taste delicious and are a good alternative to conventional wheat noodles.

Low-carb noodles for low-carb diets

With a low-carb diet, you replace carbohydrates with fats and proteins, which also fill you up and provide energy. Conventional pasta mainly contains carbohydrates and is unsuitable for a low-carb diet. There is a large selection of low-carb pasta so that you don’t have to do without pasta despite the lack of carbohydrates.

Low-Carb Noodles: Konjac Noodles

Konjac root extracts have been used medicinally and as food in Southeast Asia for over 3,000 years. The main component of the tuber is the fiber-containing glucomannan. Dried and ground, you can use it as a thickening agent or as a gelling agent and prepare desserts with it. Konjac is also processed into low-carb noodles.

The Konjac noodles, which are visually reminiscent of glass noodles, contain almost ten kilocalories per 100 grams and only around two grams of usable carbohydrates.
Since the pasta substitute is not made from grain, konjac noodles are also gluten-free.
In addition to glucomannan, konjac noodles contain large amounts of water and the natural stabilizer calcium hydroxide.
The low-carb noodles are also known as Shirataki noodles and are versatile. You can find them in the Asian market and in more and more supermarkets and organic markets.

Low carb red lentil pasta

Low-carb noodles made from red lentils contain more carbohydrates than konjac noodles. With around 56 grams of carbohydrates per 100 grams, however, they are lower in carbohydrates than conventional wheat noodles. Low-carb red lentil pasta is also healthier for other reasons:
Unlike wheat pasta, lentil pasta is made up of complex carbohydrates. These have a lower glycemic index, meaning they cause blood sugar levels to rise more slowly after eating than wheat noodles. As a result, the low-carb pasta keeps you full for longer.
Lentils are legumes and therefore gluten-free.
Low-carb pasta made from lentils has a high protein content, which also keeps you feeling full for longer. They are a good plant-based source of protein, especially for vegans.

Low carb chickpea pasta

At around 37 grams per 100 grams, low-carb noodles made from chickpeas have significantly fewer carbohydrates than wheat noodles. Your glycemic index is also lower.

Chickpea noodles, like lentil noodles, contain a high proportion of fiber and unsaturated fatty acids.
They are also very high in protein.
In addition, the low-carb pasta contains many vitamins and minerals, especially magnesium, iron and zinc. Wheat noodles have a much lower nutrient content.

Soy Noodles: Asian low-carb noodles

Low-carb soy noodles also contain very few carbohydrates at 13 grams per 100 grams.

Pure soy noodles have a high protein content and keep you full for a long time.
When it comes to low-carb soy pasta, you should make sure that you buy the pure soy version. Many soy noodles on the market are mixed with wheat flour or egg and are then no longer gluten-free and low-carb or no longer vegan.
Just like regular pasta, you can buy soy noodles in different shapes. They are available as classic spaghetti, tagliatelle, fusilli or spirelli. They taste slightly nutty and go particularly well with Asian recipes.

Even if most people can no longer hear the advertising slogan “Then it’ll work with the neighbor too” of the beaming housewife with a sparkling wine glass in the camera, the nagging envy tells us all: “I also want to have clean glasses like that .”

However, today’s cleaning lady thinks economically and avoids environmental pollution wherever possible. This commendable attitude is in no way opposed to the Clean Glasses plan. Here are a few tips on how glasses, cutlery, and porcelain, and especially stainless steel, can shine in the kitchen cupboard without water stains.

How are water stains formed?

The given tips work against contamination on dishes, which are usually due to incorrect treatment. Water stains occur when the water cannot flow freely down the clean dishes. Therefore, very well cleaned dishes can air dry without forming water stains. Usually, this condition does not last very long, so it is advisable to dry the dishes well right away.

1. What the dishwasher really needs

Unfortunately, this is often the case: the dishes come out of the dishwasher unclean. On the one hand, this can be due to the wrong acknowledgment, but more often the lack of salt is the devil in the details.

Dishwasher owners should therefore always make sure that there is enough salt in the filling device provided for this purpose. Although the “Minna” washes with hot water alone, the composition of the rinsing water contains magnesium and calcium ions, depending on the degree of hardness, which is deposited in a light layer on the dishes.

The dishwashing salt prevents this process by precisely separating these ions and leads to clean dishes that do not show any streaks when dried with a clean tea towel. Also, note tips for descaling and cleaning the dishwasher.

2. Washing by hand: Crystal clear, environmentally friendly

It’s not the amount of detergent that causes clean dishes. It’s washing dishes with your head. For people who have their own household for the first time: First, the glasses, then the plates, then cutlery, pots, and pans, as these are the dirtiest, in the end. The glasses should be washed so hot that you almost (!) burn your fingers. It is enough not to let the sink fill up completely with water.

Once briefly cleaned underwater with a kitchen sponge inside and outside as well as on the handle, a small amount of cold water can always remove the foam. This means that the washing-up water also has a more bearable washing-up temperature for the dishes that follow the glasses. The other cutlery and dishes are then treated in the same way before they are wiped dry with the tea towel.

3. Tea towel is not a hand towel

Before using them for the first time, new tea towels should be washed just like another laundry, as the textiles often contain chemical color pigments. Not only are these unhealthy, but they also leave a film on the dishes that make spot-free cleaning difficult. Failure to do this first wash can lead to smeared dishes that cannot stand up to scrutiny in the sunlight.

Surprisingly, many people, mostly men, students, and trainees, do not know the difference between a hand towel and a tea towel. In the industrial processing sector, too, this differentiation is no longer made exactly, since they are both almost the same size. However, the tea towel is made of thin cotton or linen fabric, while the hand towel, as a category of body towels, is made of less absorbent but thicker cotton fabric. Since cotton fibers fluff easily, the long-fiber linen tea towel with a dense weave structure is the better choice for drying glasses and good china.

Cutlery and stainless steel can also be perfectly polished with it. The extremely absorbent microfiber cloths are just as powerful. However, when washing at 40 or 60 degrees, they must never get fabric softener on them, as the remains lead to the formation of streaks and the absorbency of the microfiber cloth is reduced by the fibers being pressed together. To ensure that dishes are cleaned as germ-free as possible, the tea towels should also be changed regularly. In addition, note how you can remove coffee and tea rims from cups.

4. When the dishes “take a hit”

If the enamel is broken, it is unfortunately not possible to have a flawless tableware appearance without a professional repair. If, on the other hand, water or dirt stains have formed over a long period of time due to incorrect treatment, which is becoming increasingly clear under the barely visible layer that is not so easy to remove, pure vinegar or citric acid can work wonders.

However, these household helpers, which can effectively replace almost all special chemical cleaners anyway, require a little more exposure time for stubborn dirt. Concentrated vinegar or vinegar essence with 75% water content or acetic acid is easily degradable and the somewhat unpleasant scent disappears in no time. However, this cleaner is powerful against calluses, grease, and limescale and even makes blind glasses and mirror surfaces shiny again.

For burnt pots or greasy pans, a dash of vinegar essence diluted with a soda can be spread over the surface with a sponge. After a short exposure time of about 10 minutes, this mixture, which has practically absorbed dirt and lime, can be easily washed off. Even stubborn burnt residues, such as those often found on grills or in ovens, can be removed in this way without having to scrub.

Does salt belong in the pasta water? If so, when and how much? There are many myths circulating on the subject. We explain to you what really matters when it comes to salt in pasta water.

Preparing noodles is very easy: Boil water in a pot, put noodles in, cook noodles. But many wonder how much salt is needed and when to add it – right at the beginning in the cold water or as soon as it boils? All in all, the salt in the pasta water can affect three factors: the taste of the pasta, the boiling point of the pasta water and the cooking time. Let’s take a closer look at each factor.

Salt in the pasta water: why the timing is still interesting

Nevertheless, it makes a difference whether you add the salt to the cold or boiling pasta water. Salt dissolves better in hot than in cold water. Therefore, when you add the salt to the cold water, a larger amount that doesn’t immediately dissolve will sink to the bottom of the pot. There the salt causes stains and can damage the pot in the long run.

Tip: Stainless steel pots are much more robust than aluminum pots. Salt doesn’t do much harm to the former.

Pasta water: salt and its effect on cooking time and taste

The Max Planck Institute says: No, salt in the pasta water does not significantly affect the cooking time. So why would you salt the pasta water at all? The answer is: for the taste.

Salt in the pasta water ensures that the pasta retains its flavor. Behind this is a relatively complex physical phenomenon called osmosis. Put simply, you can imagine it like this with pasta water: If the water is completely unsalted, the salt concentration in the pasta is higher than in the pasta water (pasta naturally contain minerals such as sodium). The system wants to compensate for this concentration gradient. This is why minerals from the pasta go into the cooking water. The result: the noodles lose their taste. On the other hand, if you salt the pasta water well, the pasta can even absorb salt.

A matter of taste: How much salt in the pasta water?

You can decide how much salt you add to the pasta water according to your taste. A simple rule of thumb is: ten grams of salt for 100 grams of pasta and one liter of water.

Another tip comes from chef Sami Nosrat (author of the book Salt, Fat, Acid, Heat): salt the water until it tastes like sea water.

Salt in Pasta Water: Does It Affect Nutrient Content?

Unfortunately, the question of whether salt in the pasta water influences the nutrient content of the pasta has not been conclusively answered. Intuitively, the section on osmosis would tell us that salted pasta water is beneficial because less of the material in the pasta migrates into the water. However, the difference may be insignificant or other factors that have not previously been considered play a role.

But with these tips you will have a nutrient-rich meal in any case:
Use whole wheat pasta instead of white flour pasta. The former contain more fiber, minerals and vitamins.
Whether with or without salt: when cooking, water-soluble nutrients are transferred from the pasta to the pasta water. This applies, for example, to B vitamins. You can save part of it by enriching the pasta sauce with the pasta water. The pasta water also contains starch from the pasta, which binds your sauce. And since you salted the pasta water well, it also adds flavor.

Thickening cherries is worthwhile for refining various desserts. We present three ways to help you thicken without much effort.

Thickening cherries is an easy way to create a delicious topping for desserts and sweets. There are three options: You can thicken cherries with cornstarch (or a cornstarch substitute), vanilla pudding powder and cake glaze. For this you need the following ingredients:

650 g organic cherries
0.5l water
2 tbsp cornstarch/custard powder/cake glaze

It usually takes less than five minutes to thicken the cherries. We explain step by step how to do this:

Place the cherries in a saucepan with the water.
Let the kirsch come to a boil.
Stir in the starch/custard powder or frosting as soon as the mixture boils. Caution: Begin stirring immediately after adding your thickener of choice to the water. That way no lumps form. You should also not add cornstarch directly to the boiling water, but mix it with a little cold water first and then add it. This also prevents lumps from forming.
Important: cherries are in season from June to August. So this is the best time to thicken cherries.

Peel the butternut or just leave the peel on? Here you can find out when you should peel butternut and how you can still use the peels.

Butternut squash, also known as butternut squash, is a popular type of squash that you can use in a variety of ways. Nevertheless, the preparation always raises questions: Do you have to peel butternut? There is no general answer to this and it depends, among other things, on the respective court. We’ll show you what’s important.

Shell the butternut or leave the shell on?

The skin of the butternut doesn’t get really soft, like the Hokkaido pumpkin, for example. You can eat them, but some dishes turn out better if you peel the pumpkin first. You should peel the pumpkin, especially for recipes in which you only cook it for a short time. In principle, you can leave the bowl on for soups and purees. You can avoid pieces in the finished meal by thorough pureeing. You can also leave the peel on for dishes like pumpkin wedges that take a long time to cook or bake.

Especially if you want to eat the skin, we recommend that you buy an organic pumpkin. This is how you avoid residues of chemical-synthetic pesticides on the shell. It is best to buy regionally grown pumpkins during the season to support local producers and avoid long transport routes.

Peeling the butternut: Here’s how

If you’ve decided to peel the butternut, here’s how to do it:

Remove the ends of the butternut and slice lengthways.
Remove the core with a spoon.
Stand the squash upright and use a sharp knife or vegetable peeler to cut off the skin.
By the way, you don’t have to throw away the pumpkin skins: you can use them for a snack instead. Cut the peels into small pieces and fry them in hot oil together with finely diced onion. Finally, you can season the bowls with pepper and salt and add other spices as you like.

You don’t have to throw away the seeds either. Dried and roasted, it also becomes a delicious snack.

Clean windows properly with simple home remedies without streaks. To ensure that you can clean your windows effectively and quickly in the future, use our instructions and tips for window polishing. Then you avoid streaks and they become sparkling clean.

Cleaning windows seems to be a science in itself. You invest a lot of time and effort in cleaning the windows, but as soon as the sun shines on the panes, you see unsightly streaks on the freshly cleaned and clean windows.

Window cleaning made easy

Are you also tired of having to constantly and laboriously clean windows? And before you know it, are there new stains on the disc? This is often unavoidable, especially in bad weather. Despite expensive means and special devices for cleaning windows, there are still streaks on the glass. When the sun shines, you will see it even more! It is usually not dirt at all that is responsible for these streaks or streaks on the windows, but the lime contained in the cleaning water. Therefore, we have simple tips on how to get the problem with the calcareous cleaning water under control. All you need are natural home remedies. Or you use a window vacuum to clean windows.

Home remedies for cleaning windows

Window cleaning is always a new challenge. How do I clean my windows without streaks or other residues later being visible on the window? There is a myriad of different cleaning agents on the market and, of course, microfiber cloths for streak-free cleaning. But this not only means a lot of effort but also considerable costs. Therefore, it is better to use the following home remedies to clean your windows. Also, note natural home remedies for cleaning the kitchen.

1) Vinegar for cleaning the window panes

To clean the window without leaving streaks, use the home remedy vinegar essence. To do this, add about 1 cup of essence per liter of water and clean the window panes with this solution as usual. Then wipe the window dry. You can also ensure a clear view of windows that appear unclear by wiping them with a cloth and a few drops of table vinegar. And if a few splatters of wall paint get on the window panes during renovation work, then simply remove them with table vinegar.

2) Use of Lemon Essence

You can also use lemon essence to avoid calcareous cleaning water and thus prevent streaks. Accordingly, add about 1 cup of lemon essence per liter of water. Then clean the window panes according to the instructions. As a result, you save yourself a long time cleaning and polishing the windows.

3) Tea to clean the window

Black tea is well suited for window cleaning. This is because it contains tannins that can dissolve dirt and grease. So take two bags of black tea, boil them in a cup and let it steep for 10 minutes. Then add it to the cleaning water and use it to clean the windows as usual and wipe everything dry. Also, read our tips for cleaning according to plan.

4) Dishwashing liquid as an environmentally friendly cleaner

Dish soap is also suitable for cleaning your windows without leaving streaks. To do this, use normal detergent with a neutral pH value in the cleaning water. Because this is a very environmentally friendly solution and you can protect the environment in the household. In addition, you always have washing-up liquid at hand and it is cheap. A soft cloth and a few drops of vegetable oil will also ensure cleanliness. In both cases, repolishing is necessary.

5) Clean windows with ammonia

The window panes will stay cleaner longer if you wipe them with a mixture of 30 ml water, 70 ml glycerine, and 3-4 drops of ammonia solution after cleaning. Liquid ammonia is also known as ammonia water and is considered a tried and tested cleaning agent. It helps against calcification and is often used to clean discolored joints. Its use for effective toilet cleaning is also recommended.

6) Clean windows without streaks with spirit

Add a dash of spirits to lukewarm water. Then moisten and clean the panes as normal with a cloth and then wipe the pane dry again. This method is quick and thorough. The alcohol in the water saves you the hassle of polishing and expensive additives. To give the window panes a nice shine, they are finally wiped again with spirit water (3-5 drops per 1 liter of water). Alcohol can also be replaced with fruit water or vodka. In addition, note other tips on using alcohol as a home remedy.

Vegans don’t always have it easy when it comes to baked goods. Because even if some bakeries now offer vegan alternatives, many cakes, biscuits and even breads still contain animal products such as butter and eggs. So how about just baking it yourself? This article will show you exactly how vegan baking works and what to look out for.

Why bake vegan at all? Being vegan means consistently avoiding products of animal origin. According to statista.de, more than 1.13 million people in Germany now live vegan – and the trend is still rising.

While a large number of meat substitutes and milk substitutes have long since found their way onto supermarket shelves, vegan baked goods are still the exception rather than the rule. Vegan baking is actually quite easy, is neither more complicated nor more expensive than traditional baking and the results are just as delicious. So why not just do it yourself?

Baking Vegan: Tips & Tricks

It doesn’t matter whether you’ve been vegan for a long time, want to please vegans in your circle of acquaintances or simply want to try out vegan baking recipes – with our tips you can make your favorite baked goods without animal products.

Rely on vegetable fats: Butter is a dairy product – and therefore taboo in vegan baking. Instead, use purely vegetable, preferably palm oil-free (organic) margarine. Of course you can also use oils. The following applies: 100 grams of margarine are replaced with 75 to 80 milliliters of oil (e.g. rapeseed or sunflower oil). Nut butter, such as almond butter, is also an interesting alternative to conventional butter – make sure you use organic and fair trade quality. If you want to improve your ecological balance and save calories at the same time, simply replace 100 grams of butter with a mixture of 120 grams of oat yoghurt and a tablespoon of semolina. Another option is to make your own vegan butter.

Egg substitute instead of eggs: In traditional baked goods, eggs are used to bind the dough better. As you will quickly find out when baking vegan, this is often not absolutely necessary. If you still want to use an egg substitute, you can buy one in most organic stores and some supermarkets – or you can simply make your own egg substitute using simple ingredients that you probably have at home anyway: banana , applesauce or flaxseed can effectively replace eggs in baking. Read more: Make your own egg substitute: 6 ideas for vegan eggs
Plant-based drinks instead of cow’s milk: plant-based milk alternatives have long been found in every supermarket and most drugstores, often even in organic quality. Depending on what you’re baking, cow’s milk can usually be easily substituted one-to-one with milk alternatives such as oat milk, soy milk, or almond milk.
Plant-based cream: Plant-based cream substitutes can also be found in most supermarkets, for example based on oats, soy or rice. Alternatively, you can easily make vegan cream yourself. More on this: Vegan Cream: Recommended Alternatives
Aquafaba instead of egg whites: There are some baking recipes that use egg whites. This is the case, for example, with biscuit doughs. But there is also a vegan variant here: aquafaba. Aquafaba is the soaking liquid from chickpeas and beans. Aquafaba is whipped into the perfect vegan egg whites and is even suitable for mousse au chocolat.

Baking with vegan chocolate: What would chocolate chip cookies be without delicious pieces of chocolate in the batter? In general, many dark chocolates are vegan by nature, although you should pay close attention to the list of ingredients. Those who value sustainability and fair production conditions should choose organic and fair trade chocolate. In the (organic) supermarket you will also find vegan white chocolate and purely plant-based “milk” chocolate with different cocoa contents.
Agar-agar instead of gelatine: Anyone who bakes fruit cakes sometimes seals the fruit layer with a gelatine-based icing. However, since gelatine consists of animal bone and cartilage residues, among other things, this is not an option for vegan baking. Instead, you simply replace the gelatine with agar-agar, a purely vegetable powder made from red and blue-green algae. Here too, pay attention to organic quality in order to get a residue-free product. More on this: Gelatin substitute: vegan plant-based alternatives

What else should you keep in mind when baking vegan?

To ensure that the cruelty-free baked goods are 100 percent successful, you should not overdo it when mixing the ingredients, otherwise a vegan dough can quickly lose consistency and become tough. So sometimes it can be worth using the whisk, spatula or fork instead of the food processor to mix the ingredients.

Depending on the type of oven, your vegan pastries may also cook faster than traditional recipes state. It is best to set the timer 15 minutes before the regular end of the baking time to make sure that cakes, biscuits, rolls and the like do not become too crispy.

Incidentally, when baking bread and rolls, most recipes are already vegan – or can be veganized quickly. Instead of the honey used in some bread recipes, you can use some organic sugar beet syrup, for example, and replace the quark in quark rolls with vegan organic soy quark. Buttermilk is easily replaced with a plant-based milk alternative with a dash of vinegar.

Is Vegan Baking Healthier?

You can decide for yourself how healthy your vegan baked goods will be. For example, if you use whole grain instead of white flour and at least partially replace the sugar content in sweets with low-calorie sugar alternatives such as organic erythritol, you can definitely produce healthier baked goods.

In general, the major health benefit of vegan baking is that purely plant-based ingredients are virtually cholesterol-free, while animal products such as eggs, milk and butter contain a lot of saturated fatty acids and trans fats. With high and regular consumption, these can promote heart and vascular diseases.

Vegan is not always sustainable

While vegan ingredients are always free of animal components, they are not always sustainable, since some of the products have extremely long transport routes to the local shops (e.g. coconut oil, cocoa, chia seeds, Agr-agar) or come from conventional cultivation and are therefore are not free from environmentally harmful pesticides.

If you also want to implement the topic of sustainability in baking, you should therefore rely on fairly traded organic products and prefer regional and seasonal ingredients.

Veganized Recipes vs. Vegan Recipes

Veganized recipes are conventional recipes that are made with purely plant-based ingredients instead of the traditional ingredients. This is particularly recommended for vegan baking beginners and for everyone who would like to recreate the taste of baked goods they love. For example, have you ever baked vegan cheesecake, apple pie, vegan biscuits or purely plant-based stollen yourself? It’s easier than you might think – and the taste is in no way inferior to the original recipes.

Of course, vegan baking is also possible with a variety of more experimental, vegan recipes in which sugar is replaced with dates, for example, and unusual types of flour such as lupine, almond or coconut flour are used. These recipes are not replicas of well-known originals, but developed vegan from the outset and represent their own category. They therefore offer a less comparable, but precisely because of this, interesting taste experience. They are often all about “Clean Baking”. Due to the often exotic ingredients, you should pay close attention to the origin and, if possible, prefer regional products.

Opening a pomegranate doesn’t seem that easy. We’ll show you how to open and core a pomegranate without the mess – and thus benefit from the vitamins and minerals it contains.

Perhaps you have left numerous stains on your clothes or on the wall when opening a pomegranate. The bulging pomegranate seeds explode when you try to loosen them from the shell; stubborn red stains on clothing, furniture and walls are therefore not uncommon.

We’ll show you two methods on how to open and core the pomegranate – without any mess.

Open and core the pomegranate: the tapping method

For this you need:

a sharp knife
a spoon
a bowl
cutting board
With this method, you place the pomegranate on a cutting board and carefully cut it in half with a sharp knife.
Take one half and hold it cut-side down over the bowl.
Use the round side of the spoon to tap the shell vigorously (!) until all the seeds have come loose. This way the kernels won’t get crushed and will keep their shape.

Open pomegranate underwater

For this you need:

a sharp knife
a cutting board
a bowl of cold water
Halve the pomegranate with the knife.
Hold one half in the water.
There you carefully remove the cores with your fingers. Should a core explode due to the pressure when removing it, the water prevents the hard-to-remove juice from sticking to the wall and clothing.

Pomegranate: ruby red vitamin bomb

Once you have opened the pomegranate, its ruby-like pits are not only beautiful to look at, they are also very healthy. This is due to the ingredients, which – as with pineapple or cranberries – not only have an anti-inflammatory effect, but also have an antioxidant effect. You can enjoy the seeds, which are 85 percent water, raw or process them into juice.

Some drawers contain many small items, such as tools, Legos, or other small treasures. You don’t feel like putting everything in and taking it out every time you’re cleaning. That’s why we’ve collected clever drawer vacuum cleaning tips for you. As a result, you will not find any small parts in the vacuum cleaner.

No more small parts in the vacuum cleaner

One of the most common vacuuming mistakes is accidentally picking up small parts. Because sometimes you’re lazy and think I can suck around it. And whoops, the small part disappeared into the vacuum cleaner. This is particularly the case when vacuuming drawers. And this topic also occupied a participant in the lion’s den a few years ago. But there is no need for a new invention. So that the cleaning still works, we have the best tricks for you. In addition, note the best vacuum cleaners and useful vacuum robots in comparison.

1) Vacuuming with a tea strainer or tea filter

Hold a small tea infuser or tea filter for loose tea in front of the vacuum cleaner nozzle. This is an easy way to solve the problem. The drawer is cleaned of dirt and the utensils that have been sucked up can be easily removed from the tea net and shaken back into the drawer. In addition, note how you can drill without dust and dirt.

2) Women’s tights vacuuming drawers

You can also use discarded and fine-meshed women’s tights to help you. To do this, fix it to the vacuum cleaner gland with a rubber band. As a result, you can vacuum in drawers without vacuuming up small parts, because the small parts get caught on the tights and do not get into the vacuum cleaner. In addition, you have both hands free with this variant. Also, note other useful tips for avoiding the most common vacuuming mistakes.

3) Use a special vacuum cleaner gland

You can find special attachments for your vacuum cleaner online or in retail stores. These are specially designed for vacuuming drawers or cleaning keyboards, ventilation, or hard-to-reach corners. These are easy to use and save you time. Because in future you won’t have to put the drawers in and out.