Tag

works

Browsing

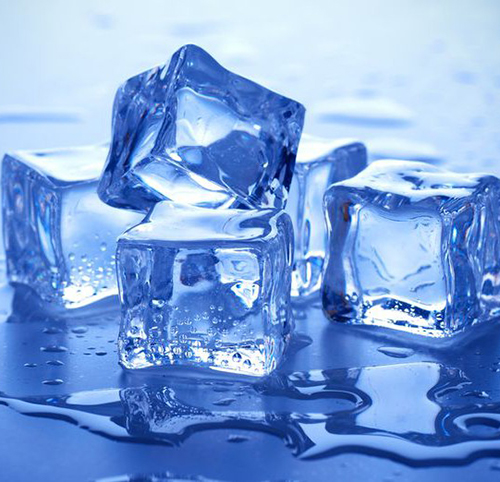
Making crushed ice yourself is easy and there is no plastic packaging. We’ll show you how to make the cool refreshment. This makes hot summer days more bearable.

You can buy crushed ice, but making it yourself isn’t difficult. Especially on hot summer days, it is a refreshing addition to drinks such as slush ice and summer (non-alcoholic) cocktails, or you can use it to cool other alcoholic drinks such as sparkling wine. All you need are ice cubes. With our tips you can easily make crushed ice yourself.

Make crushed ice yourself with a tea towel

Probably the most sustainable and easiest way to make your own crushed ice is with a clean tea towel and a solid object. So there is no plastic packaging and you don’t have to buy any additional new devices.

To do this, place ready-made ice cubes in the middle of a clean tea towel. Hold the open sides tightly together. Now you need a solid object. For example, a hammer, a rolling pin or something similar are suitable. Now break the ice cubes out of the kitchen towel with your solid object. Your homemade and sustainable crushed ice is ready.

Tip: Be careful not to break the ice cubes too small. This way you get more of your crushed ice because it melts more slowly.

Make your own crushed ice with a stand mixer

Another way to make your own crushed ice is with a stand mixer. However, this method only makes sense if you already own a stand mixer. In general, you should not buy any new equipment for the production of crushed ice to avoid wasting unnecessary resources. You can prevent this by using the dishcloth crushed ice method above.

If you already own a stand mixer, the crushed ice method with a stand mixer is the faster and less complicated method for you.

Simply put the ice cubes in a blender and crush them in batches. This makes it easier to crush the ice cubes than if you use the normal smoothie function. In addition, the blade of the blender does not wear out as quickly. Also make sure that your blender has enough power to crush the ice cubes.

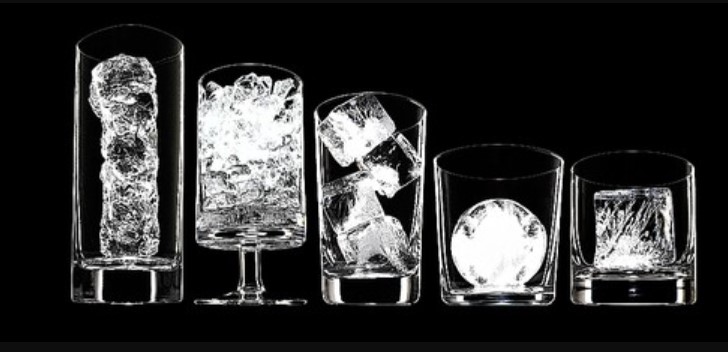
Tip for sustainable ice cubes for your crushed ice

The basis for making crushed ice yourself are ice cubes. But you don’t necessarily need the classic plastic ice cube tray. A sustainable alternative is to simply make the ice cubes yourself in glasses. Make sure that you fill the water mainly in cone-shaped glasses and do not screw a lid on top. Let the ice cubes thaw briefly at room temperature before processing them into crushed ice – this is how you get them out of the glasses. Also, to avoid expanding the glass, you should only fill the glass up to three quarters full with water.

No more fear of gelatin! Gelatine is often required to make cakes, slices, and roulades firm. Processing these is not as tricky as some might think. With our tips & tricks, nothing can go wrong.

Correct dosage of gelatine

The amount of gelatin needed depends on the amount and desired consistency of the mass you want to gel. As a guideline: For 500 ml of liquid, either 1 pack of ground gelatine or 6 sheets of gelatine are used.

Soaking is part of it

Leaf gelatin needs to be soaked in cold water in a wide bowl for about 5 minutes. So that the leaves do not stick together and can swell sufficiently, they should be placed individually in the water. Mix the powdered gelatine with a few tablespoons of the cold mass, juice, cold water, or liqueur (depending on the recipe) in a small saucepan and leave to swell for about 5 minutes.

Cold masses gel

Remove the swollen gelatine leaves from the water, squeeze them out well and dissolve them in a small saucepan over low heat. Here you can also add a few tablespoons of the mass to be gelled or some juice. You can also slowly dissolve swollen powdered gelatine over low heat.

Before you add the gelatine to the rest of the mass, it should be leveled. To do this, stir a few tablespoons of the cold mass into the dissolved gelatine and then mix the gelatine mass with the cold mass.

Hot masses gel

If you want to gel hot masses, you can immediately add the gelatine undissolved to the hot, no longer boiling liquid and stir until it has completely dissolved.

The liquid should not be boiled after the gelatin has been added, otherwise, the gelatin will lose its gelling power.

Tips and tricks

Gelatine is not suitable for creams or jellies with fresh kiwi, pineapple, papaya, and figs, as these contain an enzyme that reduces the gelling power.

A plant-based alternative to gelatin is agar-agar. The difference is that agar-agar has to be boiled for 2 minutes in order to develop its gelling power. It is therefore very suitable for fruit jellies.

You can quickly make sunflower seed butter yourself with just a few ingredients. The mush can be used in a variety of sweet and savory dishes. We show you a recipe and what you should pay attention to.

Sunflower seed butter made from Europe sunflower seeds is a regional alternative to almond butter and other nut butters. This avoids long transport routes and packaging.

Sunflower seeds are healthy because they contain important nutrients. They are rich in vitamins, fiber, unsaturated fatty acids, minerals and vegan proteins. The seeds are therefore particularly suitable for a balanced plant-based diet. Processed as a mush, you can use sunflower seeds in a variety of ways in the kitchen.

Make sunflower seed butter yourself

When buying your ingredients, make sure that they are organic and, if possible, from regional cultivation. This makes your sunflower seed puree a sustainable alternative to conventional nut spreads and you avoid chemical-synthetic pesticides.

Ingredients:

200 gorganic sunflower seeds
1 pinch(s) of salt

Directions:

Soak the sunflower seeds in water overnight or for at least 8 hours. This makes them softer and easier to work with.
After soaking, drain the sunflower seeds through a sieve.
Place the sunflower seeds and salt in a high powered blender. Mix everything into a smooth mass.
If the mousse is still too chewy, you can add some tasteless oil.

Variation tips for sunflower seed butter

You give your sunflower seed butter a particularly nutty aroma when you roast the sunflower seeds. They shouldn’t be too dark.

Variants:

You can add some olive oil or oat milk. This makes the sunflower seed butter a little milder and creamier.
For a savory taste, you can add a clove of garlic.
For a sweet alternative, you can add a spoonful of honey or syrup, some cinnamon and vanilla to the mousse.
As a regional alternative to tahini sauce, you can add some salt, pepper, lemon juice, olive oil and fresh herbs to your sunflower seed puree.

Use sunflower seed butter

Sunflower seed puree can be refined as a sweet or savory puree. You can therefore use it in many ways. Here are some tips on how to use your sunflower seed butter:

As a hearty spread: If you refine your sunflower seed puree with fresh herbs and spices, you can use it as a delicious spread.
As a sweet spread: Alternatively, you can make a sweet variant of the spread from the sunflower seed butter. This goes particularly well with pancakes and fresh rolls.
As a dip: Use more liquid during preparation to create a sauce-like consistency. This dip goes great with raw vegetables, crackers or homemade falafel.
As a vegan butter substitute: neutral sunflower seed butter is an excellent vegan alternative to butter.
As a salad dressing: Use the puree to make a delicious salad dressing. Simply add a tablespoon of puree to your favorite dressing.
As a cooking cream: You can refine warm dishes such as soups or stews with the sunflower seed butter. The mush gives the dish a creamier consistency.
As a muesli topping: You can put sunflower seed butter on your muesli or porige for a wholesome breakfast.

You can easily make vegan lard with onions yourself. We use kidney beans as a healthy base. We show you a delicious recipe for vegan lard.

Lard is an animal fat that is commonly used in cooking and frying. Butter lard or onion lard is also very popular as a spread. Since lard consists entirely of fat, it is considered very unhealthy. It also contains a lot of saturated fatty acids, which, according to the German Nutrition Society, can have a bad effect on the cardiovascular system and promote lipid metabolism disorders. Therefore, more and more people are turning to vegetarian or vegan lard.

Vegan lard with onions is mostly made from vegetable fats like margarine. We avoid using too much fat in our recipe. Our onion lard is prepared with white beans. These are very healthy as they are rich in protein and fiber. They provide important proteins, especially for a vegetarian and vegan diet. We show you a vegan recipe for delicious onion lard.

Vegan lard: the recipe

Ingredients:

2 onions
2 tablespoons rapeseed oil
2 pieces of bay leaves
2 pieces of cloves
0.5 teaspoon
400 g kidney beans (one can)
40 ml water
1 tsp soy sauce
1 pinch(s) of salt
1 pinch(s) of pepper
0.5 tsp marjoram

Directions:

Peel the onions and chop them finely. Heat the rapeseed oil in a pan and fry the onions in it.
Add the bay leaves, cloves and allspice. Let everything simmer for another five minutes. Then remove the pan from the stove.
Drain the white beans and put them in a measuring cup with the water and soy sauce.
Using an immersion blender, mash the beans until they have a mushy consistency.
Pick the cloves and bay leaves from the pan. Stir the onions into the bean paste.
Depending on the desired consistency, you can further puree the lard with the onions. If you prefer coarser pieces, this step isn’t necessary.
Season the lard with salt, pepper, and marjoram to taste. Pour the finished onion lard into a mason jar.

Vegan lard: tips for preparation

The vegan onion lard is ready in just 15 minutes. You can prepare it ahead of time and store it in the fridge. The lard can be kept for several days in this way. With the following preparation tips, the lard is not only delicious, but also sustainable:

When shopping, pay attention to the organic quality. The Demeter seal, the Bioland seal and the Naturland seal are particularly recommended, as they represent strict guidelines.
Buy preferably regional and seasonal ingredients. In this way you can support local providers, avoid long transport routes and reduce CO2 emissions. White beans originally come from tropical areas. However, Europe is now one of the main growing regions. Since they grow all year round, you can prepare the onion lard for every season. Onions are in season in Germany from June to October. But you can buy them all year round from German storage. You can find out when which fruit and vegetables are seasonal in Germany in our seasonal calendar.
You can refine and vary the vegan lard with different ingredients. For example, chickpeas or kidney beans are an alternative to white beans. Garlic, chilli or cumin also give the lard a whole new taste.
The vegan onion lard is delicious and versatile. You can use it to fry for stir-fries or stews. It also tastes delicious as a dip or as a spread. Sometimes lard is also used in baking recipes.

Don’t buy fruit but pick it yourself? That is possible because there is a lot of wild fruit that grows in Europe. In this article, you will find out what it is and how you can process it further.

Wild fruit in Europe: what, where, and when you pick it best

There is a lot of wild fruit in Germany that you can pick yourself. These include, among others:

Blackberry (May-June)
Elder (May-June: flowers, August-October: berries)
Pear (June-July)
wild plum (July-August)
Raspberry (depending on species; July-October)
Sea Buckthorn (August-October)
Quince (September)
Sloe (November-December)
You have probably already seen or heard of most of the varieties mentioned, but of course there are also some other varieties that are not so common.

Once you have found out what sorts there are, you can go and pick them. However, there are a few things you should keep in mind:

While you are allowed to pick in public areas such as parks, forests and fields, it is forbidden in nature reserves and on designated private property. Also, try not to pick along roads or next to chemically treated fields, as the wild fruit you find there may be contaminated with pollutants
Harvest only fully ripe fruit, because once picked they will no longer ripen
Only take as much of the wild fruit with you as you really need to avoid unnecessary food waste.
So that you don’t go out completely without a plan and look for possibly edible wild fruit, there is a website called Mundraub. On the website you will find a directory of different places where you can find wild fruit. Herbs, nuts and groups of other “mouth predators” are also listed. You can also look out for trees or bushes that are marked with a yellow band. As a result, the private owners invite you to pick them, as they cannot eat the entire harvest themselves.

So you can plant wild fruit yourself

Instead of picking wild fruit from nature, you can also plant it yourself. Of course you need a (Schreber) garden for that. Then think about the following:

What wild fruit would you like to plant?
In what form would you like to do this, for example a hedge or a tree?
What are the requirements for the wild fruit you want to plant and how does it grow in the nest?
Once you’ve done that, you can start planting.

If you don’t have your own (allotment) garden, just a balcony, that’s no problem either. You can also plant wild fruit plants such as wild strawberries, blueberries or cranberries on the balcony. More on this here: Creating a balcony garden: Simple step-by-step instructions and growing fruit on the balcony and terrace.

Wild fruit recipes to try

When you harvest wild fruit fresh, you often end up with large amounts of fruit. You can process them in different ways.

The most common methods are in the form of jam, compote, cake, juice or jelly. You can also boil the fruit to make it last longer.

Some wild fruit varieties also help against certain ailments in processed form. For example you can:

Dry blueberries and then use them against diarrhea
Juice elderberry, which relieves feverish colds
Prepare sloe juice, which helps with loss of appetite